RAK11720 WisDuo LPWAN+BLE Module Firmware Update
There are different ways to update the firmware of the RAK11720. Additionally, there are cases where you may need to recover the device if it becomes unresponsive after uploading custom firmware. Firmware updates can be performed using Arduino IDE or J-Link, while recovery can be done via UART/boot mode.
The following methods are covered in this guide:
Prerequisites
Before updating the firmware, make sure to prepare the necessary items:
- Arduino IDE (with RUI3 BSP installed)
- J-Link Software Pack (includes J-Flash)
- RAK11720 HEX Firmware
- Hardware connections (USB or SWD interface)
Firmware Update via Arduino IDE
When uploading custom firmware using the Arduino IDE, the device firmware will be updated or downgraded based on the installed RUI3 BSP version.
For a step-by-step guide on uploading firmware using the Arduino IDE, see the How to Perform Installation of Board Support Package in Arduino IDE guide.
Firmware Update using J-Link
You can upload the latest RAK11720 HEX firmware using J-Link. The RAK11720 must be powered, and the SWD lines must be properly connected.
Hardware Setup
Connect the following pins from the RAK11720 to the J-Link debugger:
- SWDIO
- SWCLK
- VDD
- GND
Steps to Update Firmware
- Download and install the J-Link Software Pack, which includes J-Flash.
- Open J-Flash and click Start J-Flash, then verify that the MCU is detected in the Log section and select Create new project to begin.
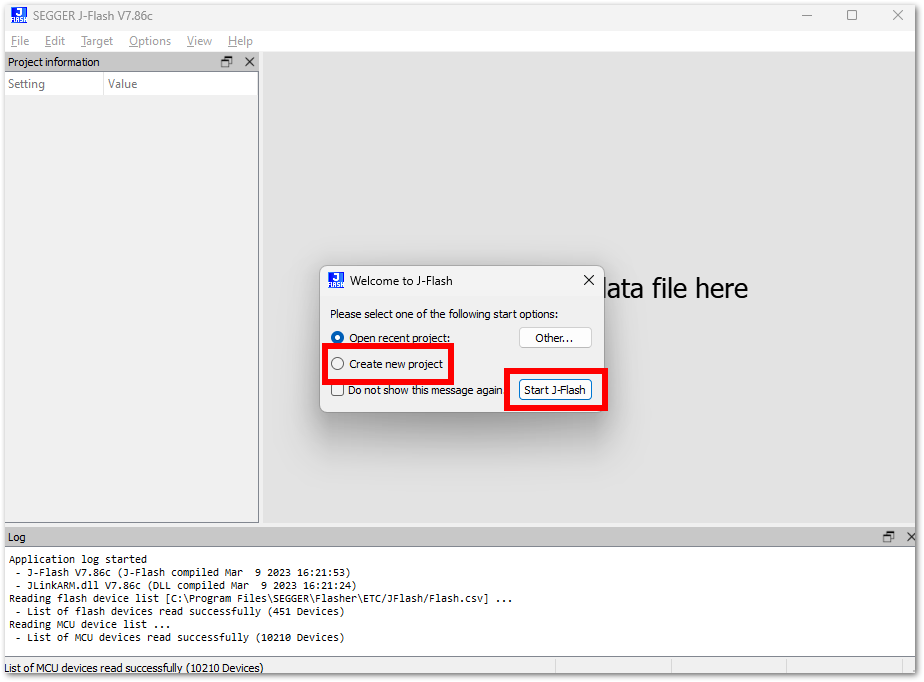 Figure 1: J-Flash startup for RAK11720 firmware update
- Click the ellipsis button (
 ), then select the Apollo3 Blue chip used in the RAK11720 module.
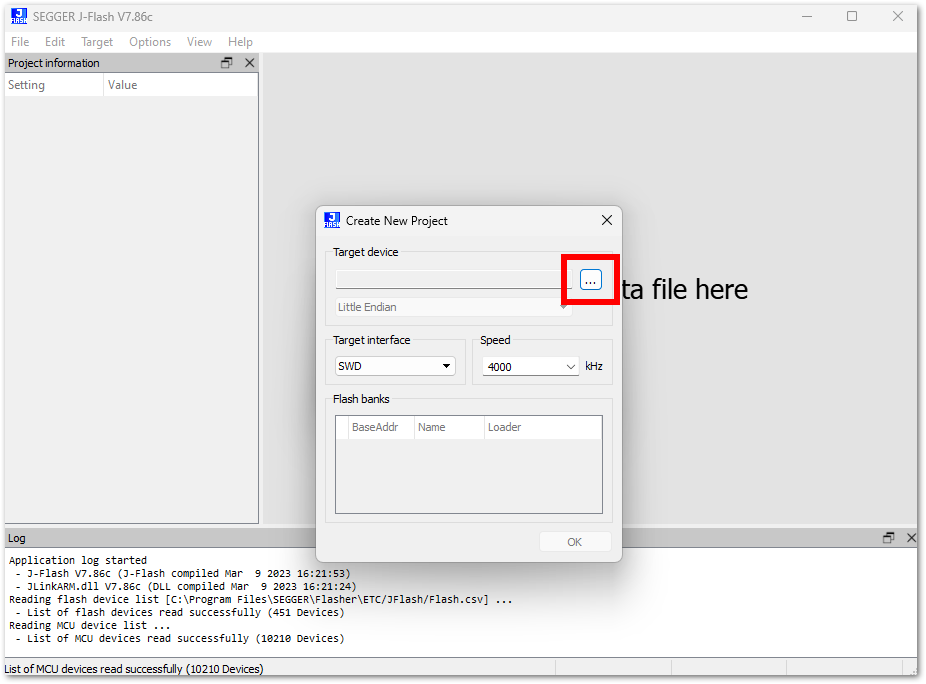 Figure 1: J-Flash target device selection
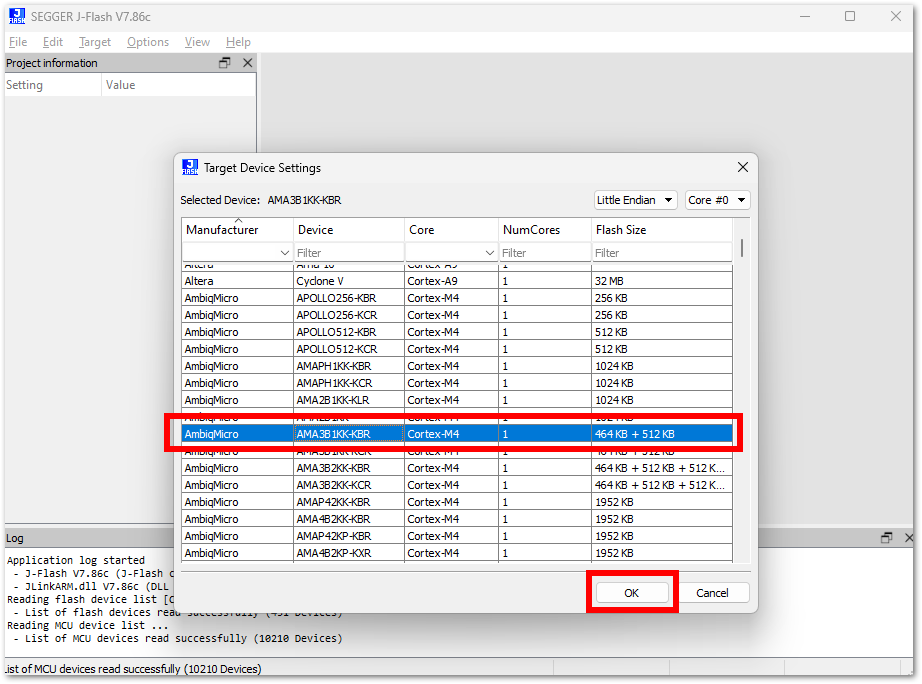 Figure 1: Apollo3 Blue target device selection
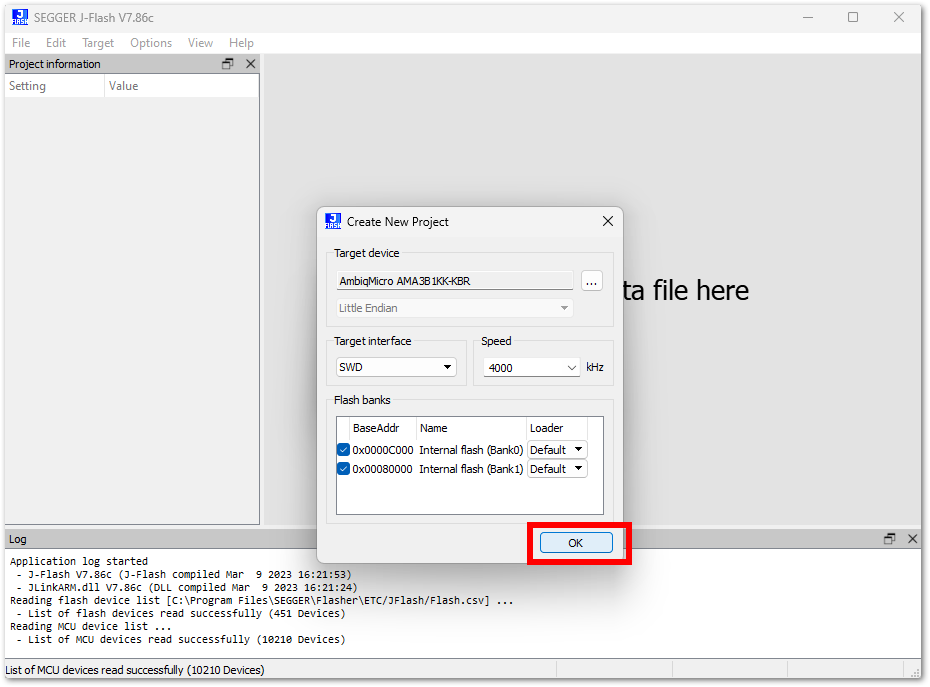 Figure 1: Apollo3 MCU configuration in J-Flash
- Open the latest firmware HEX file that you want to upload.
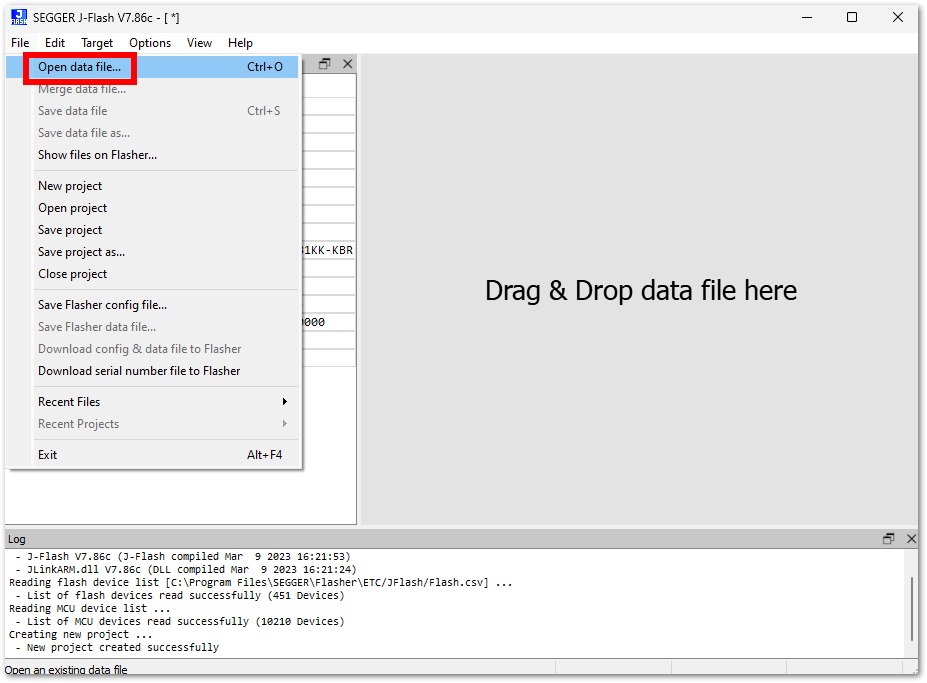 Figure 1: Opening firmware HEX file in J-Flash
- After loading the HEX file, the binary/hex outline will appear in J-Flash. Click Production Programming to start uploading.
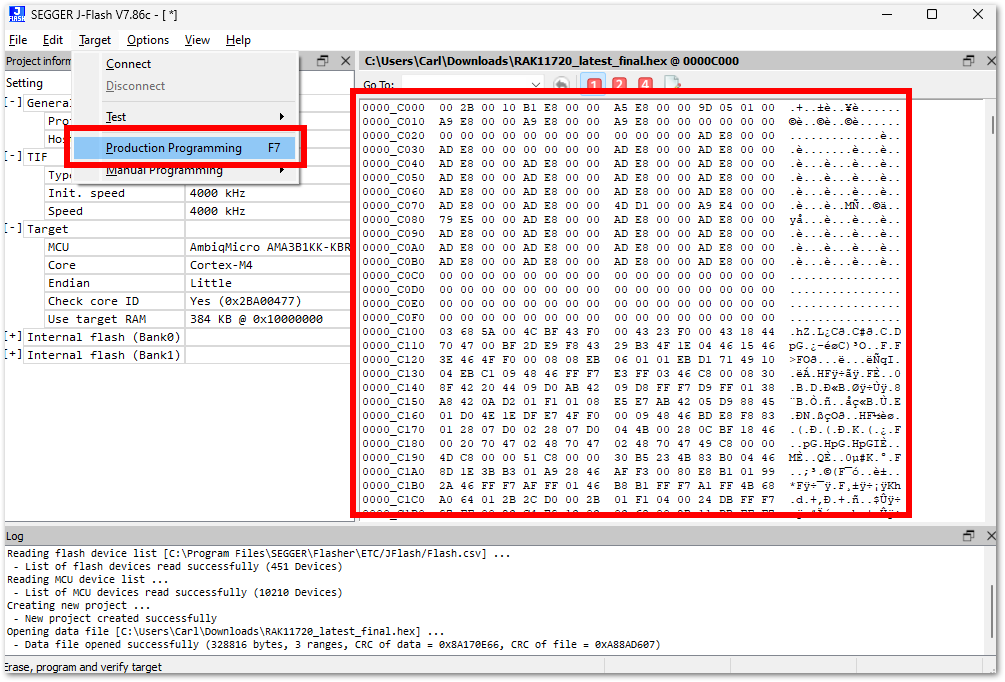 Figure 1: J-Flash production programming for RAK11720
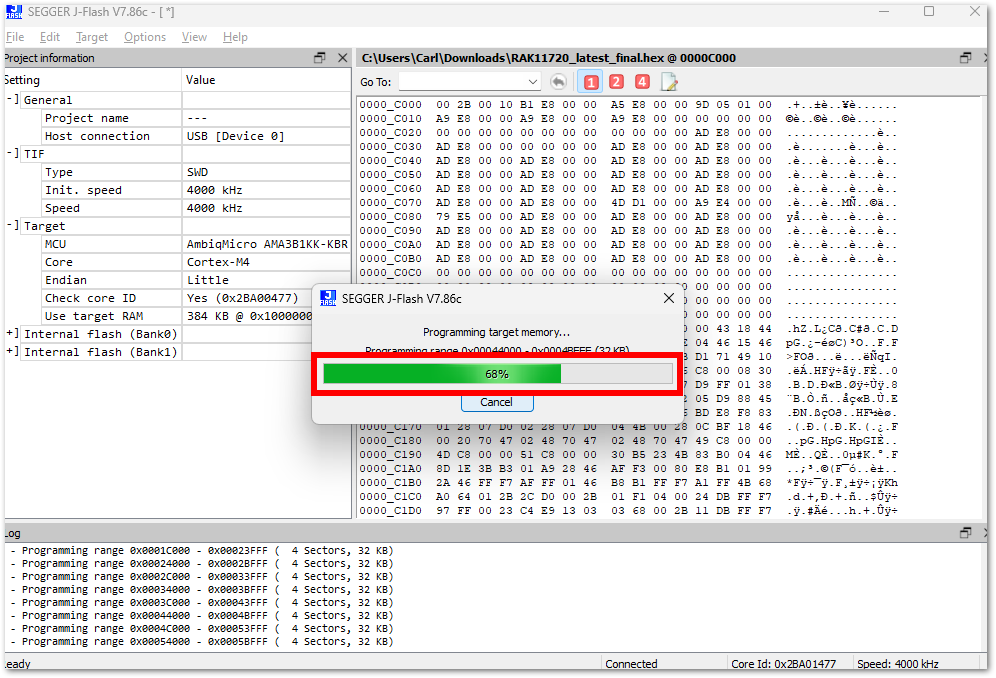 Figure 1: Firmware upload progress in J-Flash
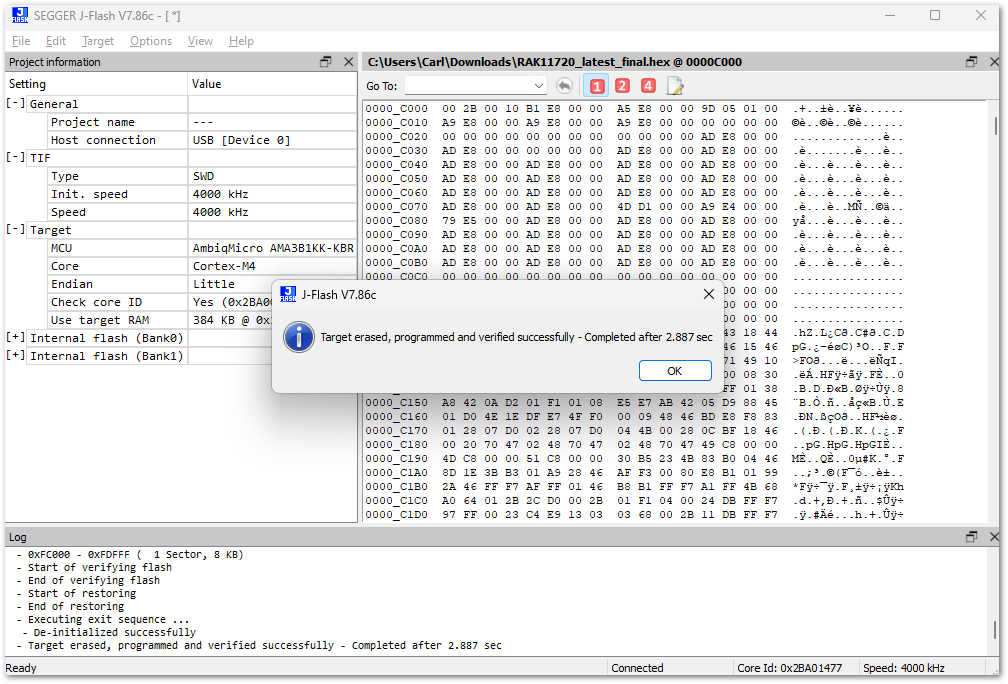 Figure 1: RAK11720 firmware upload completion
Firmware Recovery
The RAK11720 has a recovery mode procedure in case the device becomes unresponsive due to faulty firmware.
When to Use Recovery
- Device does not respond to commands
- Firmware upload failed or corrupted
- Device is stuck or halted
Steps for Firmware Recovery
- Enter recovery mode by connecting the SWO/BOOT pin to VDD and momentarily pulling the RESET pin to GND. This skips the application and starts recovery mode.
Do not hold RESET low permanently, or the module will remain halted.
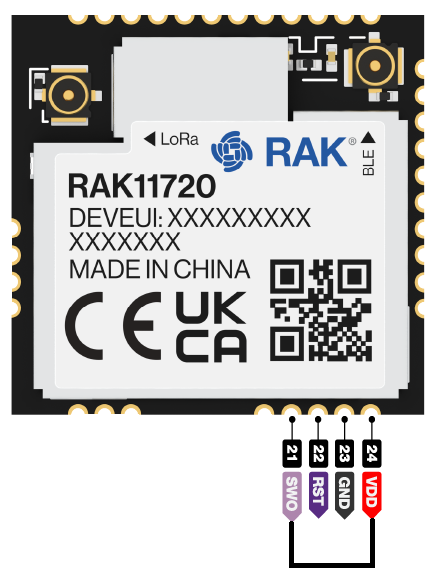 Figure 1: BOOT pin configuration for boot mode
- Set up Arduino IDE by selecting the Apollo3 Board and choosing the correct COM port.
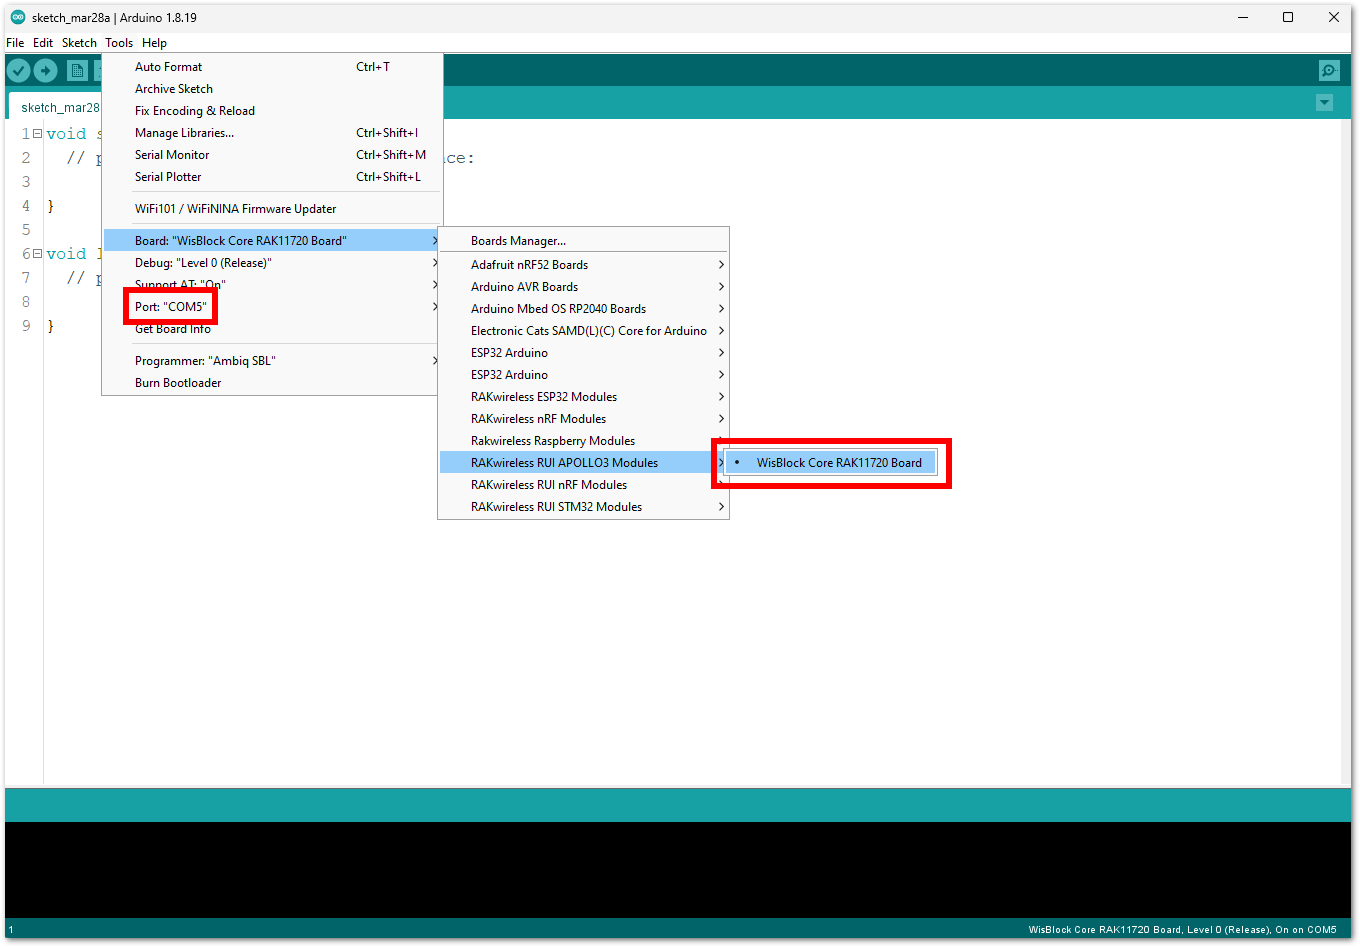 Figure 1: Apollo3 board and COM port selection
- Initiate bootloader recovery by selecting Ambiq SBL, clicking Burn Bootloader, and preparing to reset the module when prompted.
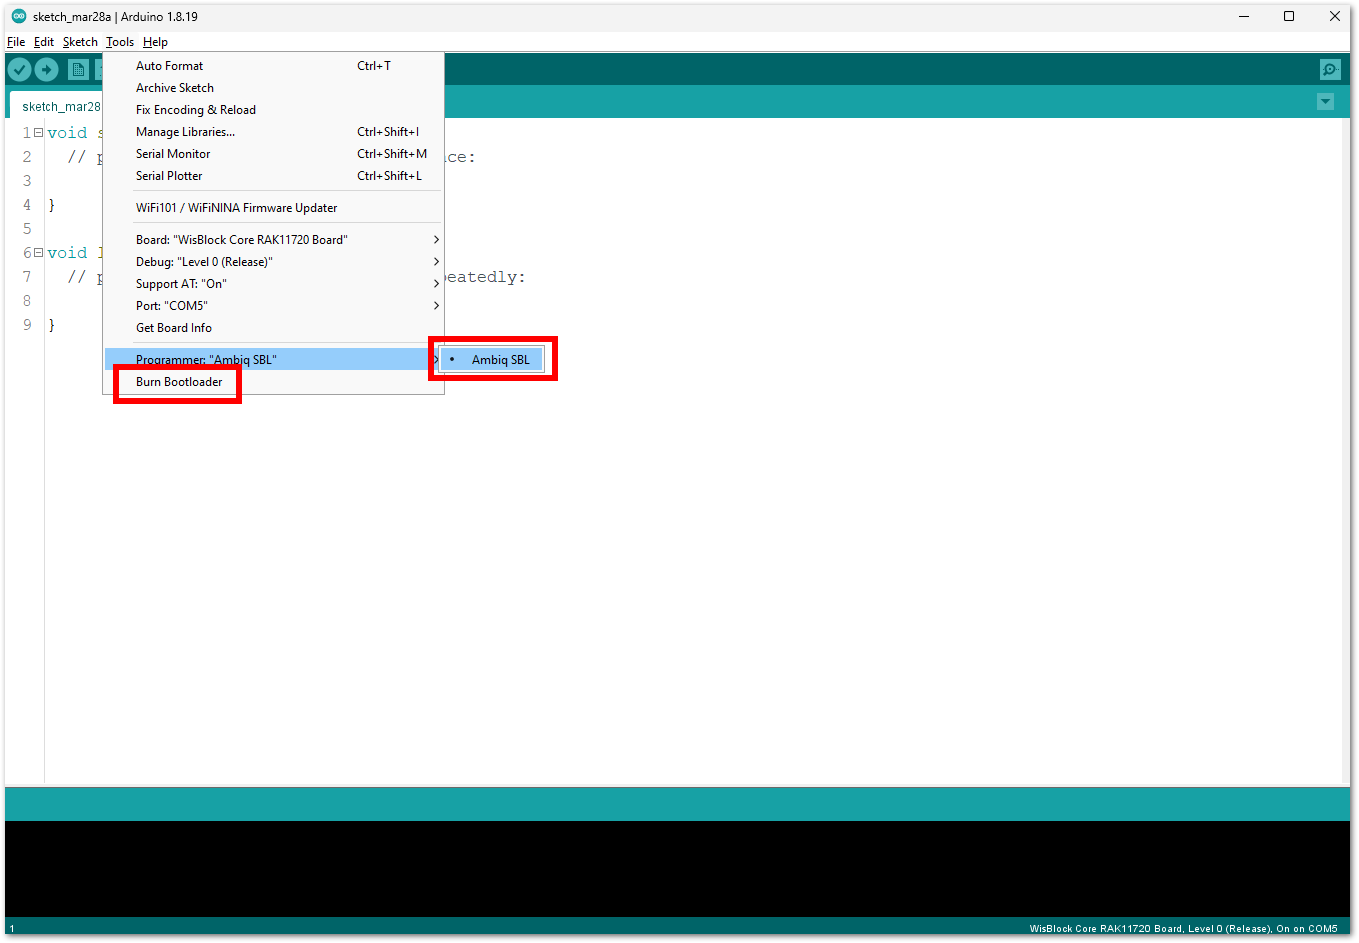 Figure 1: Apollo3 bootloader recovery in Arduino IDE
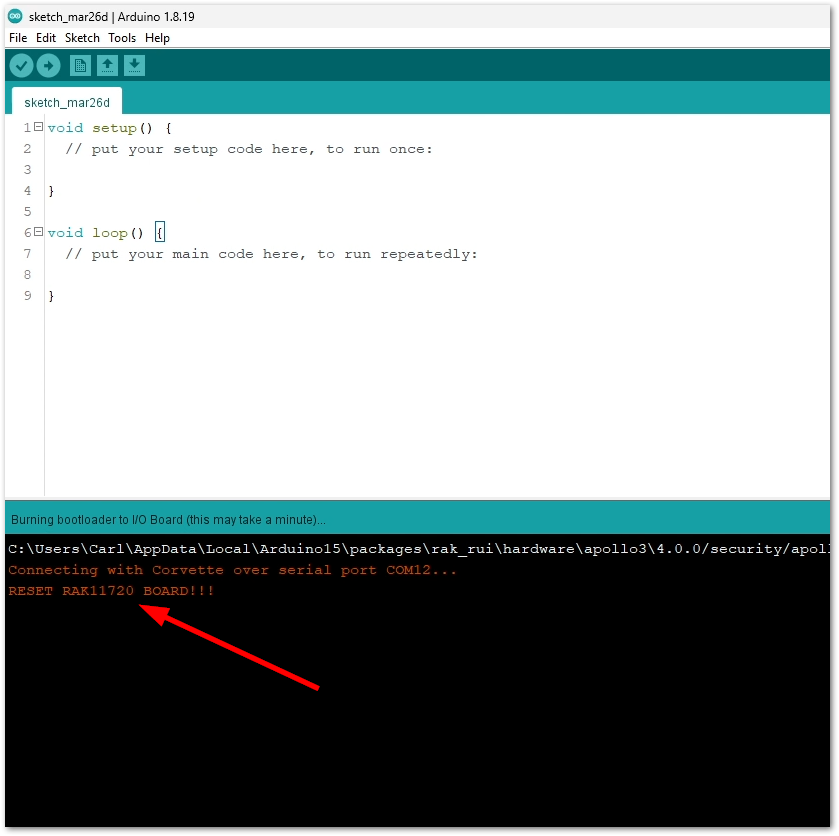 Figure 1: RAK11720 bootloader reset prompt
- Complete the recovery process by releasing RESET when uploading begins and waiting until the process is finished.
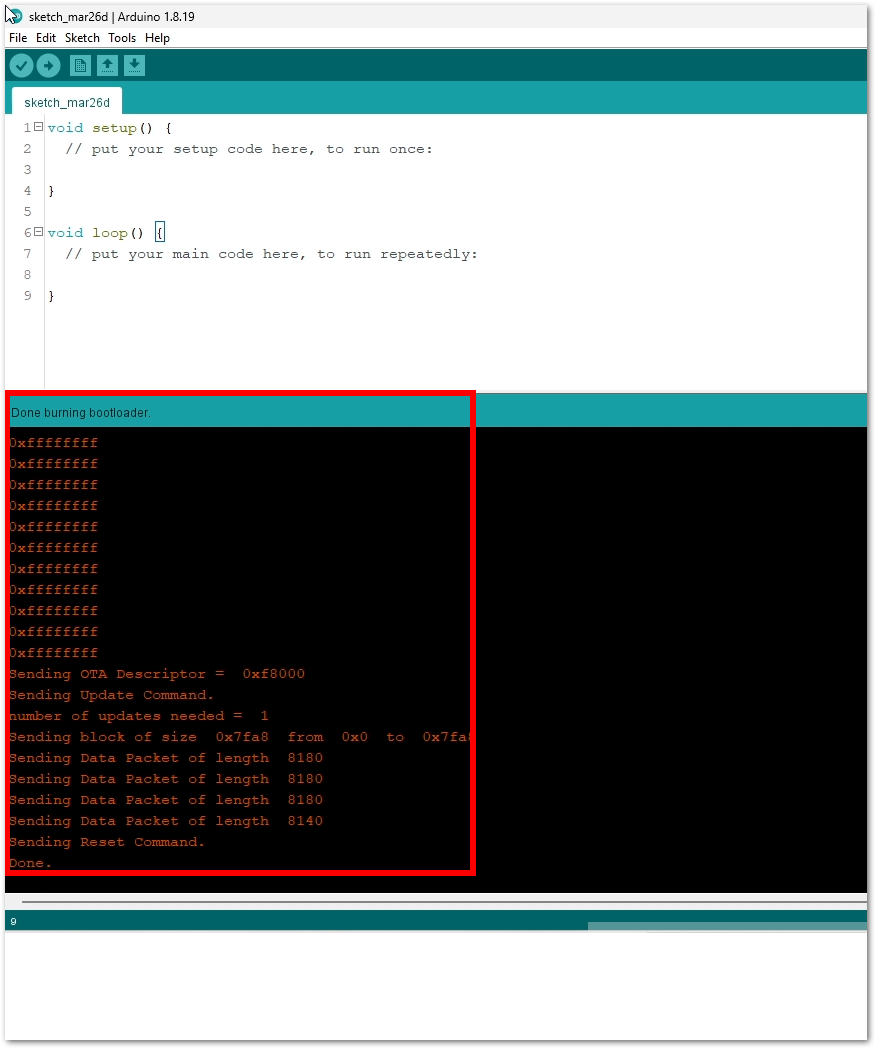 Figure 1: RAK11720 firmware recovery success
- Reset the module again and upload the firmware using the Arduino IDE.
After recovery, the device will be in RUI3 Boot Mode, so firmware must be uploaded to make it operational again.


