index
RAK modules can be configured using WisToolBox for ABP configuration. WisToolBox is a software tool designed to support the RAK module, automatically detecting the RAK module once connected to the PC. Below are the options available in WisToolBox for ABP configuration:
ABP Configuration for TTN via WisToolBox UI
- Open the WisToolBox application.
- Click the CONNECT DEVICE button to launch the WisToolBox Dashboard.
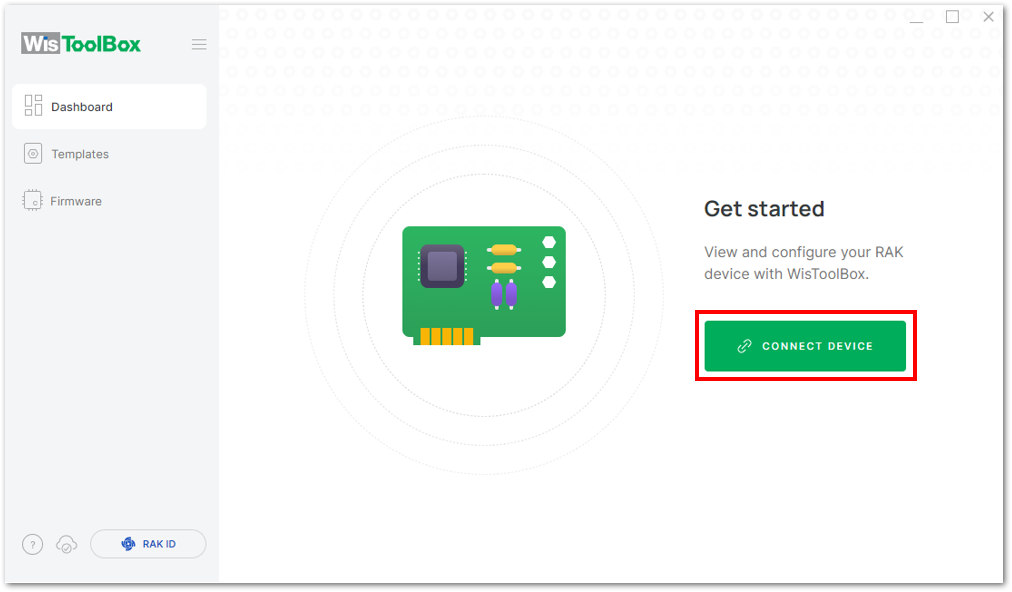 Figure 1: CONNECT DEVICE
- Select your target port where your RAK module is connected. Once recognized, click CONNECT.
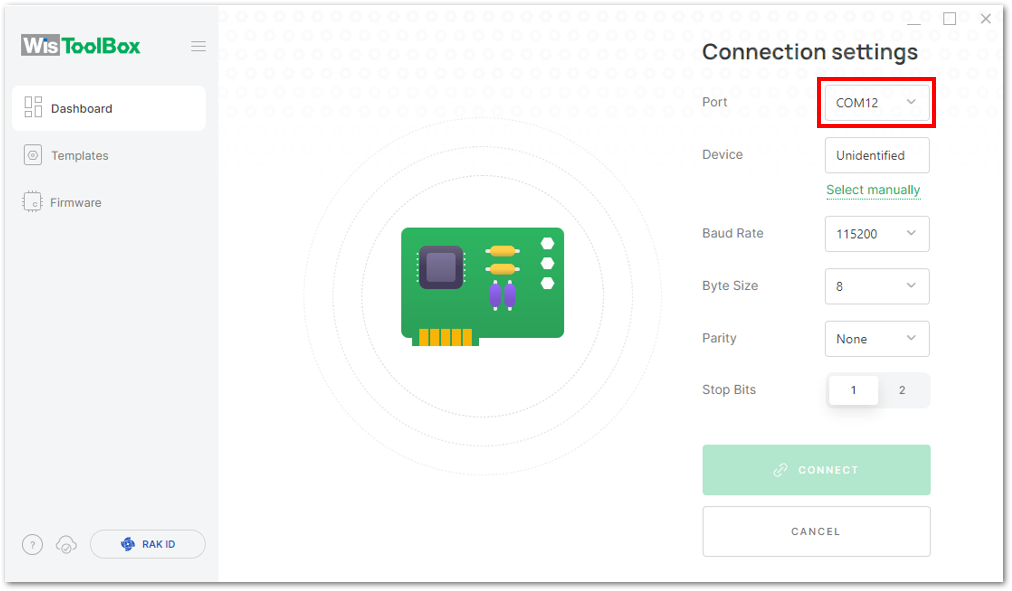 Figure 1: Setting up your device
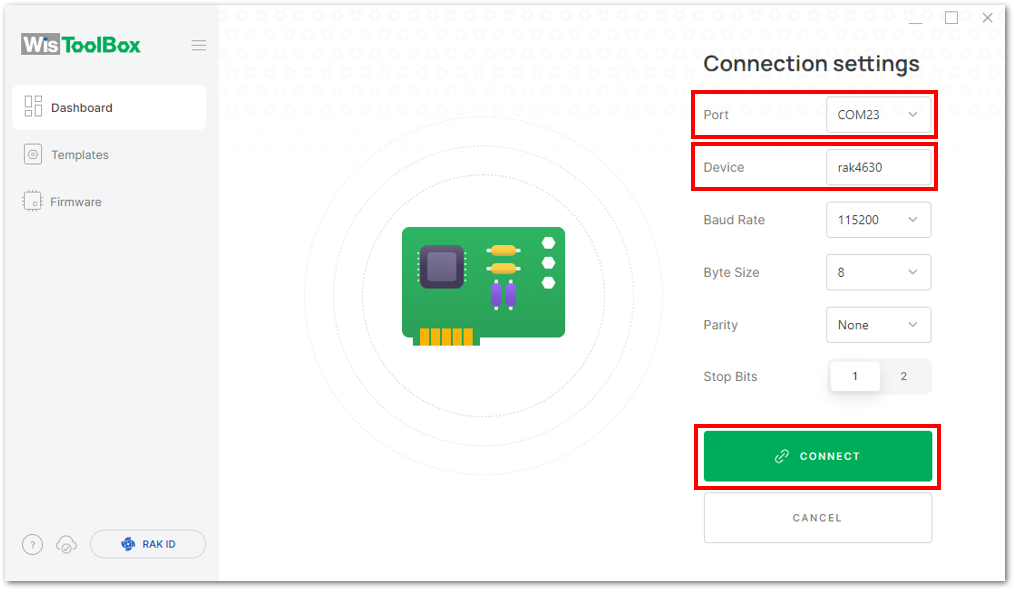 Figure 1: Setting up your device
- The device will appear in the dashboard, Click on it.
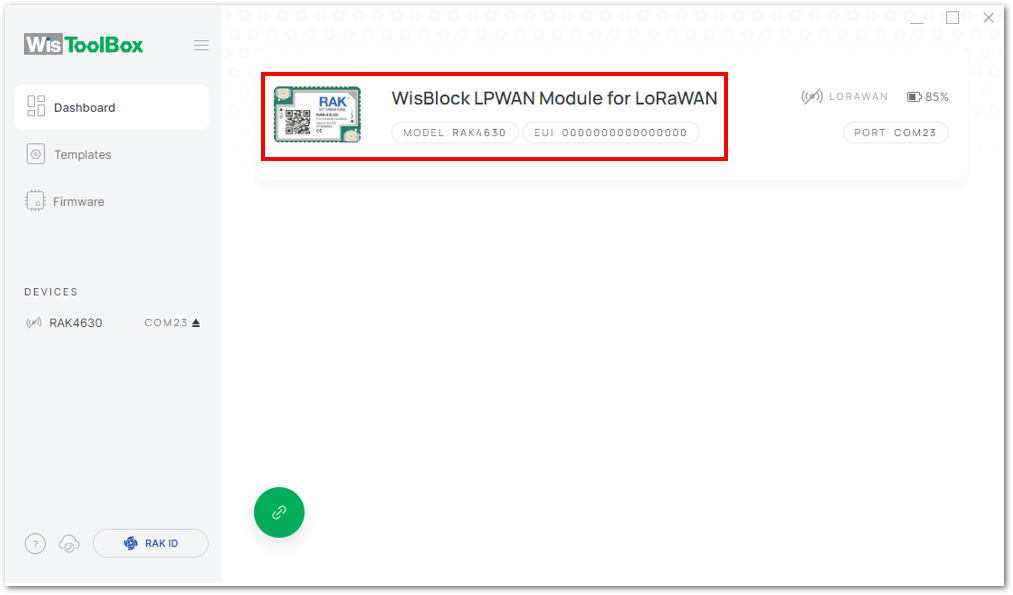 Figure 1: Device seen from WisToolBox dashboard
- Click PARAMETERS to configure the device.
- The AppSKey, Device address, and NwkSKey are hidden in this section as these are unique from a specific device.
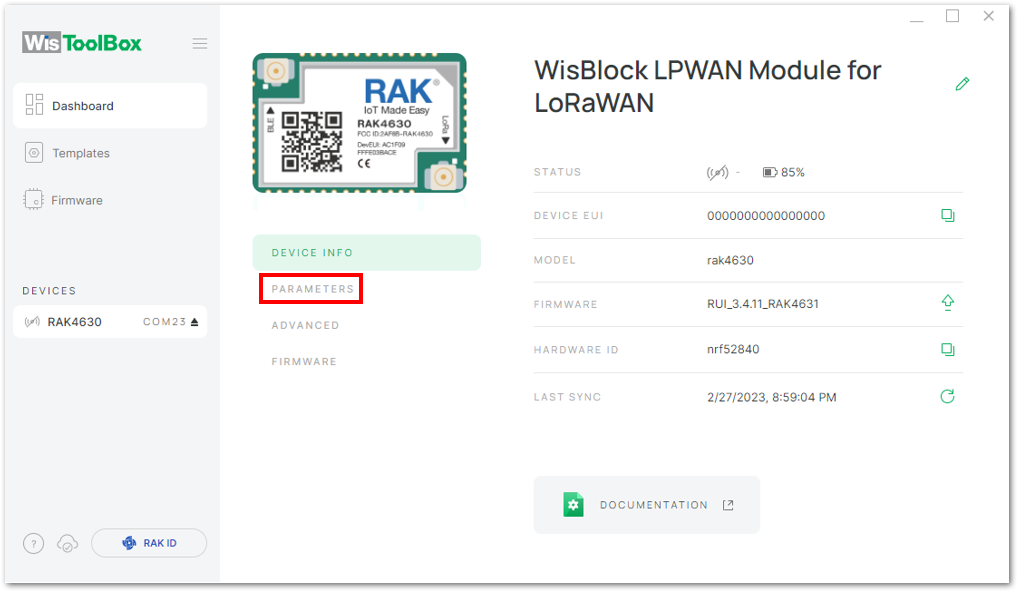 Figure 1: Setting up your device
- Click Global settings to set the network mode to LoRaWAN and the join mode to ABP. Ensure that the active region is set to EU868 for this configuration. If you wish to work on other regional bands, you can choose among the active regions based on your location.
- LoRa network mode: LoRaWAN
- LoRaWAN join mode: ABP
- LoRaWAN region: EU868
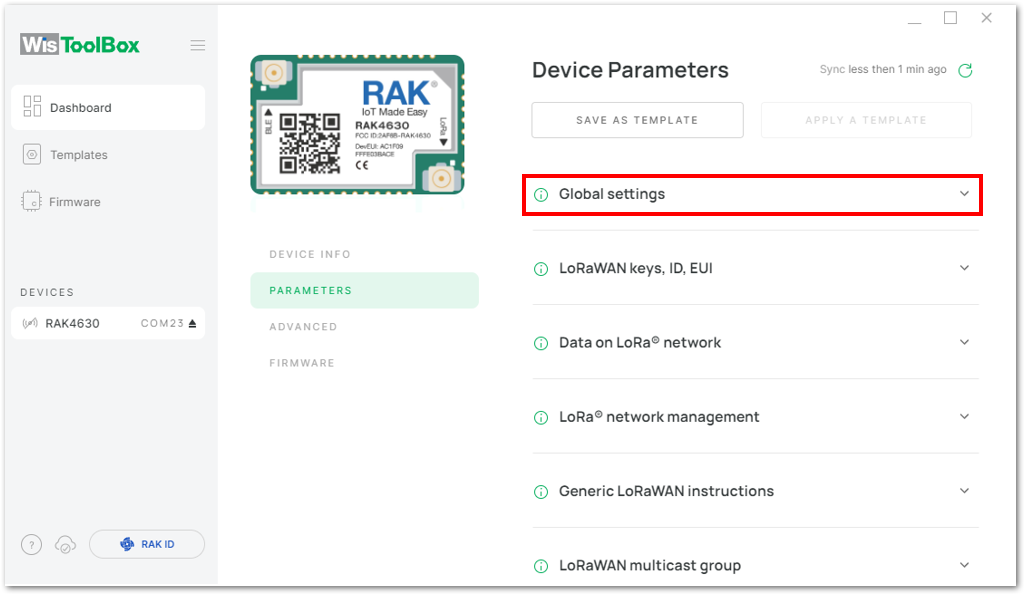 Figure 1: Global settings
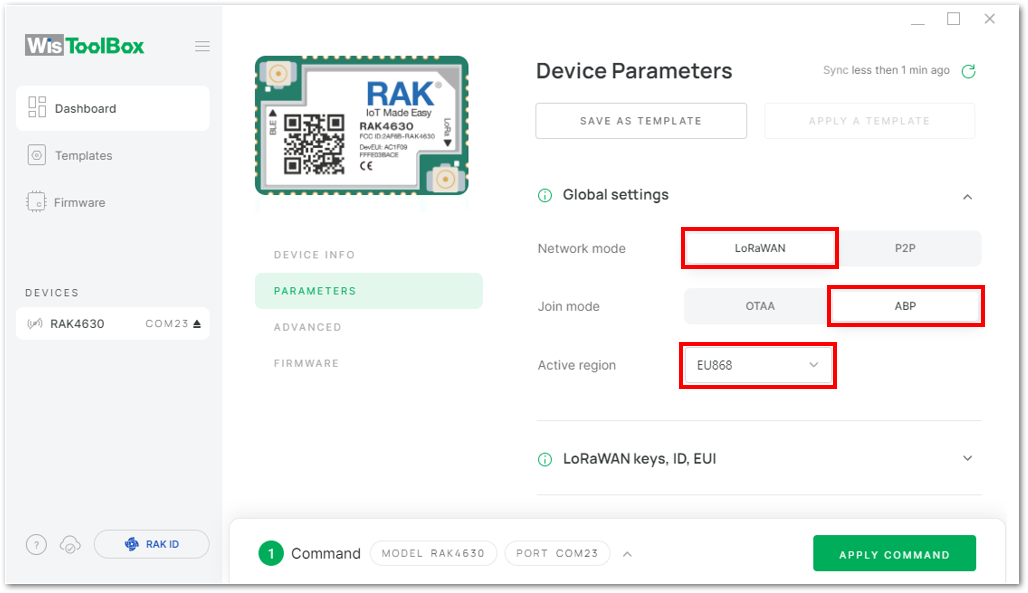 Figure 1: Global settings
- Click LoRaWAN keys, ID, EUI to configure the Application session key (AppSKey), Device address and Network session key (NwkSKey).
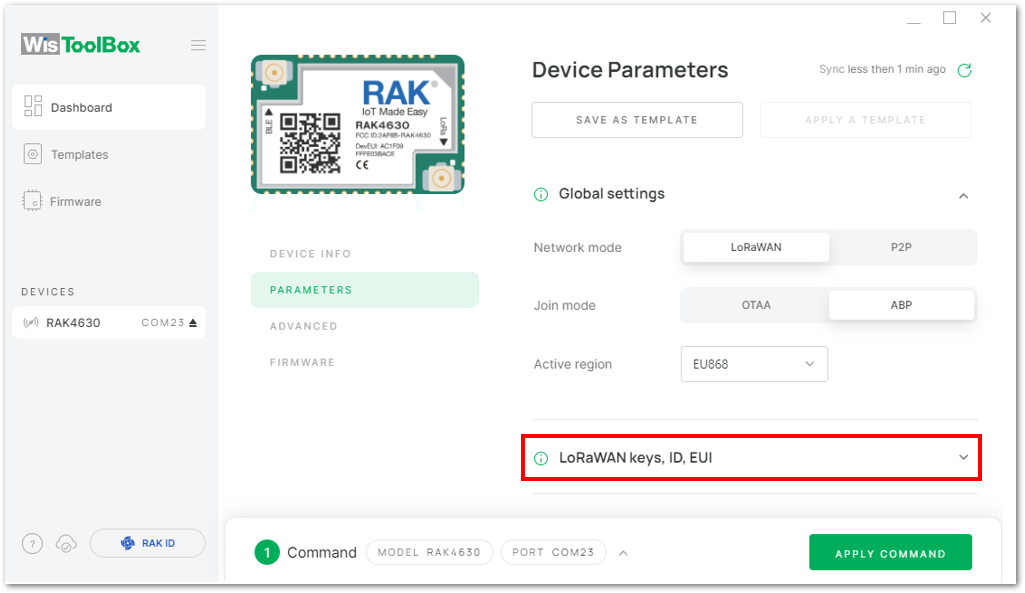 Figure 1: LoRaWAN keys, ID, EUI
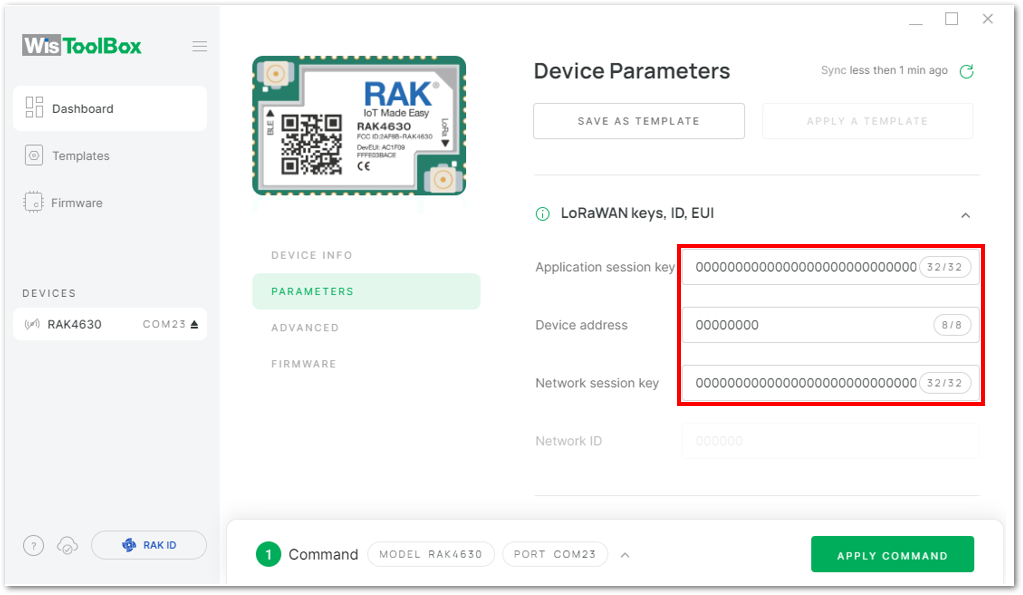 Figure 1: Setting up your device
- Go back to the console where your End device is created previously, then copy all the credentials from there. Those will be the ones to be used also in the WisToolBox dashboard. Once encoded into the dashboard, click APPLY COMMANDS to update your device.
- The AppSKey, Device address, and NwkSKey are hidden in this section as these are unique from a specific device.
- For Application session key (AppSKey)
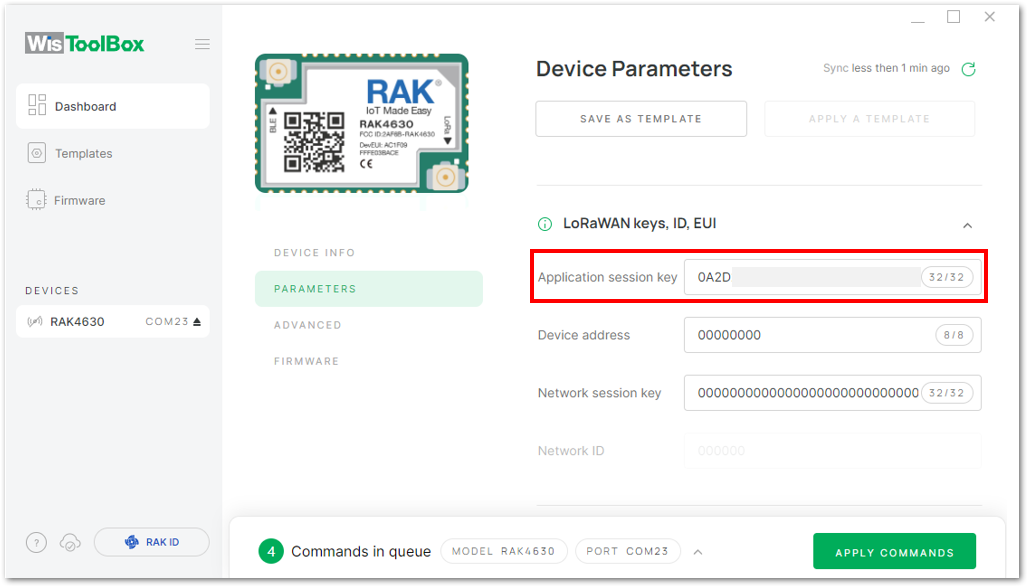 Figure 1: Copying the AppSKey credential from TTN to WisToolBox
- For Device address
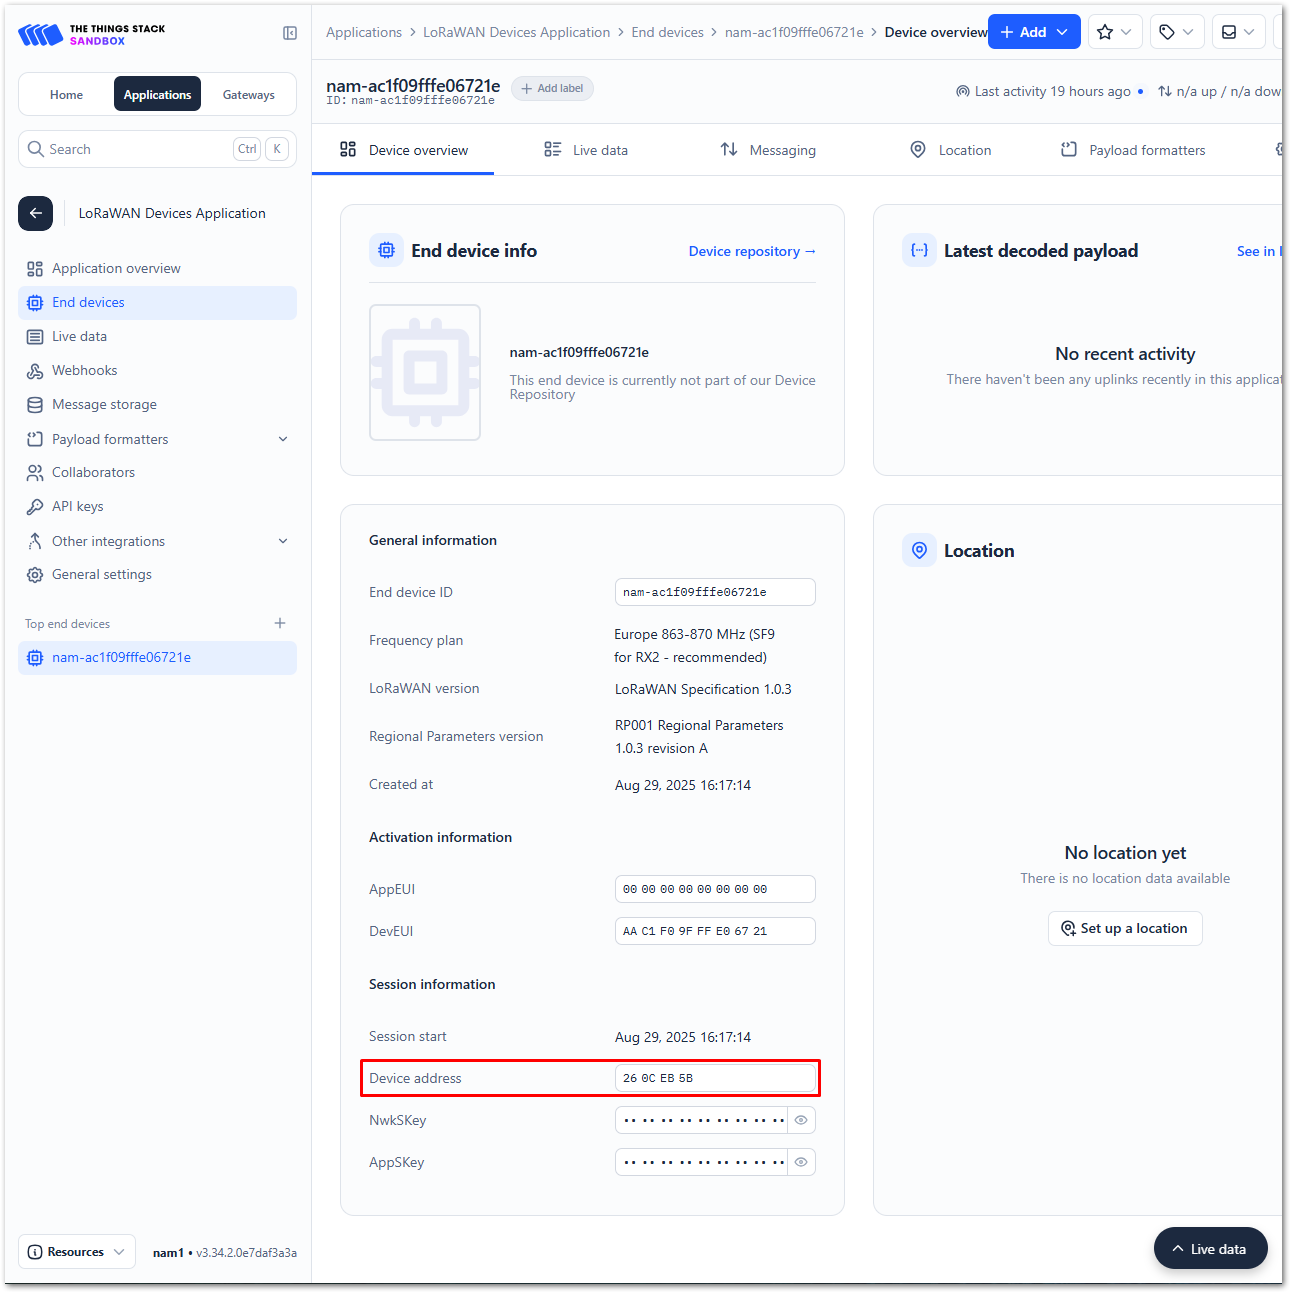 Figure 1: Copying the Device address credential from TTN to WisToolBox
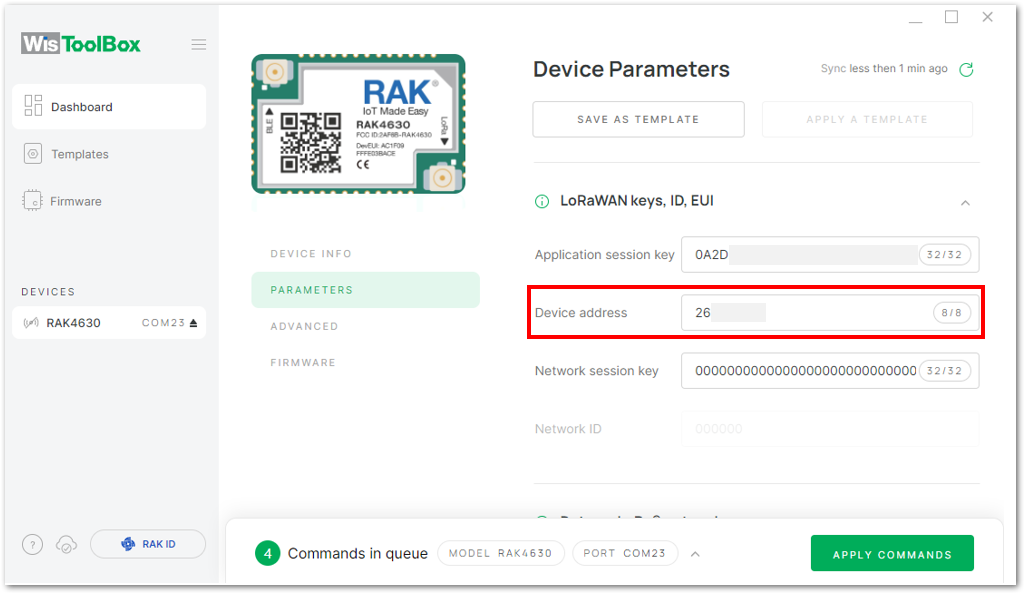 Figure 1: Copying the Device address credential from TTN to WisToolBox
- For Network session key (NwkSKey)
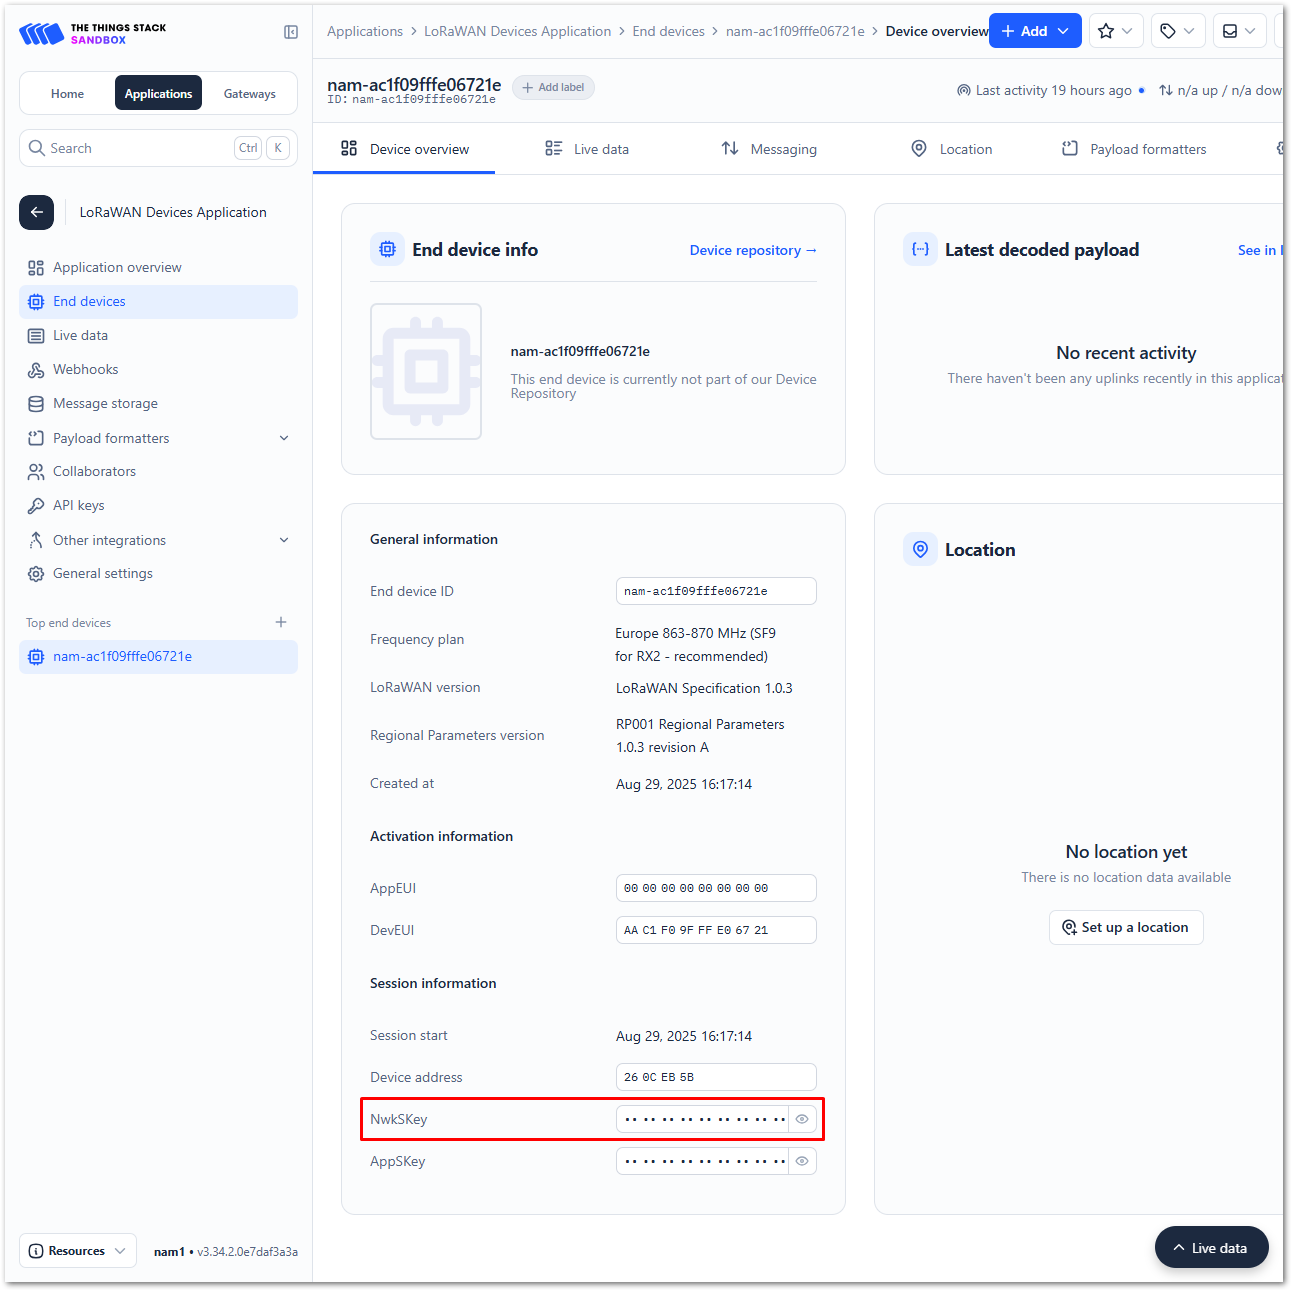 Figure 1: Copying the NwkSKey credential from TTN to WisToolBox
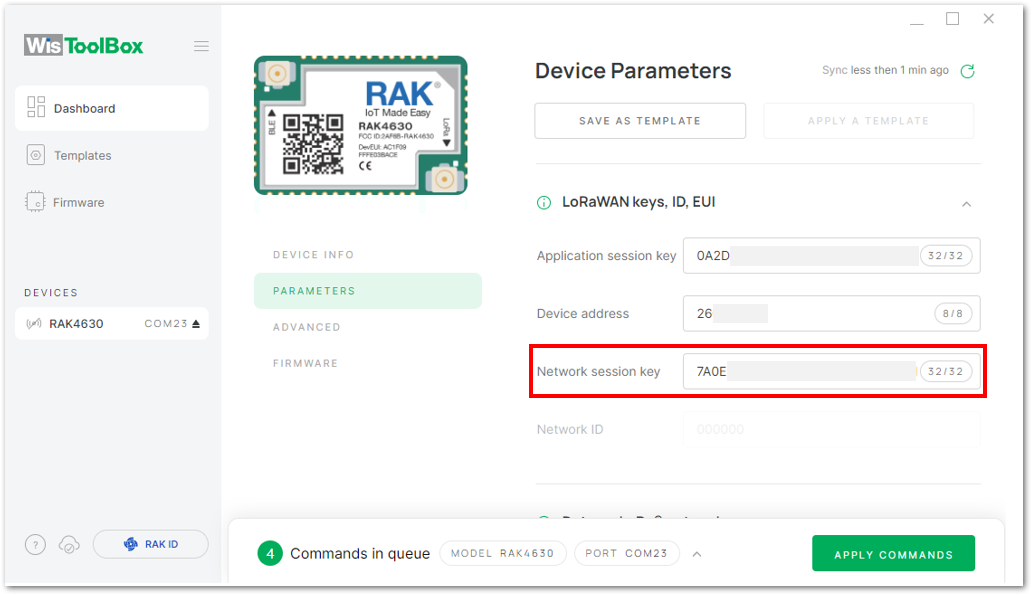 Figure 1: Copying the NwkSKey credential from TTN to WisToolBox
- WisToolBox Dashboard
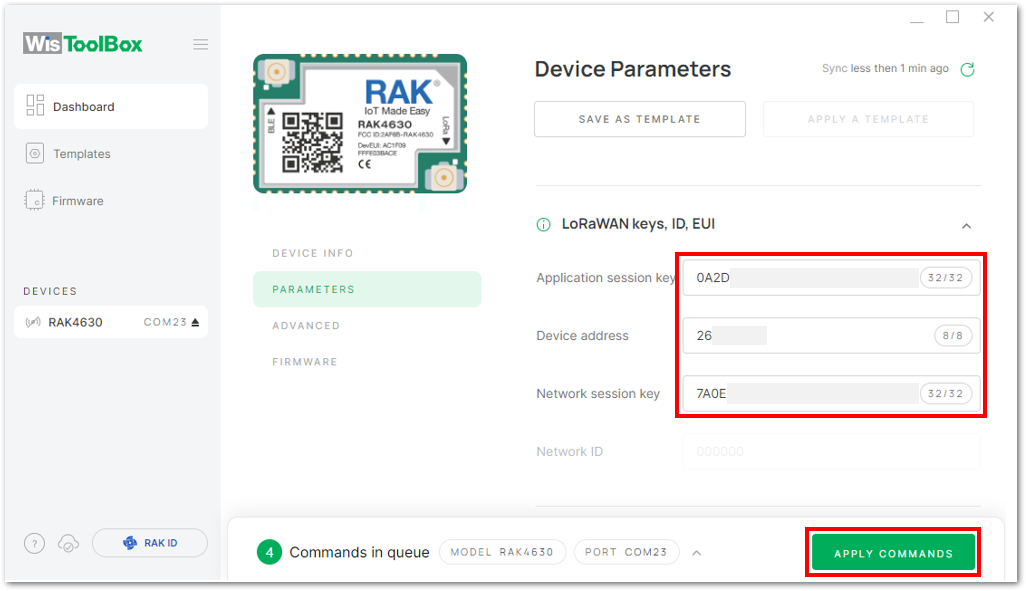 Figure 1: Used credentials from your console in WisToolBox dashboard
- Once completed, you will see a summary of the commands that were applied to your device. Then, click CLOSE.
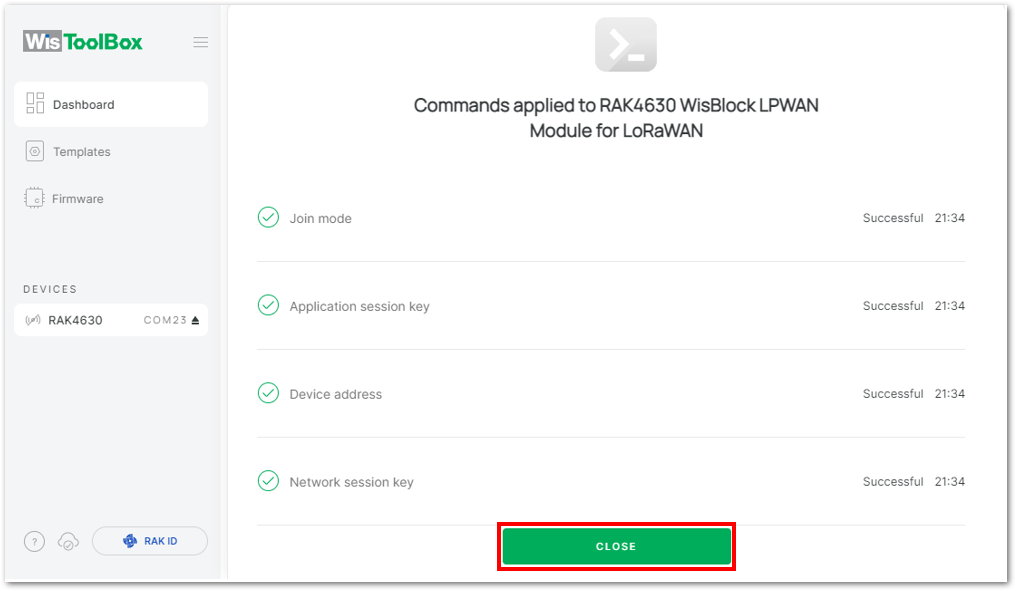 Figure 1: Summary of commands
- Now you will see it returns to the dashboard with updated credentials of your device.
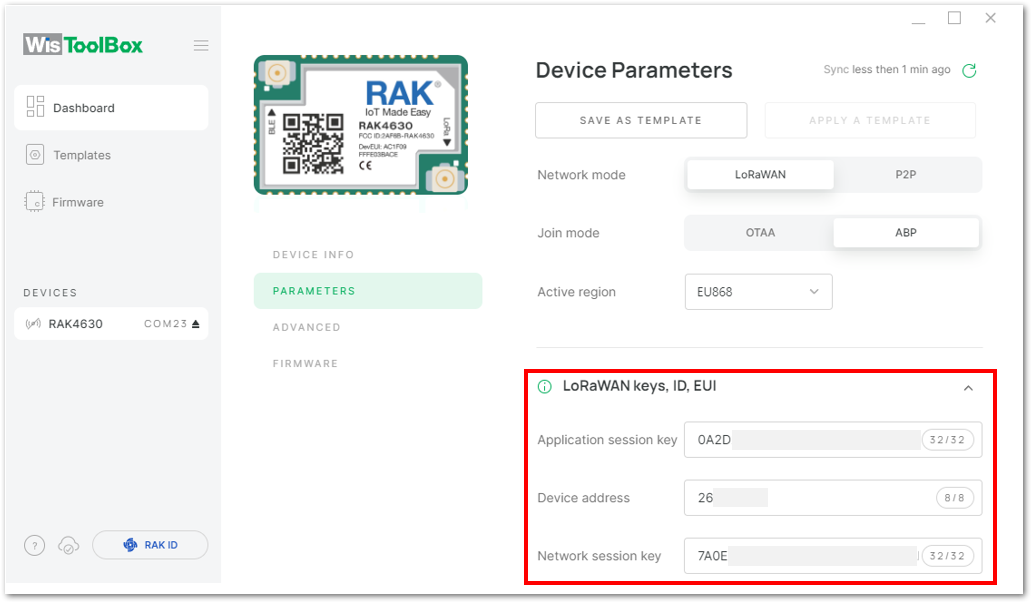 Figure 1: Successfully configured ABP device via WisToolBox dashboard
ABP Configuration for TTN via WisToolBox Console
Here's another way of ABP configuration using WisToolBox Console. Below are the steps on setting up your RAK module using WisToolBox Console.
- Open the WisToolBox application.
- Click the CONNECT DEVICE button to launch the WisToolBox Dashboard.
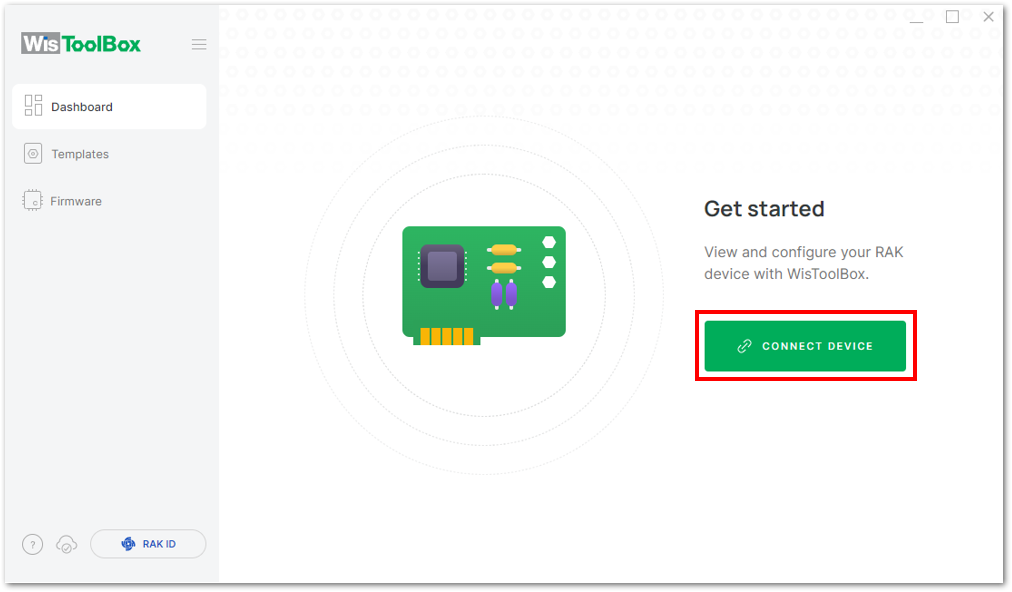 Figure 1: CONNECT DEVICE
- Select your target port where your RAK module is connected. Once recognized, click CONNECT.
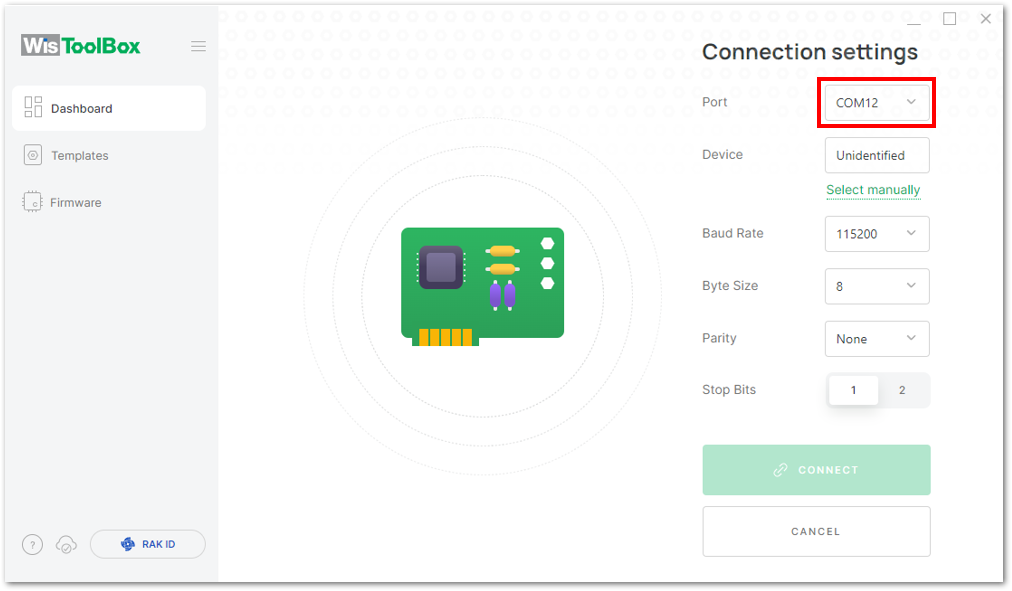 Figure 1: Setting up your device
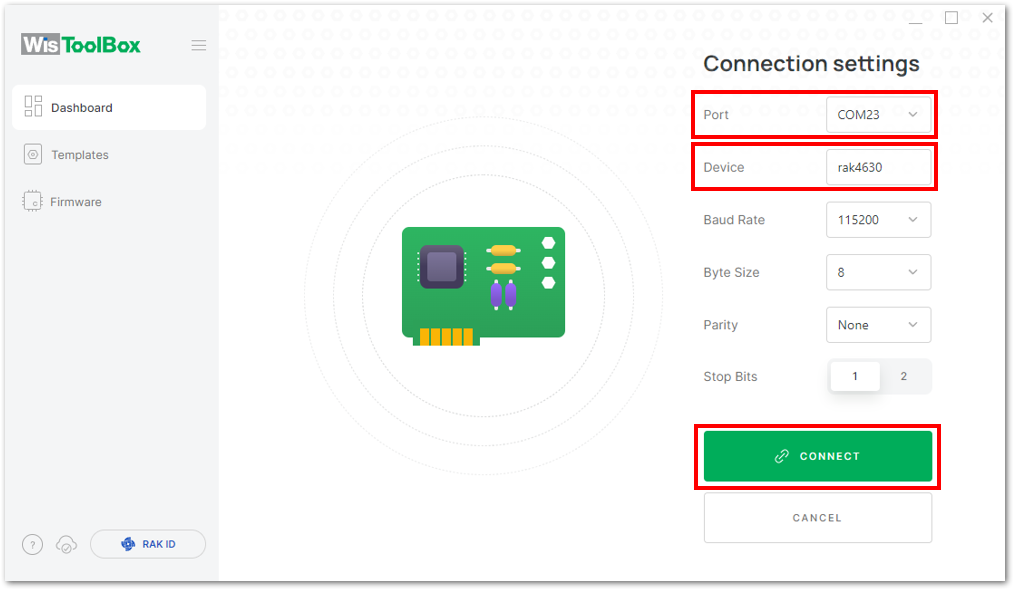 Figure 1: Setting up your device
- Once done, the device will appear in the dashboard, click on it.
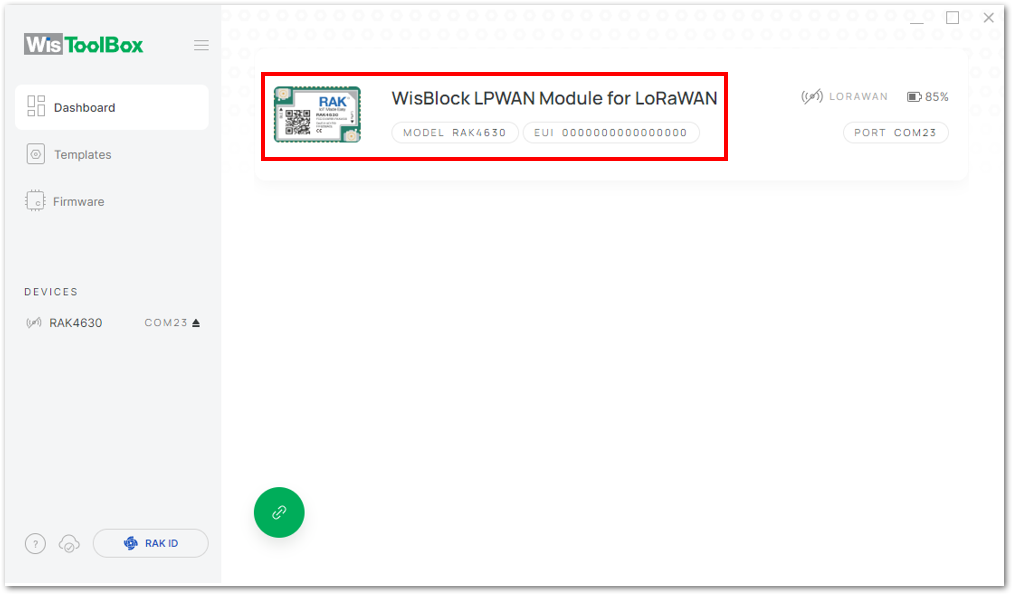 Figure 1: Device seen from WisToolBox dashboard
- Click ADVANCED.
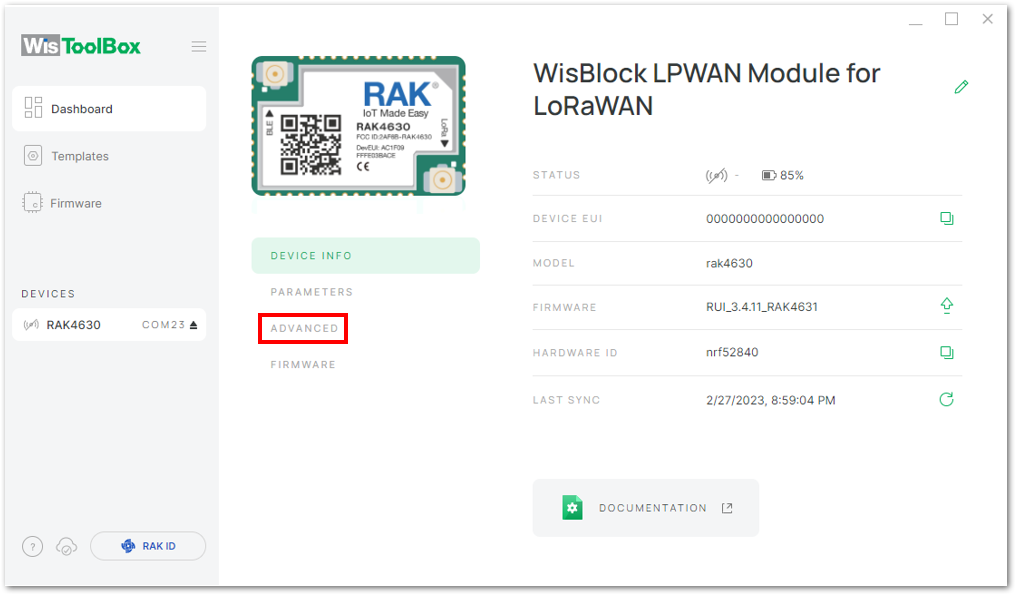 Figure 1: Setting up your device
- click OPEN CONSOLE to proceed with the configuration.
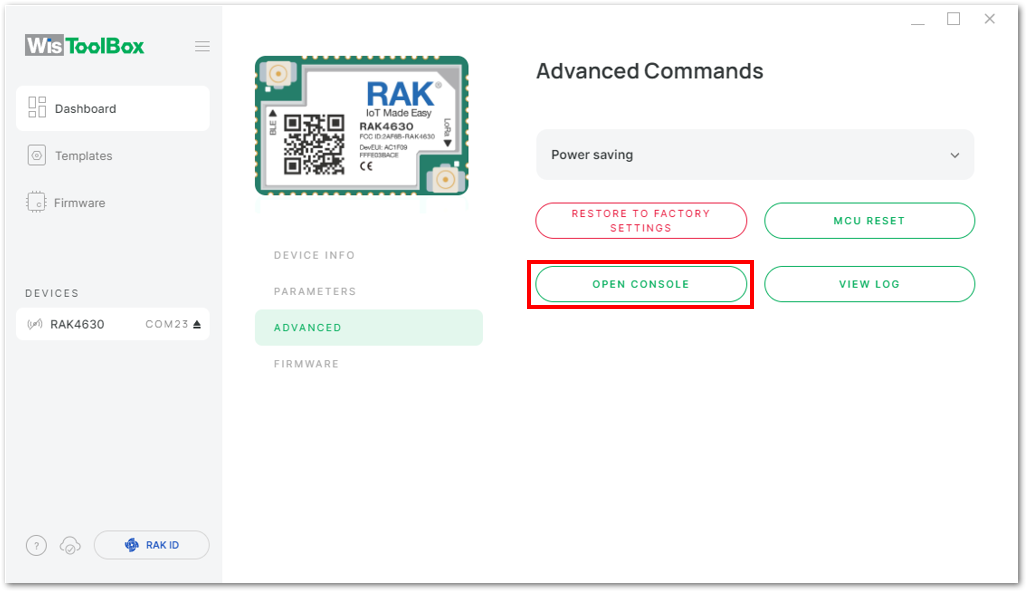 Figure 1: OPEN CONSOLE
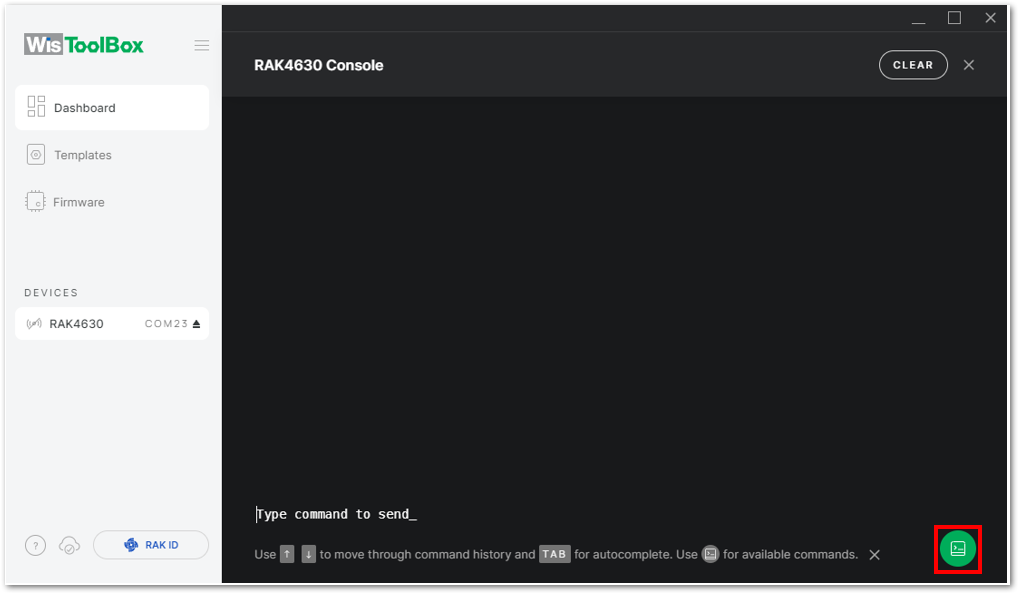 Figure 1: Opening the Console terminal of WisToolBox
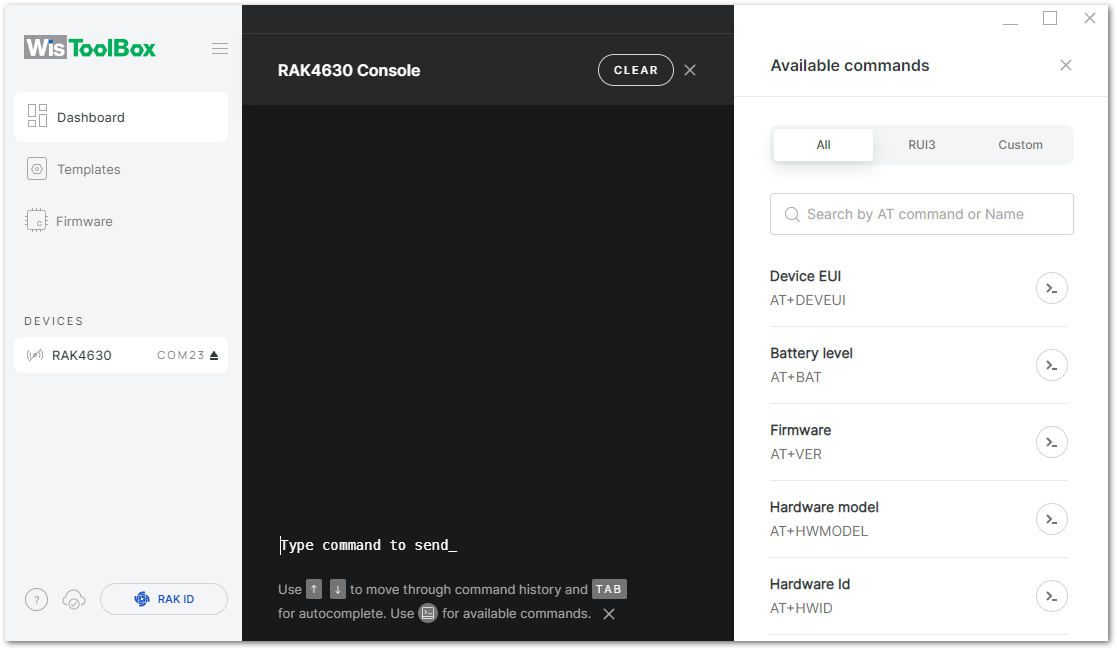 Figure 1: Opening the Console terminal of WisToolBox
- To start the configuration, type ATE so you can echo the commands you input during your configuration. Then press Enter.
It is recommended to start by testing the console and verify that the current configuration is working by sending these two AT commands:
AT
ATE
ATE is useful for tracking the commands and troubleshooting.
You will receive OK when you input the two commands. After setting ATE, see all the commands you input together with the replies.
If there is no OK or any reply, check if the device is powered correctly. If you are getting power from a USB port, ensure that you have a good USB cable.
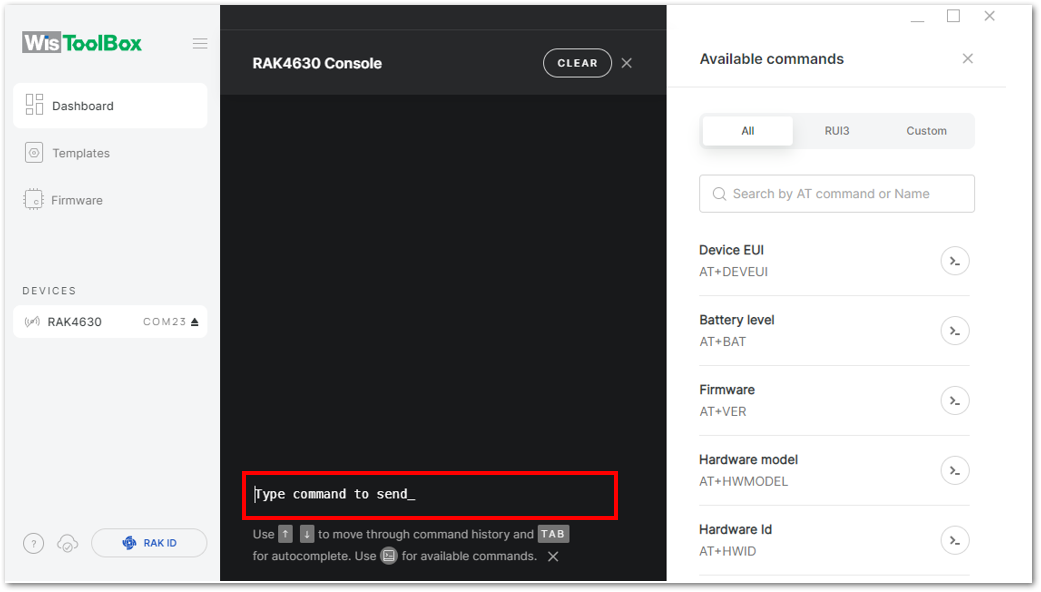 Figure 1: Setting up your Console
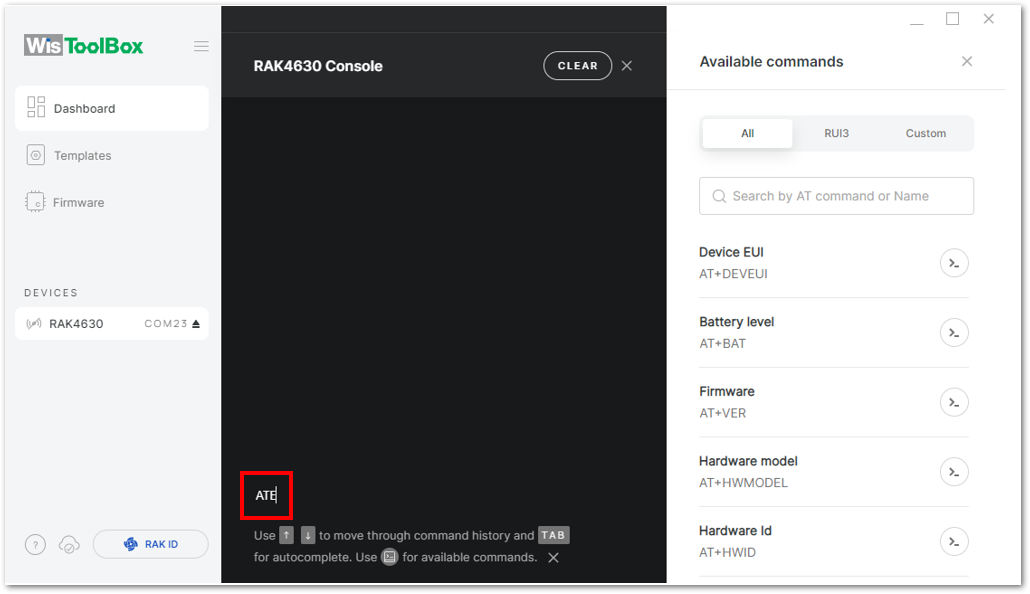 Figure 1: Setting up your Console
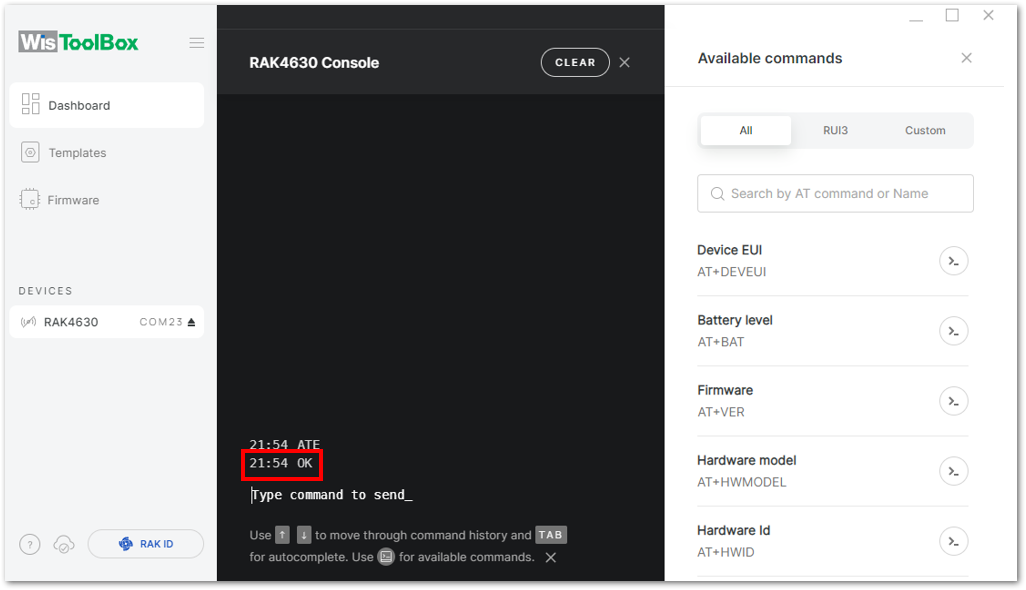 Figure 1: Setting up your Console
- Configure the LoRaWAN join mode to ABP. Check what parameter you will input by typing
AT+NJM?and then Enter into the console terminal. For ABP, inputAT+NJM=0and then press Enter.
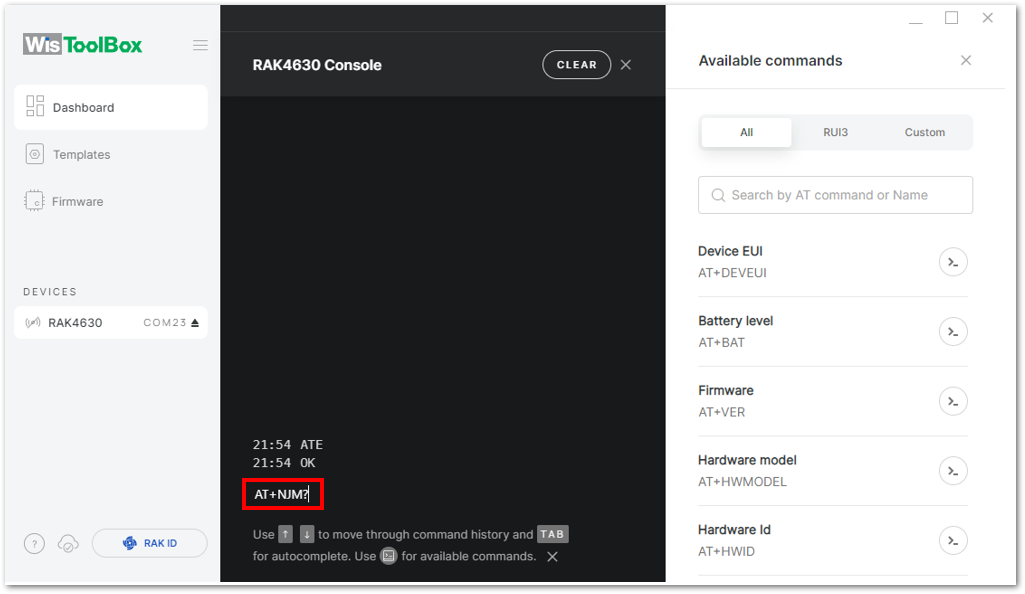 Figure 1: Setting up your Console
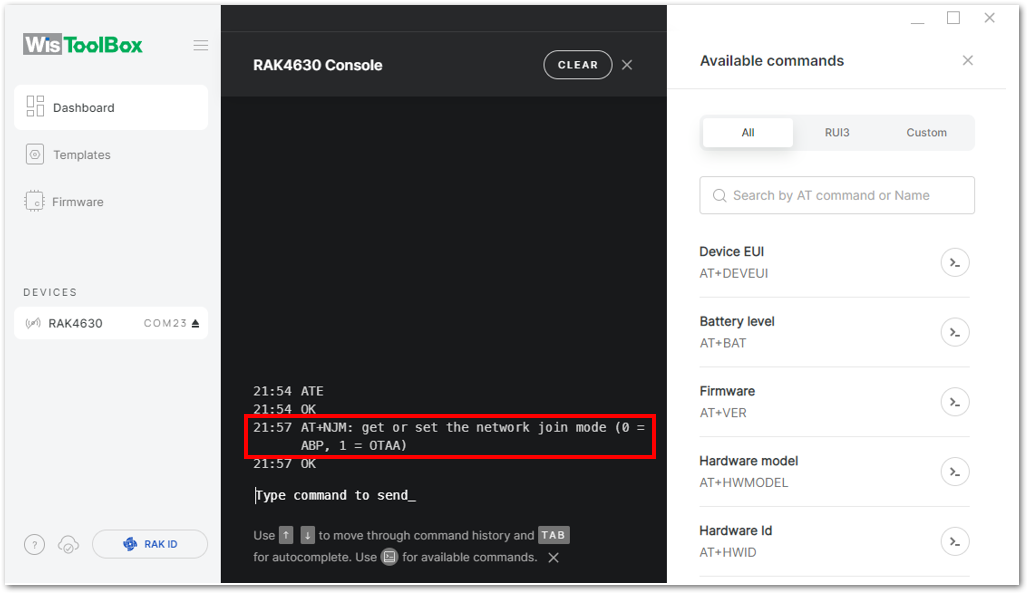 Figure 1: Setting up your Console
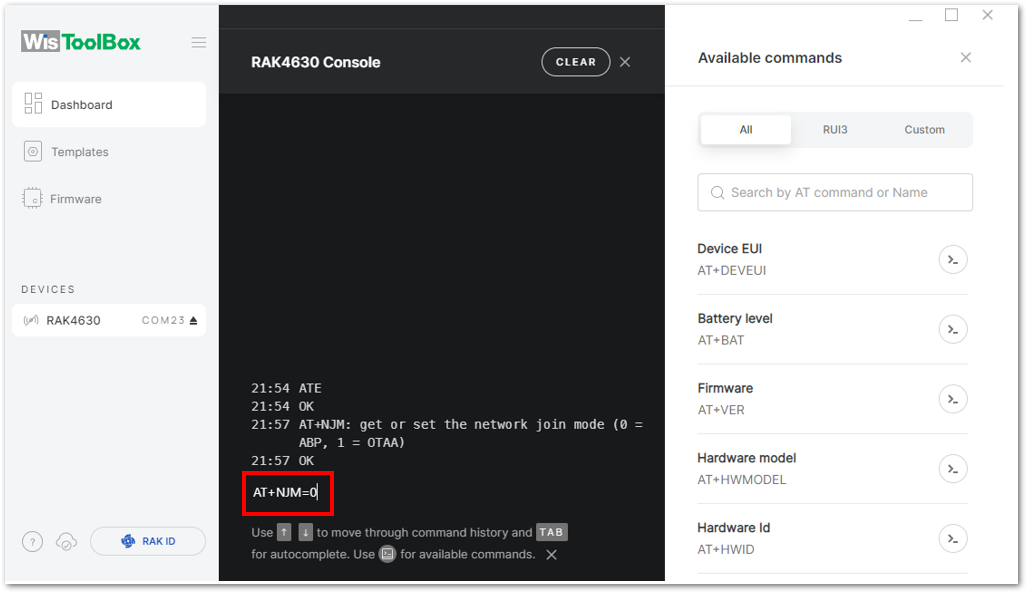 Figure 1: Setting up your Console
- Once done, set up your LoRaWAN region to EU868. Check what parameter you will input by typing AT+BAND? and then Enter into the console terminal. For EU868, input AT+BAND=4 then press Enter. If you wish to work on other regional bands, you may check the List of band parameter options
Set the frequency/region to EU868.
AT+BAND=4
Depending on the Regional Band you selected, you might need to configure the sub-band of your RAK module to match the gateway and LoRaWAN network server. This is especially important for Regional Bands like US915, AU915, and CN470.
To configure the masking of channels for the sub-bands, you can use the AT+MASK command that can be found on the AT Command Manual.
To illustrate, you can use sub-band 2 by sending the command AT+MASK=0002.
-
EU433=0
-
CN470=1
-
RU864=2
-
IN865=3
-
EU868=4
-
US915=5
-
AU915=6
-
KR920=7
-
AS923-1=8
-
AS923-2=9
-
AS923-3=10
-
AS923-4=11
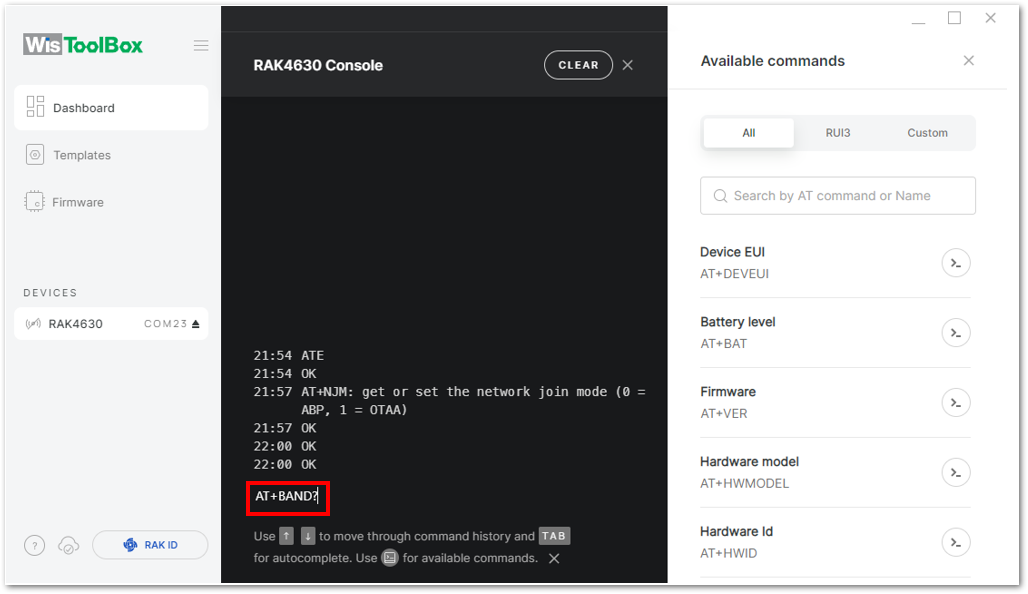 Figure 1: Setting up your Console
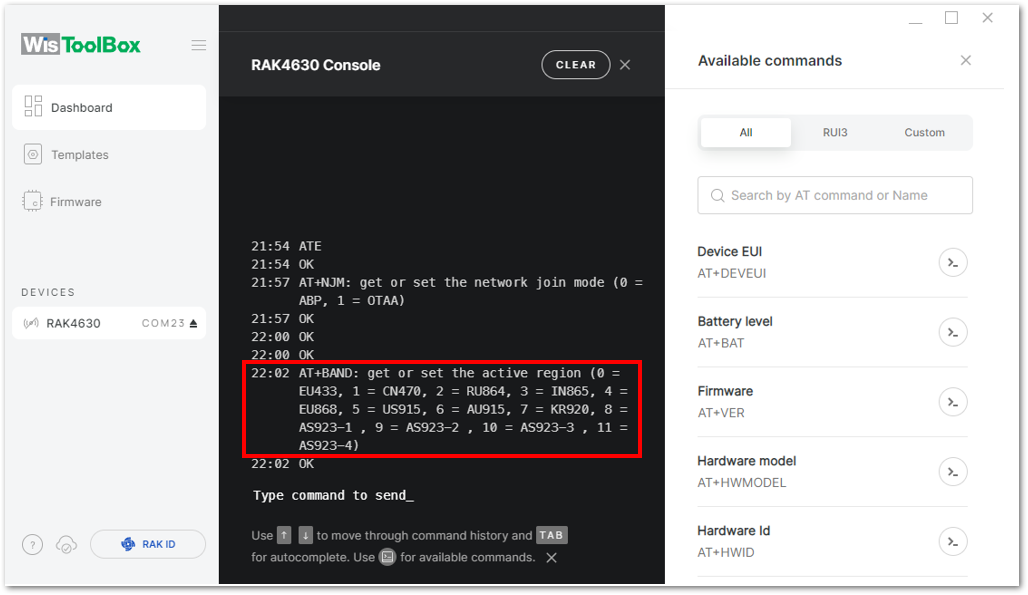 Figure 1: Setting up your Console
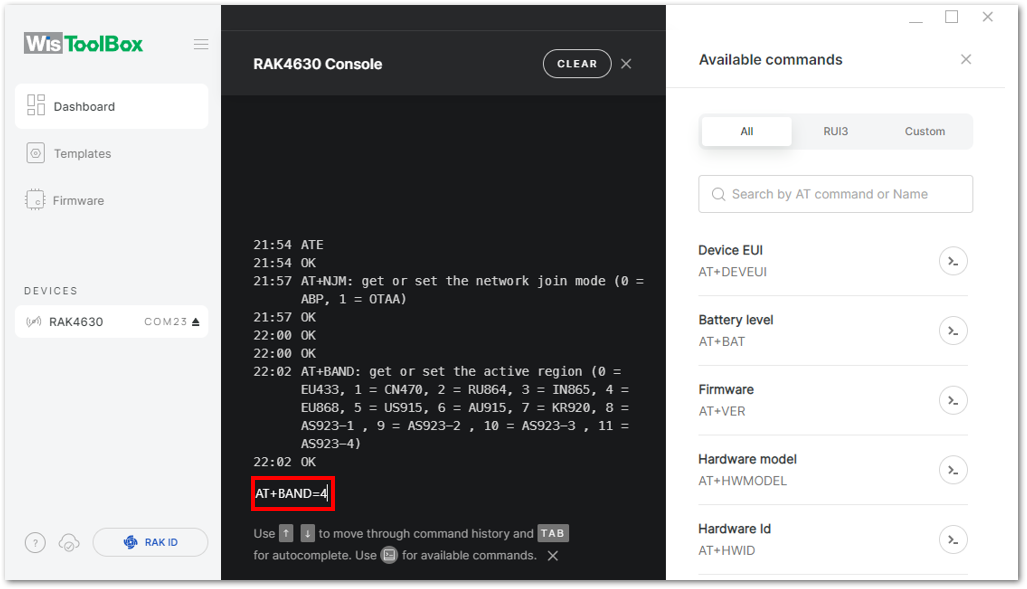 Figure 1: Setting up your Console
- Update the ABP credentials of your device and start with the Application Session Key (AppSKey). Go back to your console where your End device was created to copy the AppSKey credential, then paste it into the WisToolBox Console, and press Enter.
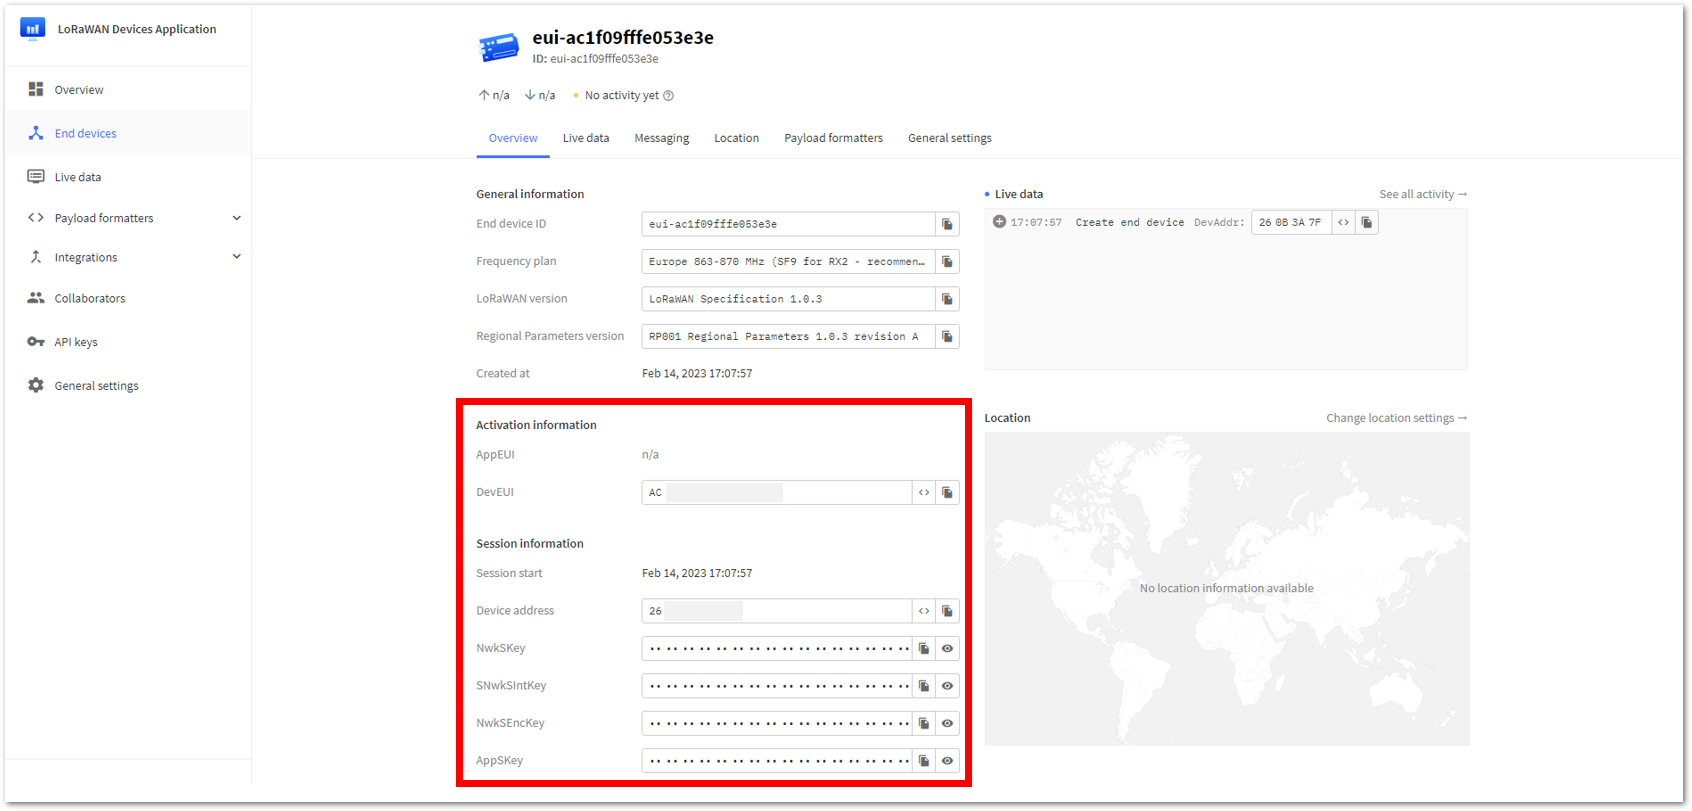 Figure 1: ABP information of the device from your TTN console
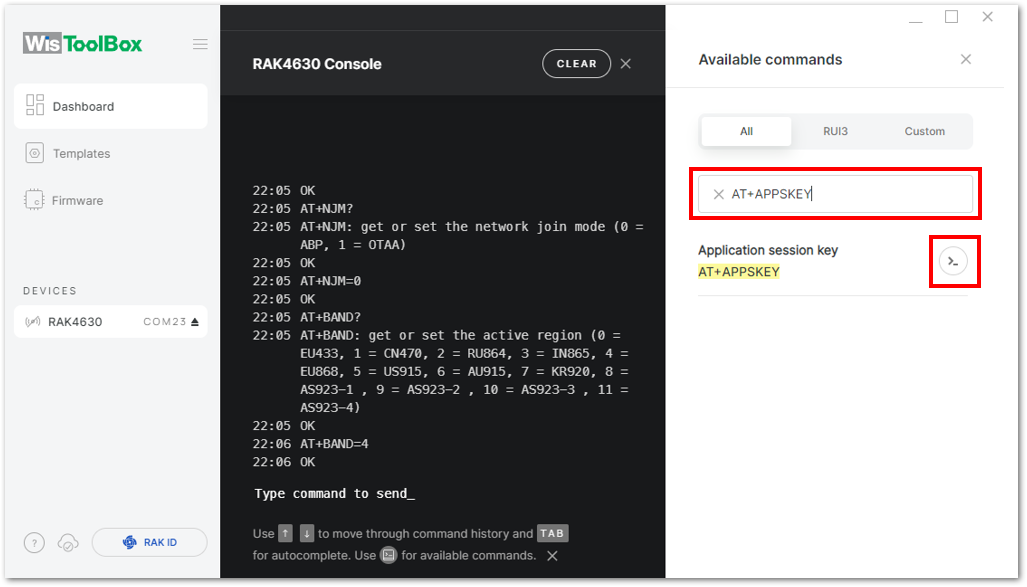 Figure 1: Setting up your Console
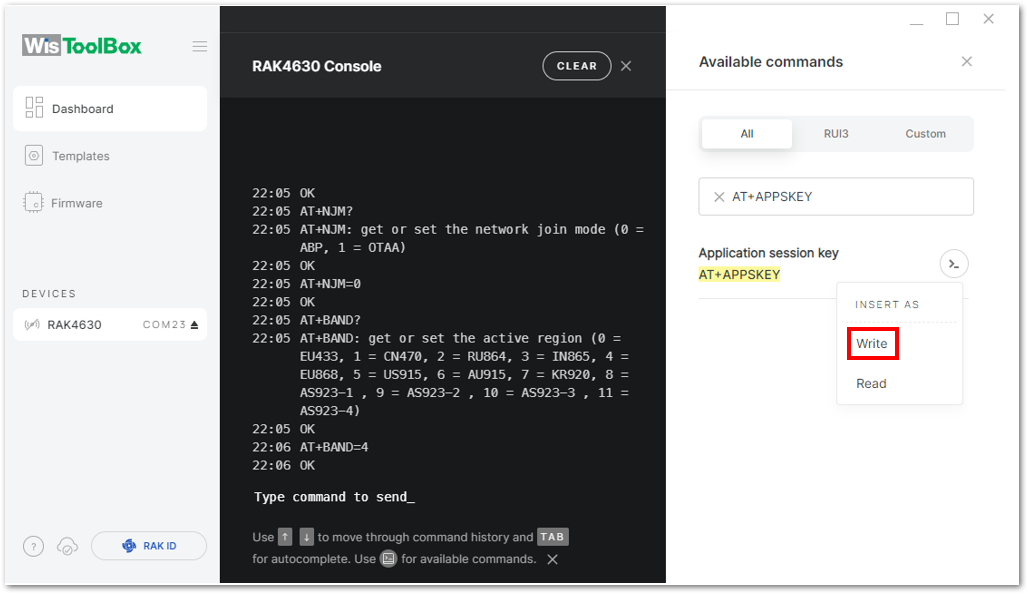 Figure 1: Write the key
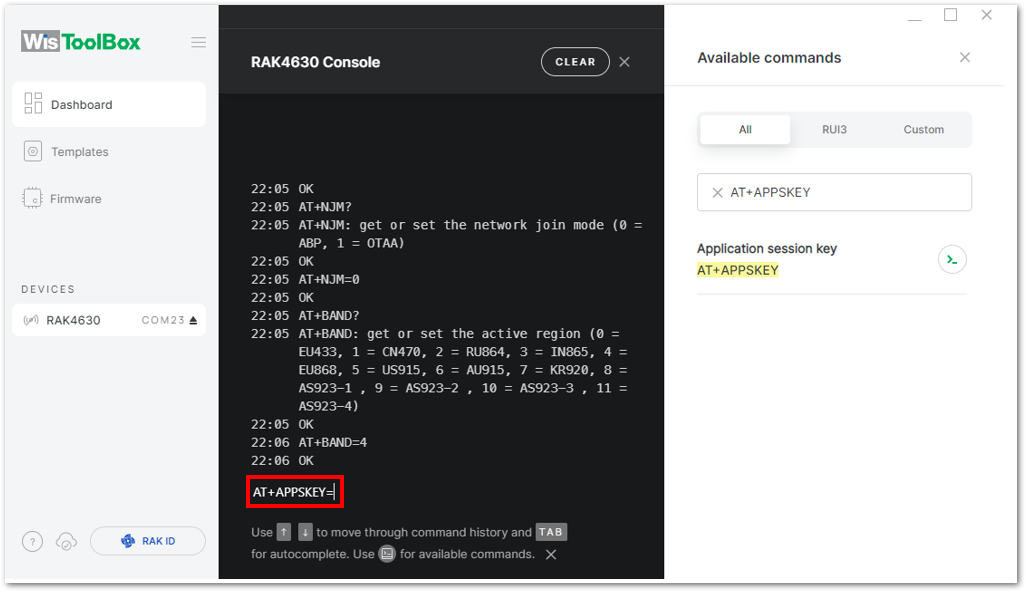 Figure 1: Setting up your Console
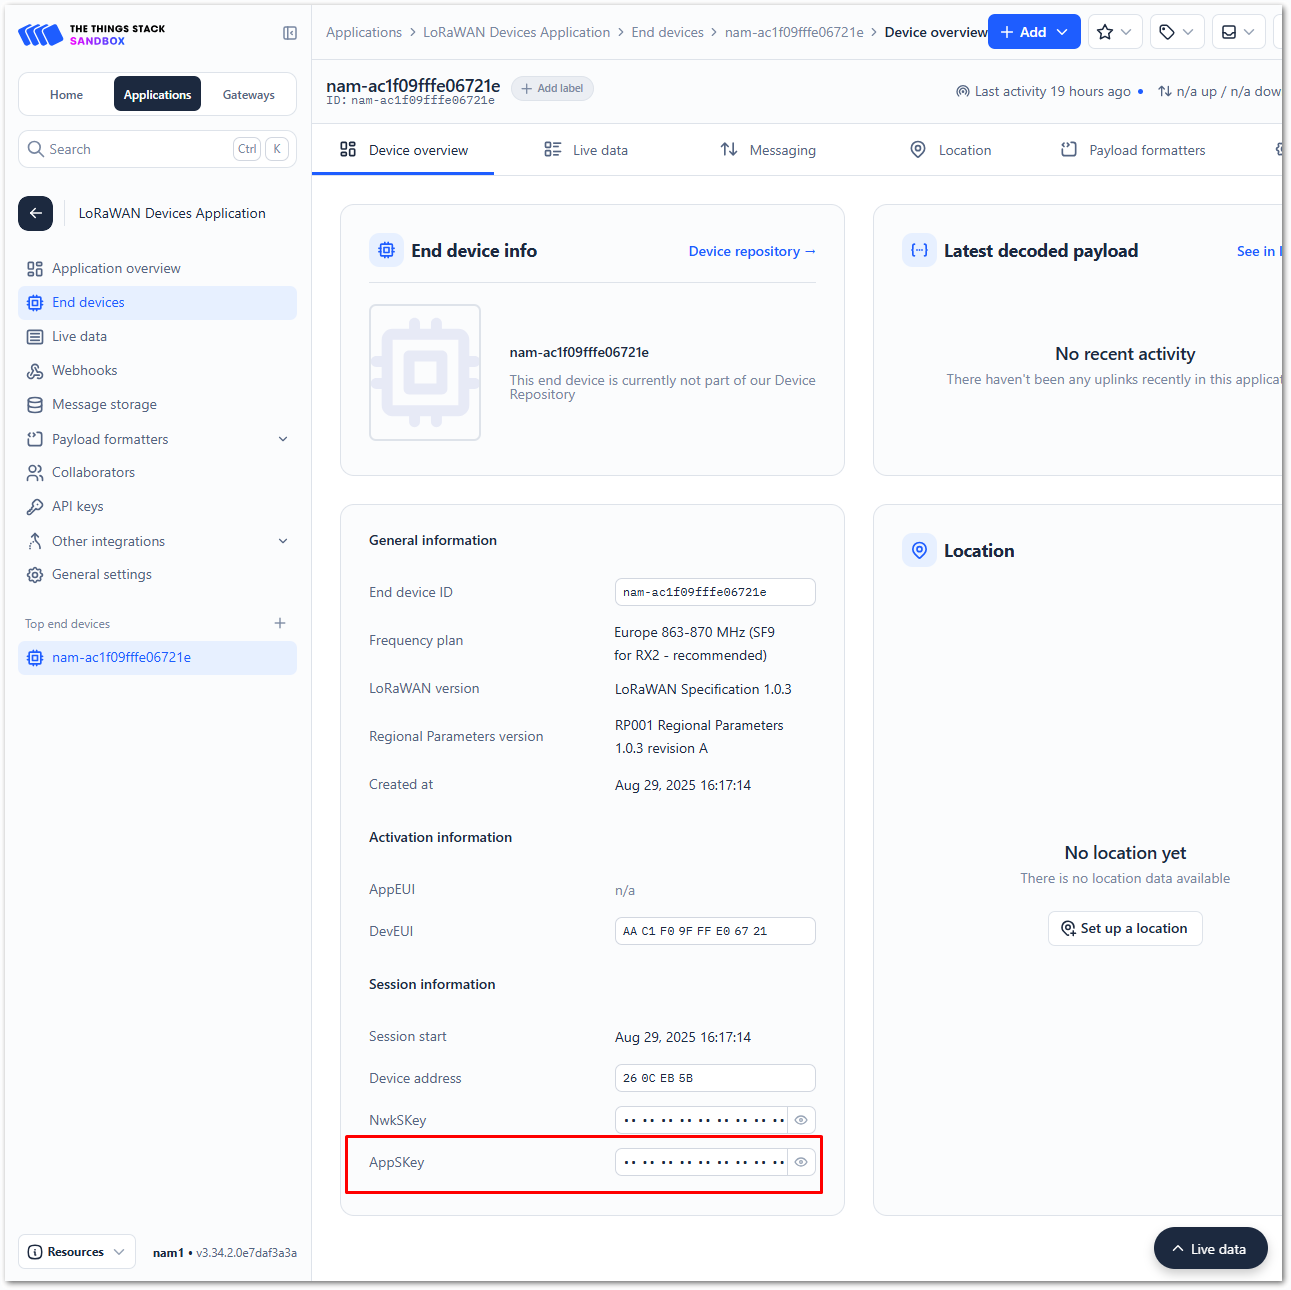 Figure 1: Copying the AppSKey credential from TTN to WisToolBox
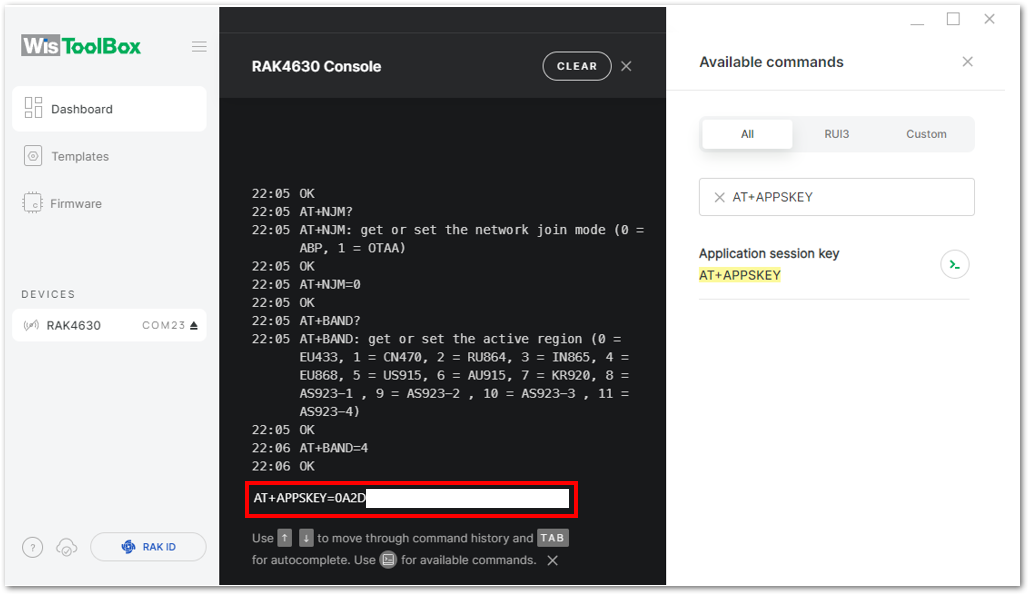 Figure 1: Setting up your Console
- Repeat the same procedure for the Device Address and Network Session Key (NwkSKey).
- For Device address
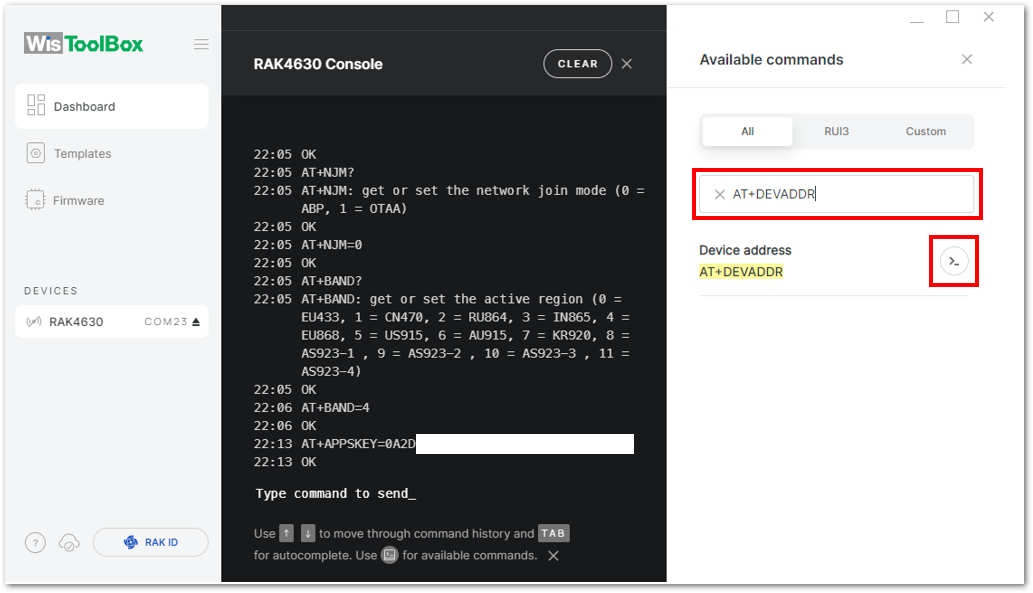 Figure 1: Setting up your Console
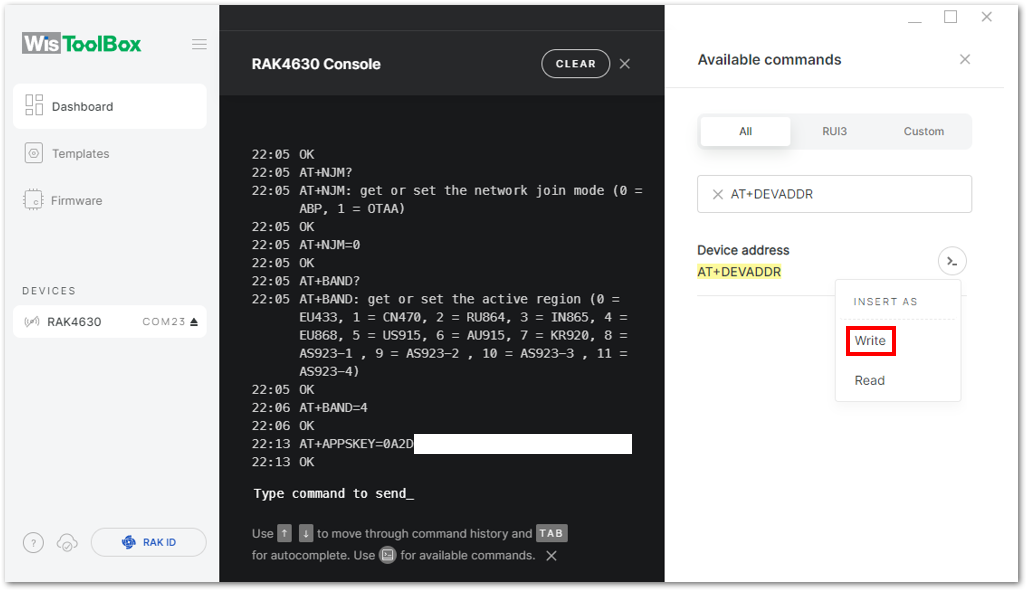 Figure 1: Setting up your Console
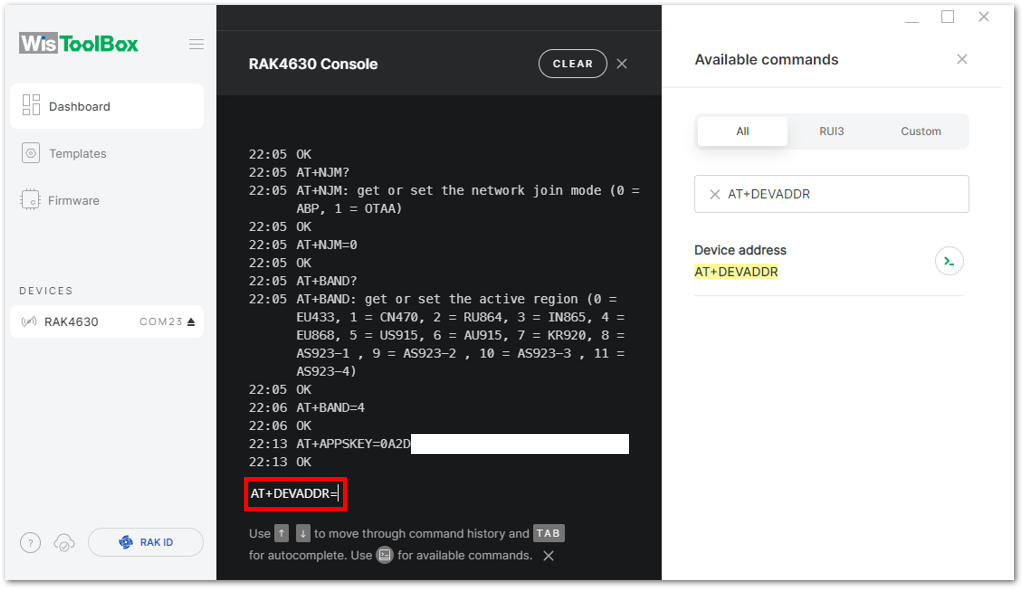 Figure 1: Setting up your Console
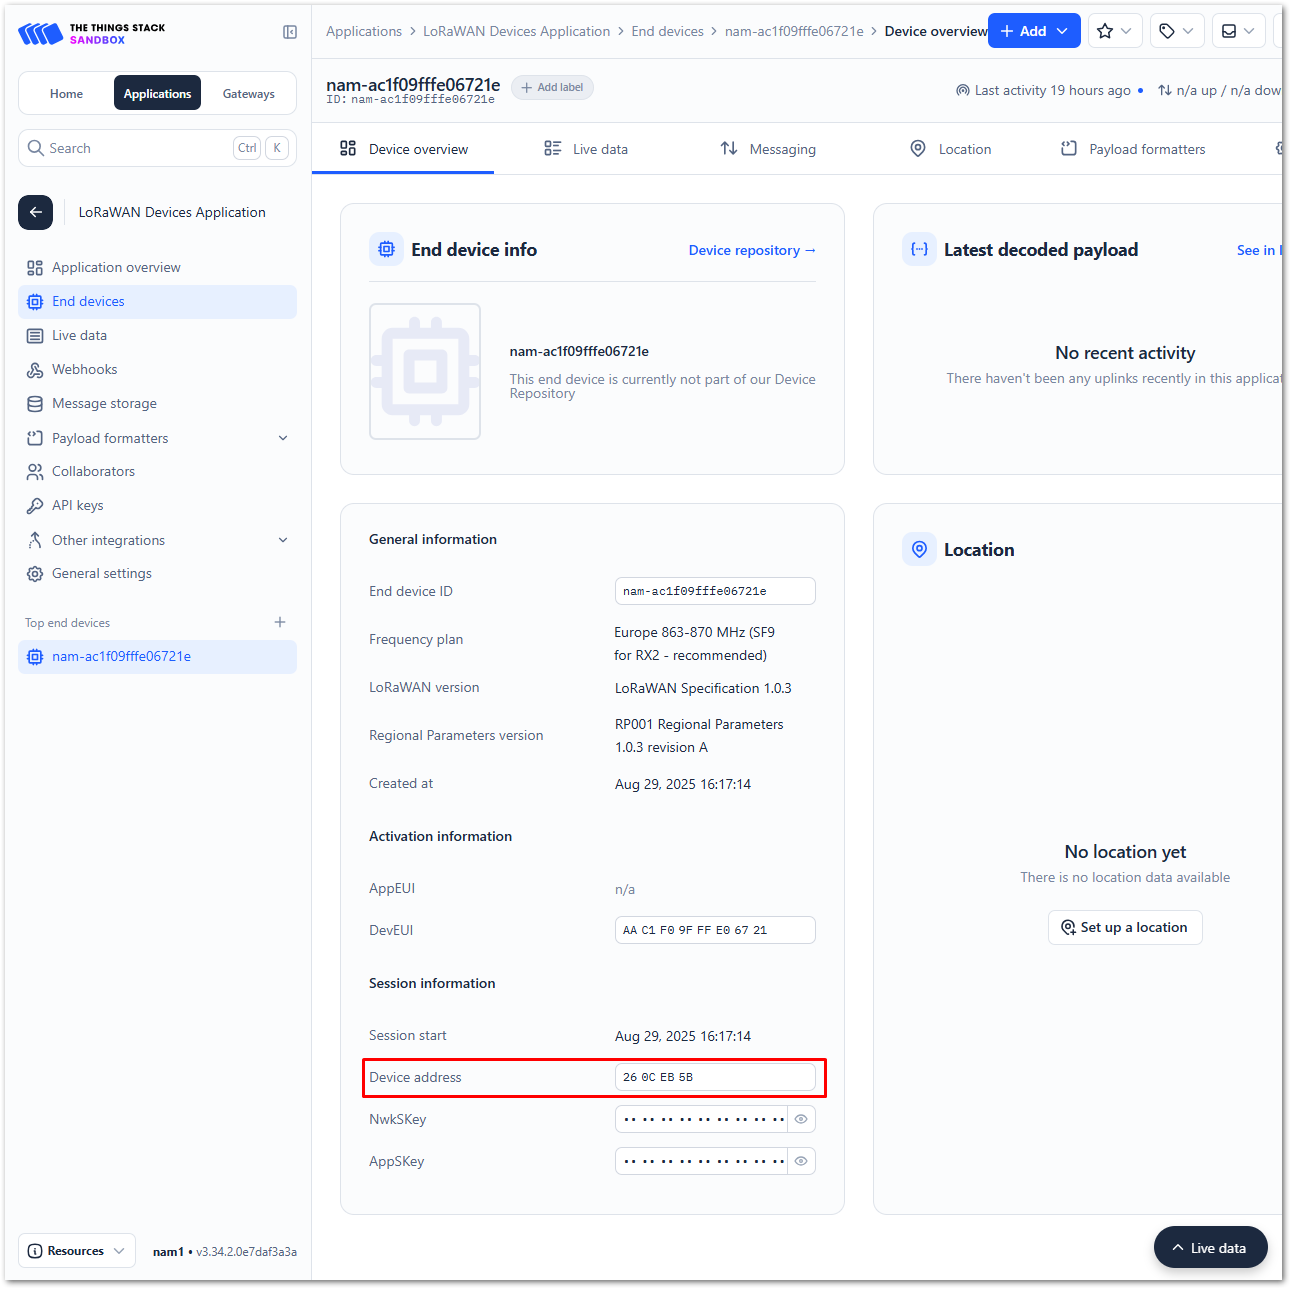 Figure 1: Copying the Device address credential from TTN to WisToolBox
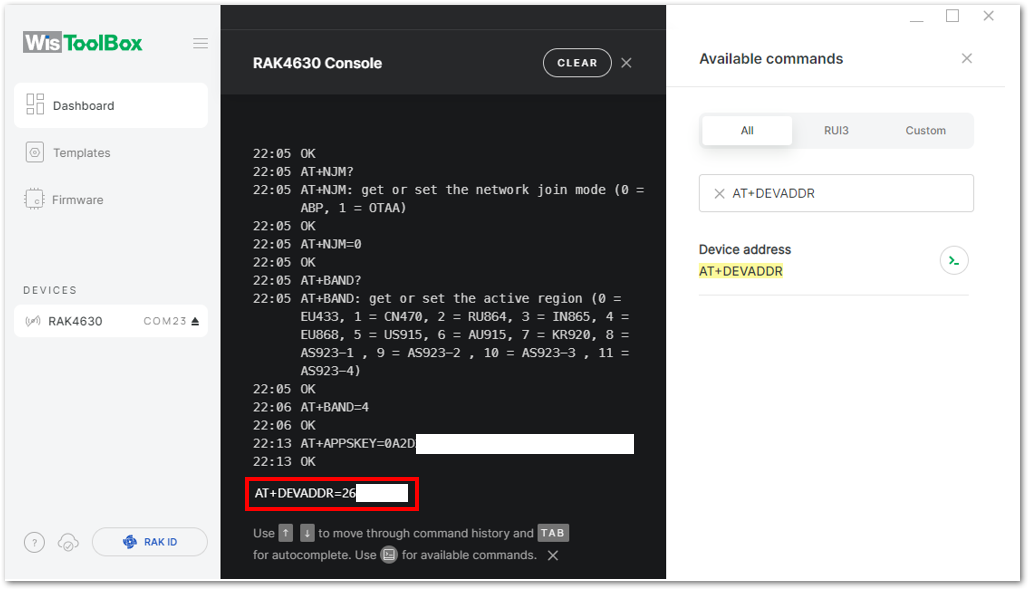 Figure 1: Setting up your Console
- For Network session key (NwkSKey)
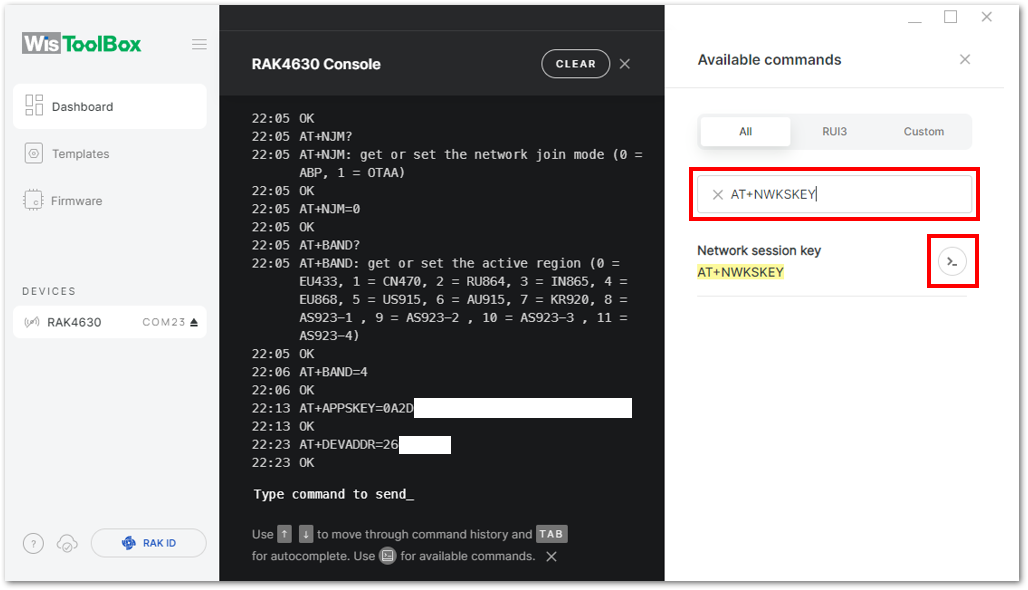 Figure 1: Setting up your Console
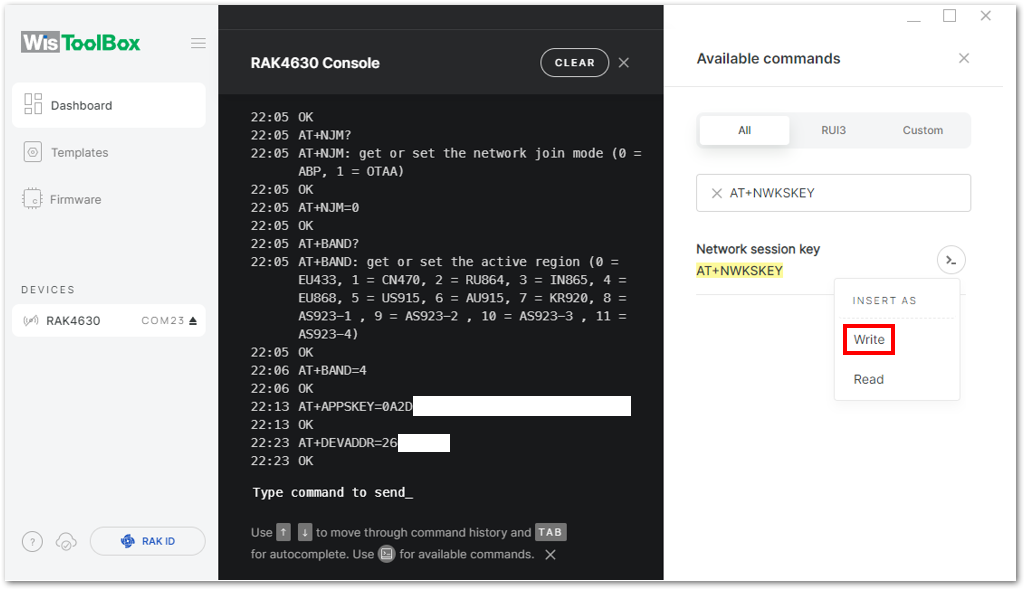 Figure 1: Setting up your Console
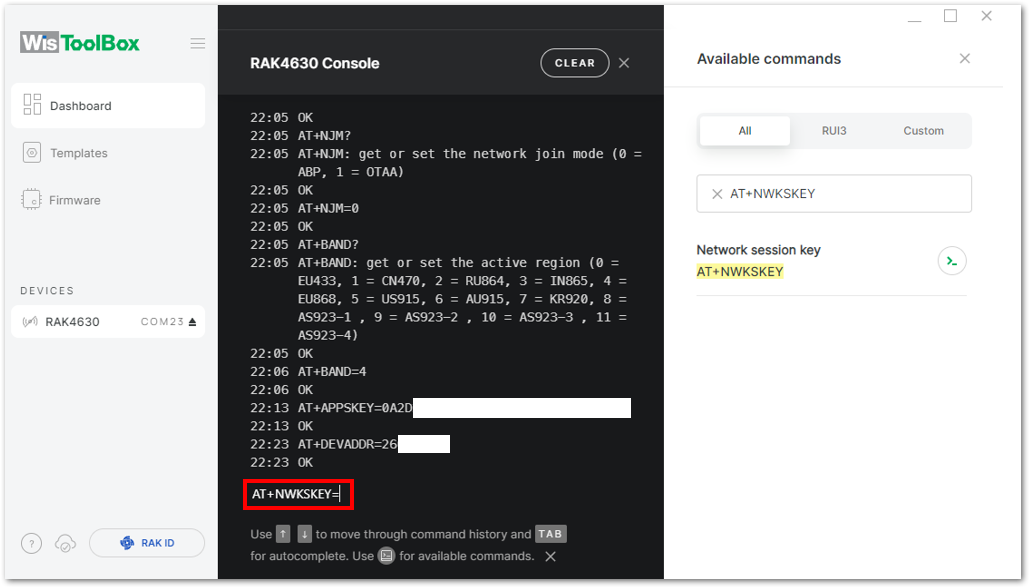 Figure 1: Setting up your Console
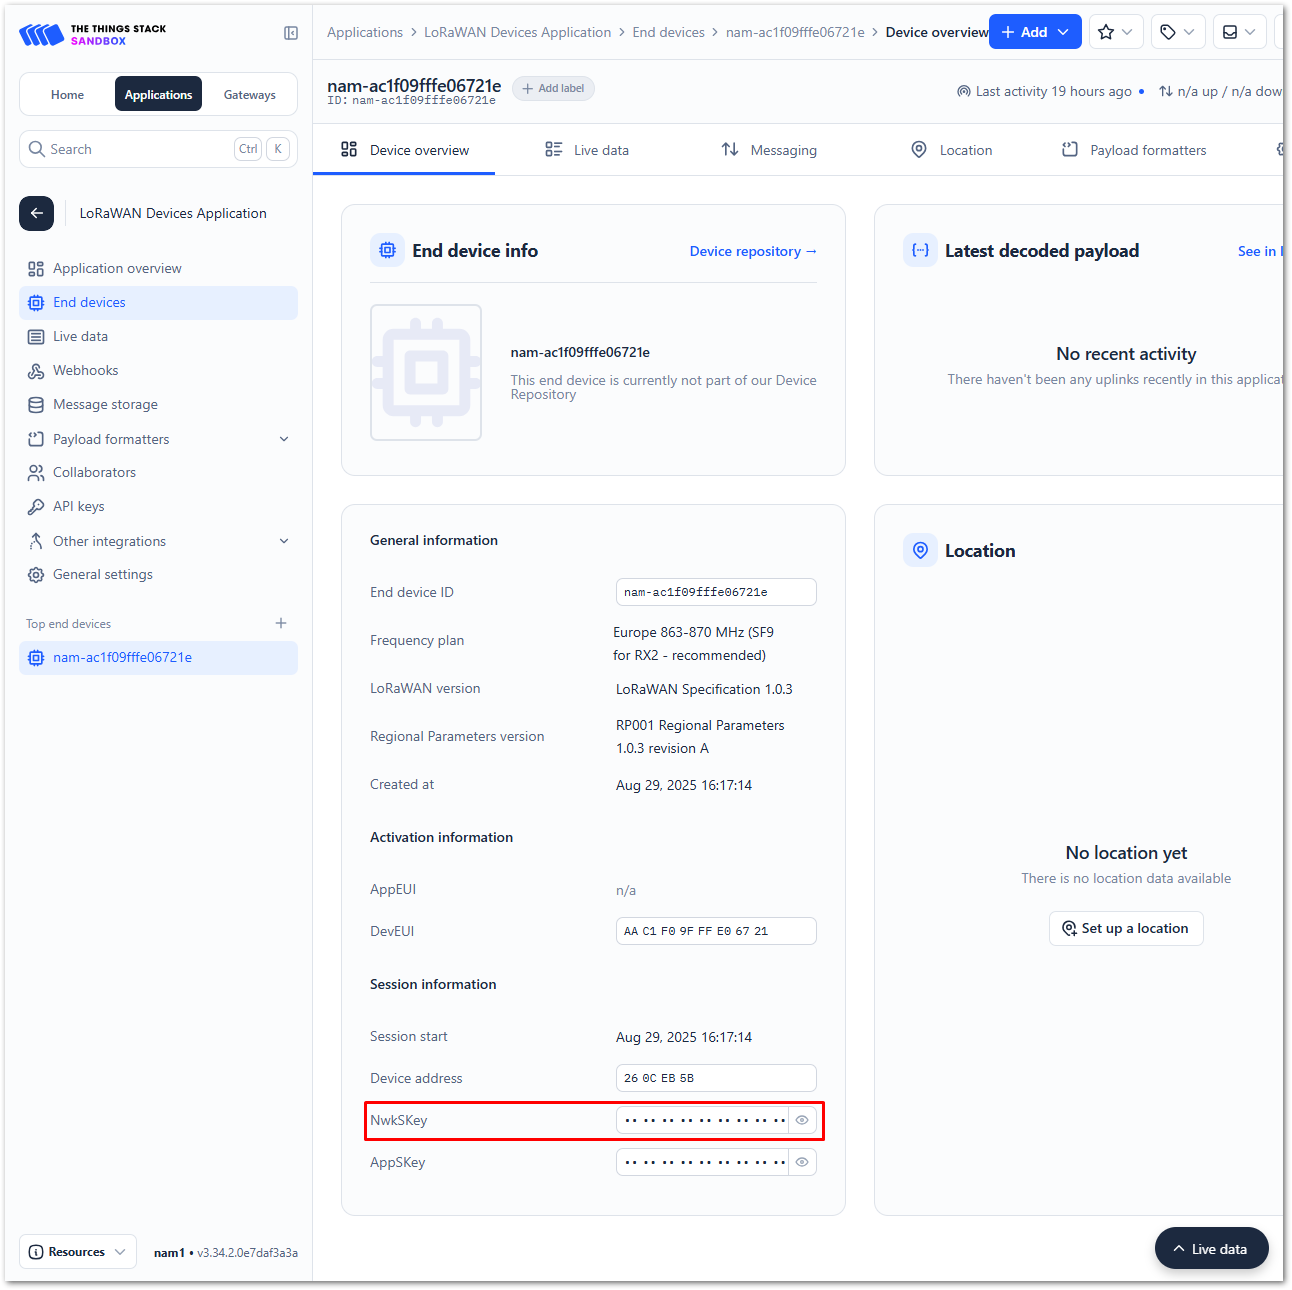 Figure 1: Copying the NwkSKey credential from TTN to WisToolBox
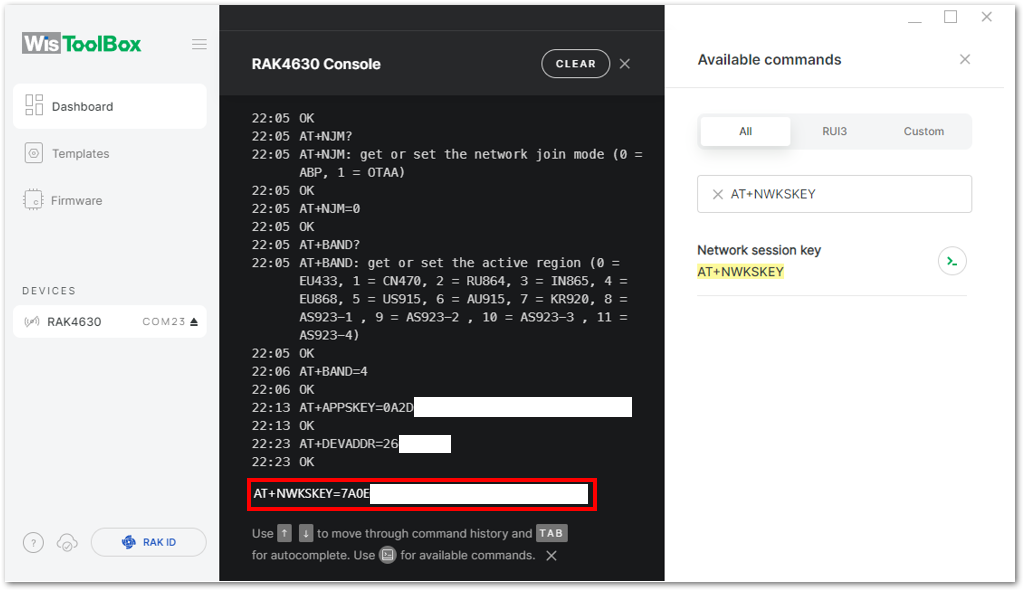 Figure 1: Setting up your Console
- Once completed, click Dashboard to verify the updated credentials of your ABP device. Then, click PARAMETERS to open the Global Settings and LoRaWAN keys, ID, EUI sections to confirm that they have been updated accordingly.
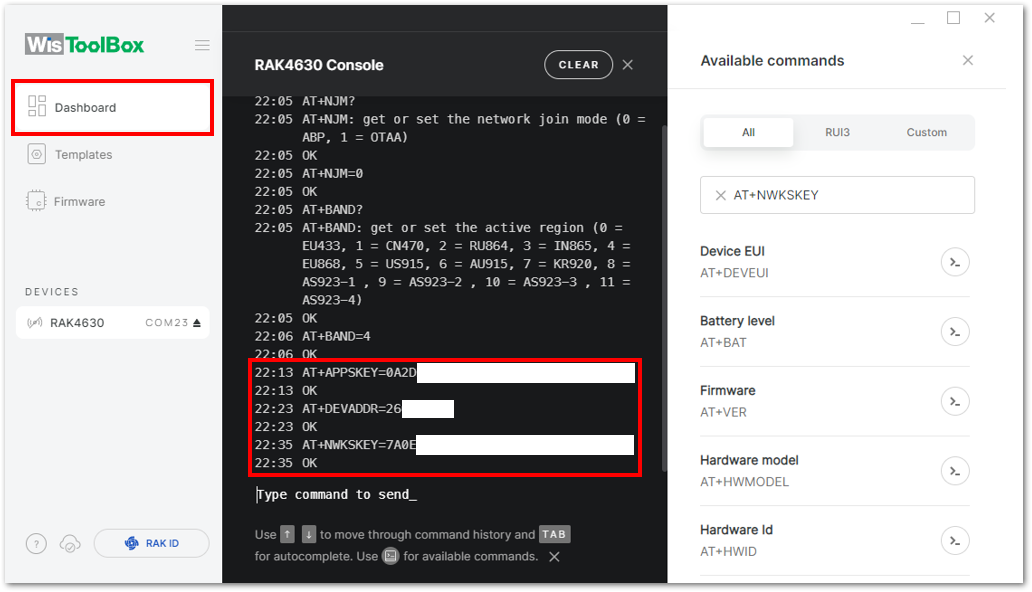 Figure 1: Setting up your Console
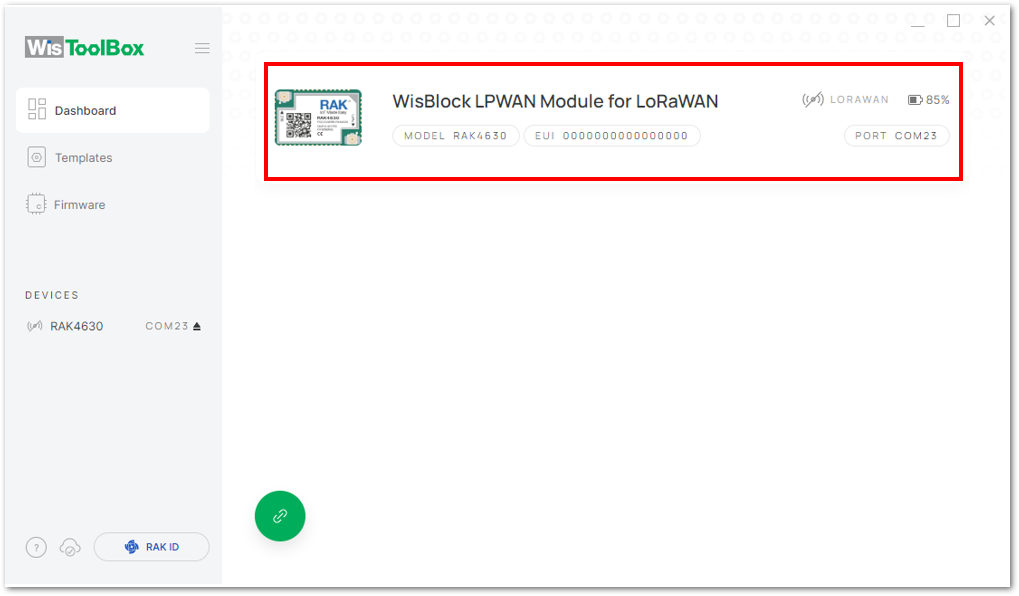 Figure 1: Setting up your Console
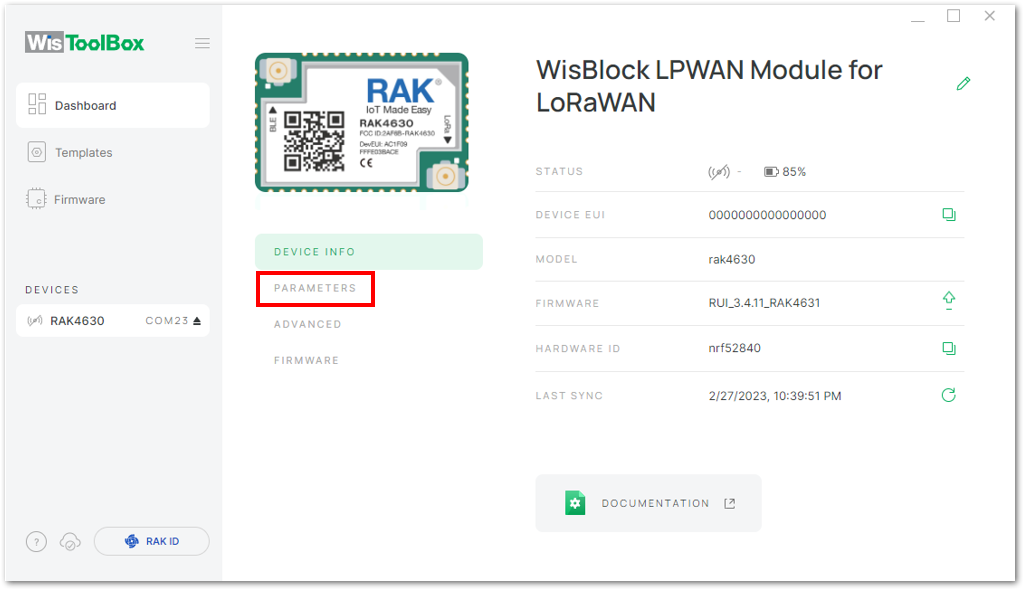 Figure 1: PARAMETERS
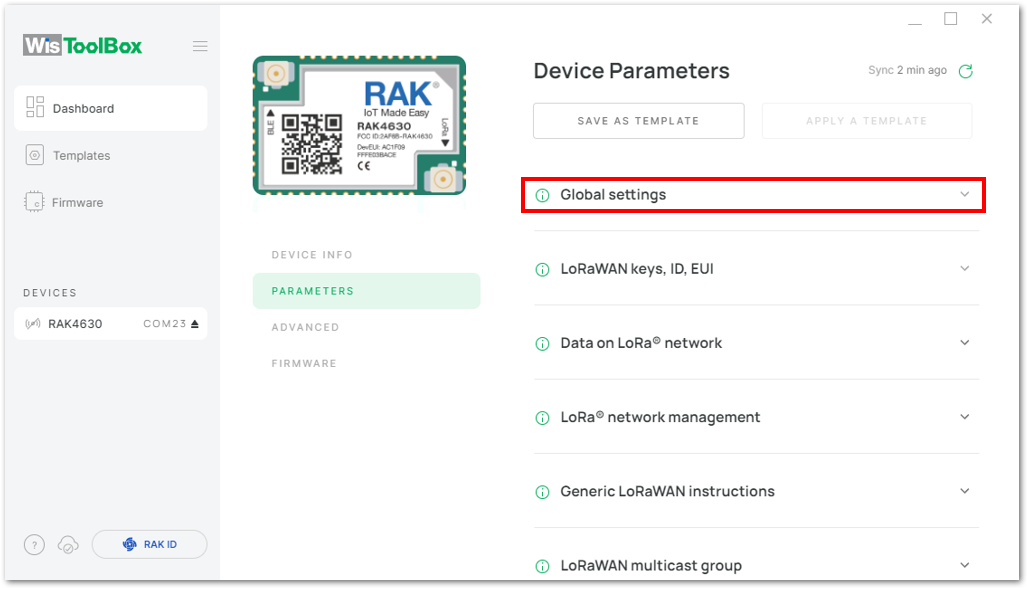 Figure 1: Global settings and LoRaWAN keys, ID, EUI
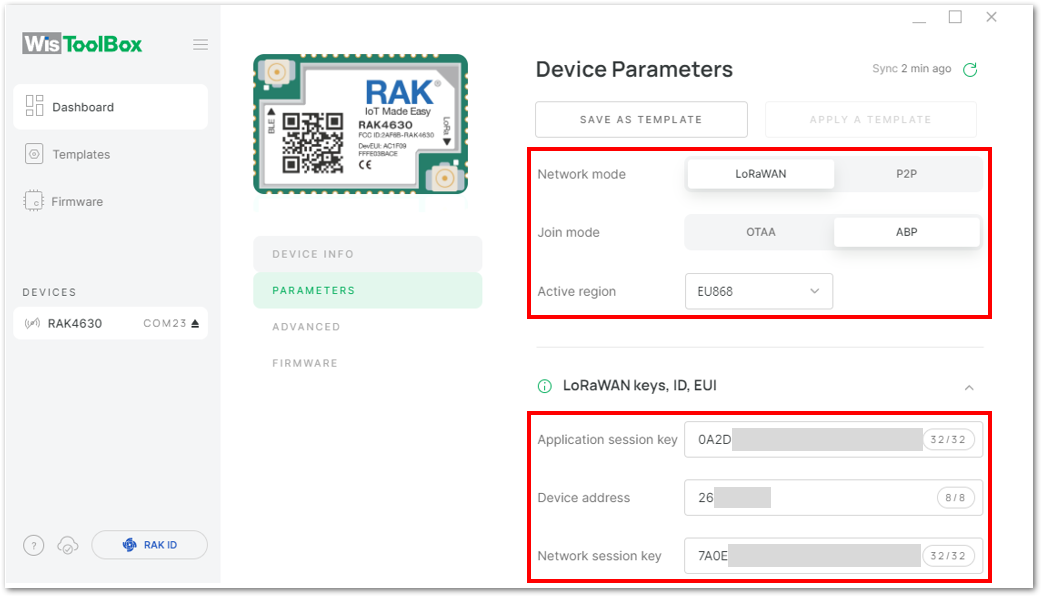 Figure 1: Global settings and LoRaWAN keys, ID, EUI details
Now you have a configured ABP device using WisToolBox Console. ABP-configured devices are directly tied to the network once done with the above procedures so joining procedure is not needed.
- Try sending the payload to TTN. Open again the terminal console of WisToolBox to send some payload. Send the command format:
AT+SEND=<port>:<payload>
AT+SEND=2:12345678
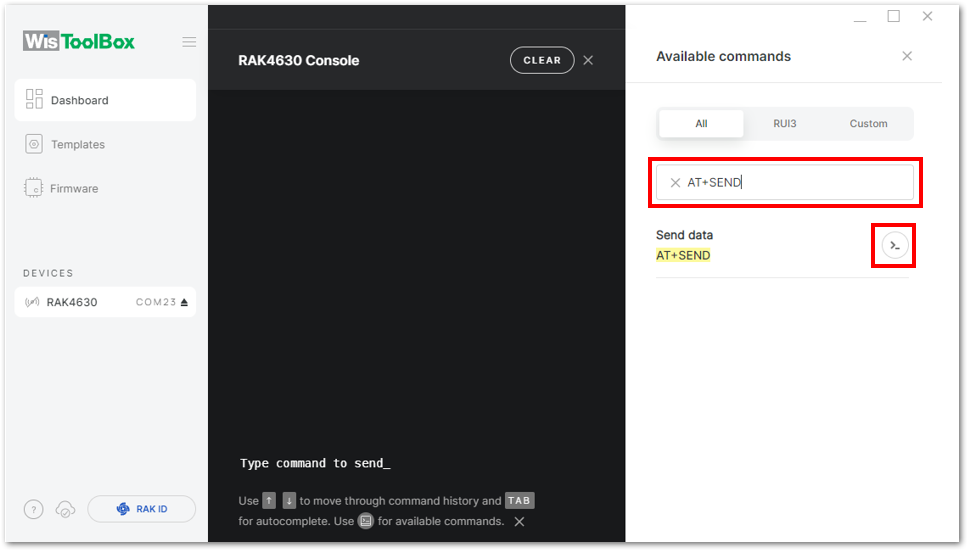 Figure 1: ABP device sending payload to the network
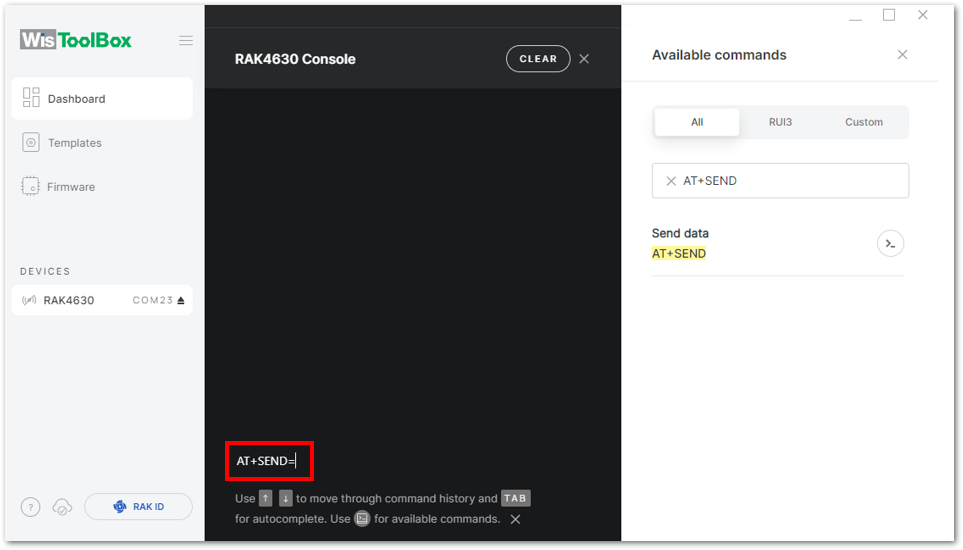 Figure 1: ABP device sending payload to the network
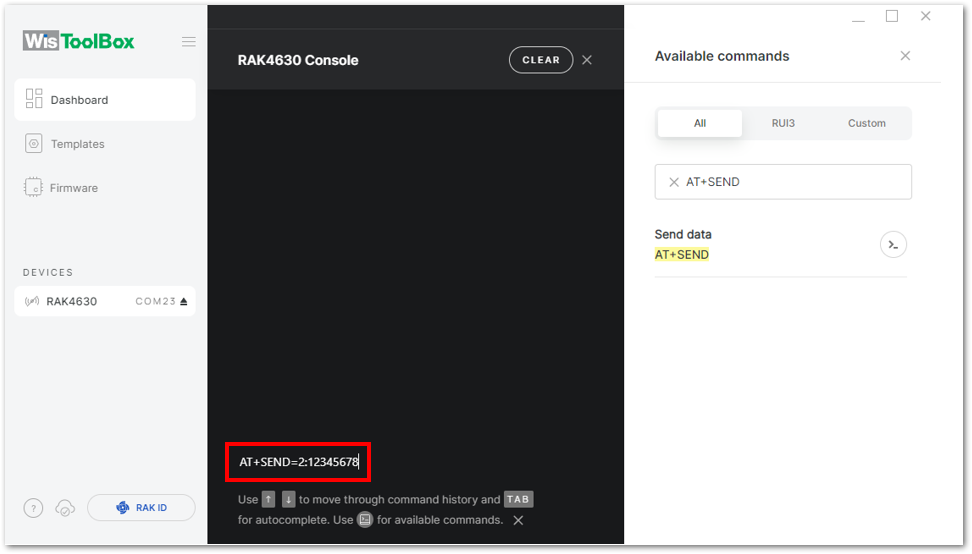 Figure 1: ABP device sending payload to the network
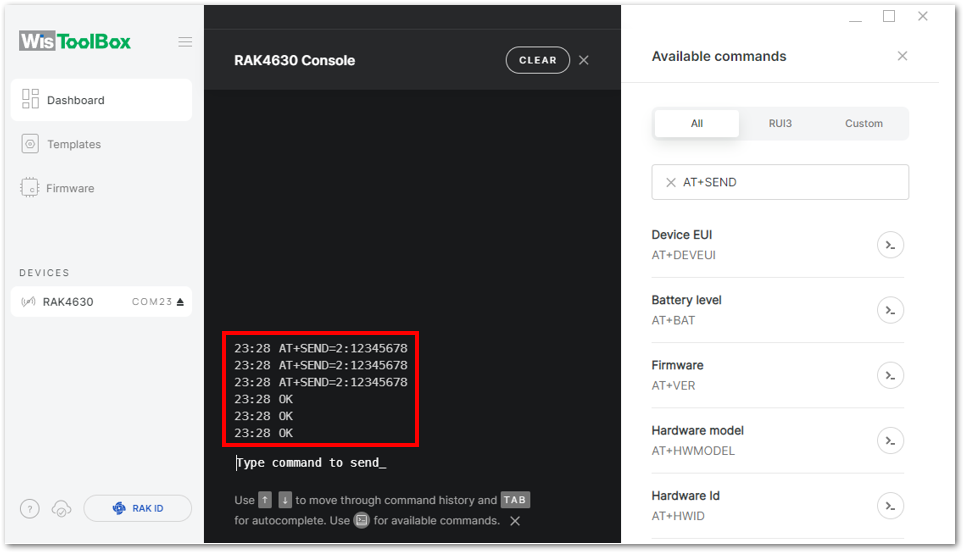 Figure 1: ABP device sending payload to the network
- You can see the data sent by the RAK module on the TTN device console Live data section. Also, the Last seen info should be a few seconds or minutes ago.
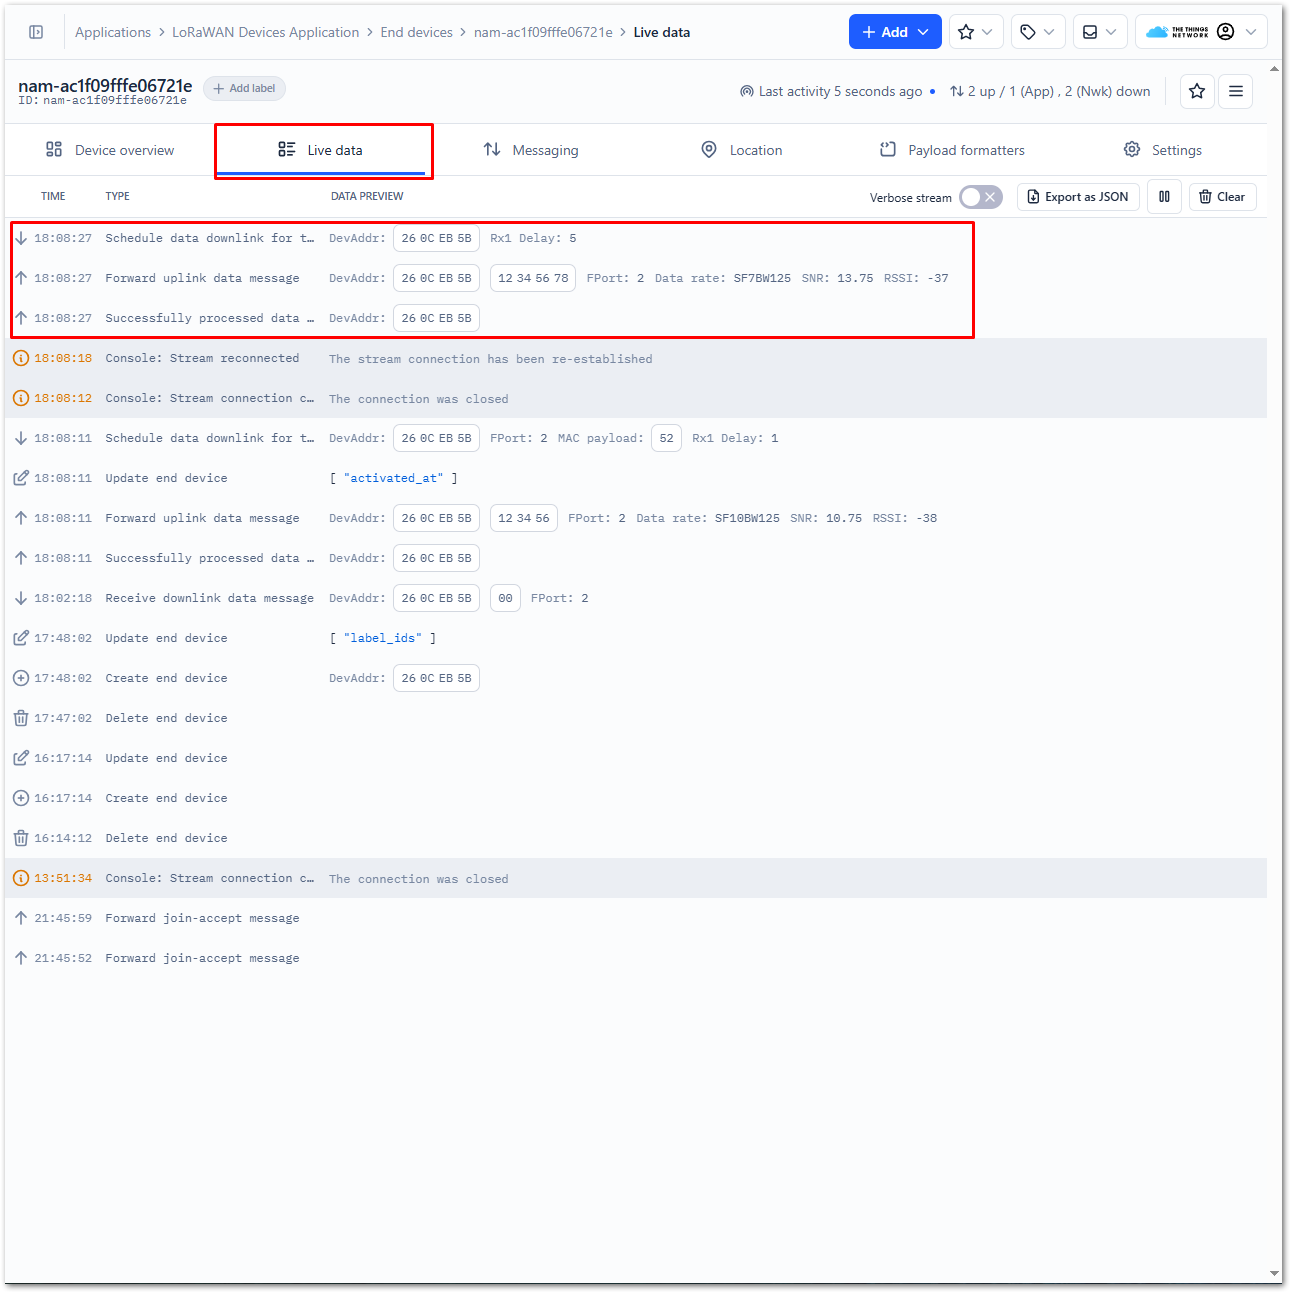 Figure 1: ABP Test Sample Data Sent Viewed in TTN


