RAK Outdoor Cavity Band-Pass Filter Installation Guide
This section provides step-by-step instructions for installing the Cavity Band-Pass Filter.
Package Inclusions
The package contains the following items:
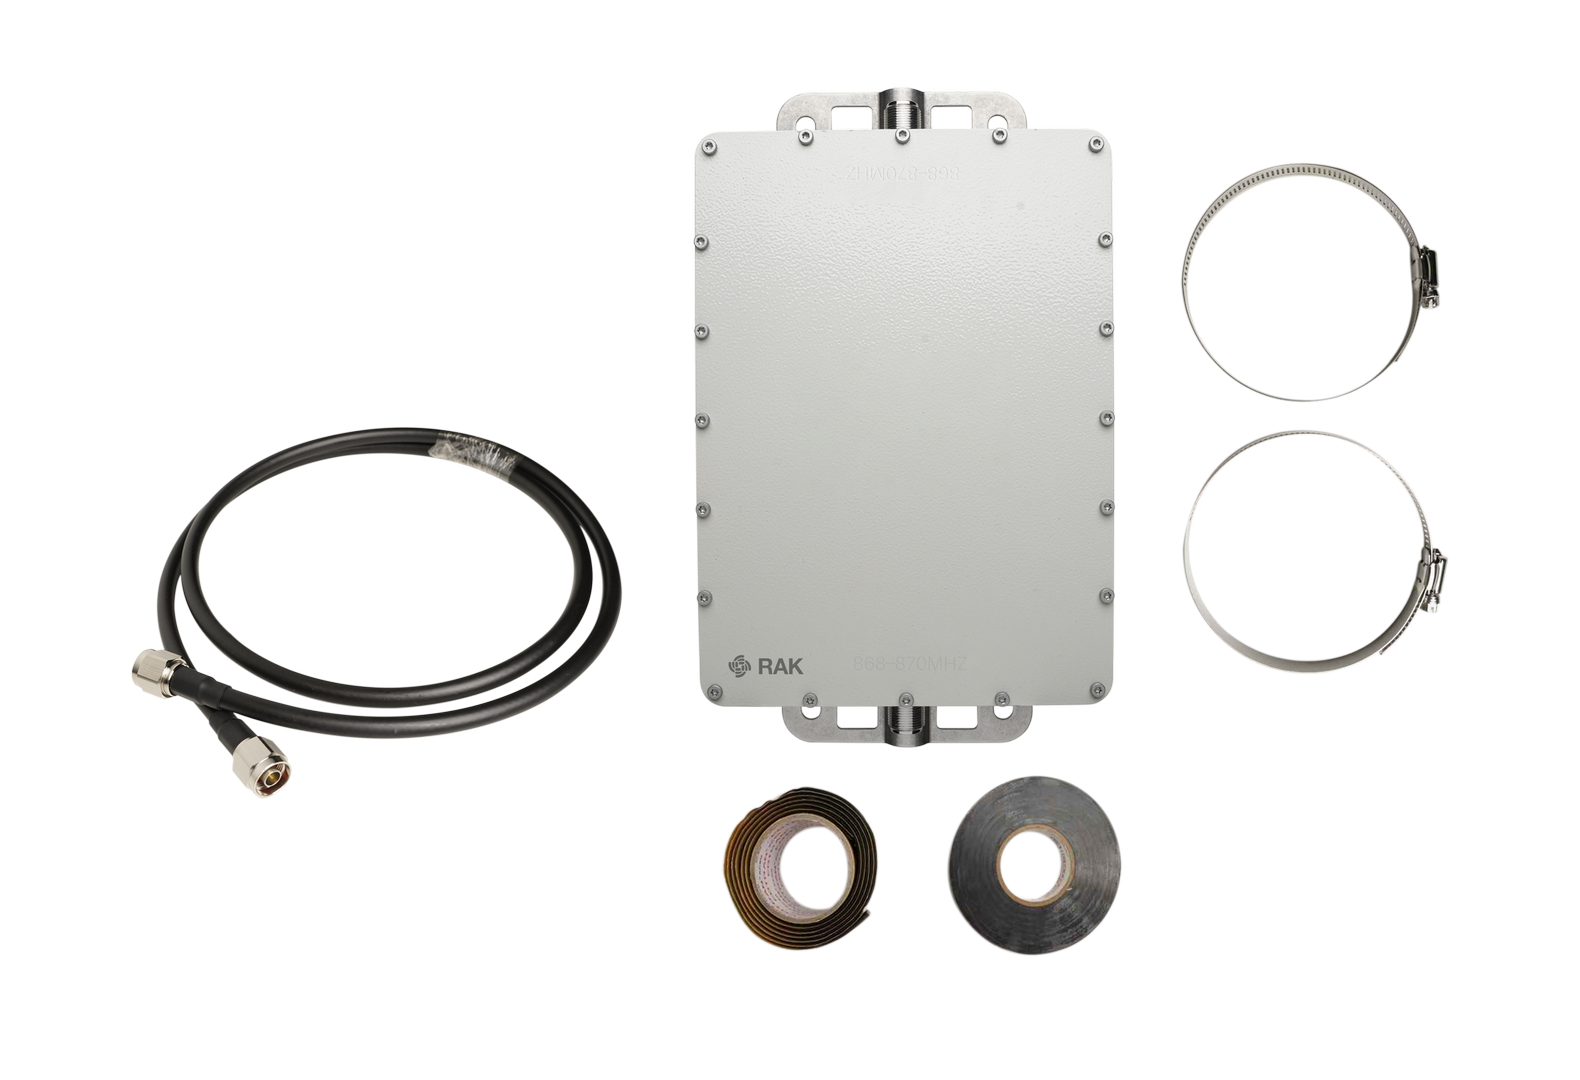 Figure 1: Package Inclusions
- 1 x RAK Outdoor Cavity Band-Pass Filter (selected frequency variant)
- 1 x RF coaxial cables
- 2 x Mounting clamps
- 1 x Waterproof tape
- 1 x PVC insulating tape
The frequency range is specified on the product label. Please check the sticker on the device to confirm your model.
Installation Guide
1. Connect the Coaxial RF Cable
Connect one of the included coaxial RF cables to Port 1 on the filter. Tighten the connector securely.
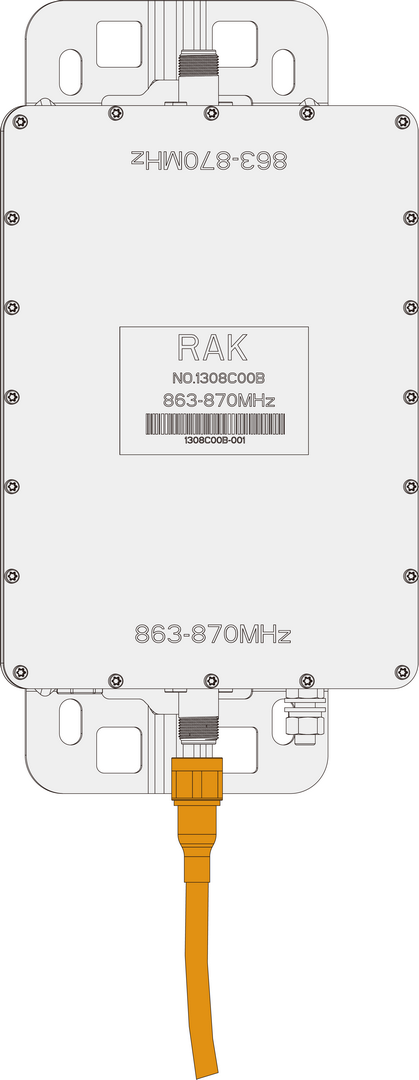 Figure 1: Connect the Coaxial RF Cable to Port 1
2. Attach the Antenna
-
Connect your LoRa antenna to Port 2 of the filter:
 Figure 1: Attach the LoRa antenna to Port 2
 -
After attaching cables and antenna, apply weatherproof sealing to every exposed RF connection. Follow the procedures described in the Weather Protection section.
3. Mount the Filter
We recommend mounting the filter slightly higher than the gateway to simplify cable routing.
Mounting Tips:
- Ensure clamps are tight and stable to prevent movement from wind or vibration.
- Mount the filter vertically upright to maintain waterproof integrity.
- For outdoor installation, use anti-slip rubber pads or rust-proof washers between the clamp and mounting bracket.
Mounting Steps:
-
Use a screwdriver to loosen the clamp by rotating the screw counterclockwise.
-
Insert the clamp through the holes on the filter’s mounting bracket.
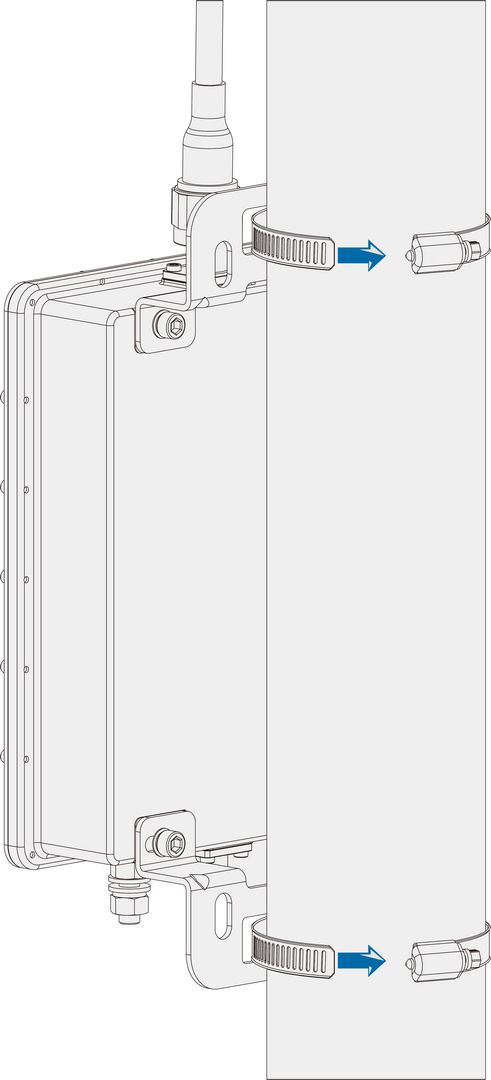 Figure 1: Insert clamp through the mounting bracket
 -
Wrap the clamp around the mounting pole.
-
Adjust the filter's height and position, then tighten the screw clockwise.
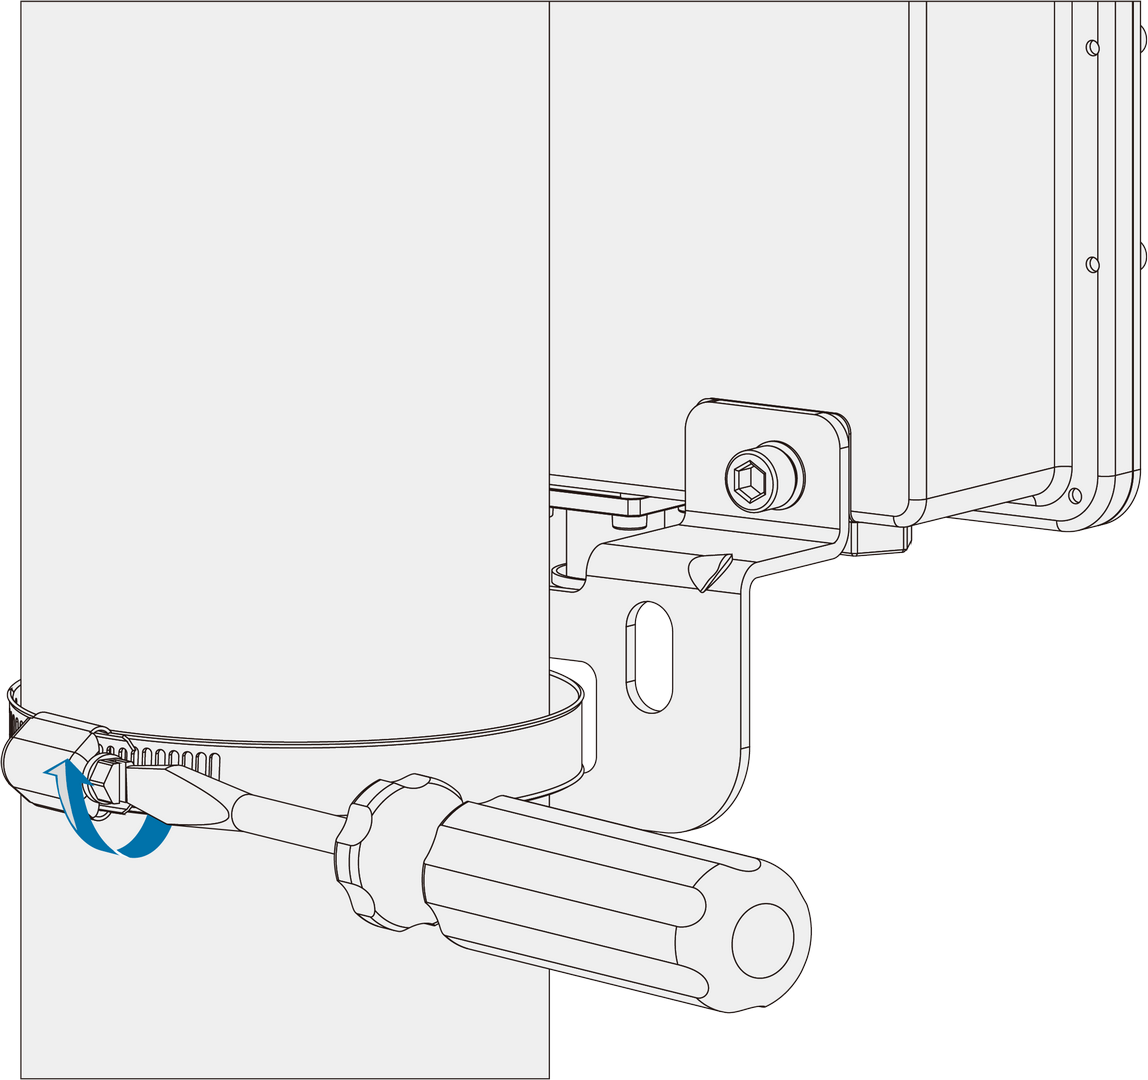 Figure 1: Secure the filter onto the mounting pole
 -
Connect the free end of the coaxial cable from Port 1 to the LoRa antenna port on the gateway.
-
Apply weatherproof sealing to the Port 1 connection.
Weather Protection
To ensure long-term outdoor reliability, all exposed RF connectors must be sealed using PVC insulating tape and waterproof self-amalgamating tape.
-
Clean the connector surface to remove dust, oil, or moisture.
-
Wrap a layer of PVC insulating tape with 50% overlap, extending about 10 mm beyond the connector end.
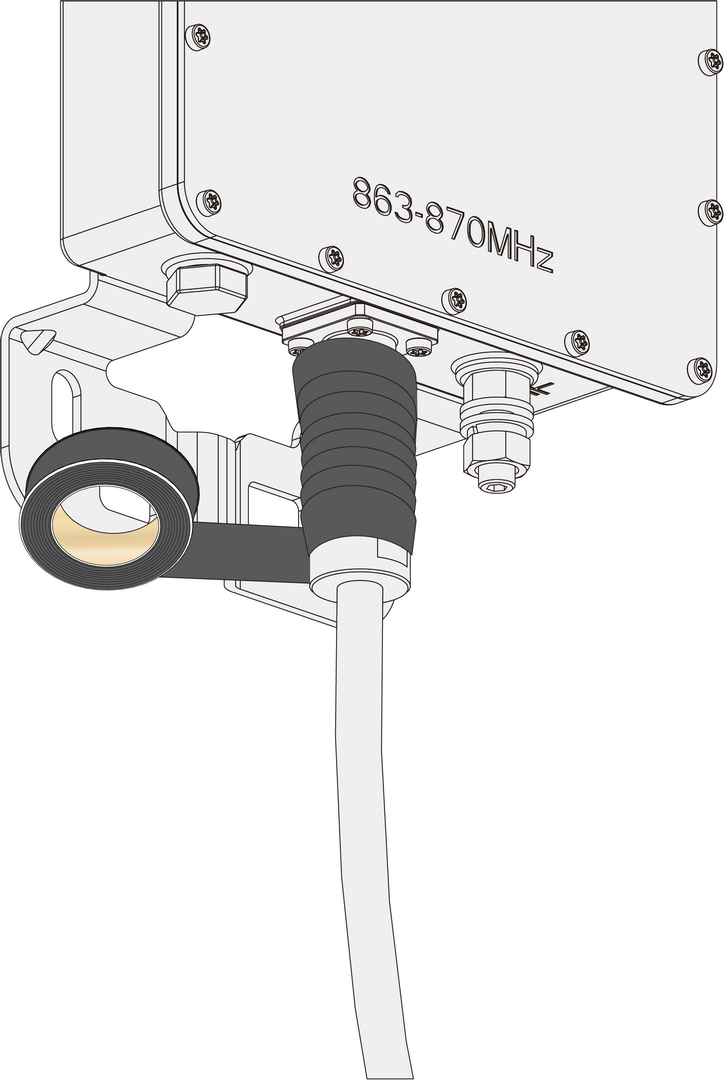 Figure 1: Wrap the first layer of PVC tape
 -
Stretch waterproof self-amalgamating tape to double its length, then wrap three layers with 50% overlap. Hold firmly for a few seconds.
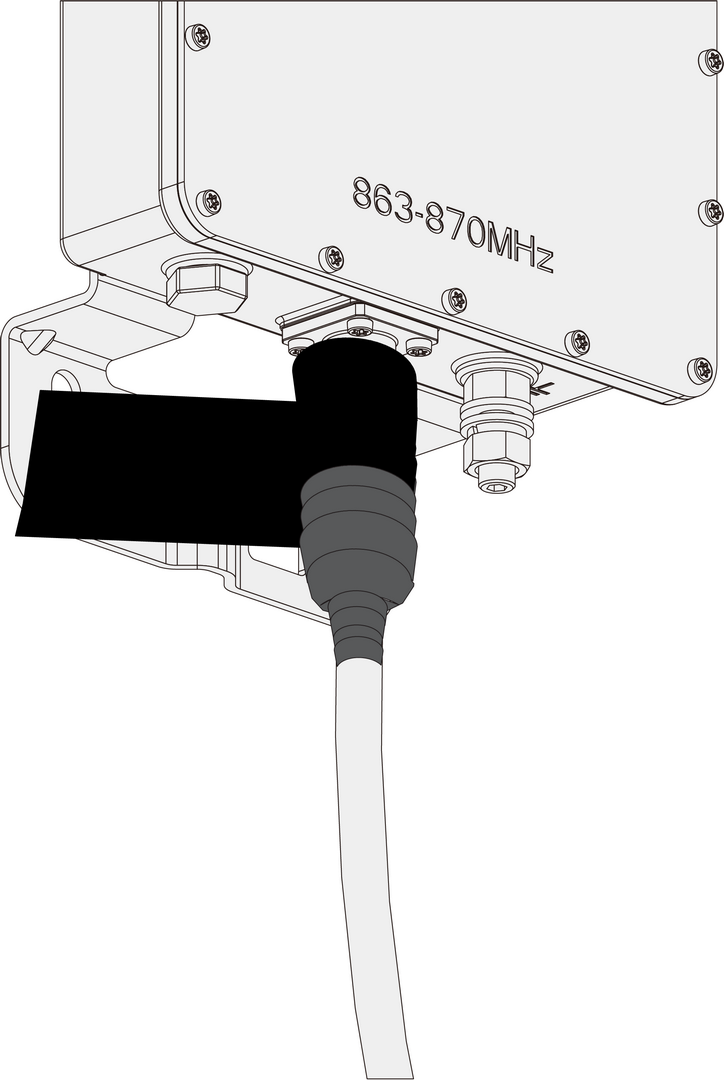 Figure 1: Apply waterproof self-amalgamating tape
 -
Apply three final layers of PVC tape with 50% overlap, covering both ends of the connector.
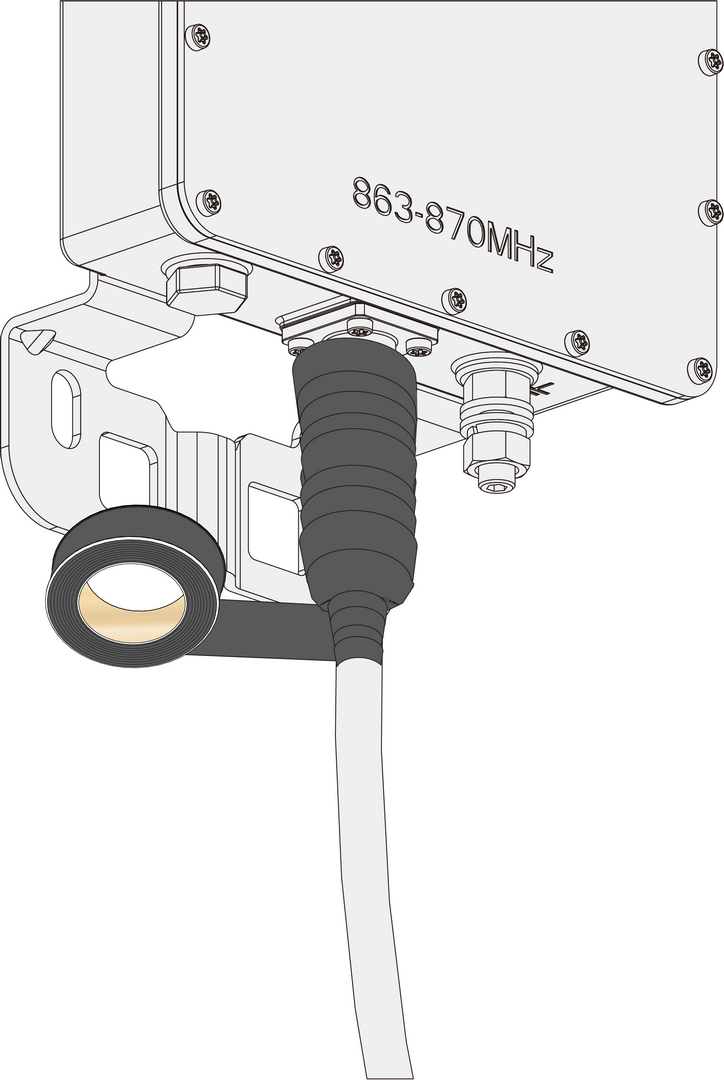 Figure 1: Apply the final PVC tape layers
Lightning Protection (Recommended)
For outdoor installations, proper grounding is strongly recommended.
- Connect a 10 AWG or thicker grounding wire from the Ground Pad on the filter to a verified earth ground point.
- This helps prevent damage from lightning-induced surges and improves ESD safety.
Lightning strikes can generate powerful electrical surges that may harm sensitive electronic devices. The warranty does not cover damages caused by lightning strikes or other natural events.