40W Solar Panel Kit Installation Guide
Package Inclusion
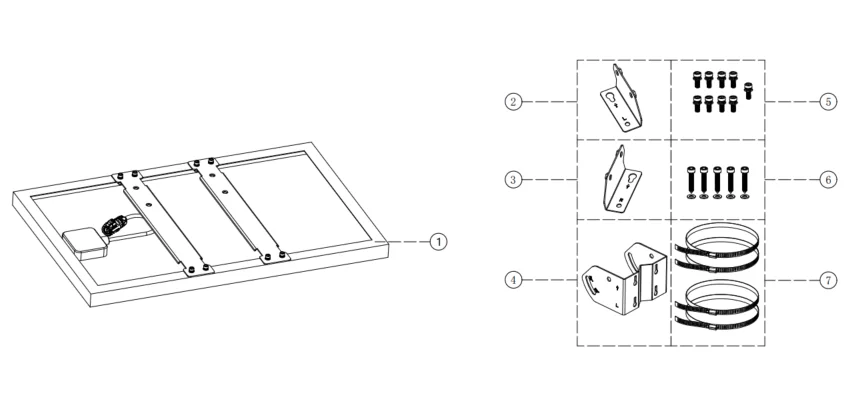 Figure 1: Package Inclusion
- Solar Panel
- Bracket-L
- Bracket-R
- Multi-Bracket
- M8 × 20 Three-Piece Screw Set (M8 × 20 Screw, M8 Spring Washer, M8 Washer)
- M8 × 45 Self-Tapping Screw and Washer Set
- Stainless Steel Clamp Set (38–156 mm / 38–256 mm, 2 pcs per set)
Solar Panel Orientation
The placement and orientation of the solar panel affect its energy generation efficiency. Install the solar panel in a location with sufficient sunlight exposure and adjust the tilt angle according to the installation environment. For optimal energy generation, the solar panel should generally face the equator. In the Northern Hemisphere, face the solar panel toward the south. In the Southern Hemisphere, face it toward the north.
Installation Guide
Pre-fix Bracket-L and Bracket-R
Install Bracket-L and Bracket-R onto the Multi-Bracket using four M8 × 20 screw sets, each consisting of one screw, one spring washer, and one flat washer.
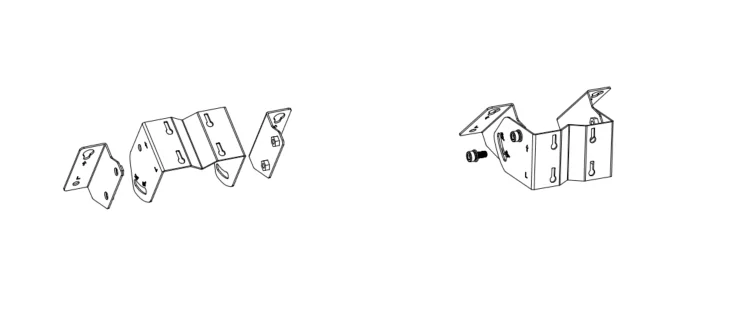 Figure 1: Fixing the Brackets
Install the Multi-Bracket
To ensure safety and optimal performance, please read this guide carefully before installation and select the appropriate installation method based on your site conditions.
Stainless Steel Clamp Pole Mounting
The included stainless steel clamps support pole diameters of 38–156 mm, and 38–256 mm. Select the appropriate clamp size according to the installation environment.
- Align the V-shaped slot on the back of the Multi-Bracket with the pole at the desired installation height.
- Pass the stainless steel clamp through the fixing ears and around the pole.
- Tighten the clamp nuts alternately until the bracket is securely fixed to the pole.
- Check the installation level and fully tighten all screws.
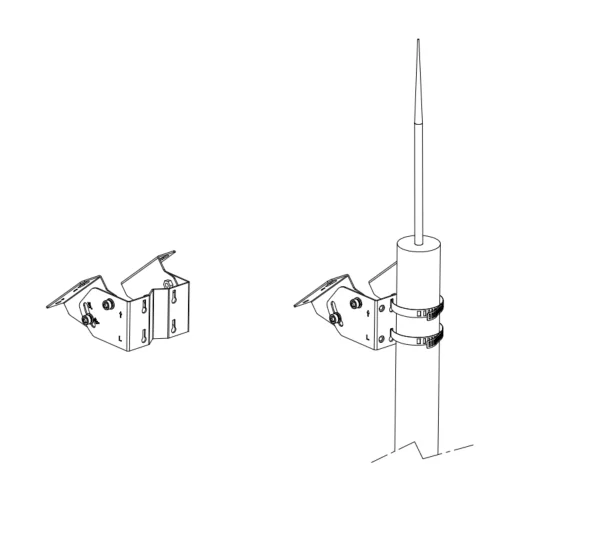 Figure 1: Installing the Bracket on a Pole
Wood Wall Mounting with Self-Tapping Screws
Before Installation:
- Ensure the wood wall is structurally sound and free of rot or cracks.
- Pre-drill pilot holes to prevent wood splitting. The recommended hole diameter is approximately 70% of the screw diameter.
- Self-tapping screws are designed to be driven directly into wood and do not require nuts.
- Tighten all screws securely to prevent loosening.
- Positioning: Place the Multi-Bracket against the wood wall at the desired height. Use a spirit level to align it and mark the screw hole positions.
- Pre-drilling (Recommended): Drill pilot holes at the marked positions using a drill bit slightly smaller than the self-tapping screws to prevent the wood from splitting.
- Securing the Bracket: Insert the M8 × 45 hexagon socket self-tapping screws with M8 washers through the mounting holes. Tighten them with a hex key to securely fix the Multi-Bracket to the wall.
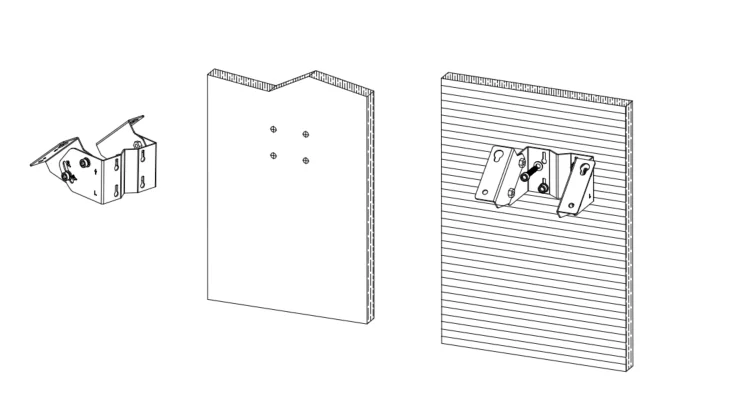 Figure 1: Installing the Bracket on a Wood Wall
Attach the Solar Panel to the Multi-Bracket
After securing the Multi-Bracket, attach the solar panel as follows:
- Pre-install the Screws: Partially thread the M8 × 20 three-piece screws into the mounting holes on the back of the solar panel. Do not fully tighten them.
- Align the Panel: Position the solar panel against the Multi-Bracket, aligning the screws with the mounting holes.
- Secure the Panel: Insert the screws through the bracket holes and slide the panel into the locking position.
- Adjust the Tilt Angle: Loosen the adjustment screws, set the desired tilt angle, and retighten all screws securely.
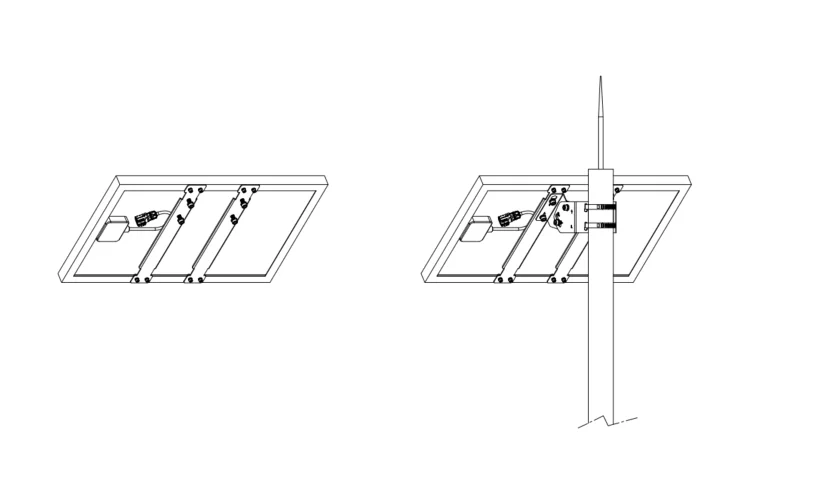 Figure 1: Installing the Solar Panel
- Leave sufficient screw length exposed during pre-threading to pass through the Multi-Bracket holes.
- Tighten the screws only after sliding them into the locking position to secure the solar panel firmly.
- Tighten all adjustment screws to prevent loosening.
Completed Installation
Mount the solar panels onto the wall using the same method once installation is complete.
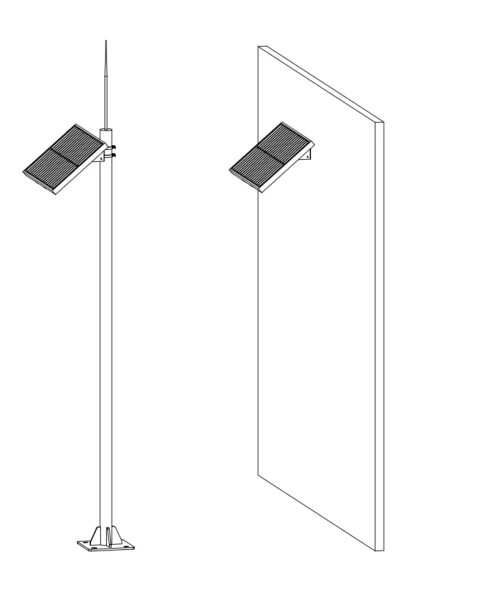 Figure 1: Completed Installation


