Meshtastic Designer Quick Start Guide
While exploring the needs of customers looking for Meshtastic devices, it became apparent that selecting the correct modules to build a specific Meshtastic device is often difficult.
With the Meshtastic Designer, the goal is to make this first and important step of selecting WisBlock modules easier.
Whether you are experienced with Meshtastic and WisBlock modules or a newbie, the Meshtastic Designer helps to:
- Select the sensor or/and IO modules
- Select the Base Board
- Select the MCU and LoRa frequency
To get started, open the Meshtastic Designer and click the Start button.
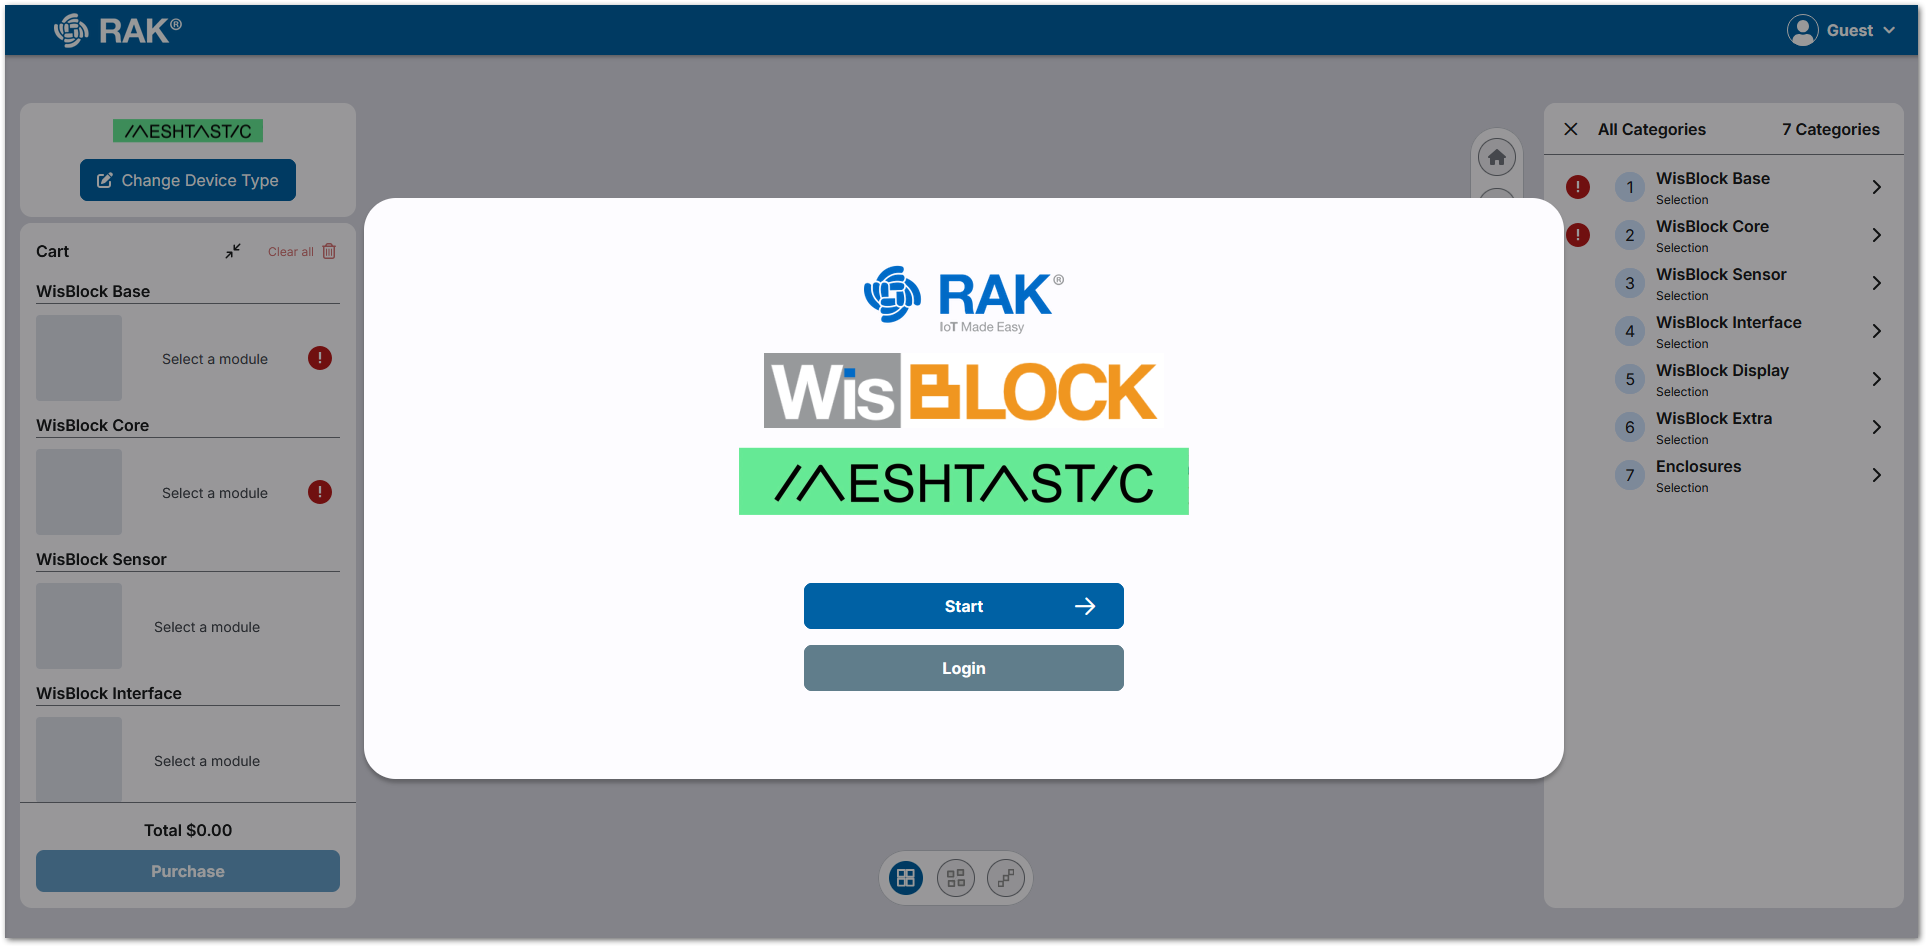 Figure 1: Start Page
- On the first click of the Start button, it might ask you to accept the cookies.
- The Login button is for a future feature, where you can login with your RAK-ID and save your configurations for later reuse.
Left Side Menu
Before proceeding to the next steps, this section explains the functions of the left-side menu. You can select different categories of modules or enclosures, and the right-side menu will update with the corresponding options.
In addition to displaying the module categories, it also has buttons with the following functions:
- Clear the selected device role, and goes back to the beginning.
- Removes all modules.
- Removes a specific module or all modules within a category.
- Checkout and place an order for the Meshtastic device from the RAKwireless online store.
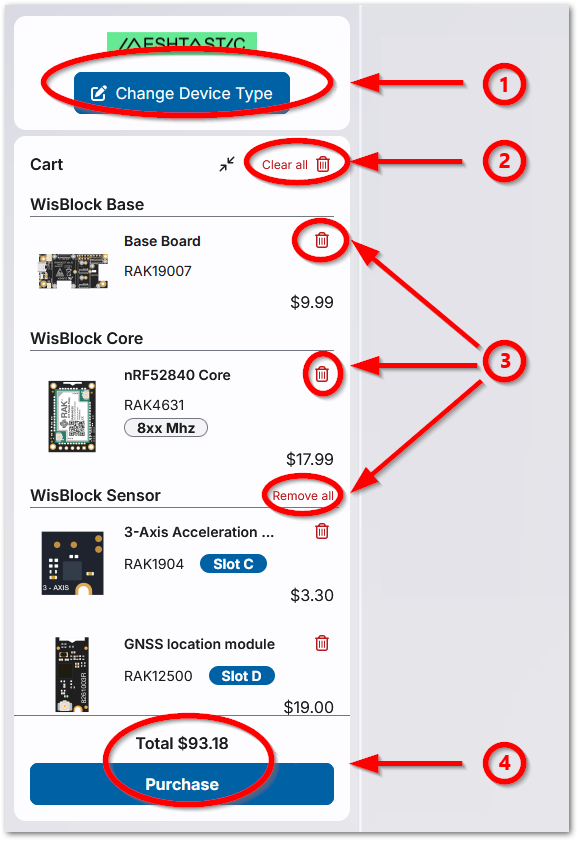 Figure 1: Left side menu
Choose Between Expert or Guided Setup Option
- If you're already familiar with Meshtastic and WisBlock Modules, you can select Skip on the pop-up screen to set everything up manually. You can find some helpful tips in the Expert Mode guide below.
- However, you can go through the Guided Setup Mode, which automatically selects the required modules and suggests the correct placement for them on the WisBlock Base Boards.
Guided Setup Mode
Select the Desired Functions
On the pop-up screen, you can see different sensors and other functions that are supported by Meshtastic and WisBlock modules.
- Select the functions you want to use in your Meshtastic device.
- In this example, the modules for a Meshtastic Client with location tracking capability, a temperature and humidity sensor, and an OLED display are being selected.
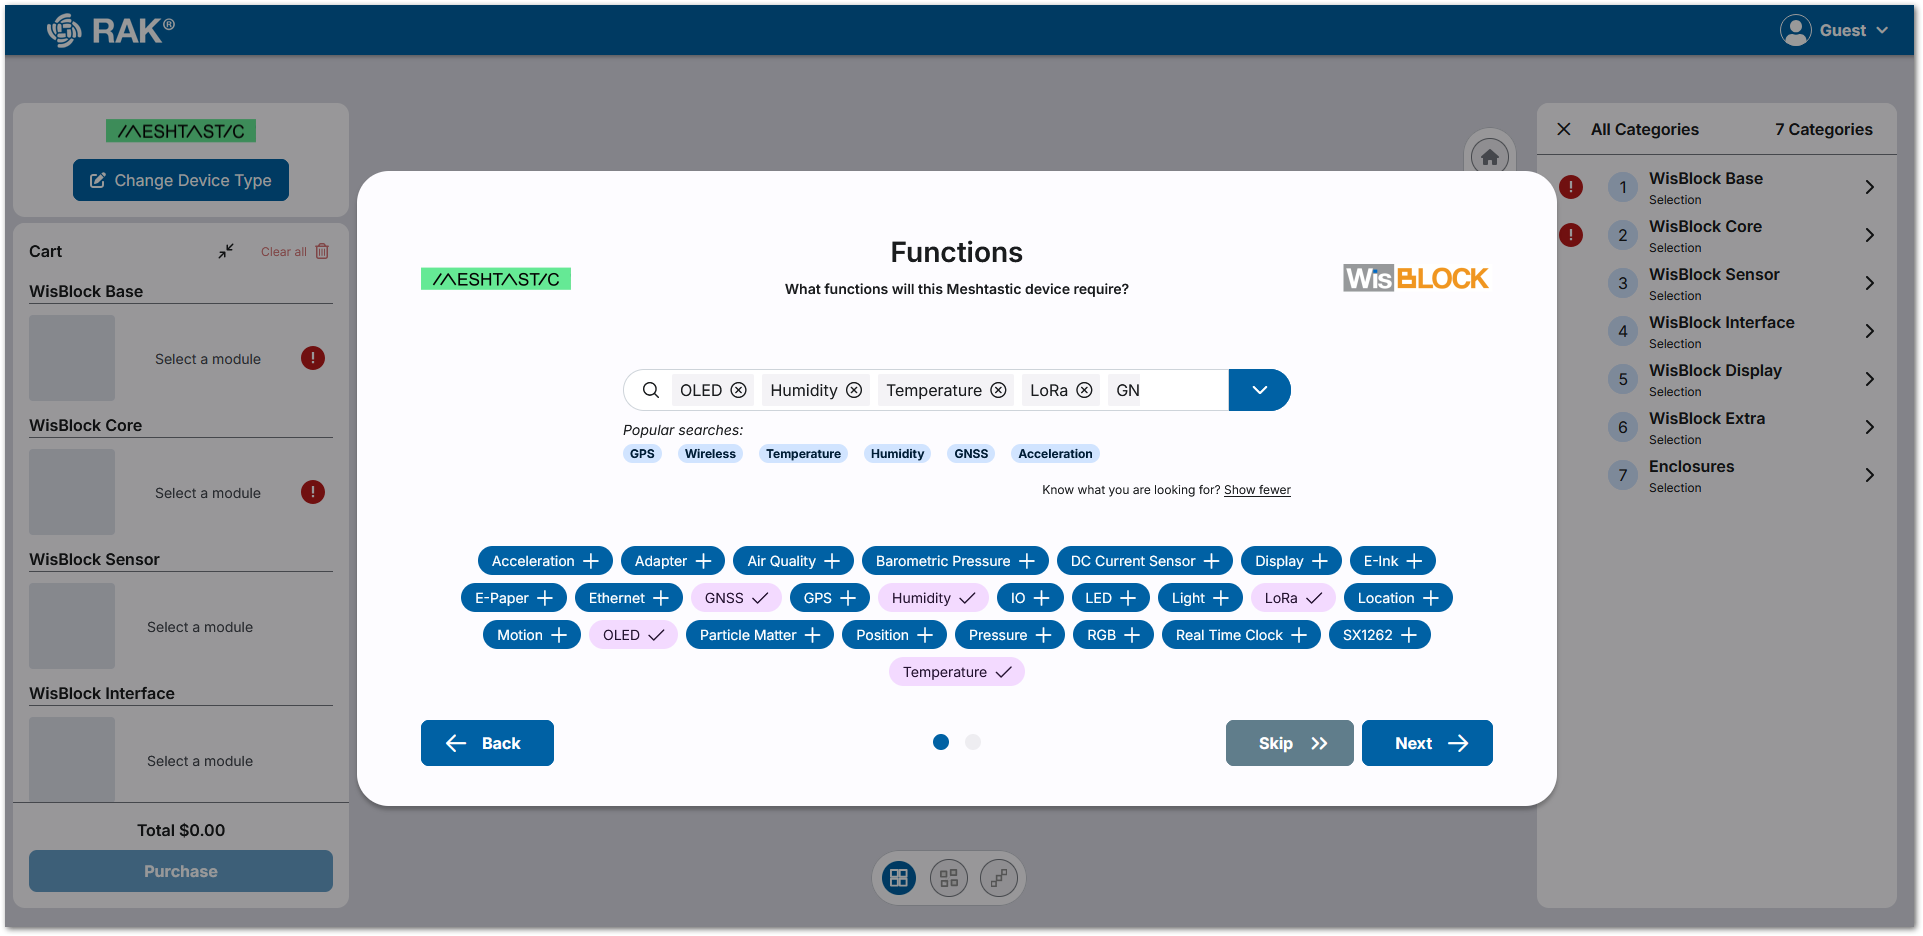 Figure 1: Device functions
- After select the functions, press on Next.
Select a Country (Frequency Band)
Meshtastic uses LoRa transmission technology for communication, with different regions and countries operating on various frequencies for LoRa communications.
To make it easier to choose, a country selector with the correct frequency has been provided for the Meshtastic device. Currently, the WisBlock Core modules for Meshtastic only support the 9xx MHz and 8xx MHz frequency bands.
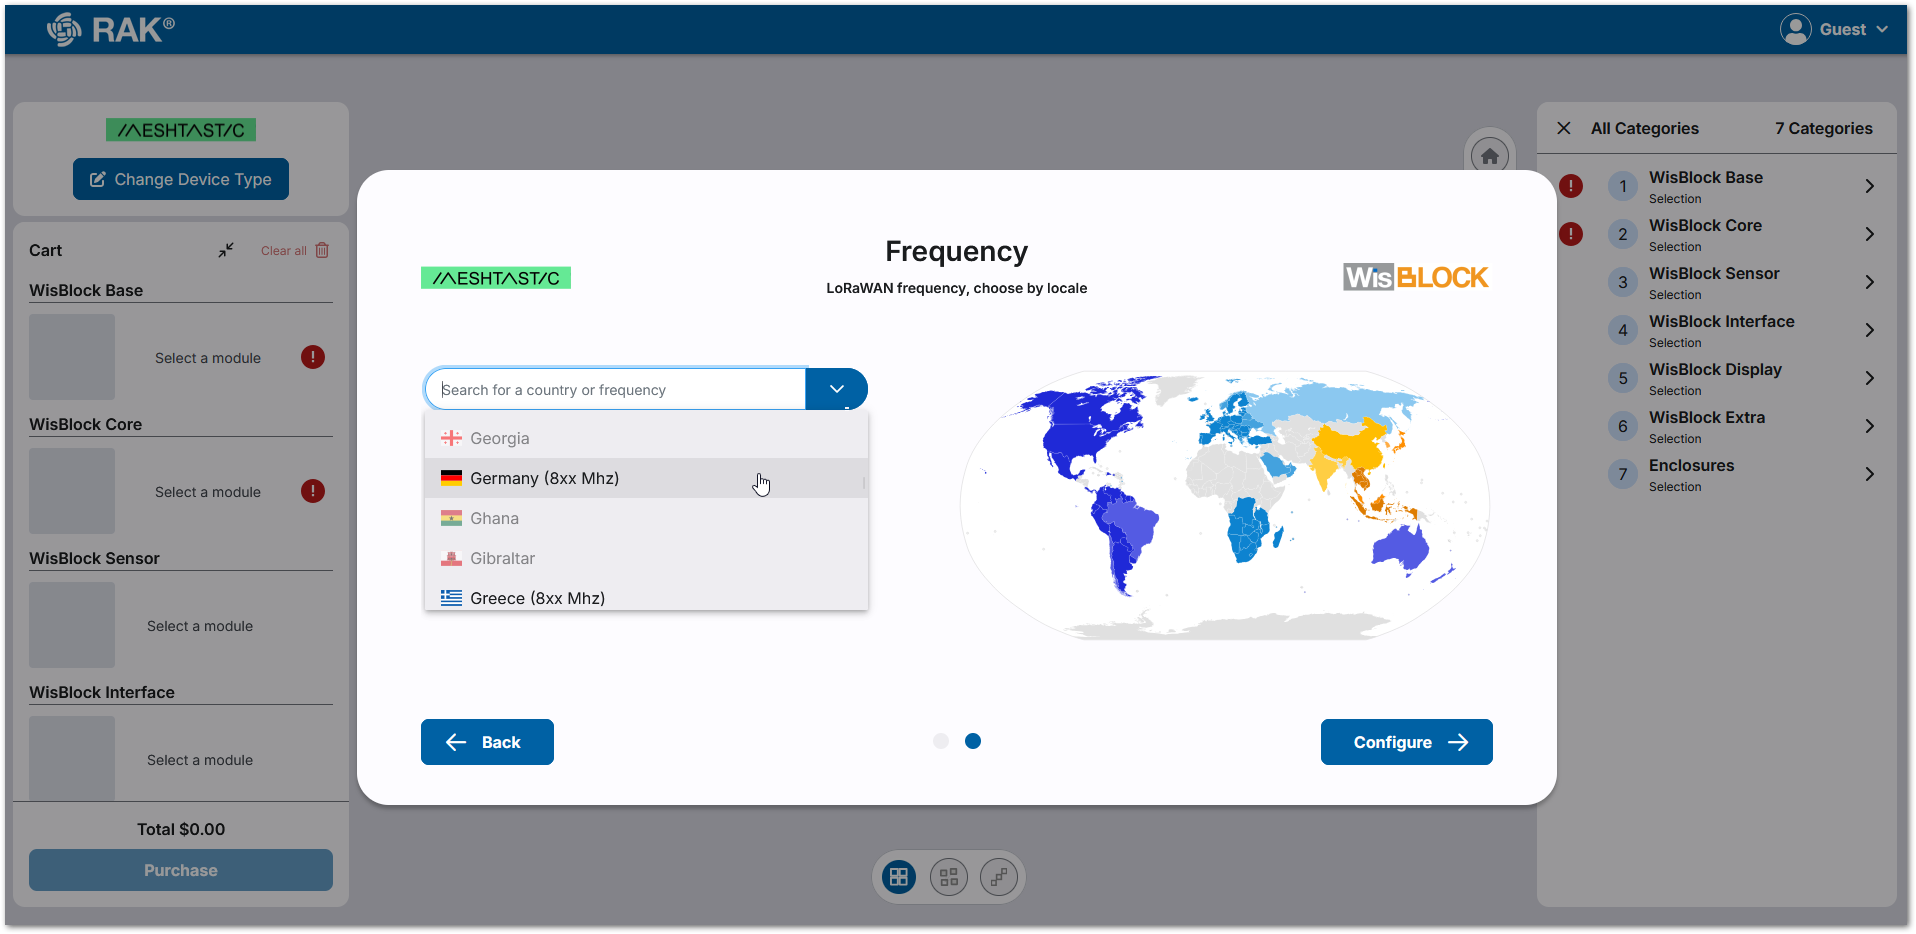 Figure 1: Regions
- In some countries, multiple frequency ranges can be used. In such a case, select the frequency you want to use.
- For a faster selection, you can type the country name in the selector input box. It will show you automatically a list with matching countries.
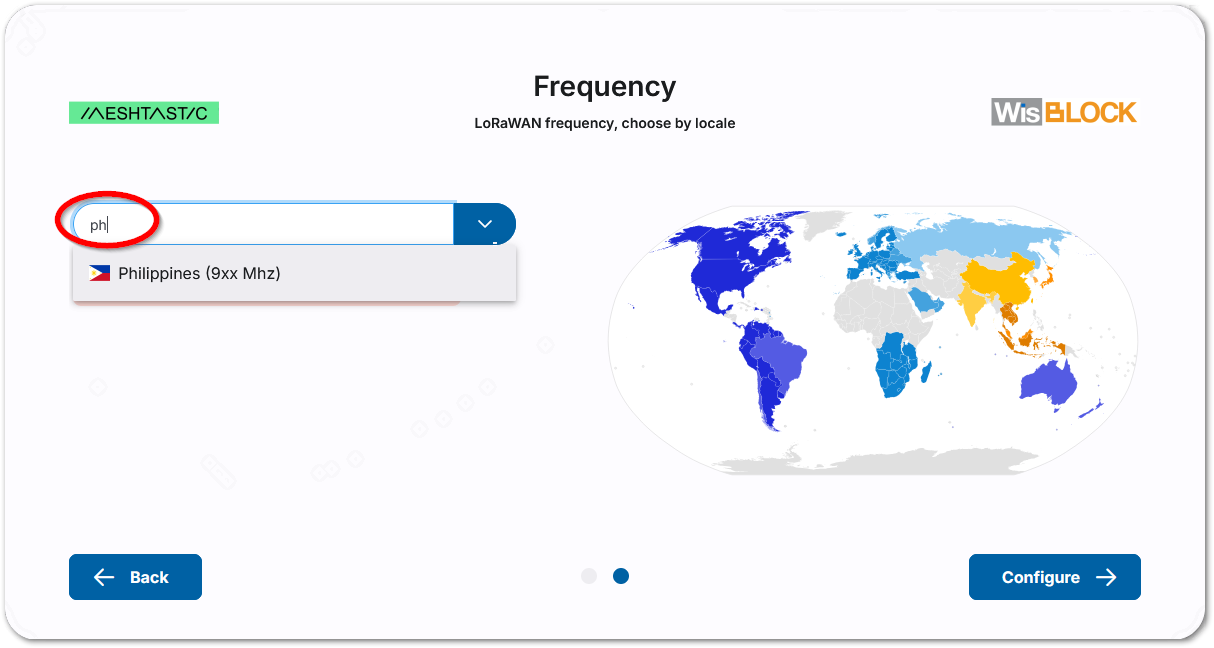 Figure 1: Regions by country name
Click on Configure to see the initial configuration for your Meshtastic Device.
Configured Meshtastic Device��
You will now see the configured device with all modules placed in their respective module slots. Potential conflicts between different modules are already taken into account and the modules are placed in the correct module slots.
 Figure 1: Meshtastic device with selected modules
Add More Modules (Guided Setup Mode)
This section explains the Guided Setup Mode for selecting and adding modules to the device. For example, an acceleration sensor can detect device movements and update location information.
Follow the steps below to add more modules:
- Scroll down on the left-side menu and look for WisBlock Sensor, then click on it.
 Figure 1: Select WisBlock Sensors to add more sensors
The right-side menu will now display the available sensor modules.
 Figure 1: Updated right-side menu
The 3-Axis Acceleration Sensor is in the list but is greyed out because it is incompatible with sensor Slot B.
 Figure 1: Explanation why the module cannot be used
Greyed-out modules in the list indicate incompatibility. To see the reason, hover the mouse over the sensor, and an explanation will appear. You will also see which slots the module is compatible with. In this case, Slot C is recommended.
- Select Slot C from the top of the right-side menu, and the 3-Axis Acceleration Sensor will become selectable.
 Figure 1: Change Slot
-
Select the sensor module and it will be placed in Sensor Slot C.
-
After you selected the module, turn the 3D model around and you can see the sensor placed in Slot C.
In addition, the 3-Axis Acceleration Sensor is now showing in the used module list in the right-side menu.
 Figure 1: 3-Axis sensor added
Add an Enclosure
At the time this guide was written, enclosures supporting the OLED display were still unavailable from RAKwireless. However, the steps to add an enclosure and mounting plate are still provided here.
Follow the steps below to add an enclosure:
- Scroll down the left-side menu to the Enclosure category and click on it to refresh the right-side menu with enclosure options.
 Figure 1: Select Enclosures
- On the right-side menu, select an enclosure and mounting plates listed.
 Figure 1: Enclosures and mounting plates
To avoid external antennas, the Unify WisBlock Mounting Plate with an integrated antenna is an ideal solution. Since Germany was selected as the region, only the mounting plate with an antenna for the 863-870 MHz frequencies is selectable.
 Figure 1: Mounting plate with integrated antenna for EU868
It is also possible to choose another mounting plate without an integrated antenna. These mounting plates come with pre-installed stand-offs for the different WisBlock Base Boards.
- After selecting the mounting plate, it will appear in the 3D view. This also serves as a guide for how the Base Board should be mounted on the plate.
 Figure 1: Device on the mounting plate
Now going back to the right-side menu, you can see that only one enclosure is left to be selected. This is because the mounting plate with integrated antennas is only compatible with the Unify Enclosure 100 mm x 75 mm x 38 mm.
 Figure 1: Matching enclosures
-
Click on the enclosure to show the device inside.
-
To open the lid, click the Enclosure Lid Open button at the bottom of the screen.
 Figure 1: Open the enclosure lid
Now you can see your Meshtastic Device inside the enclosure.
 Figure 1: Device inside the enclosure
- Proceed to the Checkout to order your device.
Expert Mode
Select a Base Board
-
Select a Base Board that matches with the required sensor and IO slots.
-
Click on the left-side menu on WisBlock Base.
 Figure 1: Select Base Board category
Now, the available WisBlock Base Boards will be shown in the right-side menu.
 Figure 1: Available Base Boards
- For this example, choose the Base Board with 4 sensor slots and 1 IO slot.
 Figure 1: Selected Base Board
Select a WisBlock Core Modules (Microcontrollers with LoRa)
- Select WisBlock Core from the left-side menu to show the available modules on the right.
 Figure 1: Available Core Modules
- Choose the correct frequency from the selector.
 Figure 1: Frequency Selector
- Use the table below to select the correct frequency for your region:
| Country | Meshtastic Region Name | Frequency |
|---|---|---|
| United States | US | 9xx MHz |
| European Union868MHz (including UK) | EU_868 | 8xx MHz |
| Japan | JP | 9xx MHz |
| Australia & New Zealand | ANZ | 9xx MHz |
| Korea | KR | 9xx MHz |
| Taiwan | TW | 9xx MHz |
| Russia | RU | 8xx MHz |
| India | IN | 8xx MHz |
| New Zealand 865MHz | NZ_865 | 8xx MHz |
| Thailand | TH | 9xx MHz |
| Ukraine 868MHz | UA_868 | 8xx MHz |
| Malaysia 919MHz | MY_919 | 9xx MHz |
| Singapore 923MHz | SG_923 | 9xx MHz |
- This table might not be accurate and is subject to change by Meshtastic.
- If you are unsure which frequency to choose, check the frequency list per country on the Meshtastic website.
- Click on the RAK4631 module to add it to the Base Board, as illustrated in Figure 24.
 Figure 1: RAK4631 on the Base Board
At the launch of the WisBlock Meshtastic Designer application, only the RAK4631 was included. Other Meshtastic-compatible WisBlock Core modules will be added in the future.
Add a Module
This section explains the Expert Mode for selecting and adding modules to the device. For example, an acceleration sensor can detect device movements and update location information.
Follow the steps below to add more modules:
- Selecting a module group from the left-side menu.
For example, click on WisBlock Sensor and the right-side menu will now display the available sensor modules.
 Figure 1: Change to add Sensors
- On the top of the right-side menu, select the IO slot you want to add the module to.
 Figure 1: Select Sensor
- After choosing the slot, select the module you want to add.
Greyed-out modules in the list indicate incompatibility. To see the reason, hover the mouse over the sensor and an explanation will appear. You will also see which slots the module is compatible with. In this case, Slot A and D are recommended.
 Figure 1: Incompatible slot warning
- Select Slot A and double click on the module to be used. After clicking, the 3D view of the Meshtastic device will appear.
 Figure 1: Sensor on the Base Board
Some WisBlock modules, like the recently added RAK12039, are separated into two parts that are connected to each other. For these modules, only the WisBlock module is shown in the 3D view, while the sensor itself is not visible.
- To add more modules, select an unoccupied slot, and the right-side menu will display which modules can be used in that slot.
 Figure 1: Select 2nd sensor slot
- Select a second sensor and add it to the Meshtastic device.
 Figure 1: 2nd Sensor placed
Add an Enclosure
- Scroll down the left-side menu to the Enclosure category and click on it to refresh the right-side menu with enclosure options.
 Figure 1: Select Enclosure category
- On the right-side menu, select an enclosure and mounting plates listed.
 Figure 1: Enclosures and mounting plates
To avoid external antennas, the Unify WisBlock Mounting Plate with an integrated antenna is an ideal solution. Since Germany was selected as the region, only the mounting plate with an antenna for the 863-870 MHz frequencies is selectable.
 Figure 1: Mounting plate with integrated antenna for EU868
It is also possible to choose another mounting plate without an integrated antenna. These mounting plates come with pre-installed stand-offs for the different WisBlock Base Boards.
- After selecting the mounting plate, it will appear in the 3D view. This also serves as a guide for how the Base Board should be mounted on the plate.
 Figure 1: Device on the mounting plate
Now going back to the right-side menu, you can see that only one enclosure is left to be selected. This is because the mounting plate with integrated antennas is only compatible with the Unify Enclosure 100 mm x 75 mm x 38 mm.
 Figure 1: Matching enclosures
-
Click on the enclosure to show the device inside.
-
To open the lid, click the Enclosure Lid Open button at the bottom of the screen.
 Figure 1: Open the enclosure lid
Now you can see your Meshtastic Device inside the enclosure.
 Figure 1: Device inside the enclosure
- Proceed to the Checkout to order your device.
Checkout
Once you've added all the required modules, the total cost will appear at the bottom of the left-side menu. To complete your purchase, follow these steps:
-
Review your items in the shopping cart.
-
Click the Purchase button to be redirected to the RAKwireless online store.
-
Select Place Order to confirm.
 Figure 1: Order
After pressing Place Order, you will be redirected to the RAKwireless Store Payment page.
- Entering your payment details and proceed with the checkout.
 Figure 1: Checkout