RAK19007 WisBlock Base Board 2nd Gen Installation Guide
RAK19007 WisBlock Base Board 2nd Gen is the main board that allows you to attach a WisBlock Core, sensors, and IO modules through the standardized expansion connectors. These connectors provide a data bus interconnection between the modules attached to the RAK19007 Base Board.
This guide explains how to install and remove WisBlock Core and Sensor modules on the RAK19007 and provides general instructions for handling the WisBlock Connector.
Prerequisite
Required items for RAK19007 WisBlock Base Board 2nd Gen setup include:
-
A compatible WisBlock Core
-
Compatible WisBlock Modules
NOTEFor module-specific setup and example code instructions, refer to the documentation for the installed WisBlock module.
-
Li-Ion/LiPo battery (optional)
-
Solar panel connector cable (optional)
-
Type-C USB cable for programming and debugging
WisBlock WisConnector Installation
Attaching a WisConnector
The WisConnector is the interface between the Wisblock Base module and the WisBlock Core, Sensor, and IO modules. Before connecting these modules, read the following instructions:
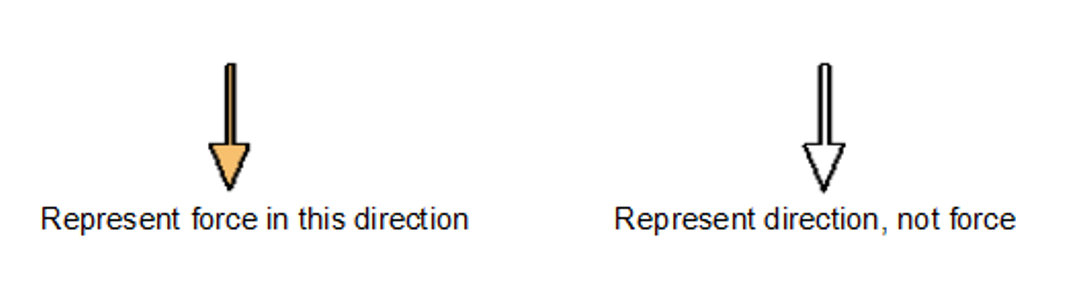 Figure 1: Notation within the guide
- Align the connectors. Keep the header parallel and place it lightly in the corresponding lap joint of the socket.
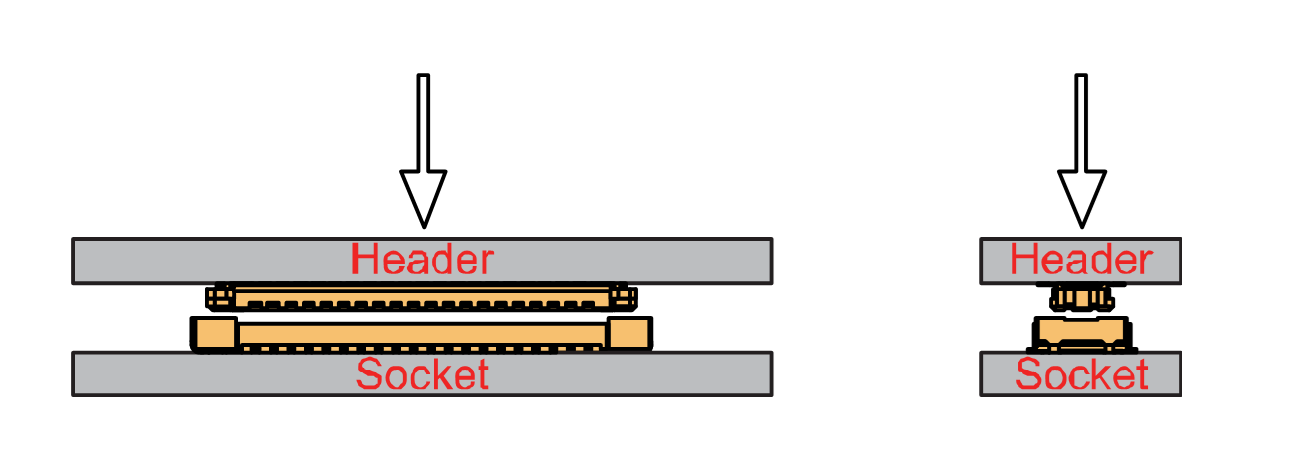 Figure 1: Alignment of WisConnector
- Fit the connector. Tilt one end of the connector (header) less than 20 degrees, while do not apply force during this process, gently place the other end in parallel.
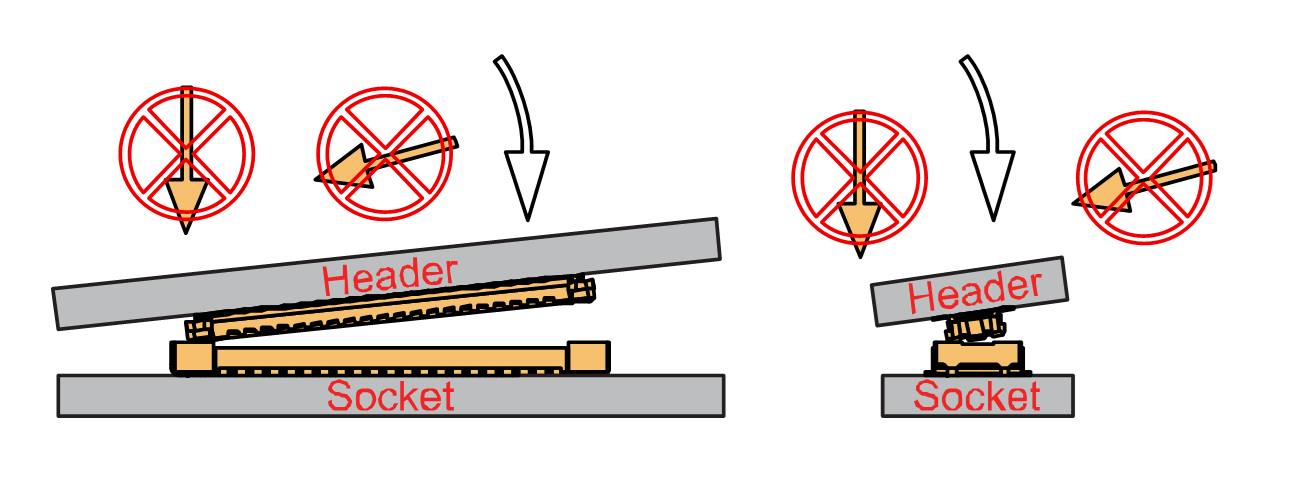 Figure 1: Fit the WisConnector’s header inside of the socket
- After the above alignment steps, the header and socket are matched but still not buckled.
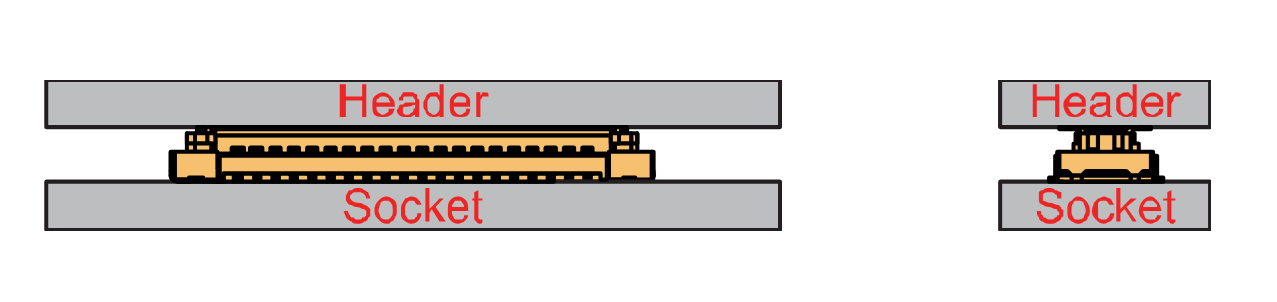 Figure 1: WisConnector’s header matched inside of the socket
- Apply forces evenly by pressing in parallel, then there will be a sound confirming the completion of the buckling.
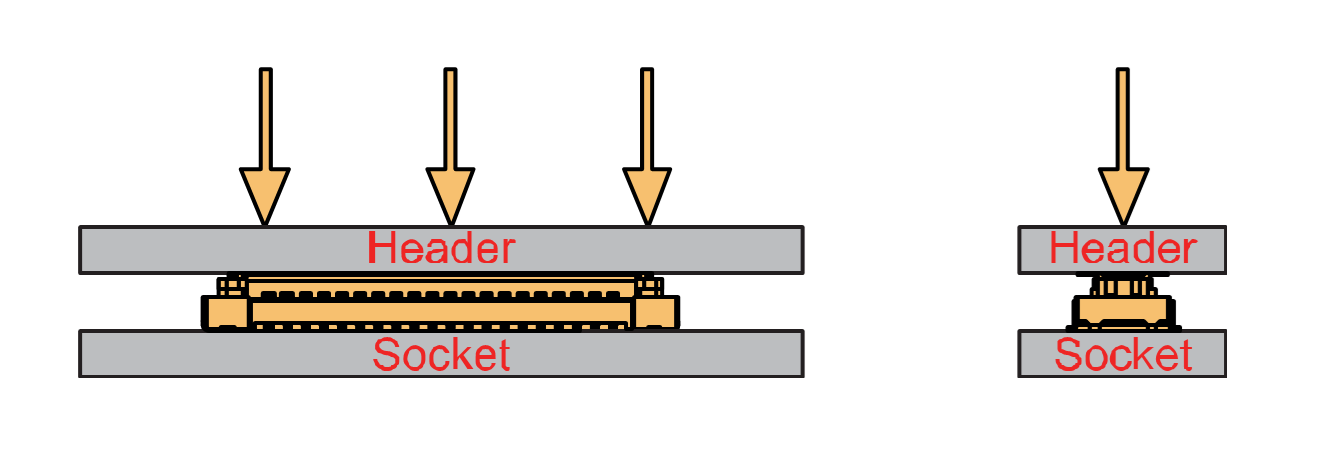 Figure 1: Apply forces to buckle the heard to the socket
- In the process of buckling and applying force, avoid the application of uneven force on both sides.
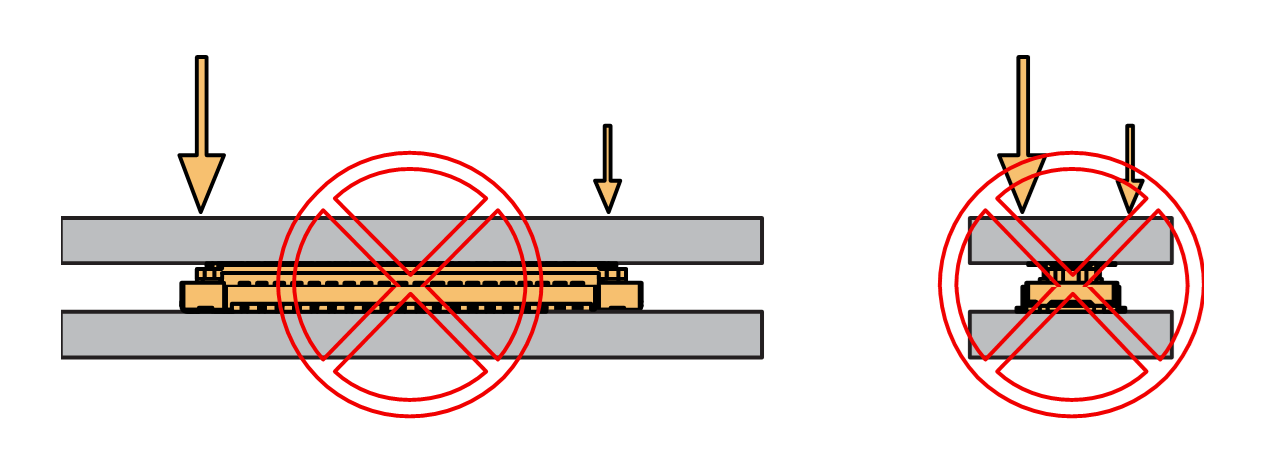 Figure 1: Avoid applying uneven forces
- When the buckling process is completed, check that the header and socket are kept in parallel.
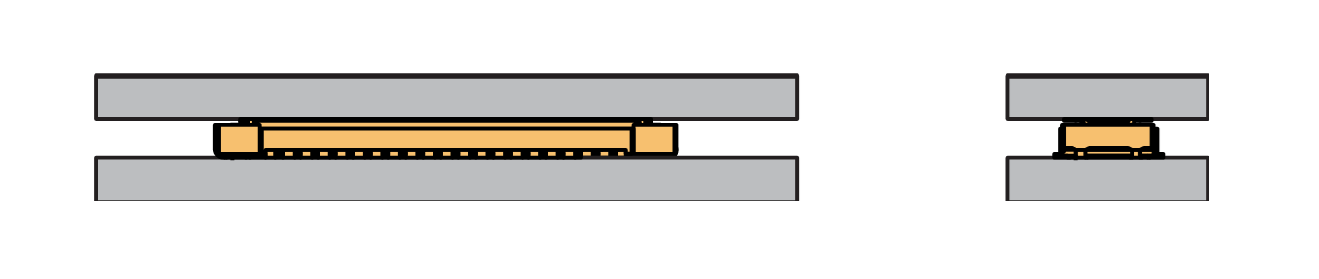 Figure 1: Correct way to buckle the WisConnector’s header to the socket
- If after buckling, the header and socket are not in a parallel state (not fully assembled in one place), then press the even force on both sides of the long side to complete the correct buckling.
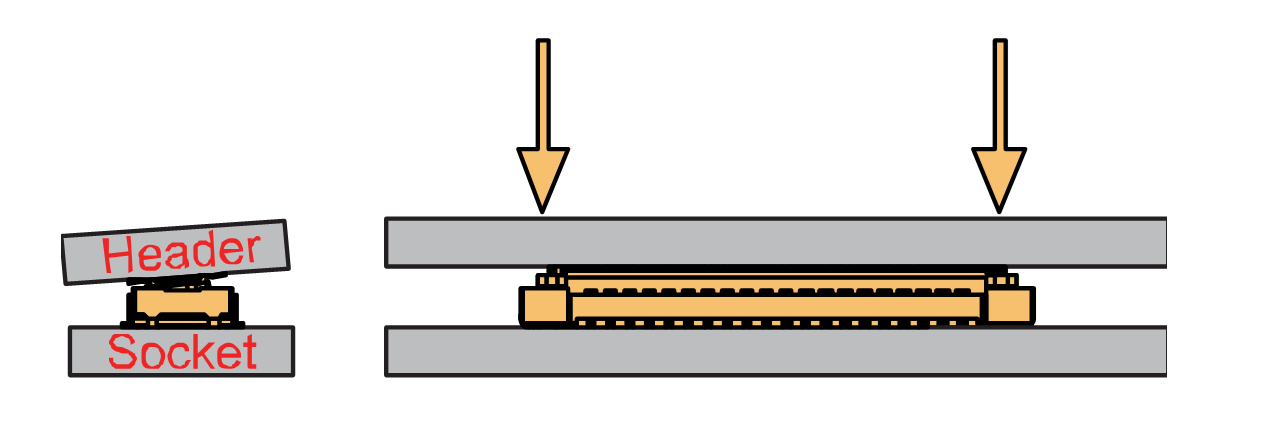 Figure 1: WisConnector’s header is not parallel to the socket
- When the aforementioned steps are not completed yet, do not apply force to buckle. Otherwise, there will be a risk to damage the connector. When the connector cannot be smoothly buckled down, repeat the alignment step.
Detaching a WisConnector
- To disconnect the header from the socket, pull out in parallel with even forces.
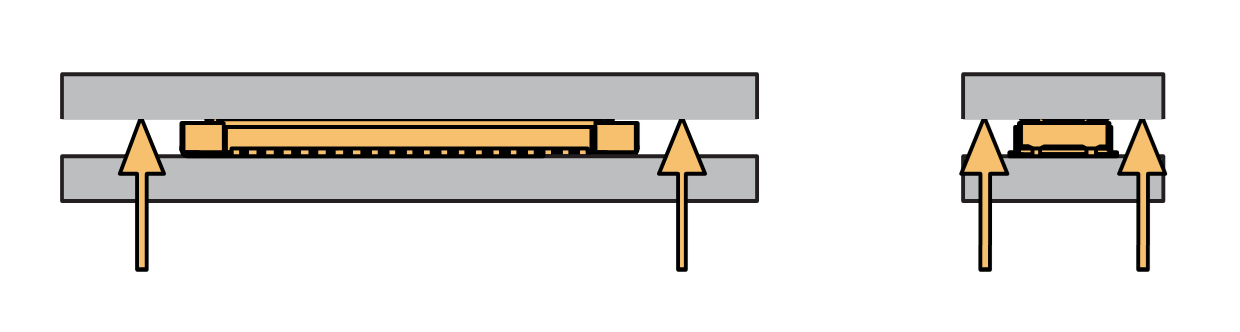 Figure 1: Correct way: Applying even forces to detach the header from the socket
- Avoid pulling out the header asymmetrically in the long-side direction.
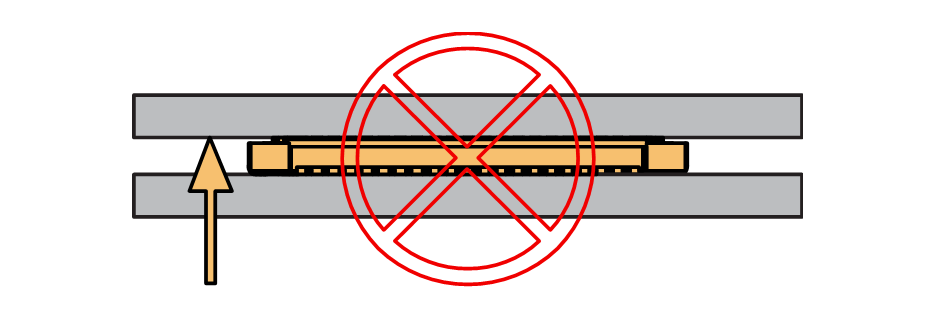 Figure 1: Wrong way: Applying uneven forces to detach the header from the socket
- The short-side of the connector can be pulled out asymmetrically, but apply the force vertically and avoid rotating the header.
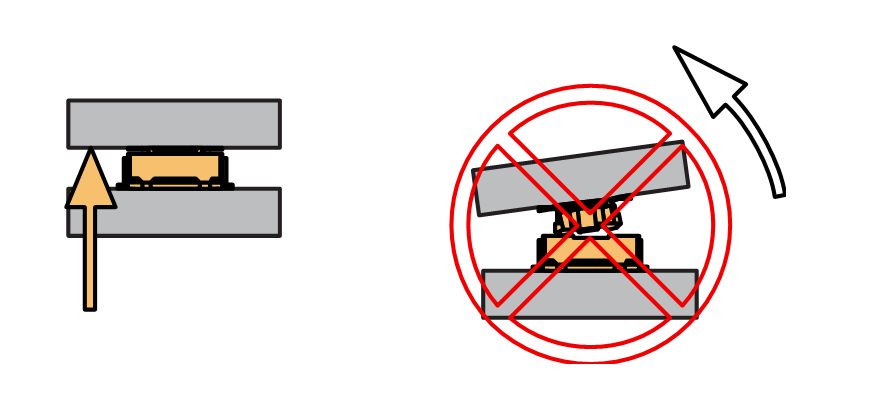 Figure 1: Wrong way: Do not rotate the header
- Avoid applying forces in a single corner.
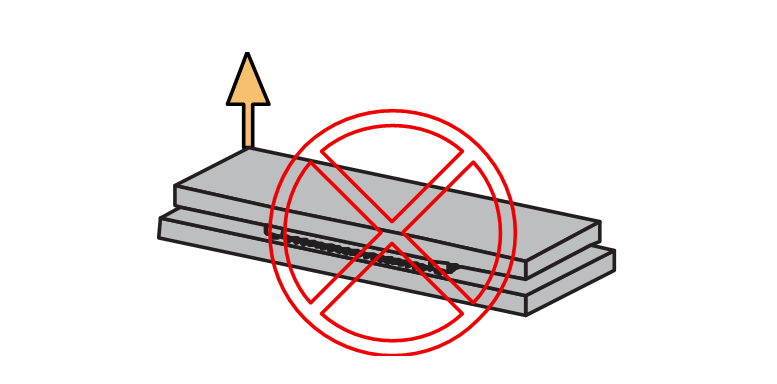 Figure 1: Wrong way: Do not apply force in a single corner of the header
WisBlock Module Installation
Assembling a WisBlock Module
WisBlock Core
Install the WisBlock Core module in the CPU slot on the RAK19007 Base Board. The CPU slot is identified by the board silkscreen. Use the WisBlock WisConnector Installation procedure to attach the module.
Secure the installed WisBlock Core with one or more M1.2 x 3 mm screws, depending on the WisBlock Core model.
 Figure 1: WisBlock Core slot on the RAK19007 Base Board
WisBlock IO
Install the WisBlock IO module in the dedicated IO slot on the RAK19007 Base Board. The IO slot is identified by the board silkscreen. Use the WisBlock WisConnector Installation procedure to attach the module.
Secure the installed WisBlock IO module with one or more M1.2 x 3 mm screws, depending on the module design.
 Figure 1: WisBlock IO slot on the RAK19007 Base Board
WisBlock Sensor
Install a WisBlock Sensor module in one of the four Sensor slots, A to D, on the RAK19007 Base Board. Slot D supports modules up to 23 mm, while Slots A to C support 10 mm WisBlock modules. Use the WisBlock WisConnector Installation procedure to attach the module.
Secure the installed WisBlock Sensor module with an M1.2 x 3 mm screw.
 Figure 1: WisBlock Sensor slots on the RAK19007 Base Board
Disassembling a WisBlock Module
- Remove the screws securing the WisBlock module.
 Figure 1: Removing screws from a WisBlock module
- Once the screws are removed, on the PCB of a WisBlock module, there is a silkscreen that shows the correct location where force can be applied. By applying even force under the marked area, the module can be detached from the Base Board.
 Figure 1: WisBlock module detaching area
 Figure 1: Detaching a WisBlock module from the RAK19007 Base Board
Battery Connection
The RAK19007 can be powered through the USB Type-C connector or by a rechargeable Li-Ion/LiPo battery connected to the dedicated P2 battery connector.
The matching connector for the battery wires is a JST PHR-2 2 mm pitch female.
 Figure 1: RAK19007 battery connector pin order
The battery can be recharged as well via a small solar panel. The GND pin of Battery Connector is located on edge of the board.
- Battery can cause harm if not handled properly.
- Only 3.7-4.2 V Rechargeable LiPo batteries are supported. It is highly recommended not to use other types of batteries with the system unless you know what you are doing.
- If a non-rechargeable battery is used, it has to be unplugged first before connecting the USB cable to the USB port of the board to configure the device. Not doing so might damage the battery or cause a fire.
- Make sure the battery wires match the polarity on the RAK19007 board. Not all batteries have the same wiring.
Solar Panel Connection
The full specification of the Solar Panel Connection can be found on the datasheet of the RAK19007 WisBlock Base Board 2nd Gen.
 Figure 1: RAK19007 solar panel connector VIN and GND
- Only 5 V solar panels are supported. Do not use 12 V solar panels. It will destroy the charging unit and eventually other electronic parts.
- The GND pin of the Solar Panel Connector is located on edge of the board. Make sure the Solar Panel wires are matching the polarity on the RAK19007 board.


