RAK7271/RAK7371 Quick Start Guide
Prerequisites
Hardware
Before proceeding with the installation guide for the RAK7271/7371 WisGate Developer Base, ensure you have prepared the necessary items listed below.:
- WisGate Developer Base RAK7271 or RAK7371
- A Host - Linux running PC/laptop or Raspberry Pi
The SIM card slot of the cellular versions is not hot-swappable. Make sure the gateway is switched off before inserting or ejecting the SIM card.
Package Inclusion
- 1pc WisGate Developer Base
- 1pc USB Type C to A Cable
- 1pc LoRa® Antenna
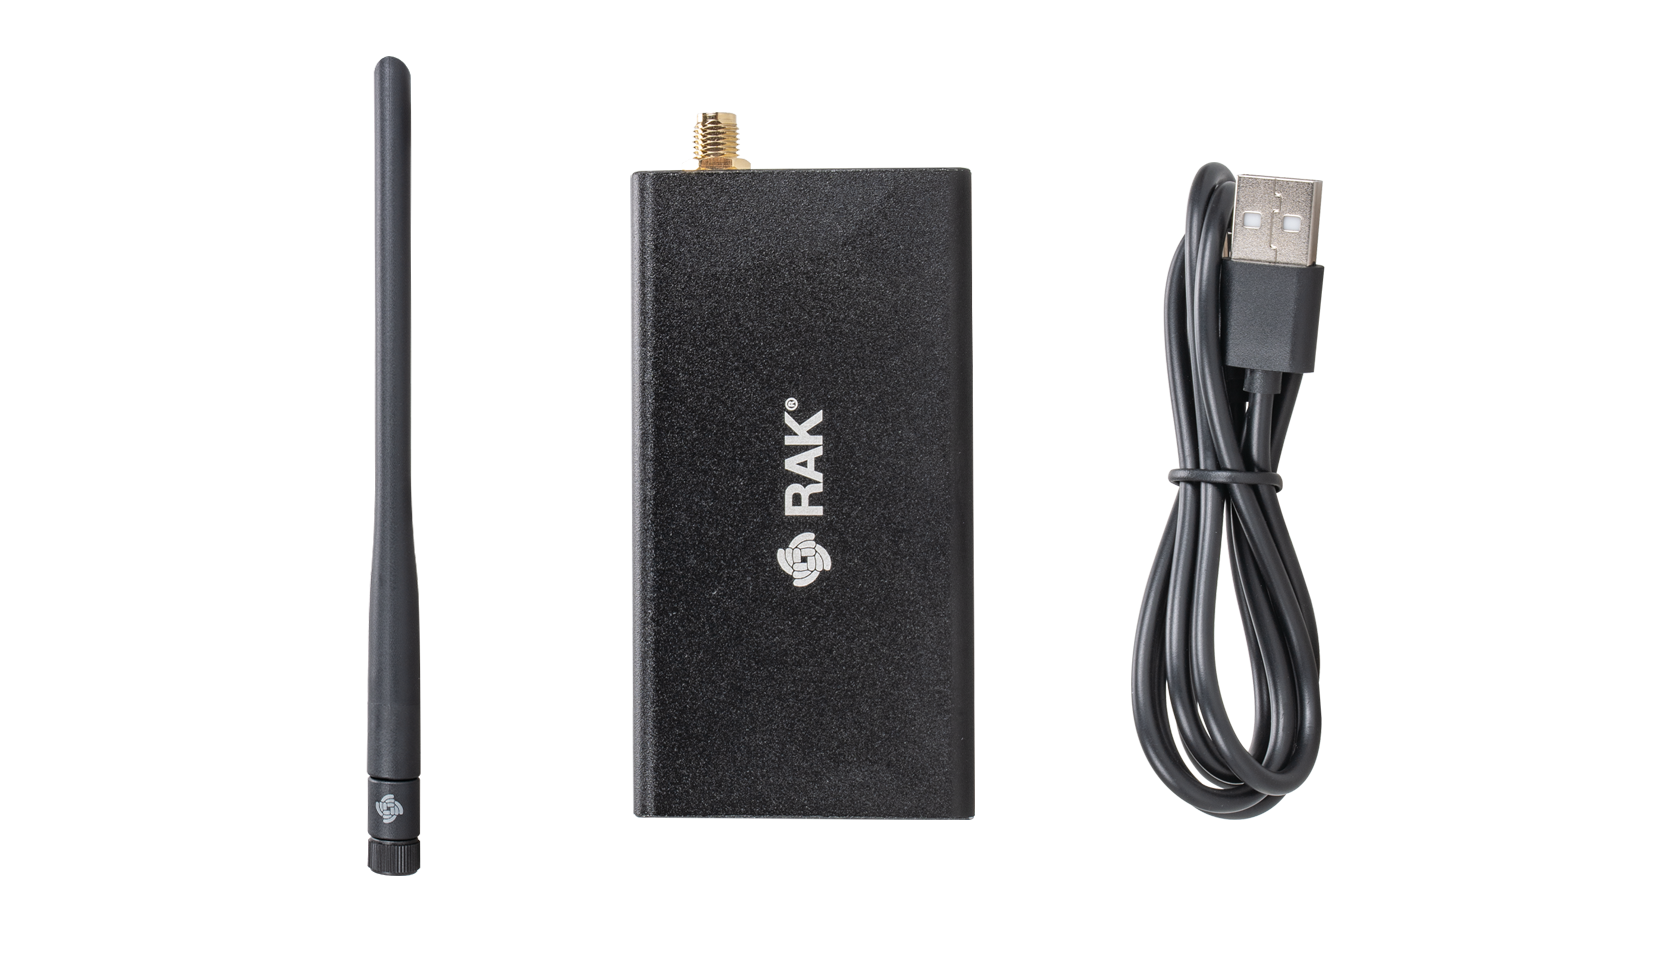 Figure 1: Package Content
Product Configuration
Raspberry Pi as a Host
Interface Between the Raspberry Pi and the WisGate Developer Base
It is assumed that your Raspberry Pi has already been installed with an OS and has internet access. You must also have an access to it over SSH or directly to the command line interface (CLI).
- Connect the WisGate Developer Base using the included cable: insert the Type-C end into the Developer Base and the Type-A end into one of the Raspberry Pi's USB ports.
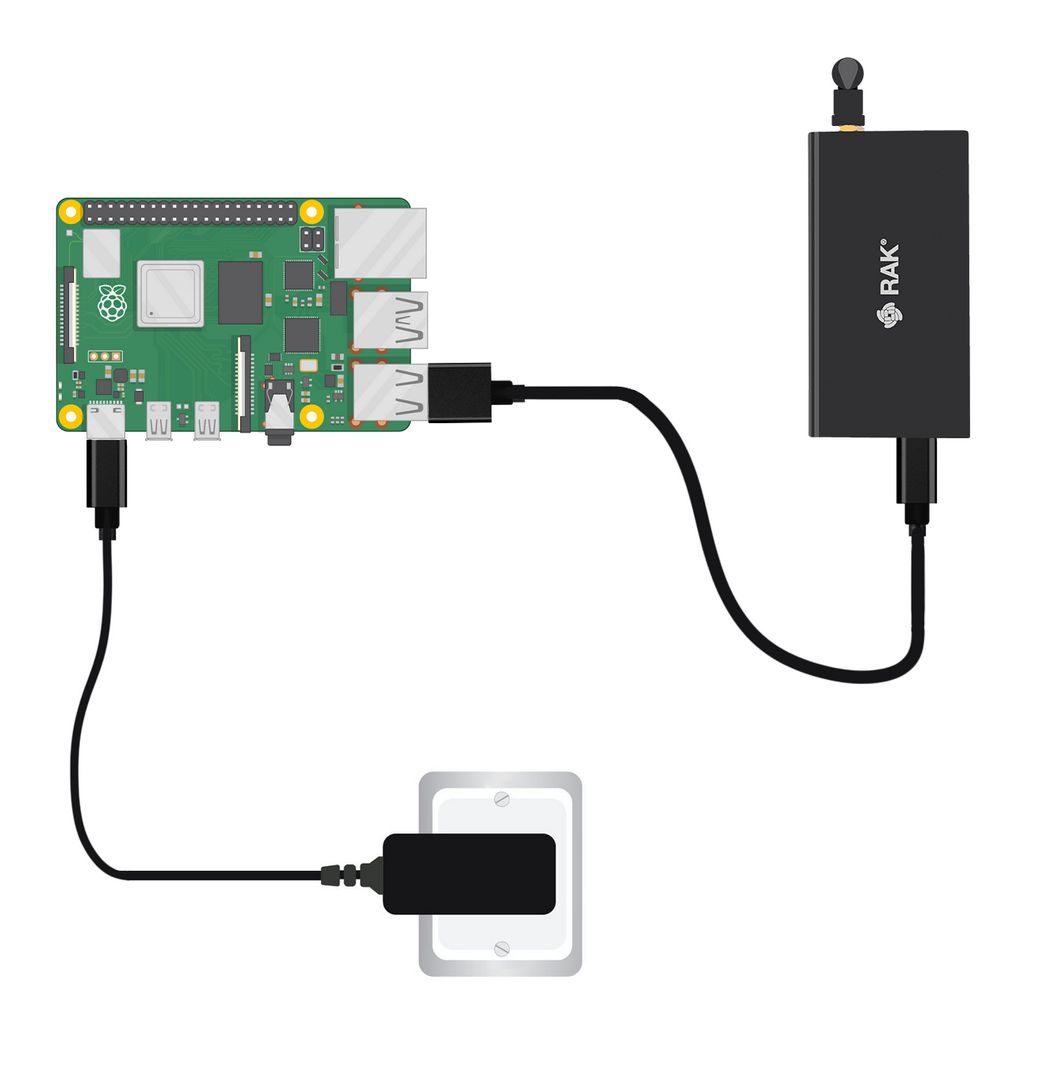 Figure 1: Connect the WisGate Developer Base to the Raspberry Pi
- After connecting the Developer Base to the Pi, the Power Led will be steady green. This means that the Base is properly powered.
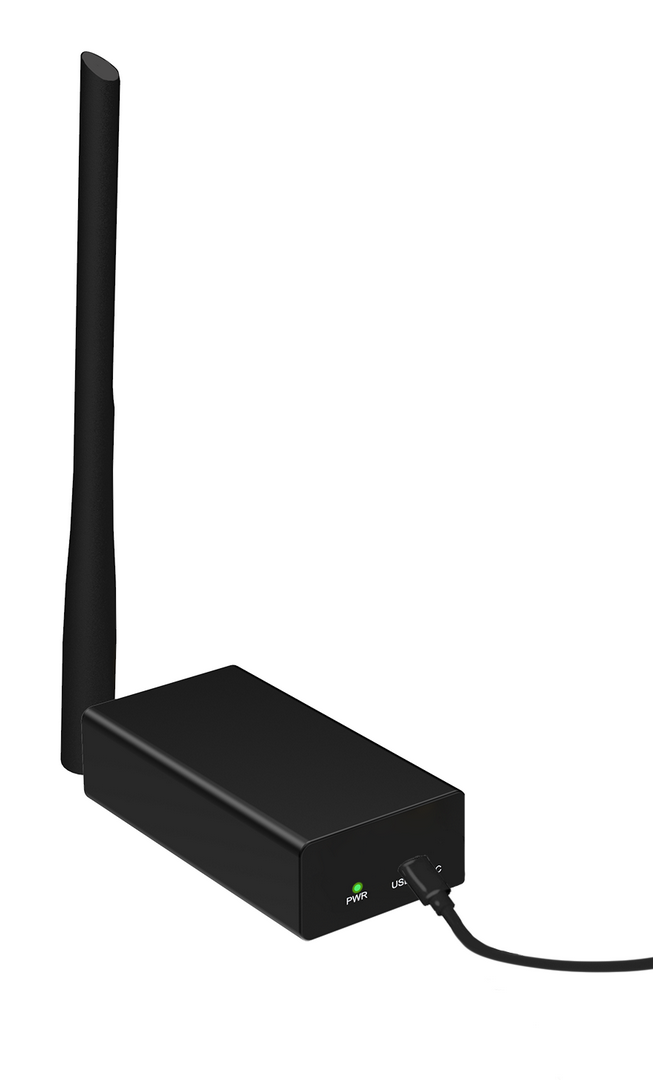 Figure 1: Power On the Developer Base
- Check if the base is properly connected by running this command on the CLI:
lsusb
- In the output, you should see a STMicroelectronics Virtual COM Port line. This means your RAK WisGate Developer Base is properly connoted to the Raspberry Pi.
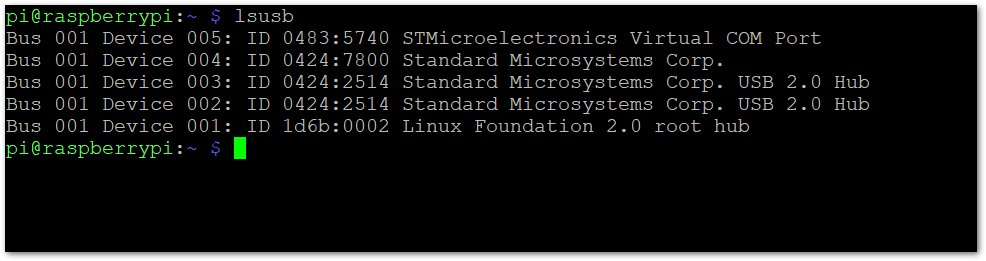 Figure 1: Check the Connection
pi@raspberrypi:~ $ lsusb
Bus 001 Device 005: ID 0483:5740 STMicroelectronics Virtual COM Port
Bus 001 Device 004: ID 0424:7800 Standard Microsystems Corp.
Bus 001 Device 003: ID 0424:2514 Standard Microsystems Corp. USB 2.0 Hub
Bus 001 Device 002: ID 0424:2514 Standard Microsystems Corp. USB 2.0 Hub
Bus 001 Device 001: ID 1d6b:0002 Linux Foundation 2.0 root hub
pi@raspberrypi:~ $
Install the Software
To use the Base, you must install and configure the necessary software.
- To download the software, execute the following commands in the CLI:
- This command will check for the latest updates of the OS and download the Git tool that will allow downloading the software:
sudo apt update; sudo apt install git -y
- Download the required software.
git clone https://github.com/RAKWireless/rak_common_for_gateway.git
- Enter the created directory.
cd ~/rak_common_for_gateway
- Start the installation.
sudo ./install.sh
The script will also install ChirpStack, an open-source LoRaWAN Network Server stack. It enables you to set up a fully functional LoRaWAN Server locally on the Raspberry Pi.
If you do not want to install ChirpStack, run:
sudo ./install.sh --chirpstack=not_install
- You will be prompted to select the model of the concentrator you are installing.
- Select 9. RAK2287 USB if you are using the WisGate Developer Base RAK7271.
- Choose 10. RAK5146 USB if you are using the WisGate Developer Base RAK7371.
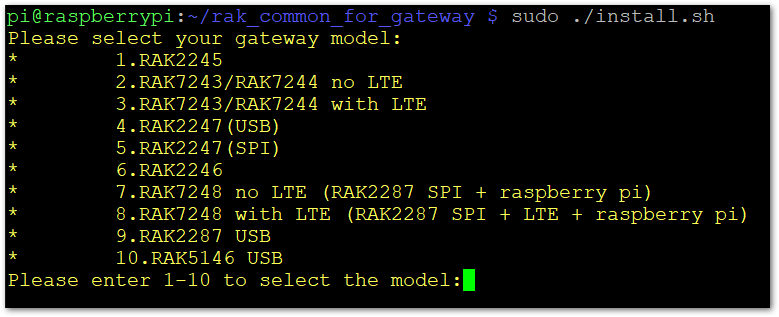 Figure 1: Select the Concentrator Model
- After a few minutes, the installation will be completed.
 Figure 1: Successful Installation
Copy sys_config file success!
/home/pi/rak_common_for_gateway
***********************************************************
* The RAKwireless gateway is successfully installed! *
***********************************************************
pi@raspberrypi:~/rak_common_for_gateway $
Linux Machine as a Host
Interface Between the Linux Machine and the WisGate Developer Base
Connect the two devices using the included USB cable to the host PC. It is recommended to use Ubuntu 18.04 LTS as the operating system.
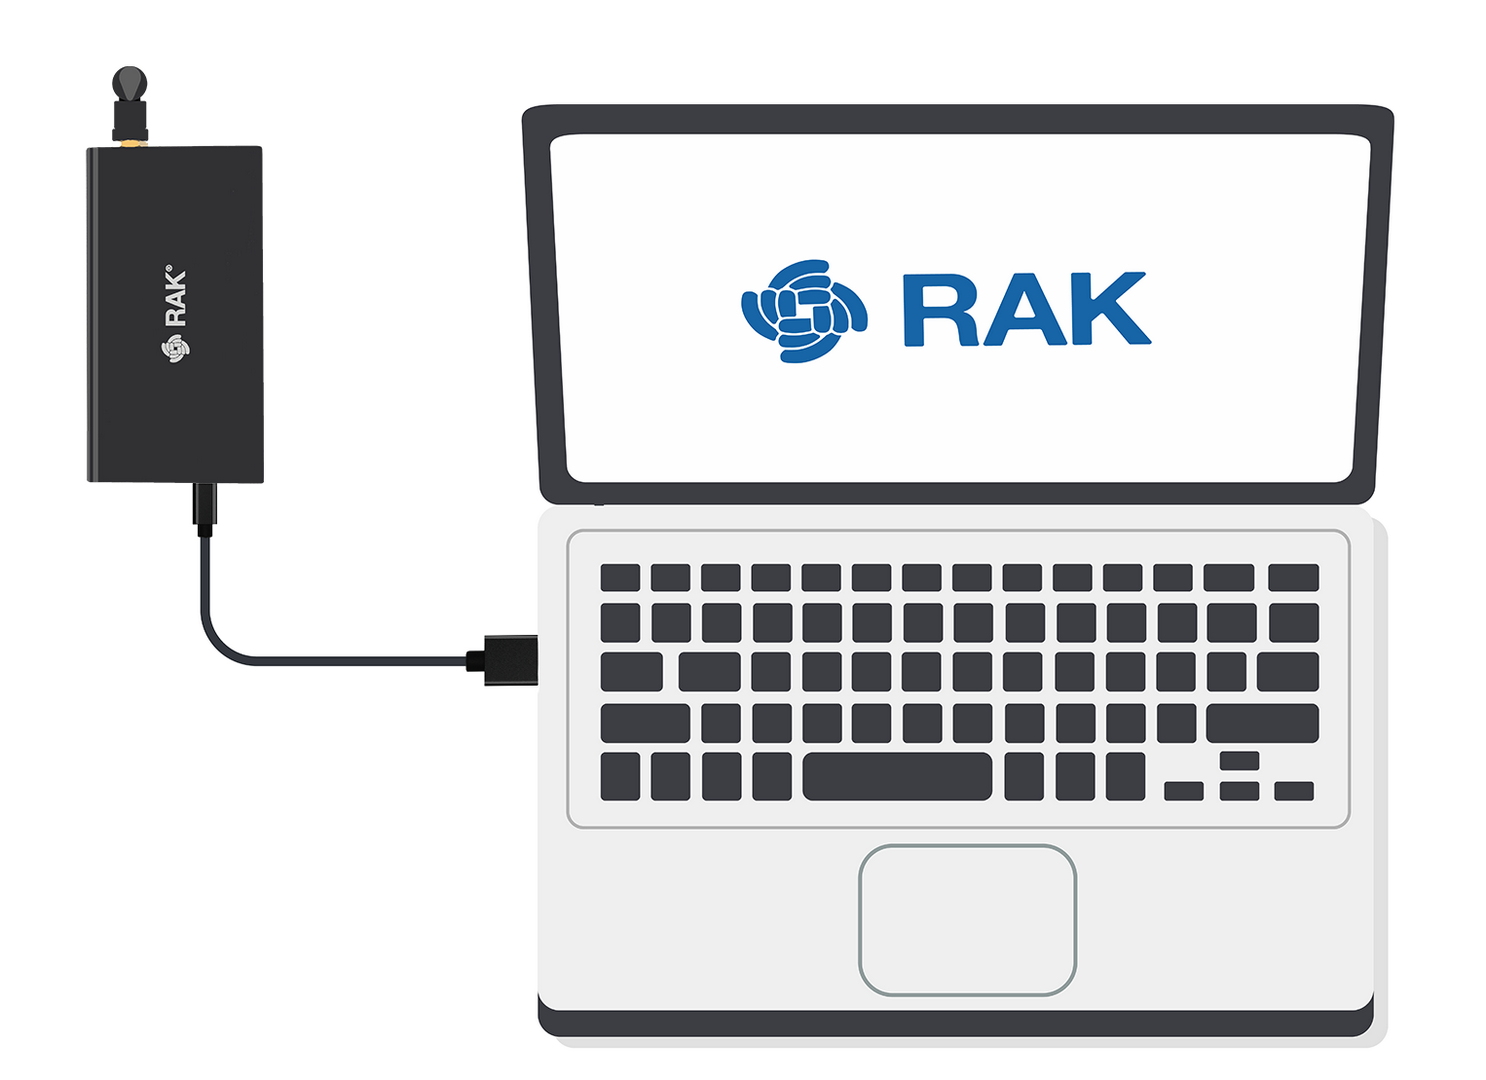 Figure 1: Connect the WisGate Developer Base to the Host
Software Installation
To use the Base, you need to install and configure the required software. The procedure varies slightly between the two variants of the WisGate Developer Base.
For RAK7271 WisGate Developer Base with RAK2287 Inside
- Install the required make and gcc tools.
sudo apt install make
sudo apt install gcc
- Download the archive from the Semtech repository:
wget https://github.com/Lora-net/sx1302_hal/archive/V2.0.1.tar.gz
- After the download is complete, extract the files with the command:
tar -zxvf V2.0.1.tar.gz
- Enter the created folder.
cd sx1302_hal-2.0.1
- Run the make command to compile the software.
sudo make
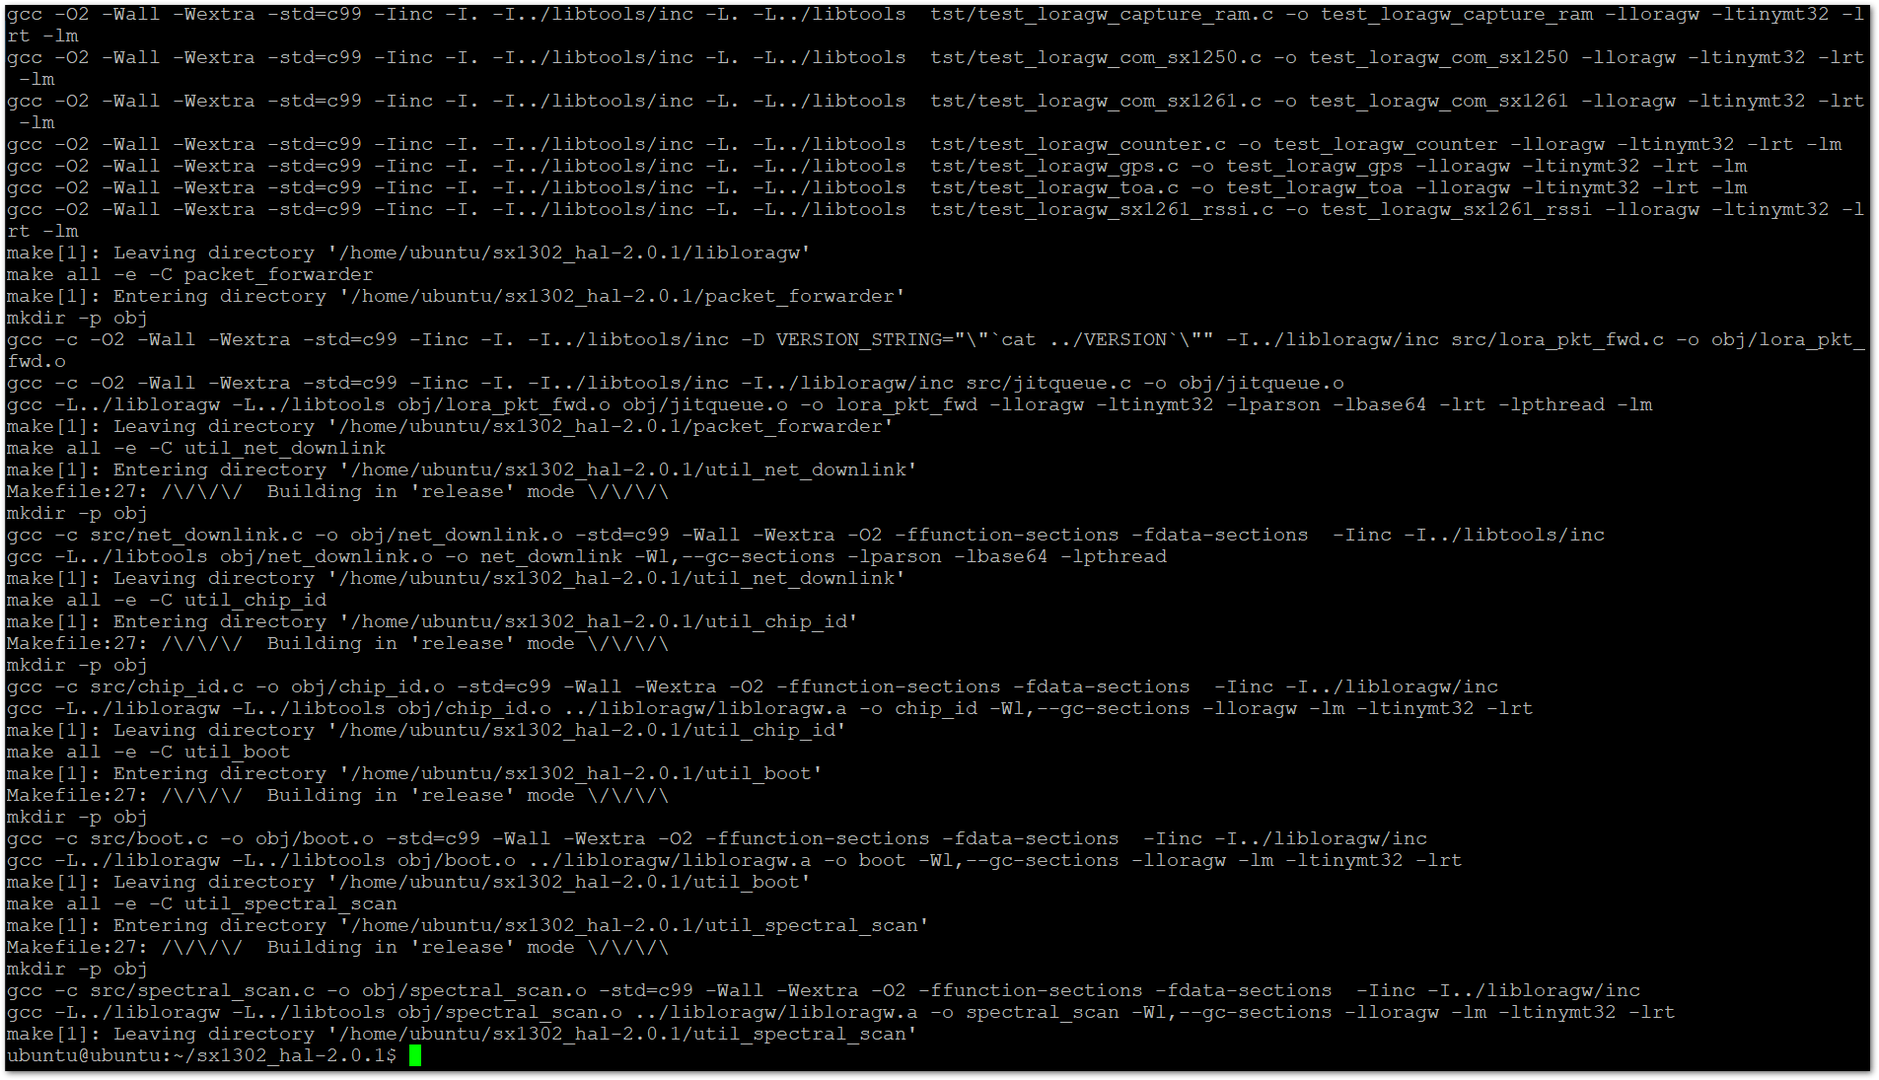 Figure 1: Install the Software
After the compilation is complete, configure the correct channel plan by setting the appropriate global_conf.json file for the packet forwarder.
-
Navigate to the Packet forwarder folder.
cd packet_forwarder -
Then list the files and folders:
ls -l
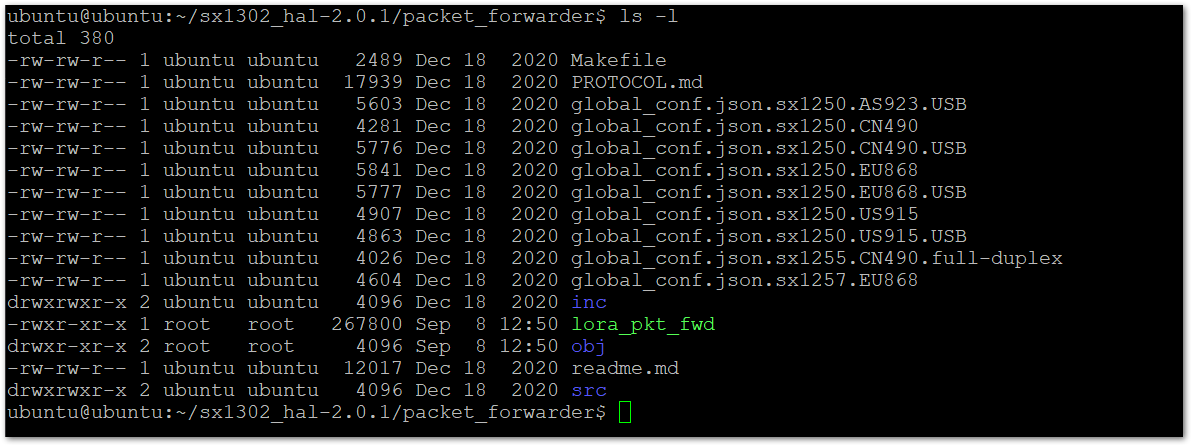 Figure 1: List the Content of the Folder
- You can see that there is a different example configuration files for different LoRaWAN bands and different types of concentrators. In this setup, you are using RAK Developer Base, which is the USB, and the EU868 band. Run this command to rename the correct file to
global_conf.json:
cp global_conf.json.sx1250.EU868.USB global_conf.json
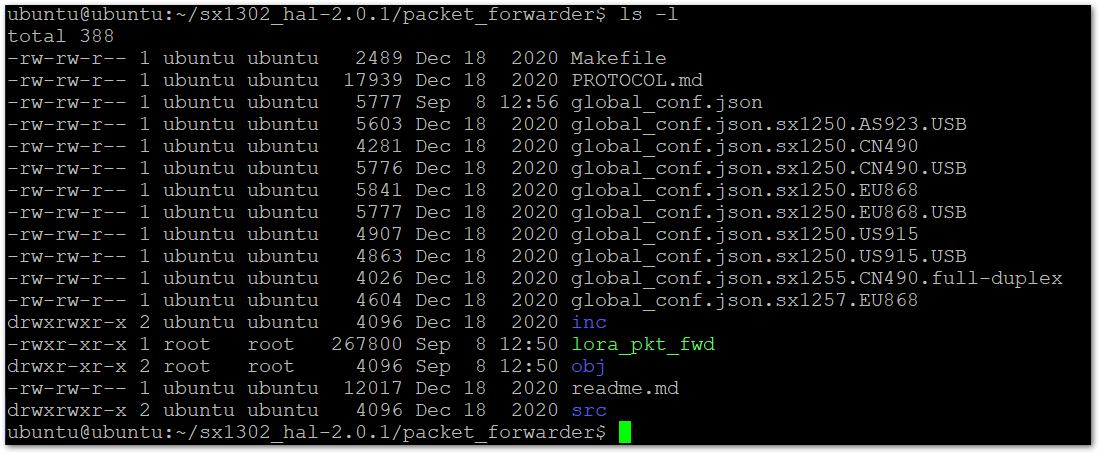 Figure 1: List the Content of the Folder After Renaming
- Start the packet forwarder process to bridge the LoRaWAN radio component with the Network Server.
sudo ./lora_pkt_fwd
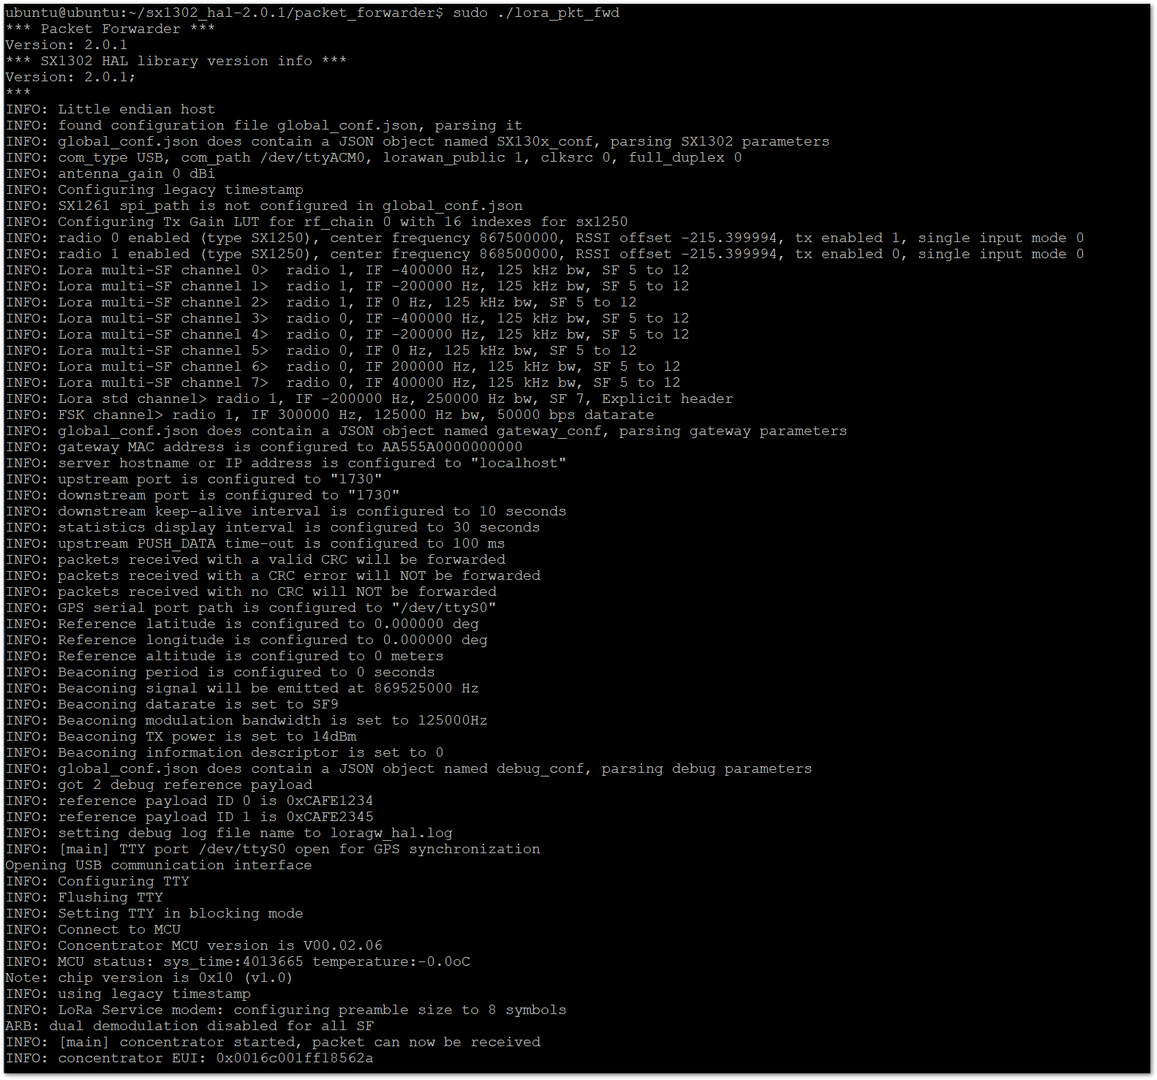 Figure 1: Start the Packet Forwarder
- At the end of this example, you can see the concentrator's EUI. Save it somewhere as it will be needed to register your gateway in the Network Server later.
You can also retrieve the EUI using the chip_id tool located in the util_chip_id folder. Navigate to the folder and execute the following command:
sudo ./chip_id -u -d /dev/ttyACM0
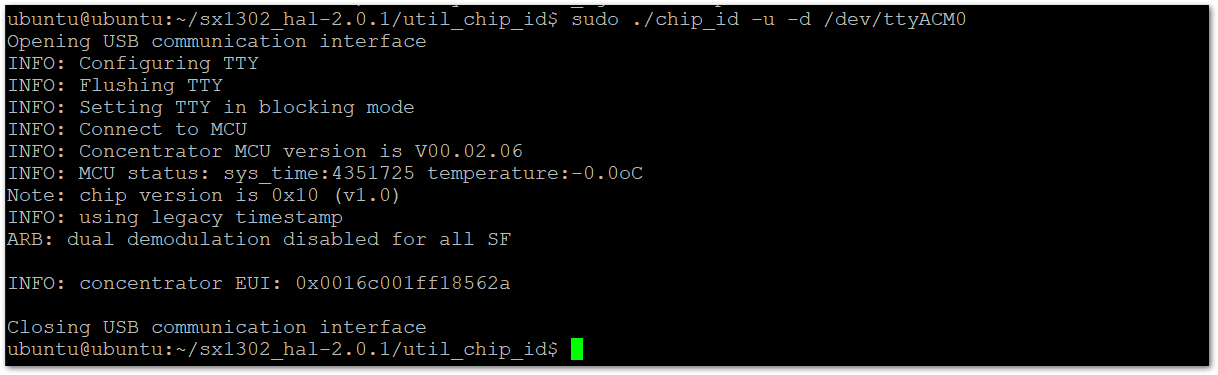 Figure 1: Concentrator EUI
For RAK7371 WisGate Developer Base with RAK5146 Inside
- Install the required make and gcc tools.
sudo apt install make
sudo apt install gcc
- Clone the software from the Git reposiory:
sudo git clone https://github.com/Lora-net/sx1302_hal.git
- After the download is complete, navigate to the newly created folder.
cd sx1302_hal
- Run the make command to compile the software.
sudo make
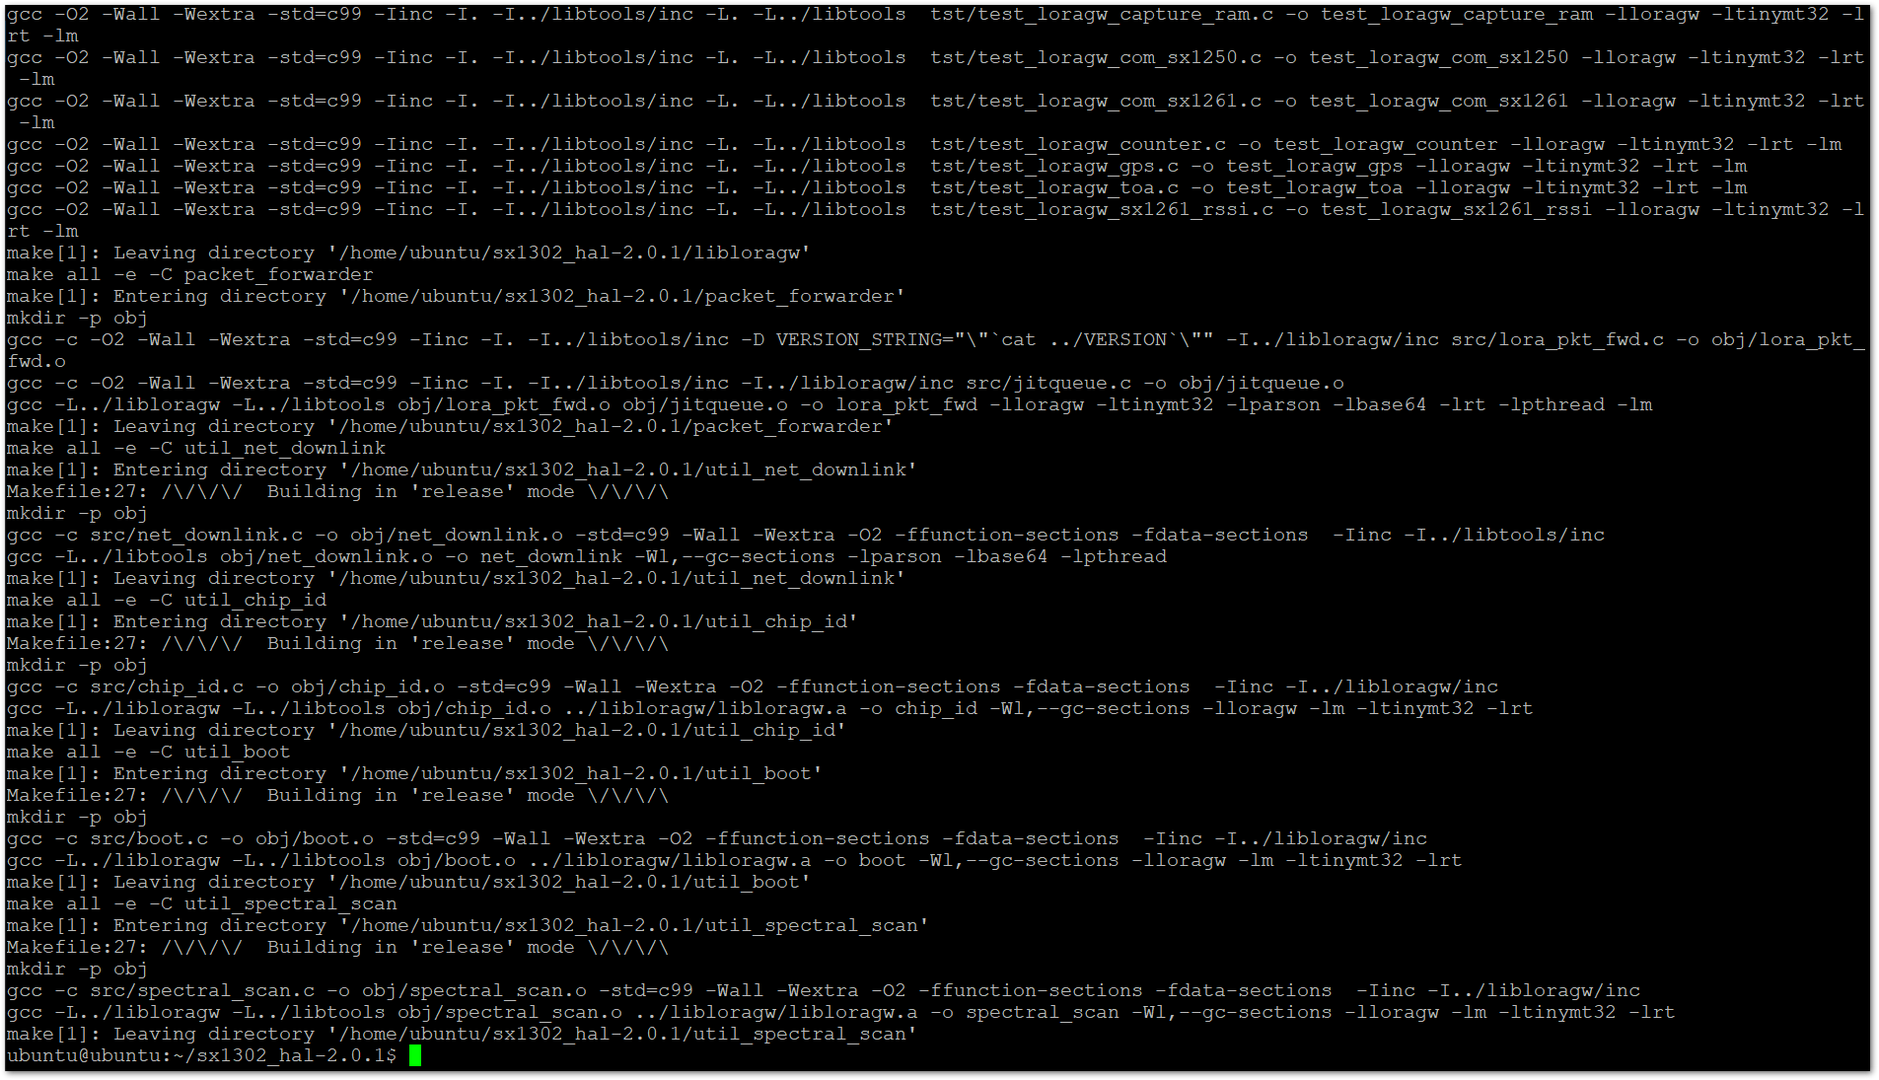 Figure 1: Install the Software
- Open the Packet forwarder folder with the following command:
cd packet_forwarder
- And then list the files and folders.
ls -l
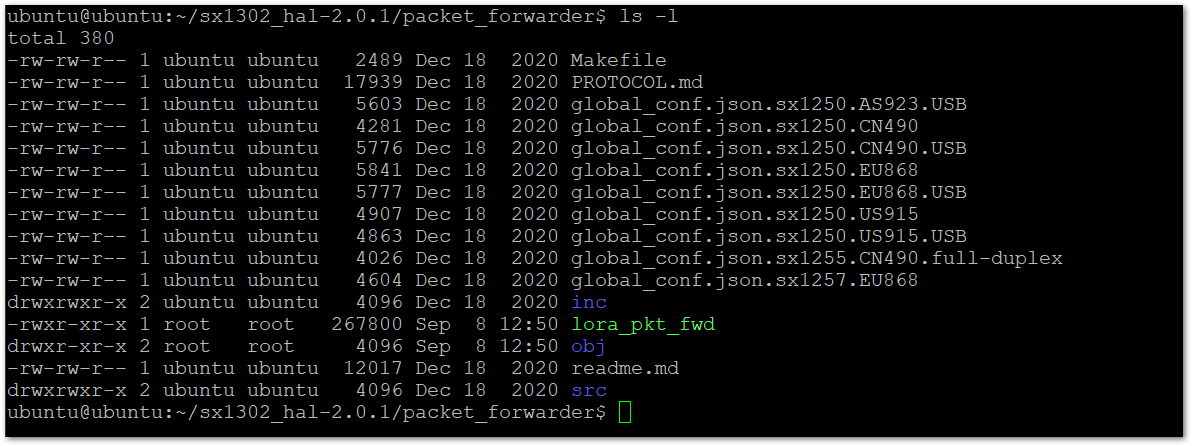 Figure 1: List the Content of the Folder
- You will find different example configuration files for various LoRaWAN bands and concentrator types. For this setup, you are using the RAK Developer Base (USB) with the EU868 band. Run the following command to rename the appropriate file to
global_conf.json.
cp global_conf.json.sx1250.EU868.USB global_conf.json
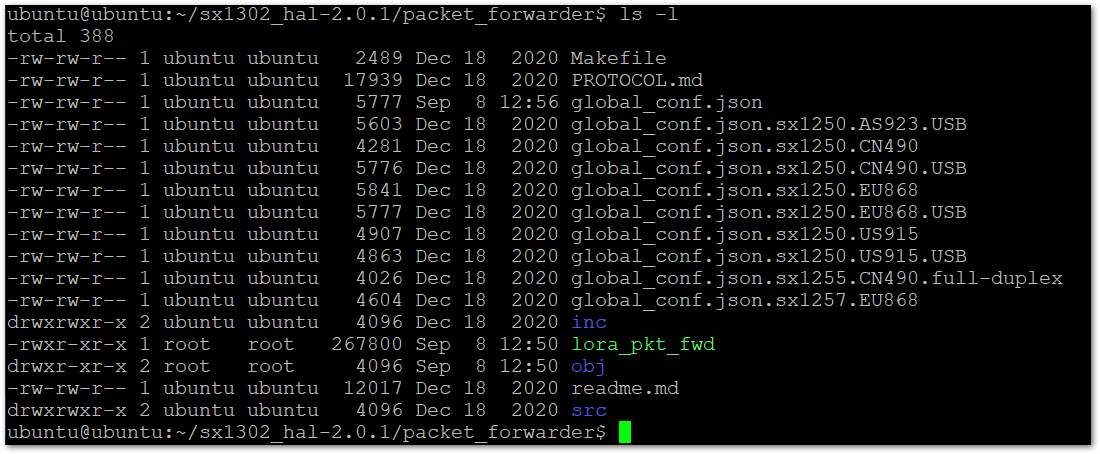 Figure 1: List the Content of the Folder After Renaming
- Start the packet forwarder process to bridge the LoRaWAN radio component with the Network Server.
sudo ./lora_pkt_fwd
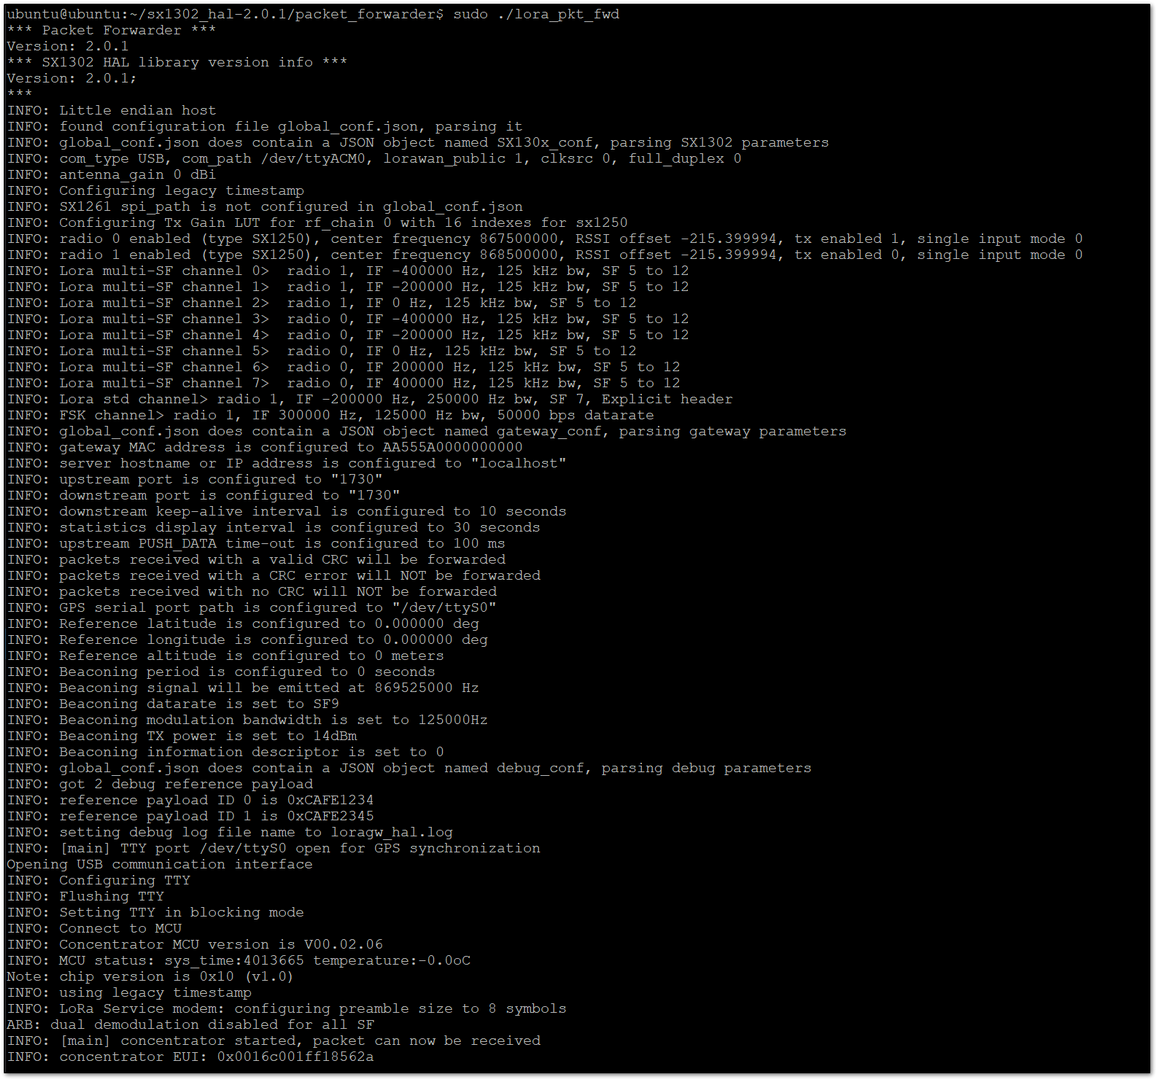 Figure 1: Start the Packet Forwarder
- At this stage, you can view the concentrator's EUI. Be sure to save it, as it will be required to register your gateway in the Network Server later.
You can also retrieve the EUI using the chip_id tool located in the util_chip_id folder. Navigate to the folder and execute the following command:
sudo ./chip_id -u -d /dev/ttyACM0
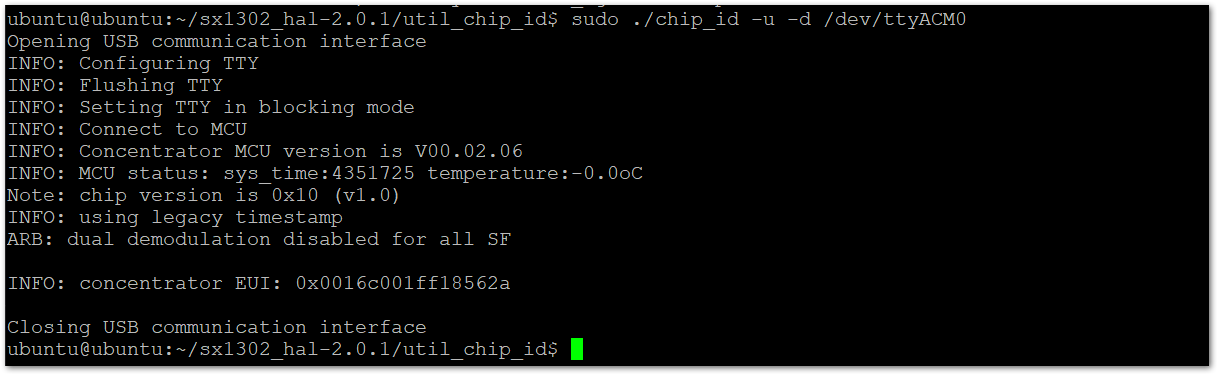 Figure 1: Concentrator EUI
Configure the LoRaWAN Network Server
Select a LoRaWAN Network Server for deployment.
-
If you used the default installation command in Step 3 of Install the Gateway Software, the Raspberry Pi setup already includes a local ChirpStack LoRaWAN Network Server.
-
If you want to use The Things Network (TTN), refer to the The Things Network Configuration.
After the gateway is connected to the selected Network Server, the RAK7271/RAK7371 setup is complete.


