Battery Prime RAK9156 Installation Guide
Prerequisites
Before installation, prepare the following external devices:
- 40W Solar Panel Kit: Prepare a compatible panel for the PV input.
- RAK7267 WisGate Soho Pro / RAK7240 Outdoor Gateway: Prepare a compatible gateway for the Load output.
Package Inclusion
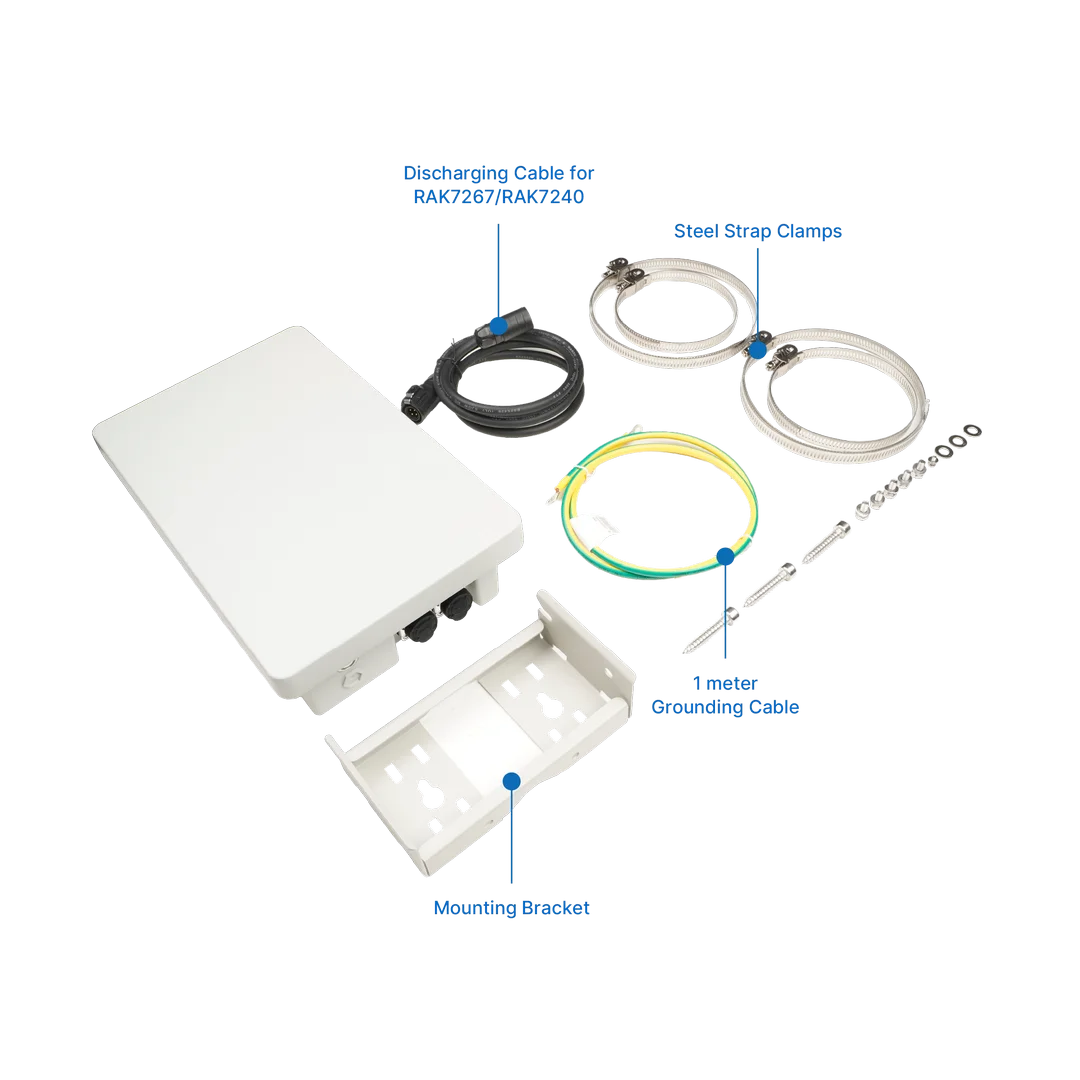 Figure 1: Package Contents
- RAK9156 Battery System
- Discharging Cable
- Charging Cable
- Grounding Cable (1 m)
- Steel Strap Clamps
- Mounting Bracket
- Mounting Hardware (Screws, Nuts, and Washers)
Battery Installation Guide
The Battery Prime RAK9156 supports two installation methods: pole mounting and wall mounting.
Pole-mounting
The mounting brackets support pole diameters of 50–150 mm. For larger poles, larger steel strips are required (sold separately).
- Fix the mounting bracket on the pole with two steel strips.
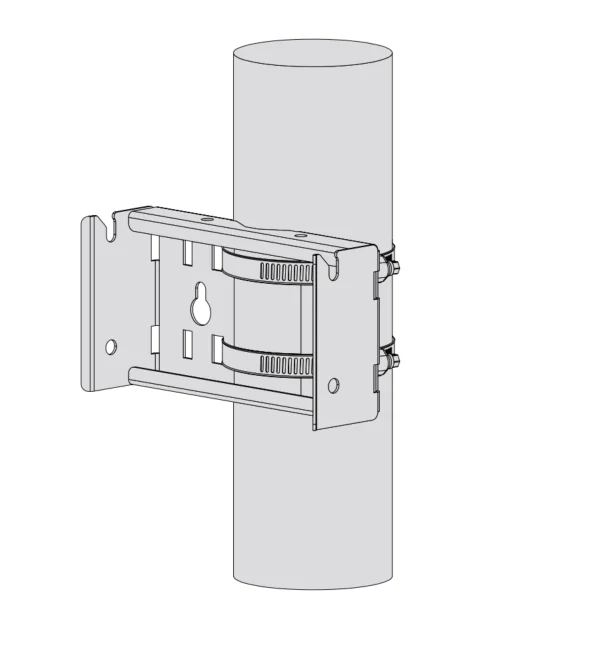 Figure 1: Fix Bracket
- Install one M6 screw on each side of the device, leaving a gap of approximately 3 mm.
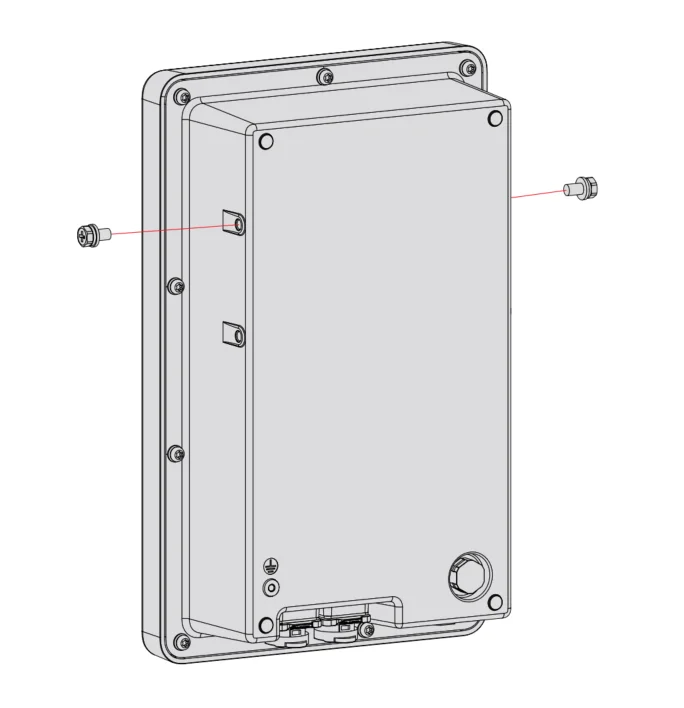 Figure 1: Install Screws
- Hang the device on the mounting bracket first, then secure all screws.
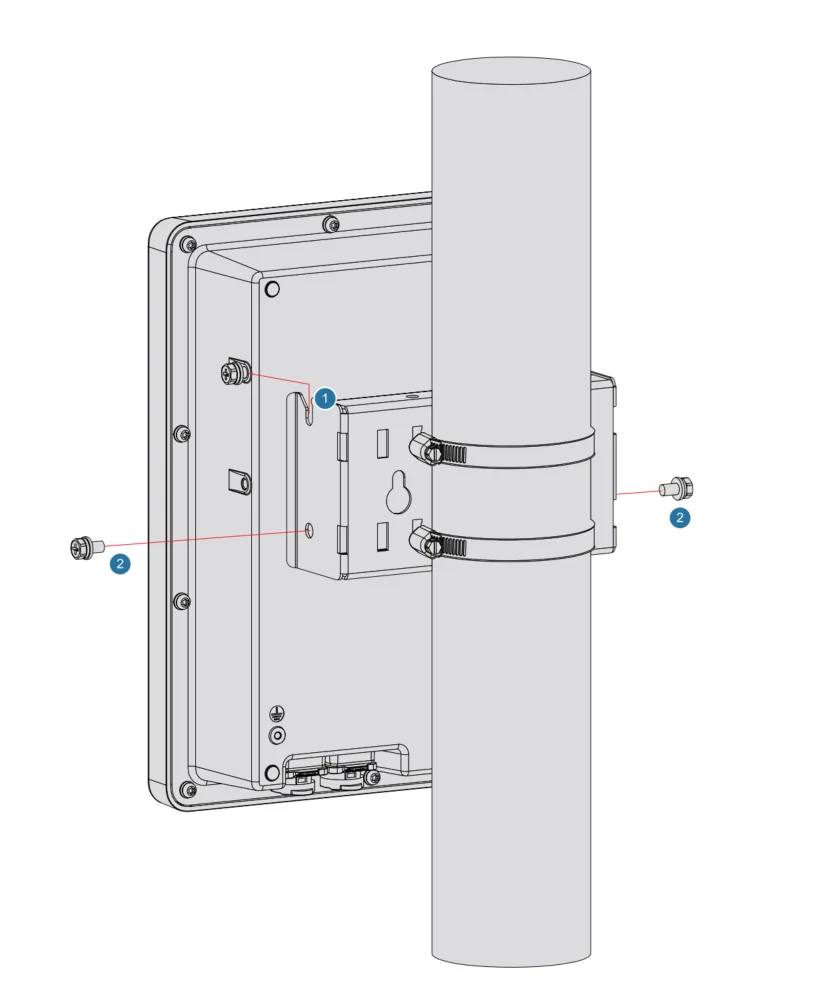 Figure 1: Mount Battery
Wall-mounting
Select appropriate screws according to the installation surface. This section demonstrates the installation on a wooden wall.
- Confirm the installation position, then install two self-tapping screws into the wooden wall.
The screws should be installed 100 mm apart, aligned horizontally, with a minimum 3 mm gap between the screw heads and the wall surface.
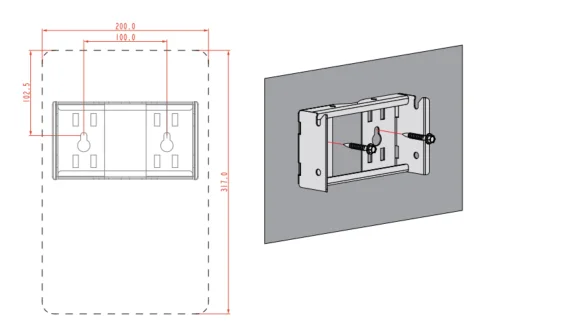 Figure 1: Install Screws
- Hang the mounting bracket on the screws, then fix the screws.
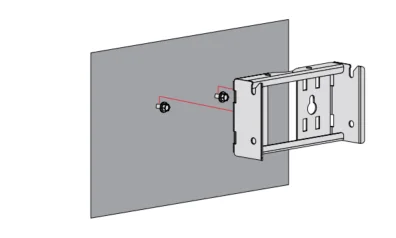 Figure 1: Hang Bracket
- Install one M6 screw on each side of the device, leaving a gap of approximately 3 mm.
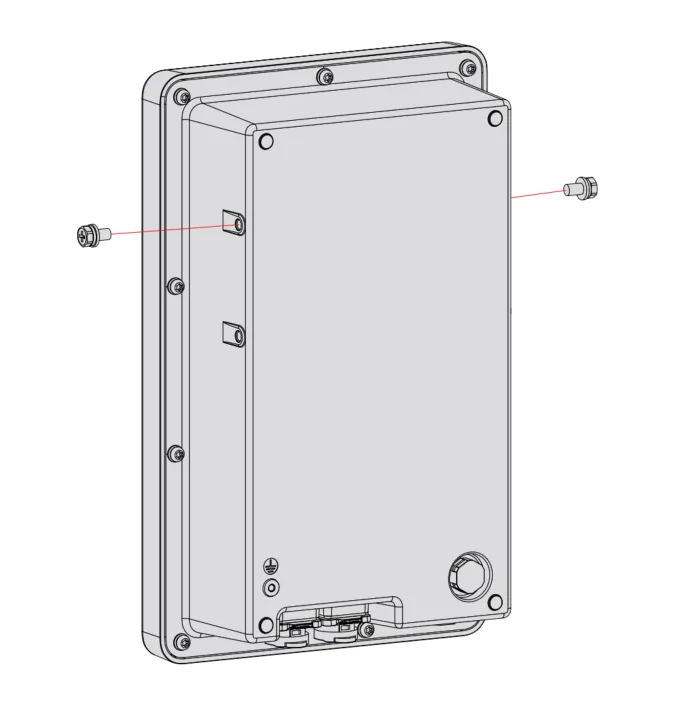 Figure 1: Install Screws
- First hang the device on the mounting bracket, and then fix all screws.
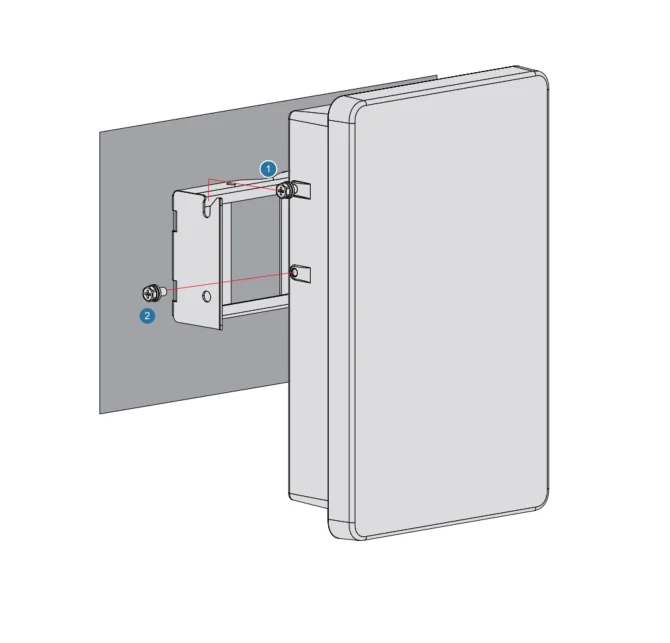 Figure 1: Mount Battery
Cable Connection
Ground Connection
- Loosen the screw on the grounding terminal at the lower-left corner of the equipment.
- Connect the ground wire to the terminal and secure it with the provided screw.
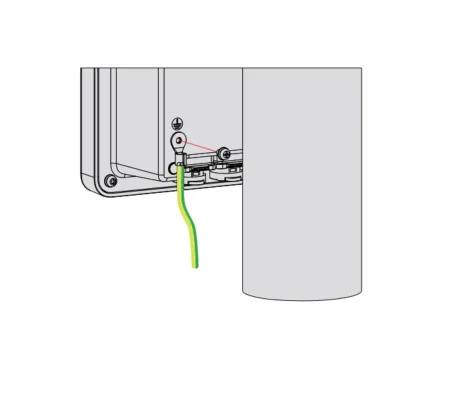 Figure 1: Ground Connection
- Connect the other end of the ground wire to a reliable grounding point.
The ground wire of 1 m is provided with the kit. If other sizes are needed, please purchase them separately.
PV and Load Connection
- Connect the PV input and Load cables to the corresponding circular connectors.
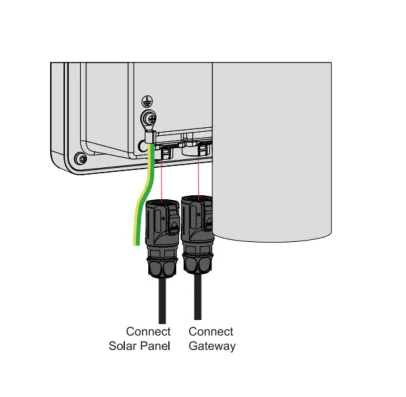 Figure 1: Cable Connection
- Position the solar panel to shield the battery from direct sunlight.
- For detailed installation instructions, refer to the corresponding installation guide for your equipment: the 40W Solar Panel Kit Installation Guide for the solar panel, or the RAK7267 WisGate Soho Pro and RAK7240V2/RAK7240CV2 installation guides for the gateways.
Power ON and OFF
System Power ON
Before powering on:
- Verify the polarity of the PV input and Load connections.
- Ensure all connectors are securely installed.
- Ensure the battery system is properly installed and grounded.
- Press the ON/OFF power switch to turn on the battery system.
- Verify that the system starts operating normally.
The LED behavior depends on the solar input condition.
- After power-on, the green LED remains solid on for approximately 3 seconds before entering the normal operating state.
- When solar power is available, the green LED remains solid on.
- When solar power is unavailable, the green LED flashes. If no load connection is established, the LED turns off after approximately 15 minutes, and the battery system enters sleep mode. When a load is connected, the green LED continues flashing.
System Power OFF
Before powering off or disconnecting cables, do not disconnect the PV or Load cables while the battery system is operating.
- Press the ON/OFF power switch to turn off the battery system.
- Confirm that the system is powered off and that the LED indicators are turned off.
- Disconnect the cables in the following order: first disconnect the PV Input cable, then disconnect the Load cable.


