WisMesh Repeater Mini V2 Quick Start Guide
WisMesh Repeater Mini V2 is a solar-powered repeater that comes in a waterproof enclosure with a high-performance built-in antenna, making it deployable anywhere regardless of power availability or weather conditions.
This guide covers the basics for the RAKwireless Meshtastic devices that are not covered by the Meshtastic documentation.
For detailed instructions how to configure the devices for the Meshtastic network, follow the Meshtastic Getting Started guide.
You can also check the Meshtastic Basic Device Setup Guide:.
To ensure you are running the latest version of the Meshtastic firmware, it is advised to download the latest Meshtastic firmware and upload it to your RAKwireless device to make it compatible with the Meshtastic network.
For Firmware 1.3 and 2.0 (from November 1, 2022), the WisBlock Base board is autodetected. This use cases is covered in the stock firmware.
- For RAK10728, use Meshtastic
firmware-rak4631-w.x.yy.zzzzzzz.uf2 - For RAK10729, use Meshtastic
firmware-rak3401-1watt-w.x.yy.zzzzzzz.uf2
Prerequisite
Before going through each and every step on using WisMesh Repeater Mini, make sure to prepare the necessary items listed below:
Hardware
Software
The WisBlock Core module of the WisMesh Repeater Mini V2 comes pre-flashed with the Meshtastic firmware.
However, to connect the device to the Meshtastic network, you will have to configure it. The recommended way to configure the WisMesh Repeater Mini V2 is using a mobile phone via a BLE connection with either of these configurations:
Alternatively, the WisMesh Repeater Mini V2 has an USB connector inside. With the USB connection, you can use either of these configurations:
Make sure that you have installed one of these applications, as they are required for the configuration of the Meshtastic network.
To access the USB port, follow these simple steps:
- Remove the rubber plug on the side of the enclosure, as shown in Figure 1.
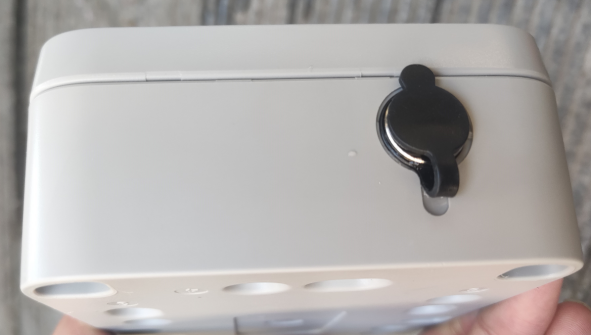 Figure 1: Remove the rubber plug
- Access the USB port, as shown in Figure 2
 Figure 1: Access the USB port
Product Configuration
Hardware Setup
The WisMesh Repeater Mini V2 comes fully assembled with the battery already connected.
- The WisMesh Repeater Mini V2 is set to deep sleep mode to prevent the internal battery from discharging during transportation.
- To use the WisMesh Repeater Mini V2, connect it to a computer using a USB cable to initiate the automatic wake-up. Without this step, the device will not advertise over BLE, and it cannot be set up.
To recharge the battery, mount the WisMesh Repeater Mini V2 with its solar panel facing direct sunlight, ensuring there is no shadow. Alternatively, you can charge the battery through the USB port.
For more details about the mounting options of the WisMesh Repeater, refer to the WisBlock Unify enclosure mounting accessories.
Antenna
The WisMesh Repeater Mini V2 has an internal BLE antenna and an external LoRa antenna. Make sure that the LoRa antenna is plugged in properly before powering up the unit.
Assembling and Disassembling of WisMesh Repeater Mini V2
It is strongly recommended to keep the WisMesh Repeater Mini V2 closed at all times. If the devices are opened, make sure the assembly of the lid is properly done to avoid water intrusions into the enclosure.
Software Setup
To ensure you are running the latest version of the Meshtastic firmware, it is advised to download the latest Meshtastic firmware and upload it to your RAKwireless device to make it compatible with the Meshtastic network.
For Firmware 1.3 and 2.0 (from November 1, 2022), the WisBlock Base board is autodetected. There's a special firmware if you have the RAK14000 WisBlock E-Ink Display connected. All other use cases are covered in the stock firmware.
- For RAK10728, use Meshtastic
firmware-rak4631-w.x.yy.zzzzzzz.uf2 - For RAK10729, use Meshtastic
firmware-rak3401-1watt-w.x.yy.zzzzzzz.uf2
The WisMesh Repeater Mini V2 comes pre-flashed with the Meshtastic firmware. If problems occur, update the Meshtastic firmware to the latest version.
To set up the WisMesh Repeater Mini V2 for the Meshtastic network, follow the Meshtastic configuration guide.