WisMesh High Power Booster Starter Kit Quick Start Guide
The WisMesh High Power Booster Starter Kit is a versatile DIY kit, ideal for DIY enthusiasts who want a hassle-free Meshtastic node. This guide covers the basics for the Meshtastic Starter Kit that are not covered by the Meshtastic documentation.
For detailed instructions how to configure the devices for the Meshtastic network, follow the Meshtastic Getting Started guide. You can also check the Meshtastic Basic Device Setup Guide:
Due to the high power consumption during the 1 W LoRa transmission, the device has to be powered either by a battery or by an external 5 V supply to work correctly. The power supply variation depends on the used RAK13302 module.
Older versions of the WisMesh High Power Booster Starter Kit are using the RAK13302 board version VC. This module is no longer in production and is with the new RAK13302 board version VD.
The board version VC allowed to switch with a jumper between external 5 V power supply and internal battery supply.
With the board version VD this is no longer available. Version VD is available in two variants, one is only working with external 5 V power supply and the other one is only working with internal battery supply.
Make sure to order the correct hardware version for your requirements.
This documentation refers to the new Starter Kit using RAK13302 VD. The steps to use the starter kit are identical beside of the power supply selection.
Power Supply Variants (Only RAK13302 VD Board Version)
The Starter Kit with the RAK13302 version VD module has two hardware variants:
- One hardware variant is only working with external 5 V power supply.
- The other one is only working with internal battery supply.
The different hardware versions are marked with different codes on the label. The version for power supplied through the battery connected to the WisBlock Base Board has the code 001 on the label, and it has no connector for the external 5 V supply on the bottom of the PCB.
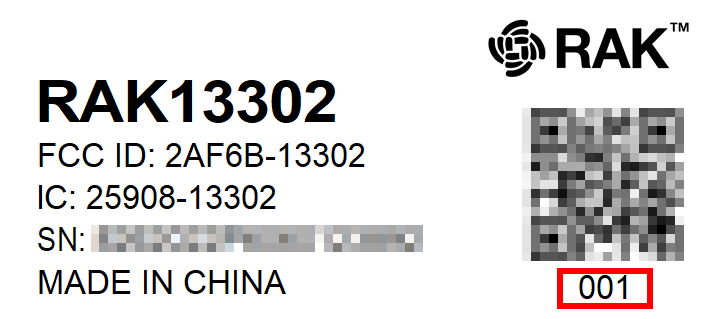 Figure 1: RAK13302 Wireless Module Battery Supply Indication
The version for supply with an external 5 V supply has the code 002 on the label, and it has the connector for the external 5 V supply on the bottom of the PCB.
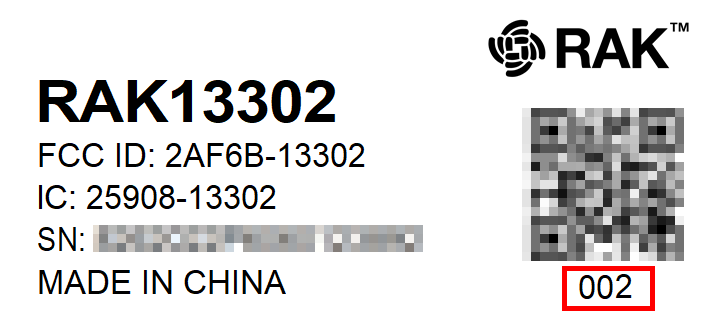 Figure 1: RAK13302 Wireless Module External 5V Supply Indication
If the supply is through EX_5V, the whole WisBlock Base Board can be supplied through this source.
External 5V Supply Connection
The connector for the external 5 V supply is on the bottom of the module.
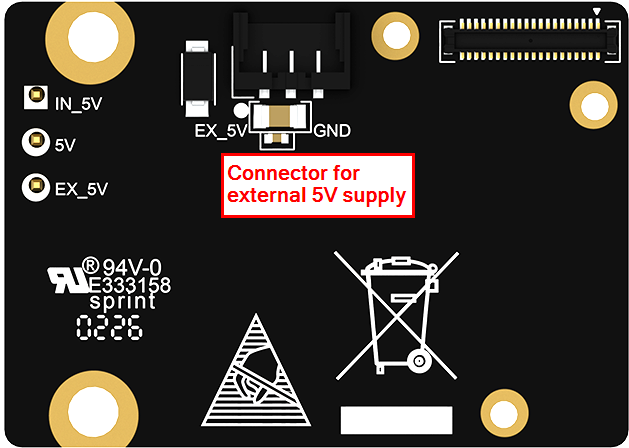 Figure 1: RAK13302 5 V supply connector
External power supply cable connections:
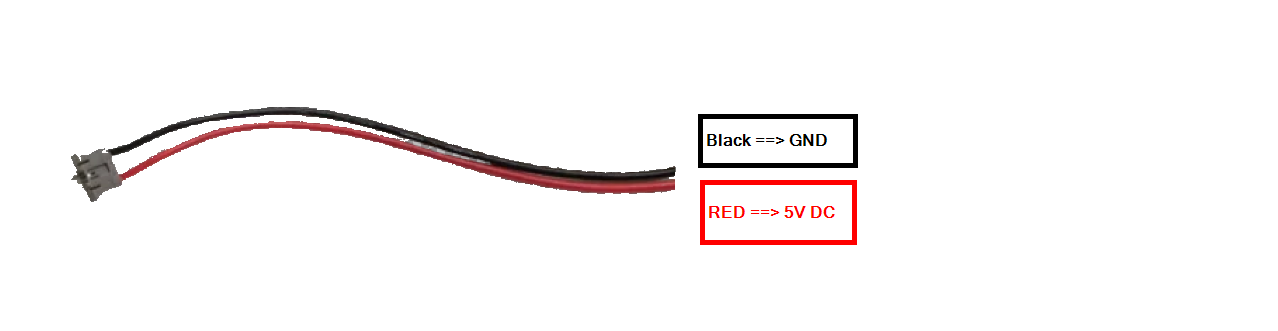 Figure 1: RAK13302 5 V supply selection
Power Selector Jumper (Only RAK13302 VC Board Version)
Click to view the power selection of the starter kit with the older RAk13302 VC board version.
The 3-pin jumper header is to select the supply source for the booster chip.
| Jumper Position | Supply Source |
|---|---|
| IN_5V to 5 V | Supply from WisBlock Base Board Battery |
| EX_5V to 5 V | Supply from Jx connector |
If the supply is through EX_5V, the whole WisBlock Base Board can be supplied through this source.
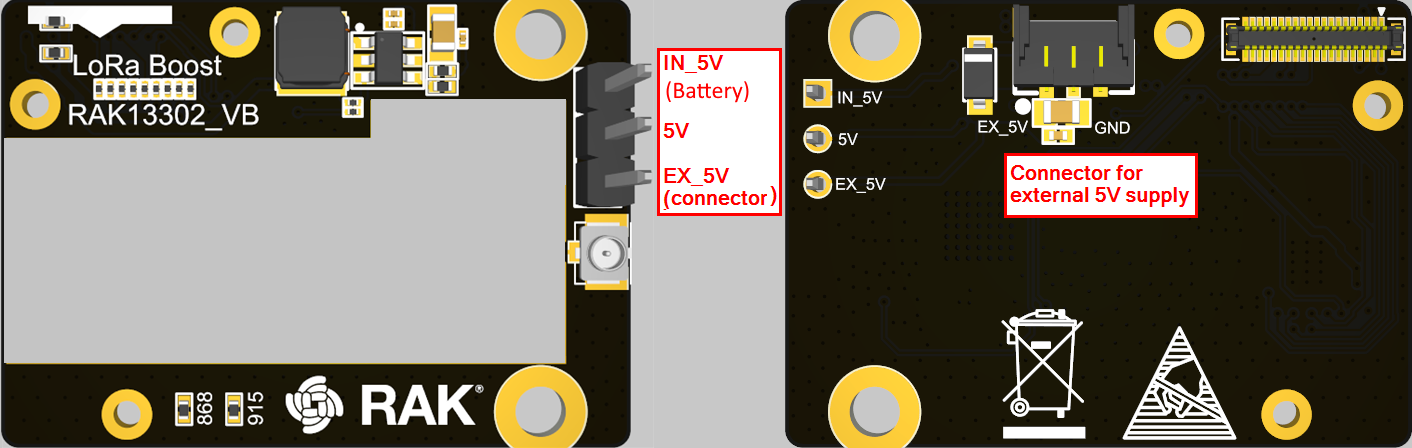 Figure 1: RAK13302 5 V supply selection
External power supply cable connections:
Figure 1: RAK13302 5 V supply selectionPower Supply Path
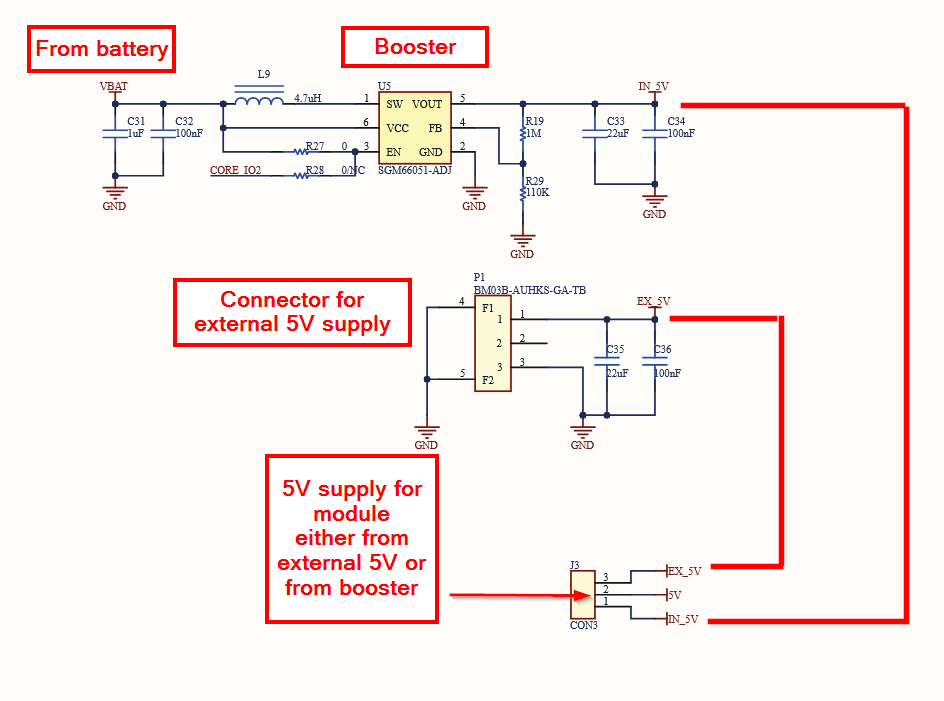 Figure 1: RAK13302 5 V supply selection
To ensure you are running the latest version of the Meshtastic firmware, download the latest Meshtastic firmware and upload it to your RAKwireless device to make it compatible with the Meshtastic network.
- All base boards with RAK3401 and the RAK13302 1 W (30 dBm) LoRa module use:
firmware-rak3401-1watt-w.x.yy.zzzzzzz.uf2
Prerequisite
Before going through each and every step on using Meshtastic Starter Kit, make sure to prepare the necessary items listed below:
Hardware
- One ( 1 ) WisBlock Base Board RAK19007
- One ( 1 ) WisBlock Core Module RAK3401
- One ( 1 ) WisBlock LoRa module RAK13302
- One ( 1 ) Wi-Fi/BLE PCB antenna
- One ( 1 ) 900 MHz LoRa PCB antenna
- One ( 1 ) USB cable
- One ( 1 ) IPEX to SMA cable for LoRa Antenna
- One ( 1 ) SMA Rubber LoRa Antenna
- Two ( 2 ) 5 V supply cable (same as used on WisBlock Audio Amplifier module)
- One ( 1 ) set of screws
Software
The WisBlock Core module of the Meshtastic Starter Kit comes pre-flashed with the Meshtastic firmware. However, to connect the device to the Meshtastic network, it must first be configured using one of several available applications:
Make sure that you have installed one of these applications, as they are required for the configuration of the Meshtastic network.
Product Configuration
Hardware Setup
RAK3401 Installation on the WisBlock Base Board
The Meshtastic High Power Booster Starter Kit comes with the RAK3401 module already assembled on the WisBlock Base board. The WisBlock Base provides a USB connection for programming the RAK3401. It also provides a power source and various interfaces to RAK3401 so that it can be connected to other WisBlock modules via different module slots.
In case you need to change the RAK3401 or install additional modules, this guide illustrates how the RAK3401 can be connected to RAK19007 WisBlock Base, as shown in Figure 1.
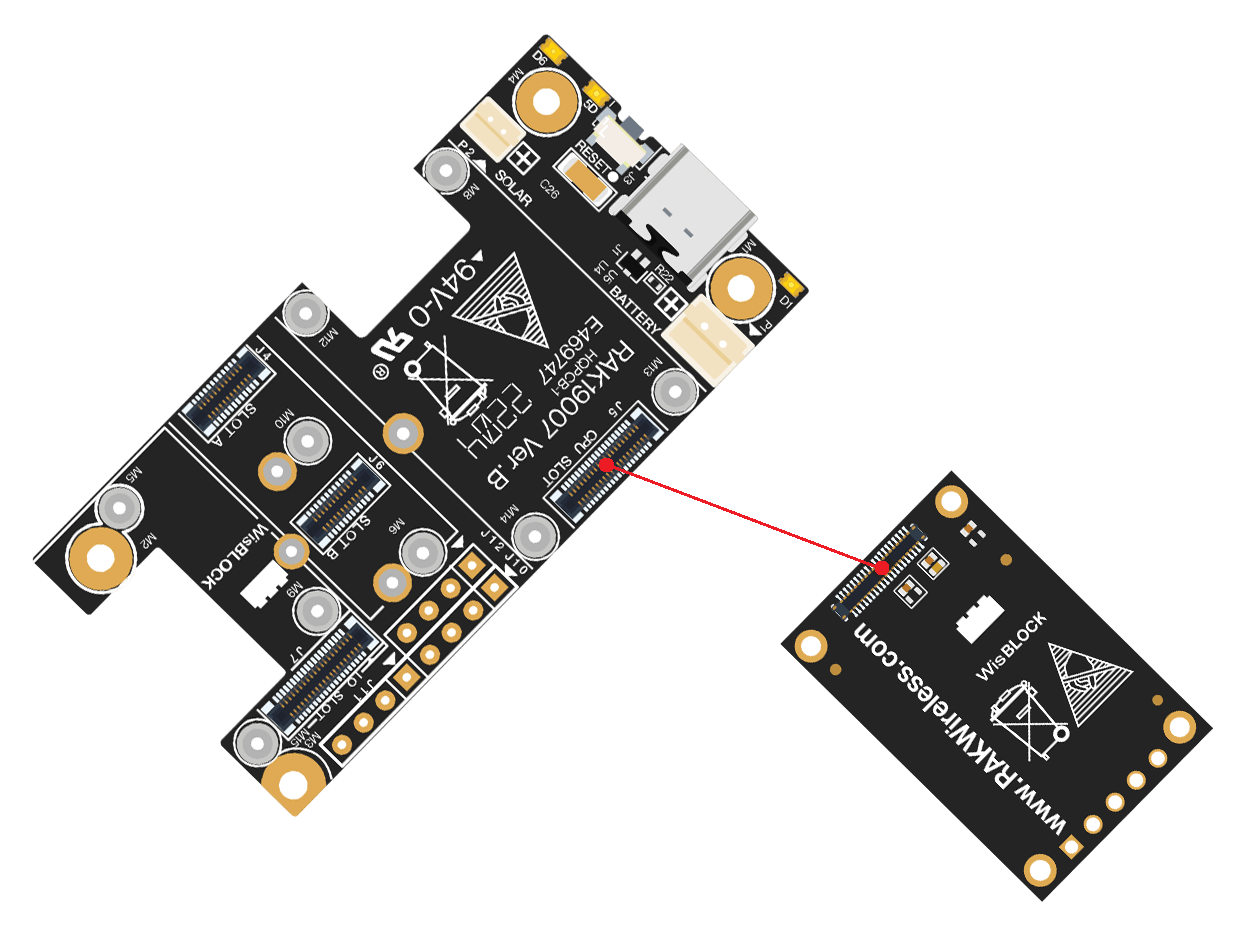 Figure 1: RAK3401 Connection to WisBlock Base RAK19007
- The RAK3401 can be assembled on other base boards in the same way.
- Assembly guides for additional modules are available in their respective Quick Start Guides.
Assemble WisBlock Modules
Figure 2 shows how to mount the RAK3401 module onto a WisBlock Base board (RAK19007). Follow the steps in the WisBlock module assembly/disassembly guide to ensure a secure connection. Once mounted, fasten the module with one or more M1.2x3 mm screws, depending on the module type.
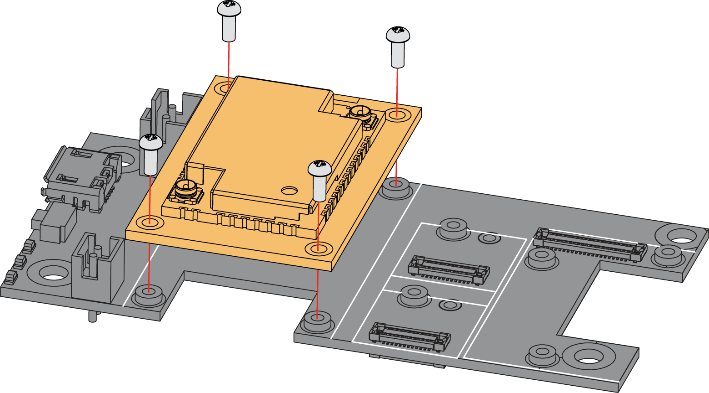 Figure 1: RAK3401 Mounting Sketch
Disassemble WisBlock Modules
The procedure in disassembling any type of WisBlock modules is the same.
- Start by removing the screws.
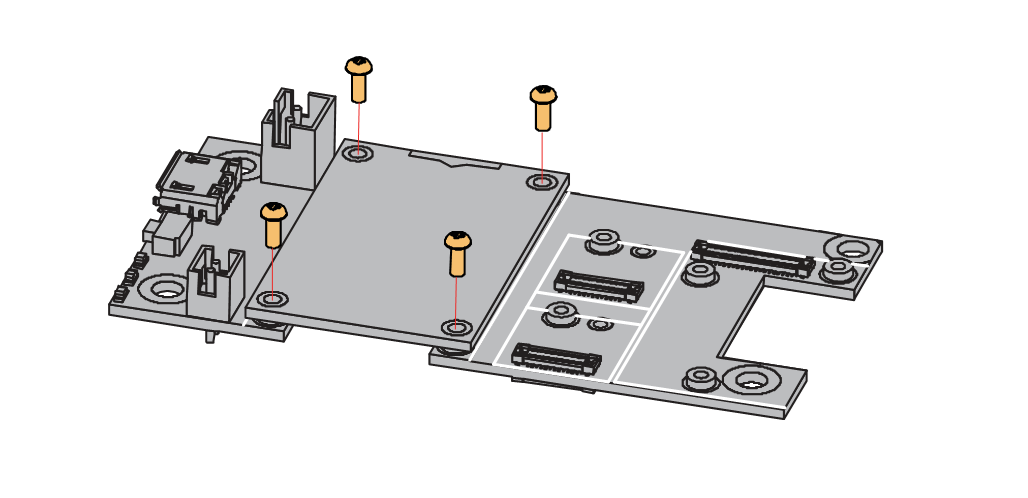 Figure 1: Removing screws from the WisBlock module
- Once the screws are removed, check the silkscreen of the module to find the correct location where force can be applied.
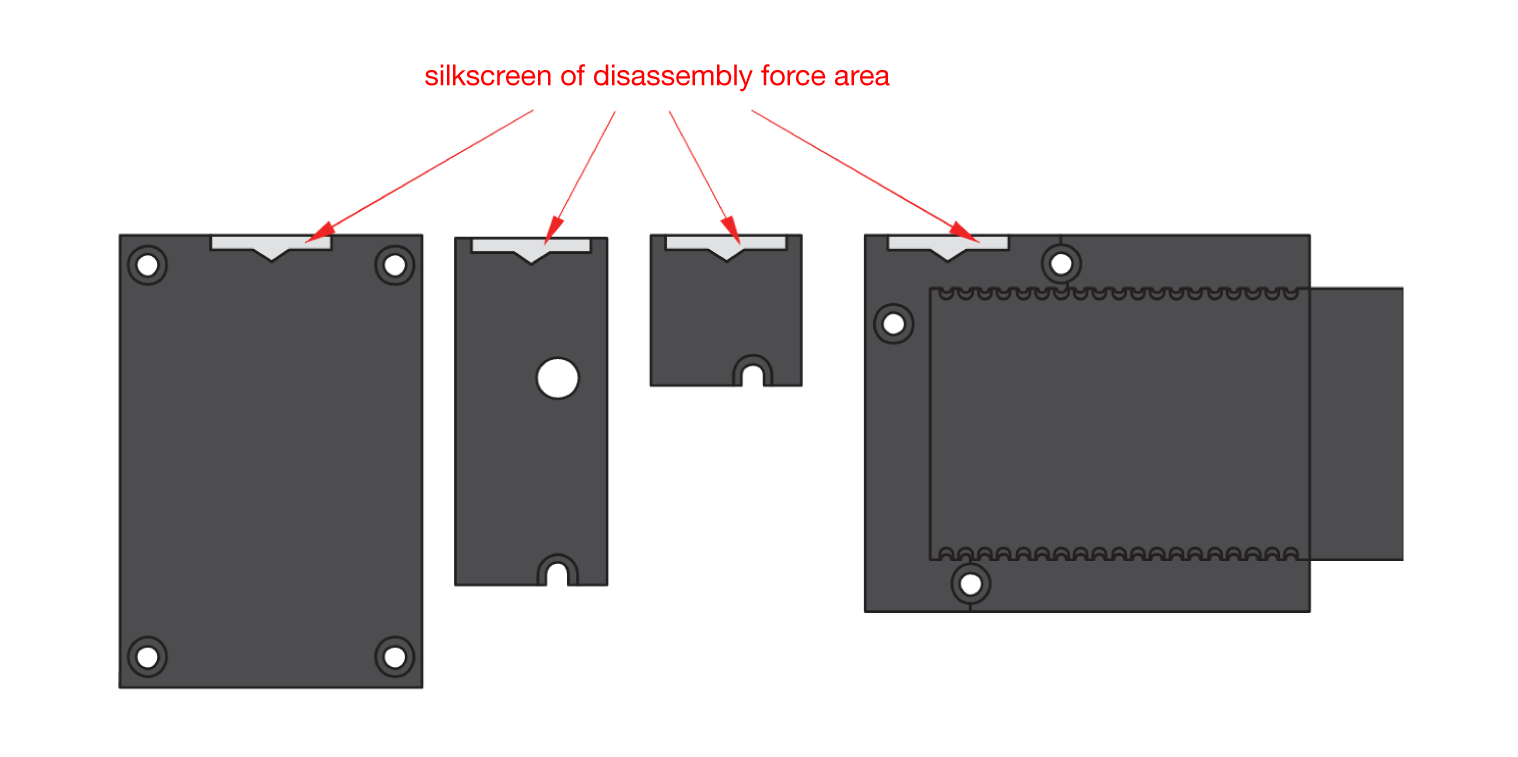 Figure 1: Detaching silkscreen on the WisBlock module
- Apply force to the module at the position of the connector, as shown in Figure 5, to detach the module from the base board.
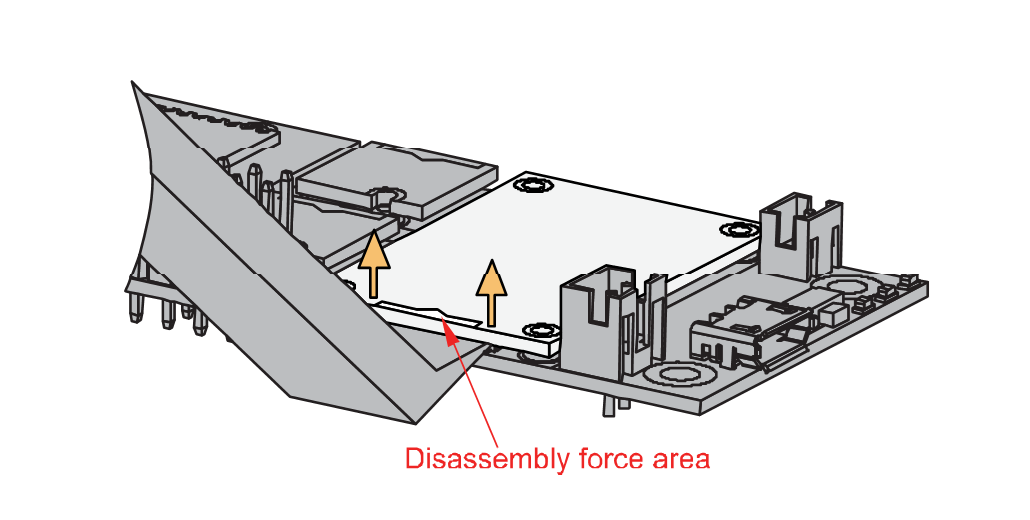 Figure 1: Applying even forces on the proper location of a WisBlock module
LoRa and BLE Antenna
Antennas are an essential part of the Meshtastic Starter Kit. The kit includes the following:
- LoRa Rubber Antenna: A 2 dBi rubber antenna with a SMA connector and an IPEX-to-SMA pigtail cable.
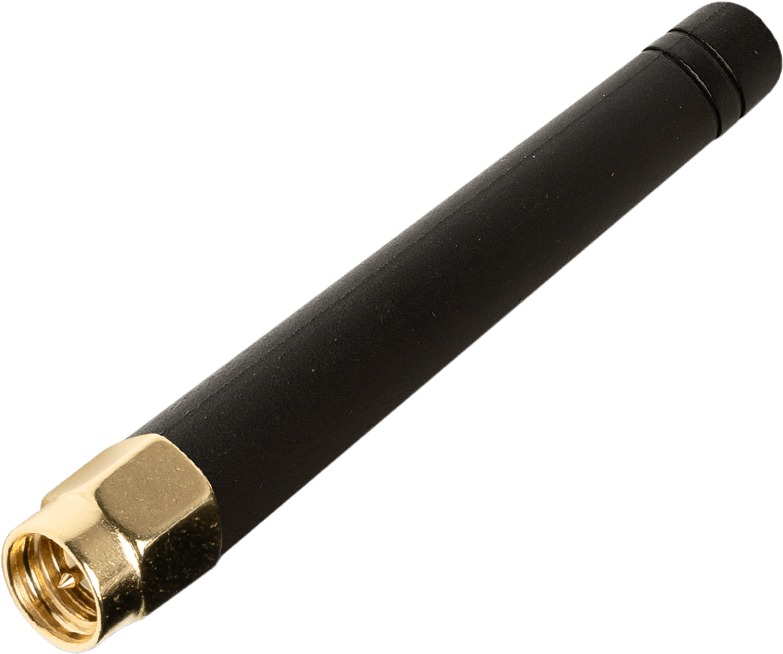 Figure 1: LoRa Rubber Antenna
Detailed information about the 2 dBi rubber antennas can be found on the antenna datasheet.
- LoRa PCB Antenna: A compact PCB antenna for LoRa.
 Figure 1: LoRa PCB Antenna
- Connect the LoRa antenna to the IPEX connector on the RAK13302 LoRa transceiver module.
- Detailed information about the LoRa antennas can be found in the 863-870 MHz antenna datasheet or the 902-928 MHz antenna datasheet.
- BLE PCB Antenna: A PCB antenna for Bluetooth Low Energy that connects directly to the RAK3401.
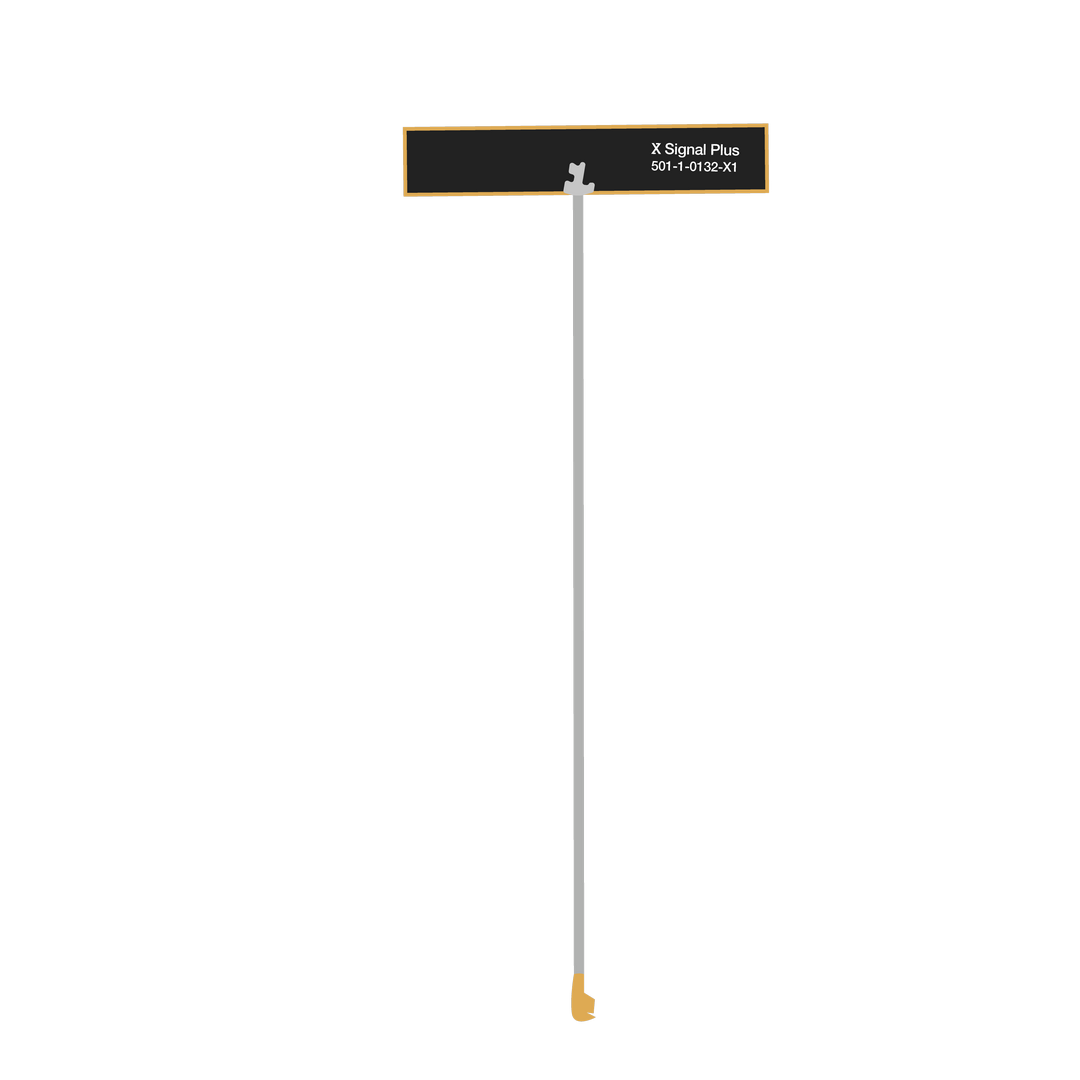 Figure 1: BLE PCB Antenna
- Never power the module without an antenna connected to the IPEX connector. Doing so may damage the RF section of the chip.
- Always ensure the correct antenna is attached when using LoRa or Bluetooth Low Energy transceivers.
Power Supply Variants (Only RAK13302 VD Board Version)
The Starter Kit with the RAK13302 version VD module has two hardware variants.
One hardware variant is only working with external 5 V power supply and the other one is only working with internal battery supply.
The different hardware versions are marked with different codes on the label.
The version for power supplied through the battery connected to the WisBlock Base Board has the code 001 on the label, and it has no connector for the external 5 V supply on the bottom of the PCB.
Figure 1: RAK13302 Wireless Module Battery Supply IndicationThe version for supply with an external 5 V supply has the code 002 on the label, and it has the connector for the external 5 V supply on the bottom of the PCB.
Figure 1: RAK13302 Wireless Module External 5V Supply IndicationIf the supply is through EX_5V, the whole WisBlock Base Board can be supplied through this source.
External 5V Supply Connection
The connector for the external 5 V supply is on the bottom of the module.
Figure 1: RAK13302 5 V supply connectorExternal power supply cable connections:
Figure 1: RAK13302 5 V supply selectionPower Selector Jumper (Only RAK13302 VC Board Version)
Click to view the power selection of the starter kit with the older RAk13302 VC board version.
The 3-pin jumper header is to select the supply source for the booster chip.
| Jumper Position | Supply Source |
|---|---|
| IN_5V to 5 V | Supply from WisBlock Base Board Battery |
| EX_5V to 5 V | Supply from Jx connector |
If the supply is through EX_5V, the whole WisBlock Base Board can be supplied through this source.
Figure 1: RAK13302 5 V supply selectionExternal power supply cable connections:
Figure 1: RAK13302 5 V supply selectionPower Supply Path
Figure 1: RAK13302 5 V supply selectionSoftware Setup
To ensure you are running the latest version of the Meshtastic firmware, download the latest Meshtastic firmware and upload it to your RAKwireless device to make it compatible with the Meshtastic network.
- All the base boards with RAK3401 -
firmware-rak3401-1watt-w.x.yy.zzzzzzz.uf2
The Meshtastic Starter Kits come pre-flashed with the Meshtastic firmware. If you encounter problems, update the Meshtastic firmware to the latest version.
- Guide to flash nRF52 devices. (link goes to Meshtastic.org)
For the setup of the Meshtastic Starter Kit for the Meshtastic network, follow the configuration guide in the Meshtastic documentation.
RAK3401 and WisBlock Base Boards
Detailed information can be found in the documentation for the different modules:


