Real IoT Kit Quick Start Guide
This guide covers all the steps needed to start using the Real IoT Kit and bundles. The kits are preconfigured, and minimal procedures are required to have a working IoT application.
In summary, there are only three steps to follow to have a working end-to-end Real IoT Kit.
- Power on the LoRaWAN gateway and connect it to the internet.
- Power on the end-device.
- Scan the QR code to generate a working IoT dashboard.
1. Gateway Setup
To initiate the Real IoT Kit setup, ensure that the gateway is online and connected to the LoRaWAN Network Server (LNS). By default, a successfully connected LoRaWAN gateway to the internet will have a blue LED indicator.
The LED indicator feature allows you to quickly determine the gateway's internet connection status by looking at it. If the LED indicator is not blue, the gateway is not connected to the internet and cannot transfer data from devices to the LNS.
When using an Ethernet connection or cellular connectivity via a SIM card, simply turn on your gateway and connect the LAN cable. Alternatively, insert the SIM card and wait for the LED to turn blue.
On the other hand, if you connect via WiFi, you need to follow the RAK7268V2 Quick Start Guide. This guide gives more details about your gateway, like the meaning of different LED color statuses.
Do not use the reset key to restore the factory settings of your gateway. If you do this, it will be disconnected from the LNS and will need to be reconfigured to its solutions kit factory settings.
Power On the Gateway
- Attach the LoRa Antenna via screwing it to the RP-SMA connector on the back panel of the RAK7268/C WisGate Edge Lite 2.
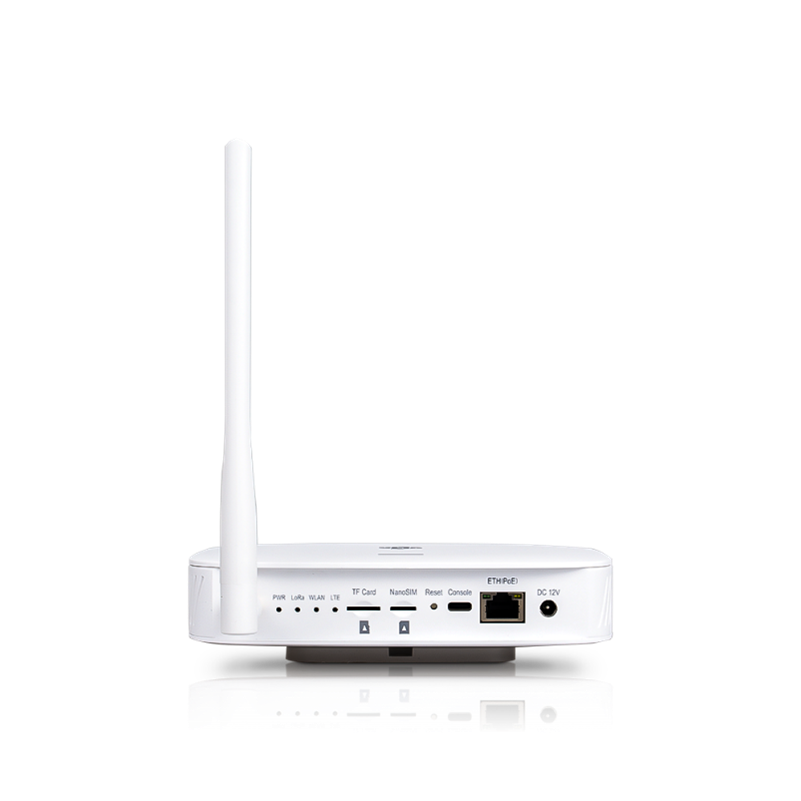 Figure 1: RAK7268V2 with attached LoRa antenna
Do not power the device if the LoRa Antenna port has been left open to avoid potential damage to the RAK7268/RAK7268C WisGate Edge.
- Connect the Ethernet cable to the port marked ETH on the gateway and the other end to the router. After the ethernet connection, you can now connect the AC power adapter to the gateway and plug it to the power source.
For more advance setup, you can configure the gateway on its portal if your PC is connected on the same LAN network where your gateway is connected.
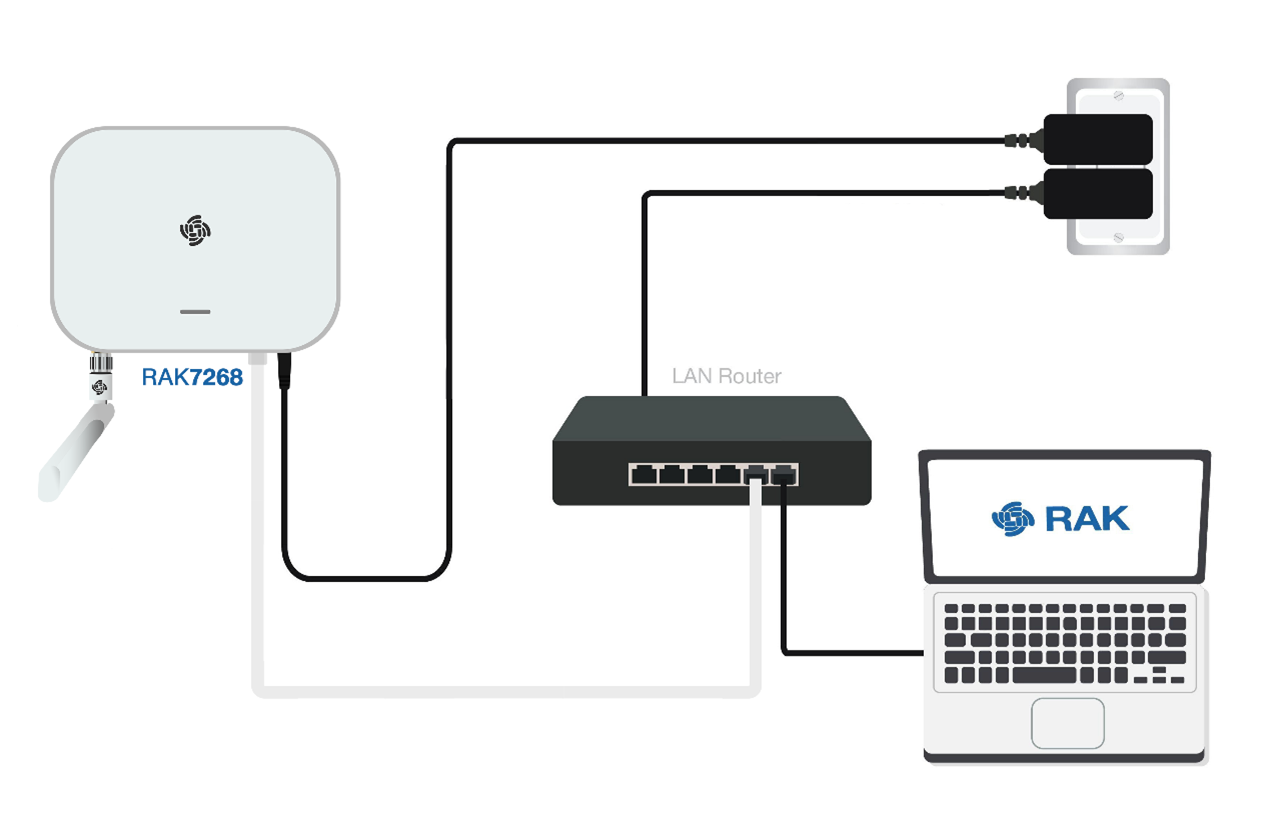 Figure 1: RAK7268V2 Ethernet and AC power connection
2. Power On the Device
After configuring the gateway and ensuring its internet connectivity, you can proceed with powering on the device that is included in your Real IoT Kit.
The guide differs depending on the type of device included in your kit. Some devices are battery-powered, so they require careful mounting with consideration of the battery polarity.
In addition, deployment and installation considerations are also included in the specific documentation of these devices.
A table of documentation is provided so you can easily access the documentation of your specific device.
How to activate devices is also shown on the next sections. If you have no advance setting needed, you can just activate the device and start using it. However, if more advance configuration is needed you can find the complete details on the device specific user guide.
Device Documentation
| Device | Description | Documentation | |
|---|---|---|---|
| NB300-TH | Indoor Air Quality Sensor | Datasheet | User Manual |
| NB308/AM308 | Indoor Air Quality Sensor | Datasheet | User Manual |
Sample: Enable Milesight Devices
Milesight devices are not enabled once you receive it. You need to use a smartphone with NFC feature and download/install the Milesight Toolbox app from Google Playstore or Apple App Store to enable Milesight devices.
- Enable the NFC of the smartphone and open the Milesight Toolbox App. Place the smartphone in front of the sensor so it can detect the NFC then click the NFC Read. If you see a Ready to Scan image, you can move away the smartphone and put it back again to trigger the NFC.
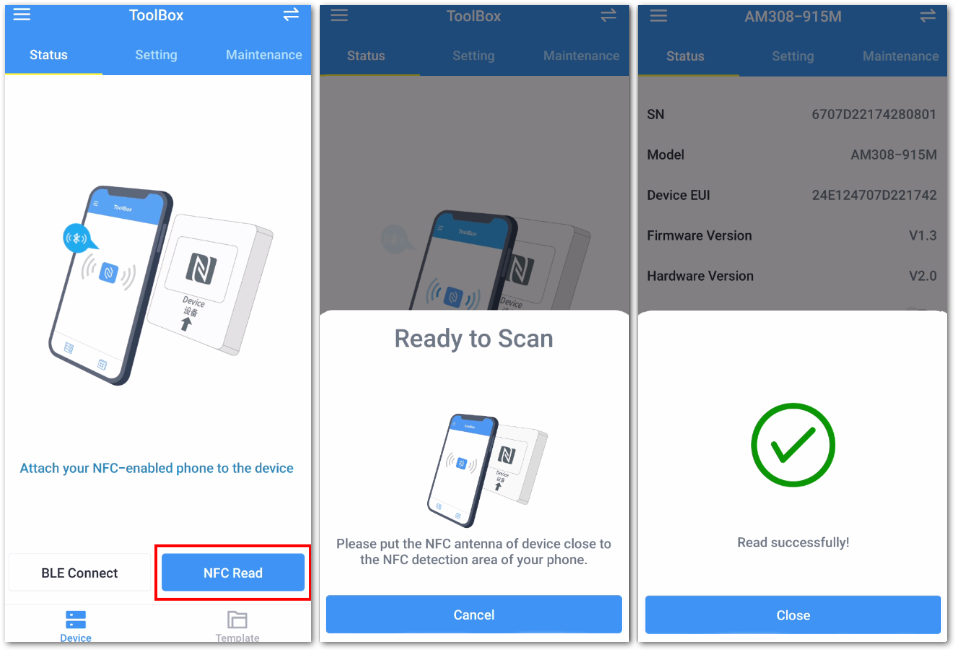 Figure 1: Milesight Toolbox NFC Connection
If it doesn't respond, you can try to turn on and off the NFC function of the smartphone and try again. In addition, the position of the smartphone and the device is important. It must be very close to the device NFC section. You can slowly move the device left-right and up-down to determine the trigger area.
- After successful connection, you should be able to see the front screen where you can enable the device via the Device Status button switch. Enable it and scan/trigger the NFC again with NFC Read button.
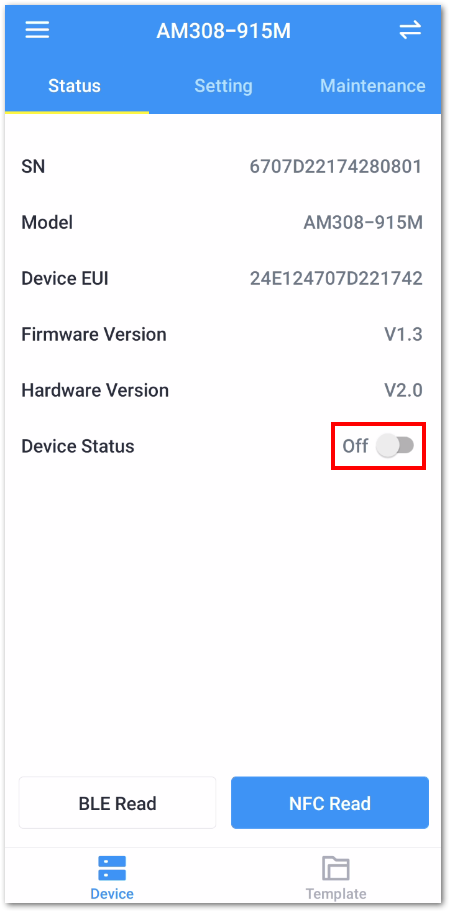 Figure 1: Device Status Activation
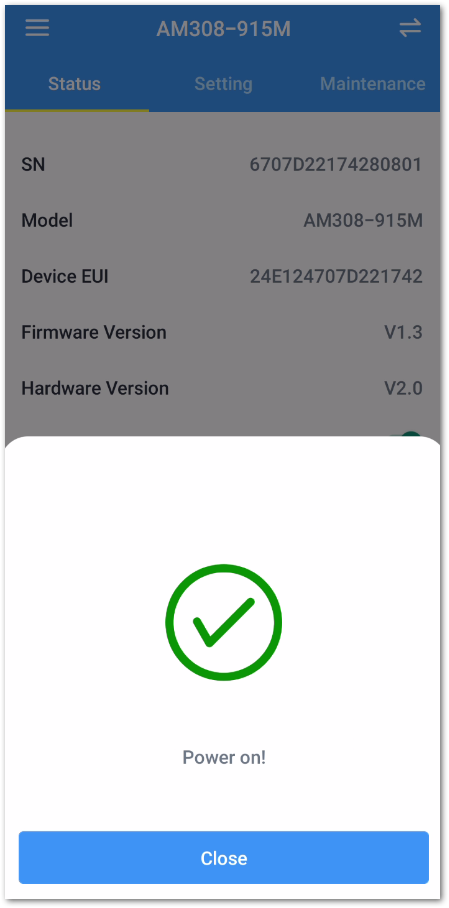 Figure 1: Device Successfully Activated
- If activation is successful, you should be able to see display on the device (if it has display) and dashboard update in few minutes.
Mounting instructions varies in each device. It is recommended to check the device specific users guide
If you want full ownership and access to your device you need to claim the device to your own Datacake account.
3. Device Dashboard Visualization
Datacake App
After powering up the device, download and install the Datacake App on your smartphone. Both Android and iOS are supported.
 Figure 1: Datacake on Android
 Figure 1: Datacake on iOS
When you open the App, the Datacake logo will show momentarily then proceed on the list of demo dashboards. You can have a glance at these dashboards to have an idea of how the widgets look.
The Datacake App can be used without registration or creation of any account.
Dashboard Creation
To enable the dashboard of your device, scan the QR code on the device. You also need to get the claim code under the QR code to create a custom dashboard, notifications, and alerts later.
Follow the steps below for the dashboard creation:
- To create a dashboard, click on the + (plus) icon located on the upper right to proceed with adding your device dashboard.
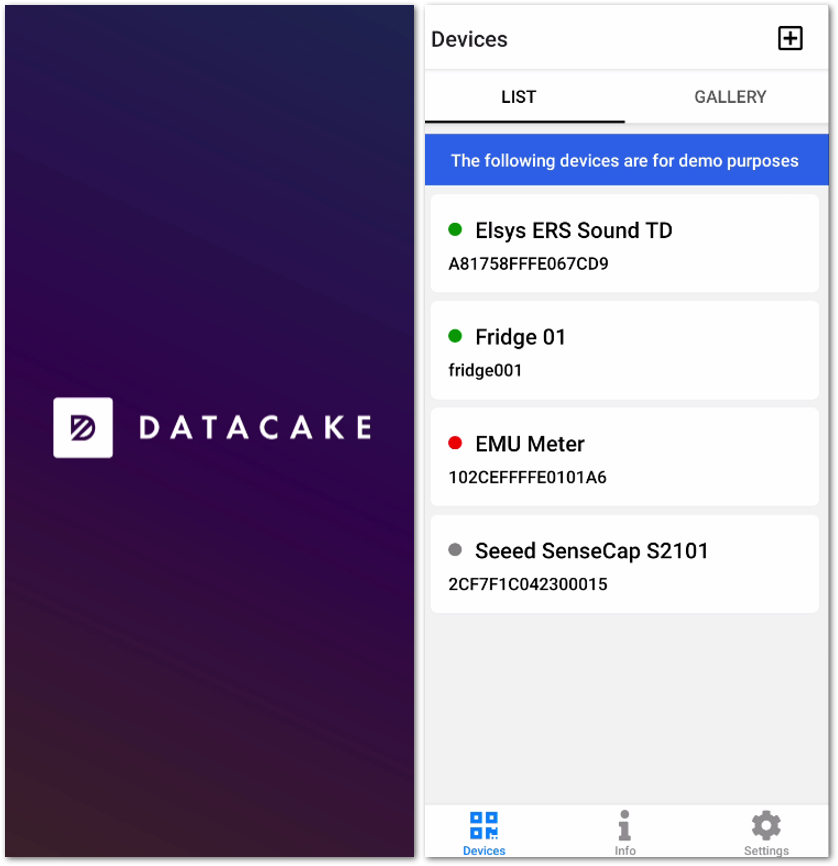 Figure 1: Adding device dashboard
- Click the Scan QR Code button. It will open the camera of your phone, which allows you to capture the QR code. This step might require permission on your smartphone to access the camera. Get your device, locate the QR code, then scan it.
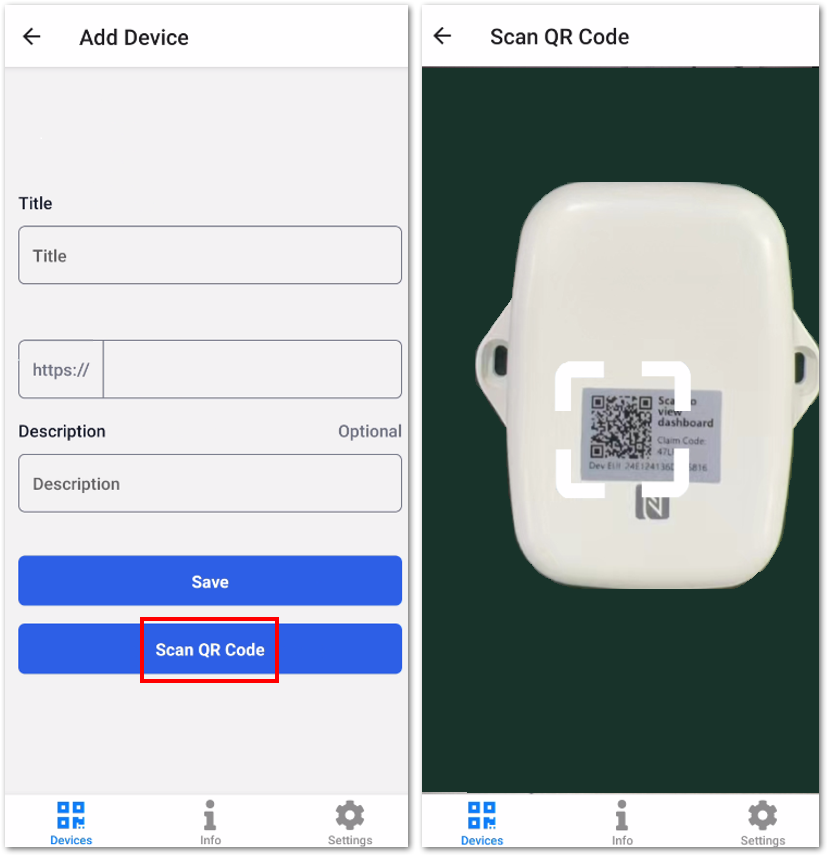 Figure 1: Scanning QR
- After a successful QR code scan, you will be given quick access to the page with the necessary information. You can change the Title field, which corresponds to the name of the device.
If you do not set a custom title, it will use the default Title. It is recommended to modify the Title because it allows you to quickly identify specific device dashboards on the App.
In addition, you can also create a useful description of the function and purpose of the device.
- After finalizing the details, you can now click Save.
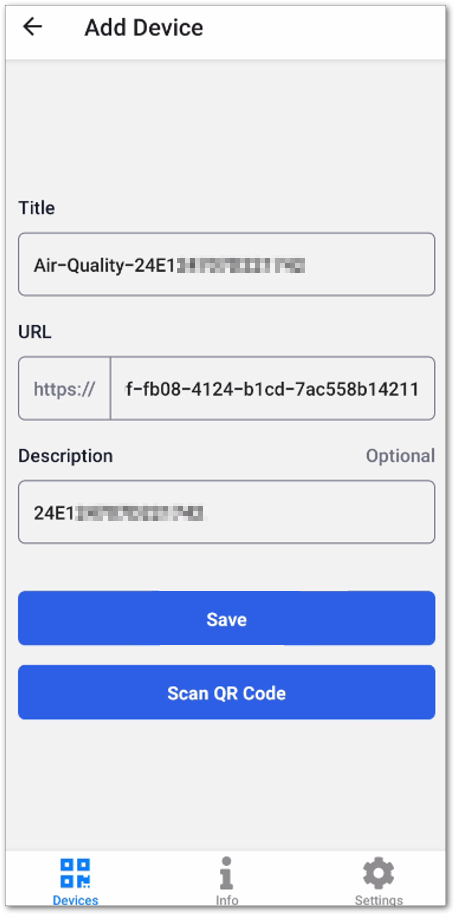 Figure 1: Saving dashboard on the Datacake App
- Once done saving the information, the main view of devices will be updated. The demo dashboards will be removed, and you will see two different views of the dashboards available named LIST and GALLERY. You can choose the suitable interface for your application.
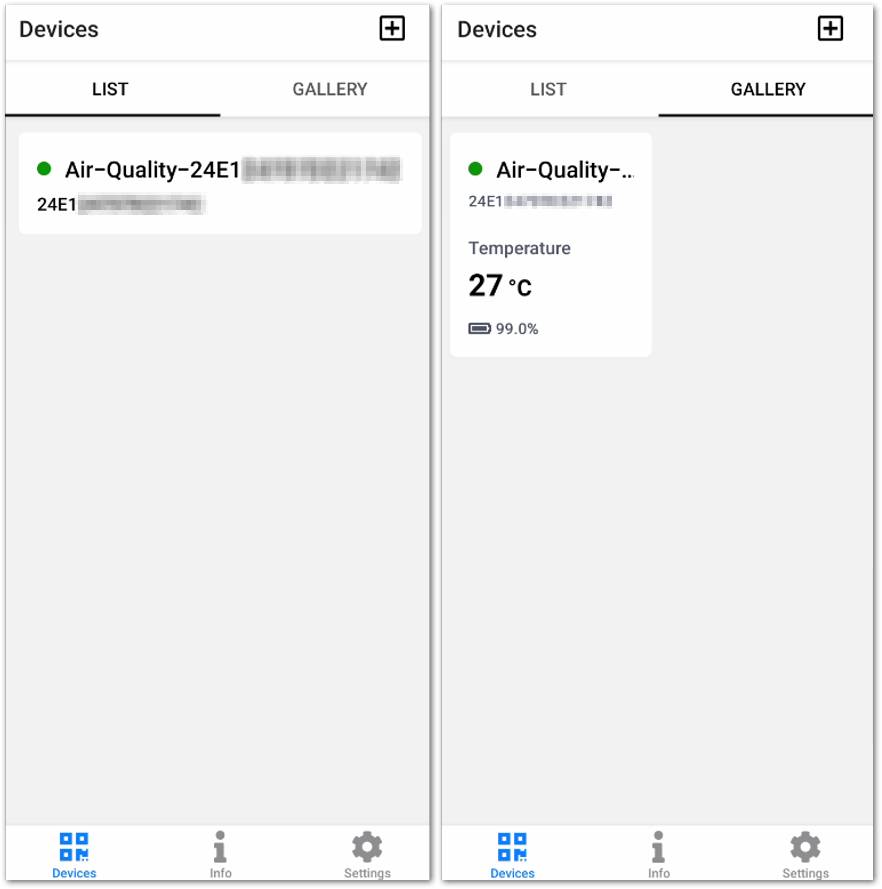 Figure 1: Device added on Datacake App
- At this point, the dashboard is now ready for viewing and already saved in your application.
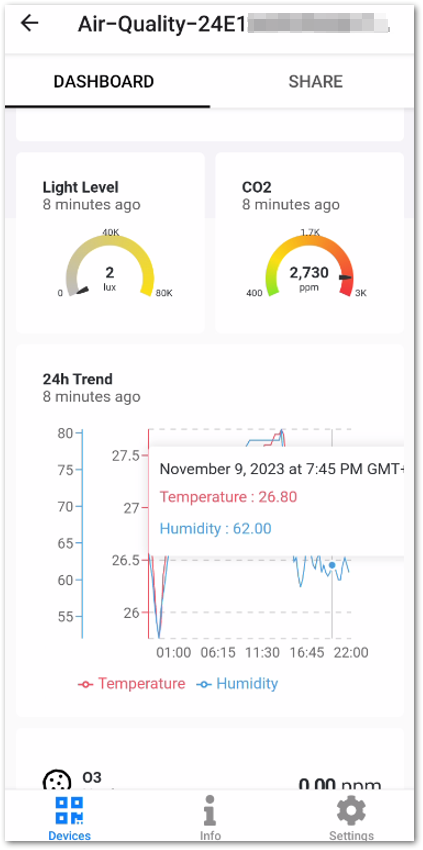 Figure 1: Dashboard ready on the App
FAQs
Why No Data is Showing in the Dashboard?
The device uplinks data to the LoRaWAN Network Server every few minutes. You have to wait for this uplink period before data is shown on the dashboard.
You can also check the LoRaWAN Gateway if you are online. The LED on the gateway should be blue. Otherwise, there is no connection to the internet. There are three possible reasons:
- The ethernet cable is disconnected.
- The SIM card is already out of data connectivity.
- WiFi is down, especially since the gateway connects to an access point.
In the deployment aspect, it is crucial to ensure that the external antenna of the gateway and the device are properly attached. Failure to do so could cause degradation of the RF signal leading to the failure of uplink packets.
Additionally, it is important to consider the area and placement of the device. If it is mounted in an area where the LoRaWAN gateway cannot reach, such as a location too far away or has many walls and blockages, it can cause attenuation of the signal.
You can check for possible issues on the Datacake platform by going to its status page Datacake Status. You can see if there is downtime on the platform or if issues are being solved.
How to Claim the Device to Your Account?
Before mounting and deploying the device in its final location, it is recommended to first claim the device using your Datacake account. By doing this, you will be able to access the device and customize its default dashboard, as well as create useful reports, alerts, and notifications. While this step is optional, failing to claim the device will prevent you from accessing these features.
When claiming the device, you need to enter the claim code. It may be difficult to access the printed claim code if the device has already been installed.
To claim your device, follow the steps outlined below:
- Go to RAKwireless-Datacake site, then click Create Account.
If you have a Datacake account already, you can use your account's login credentials, then proceed to Step 3.
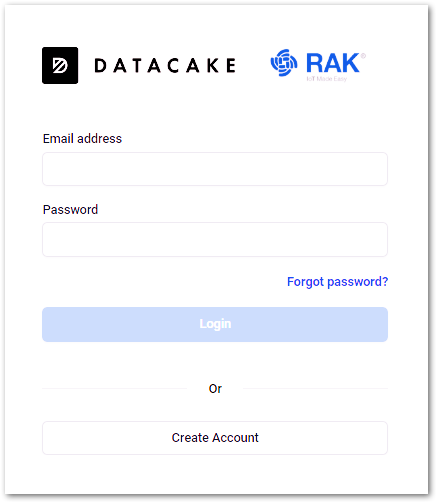 Figure 1: RAKwireless-Datacake login page
- Input the necessary information and agree to the terms and conditions, then click Create Account. Once the account is created, log in and go to your RAKwireless-Datacake account.
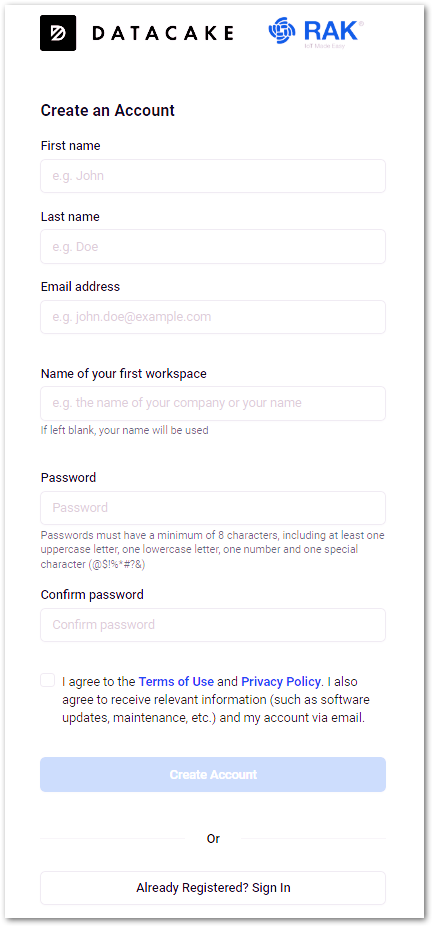 Figure 1: Creation of account
- Once logged in, start the claiming process by clicking + Add Device and then Pincode Claiming.
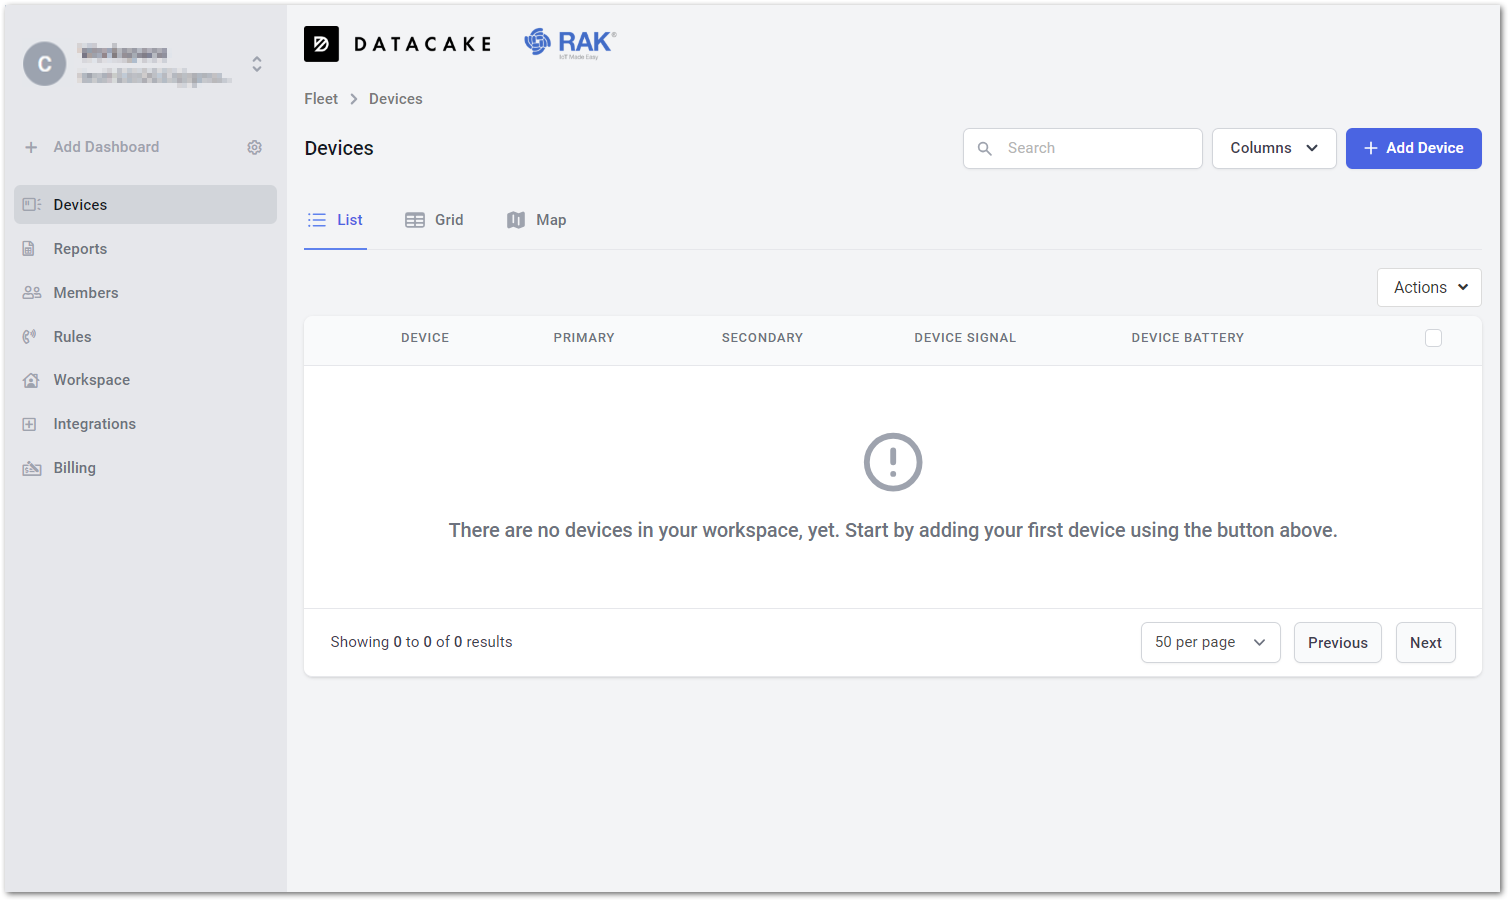 Figure 1: Add device to claim
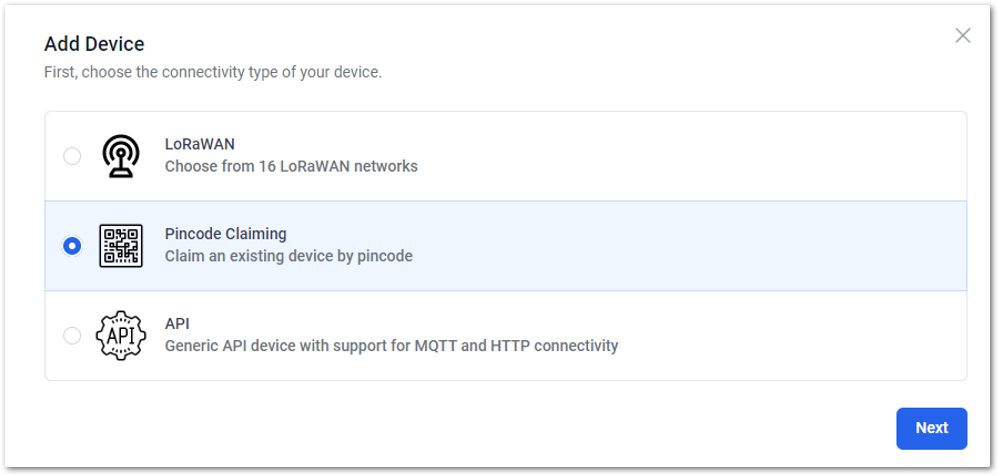 Figure 1: PIN code claiming
- Input the Serial Number which is the DEVEUI of your device as well as the Claiming Code, then click on Add Device to Workplace.
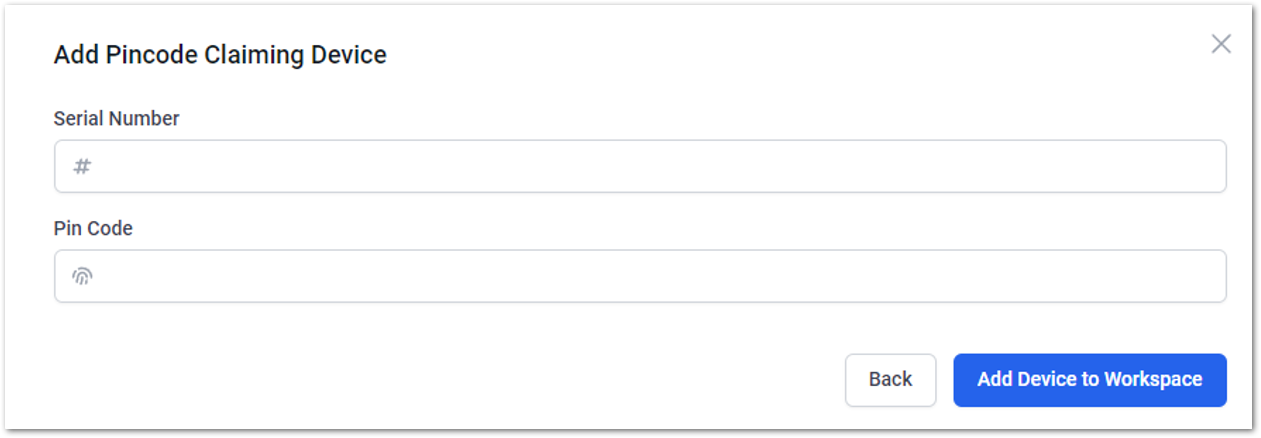 Figure 1: Input DEVEUI as Serial number, then claim code in device sticker
How to Create Reports and Alerts via Rules?
- To generate reports, go to the Reports tab and click + Add Report. It redirects you to the page where you can configure the reports you need.
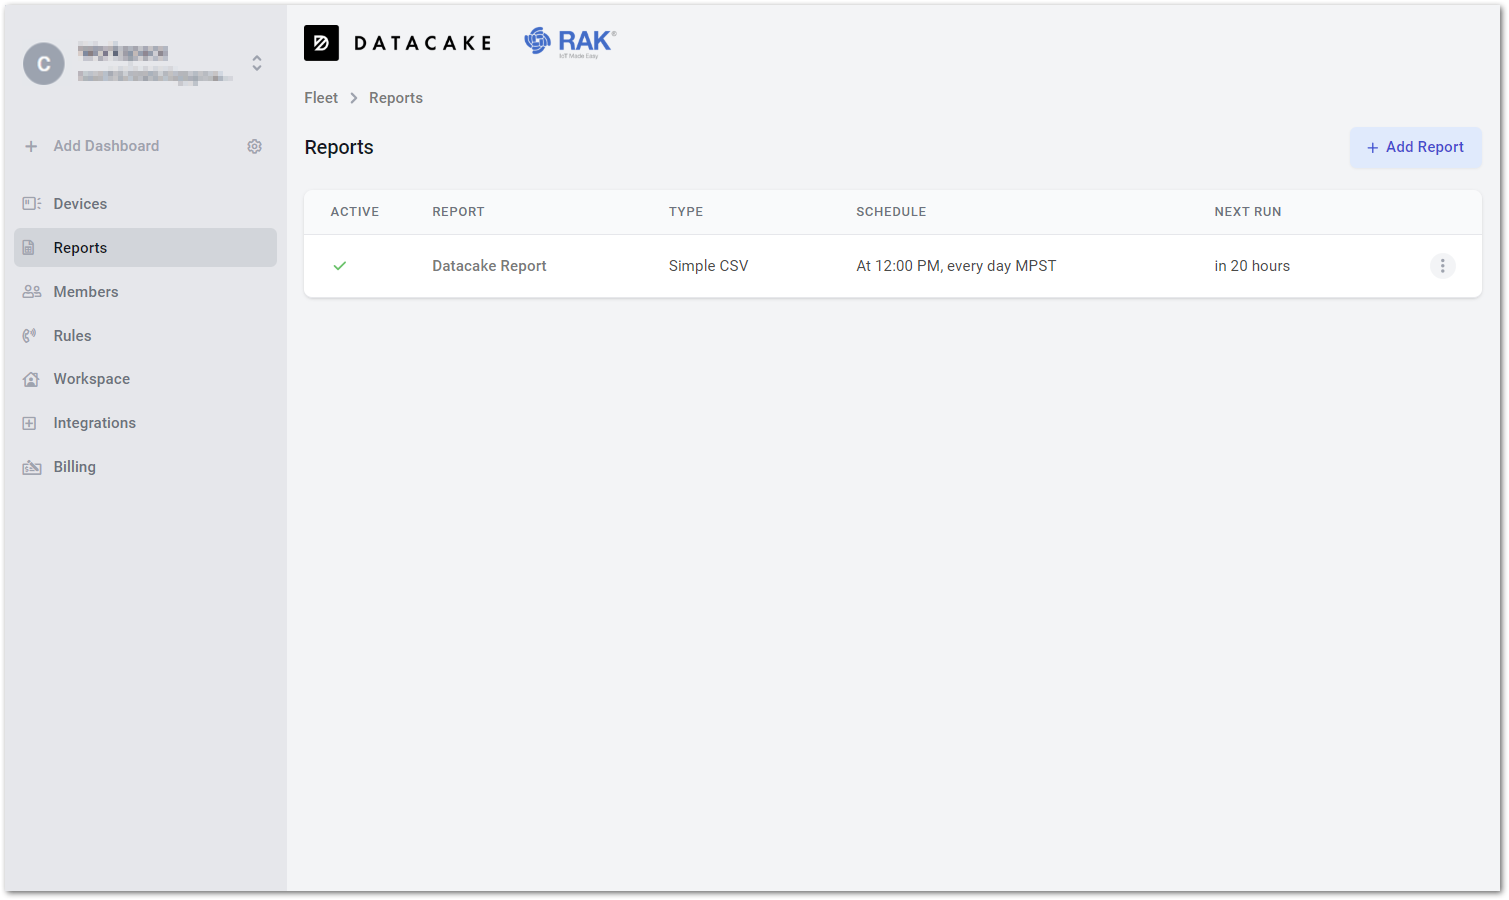 Figure 1: Reports feature of Datacake
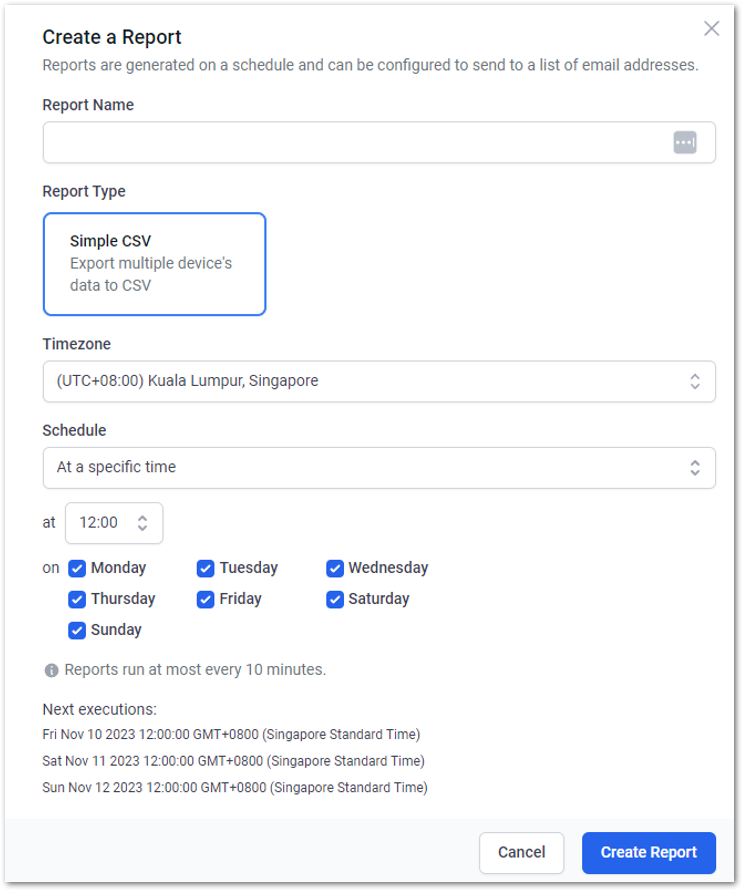 Figure 1: Reports setting and configuration
- For notifications and alerts, go to the Rules tab and click on + Add Rule. You can create a descriptive name for this notification and set the condition.
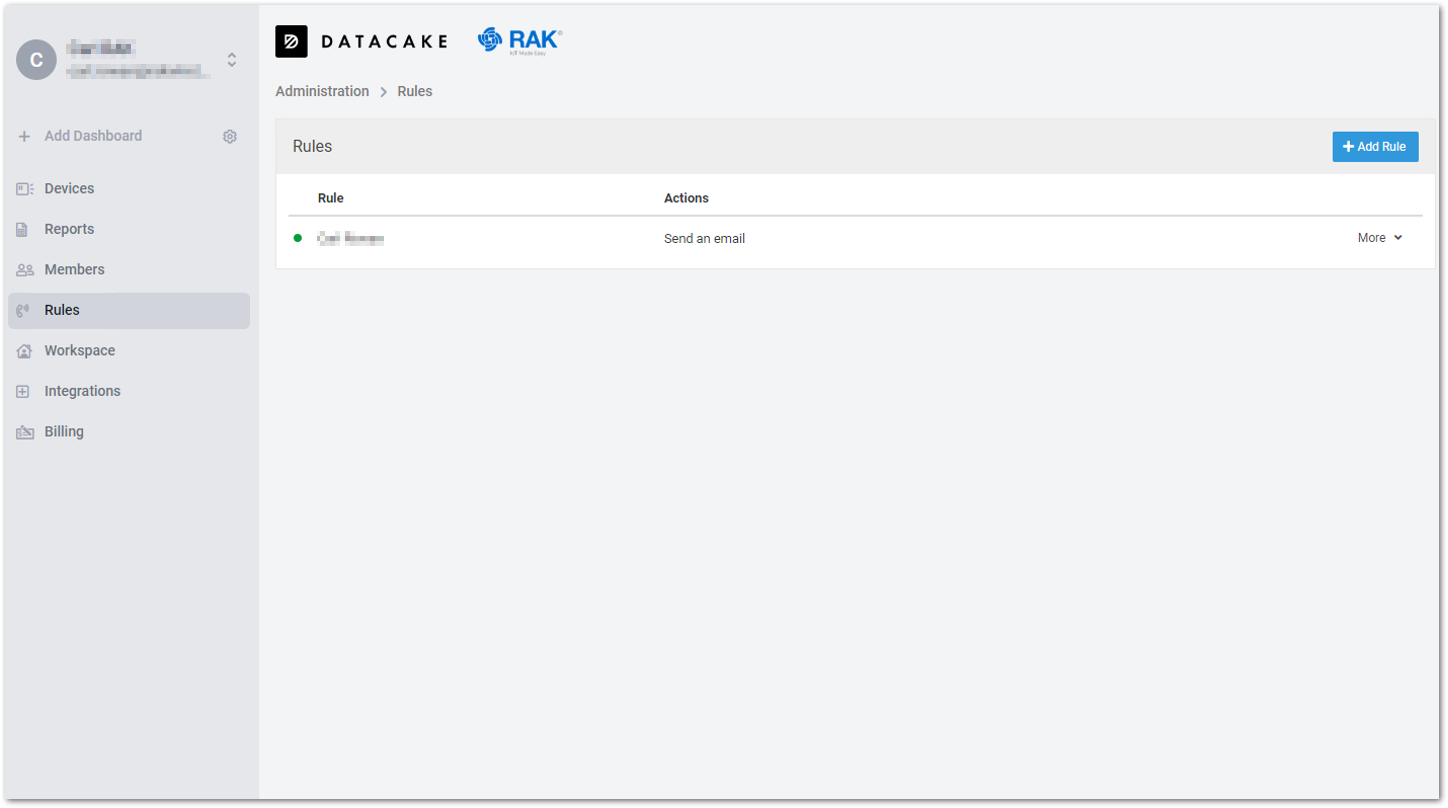 Figure 1: Rules and conditional alerts
- When the condition is met, it sends a notification via email or SMS. Also, you can perform automatic actions via webhook or downlink process.
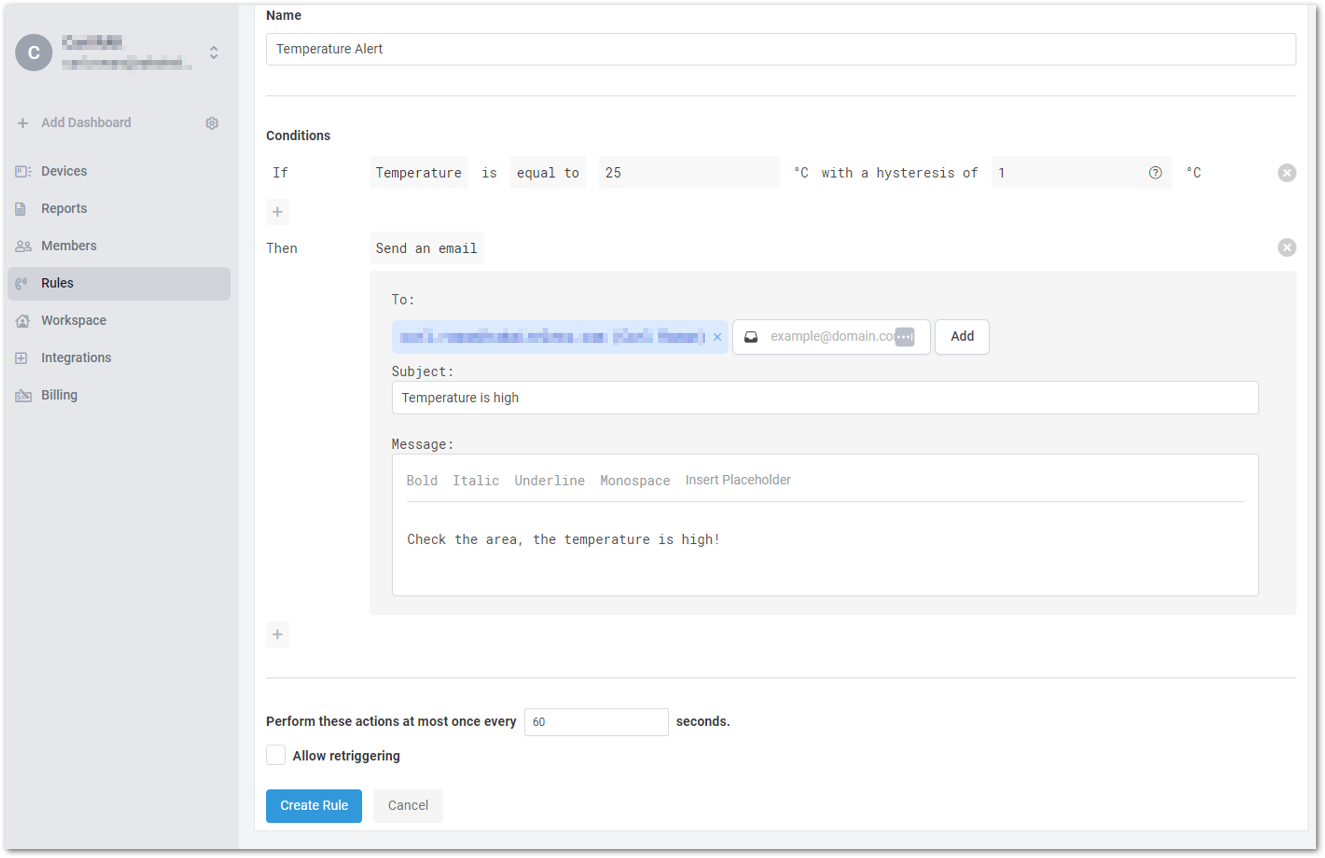 Figure 1: Rules and alert configuration
How to Upgrade Datacake License?
- To upgrade your license for longer data retention and dedicated support, go to the device you want to upgrade the plan.
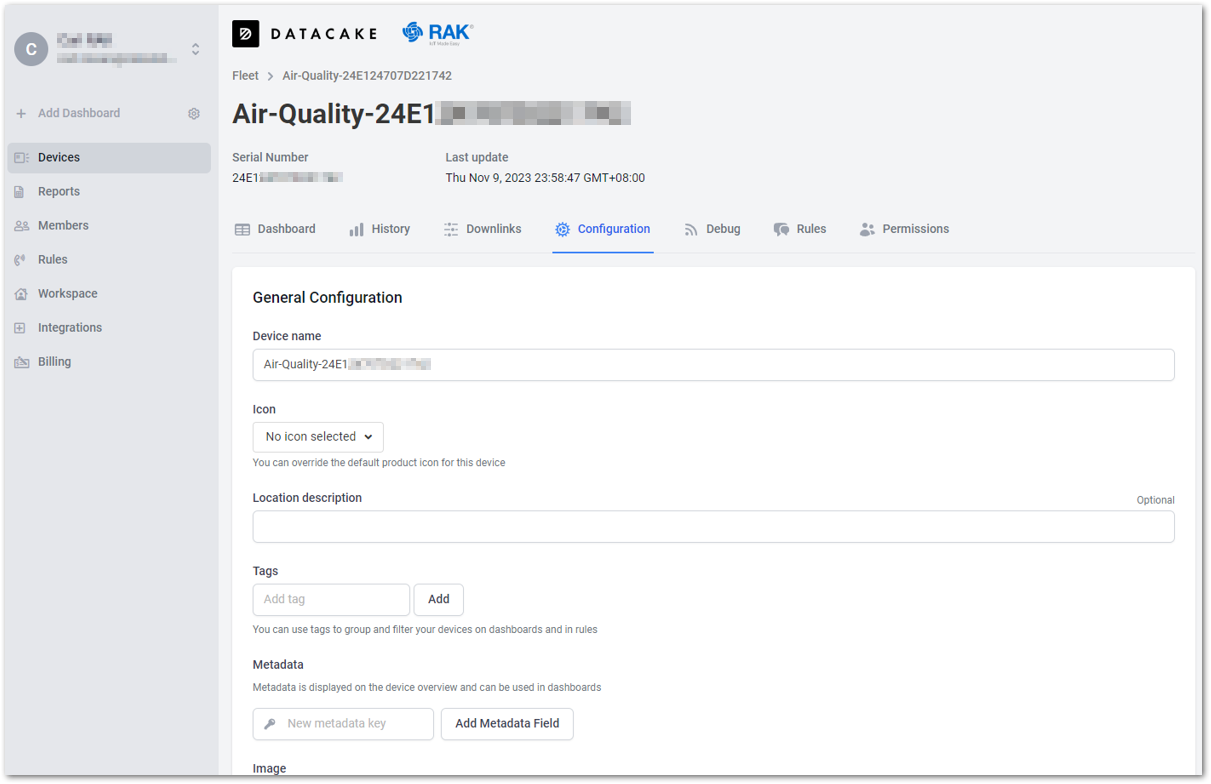 Figure 1: Device configuration for the purchase of a license
- Scroll down to the bottom until you see Device Plan under Danger Zone, then click on Change Plan. It opens a new window where you can select the plan and payment method to upgrade it.
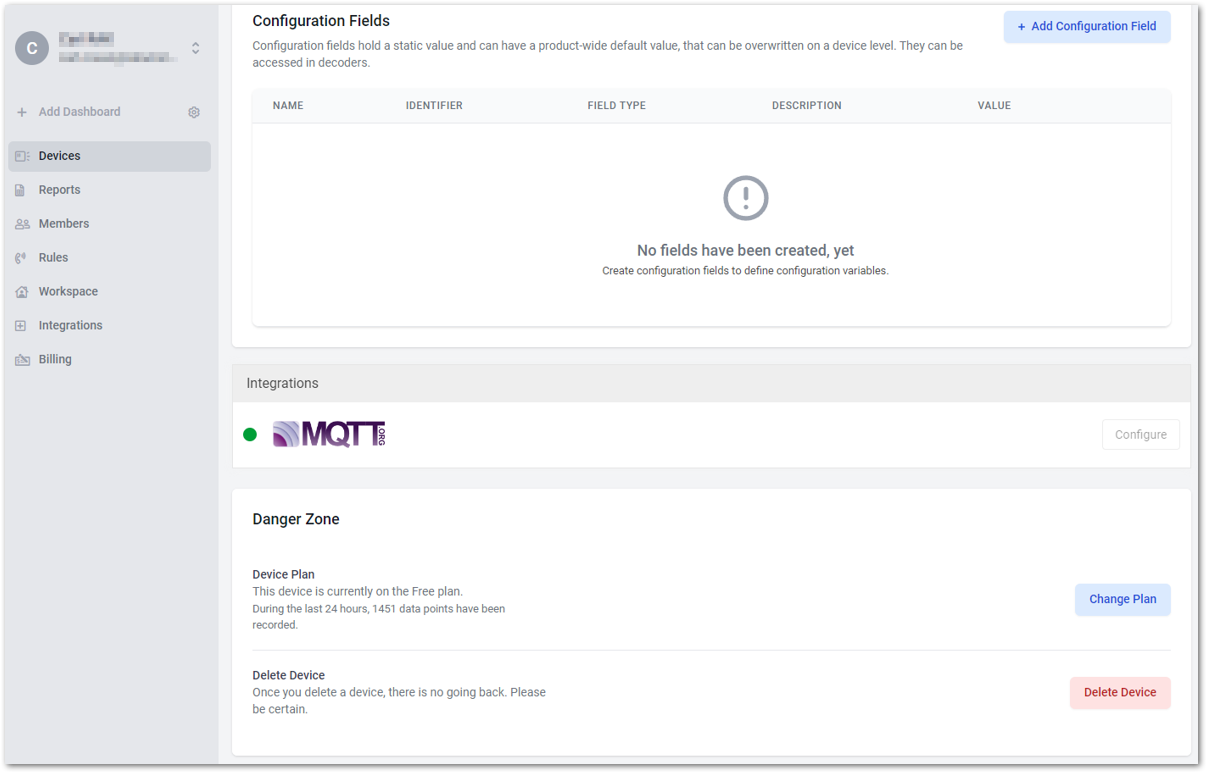 Figure 1: Device configuration for the purchase of a license
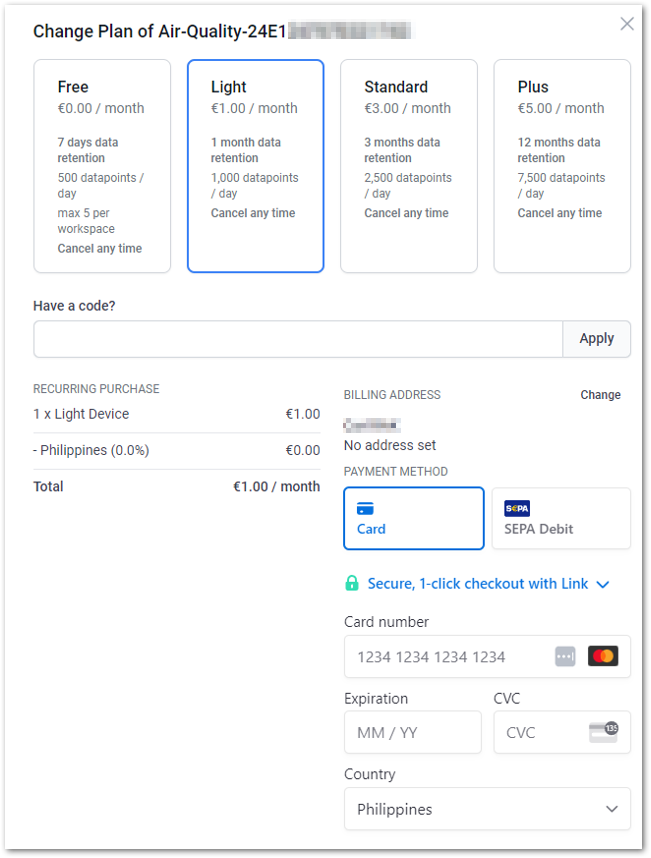 Figure 1: Device configuration for the purchase of a license