Miromico Miro EdgeCard mioty® Management
Overview
mioty is a low-power wide-area network (LPWAN) radio protocol designed for IoT applications. It uses the telegram splitting technology, which divides the message into multiple sub-packets. These sub-packets are sent using error-correcting codes in a set time and frequency pattern, making the transmission resistant to interference and packet collisions. Its main use case is large-scale, high-density deployments, such as those in smart cities.
RAKwireless aims to simplify IoT by making connectivity solutions, including mioty, easily accessible. Consequently, RAKwireless has recently become a member of the Mioty Alliance.
The WisGate Connect for mioty is RAKwireless' first mioty-enabled product, built on the Miromico Miro EdgeCard for mioty and the WisGate Connect platform. Designed for system integrators, it is the ideal platform to get started with mioty and deploy multi-protocol solutions, supporting a variety of IoT protocols on a single device.
 Figure 1: WisGate Connect for mioty
Solution Features
The WisGate Connect for mioty is a CM4-based device with three (3) Mini PCIe slots and one (1) M.2 slot to support multiple radio protocols. All available slots have USB 2.0/3.0 connectivity, SPI bus (Mini PCIe slots #1 and #2), and PCIe (Mini PCIe slot #3 and M.2 slot). This enables many different IoT connectivity solutions, including both LoRaWAN and mioty coverage with a 4G or 5G backhaul.
With three external USB 2.0/3.0 ports, HDMI output, a 2.5 Gb Ethernet port, and a 1 Gb Ethernet port (supporting PoE), the WisGate Connect enables seamless connectivity to multiple peripherals. Additionally, it features two slots for WisBlock modules, allowing connection to industrial devices via RS485, Modbus, CAN bus, and both analog and digital ports.
Furthermore, the power of the CM4 module is more than enough to deploy edge solutions, providing robust processing capabilities for demanding IoT applications, making the WisGate Connect an ideal solution for advanced edge computing and connectivity needs.
Focusing on the mioty compatibility, the WisGate Connect for mioty includes a Miromico Miro EdgeCard for mioty. This is a mini PCIe form factor System-on-Module (SoM), running a full Linux distro with the embedded and licensed mioty base station software.
In order to use the Miro EdgeCard for mioty with the WisGate Connect, some configuration is required on the host. Fortunately, the mioty-cli tool is available to help with the configuration. This tool is included in the latest versions of RAKPiOS but it is also available as a standalone solution. It handles the following setup, which we will be explored in more detail throughout this document:
- Connection configuration
- Firewall settings to enable routing
- mioty base station configuration
Install and Update the mioty-cli
One of the tools included with the latest versions of RAKPiOS (version 0.9.1 and above) is the mioty command line interface or mioty-cli. This tool allows you to easily configure the OS to route the packets from the Miro EdgeCard to the mioty backend, configure the base station and also retrieve basic information about the status of the card.
The mioty-cli tool is available to anyone, you can check the code and submit issues and fixes to the public repository: https://github.com/RAKWireless/mioty-cli.
- To check if you have the mioty-cli tool installed, run this command:
rak@rakpios:~$ mioty-cli version
The current version you are using will be displayed.
mioty CLI utility v0.2.3
- If you have the mioty-cli tool installed, skip step 2.
- If you get an error instead, it mean that you have install the tool.
- Install the
mioty-cliusing this command:
rak@rakpios:~$ curl https://raw.githubusercontent.com/RAKWireless/mioty-cli/master/mioty-cli -sSf | bash -s -- install
It will download and install the latest version.
Installing mioty CLI v0.2.3
To update your tool to the latest version, run this command:
rak@rakpios:~$ mioty-cli update
You will then be informed that it's already in the latest version.
mioty CLI is up to date
Use mioty-cli
The mioty-cli tools will let you easily set up and configure your device and the Miro EdgeCard to connect to the mioty backend with ease. When you run mioty-cli, it will show you the various commands available:
rak@rakpios:~$ mioty-cli
Expected outcome (mioty-cli command list):
mioty CLI
Utility to configure and manage Miromico's Miro EdgeCard for mioty board.

Host configuration:

  mioty-cli setup                --> setups connection and firewall rules
  mioty-cli remove               --> deletes connection
  mioty-cli up                   --> brings up connection to edge card
  mioty-cli down                 --> brings down connection to edge card

Edge card configuration:

  mioty-cli start                --> starts base station
  mioty-cli stop                 --> stops base station
  mioty-cli restart              --> restarts base station
  mioty-cli enable               --> enables base station on boot by default
  mioty-cli disable              --> disables base station on boot by default
  mioty-cli getall               --> gets params from builtin base station
  mioty-cli set <param> <value>  --> sets a param of the builtin base station
  mioty-cli cert <file>          --> pushes a certificate file to card
  mioty-cli reset                --> resets base station params to factory values
  mioty-cli ssh                  --> ssh to the EdgeCard
  mioty-cli dashboard            --> create tunnel to access EdgCard dashboard
  mioty-cli credentials          --> shows default credentials based on...

Tool management:

  mioty-cli version              --> show the currest script version
  mioty-cli install              --> installs tool to user path
  mioty-cli update               --> updates tool to the latest version
You will be able to see that the various commands are split into three (3) groups:
- Host configuration
- Edge card configuration
- Tool management (for more details, refer to Install and Update the
mioty-cli)
The next sections will focus on the first two groups—Host configuration and Edge card configuration.
Create and Bring Up the Network Connection
The Host configuration commands in the mioty-cli tool enable you to configure the connection to the Miro EdgeCard, manage firewall settings, and set up routing, ensuring seamless communication with the remote mioty backend. Use this command:
rak@rakpios:~$ mioty-cli setup
The outcome may vary slightly from the example, as the connection ID generated will be unique. Additionally, it may prompt you for the sudo password, as root privileges are required to establish the connection.
Setting up connection and firewall rules

[sudo] password for rak: *****

Connection 'mioty' (a205f647-9df9-486c-9444-b340d567df7b) successfully added.
Connection successfully activated (D-Bus active path: /org/freedesktop/NetworkManager/ActiveConnection/8)
The mioty-cli tool uses a Network Manager in the background to manage connections. The default network management service it uses in Debian. You can find the connection with this command:
rak@rakpios:~$ nmcli c
You will be able to see the active connections, one of them being your newly created mioty connection.
NAME                UUID                                  TYPE      DEVICE
Wired connection 1  631c4c05-fef2-3ed1-b2c7-72c52ab32bca  ethernet  eth0
lo                  5d01c541-459b-47bb-b18d-90154fadbc42  loopback  lo
mioty               a205f647-9df9-486c-9444-b340d567df7b  ethernet  eth2
Wired connection 3  def4ec7f-f26c-3827-81e0-e5b972619c14  ethernet  eth3
docker0             21d17c70-5b59-4640-aa0d-d062d9b92c7d  bridge    docker0
Wired connection 2  e9f8466f-2c2a-3135-b522-4764946f5ad0  ethernet  --
Provision the Base Station
Your base station might be pre-provisioned on Loriot. Loriot is a platform provider that offers both LoRaWAN and mioty backends.
Check the Preprovisioned base stations section in the Annexes. This section outlines the process for provisioning your base station on Loriot, if it has not already been provisioned. To provision your base station on Loriot, follow these steps:
1. Create a Loriot Account
Create a new account in the Loriot EU3 cluster site, the one with support for mioty. Then, log in.
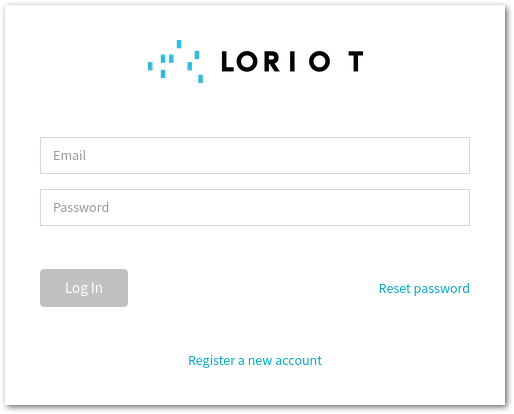 Figure 1: Loriot login page
2. Create a Network
Under Networks, click on the New mioty Network option on the left menu. Enter a name and an optional location.
3. Retrieve a Unique Base Station ID
- In your WisGate Connect, run this mioty-cli tool command:
rak@rakpios:~$ mioty-cli getall
The built-in base station parameter will be shown similarly to the one below:
Base station parameters

uniqueBaseStationId : 9C-65-F9-FF-FE-55-44-33
baseStationName     : miro Edge mioty
baseStationVendor   : Miromico
baseStationModel    : EDGE-GW-MY-868
serviceCenterAddr   : eu3.loriot.io
serviceCenterPort   : 727
tlsAuthRequired     : true
profile             : eu1
- Take note of the uniqueBaseStationId, check if the serviceCenterAddr is set to eu3.loriot.io, and ensure the serviceCenterPort is 727.
4. Create a Base Station on Loriot
- Go back to Loriot dashboard on your computer and click the Add Base Station button on the network page.
 Figure 1: Add base station to Loriot
- Add the unique ID you retrieved from the device to the Base Station EUI field without the slashes. Optionally, add a location and click create.
5. Retrieve Credentials from Loriot
- Navigate to the Certificate option on the left menu of the base station page.
- Retrieve these three files:
root_ca.cer: root certificate from Loriot (this is common to all base stations on Loriot)bstation.cer: base station certificate (specific to this base station)bstation.key: base station certificate key (specific to this base station)
- Download the TLS CA Certificate you can see on the Certificate page and save it as root_ca.cer.
- Generate a TLS certificate and a TLS key by clicking on the Generate TLS Certificate button. Download them both as
bstation.cerandbstation.keyrespectively.
6. Save the Credentials on the EdgeCard
- Copy the three files to the WisGate Connect. You can use scp (Secure Copy Protocol), for instance.
- From the WisGate Connect, push the certificates to the EdgeCard using the
mioty-cli cert <file>command:
rak@rakpios:~$ mioty-cli cert root_ca.cer
rak@rakpios:~$ mioty-cli cert bstation.cer
rak@rakpios:~$ mioty-cli cert bstation.key
Start/Restart the Base Station Service
Once the Miro EdgeCard for mioty is provisioned, connecting it to Loriot mioty backend using the mioty-cli tool will be easy.
The base station commands in mioty-cli allow you to manage the process on the EdgeCard, which is responsible for parsing and forwarding the MIOTY packets it receives. Use this command to start:
rak@rakpios:~$ mioty-cli start
The base station will then start to boot.
Starting base station
You also have the option to stop it (stop), restart it (restart), enable it to start at boot (enable), or disable it from starting at boot (disable).
Local Monitoring
Once the connection and firewall are set on the host and the service is running on the EdgeCard, you should be connected. The best way to monitor the connection is by using the embedded dashboard in the EdgeCard. This dashboard is accessible on port 8080 on the card, but if you are connected to the WisGate Connect from another machine, which is usual, you can expose it to the host by running this command:
rak@rakpios:~$ mioty-cli dashboard
A message displaying dashboard access instructions will appear. Open the URL in your browser.
Access dashboard on http://192.168.1.96:8888 once the tunnel is created

root@mioty-bsm:~#
You will be redirected to your local Base Station dashboard.
 Figure 1: Base station local dashboard
The mioty-cli uses an ssh tunnel to the EdgeCard forwarding the specific port. The dashboard will be accessible on the given URL as long as the connection is established. Press Ctrl+D to quit the connection and shut down the tunnel.
Loriot Monitoring
- Go back to Loriot to check your base station.
- Navigate to Networks and, under mioty Networks, click on the name of the existing network. The existing network(s) will be displayed.
- Click on the name corresponding to your base station's EUI. You will be redirected to a page displaying live data and a PING button (if the connection is established correctly).
 Figure 1: Loriot gateway dashboard
If you have a sensor (provided it has already been provisioned; otherwise, you will need to provision it first), you can check its status under Applications by clicking on the application name under mioty Applications. There you will have your sensors listed under End Points.
 Figure 1: Loriot end-point dashboard
Summary
The mioty-cli tool has many commands, some of them are not even covered here, but the basic commands to set up the connection with the Miro EdgeCard board are as follows:
- setup: set ups the connection and firewall rules
rak@rakpios:~$ mioty-cli setup
Expected outcome:
Setting up connection and firewall rules

[sudo] password for rak: *****

Connection 'mioty' (a205f647-9df9-486c-9444-b340d567df7b) successfully added.
Connection successfully activated (D-Bus active path: /org/freedesktop/NetworkManager/ActiveConnection/8)
- start: starts the base station
rak@rakpios:~$ mioty-cli start
Expected outcome:
Starting base station
- enable: enables the base station on boot by default
rak@rakpios:~$ mioty-cli enable
Expected outcome:
Enabling base station on boot
With these three (3) commands you will have a mioty gateway up and running and the connection to the mioty backend will be reestablished across reboots.
Annexes
Preprovisioned Base Stations
The base station might come pre-provisioned by Miromico on Loriot. If that is the case, you will not be able to create a new base station with the same unique ID. Instead, you will have to log in to Loriot with the default credentials generated by Miromico.
- Open a browser on your PC and visit Loriot EU3 cluster site. You will be prompted with a login page.
 Figure 1: Loriot login page
The Miro EdgeCard comes with a pre-provisioned username and password based on the base station's EUI. You can use the mioty-cli tool to find the credentials using this command:
rak@rakpios:~$ mioty-cli credentials
The default credentials with then be displayed.
Default credentials (mind these might have changed)

Service center : https://eu3.loriot.io
Username       : pockit+5cc7a1@miromico.io
Password       : a125cc_B347a1
- If you change the default credentials on the Loriot dashboard, they will be no longer valid. The mioty-cli tool or the EdgeCard will not know they have been changed.
- If you have not changed the credentials but you cannot log in, your base station may not be preprovisioned. In this case, return to the Provision the Base Station section and follow the steps to provision it.