WisDM User Manual
Overview
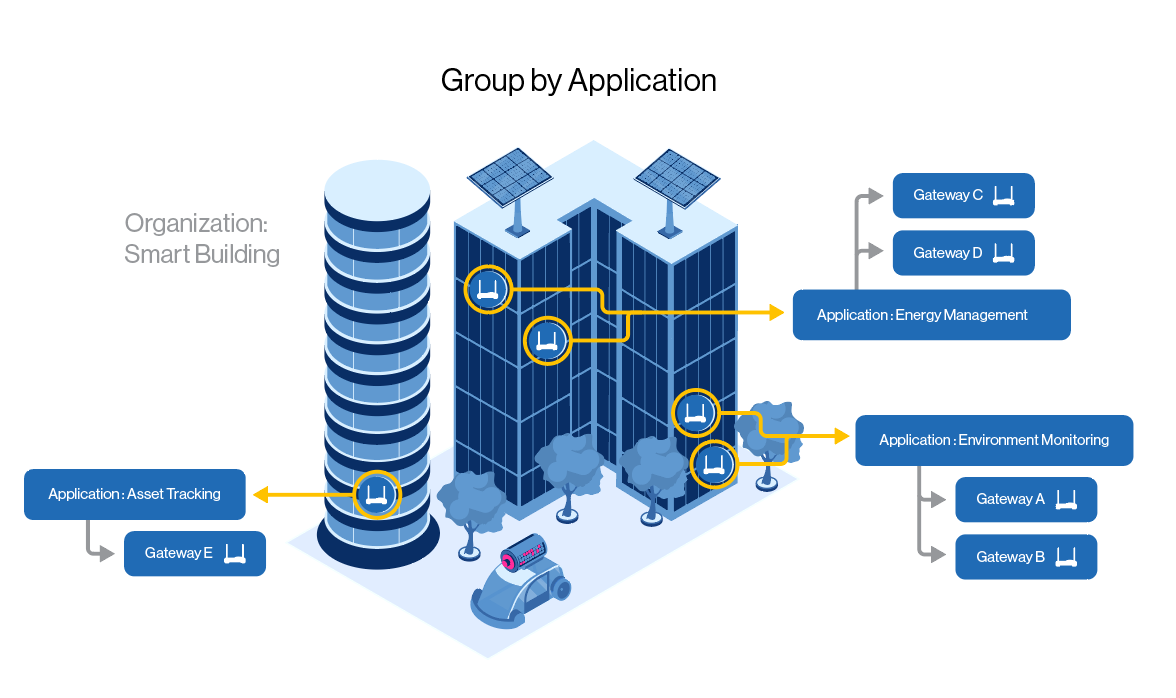
WisDM is the cloud-based device management platform of RAKwireless. The WisDM platform is designed to help you optimize the ways of controlling your gateways. It allows you to access your gateways from a distance and configure them.
WisDM device management software supports IoT networks of any scale built around commercial-grade LoRaWAN Edge gateways from RAKwireless.
RAKwireless WisDM platform offers you remote configuration, OTA updates, and scalable management.
This manual will explain in detail the functionalities and configurations of WisDM.
Terms and Definitions
- Organization – The organization in the context of WisDM is your account, where all your activities are tied under the same cap. You need to establish an organization to use the location and all its functionality.
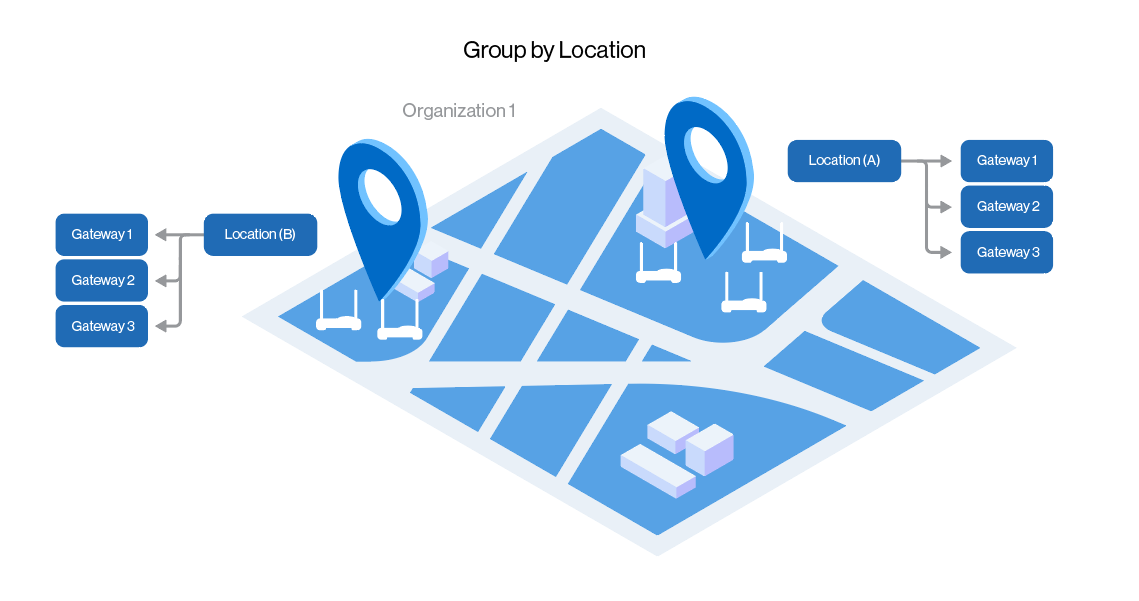
- Location – The location defines how the gateways are connected to the LoRaWAN Network Server (LNS).
- Assigned gateway - The assigned gateway is the one added to a location in WisDM.
- Unassigned gateway - The unassigned gateway is an onboarded gateway that was removed from the location but remains in the organization.
Minimum Requirements
To connect to WisDM, you need the RAKwireless Edge Gateways running WisGate OS version 1.2.2 or later. However, it is recommended to use the latest available version.
Create an Account
Log in to WisDM using your RAK ID. If you don't have a RAK ID yet, refer to the FAQ page and create one.
There are two ways to access WisDM:
- For new users, create an account and RAK ID. Click on Create new to start creating an account.
- If you already have a RAK ID, simply enter your credentials in the login field.
- RAK ID is the authentication service of RAKwireless. It is a set of credentials that provides access to all RAKwireless services.
After entering the correct credentials, you can now start the configuration. Begin by creating an Organization.
Create an Organization
In the context of WisDM structure, Organization is your account, and it ties all your activity under one cap. Learn more about the Organization on the FAQ page.
Fill in some basic information for the organization. The page consists of the following elements:
- Company Name – a name of your choice, up to 50 characters.
- Subdomain – it is automatically filled with correspondence with the company name. It can be changed to be different from the company name.
- Address (optional) – you can add an address for the organization either by typing in the search box or by choosing an address on the map on the right.
- Phone (optional) – optionally, you can add a phone number.
After filling in the required information, choose the subscription plan. Choosing the pricing plan is the last step in creating an Organization. More information can be found on the support page.
WisDM offers a free subscription plan that allows you to manage up to three (3) gateways. The different paid subscription plans allow you to manage a variety of gateways. More about the subscription plans and what they provide can be found on the FAQ page.
Location
In the context of WisDM’s structure, location is a logical entity that defines how the gateways are connected to the LoRaWAN Network Server (LNS). It groups the gateways according to their LoRaWAN connectivity.
Adding a Location
You can add a location by clicking the New Location button.
Then fill in the following information:
- Location name – a name of your choice, up to 50 characters.
- Location address – you can copy the organization address or set a new one, either by typing the address in the search bar or by choosing it from the map on the right.
- Location email settings – you will be notified when there is any change in the gateway’s activity.
Figure 1: Email notifications
- Enable/disable – enable or disable the email notifications.
- Instantly – when choosing this option, you will be notified immediately of any activity.
- Hourly – you will be notified once an hour.
- Daily – you will be notified once a day.
The next step is to do the network configuration. You can choose an existing template if there is such.
The location can be set to work in three modes, depending on the user’s needs. The modes are Packet forwarder, Basics station, and Built-In network server.
LoRaWAN Network Configuration
After choosing the work mode and the band that the location will operate on, configure the following settings:
-
Work Mode – choose the work mode in which they want the location to operate.
-
Frequency Plan – choose the band that is suitable for the gateways and the country of residence.
-
Supported channel number – choose the number of channels based on the supported channels of the gateway intended for that location.
NOTEThe 16-channel gateways can be added to any location, but an 8-channel gateway can be added only to 8-channel locations.
-
UDP protocol parameters
-
Templates – can save the network configuration as a template to use when adding locations in the future.
The further configurations for the three possible work modes differ in the following ways:
- Location in Packet Forwarder Work Mode
- Basics Station Work Mode
- Location in Built-In Network Server Work Mode
Location in Packet Forwarder Work Mode
If you opt for advanced frequency options, you will see the following options:
By choosing the channel plan, the fields related to the frequency configuration of the location and the gateways registered are automatically configured based on the LoRaWAN specification.
Basics Station Work Mode
When creating a new location in Basics Station work mode, you need to set up the following configurations:
- Basics station server setup – in this part, you need to input the Server URL and the Server port number of the LoRa Network Server (LNS) to which the gateways will forward the LoRaWAN messages. You have the option to input the LNS server's address directly or choose CUPS mode, which will update the LNS address and parameters dynamically.
- Authentication mode - to strengthen the connection security to the LNS, you can choose from different authentication methods - TLS server authentication, TLS server and Client authentication, TLS server authentication, and client token.
Location in Built-In Network Server Work Mode
When creating a new location in built-in network server work mode, you need to set up the following configurations:
Network Server - By default, the settings are pre-filled. For more details, you can check the guide for setting the WisDM location in built-in work mode.
Disable frame-counter validate - The frame-counting provides an additional layer of security between the end devices and the LoRa network server. Disabling the frame-counter validation should be done only in specific cases and on the user's own responsibility.
Gateway backend - By default, the gateway backend is set to use the embedded MQTT broker in the gateway. If needed, the user can set up an external MQTT broker or use the provided topics to share the network server data with external clients.
Integration interface – The Built-in network server provides integration to share the data of registered end devices for post-processing to third-party services.
Adding a Gateway to a Location
To start the process of adding a gateway to a location in a packet forwarder work mode, click the Add gateway button.
On the next page, you can see the following required information to add a gateway:
- Unassigned gateways – unassigned gateways are gateways that you removed from the location. Read more on the FAQ page.
- Upload CSV – use a comma-separated value document to import the required information for several gateways simultaneously.
- Add a gateway – add gateways to the location.
- Serial Number – can be found on the back of the gateway
- Gateway EUI – can be found on the WisGate OS web page by navigating Status > Overview > System > Gateway EUI
Status of the onboarding gateway:
-
If the gateway is connected to the internet with the WisDM agent turned on, and the UI and serial number are correct, it will appear in the Available gateways.
-
If any of the mentioned requirements are not completed, the gateway will appear as Unavailable gateways. The tooltip next to the unavailable gateway line will suggest the possible reason why the gateway is not successfully onboarded.
-
The steps to add a gateway to a location in packet forwarder or Basics Station work modes are the same.
-
To add a gateway to a location in built-in network server work mode, you need to follow the steps and choose if the gateway will be added as a central and work as a network server.
Assigned and Unassigned Gateways
Assigned gateways are gateways you put to work inside WisDM by adding them to a location. Below is the primary flow to help you understand more about assigned and unassigned gateways.
When you add a gateway to WisDM, you add it to a location. Without specifying a location, you cannot add a gateway. Once you’ve specified the location and added them, you have an assigned gateway.
Unassigned gateways are gateways that you removed from the location. Removing them means they are not actively working for you but remain within the organization for you to assign to a location later.
Members
You can add and manage the members of the Organization after creating and setting up the organization. In WisDM, there are four types of roles. Each one of them has a different rights variety.
There are different user roles in WisDM, and they provide different levels of access.
- Organization admin
The Organization admin has full access to all its assets in all the organization. The Organization admin in WisDM has the right to make any kind of change possible and can see and change the subscription plan and the billing information. It is the only user role that can give access to other users
- Organization supervisor
The Organization supervisor has full access to all the assets of the organization but doesn’t have the right to execute changes. The Organization supervisor cannot change the subscription plan for WisDM, modify the billing information, or provide access to other users.
- Location admin
The Location admin in WisDM has access to several locations that are pre-stated by the Organization admin. The Location admin can make some changes to the locations but cannot modify the subscription plan or the billing details for WisDM.
- Location supervisor
The Location supervisor in WisDM has access to several locations pre-stated by the Organization admin but cannot execute any changes within the location or modify the subscription plan or billing details for WisDM.
Menu Structure
- Dashboard – view the gateway and its locations summary.
- Locations – see their locations.
- Gateways – view the information on the gateways and add new ones.
- Member – see the members of the organizations and invite new members.
- Settings – change the organization’s settings and information.
WisDM Plans and Subscriptions
More about payment security can be found on the FAQ page.
Subscription Plans and Pricing
WisDM offers various subscription plans. The plans are designed to meet your needs, whether you are just getting started with RAK gateways deployment or managing IoT devices at scale.
WisDM offers a free subscription plan that allows you to manage up to three (3) gateways. With the paid subscription plans, you can manage more gateways, depending on the plan you choose.
More about the subscription plans and what they provide can be found on the FAQ page.
Subscriptions Offered
WisDM provides a few subscriptions to match the needs of the organization:
- Тhe Community subscription is free. It includes up to 3 gateways and is suitable for small deployments, DIY projects, POC, and testing.
- The Standard subscription includes up to 10 gateways. It is suitable for small to medium deployments.
- The Professional subscription includes up to 50 gateways. For medium deployments, system integrators, and solution providers.
- The Enterprise subscription is available with 4 sub plans (up to 100, 200, 500, and 1000 gateways), selectable from the dropdown, and suitable for huge deployments and remote management of hundreds of gateways.
Subscription Upgrade
You can upgrade your subscription plan at any time. You will only pay the difference between your current and the new plan.
Subscription Downgrade
There are two approaches on how your subscription could be downgraded:
- During the current billing cycle: Once you choose to downgrade a subscription it will still be active until the end of the paid billing cycle. We do not provide refunds.
- During the retry period: The downgrade happens immediately.
For more information about subscription plan management, refer to the FAQ page.
Subscription Cancellation
There are two approaches on how your subscription could be canceled:
- During the current billing cycle: Once you choose to cancel a subscription it will still be active until the end of the paid billing cycle. We do not provide refunds.
- During the retry period: Cancellation is immediate to the user choosing to cancel.
Billing Ownership Change
The billing ownership within an Organization can be changed. It can be transferred only to members that are organization admins.
- To transfer the billing ownership, go to Members.
- Choose the member you want to transfer the billing ownership to.
- Click on the kebab menu (), and choose Transfer billing ownership.
RAK Remote Support
Grant Access to the RAK Support Team
RAK support can access your Organization only upon your request. By going to your Organization’s Settings and clicking on the Temporary access option, you can choose the period during which the RAK support team can have access to your WisDM Organization and identify how to solve the problem you’re experiencing.