WisToolBox for Desktop
Installation
To use the WisToolBox Desktop, make sure you meet the two requirements:
- A connected RAK device;
- An active internet connection the first time after the WisToolBox app starts. The application will update the latest configuration.
The WisToolBox Desktop is available in Windows, macOS, and Linux.
For direct downloads of installers:
Operating system version compatibility:
- Windows 10 and newer
- MacOS Big Sur and newer
- Linux Ubuntu 20.04 and newer
For Linux users, extra configuration is needed to enable automatic port detection of RUI3 enabled RAK module.
Hardware Compatibility
The WisToolBox Desktop application is currently available only on RUI3 devices. It is compatible with the following RAK LPWAN modules:
Open the WisToolBox Desktop
- After the download has been completed, launch WisToolBox Desktop.
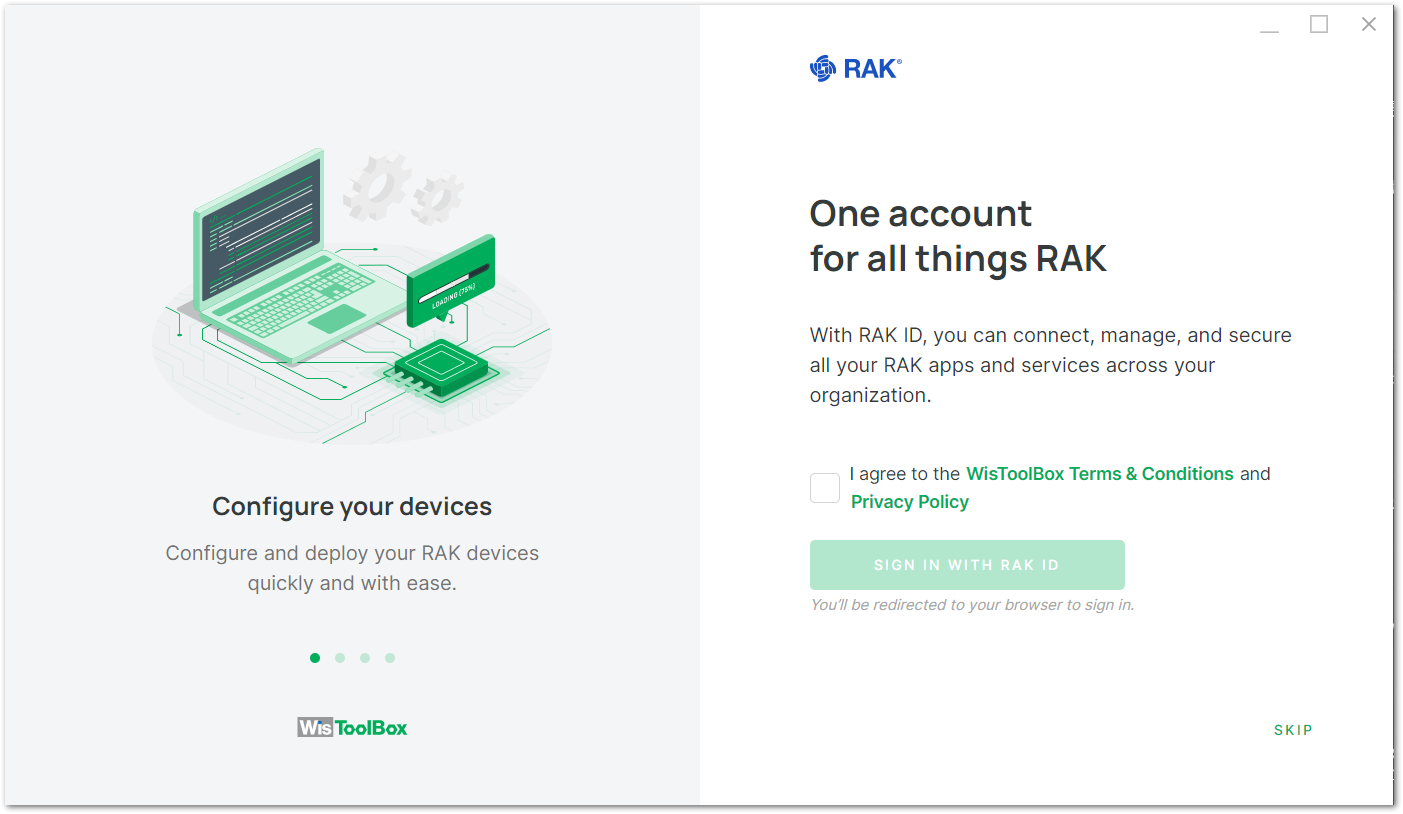 Figure 1: WisToolBox Desktop Startup screen
- Check the "I agree to the WisToolBox Term & Conditions and Privacy Policy".
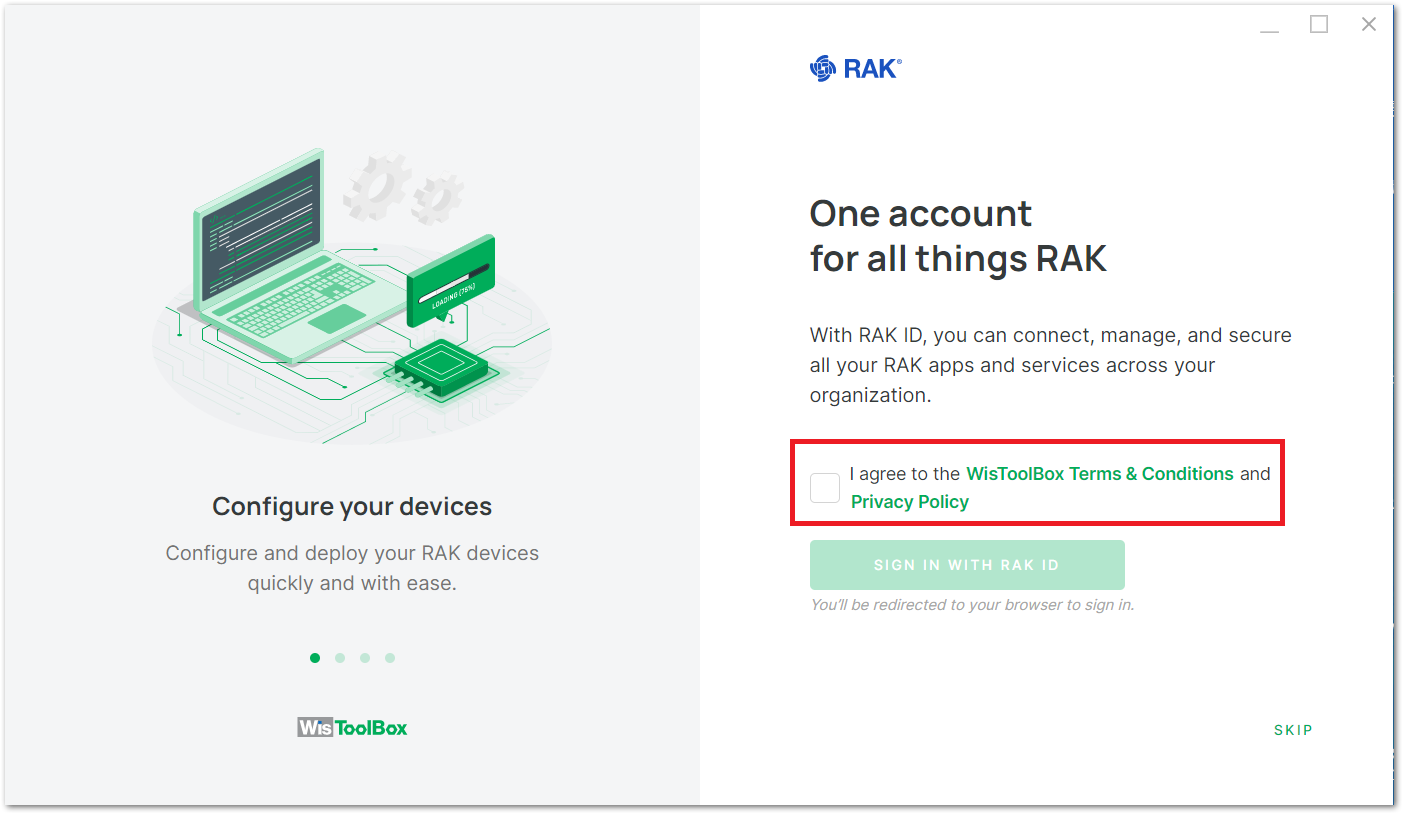 Figure 1: WisToolBox Terms and Conditions
- If you select SKIP, refer to WisToolBox Dashboard and follow the steps. But if you choose to log in with your RAK ID, refer to Create RAK ID Profile.
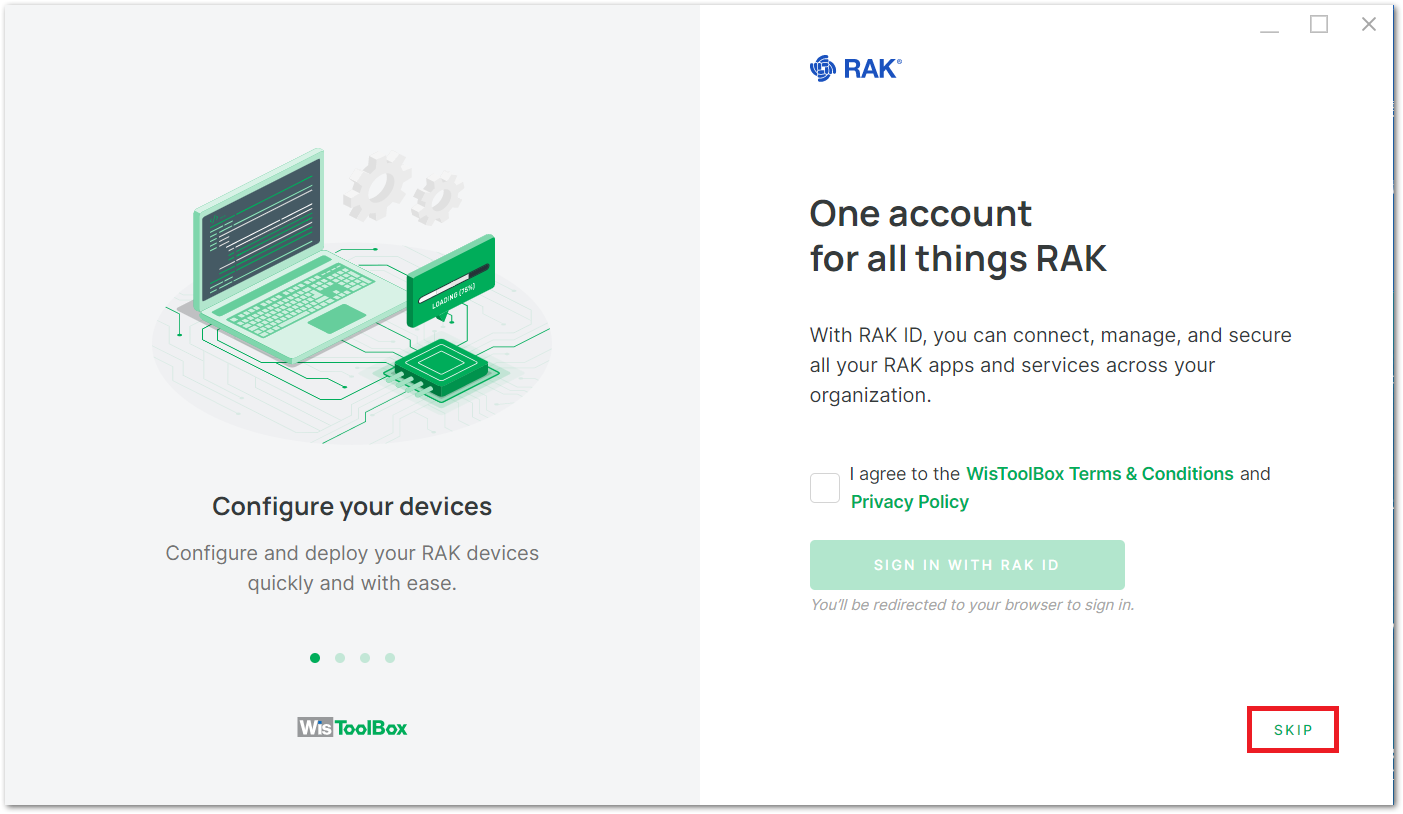 Figure 1: WisToolBox Skip
Create RAK ID Profile
It is recommended to create a RAK ID profile. Your RAK ID profile will be stored in the cloud and can be synced on different PCs. You can only edit your details and preferences at the RAK ID Portal.
- If you wish to log in with your RAK ID, click the SIGN IN WITH RAK ID button.
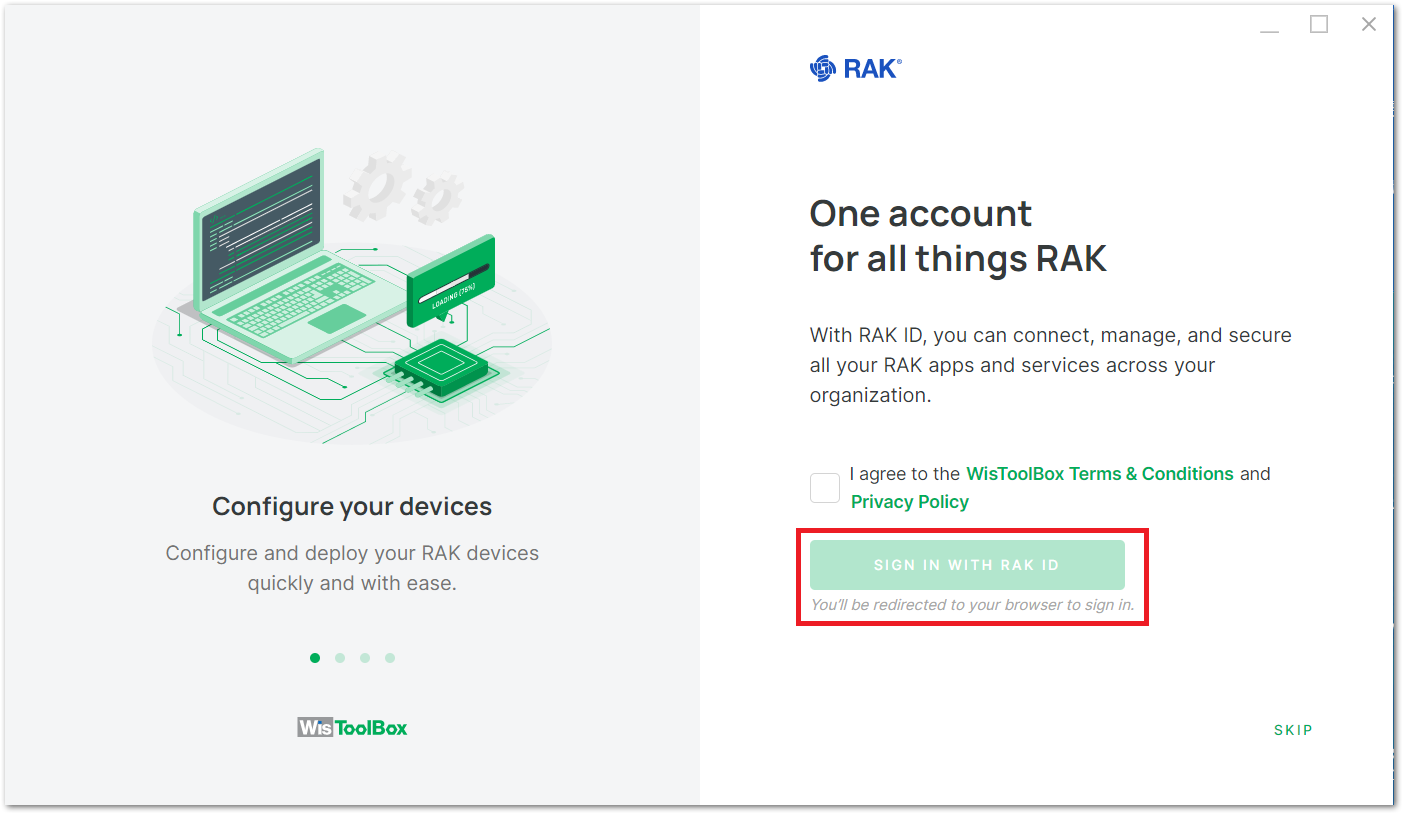 Figure 1: WisToolBox Sign in with RAK ID
- The WisToolBox Desktop will enter its Dashboard interface. Click the Sign In icon as shown in Figure 5.
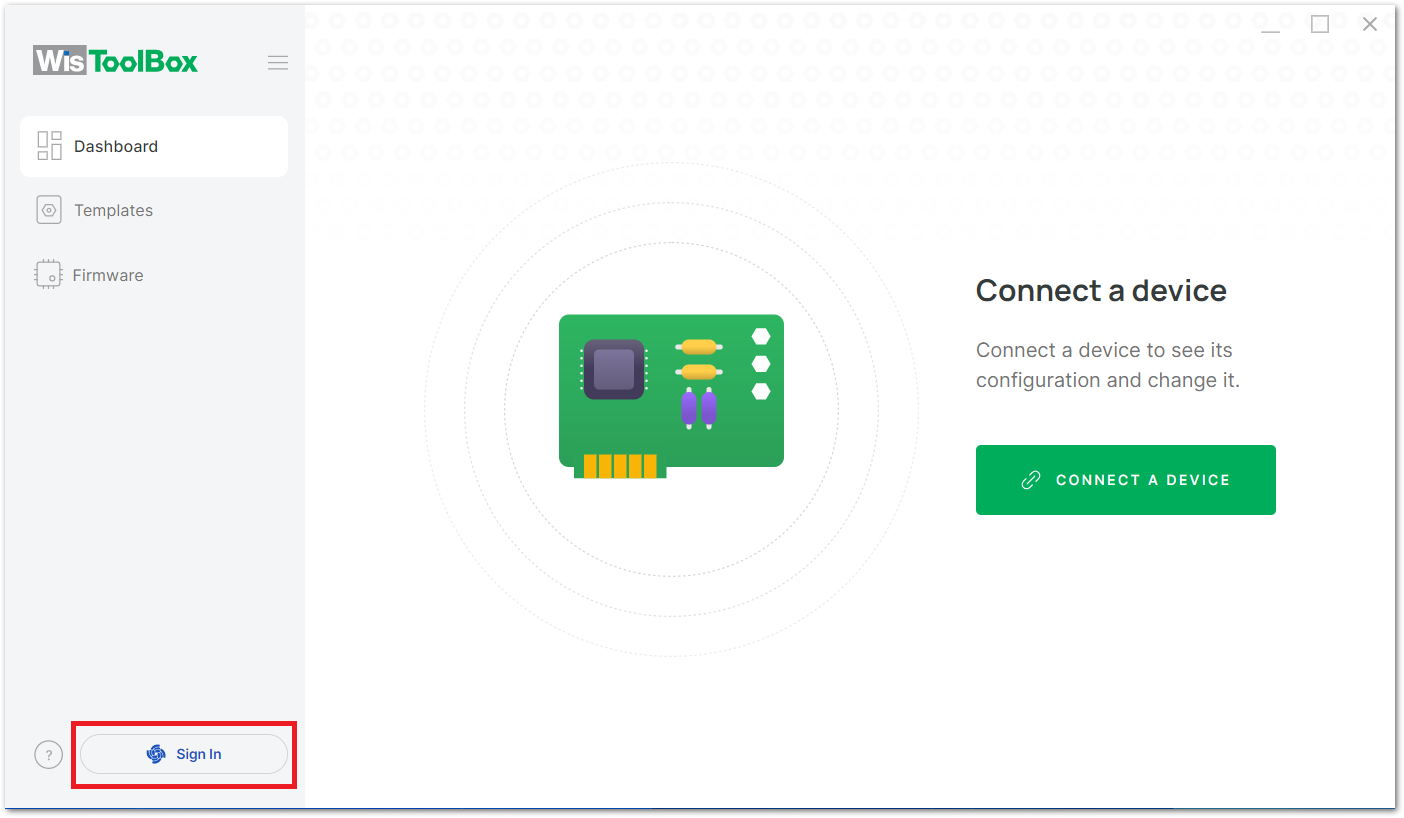 Figure 1: WisToolBox Desktop Dashboard Interface
- Click the SIGN IN TO RAK ID blue button, and you'll be redirected to the RAK ID Portal webpage in the browser to sign in.
 Figure 1: WisToolBox Desktop RAK ID Sign in
- Once you are already on the RAK ID Portal webpage, as shown in Figure 7, log in to your RAK ID account information according to the interface prompts. If you haven't registered a RAK ID, you can click Create new to create a new account, and follow the interface prompts to configure the account.
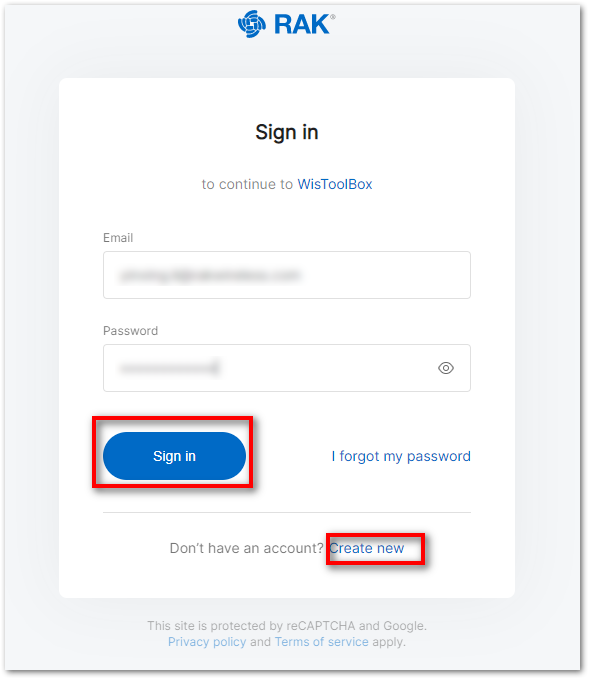 Figure 1: WisToolBox RAK ID Portal
- After you have successfully logged in, you will be then prompted on the following interface. Click the "Yes, I want to authorize" button.
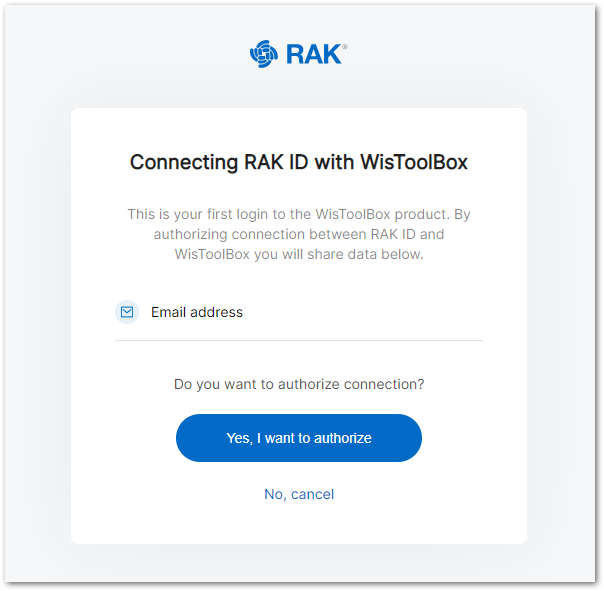 Figure 1: Authorization Connection confirmation
- After agreeing to authorize the connection, the RAK ID icon will appear in the Dashboard interface of the WisToolBox as shown in Figure 9. This indicates that you have successfully logged in with your RAK ID.
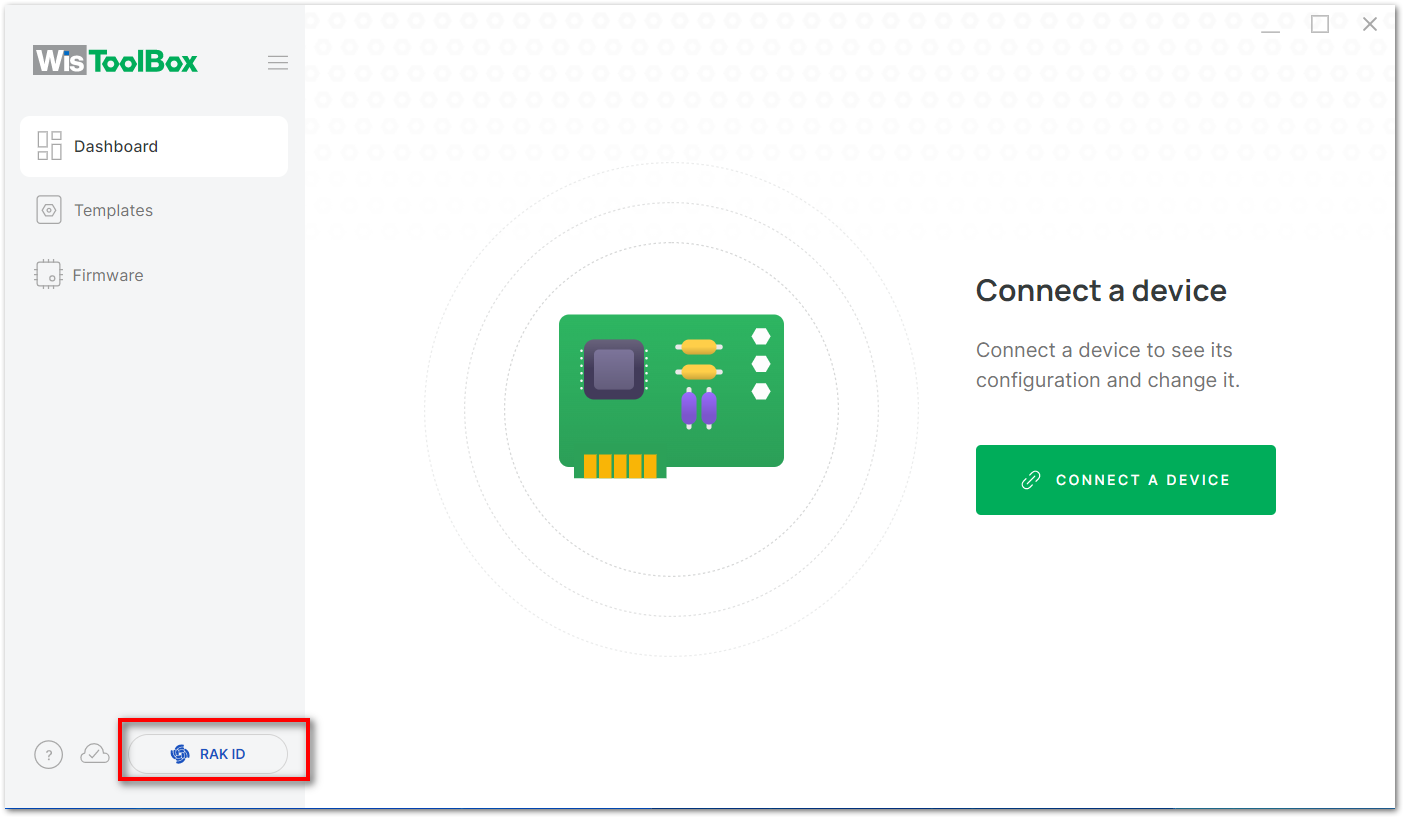 Figure 1: RAK ID successfully connected
WisToolBox Dashboard
-
Power up the RAK device and connect it to your computer.
-
Click the CONNECT DEVICE button in the Dashboard interface of the WisToolBox Desktop to find your device.
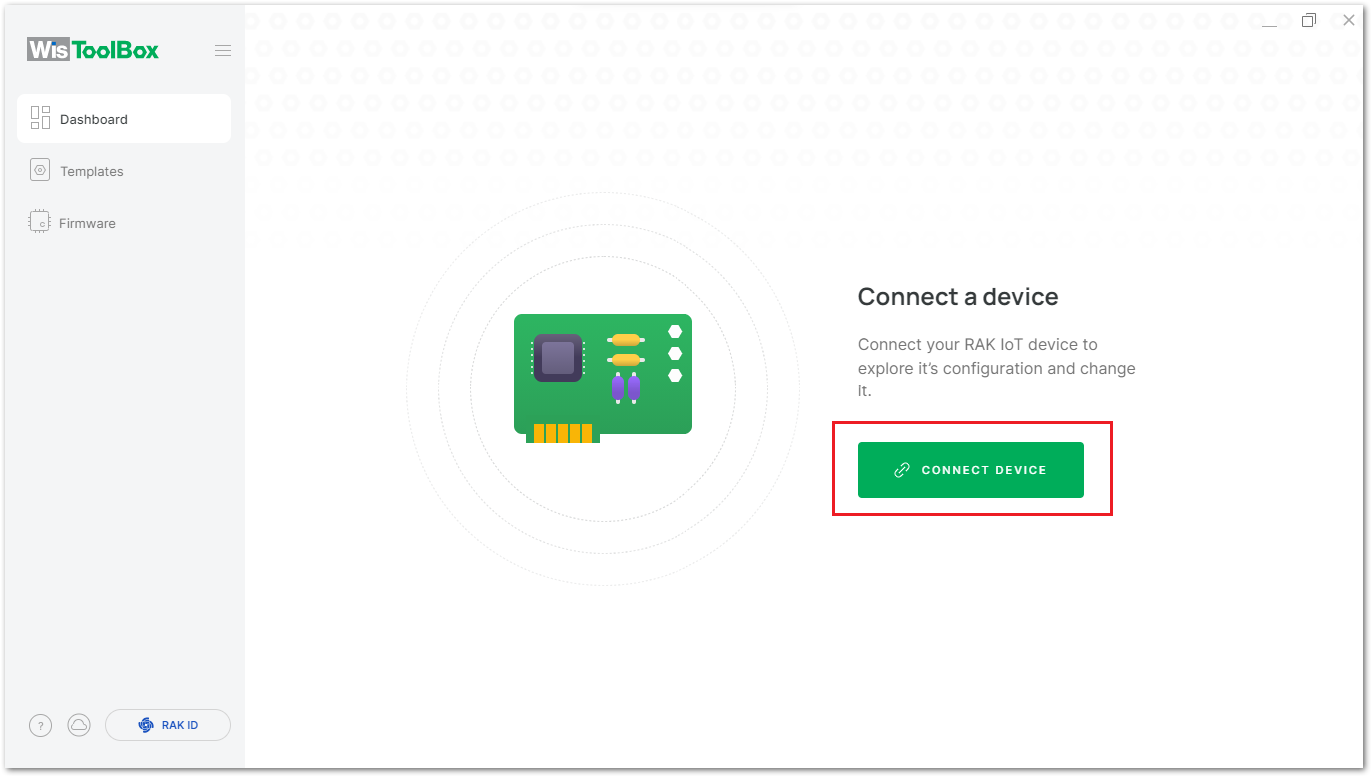 Figure 1: Connect a Device
- If
No device detectedhas occurred while searching for your device as shown in Figure 11,
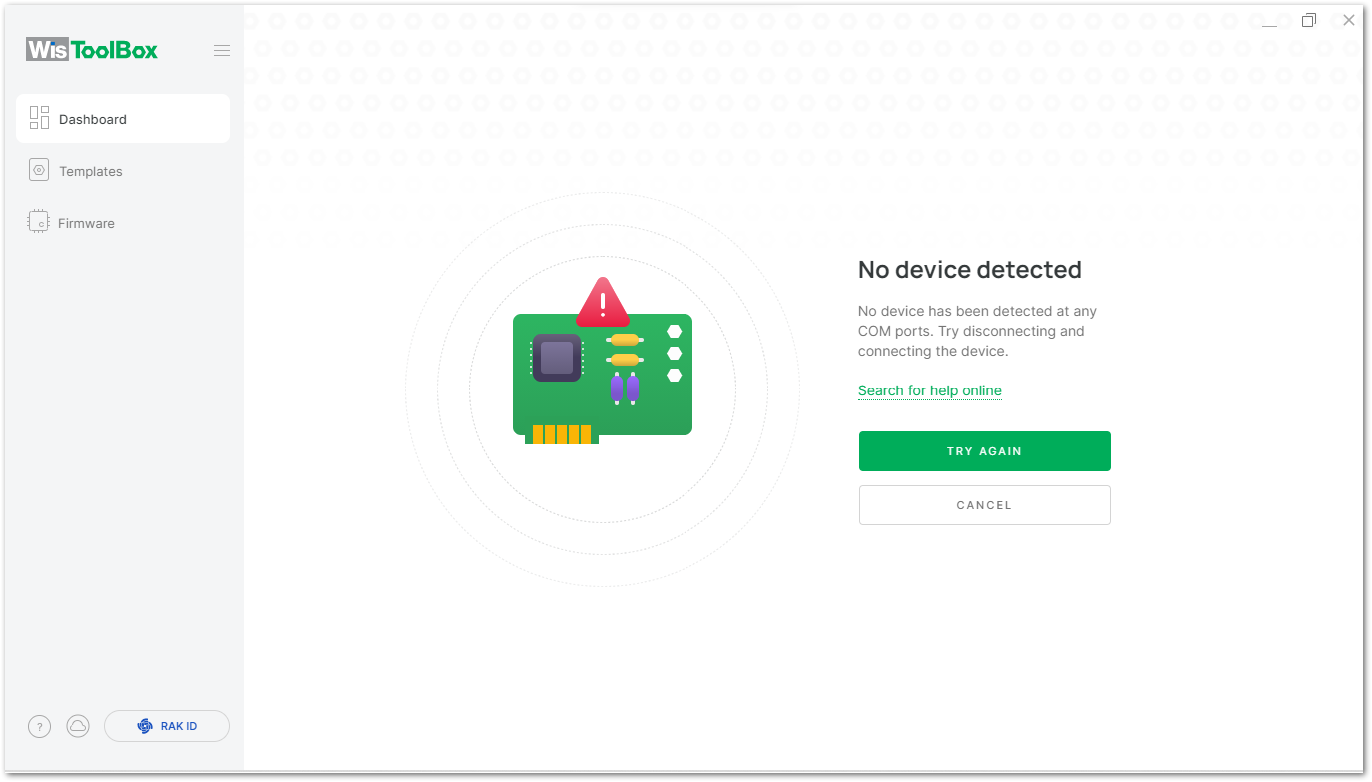 Figure 1: WisToolBox No device detected
Here are some possible causes of the No device detected error that can be fixed as follows:
- Ensure that the device you are using has RUI3 firmware on it.
- Double-check the quality of the USB cable and COM port used.
- Check if other terminal software is active and still connected to the RUI3 enabled RAK module (RAK3172, RAK4630, etc).
- After the device search is successful and completed, the following interface will appear. Review the Connection settings parameters of the device on the dashboard, then click the CONNECT button.
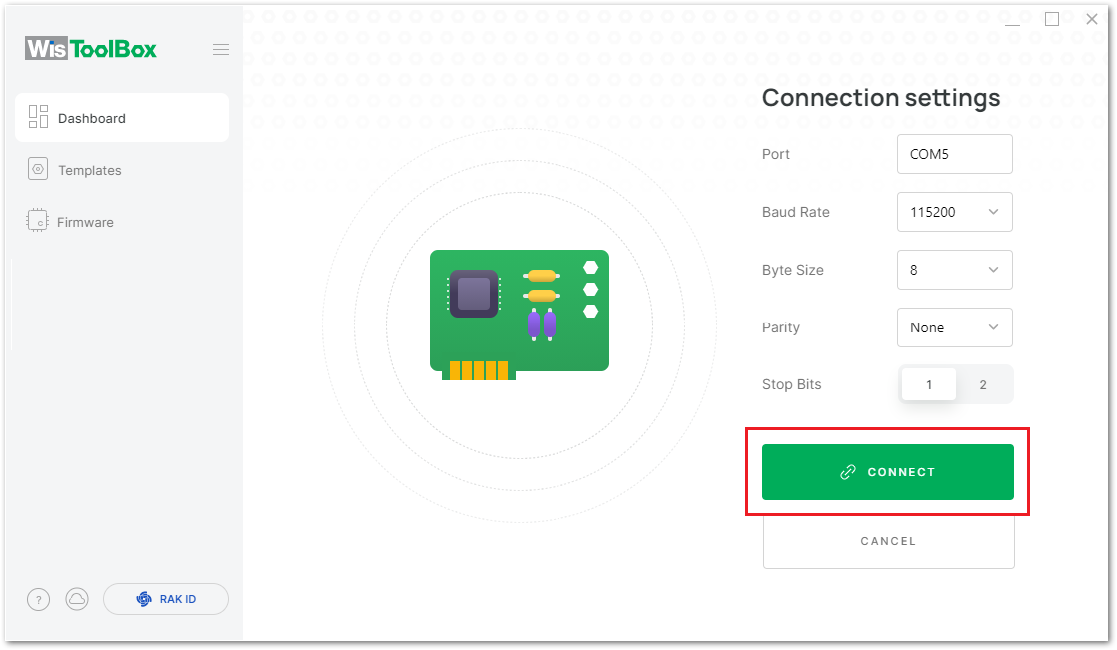 Figure 1: WisToolBox Desktop connection settings
- On the WisToolBox Dashboard screen, you can get the following information:
- List of connected devices. (1)
- The device model. (2)
- The device
EUIvalue. (3) (TheEUIis a 64-bit globally-unique Extended Unique Identifier (EUI-64) assigned by the manufacturer or the owner of the end device.) - The serial
COMport was used. (4)
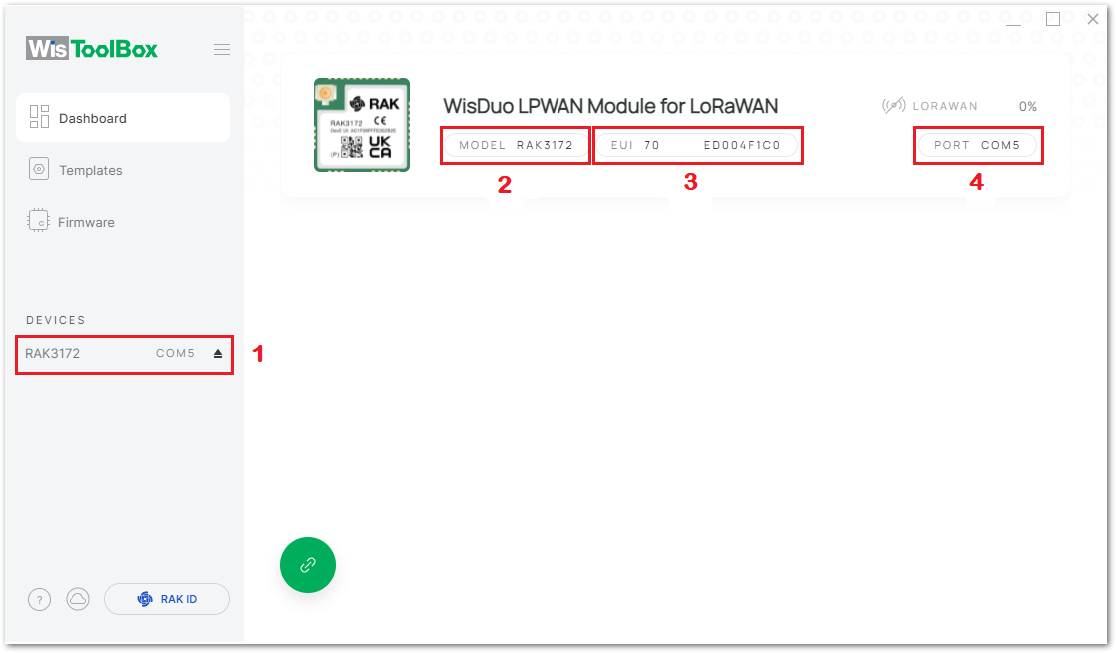 Figure 1: WisToolBox Desktop dashboard screen
- You have to select the device by clicking it to access all configurations and features - DEVICE INFO, PARAMETERS, ADVANCED, and FIRMWARE.
Device Info
Figure 14 below shows the DEVICE INFO section of the dashboard.
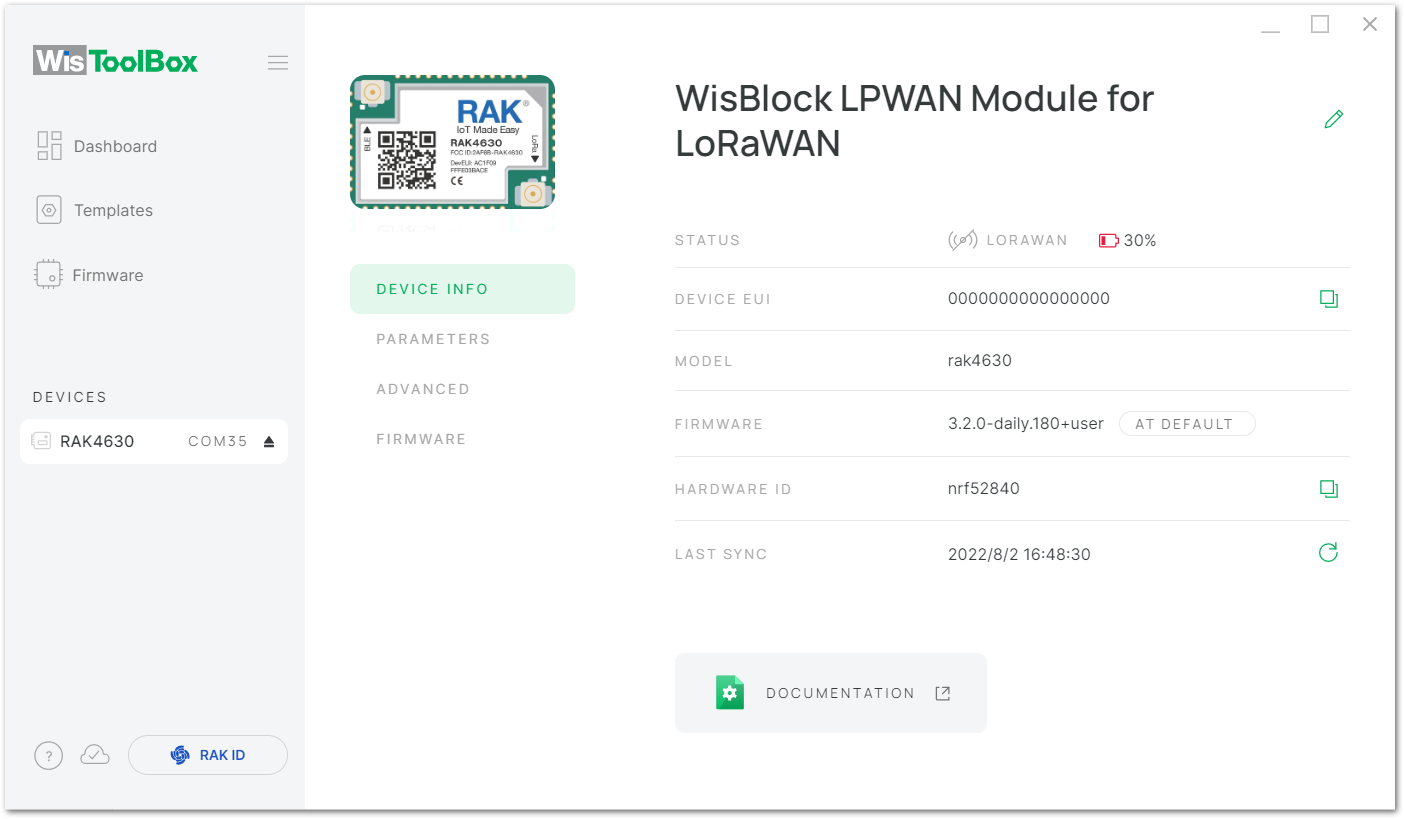 Figure 1: WisToolBox Desktop dashboard device info
- STATUS: shows the device network connection status, battery status, RSSI, and SNR
- DEVICE EUI: device EUI
- MODEL: device module's model
- FIRMWARE: device firmware version
- HARDWARE ID: hardware ID
- LAST SYNC: last sync time
To learn more about the device connected to WisToolBox, you can click the DOCUMENTATION button at the bottom of the dashboard.
Parameters
The WisToolBox parameters are categorized into seven (7) sections:
- Global Settings
- LoRaWAN Keys, ID, EUI
- Data on LoRa Network
- LoRa Network Management
- Generic LoRaWAN instructions
- LoRaWAN Multicast Group
- Custom Fields
Figure 15 below shows the PARAMETERS section of the dashboard.
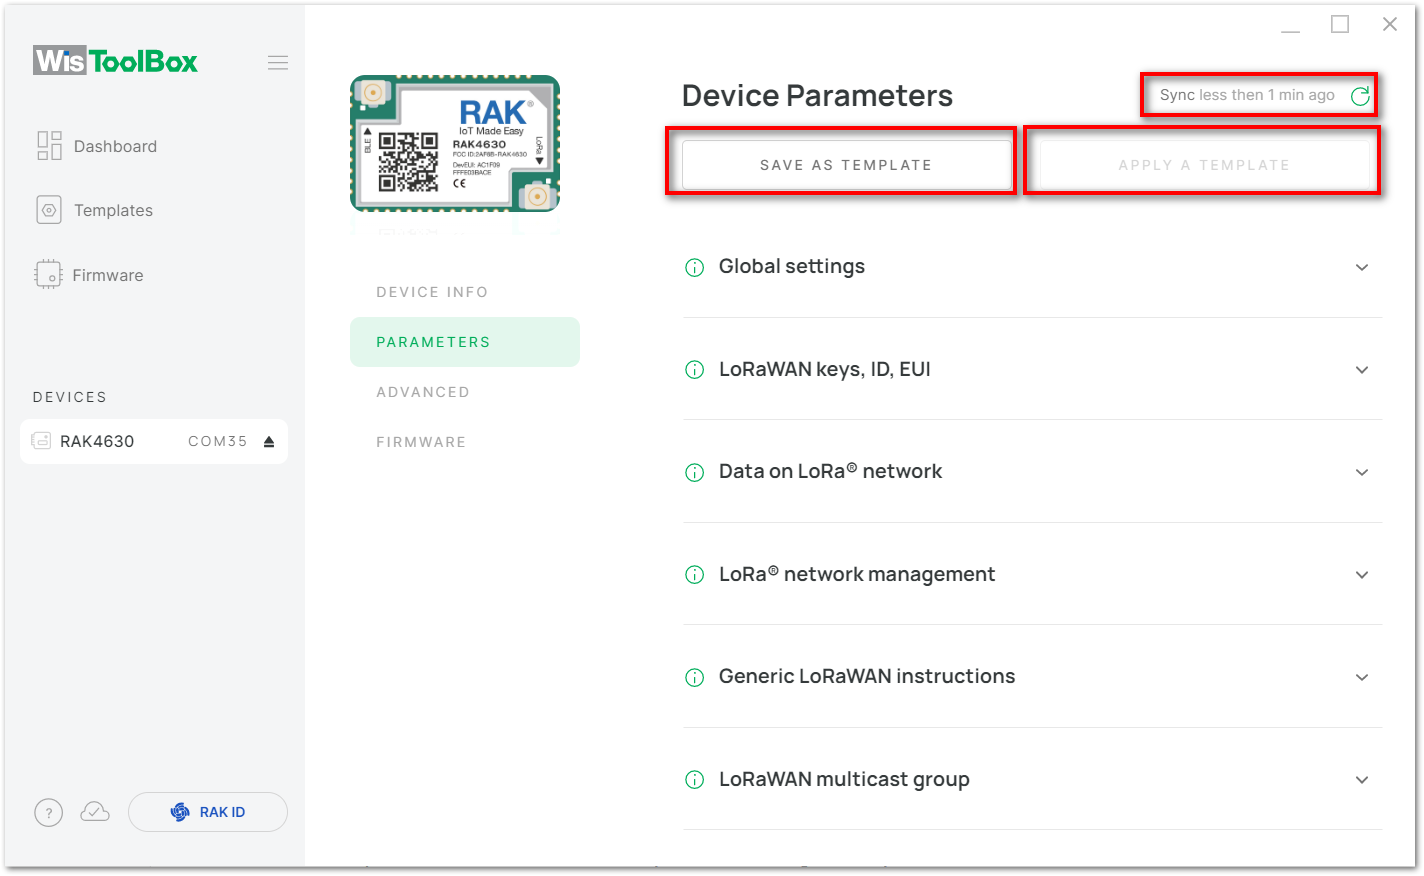 Figure 1: WisToolBox Desktop dashboard parameters
-
SYNC ICON: During the configuration process, if the configuration parameters in the tool have not been updated yet, click the synchronization icon highlighted on the upper right will refresh the data and get the latest AT command return values if the tool shows no updated values.
-
SAVE AS TEMPLATE: After the custom device configuration is complete, you can click this button to save the parameters as a configuration template.
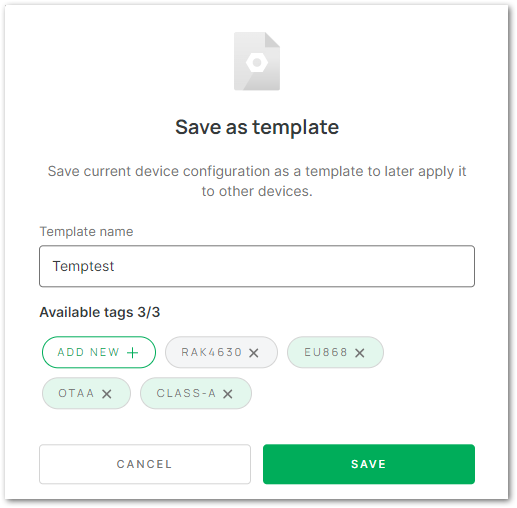 Figure 1: Save a Template
To save a template, follow the steps below:
Template Name: enter your desired template name.Available tags: add tags to the template, up to three can be selected.- When done, click the "SAVE" button.
- APPLY A TEMPLATE: when configuring a new device, a saved configuration template can be selected here and applied to the new device. This function can only be used after saving the template.
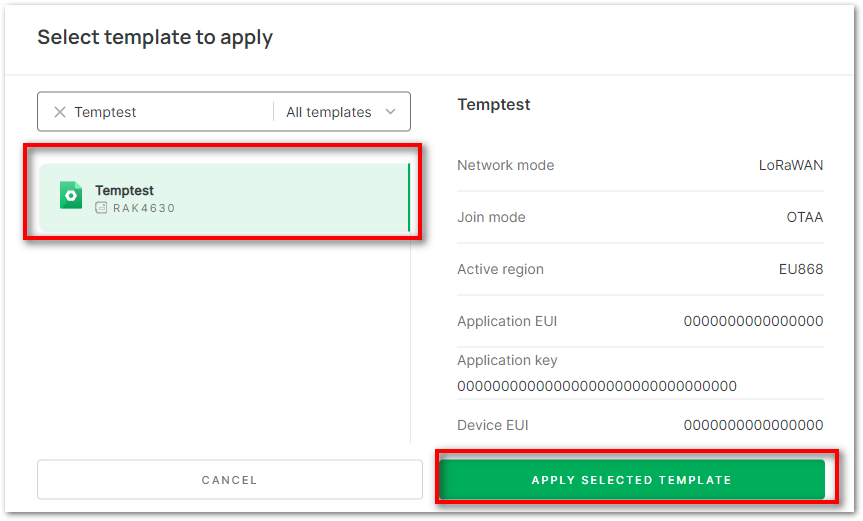 Figure 1: Apply a Template
To apply a template, follow the steps below:
- In the search bar, enter the name of the template you want to select.
- In the list of search results, click the template of your choice.
- Click the "APPLY SELECTED TEMPLATE" button to apply this template to the new device configuration.
Global Settings
Network Mode: Optional LoRaWAN / P2P settings.Join Mode: The LoRaWAN join method of the end-device - OTAA or ABP, which must be consistent with the LoRaWAN Network Server.Active Region: The available frequency bands are CN470, EU433, RU864, IN865, EU868, US915, AU915, KR920, and AS923.
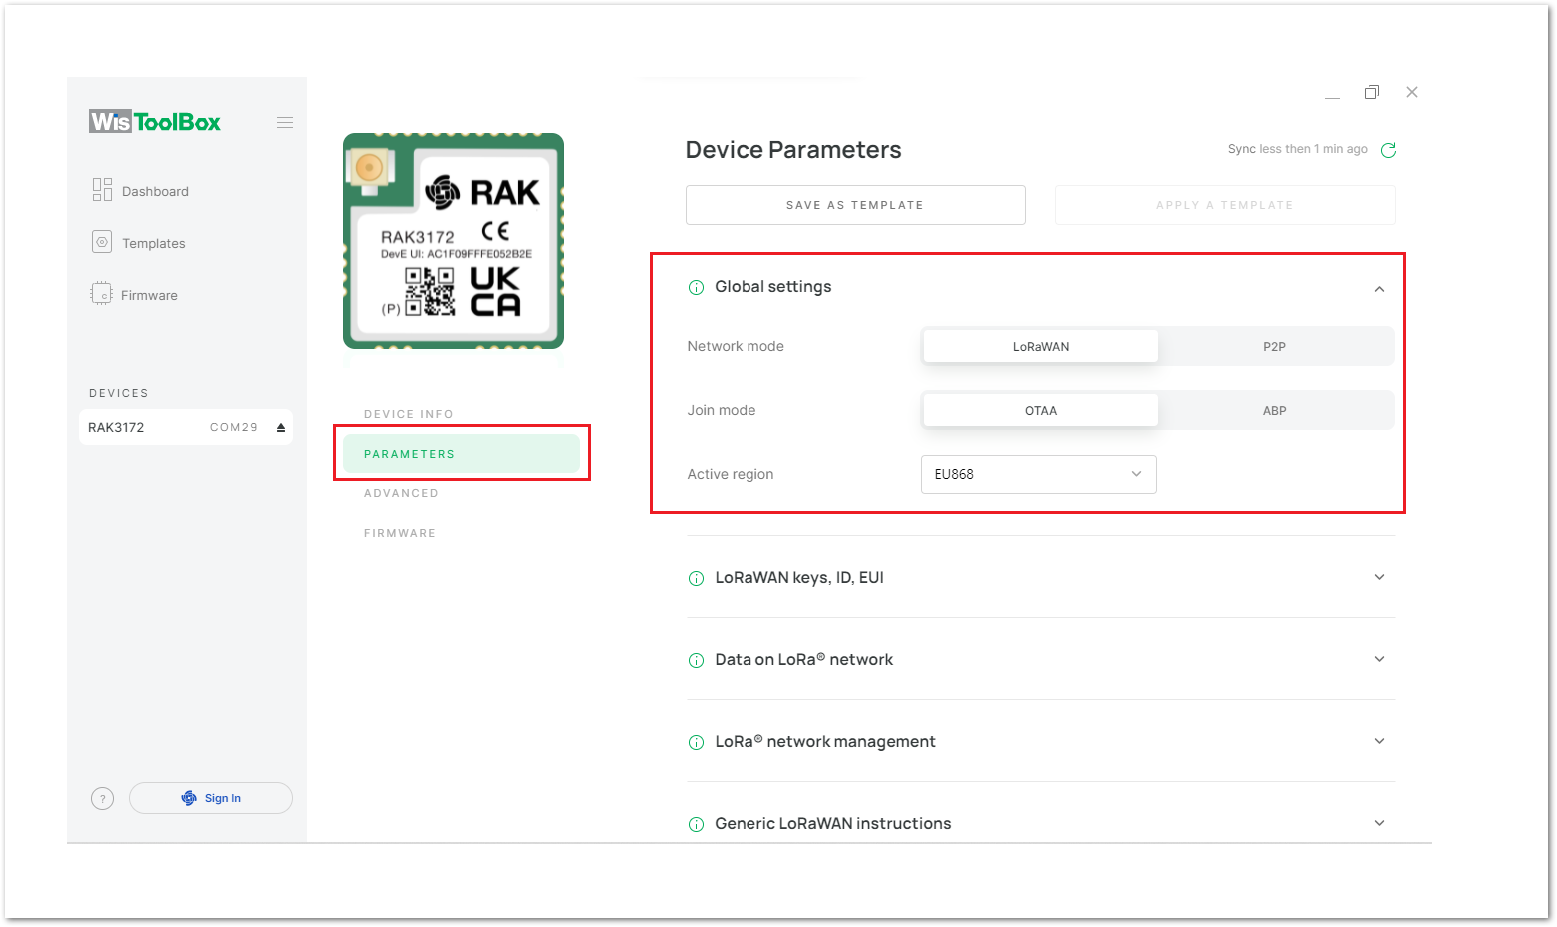 Figure 1: WisToolBox Desktop dashboard global parameters
LoRaWAN Keys, ID, EUI
Application EUI: The APPEUI parameter of the LoRaWAN network server must be the same as the device. It can be obtained from the LoRaWAN network server after configuration, or you can also customize 16 hexadecimal values here and apply the customized Application EUI to the LoRaWAN network server.Application Key: The APPKEY parameter of the LoRaWAN network server must be the same as the device. It can be obtained from the LoRaWAN network server after configuration, or you can also customize 32 hexadecimal values here and apply the customized Application KEY to the LoRaWAN network server.Device EUI: The DEVEUI parameter of the LoRaWAN network server must be the same as the device. It can be obtained RAK module sticker and must be applied to the DEVEUI of the LoRaWAN network server and also to the device via WisToolBox.
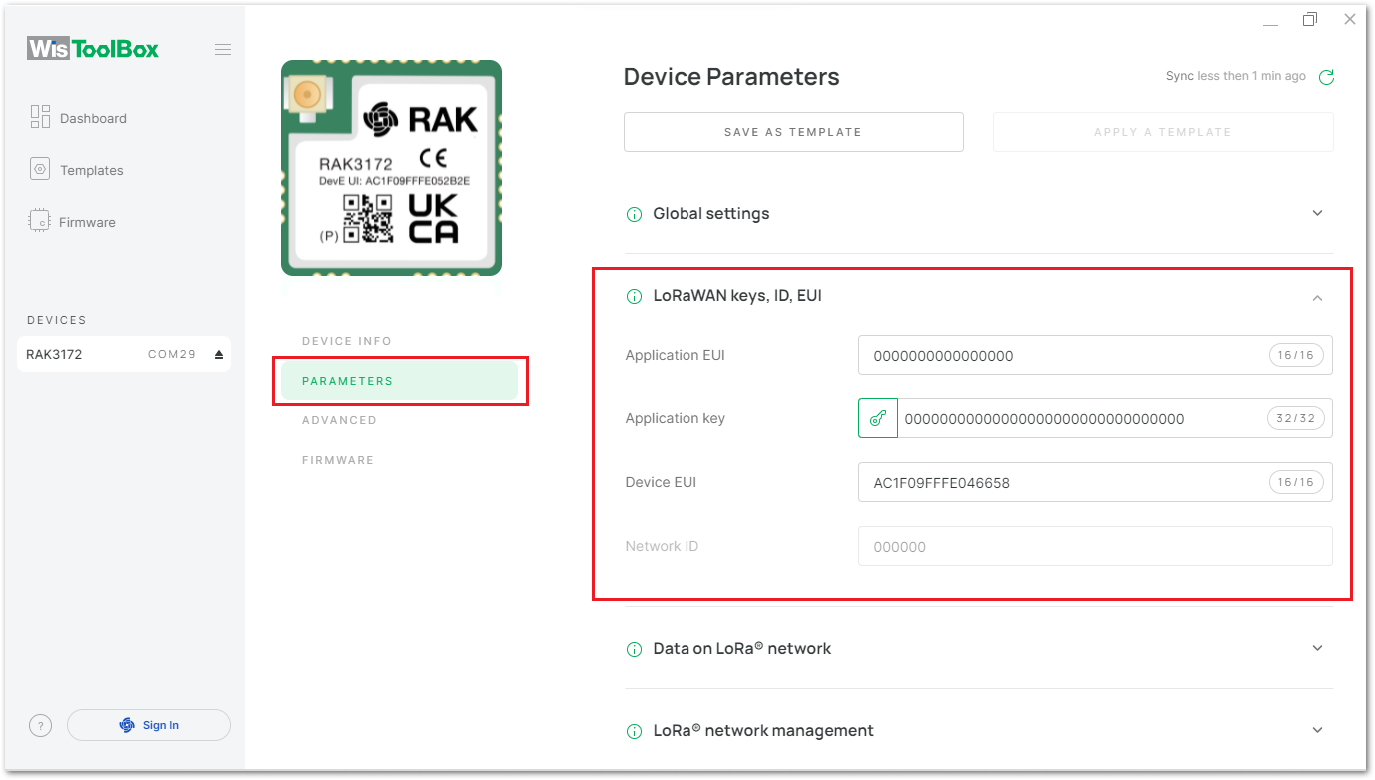 Figure 1: WisToolBox Desktop dashboard LoRaWAN keys, ID, and EUI parameters
Data on LoRa Network
Configure the following parameters as required:
Confirm Mode: Message confirmation mode.Join network: Enables joining the network.Automatic access: Whether to enable automatic access to the network, after the module is powered on, it will automatically join the network.Reattempt period (s): Indicates the network retry period, the value is 7~255 (in seconds), and the default value is 8.Max number of reattempts: Indicates the maximum number of retries, the value is 0~255, and the default value is 0.
When done, click "SAVE AND SEND".
 Figure 1: Network Access settings
Before sending the network access command, make sure that the device is already registered to the LoRaWAN Network Server and has access to the connected LoRaWAN Gateway.
Network Status: After successful network access, you can see that "Network status" is enabled.Last received data: View the last data received by the device.Send data: Configure the port number and send data to send uplink data to the gateway.
Click "SEND" after completion.
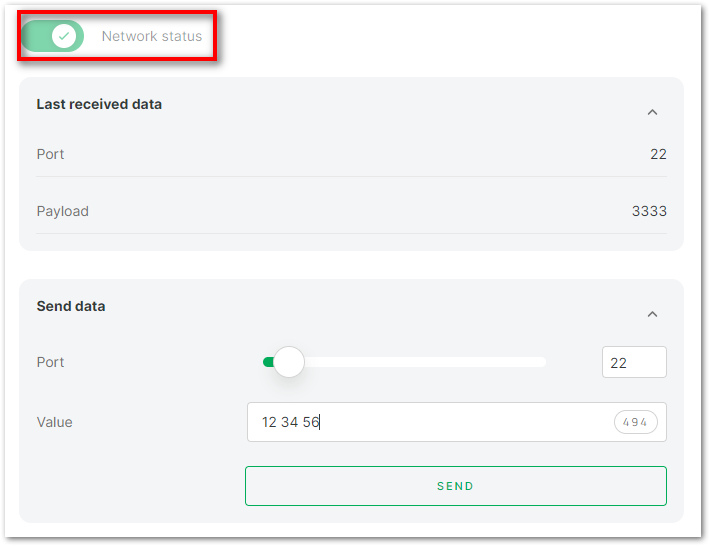 Figure 1: Send Data settings
LoRa Network Management
ADR: Adaptive Data Rate.CLASS: Device working mode. Class A / Class B / Class C.Duty Cycle: Duty cycle.Data rate: The data rate.Public network mode: Public network mode.RX1 delay: Receive window 1 delay.RX2 data rate: The data rate of receive window 2.RX2 delay (s): Receive window 2 delay.Transmit power: Transmit power.
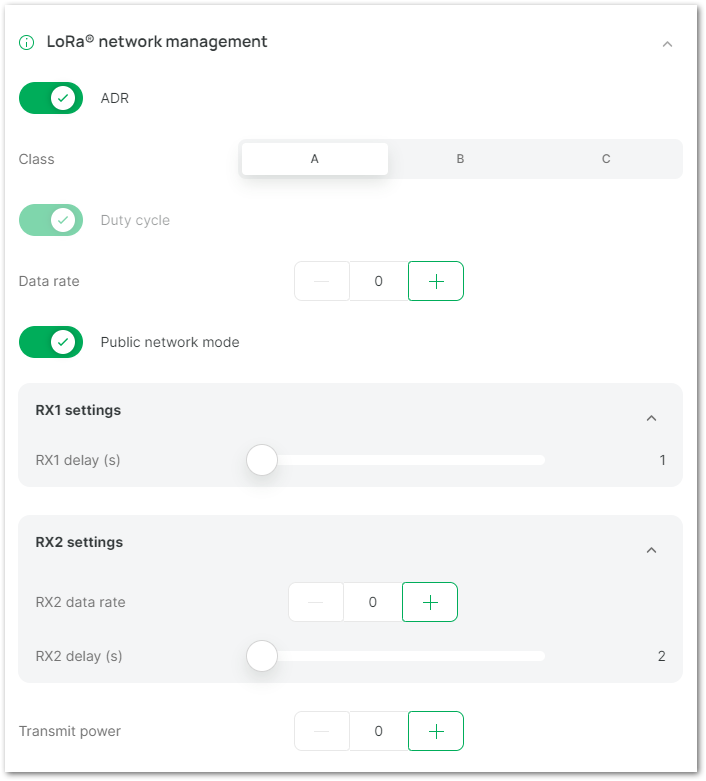 Figure 1: LoRa Network Management
Generic LoRaWAN Instructions
- Long packet data
Port: The application port to transfer.Ack: Whether to open the confirmation package.Payload: String in hexadecimal format.
- RSSI query: View received RSSI.
- Network link check: Network link status.
0: Disable link checking.1: Perform a link check.2: The module will automatically perform a link check after each upload of data.
- Confirm packet retransmission: Confirm packet retransmission. The parameter range is 0~7.
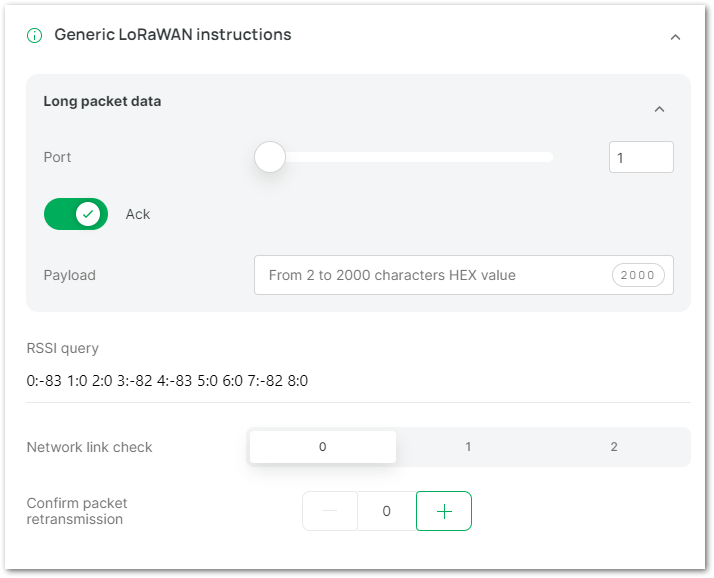 Figure 1: Generic LoRaWAN Instructions
LoRaWAN Multicast Group
This function can be used to create a multicast group, and the supported device working mode is Class B or Class C.
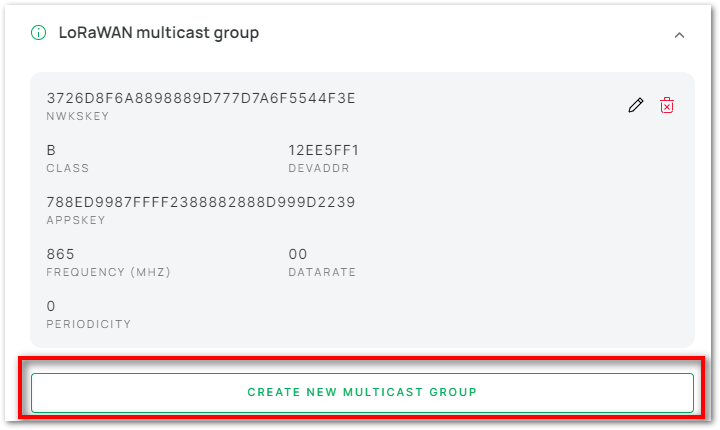 Figure 1: Create Multicast group
To create a new multicast group, configure the following parameters:
Class: device working mode, Class B or Class C.DevAddr: the device address to add.NwkSKey: network session key.AppSKey: application session key.Frequency (MHz): enter the frequency within the frequency band.Datarate: the data rate.
After that, click "CREATE GROUP"
The parameters in the multicast group must be the same as the ones in the LoRaWAN network server.
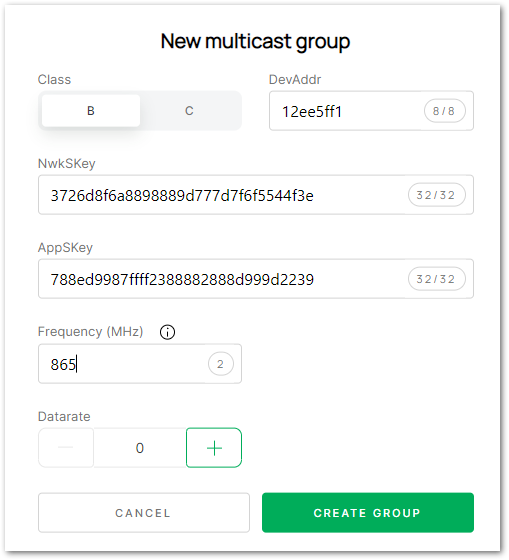 Figure 1: Configuring Multicast group
Custom Fields
This option is displayed if the device firmware is a custom firmware. Custom AT commands can be read and sent in the function options.
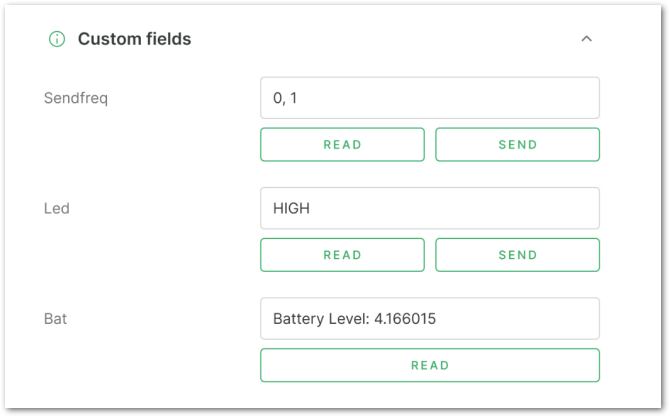 Figure 1: Custom command field
APPLY COMMAND
If you change the value of any parameter, then the APPLY COMMAND button will appear. Click the button to update the new value on the RAK device.
 Figure 1: WisToolBox Desktop dashboard apply command
Figure 28 shows that the command was applied successfully. Click the CLOSE button to return to the Dashboard.
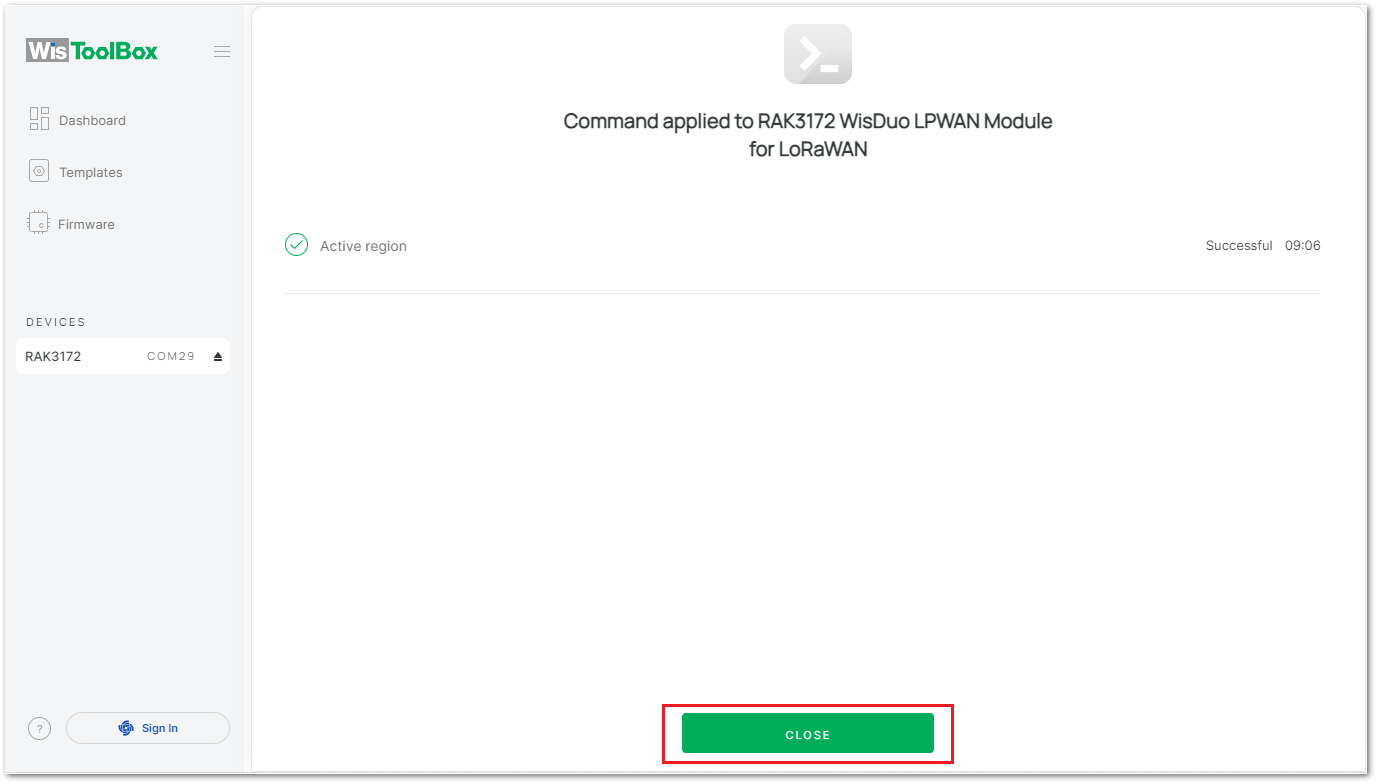 Figure 1: WisToolBox Desktop dashboard apply command result
Advanced
- The ADVANCED option allows access to the RAK module ADVANCED commands. From the dashboard menu, select the installed module, as shown in Figure 29.
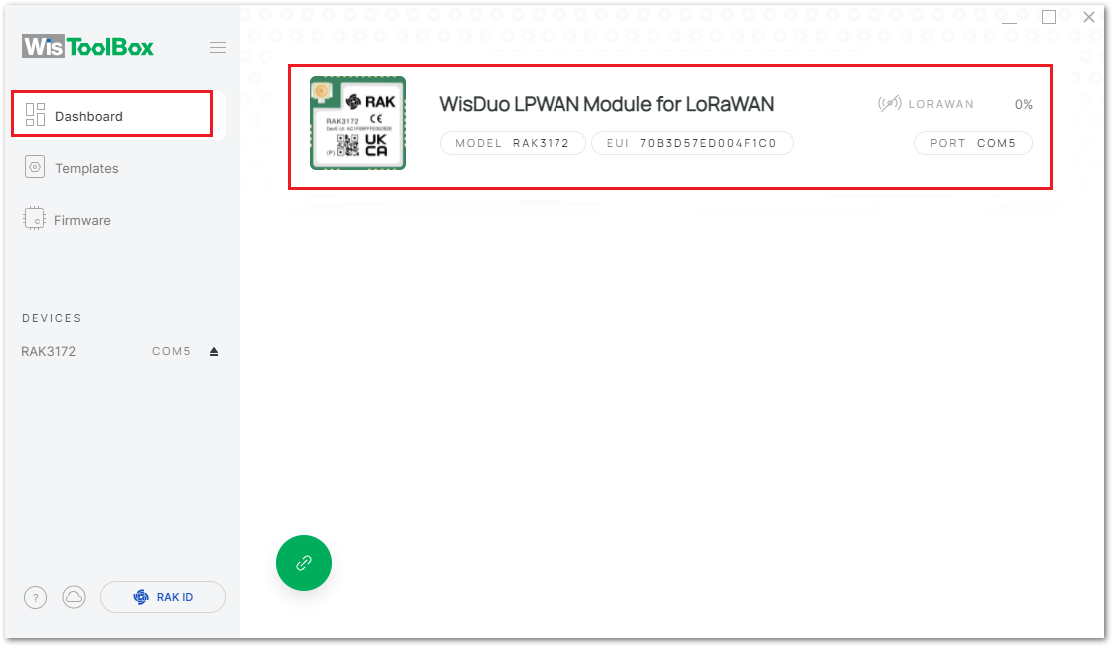 Figure 1: WisToolBox Desktop connected device
- Then click the ADVANCED option.
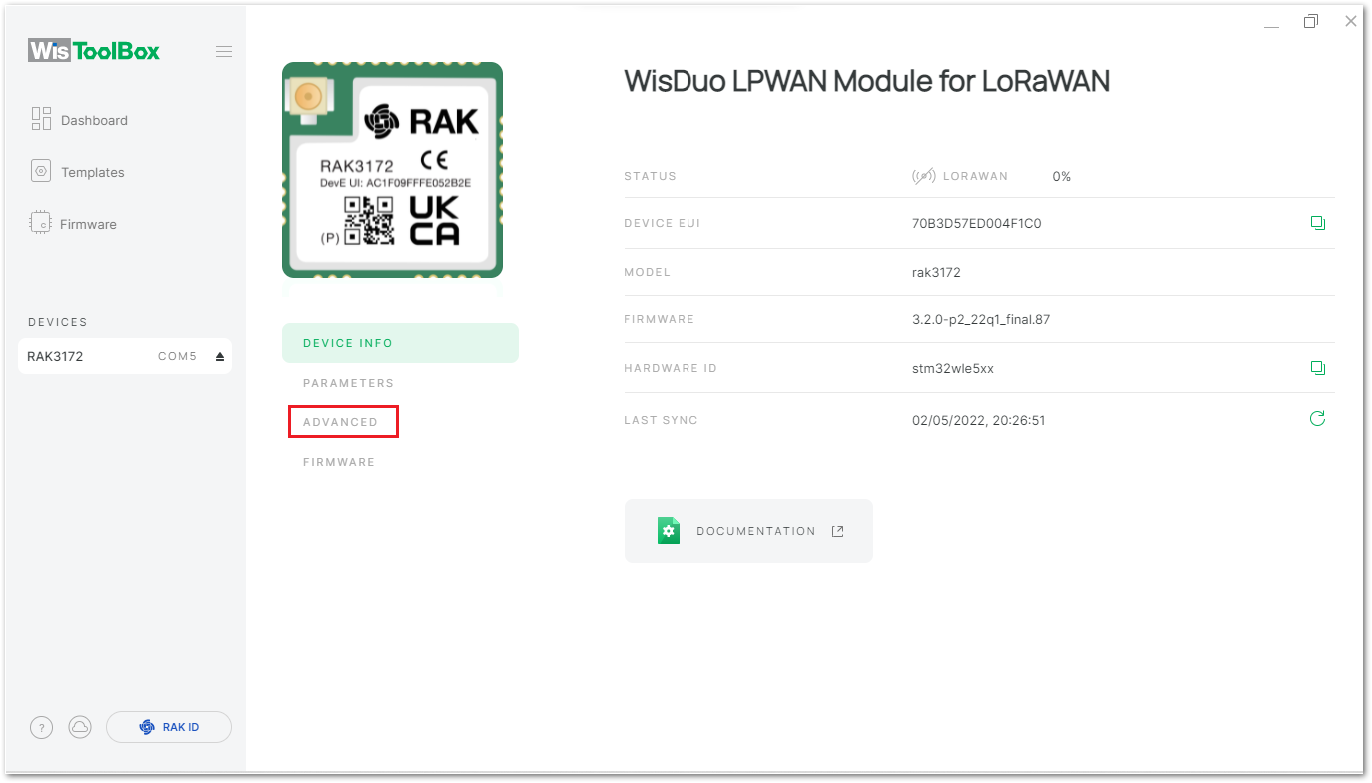 Figure 1: WisToolBox Desktop module details
- Figure 31 shows the advanced commands.
Sleep mode: Enable sleep mode. After setting the sleep time, click "SAVE".RESTORE TO FACTORY SETTINGS: Restore factory settings.MCU RESET: Reset the device.OPEN CONSOLE: Open the console, where you can send AT commands and view the return value of the device AT commands.
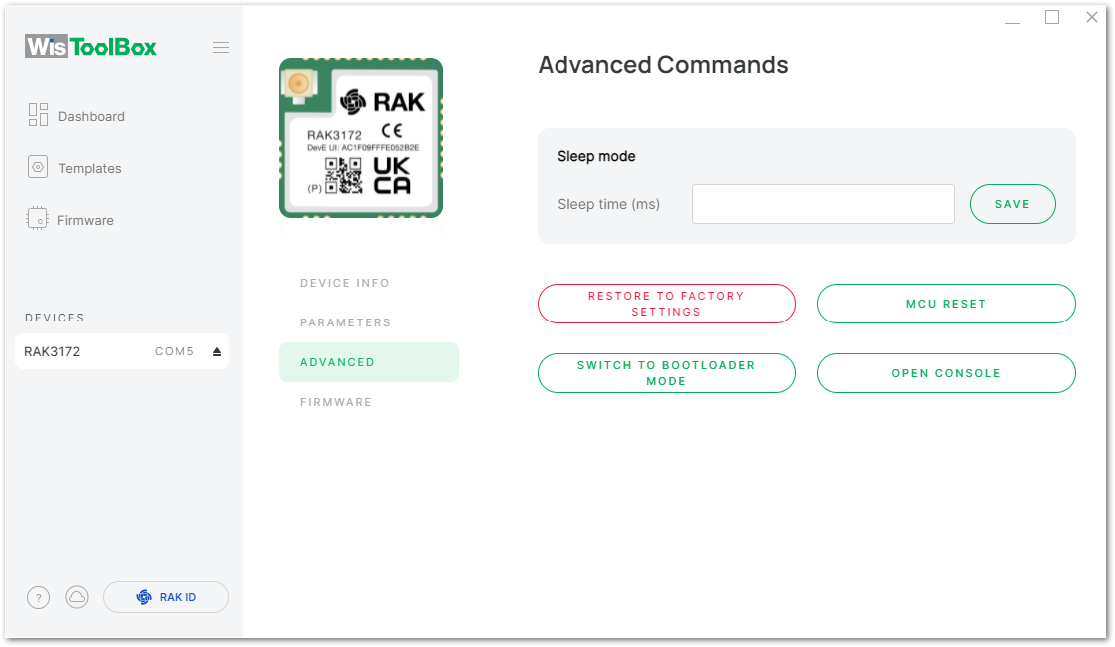 Figure 1: WisToolBox Desktop advanced commands
WisToolBox Templates
Use a template to define your LoRa preferences and apply them to RAK devices. If you sign in using a RAK ID, the templates are stored in the cloud and can be synced on different PCs.
- Click the + NEW TEMPLATE button to create a template.
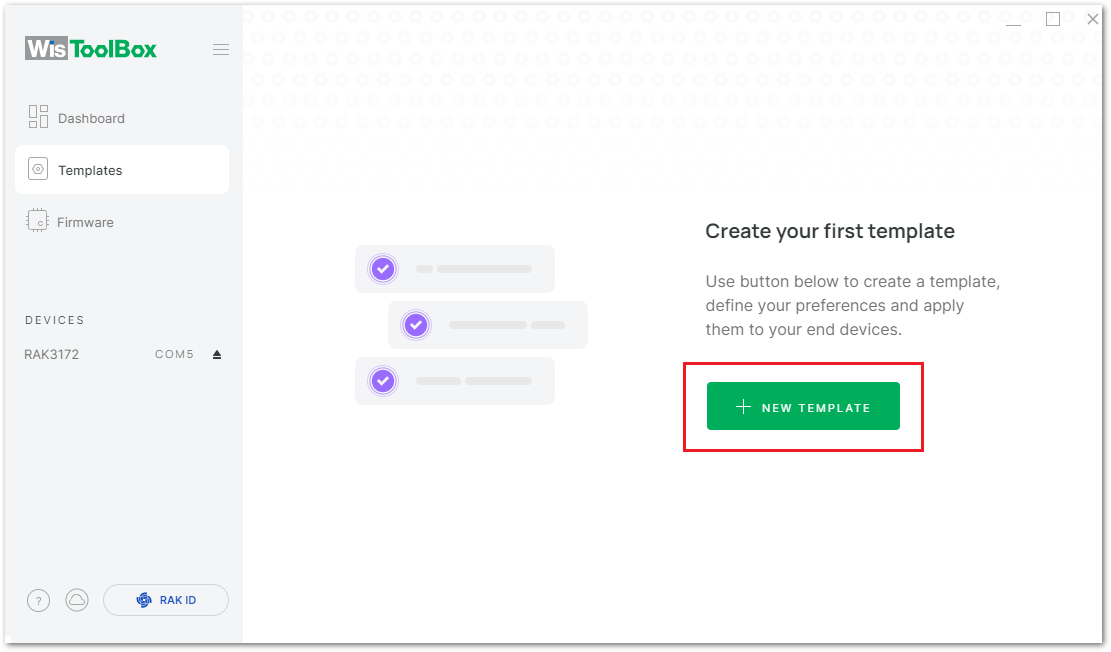 Figure 1: WisToolBox Desktop new template screen
- Place the mouse pointer over the TEMPLATE DEVICE window and use the mouse scroll button to view the complete list of devices.
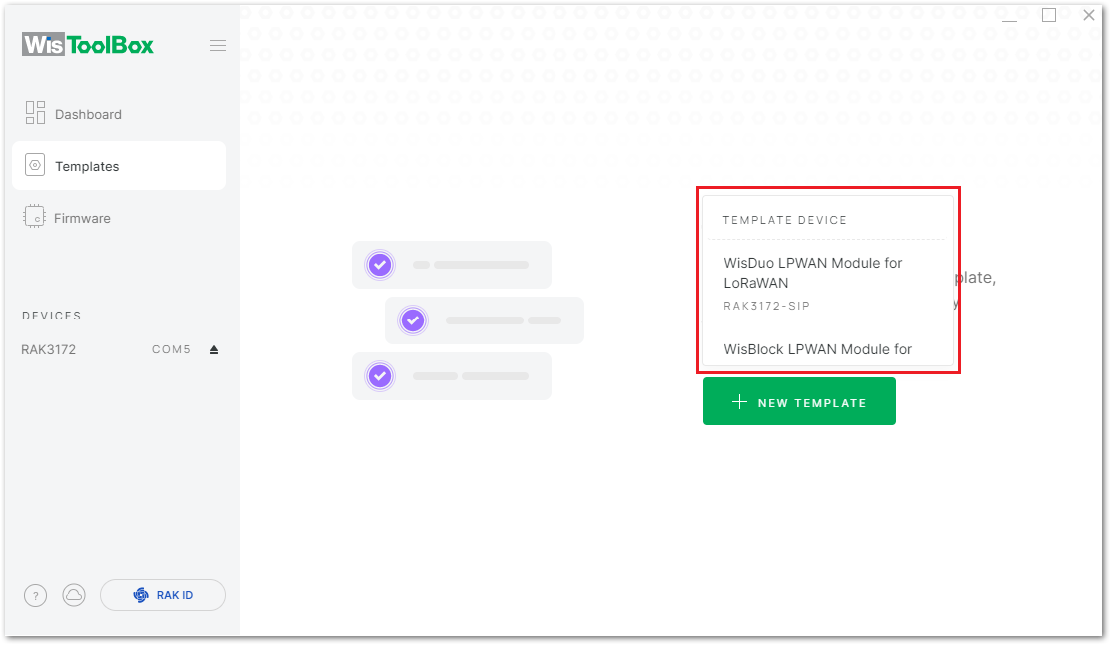 Figure 1: WisToolBox Desktop template device list
- Choose the RAK device to use in the new template.
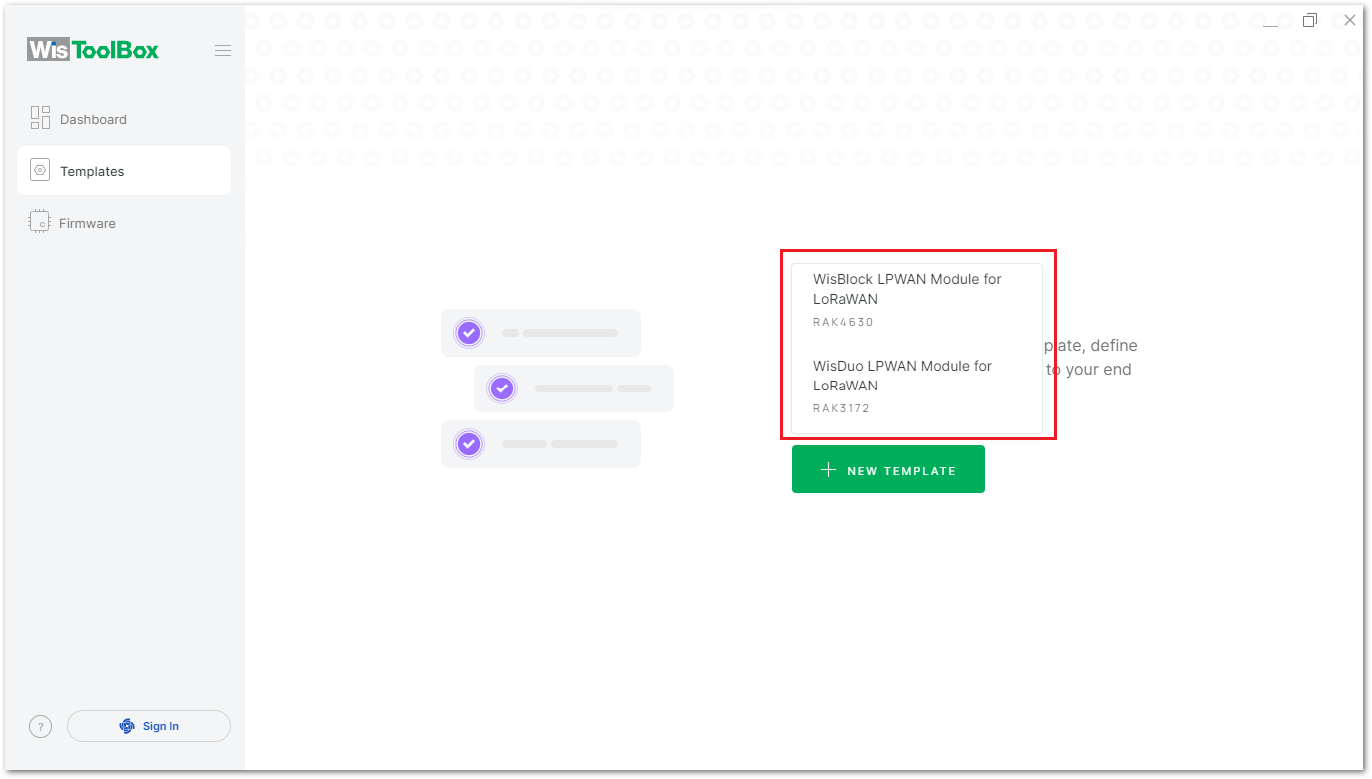 Figure 1: WisToolBox Desktop template scroll list
- Now type a name for your new template. Then click the highlighted icons and fill in the template parameters.
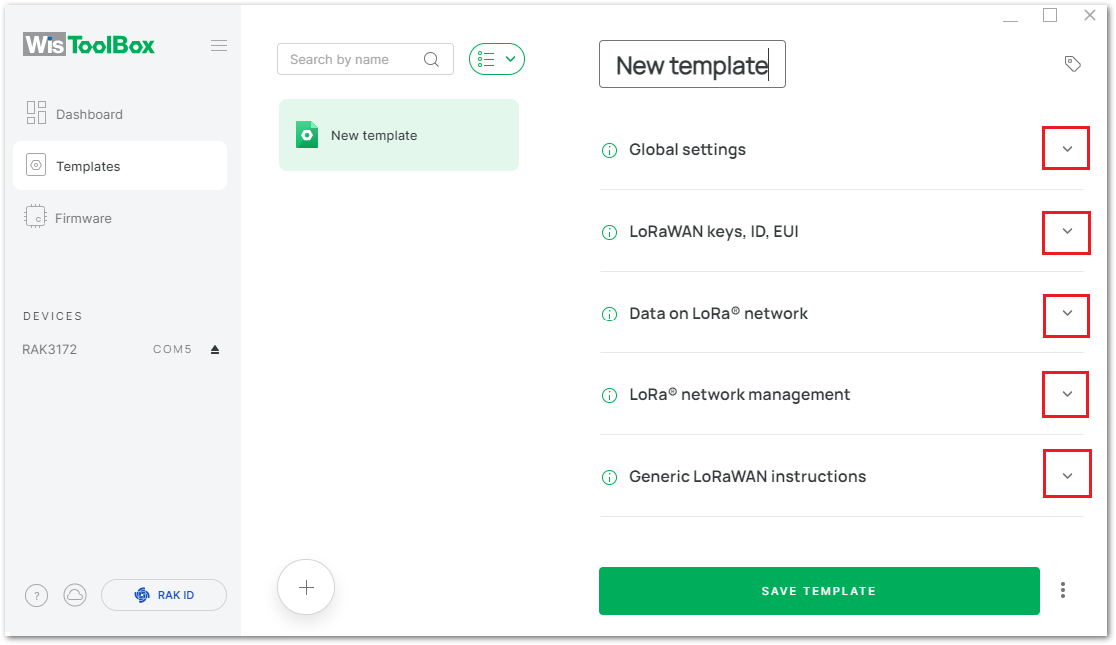 Figure 1: WisToolBox Desktop template fill parameters
Global Settings Parameters
- Figure 36 shows the existing parameters on Global Settings Template.
Choose the Network mode, Join mode, and LoRa Active Region. The Join Mode is configured on your LoRa gateway.
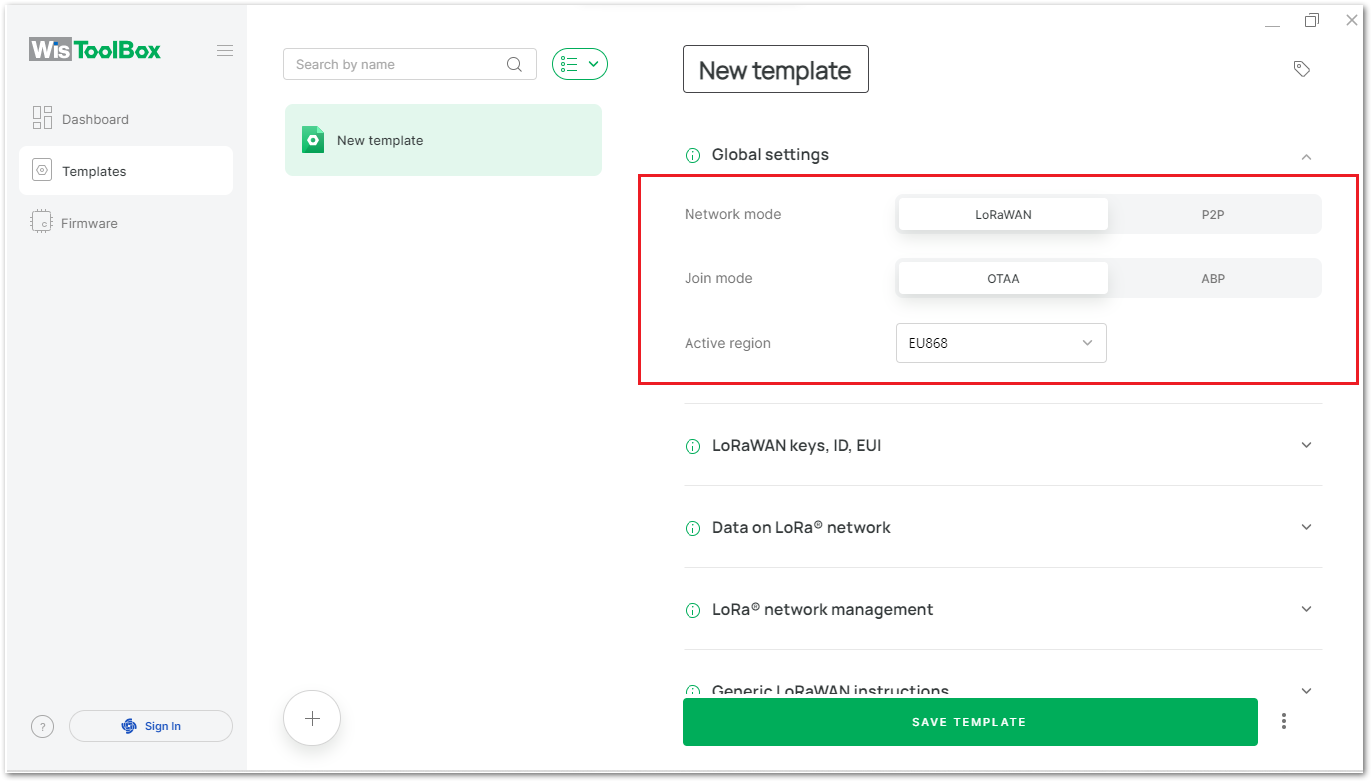 Figure 1: WisToolBox Desktop Template Global Settings parameters
LoRaWAN Keys, ID, EUI Template Parameters
- Figure 37 shows the existing parameters on LoRaWAN keys, ID, and EUI Template.
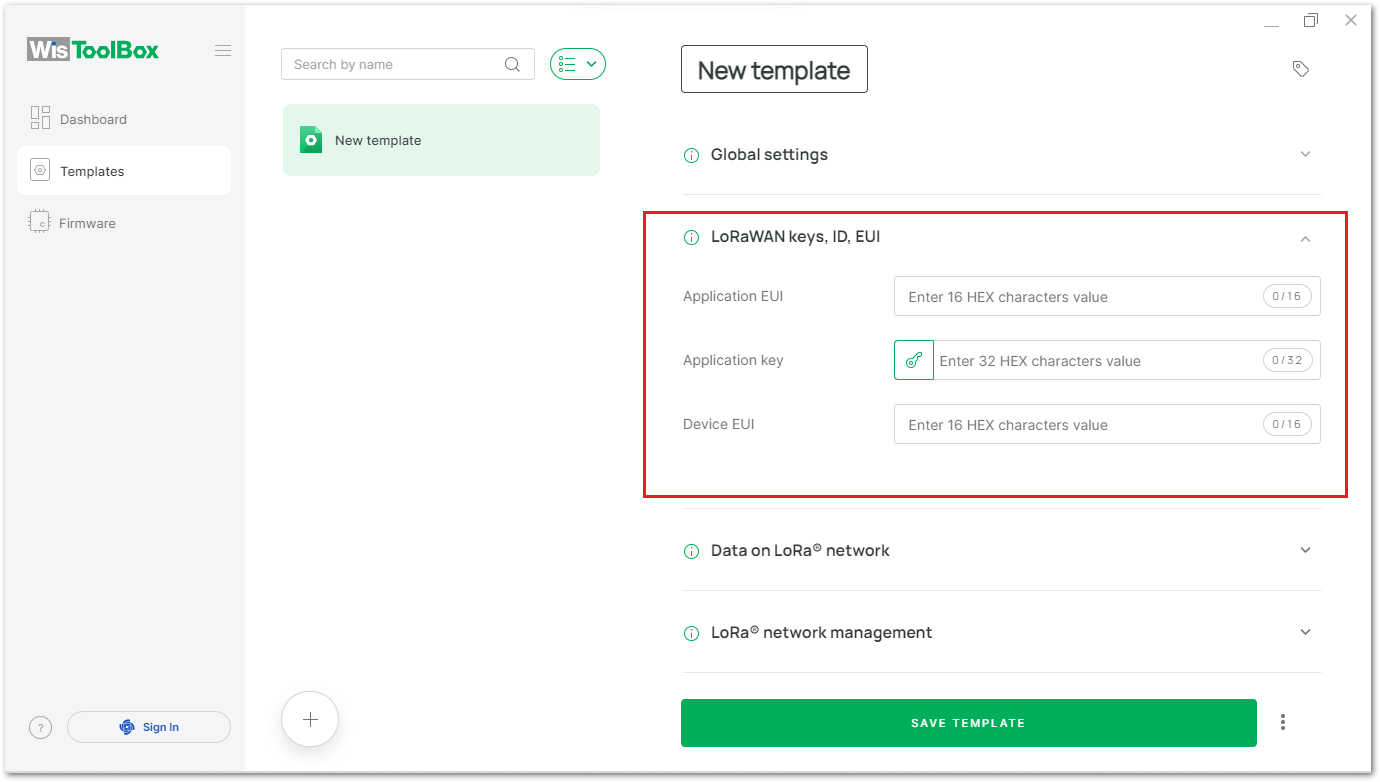 Figure 1: WisToolBox Desktop Template LoRaWAN keys, ID, and EUI parameters
The Application EUI and Application key parameters have been configured on your LoRaWAN gateway. If you do not have a Device EUI, then use the QR code printed on the sticker of your RAK device.
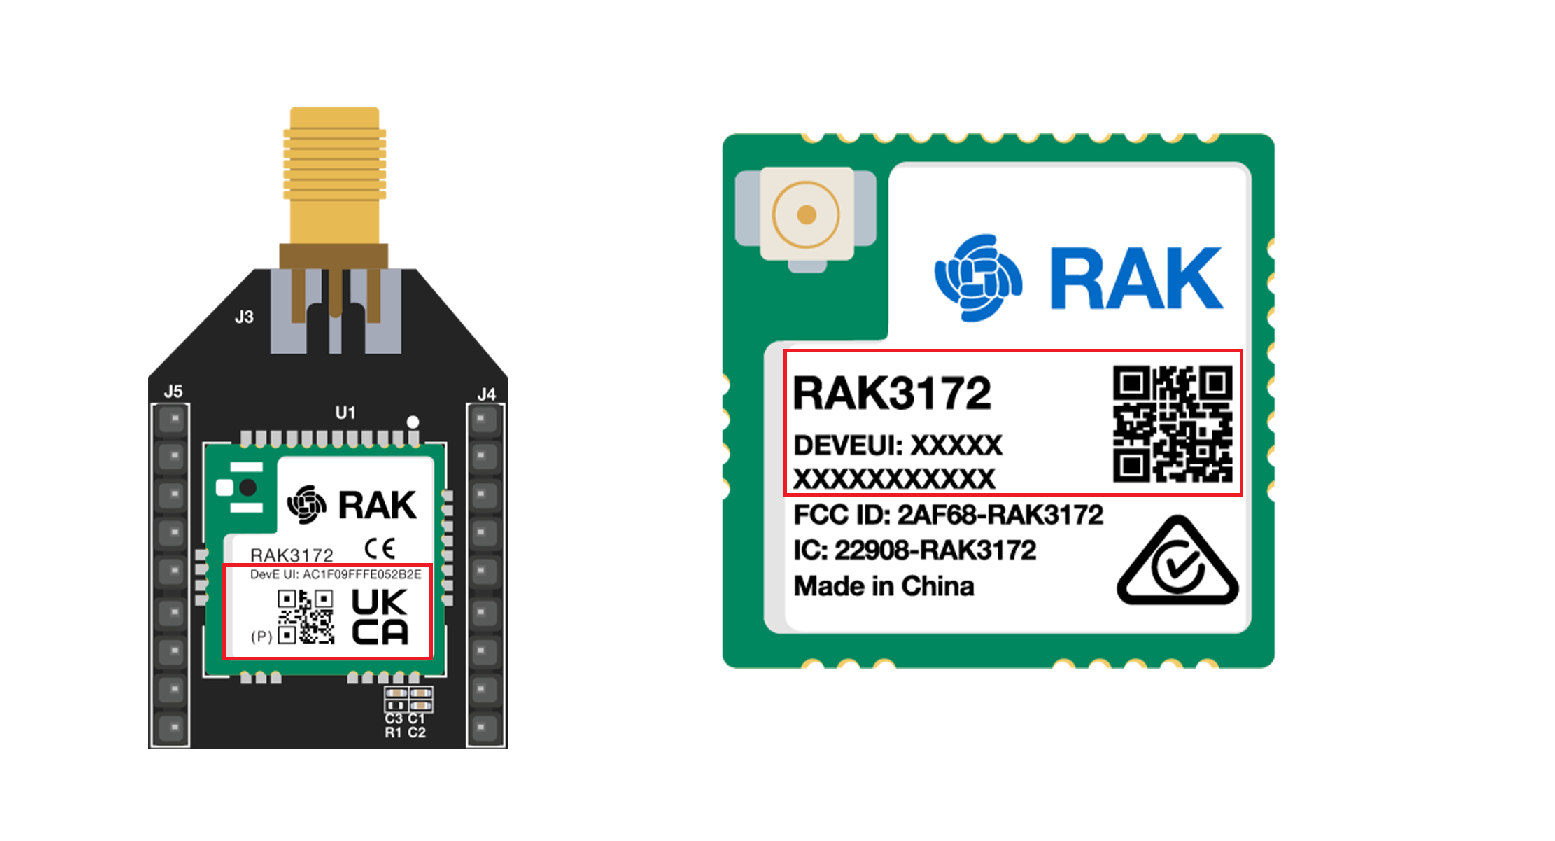 Figure 1: Device EUI QR code
- To finish creating the template, click the SAVE TEMPLATE button. The next time you launch the WisToolBox Desktop, the saved template will appear in the list of templates.
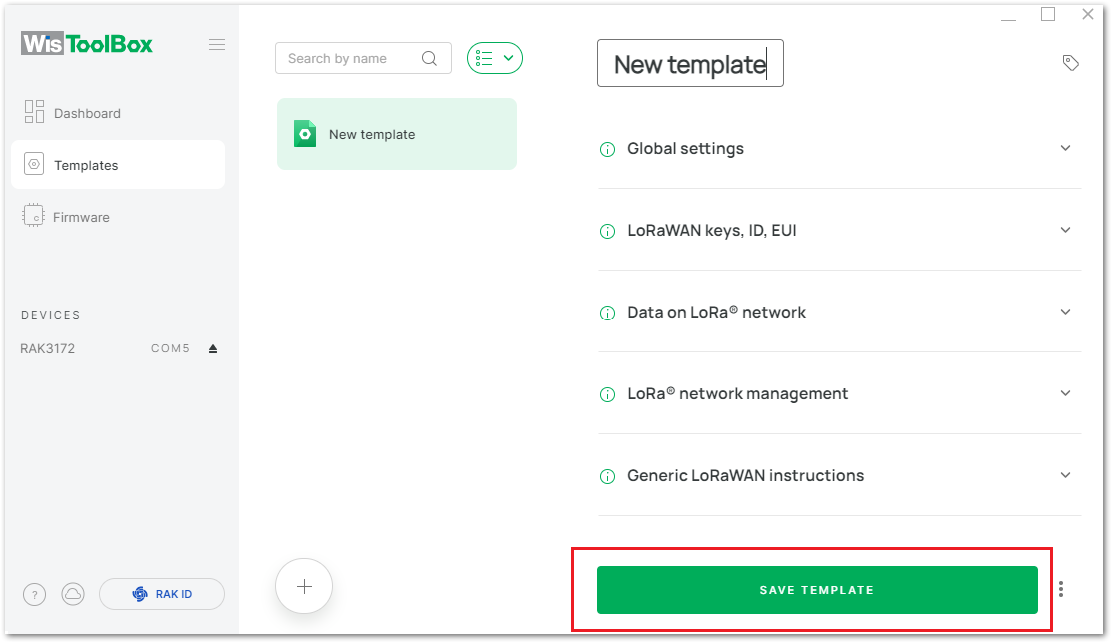 Figure 1: WisToolBox Desktop Template fill parameters
Templates can also be created on the main dashboard during device configuration.
WisToolBox Firmware
Official Firmware
The firmware versions are officially released by RAK. If there is a new available version, it is recommended to upgrade the firmware to use the optimized functions.
- From the dashboard window, select the FIRMWARE menu, as shown in Figure 40.
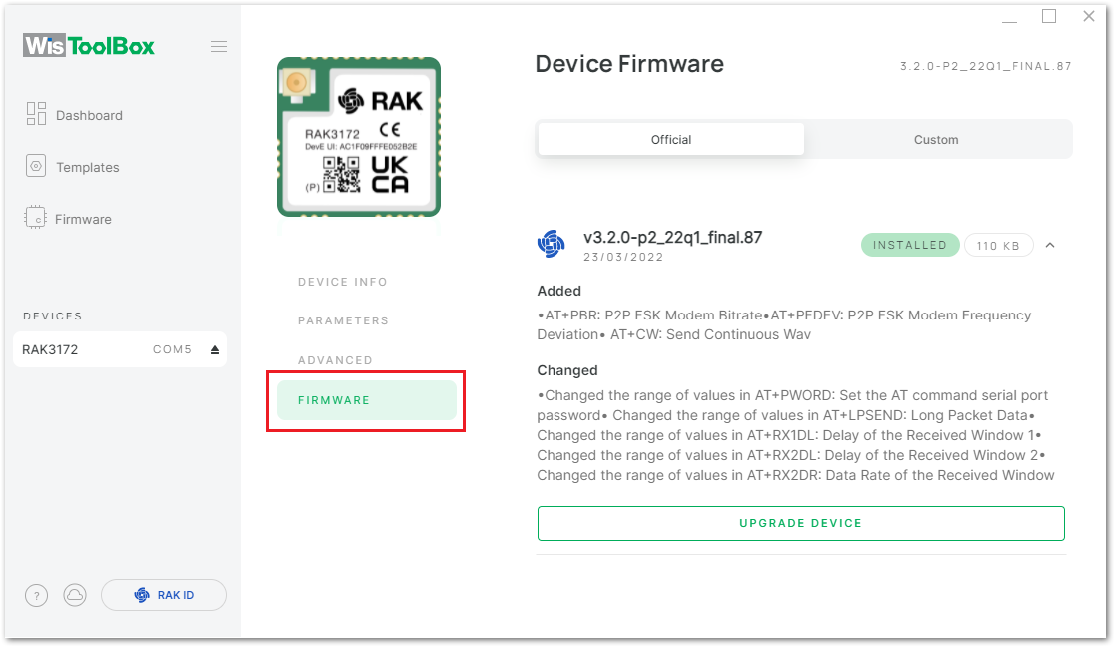 Figure 1: WisToolBox Desktop Firmware Menu
- Click the INSTALLED button to check details about the actual firmware version.
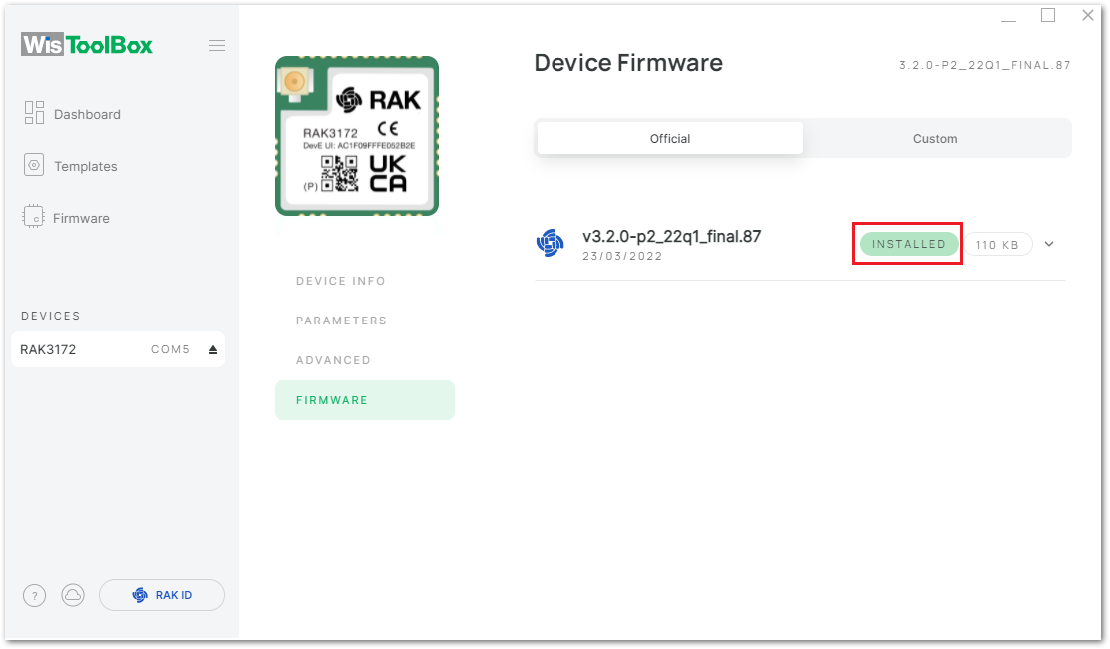 Figure 1: WisToolBox Desktop current firmware
- Figure 42 shows the details of features added and changed in the current version. To upgrade the firmware, click the "UPGRADE DEVICE" button to install a new firmware version.
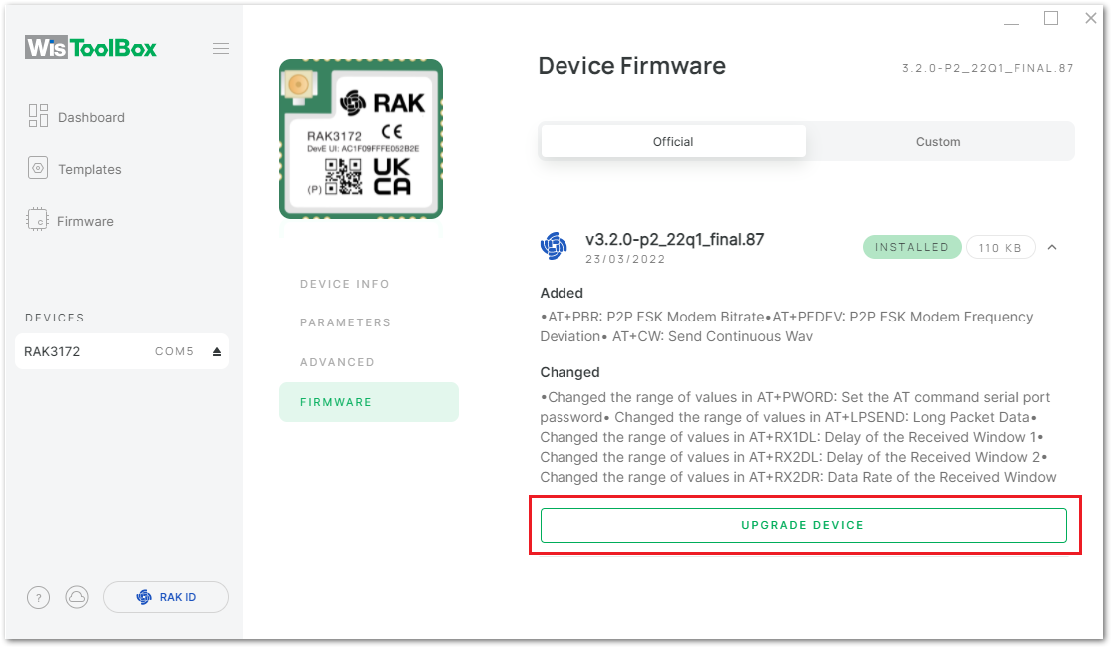 Figure 1: WisToolBox Desktop upgrade device
- Click "UPGRADE" in the pop-up window to confirm the upgrade.
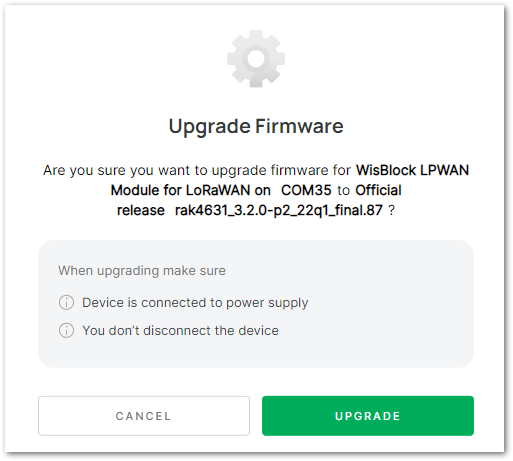 Figure 1: Upgrade Firmware Confirmation
- After the firmware upgrade has been completed, you may now click "CLOSE".
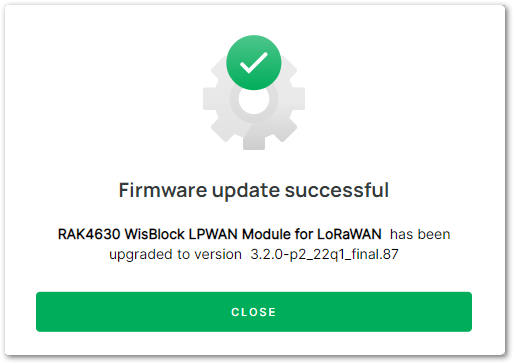 Figure 1: Firmware Upgrade Success
Custom Firmware
Users can try to upgrade Custom Firmware by compiling your application using RUI3-supported IDEs like Arduino. The Custom Firmware is the binary .bin file generated by Arduino IDE. The file must be compressed in a zip to be accepted by WisToolBox.
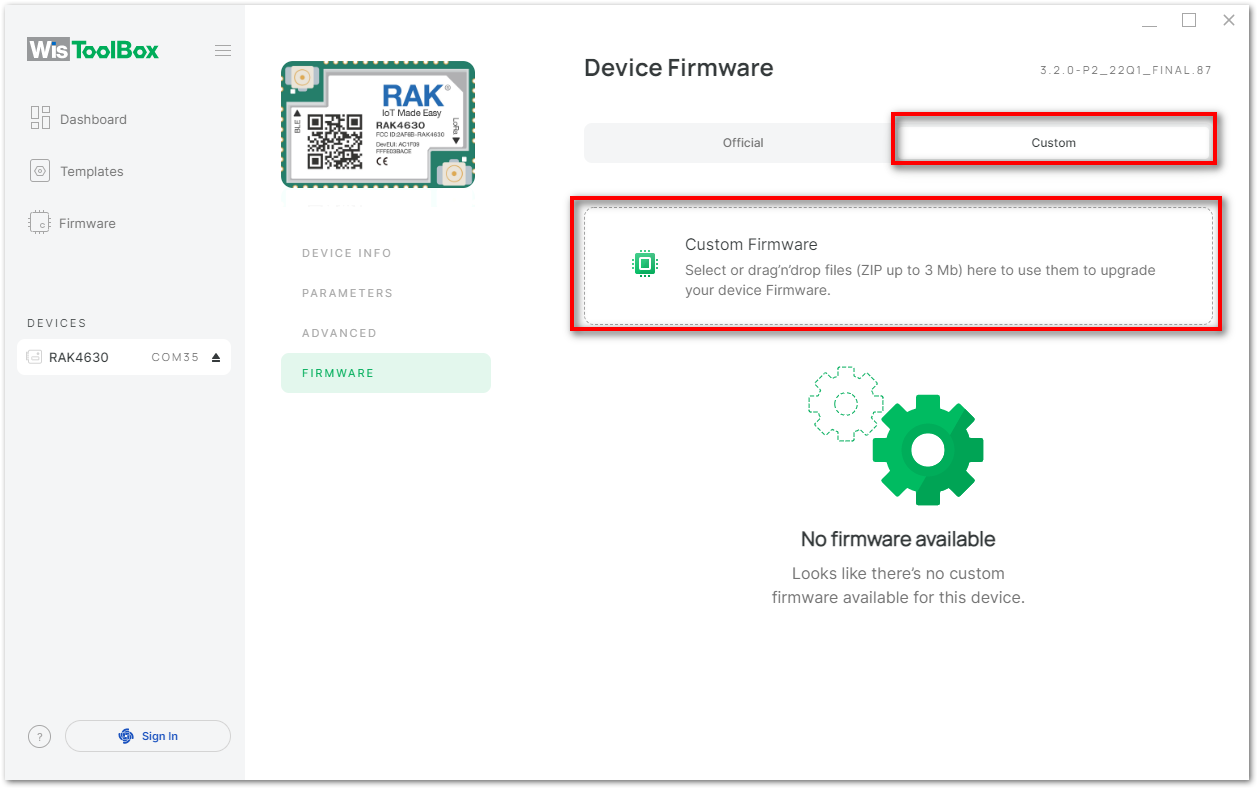 Figure 1: WisToolBox Desktop Custom Firmware
Appendix
Linux Installation Configuration
For Linux users, an extra configuration is required so that WisToolBox can automatically switch to the specific port used by the RUI3-enabled RAK module.
Upon installation, click (1)Permissions and then enable (2)Access USB hardware directly.
 Figure 1: WisToolBox Linux Permission
After this, you need to run in terminal sudo gpasswd --add $USER dialout and then restart via reboot command.
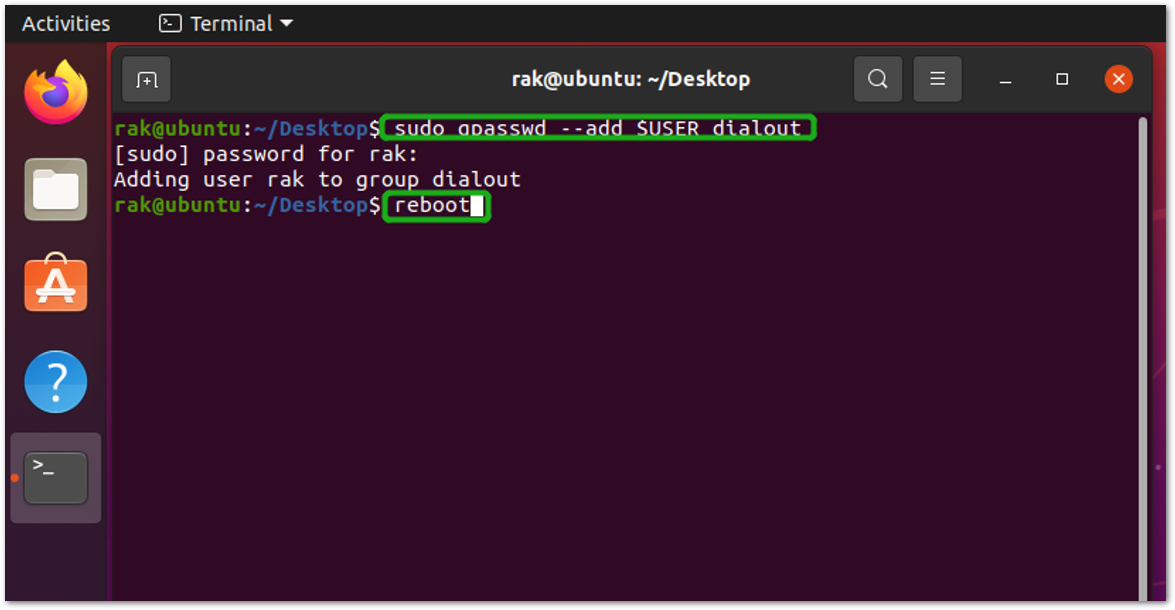 Figure 1: WisToolBox Linux Terminal