WisToolBox for Mobile
Installation
To use the WisToolBox Mobile app, make sure you meet the three requirements:
- A RAK device that has a Bluetooth Low Energy (BLE) interface;
- A mobile with WisToolBox mobile app installed, which is available both in iOS App Store and Android Google Play Store;
- An active internet connection the first time after the WisToolBox app starts. The application will update the latest configuration.
Compatible versions of iOS and Android:
- iOS 15 and newer
- Android 11 and newer
Hardware Compatibility
The WisToolBox Mobile application is currently available for RAK463x RUI3 devices. It is compatible with the following RAK LPWAN modules:
| RAK Devices |
|---|
| RAK4630 |
| RAK4631-R |
Open the WisToolBox Mobile
- Power up your RAK device then launch WisToolBox application on mobile.
- Press the reset button on the RAK device and click on the CONNECT DEVICE button.
- Press the ALLOW button to turn on BLE and start the scan. Look for a BLE Device named RAK.XXXXXX in the scan list of the app.
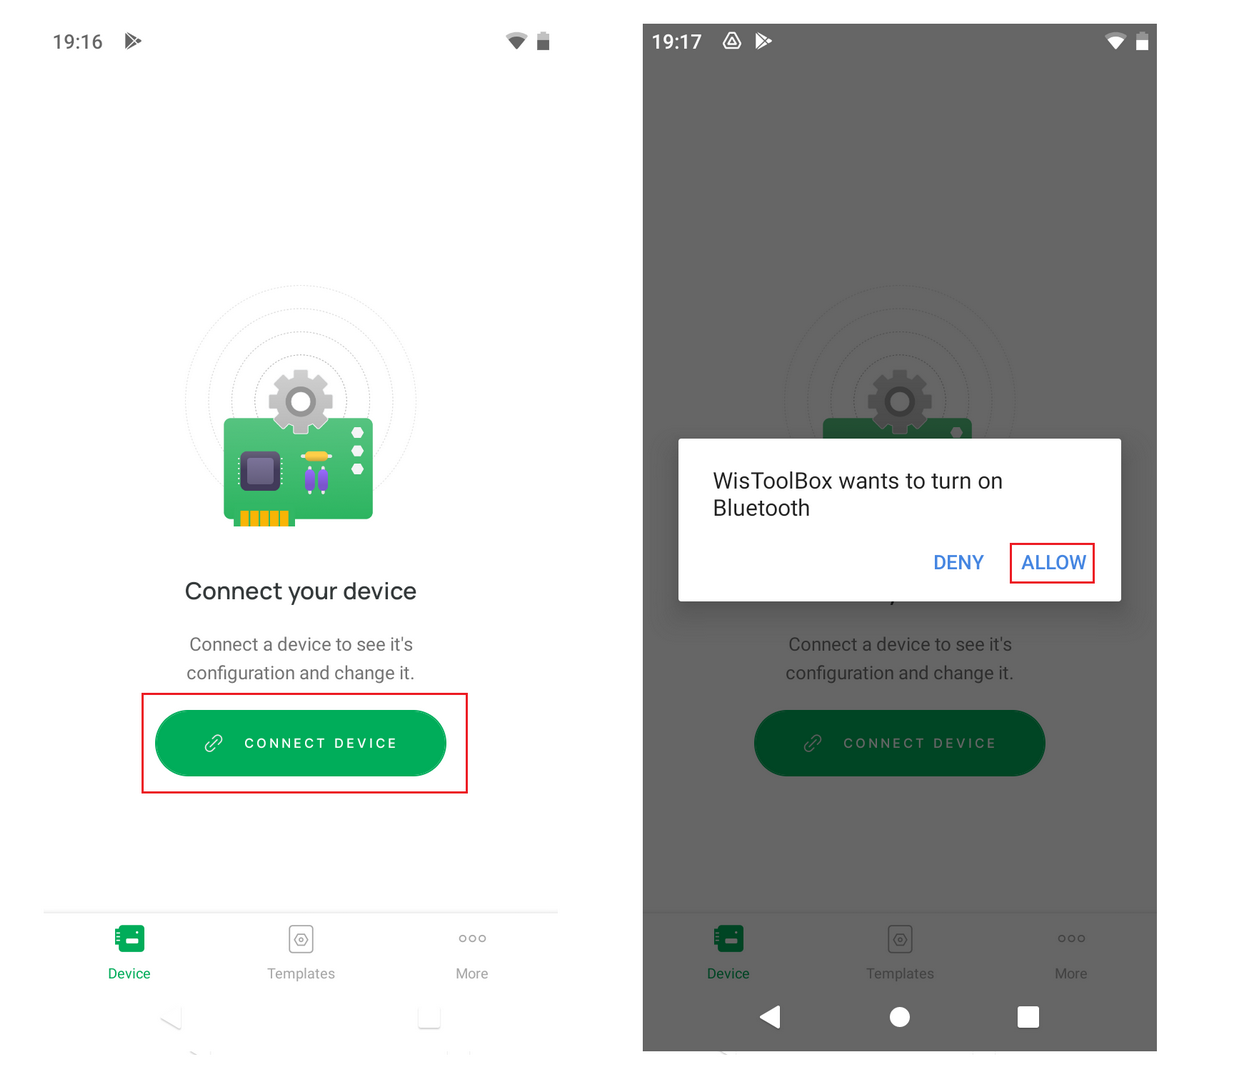 Figure 1: WisToolBox Mobile connect device
By default, the BLE advertising of the RAK device is turned off automatically if no connection is established after 30 seconds. Connect to the RAK device immediately after pressing the reset button.
Some Android smartphones require GPS enabled to permit connection to BLE. When GPS is enabled, no sensitive information is used or shared with the application.
- When the RAK device is found, connect and pair the device by clicking the green button. Then wait for data synchronization.
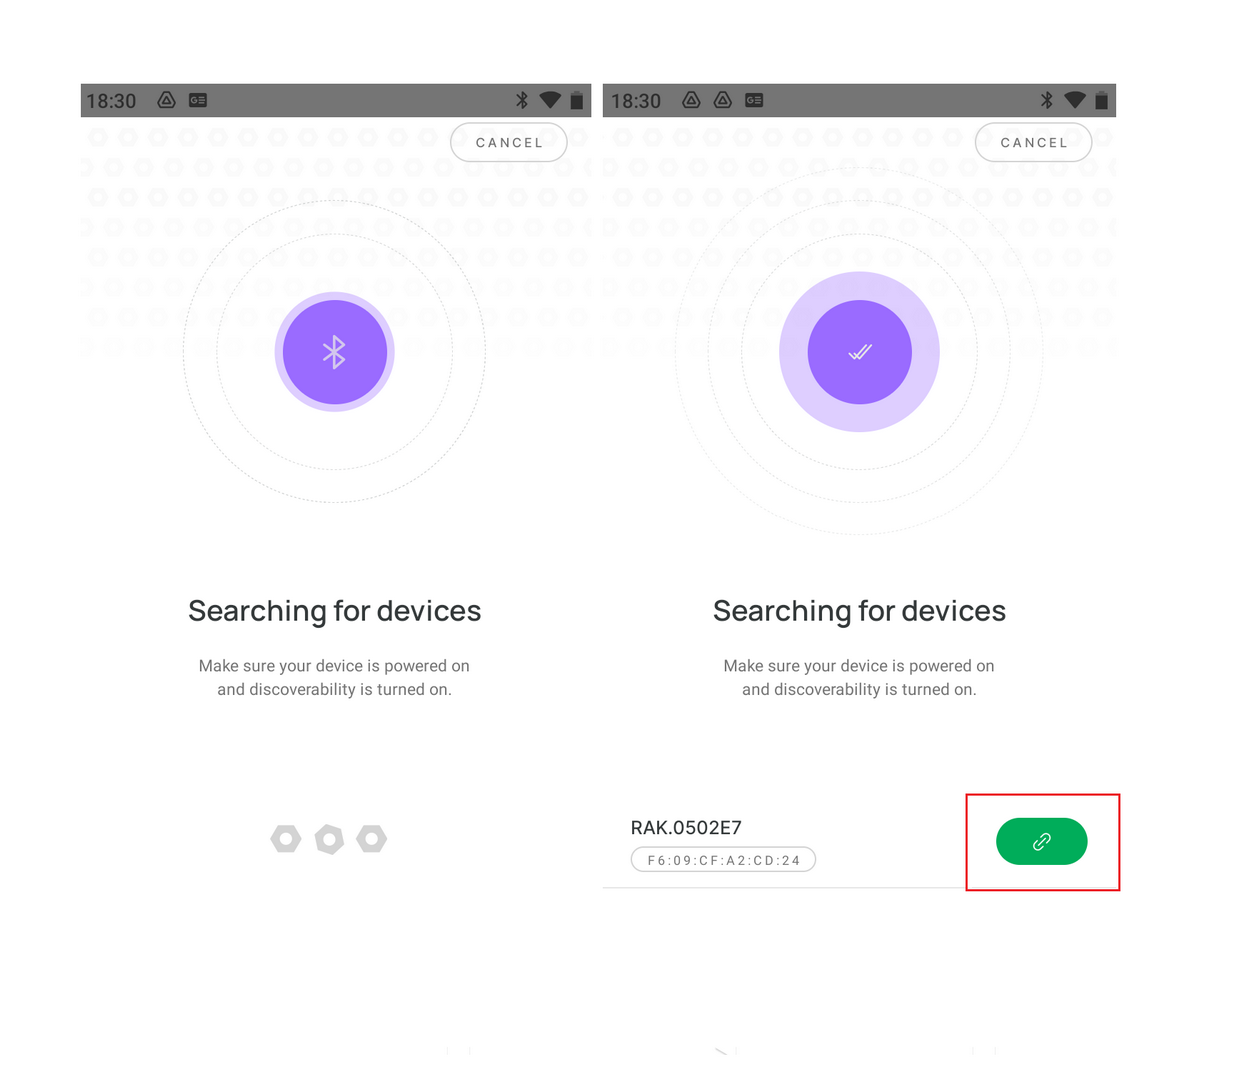 Figure 1: WisToolBox Mobile BLE scan
- When the Data synchronization is completed, you will see the DEVICE INFO screen.
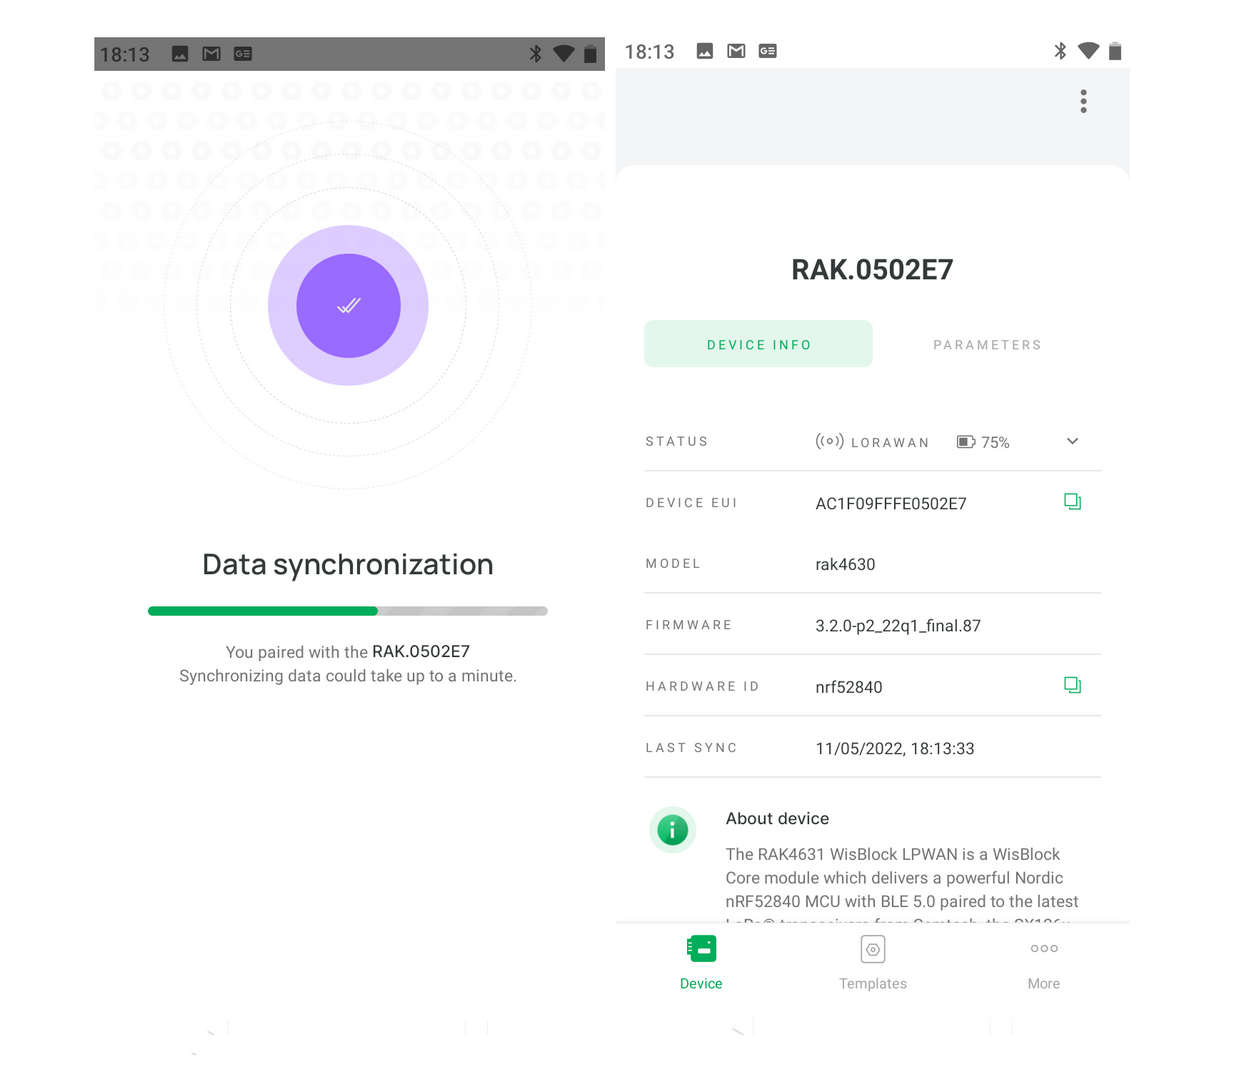 Figure 1: WisToolBox Mobile BLE is connected
- In case of an error, it will show No devices found, as seen in Figure 4. Then you need to redo the steps again from step 1.
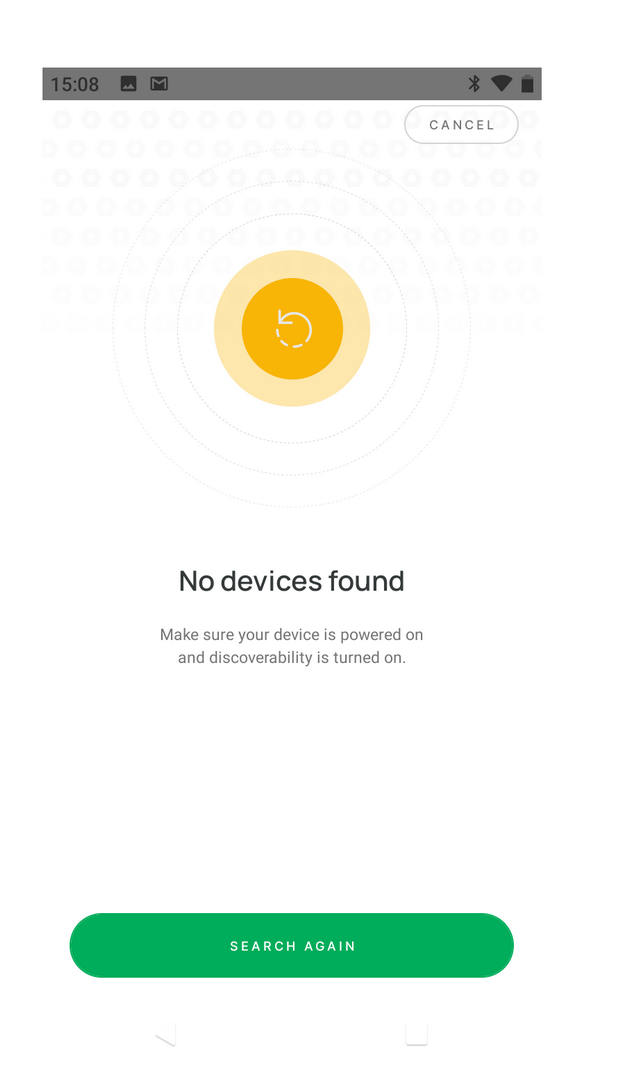 Figure 1: WisToolBox Mobile BLE scan error
Create RAK ID Profile
It is recommended to create a RAK ID profile. Your RAK ID profile will be stored in the cloud and can be synced on different PCs. You can only edit your details and preferences at the RAK ID Portal.
- First, click on the More menu icon, and select Sign in.
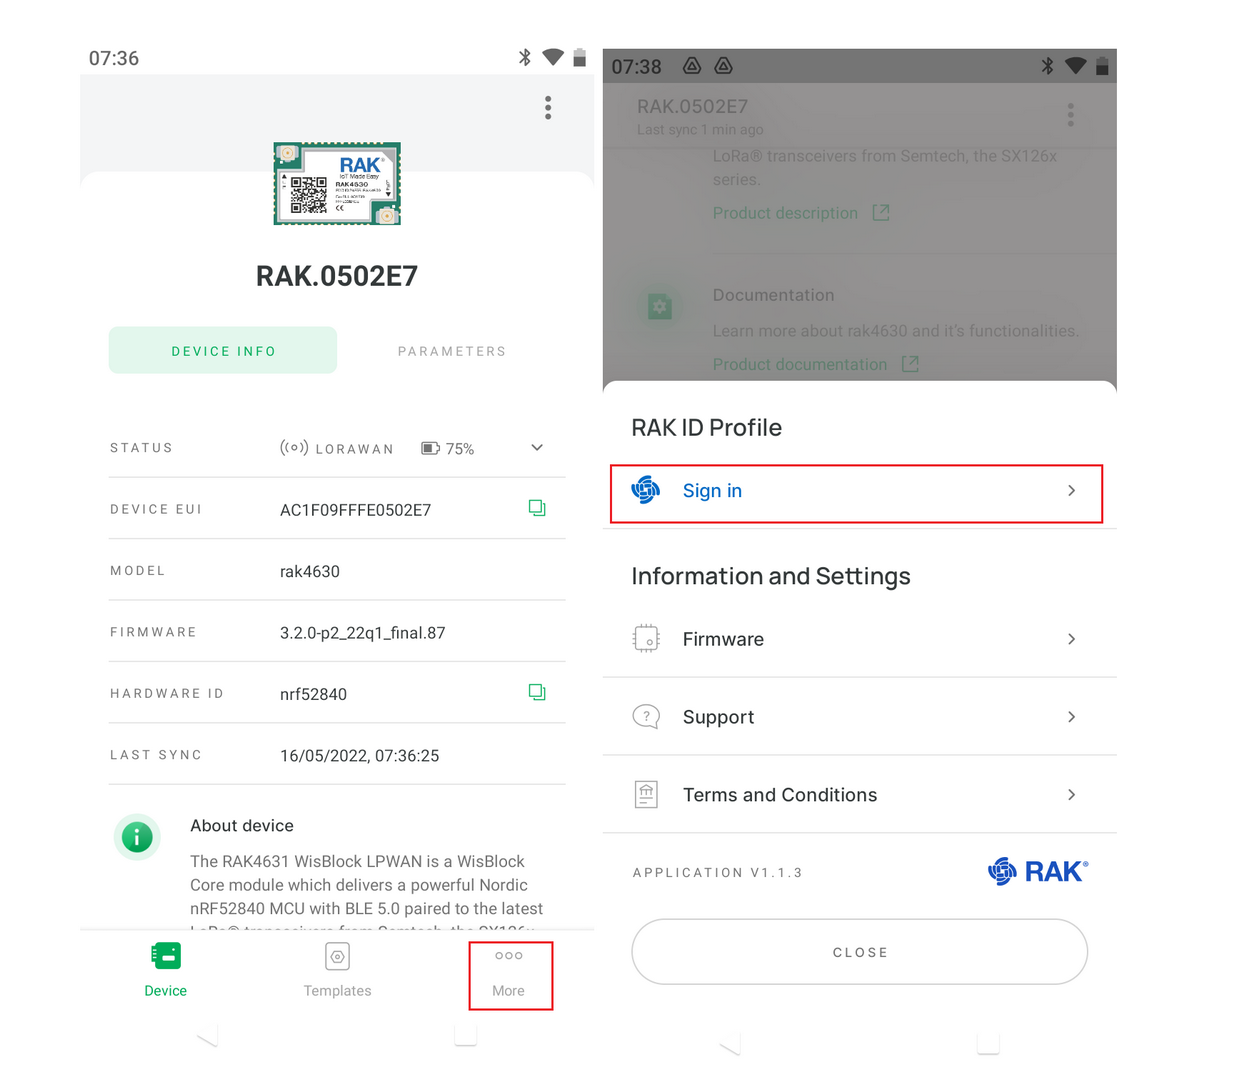 Figure 1: WisToolBox Mobile RAK ID menu
- Lastly, click on the SIGN IN WITH RAK ID button.
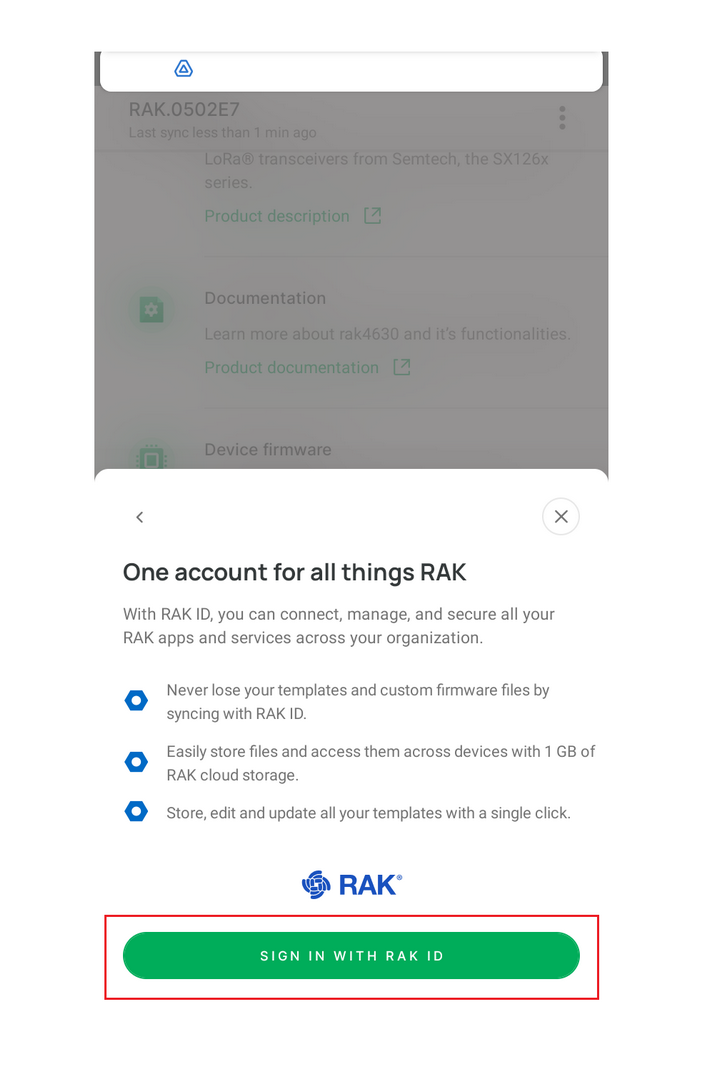 Figure 1: WisToolBox Mobile create RAK ID profile
Parameters
Global Settings Parameters
Figure 7 shows the Global Settings parameters section.
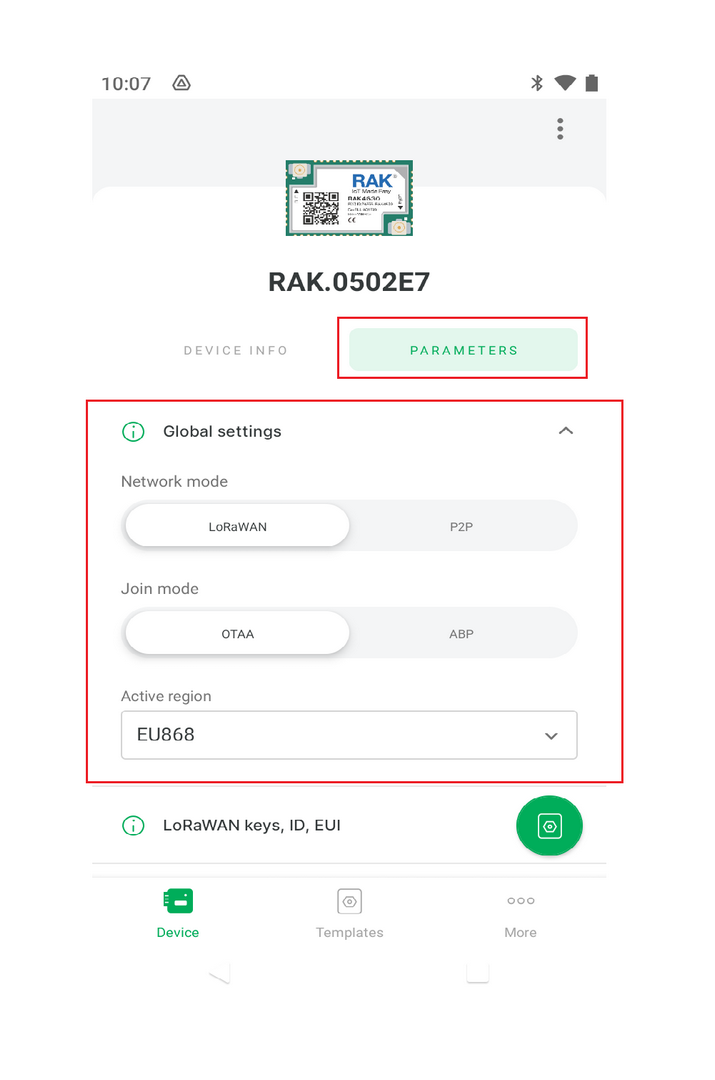 Figure 1: WisToolBox Global Settings parameters
LoRaWAN Keys, ID, EUI Parameters
Figure 8 shows the LoRaWAN keys, ID, EUI parameters section.
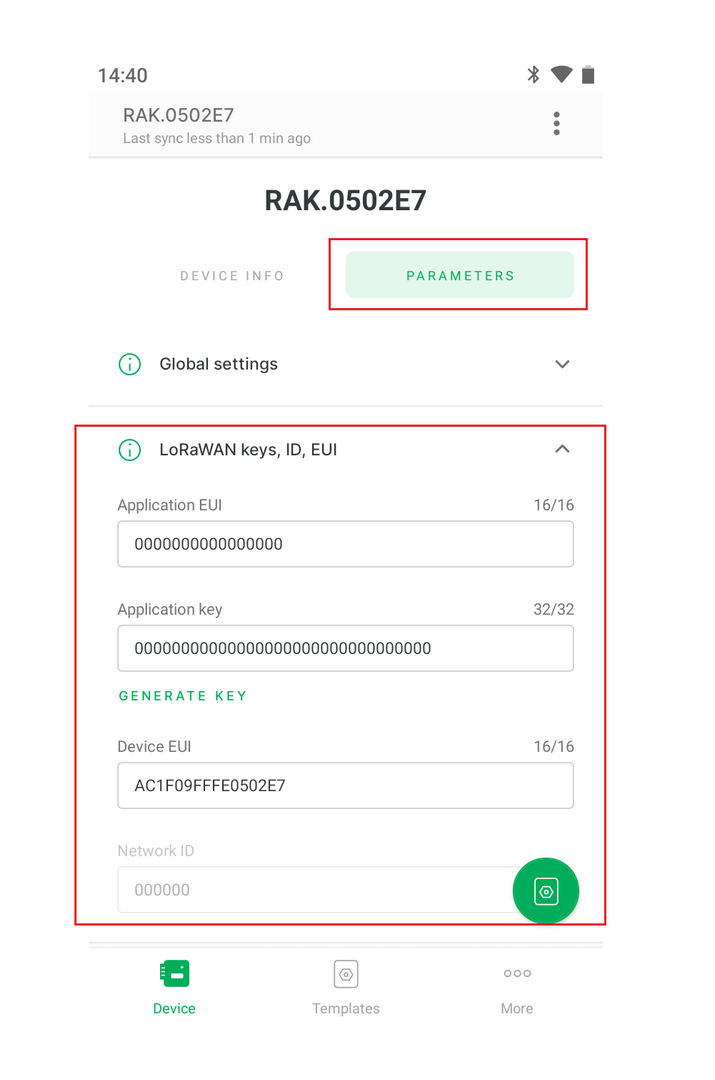 Figure 1: WisToolBox LoRaWAN Keys, ID, EUI parameters
If you change the value of any parameter, then you have a new command in a queue, and a button will appear.
- Click on the button to update the new value on the RAK device.
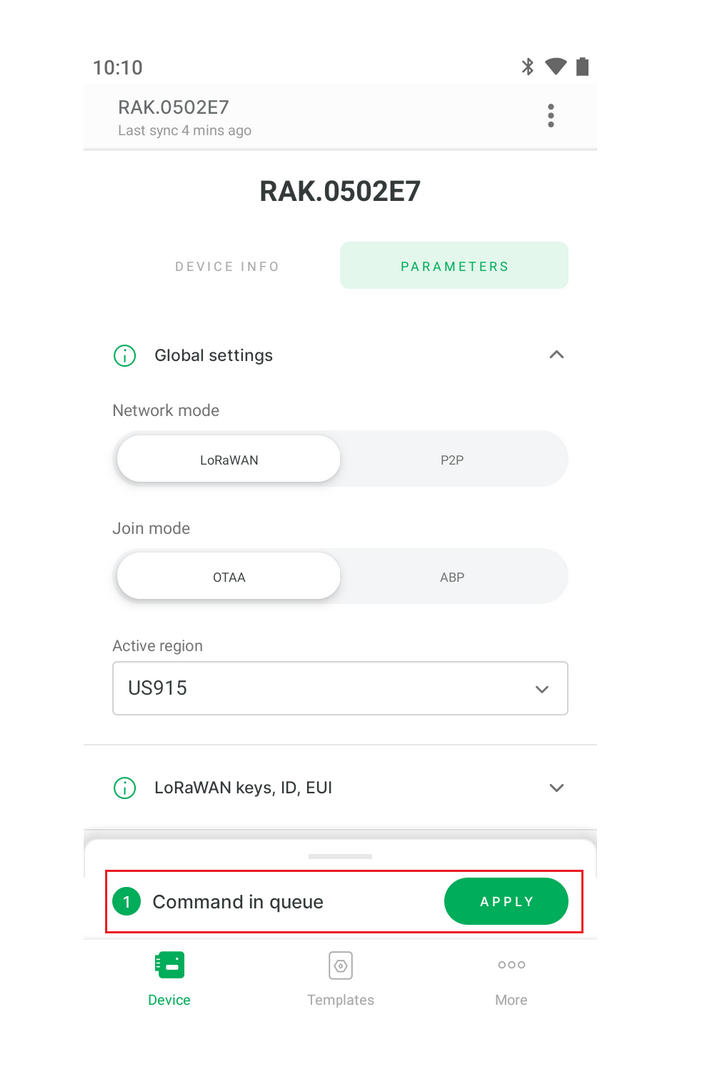 Figure 1: WisToolBox Command in queue
- Now wait up to a minute for command reply.
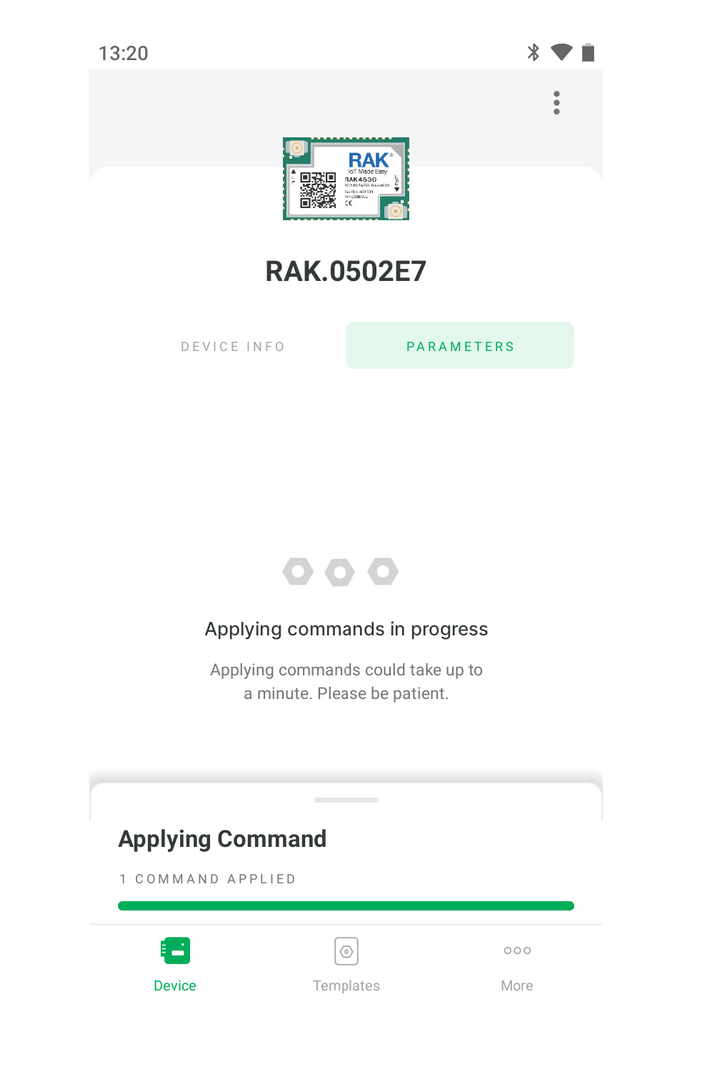 Figure 1: WisToolBox Applying Command progress
Advanced Mode Commands
- The Advanced Mode commands are available from the DEVICE INFO menu shown in Figure 11.
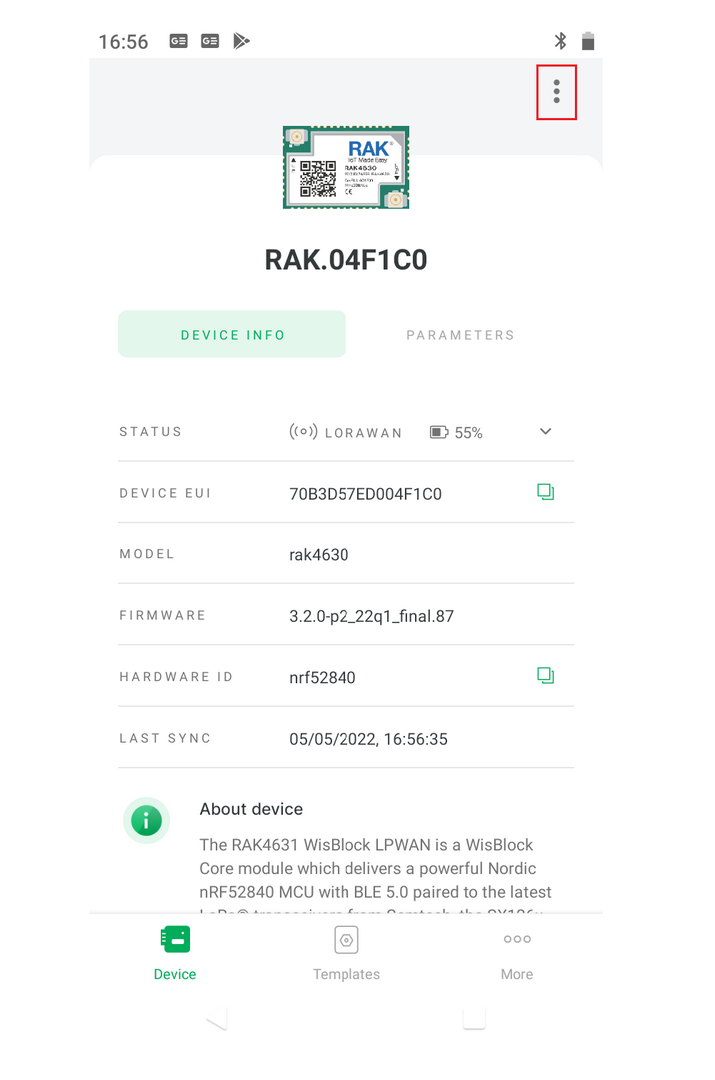 Figure 1: WisToolBox Mobile Advanced commands menu
- Click on Advanced Mode Commands button to check the Advanced commands.
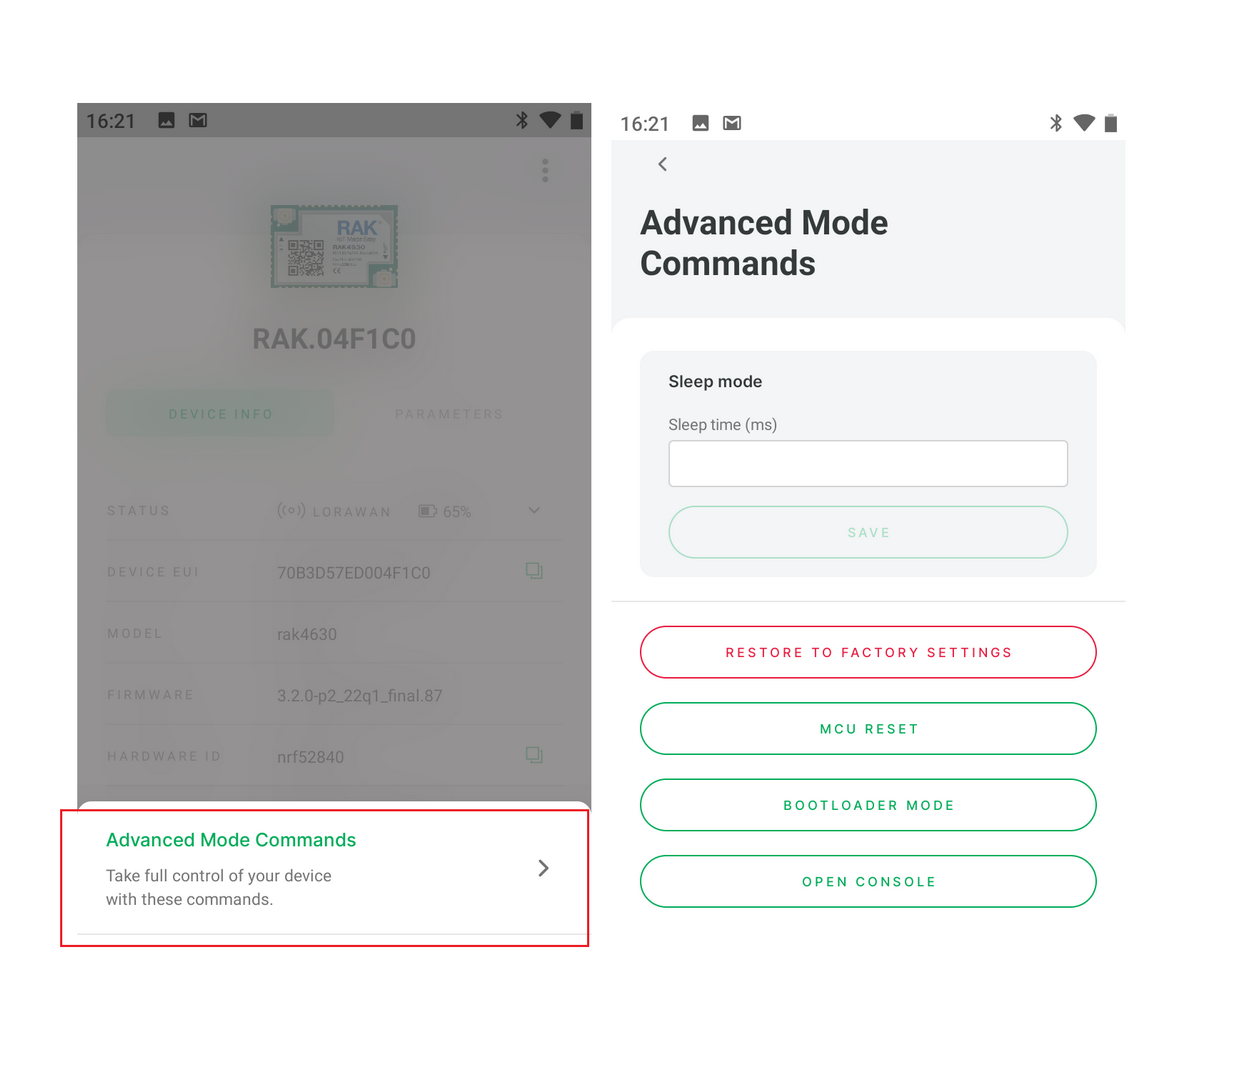 Figure 1: WisToolBox Mobile Advanced commands
WisToolBox Mobile Templates
You can save the LoRa parameters used in your application in a template. It is also possible to create multiple templates for different projects and applications. If you sign in using a RAK ID, the templates are stored in the cloud.
- To create a new template, select Templates icon, then click on NEW TEMPLATE button.
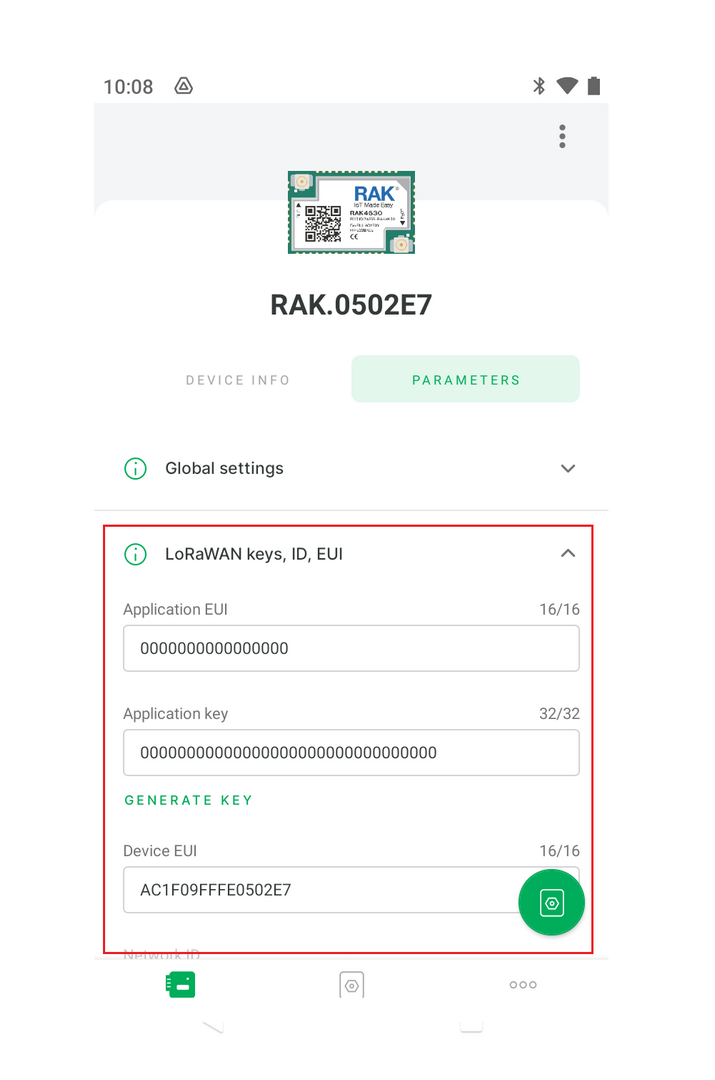 Figure 1: WisToolBox Mobile Templates
- Type a Template name on the text area, then click on NEXT button.
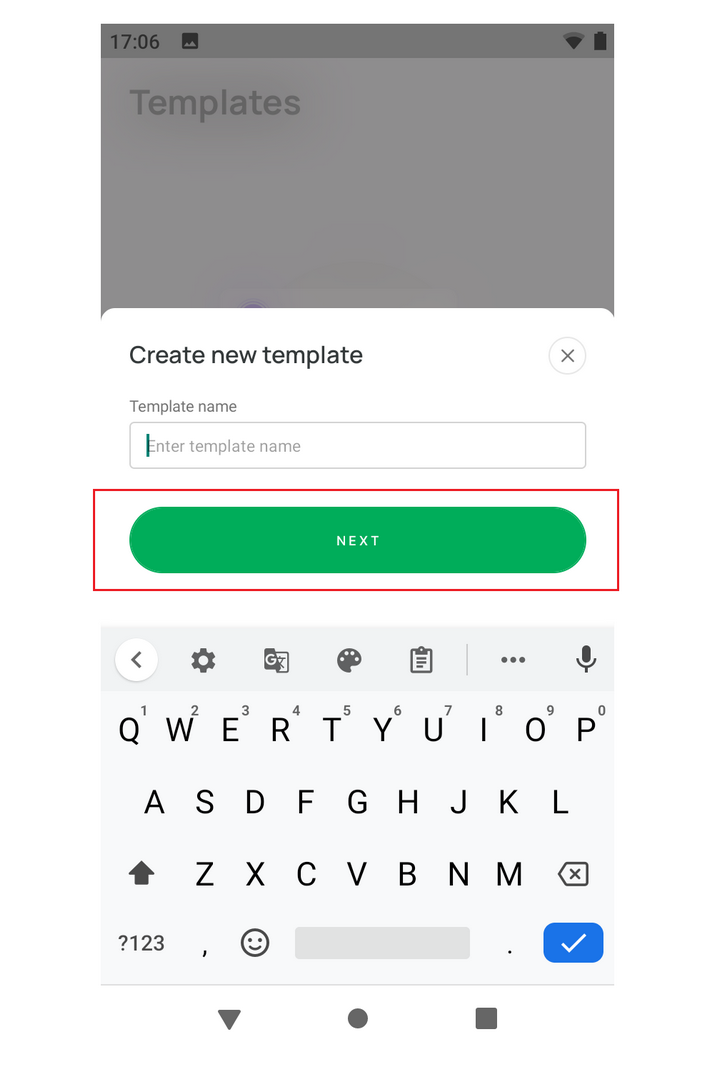 Figure 1: WisToolBox Mobile template name
- On the Template device list, choose RAK4630, then click on the CREATE TEMPLATE button. The RAK3172 modules are not supported by WisToolBox mobile.
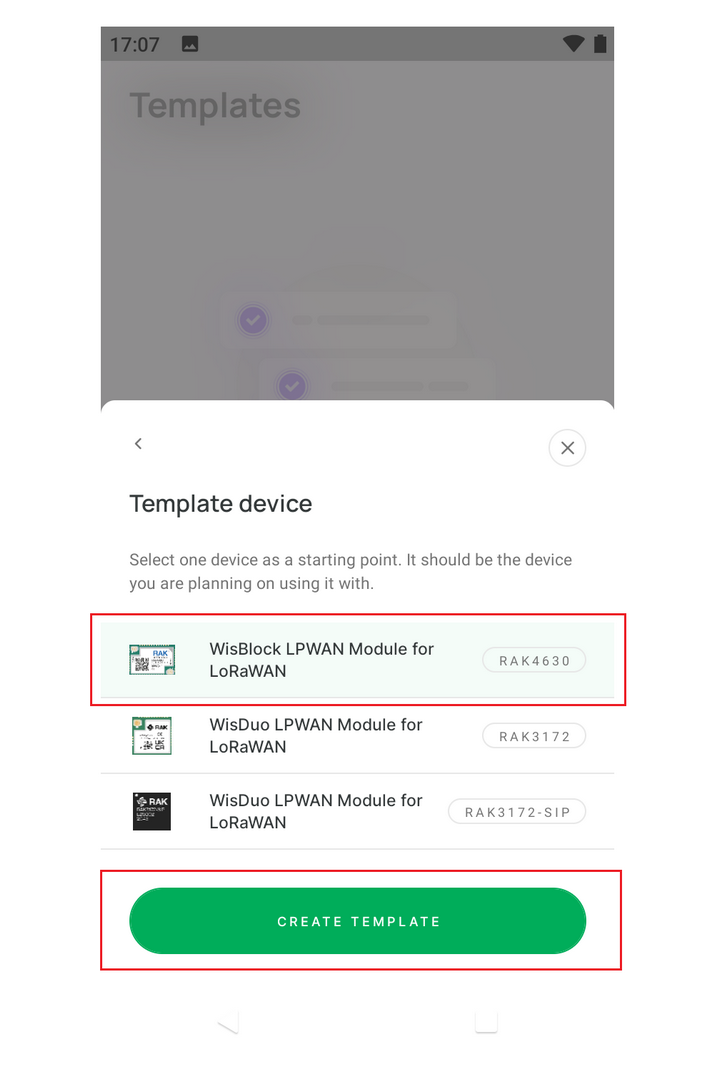 Figure 1: WisToolBox Mobile new template
- In Figure 16, the template named
otaa_us915was created. The parameters screen shows all available LoRa parameters for the template.
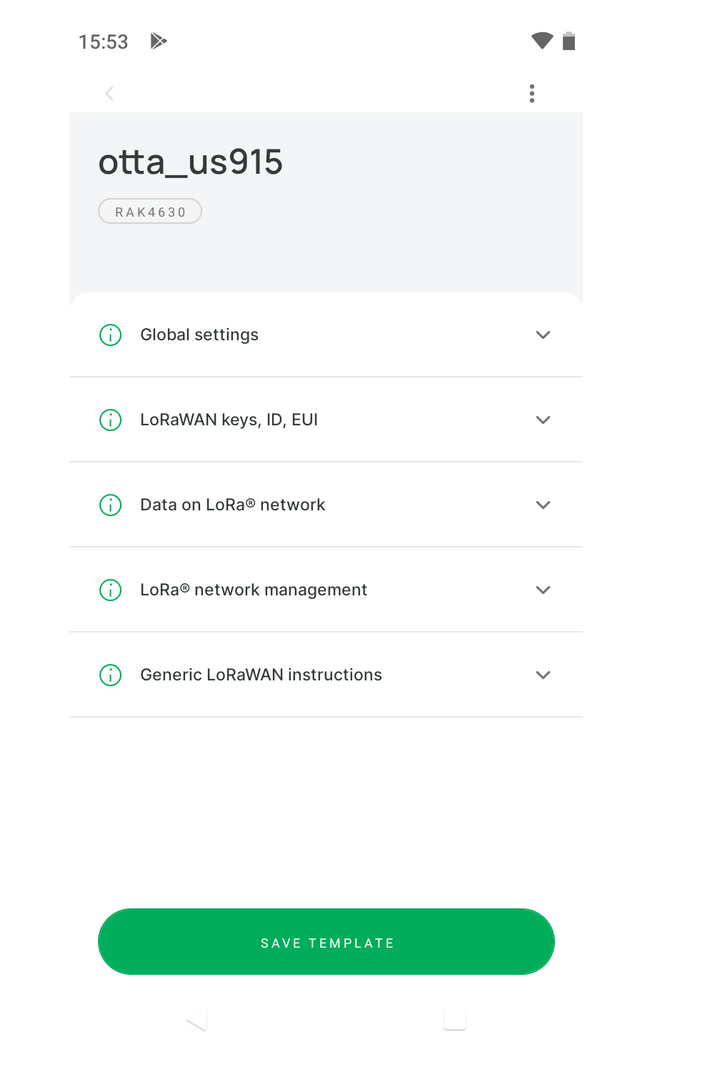 Figure 1: WisToolBox Mobile Template parameter
- To select a specific parameter set, click on some icons highlighted in red.
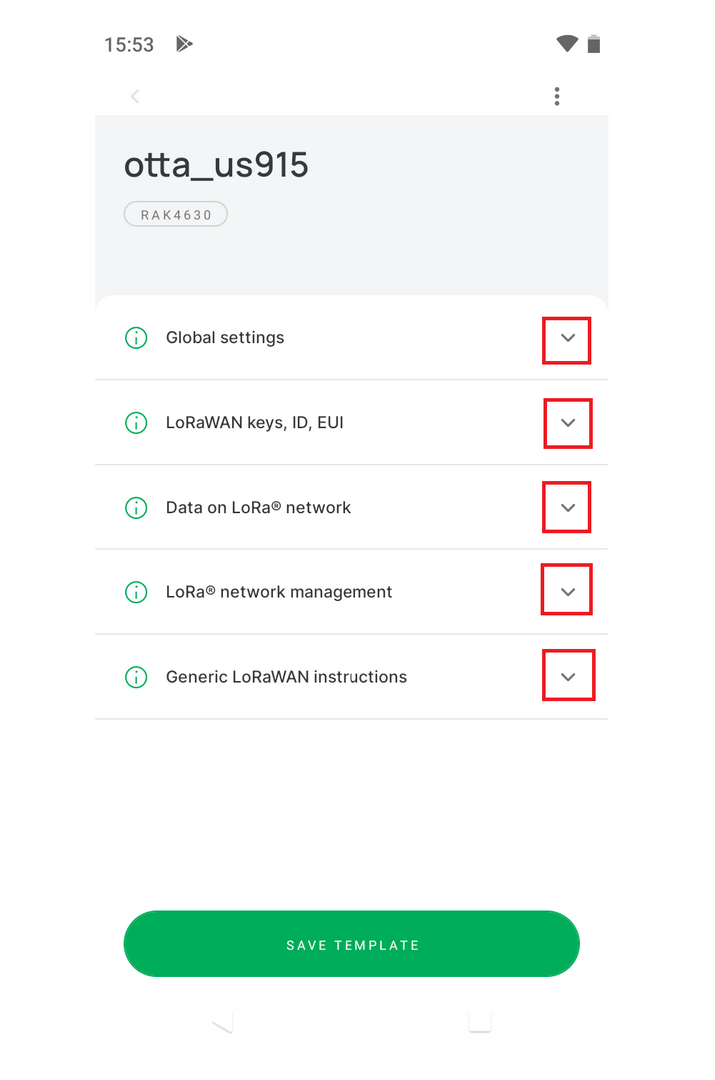 Figure 1: WisToolBox Mobile select parameter
- The screen below shows the Global settings parameters for
otaa_us915template. After filling all the parameters, click on the SAVE TEMPLATE button.
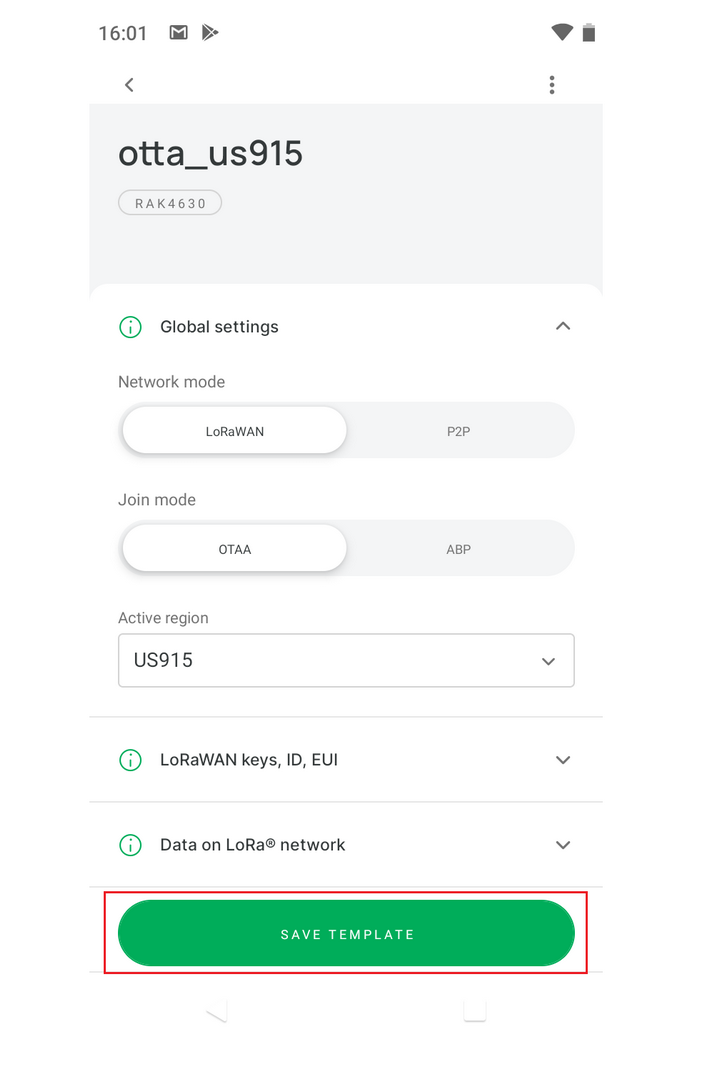 Figure 1: WisToolBox Mobile fill Global settings params
- The saved template
otaa_us915appears listed, as seen in Figure 19.
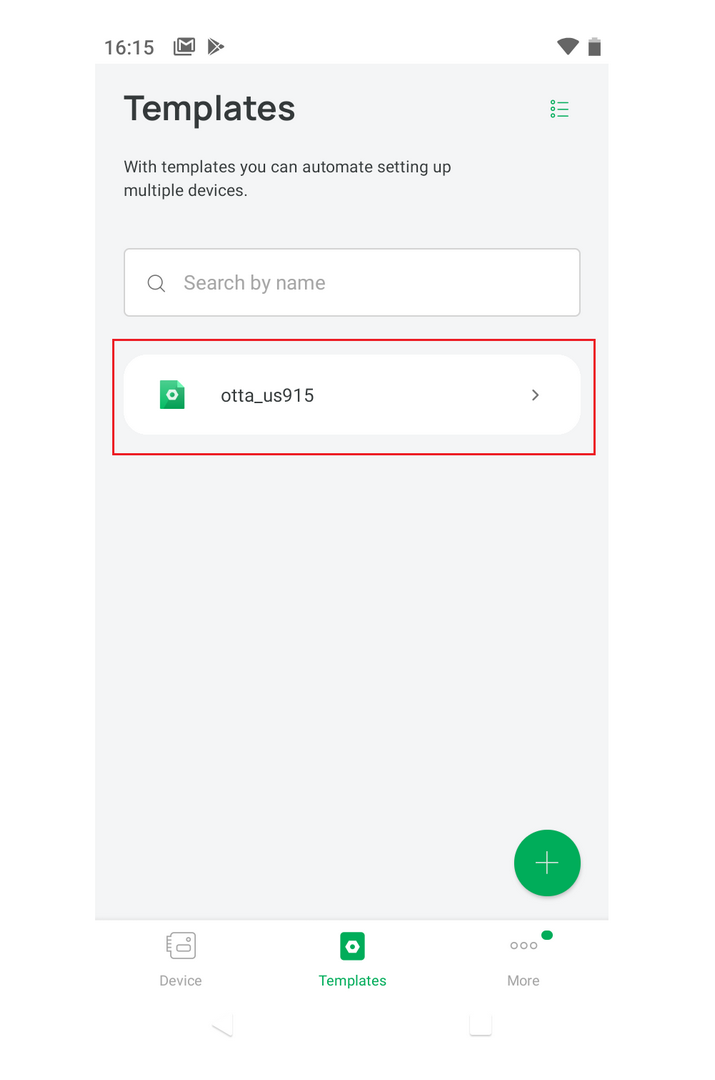 Figure 1: WisToolBox Mobile saved templates
WisToolBox Firmware
- To select the Firmware menu, click the More menu, as shown in Figure 20.
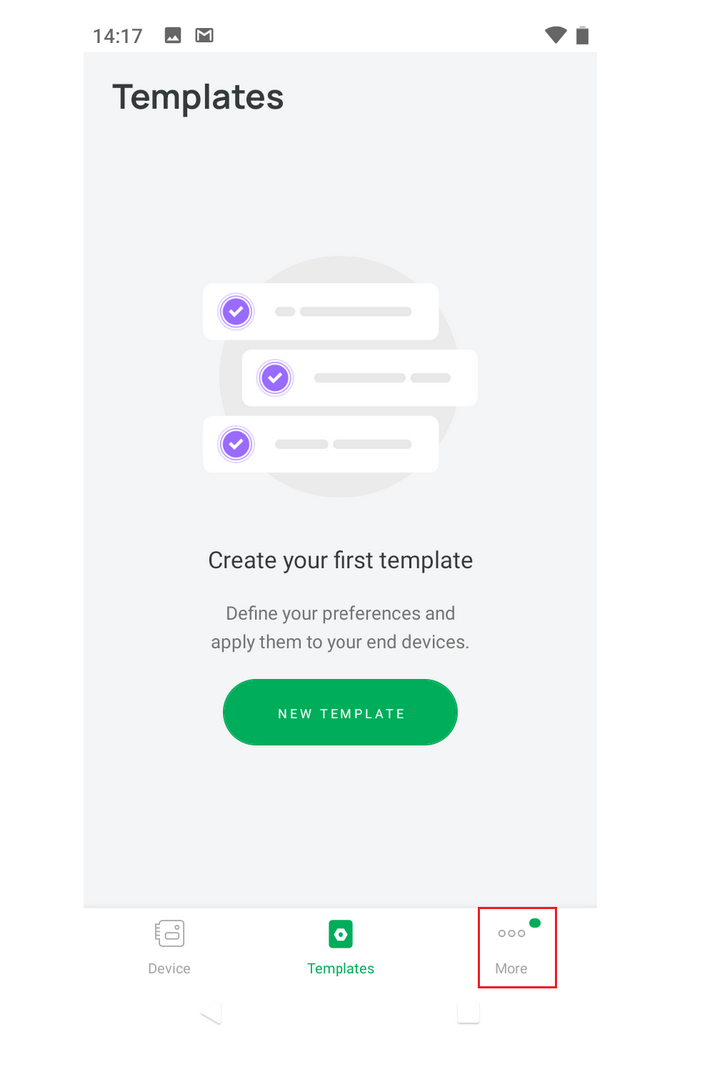 Figure 1: WisToolBox Mobile More menu
- The Information and Settings screen shows if there are any firmware updates. Click on Update Available to get more information.
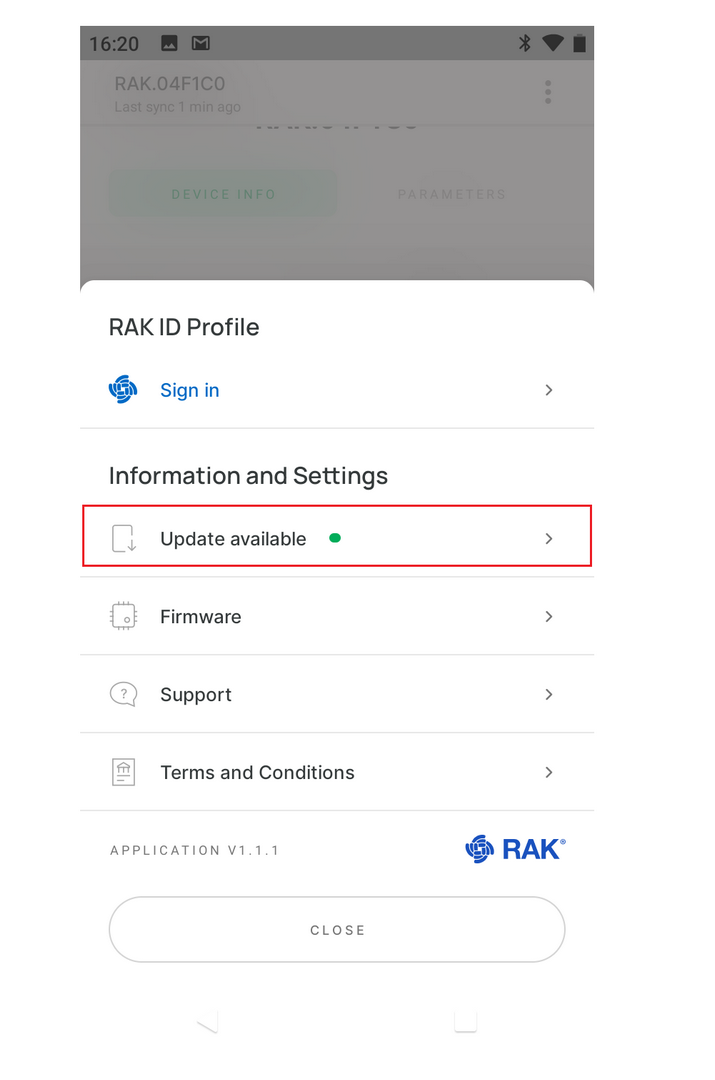 Figure 1: WisToolBox Mobile Information and Settings
- New firmware version details are displayed. Click on the UPDATE NOW button to flash the newer version.
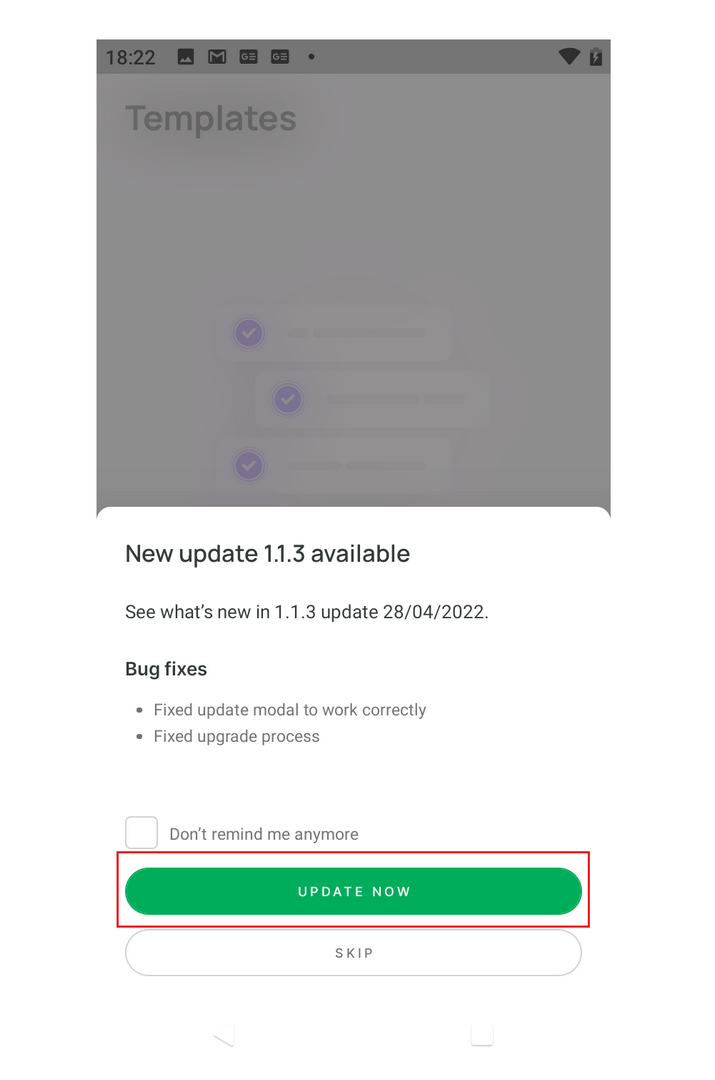 Figure 1: WisToolBox Mobile Firmware Update