RAK12016 WisBlock Flex Sensor Module Installation Guide
Prerequisite
The modules required before installation include:
- RAK12016 WisBlock Flex Sensor Module
- Your choice of WisBlock Base with IO slot
- Your choice of WisBlock Core
WisBlock Module Installation
The RAK12016 extends the WisBlock system with flex sensing capability. Connect it to the IO slot of a WisBlock Base to communicate with the WisBlock Core. Secure the module with a compatible screw.
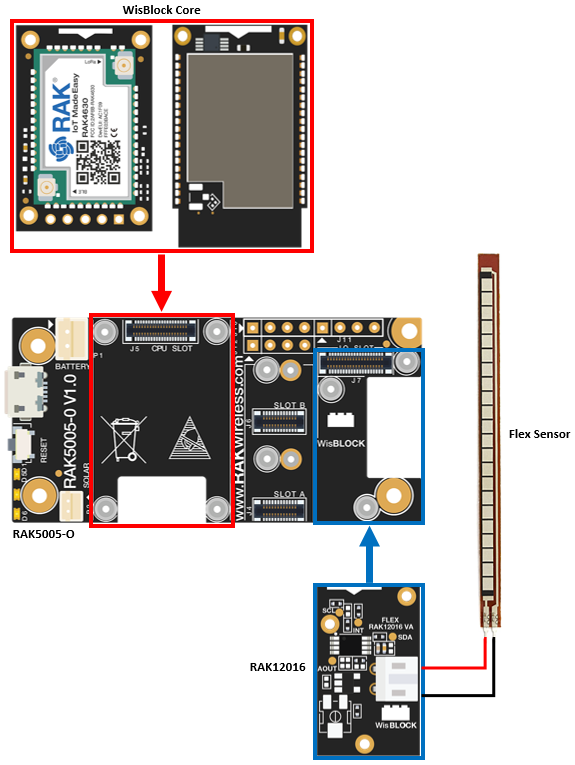 Figure 1: RAK12016 connection to WisBlock Base
Select a suitable WisBlock Base and WisBlock Core according to your application requirements and hardware configuration.
Flex Sensor
A flex sensor uses carbon on a strip of plastic, which acts as a variable resistor. The more it bends, the higher the resistance of the sensor increases.
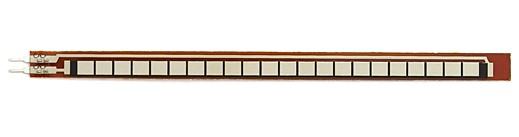 Figure 1: FS-L-0095-103-ST Flex Sensor
The Flex sensor can only be bent in one direction. Thus, bending the sensor in the other direction may not produce any reliable data and may damage the sensor. Also, be careful not to bend the flex sensor near the bottom where the wires are attached in the RAK12016 module, as they have the potential to kink and fail.
Assembling and Disassembling of WisBlock Modules
Assembling
The location for the IO slot is properly marked by silkscreen. Follow carefully the procedure defined in WisBlock Base board assembly/disassembly instructions to attach a WisBlock module. Once attached, carefully fix the module with three pieces of M1.2 x 3 mm screws.
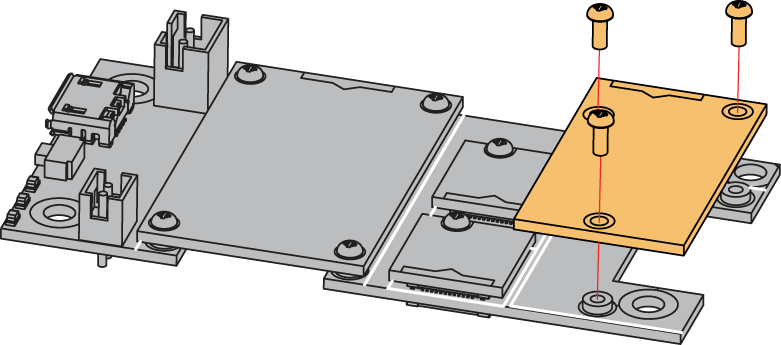 Figure 1: RAK12016 mounting connection to WisBlock Base module
Disassembling
The procedure in disassembling any type of WisBlock modules is the same.
- First, remove the screws.
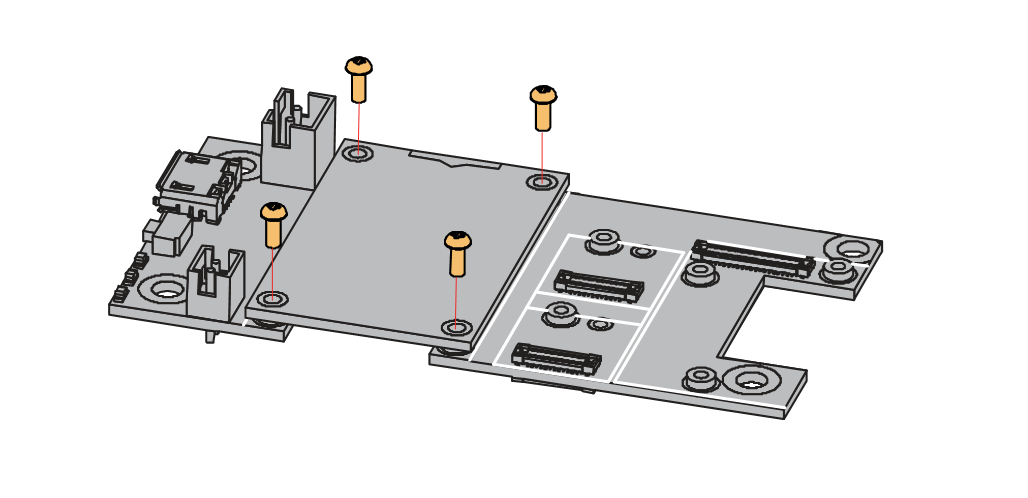 Figure 1: Removing screws from the WisBlock module
- Once the screws are removed, check the silkscreen of the module to find the correct location where force can be applied.
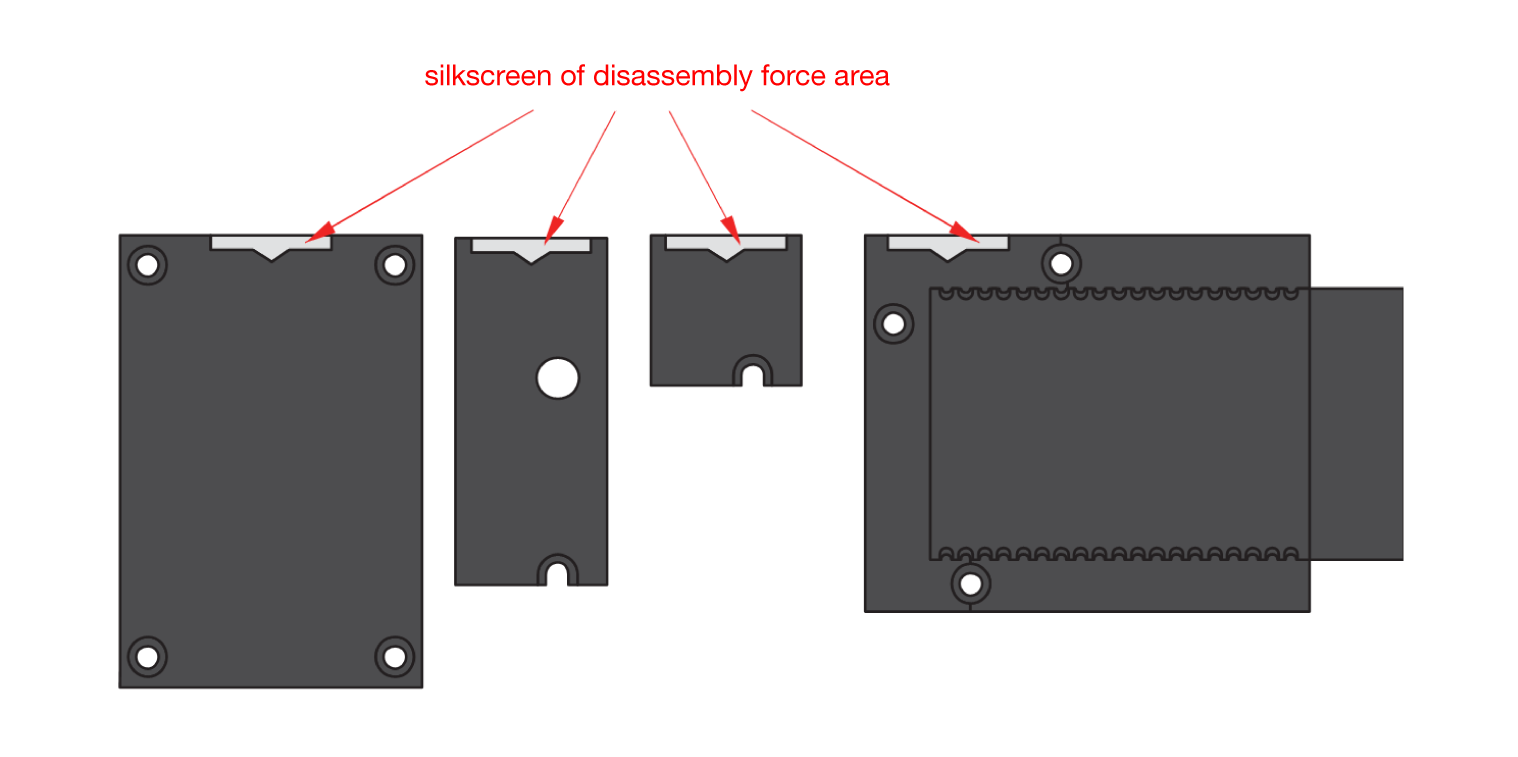 Figure 1: Finding the proper position to detach the WisBlock module
- Apply even force to the module at the position of the connector to detach the module from the WisBlock Base.
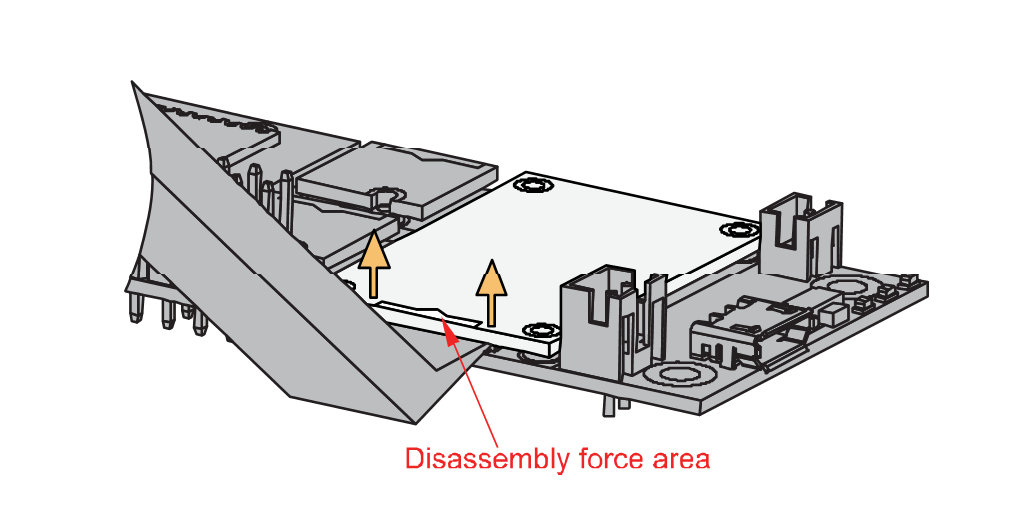 Figure 1: Applying even forces on the proper location of a WisBlock module
If you will connect other modules to the remaining WisBlock Base slots, check on the WisBlock Pin Mapper tool for possible conflicts.
After all this setup, you can now connect the battery (optional) and USB cable to start programming your WisBlock Core.
- Batteries can cause harm if not handled properly.
- Only 3.7-4.2 V Rechargeable LiPo batteries are supported. It is highly recommended not to use other types of batteries with the system unless you know what you are doing.
- If a non-rechargeable battery is used, it has to be unplugged first before connecting the USB cable to the USB port of the board to configure the device. Not doing so might damage the battery or cause a fire.
- Only 5 V solar panels are supported. Do not use 12 V solar panels. It will destroy the charging unit and eventually other electronic parts.
- Make sure the battery wires match the polarity on the WisBlock Base board. Not all batteries have the same wiring.


