RAK16000 WisBlock DC Current Module Installation Guide
RAK16000 is a part of the WisBlock Sensor Series that is capable of measuring DC current in the range of 0 to 3 A in a voltage range of 0 to 26 V. With the two measured DC values, you get the power consumption by multiplying the current and voltage. Additionally, this module uses the INA219BID from Texas Instruments that offers high accuracy maximum rate of 0.5% over temperature.
The current measurement method used is the high-side, where the shunt resistor is placed between the power supply and the load. This method allows the RAK16000 to measure both the circulating current and the voltage across the load.
Prerequisite
The modules required before installation include:
- RAK16000 WisBlock DC Current Module
- A WisBlock Base with an IO slot
- Your choice of WisBlock Core
- RAK19008 WisBlock IO Extension Cable (optional)
WisBlock Module Installation
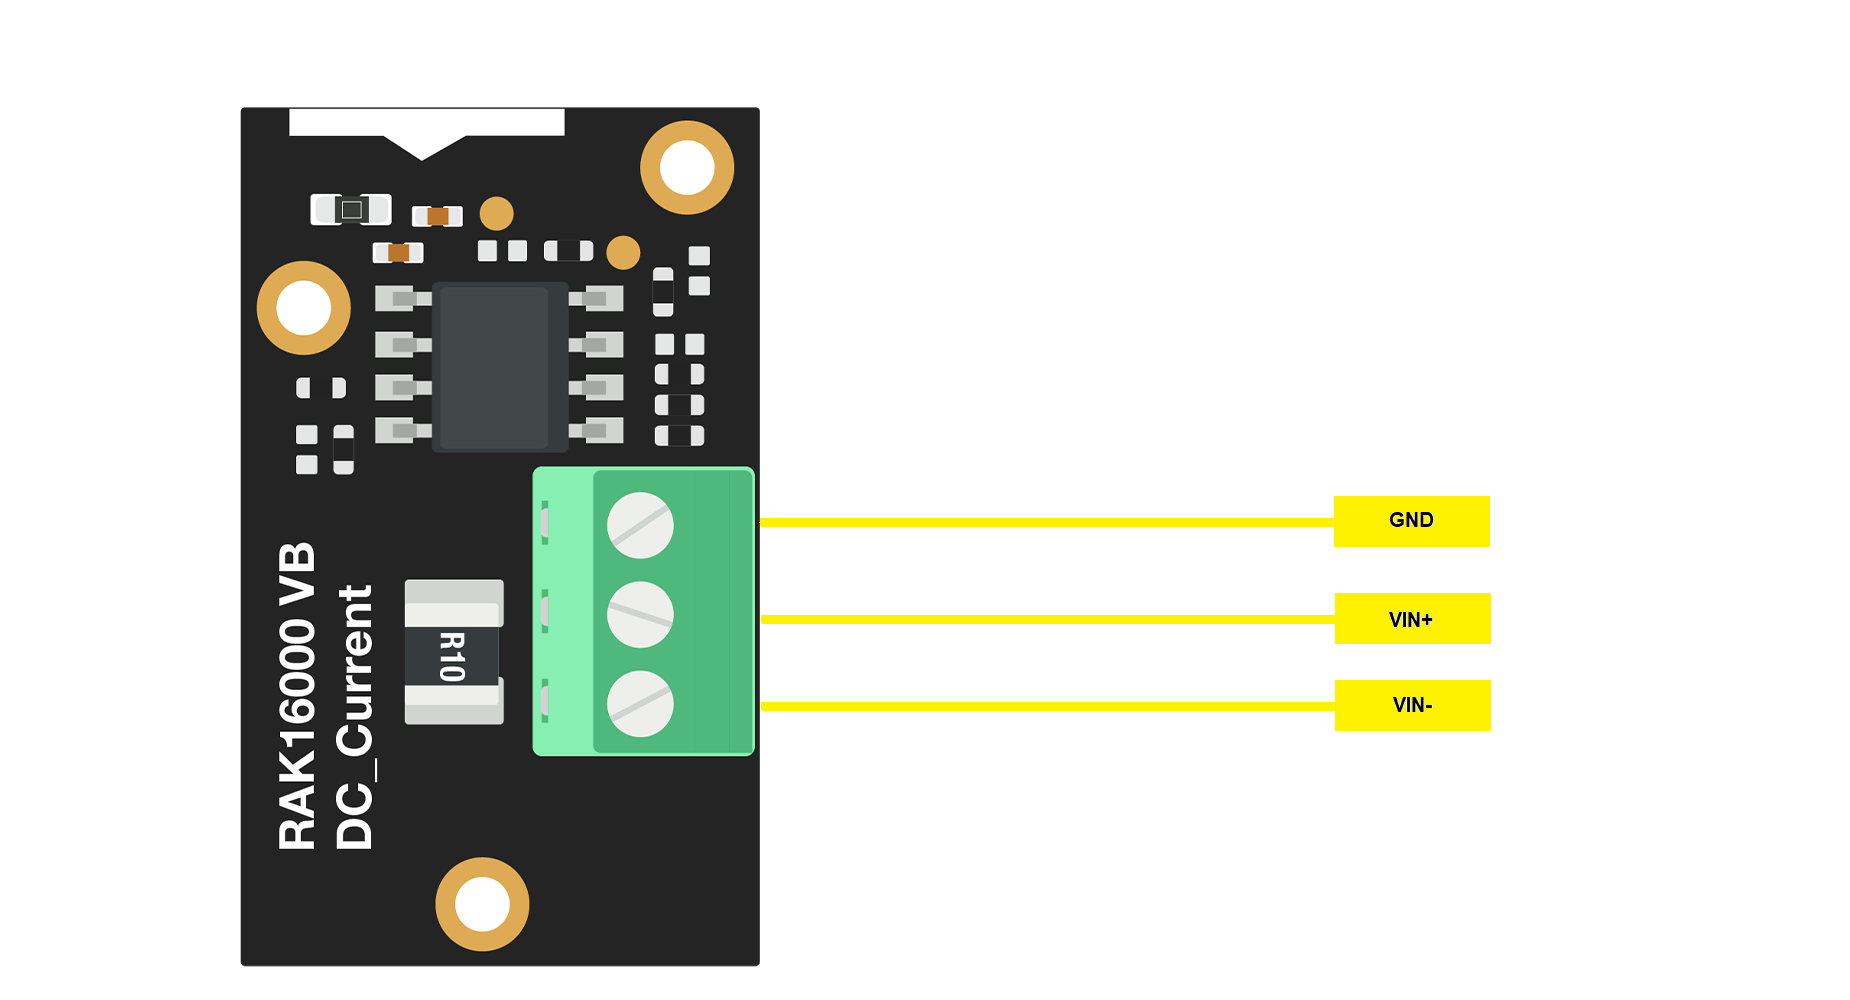 Figure 1: RAK16000 external connection terminals
Pin Definition
Connect the RAK16000 in series between the DC power supply and the load:
- GND: Connect to the common ground.
- VIN+: Connect to the positive terminal of the power supply.
- VIN-: Connect to the positive input of the load.
Assembling and Disassembling WisBlock Modules
Assembling
The location for the IO slot is properly marked by silkscreen. Follow carefully the procedure defined in WisBlock Base board assembly/disassembly instructions to attach a WisBlock module. Once attached, carefully fix the module with one or more pieces of M1.2 x 3 mm screws depending on the module.
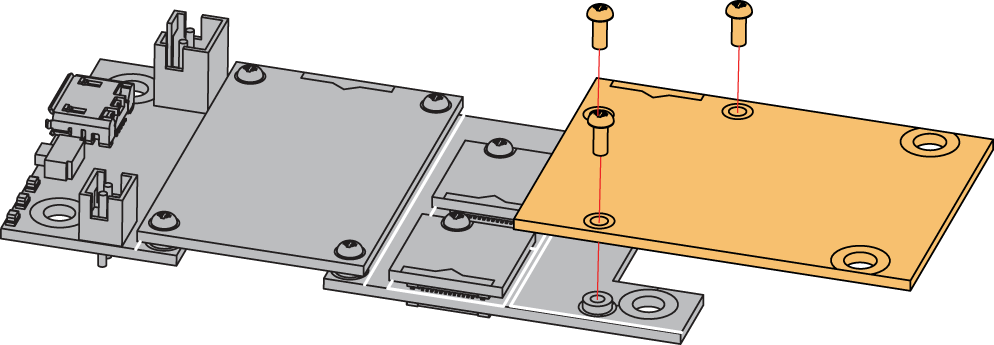 Figure 1: Installing the RAK16000 on a WisBlock Base
Disassembling
The procedure in disassembling any type of WisBlock modules is the same.
- First, remove the screws.
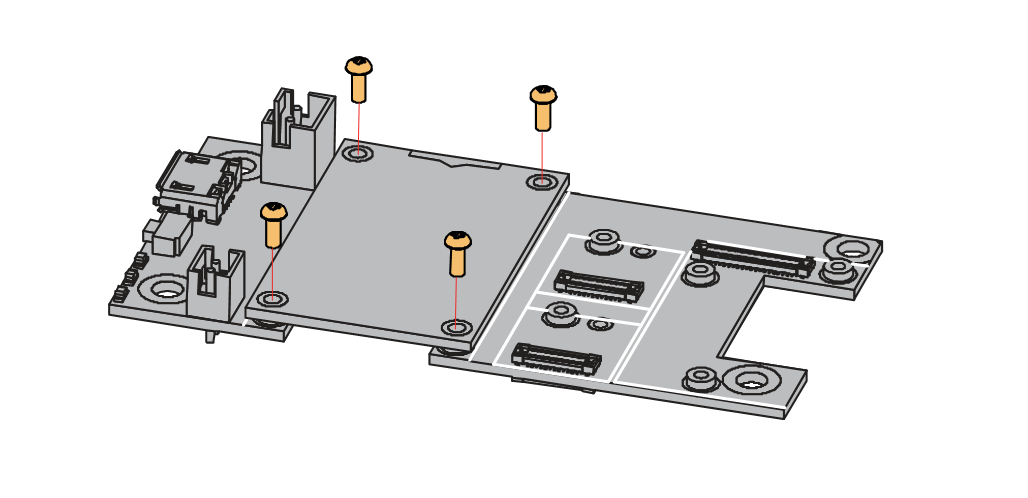 Figure 1: Removing screws from the WisBlock module
- Once the screws are removed, check the silkscreen of the module to find the correct location where force can be applied.
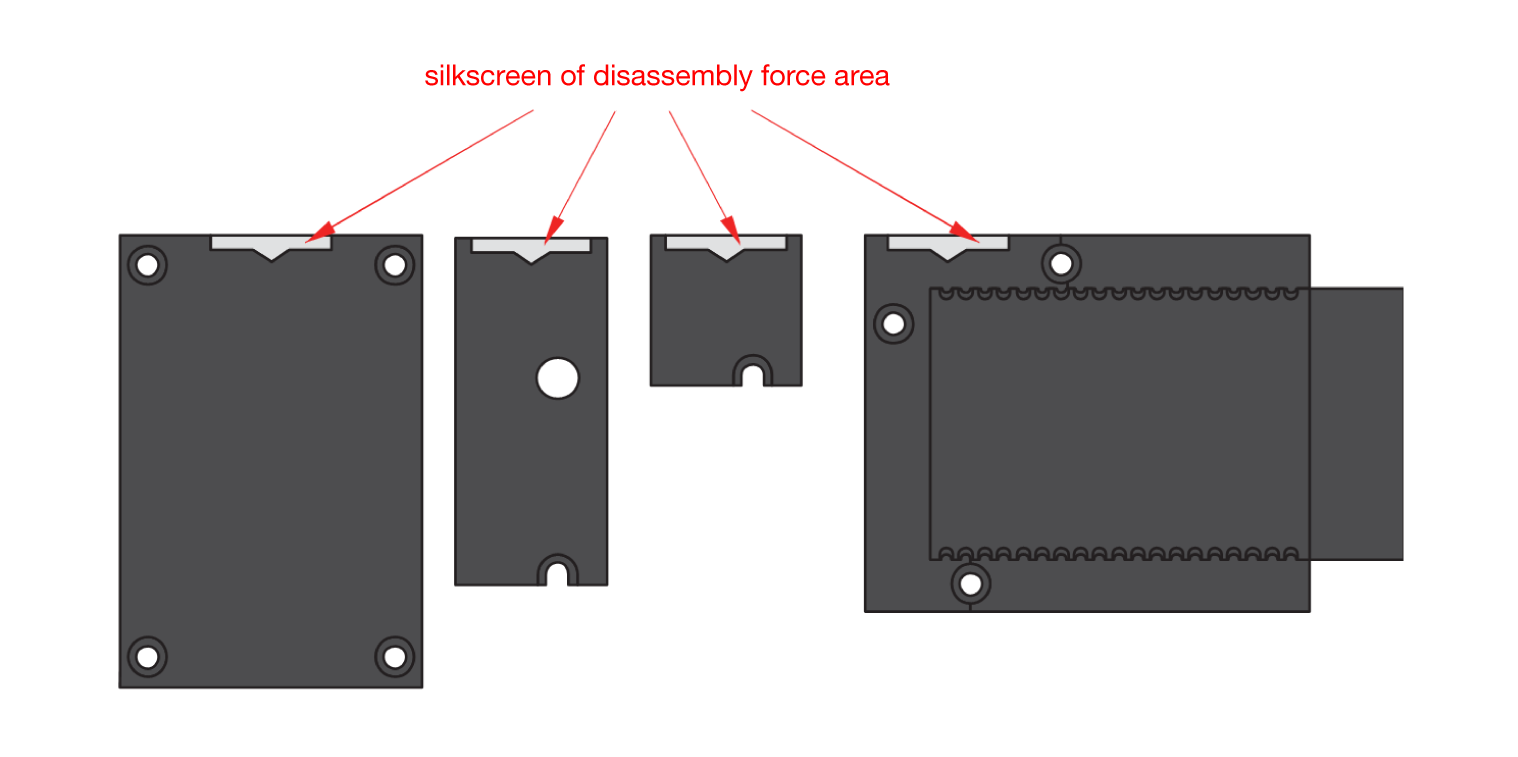 Figure 1: Finding the proper position to detach the WisBlock module
- Apply even force to the module at the position of the connector to detach the module from the WisBlock Base.
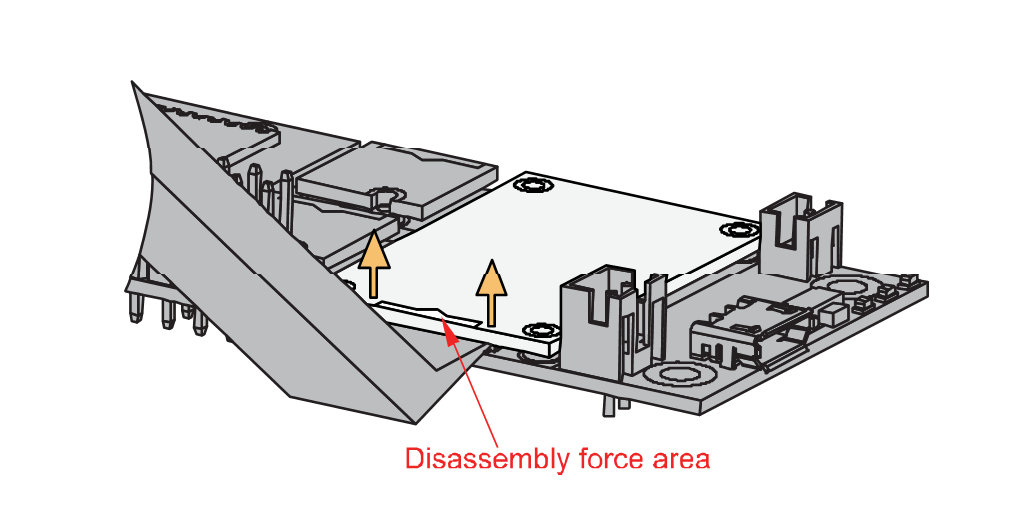 Figure 1: Applying even forces on the proper location of a WisBlock module
If you will connect other modules to the remaining WisBlock Base slots, check on the WisBlock Pin Mapper tool for possible conflicts.
After all this setup, you can now connect the battery (optional) and USB cable to start programming your WisBlock Core.
- Batteries can cause harm if not handled properly.
- Only 3.7-4.2 V Rechargeable LiPo batteries are supported. It is highly recommended not to use other types of batteries with the system unless you know what you are doing.
- If a non-rechargeable battery is used, it has to be unplugged first before connecting the USB cable to the USB port of the board to configure the device. Not doing so might damage the battery or cause a fire.
- Only 5 V solar panels are supported. Do not use 12 V solar panels. It will destroy the charging unit and eventually other electronic parts.
- Make sure the battery wires match the polarity on the WisBlock Base board. Not all batteries have the same wiring.


