RAK4260 Evaluation Board Low Level Development
Overview
Using Low Level Development, you can develop your own firmware that runs on RAK4260. RAK offers this alternative for advanced users who need to have deeper integration of their solutions with this board.
How to Implement your App on the RAK4260 Evaluation Board
Schematic
One of the essential aspects that allow you to develop your own firmware is the hardware schematics. This allows you to understand the connections between the inner MCU and the LoRa transceiver.
The RAK4260 Evaluation Board covers only the high-frequency LoRaWAN bands (864 MHz to 923 MHz).
Check the LoRaWAN frequencies by country.
Microchip LoRaWAN Stack (MLS)
Reading Microchip LoRaWAN Stack API Reference Manual is recommended.
RAK4260 Development Platform
Before compiling a project for the RAK4260 Evaluation Board, it is necessary to install Microchip Studio integrated development platform (IDP).
- Download and install the Microchip Studio web installer.
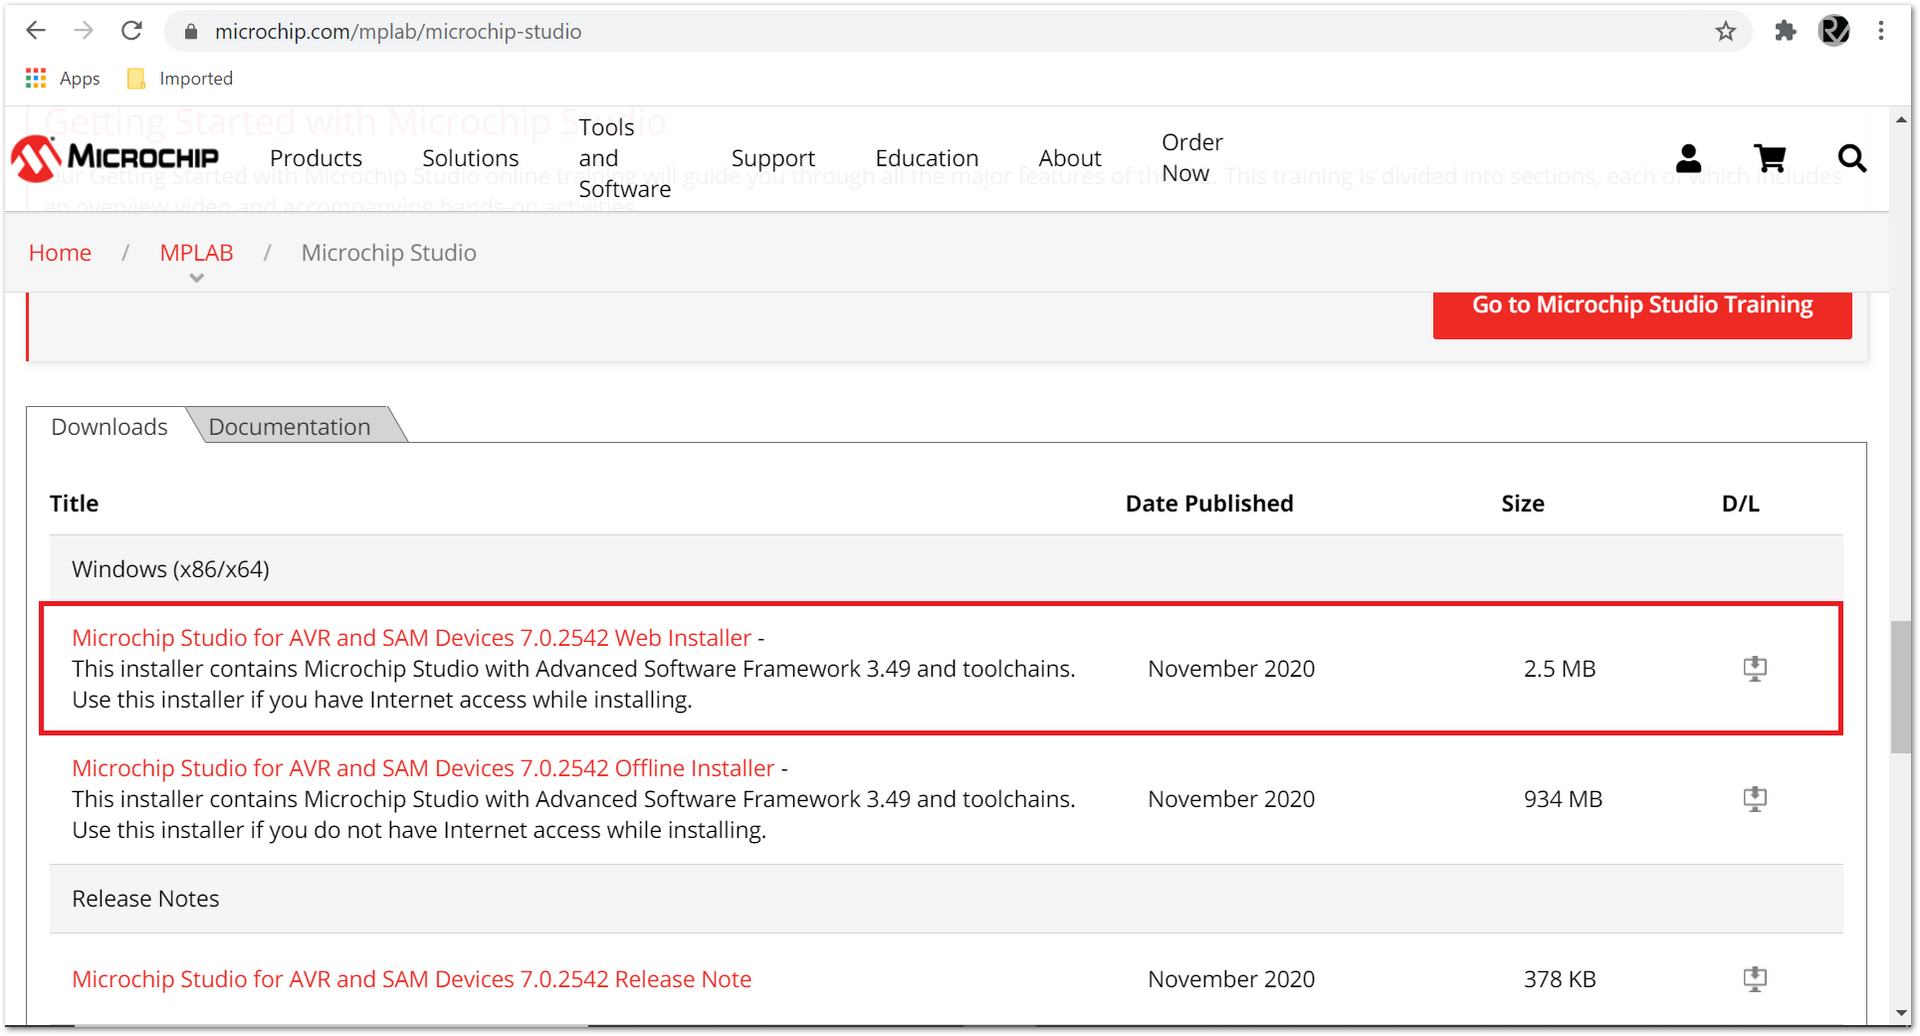 Figure 1: Microchip Studio web installer
- Agree to the license terms and conditions.
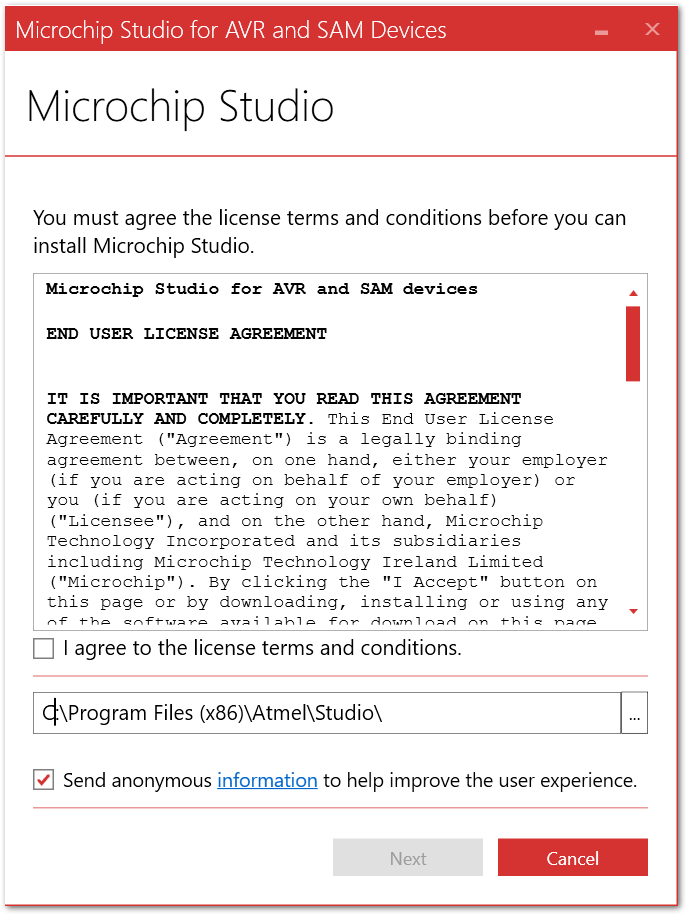 Figure 1: Microchip Studio license
- In Select Architecture, choose "SAM".
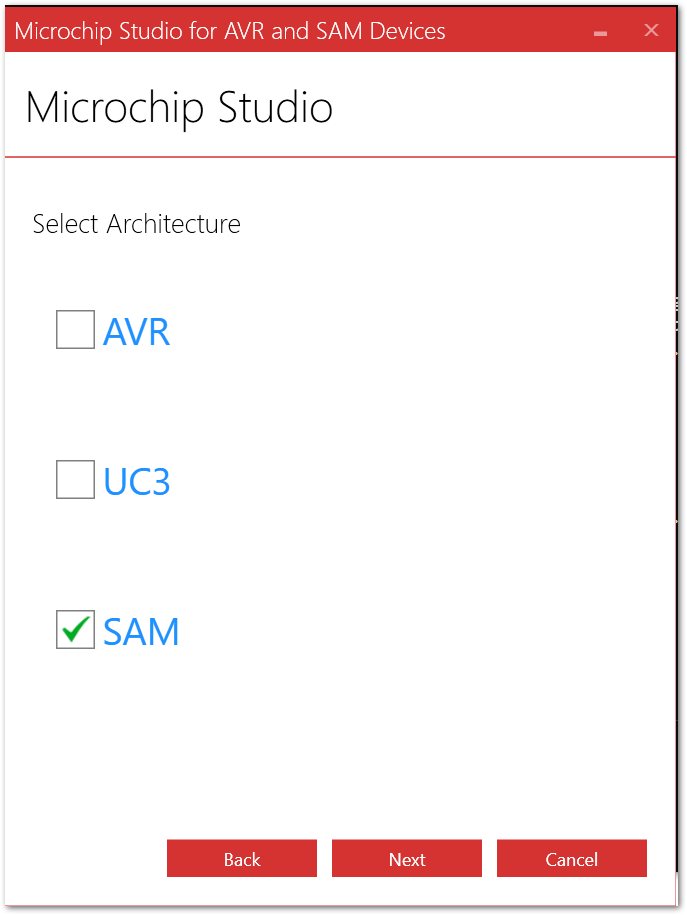 Figure 1: Microchip Studio Architecture
- Don't select "Atmel Software Framework and Examples Project" yet. Do it later.
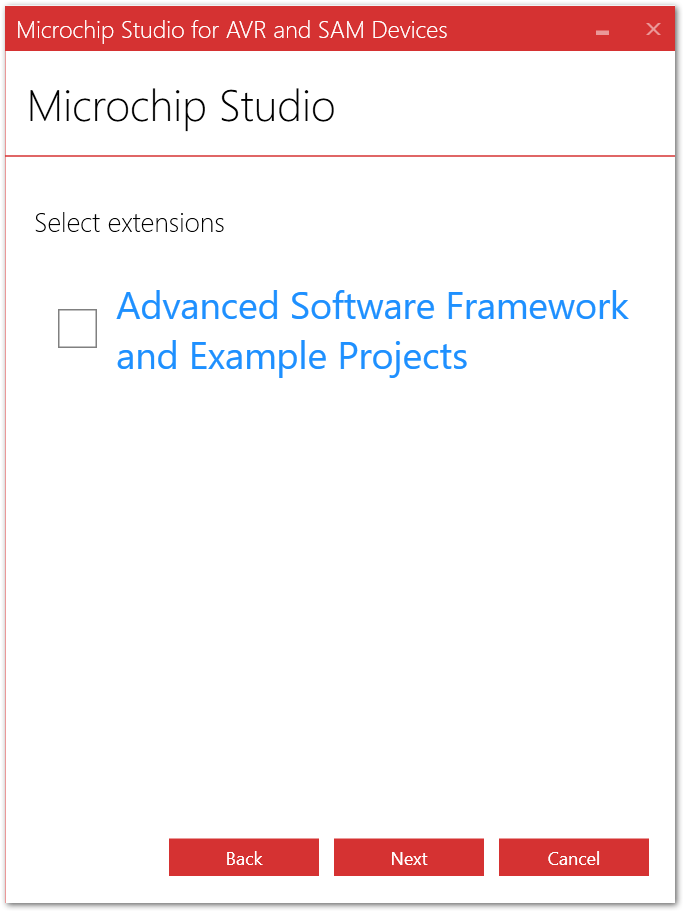 Figure 1: ASF skip install
- Launch Microchip Studio then select Tools -> Extensions and Updates.
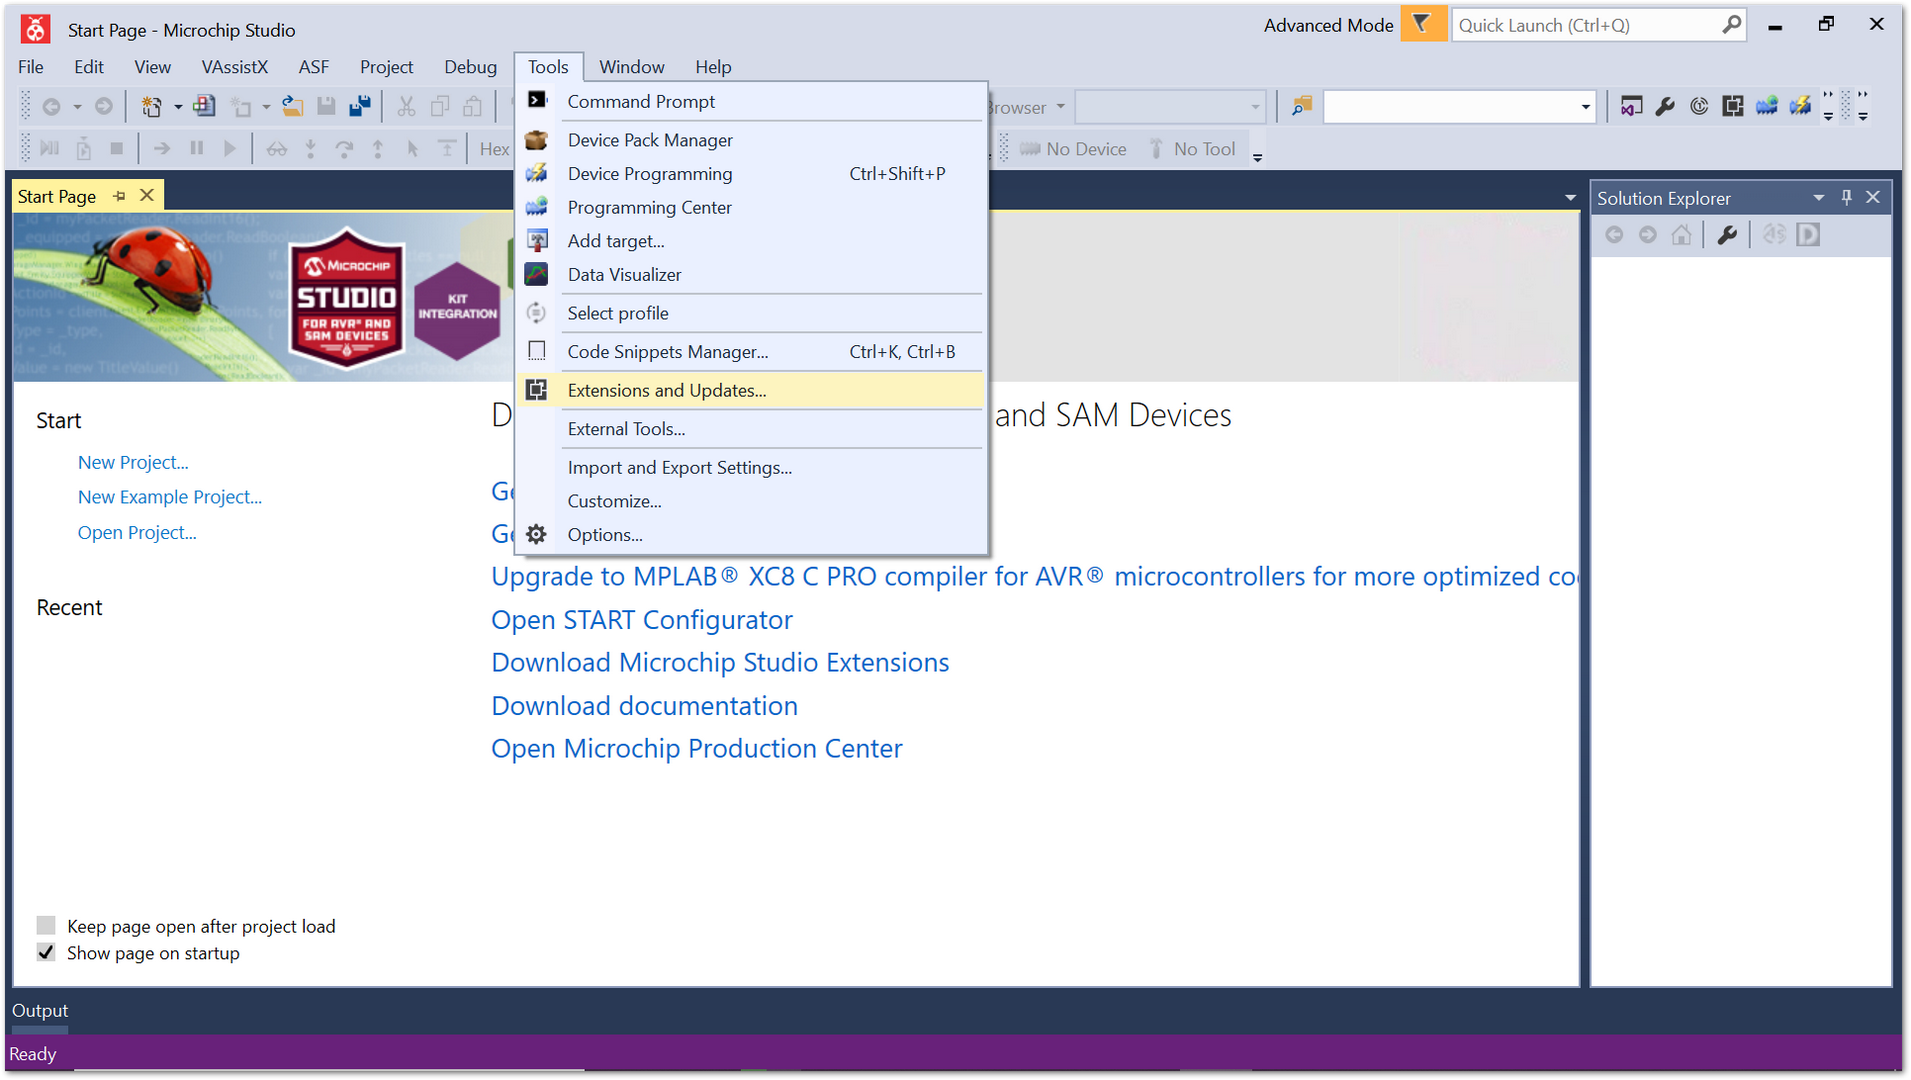 Figure 1: Microchip Studio Extensions and Updates
- In the Extensions and Updates window, click on "Online" and then search for "atmel software framework".
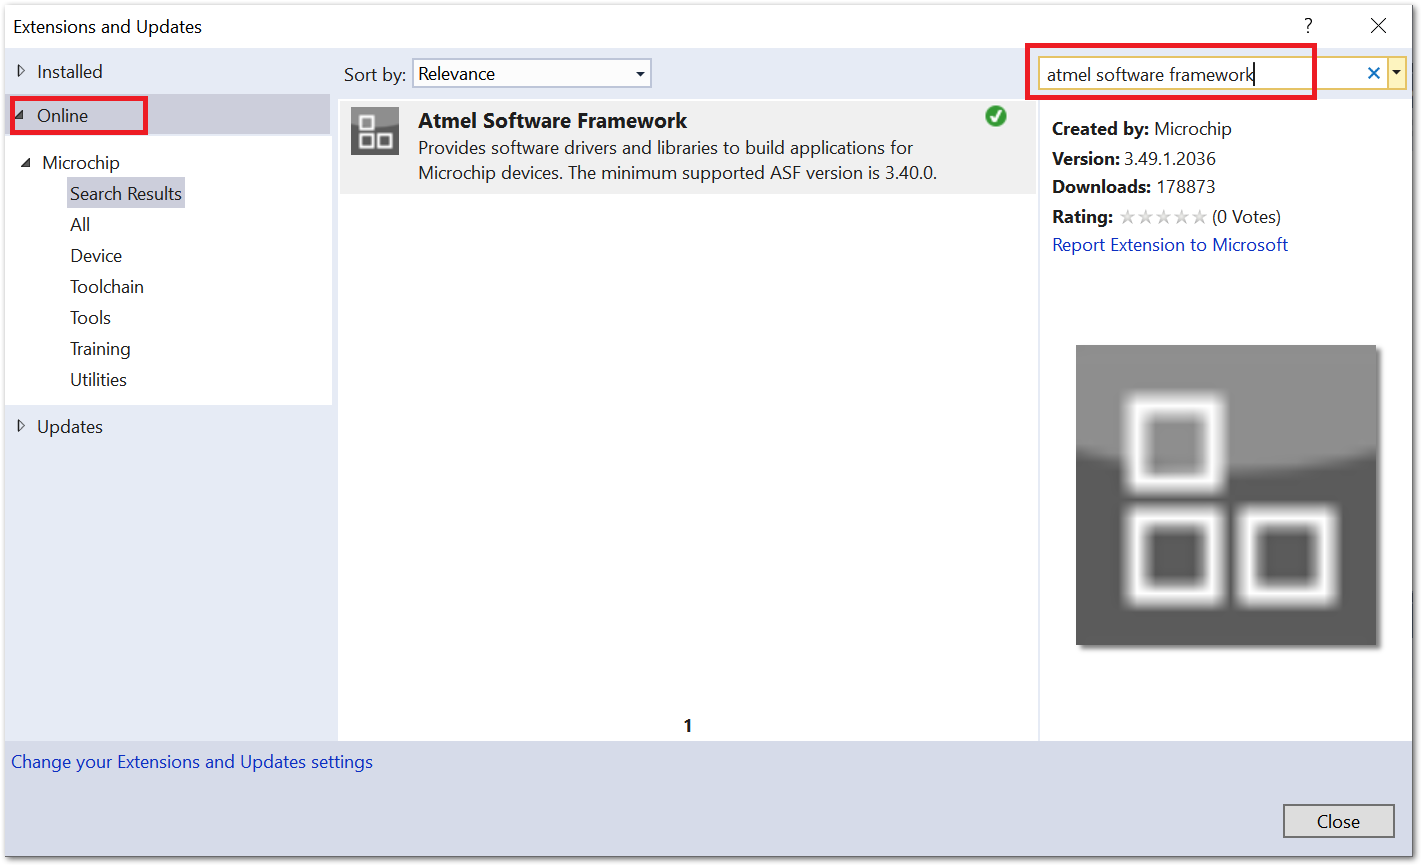 Figure 1: ASF install
-
Select "Atmel Software Framework" and click on the "Download" button to install it.
-
To finish the installation, launch Microchip Studio then go to Tools -> Device Pack Manager. Search for "SAMR34" and install "SAMR34_DFP" pack.
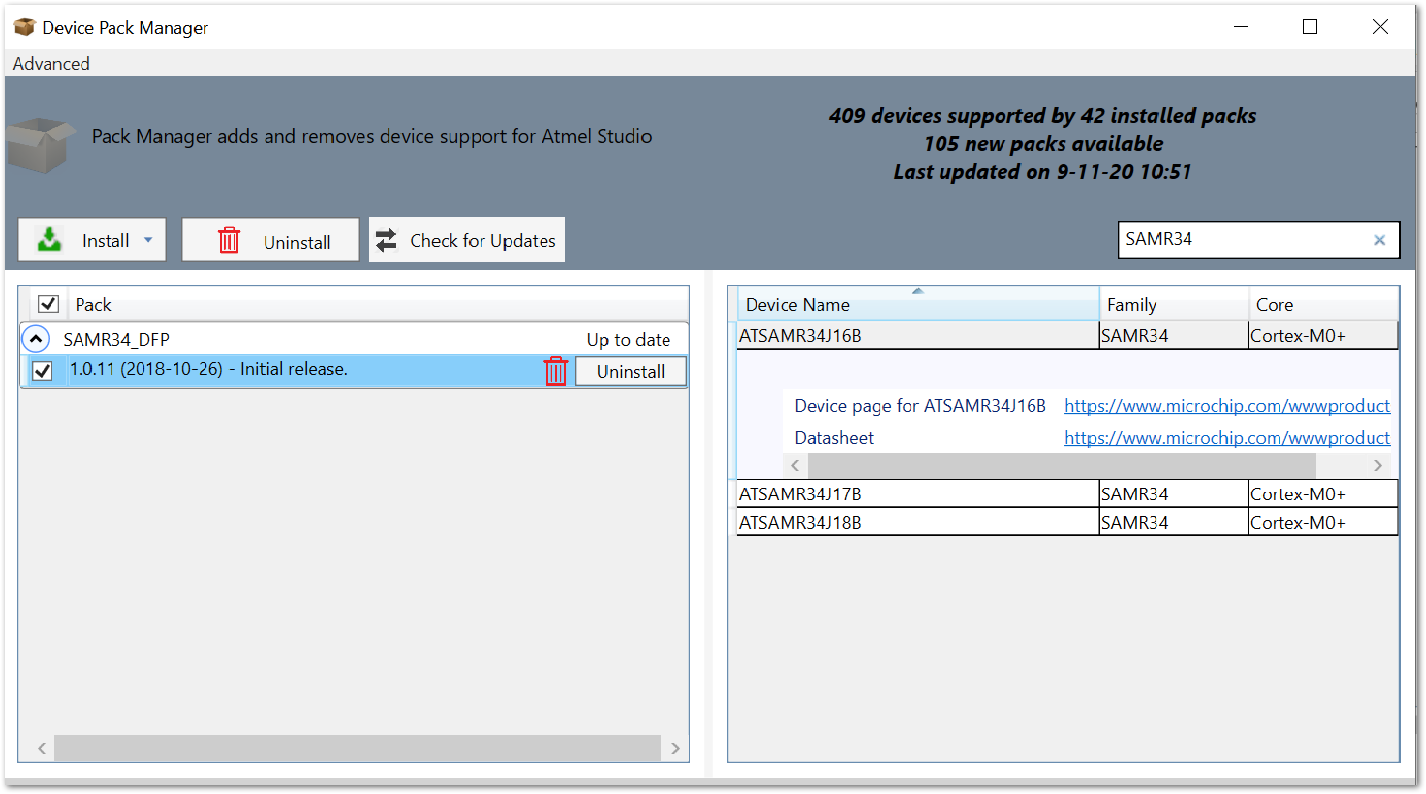 Figure 1: SAMR34 pack install
Build RAK4260 LoRaNode Demo Project
RAK has already configured a demo firmware for RAK4260 based on Microchip LoRaWAN Stack (MLS) that can be downloaded freely for testing purposes in this Github Repository:
The Microchip Studio LoRaWAN examples are based on SAMR34 Xplained Pro, but RAK260 did not adopt the same GPIO pinout. If you plan to develop a new LoRaWAN application, refer to the RAK4260 GPIO pins defined in the samr34_xplained_pro.h file.
This sample firmware is solely for testing purposes. If you want to use and deploy your own LoRaWAN application, you need to develop a customized firmware based on Microchip LoRaWAN Stack (MLS).
- Clone the RAK4260 GitHub repository.
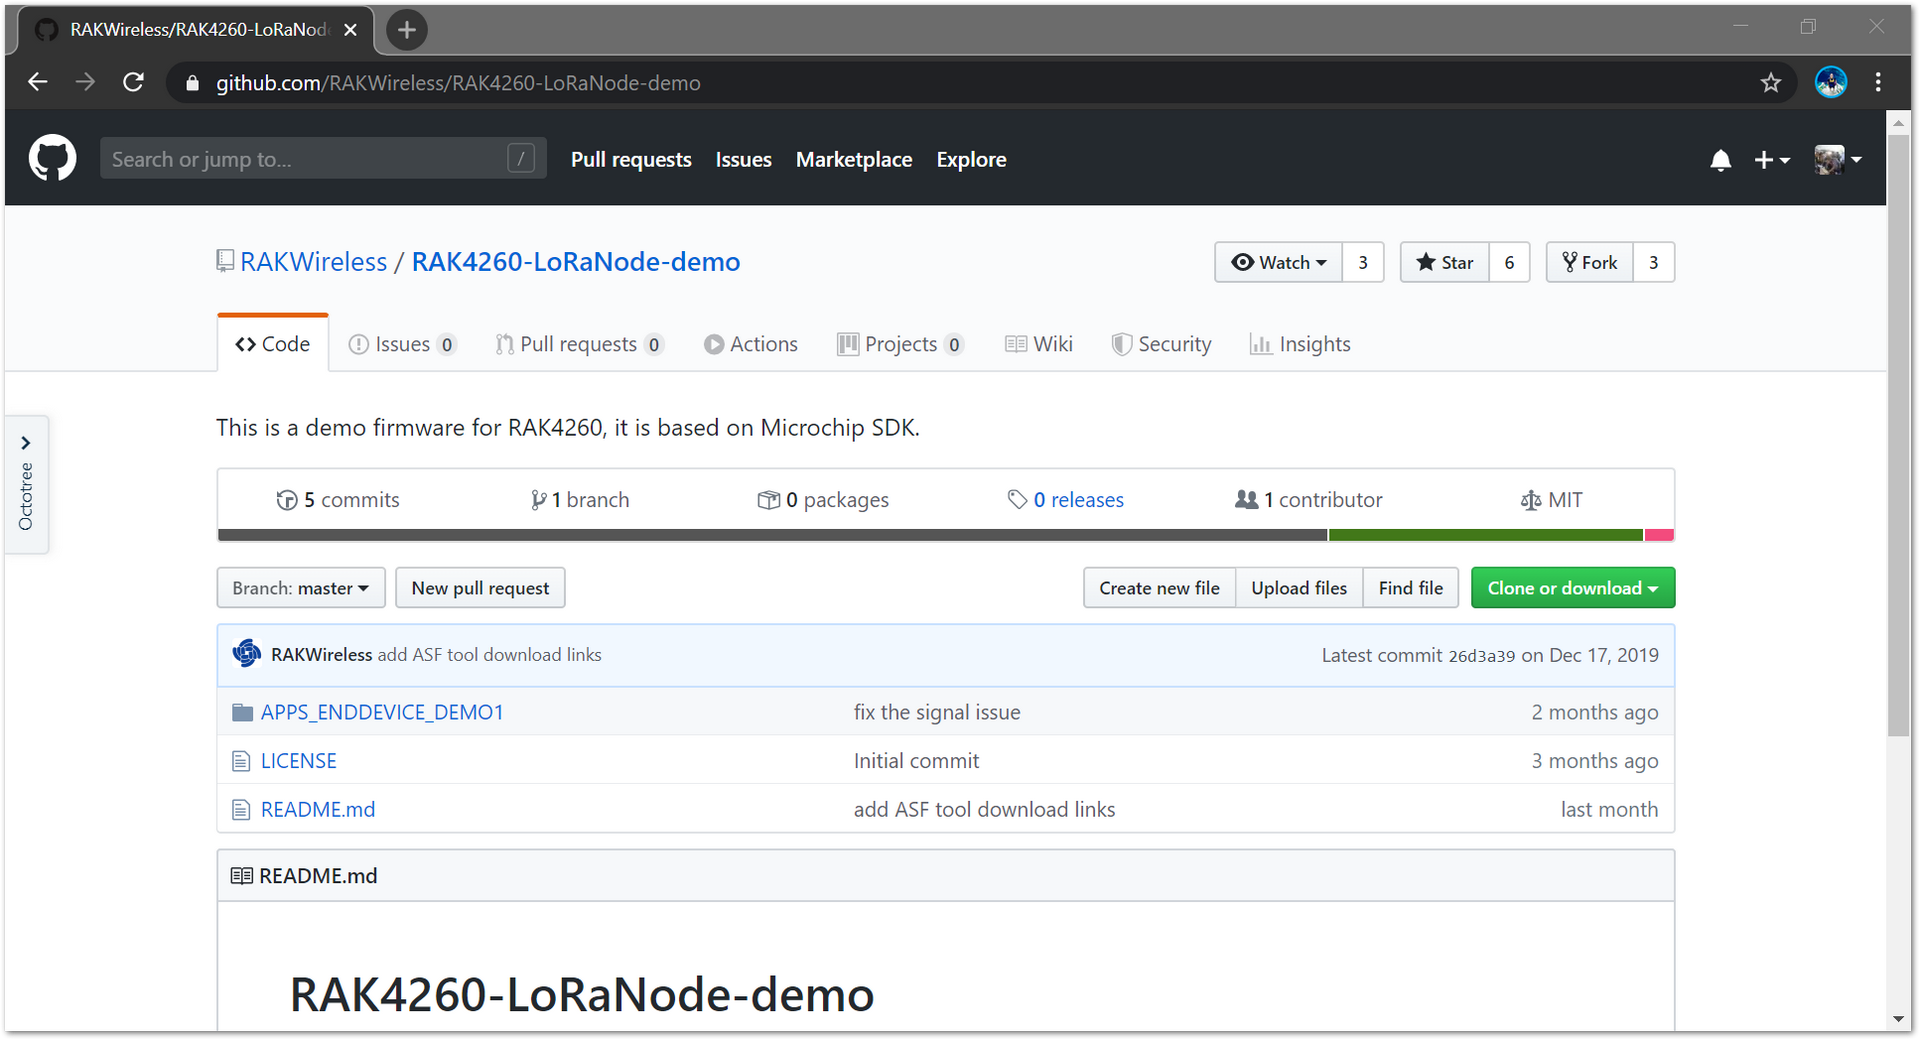 Figure 1: RAK4260 GitHub Repository
- Open and configure the RAK4260-LoRaNode-demo solution.
Go to the cloned directory folder:
**<cloned_dir>\RAK4260-LoRaNode-demo\APPS_ENDDEVICE_DEMO1**. Then double click on file "APPS_ENDDEVICE_DEMO1.atsln" to open Solution on Microchip Studio.
- Compile RAK4260-LoRaNode-demo solution. In Microchip Studio, select Build -> Build Solution.
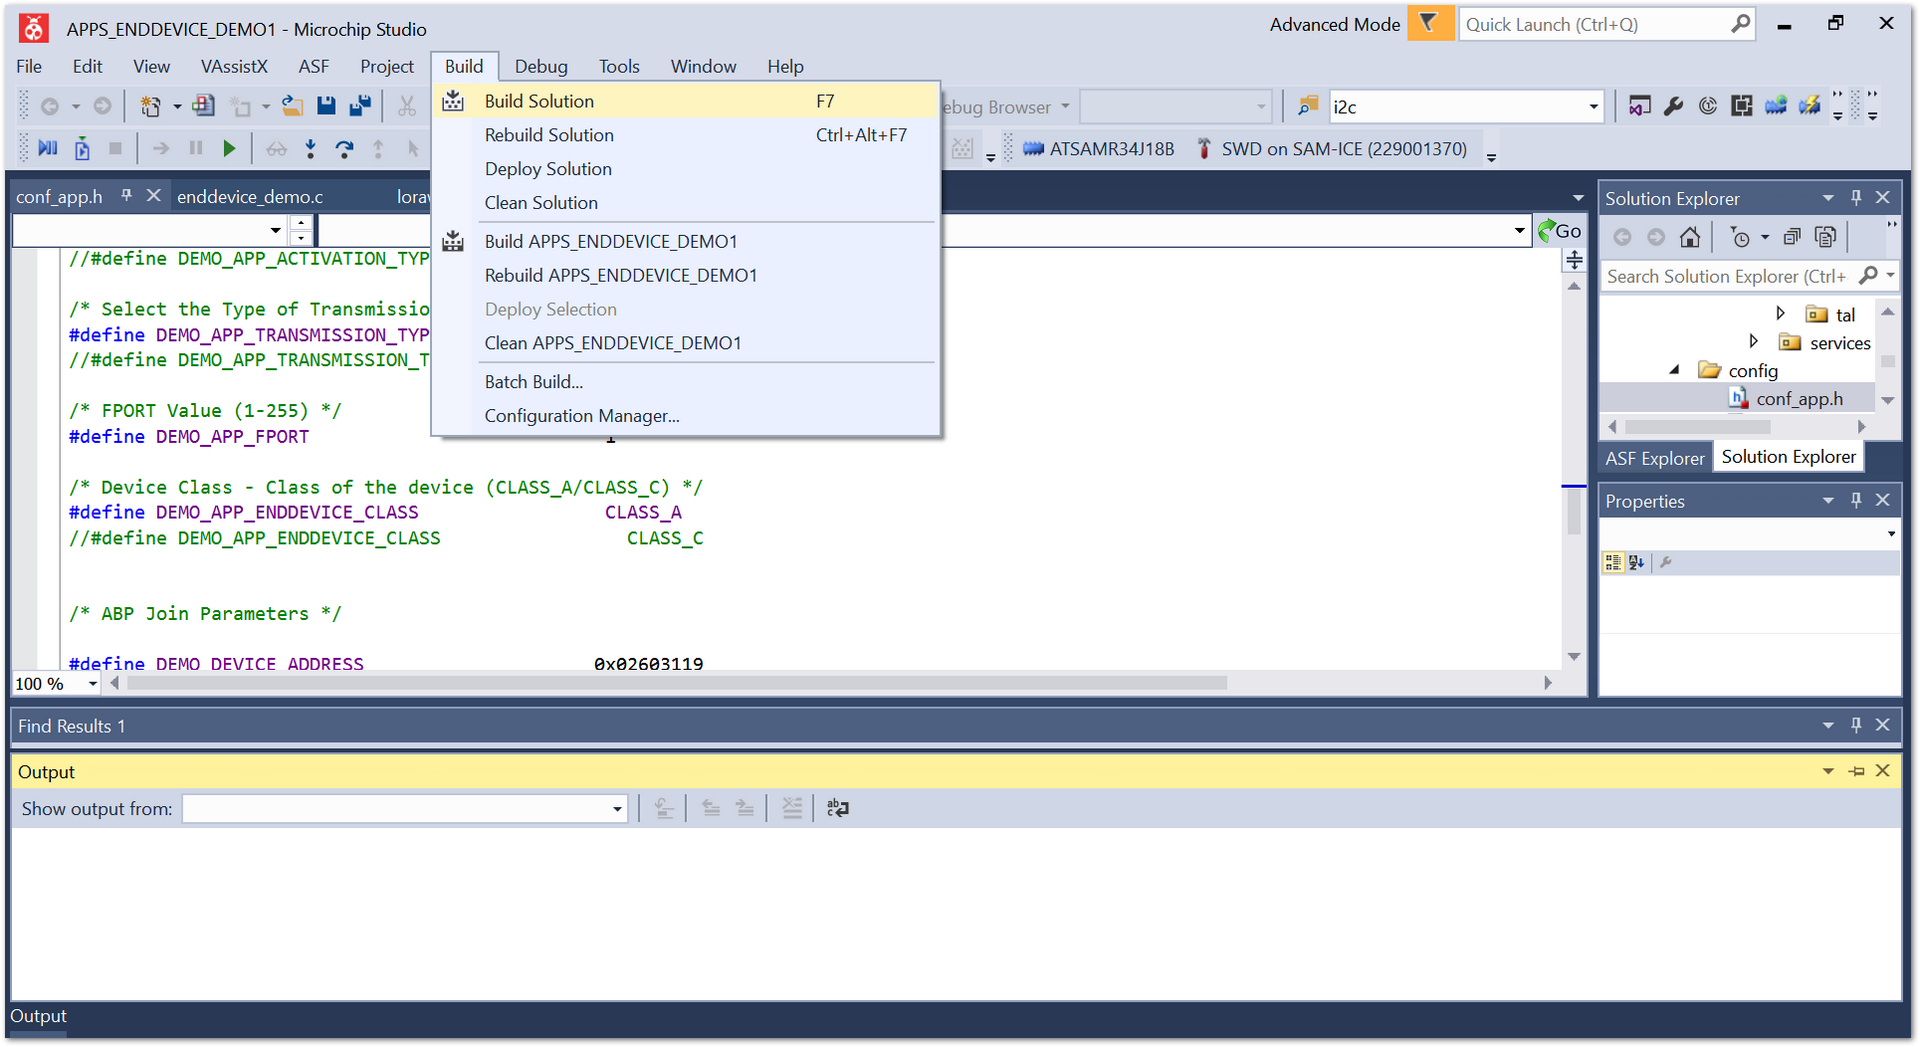 Figure 1: Build RAK4260-LoRaNode-demo solution
Flash the Firmware Using DAPLink and RAKDAP1
To flash a new firmware, use the RAKDAP1, an SWD adapter. Refer to Figure 10 as a reference to connect RAKDAP1 and RAK4600 Evaluation Board.
 Figure 1: RAK4260 Evaluation Board connected to RAKDAP1
- Install the RAKDAP1 Flash and Debug Tool.
RAKDAP1 uses the pyOCD package. pyOCD is an open-source Python package for programming and debugging ARM Cortex-M microcontrollers using multiple supported types of USB debug probes.
- Check Support Package installation for RAK4260.
pyocd list -t -n atsaml21j18a
- Flash the hex file.
As an example, flash the RAK4260-LoRaNode demo project. The hex file of the RAK4260-LoRaNode-demo project is located in a folder, depending on whether you select to compile the Debug or Release version of the Microchip Studio project.
- **<cloned_dir>\RAK4260-LoRaNode-demo\APPS_ENDDEVICE_DEMO1\Release**
- **<cloned_dir>\RAK4260-LoRaNode-demo\APPS_ENDDEVICE_DEMO1\Debug**.
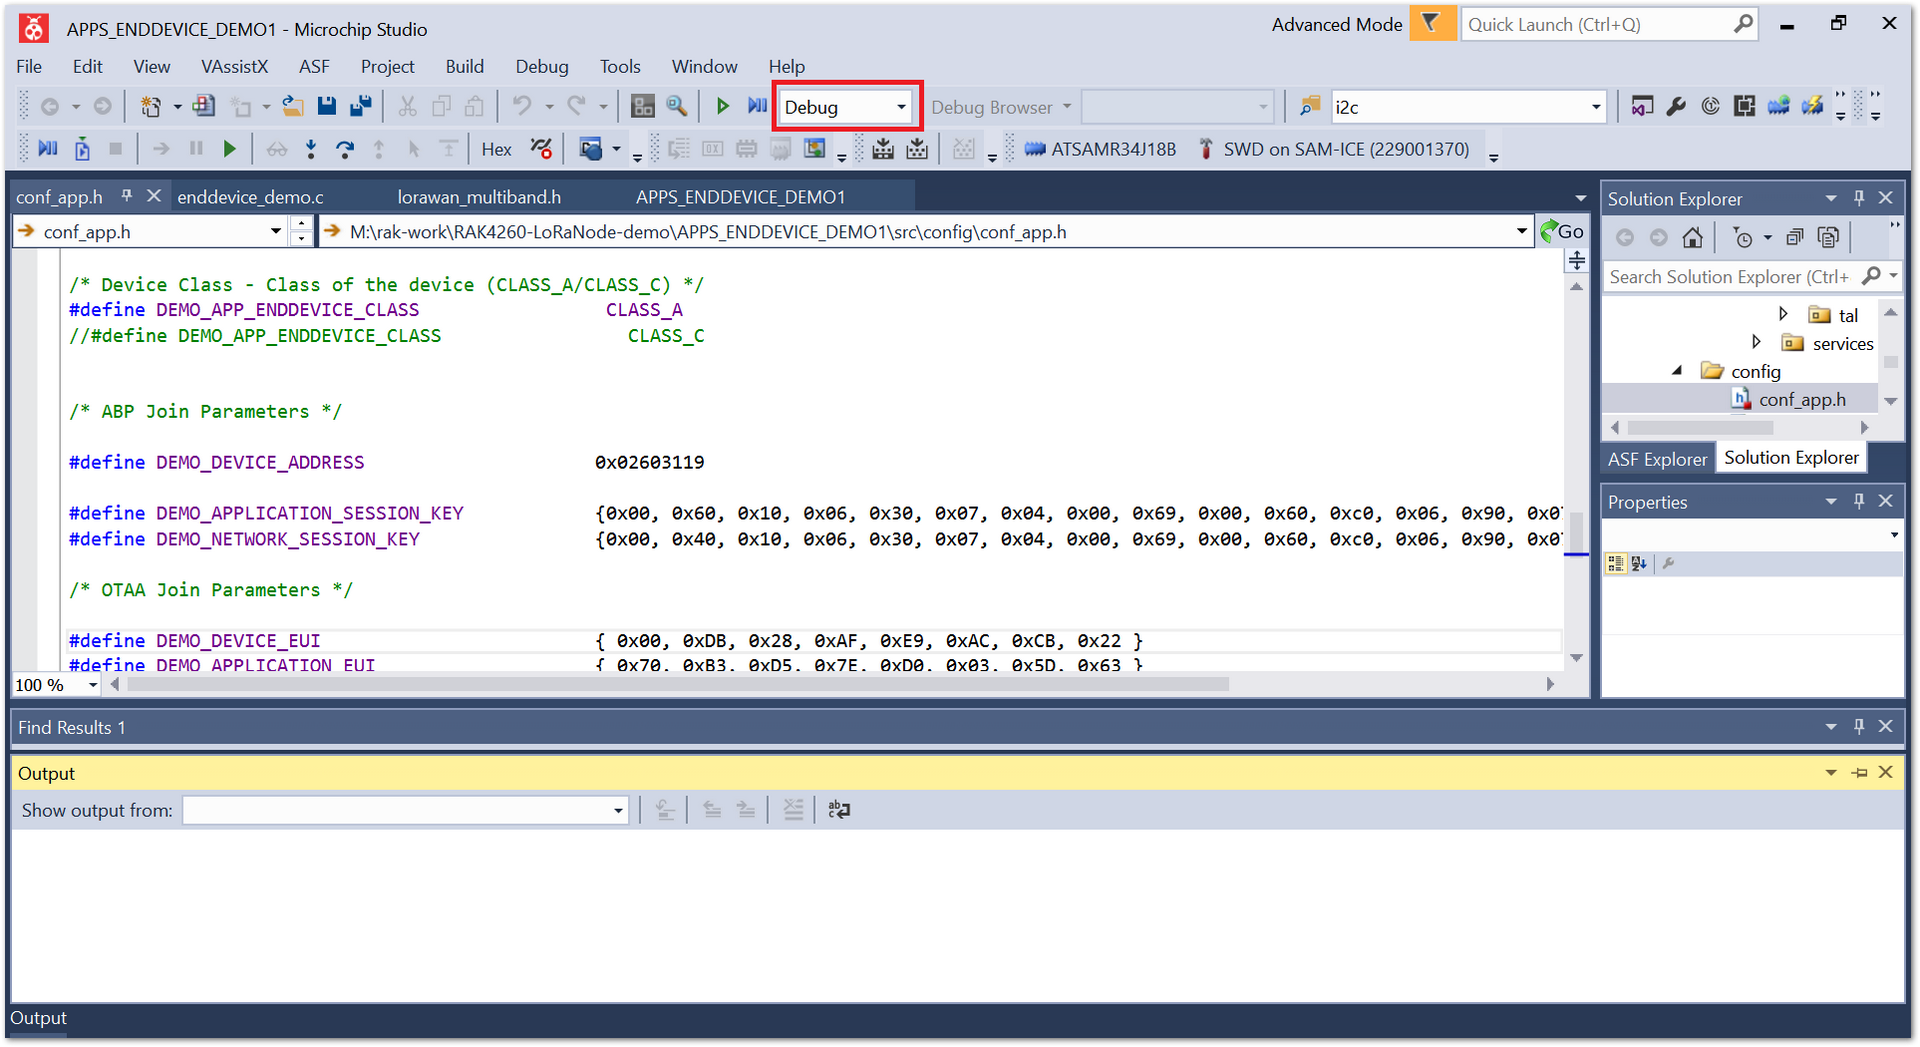 Figure 1: Microchip Studio Solution Configurations
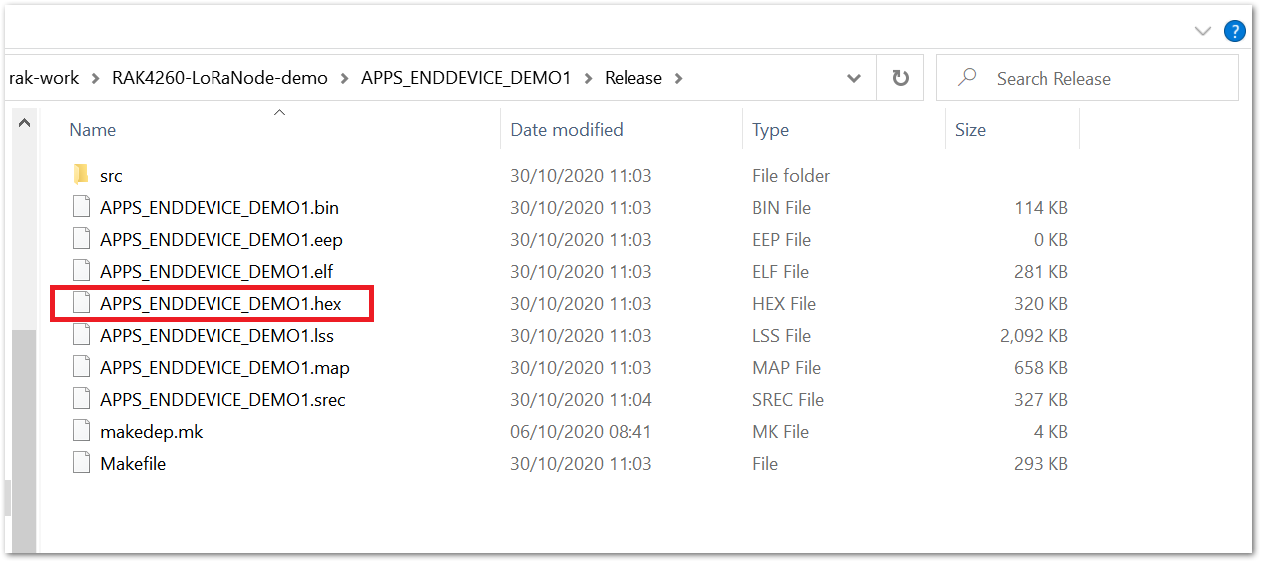 Figure 1: RAK4260 hex file
pyocd flash -t atsaml21j18a APPS_ENDDEVICE_DEMO1.hex
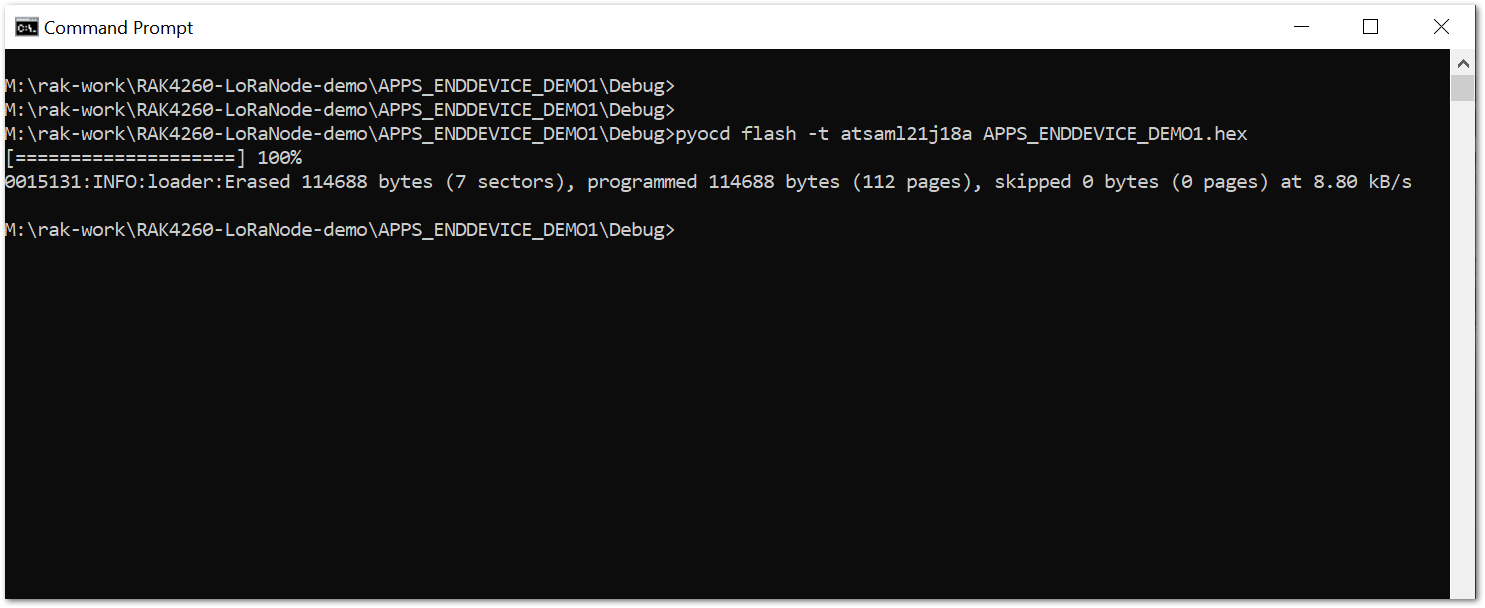 Figure 1: Successful pyOCD flash