RAK7394 WisGate Developer CM4 LoRaWAN® Network Server Guide
This guide explains how to connect the RAK7394 WisGate Developer CM4 Gateway to different LoRaWAN Network Servers, including The Things Stack, ChirpStack, and AWS IoT Core for LoRaWAN. Before connecting the gateway to a LoRaWAN Network Server, complete the gateway configuration according to the Gateway Configuration guide.
Connecting to The Things Stack (TTNv3)
The Things Network is enabling low-power devices to use long-range gateways to connect to an open-source, decentralized network to exchange data through an Application. Learn more about the Things Network through their documentation.
In this section, you will learn how to connect RAK7394/RAK7394C/RAK7394P WisGate Developer CM4 gateway to TTNv3.
-
Connect your gateway to the internet via the router using the method outlined in the Accessing the Internet section of the Quick Start Guide.
-
Configure the gateway by selecting TTN as the LoRa® Server and setting the correct frequency, following the instructions provided in the Configuring the Gateway section.
-
For the TTN Console registration steps, refer to:How to Register a RAK Gateway in TTN v3
Connecting the Gateway with ChirpStack
The ChirpStack is an open-source LoRaWAN Network Server. For more information, visit the ChirpStack site.
For the RAK7394/RAK7394C/RAK7394P WisGate Developer CM4 Gateway, there are two ways to use ChirpStack:
Using the Built-in ChirpStack
There is a built-in ChirpStack in every RAK Developer gateway if you use the latest firmware or the rak_common_for_gateway repository.
-
When using the gateway for the first time after burning the latest firmware, it will operate in the EU868 Band and use the built-in ChirpStack as its default LoRa Server. If you do not wish to change the frequency or LoRa Server, no additional configuration is required, as this setup is automatically applied when the gateway boots.
-
If it is not your first time using the gateway and you want to use the built-in ChirpStack as the LoRa Server, follow the steps outlined in the Configuring the Gateway section.
-
Optional: If you have disabled AP Mode and connected the gateway to your Wi-Fi network (Client Mode), you can locate your gateway’s IP address using tools like Advanced IP Scanner.
-
The ChirpStack instance includes a Web-based UI. To access it, open a browser and use the following credentials:
- Browser Address:
<Gateway IP address>:8080(Example:http://192.168.0.100:8080) - Username:
admin - Password:
admin
- Browser Address:
It is recommended to change your password to enhance the security of your account. You can do this by clicking the Change Password option under the user icon.
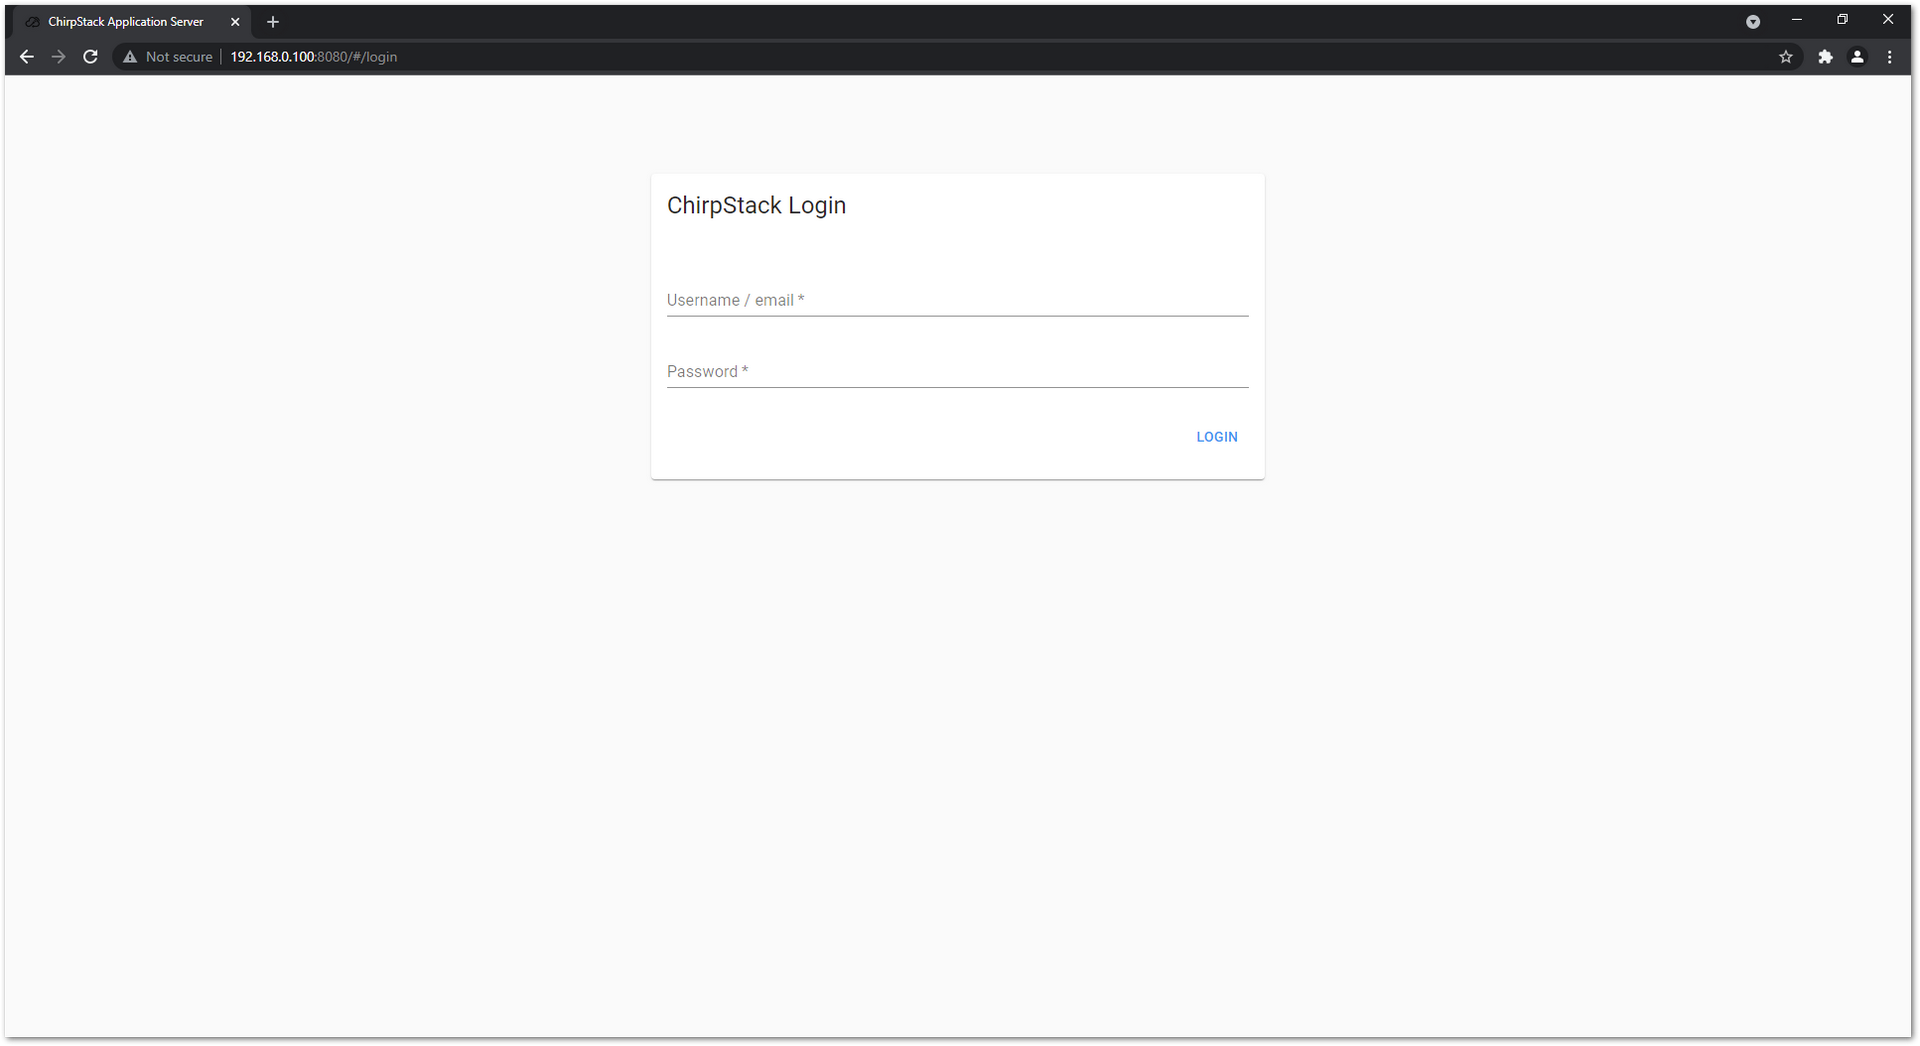 Figure 1: ChirpStack web-based UI
- Everything is pre-configured, including Device Profiles, and the gateway is already registered with the server. To view the details, go to the Gateways tab and click on rak_gateway to access the gateway details page.
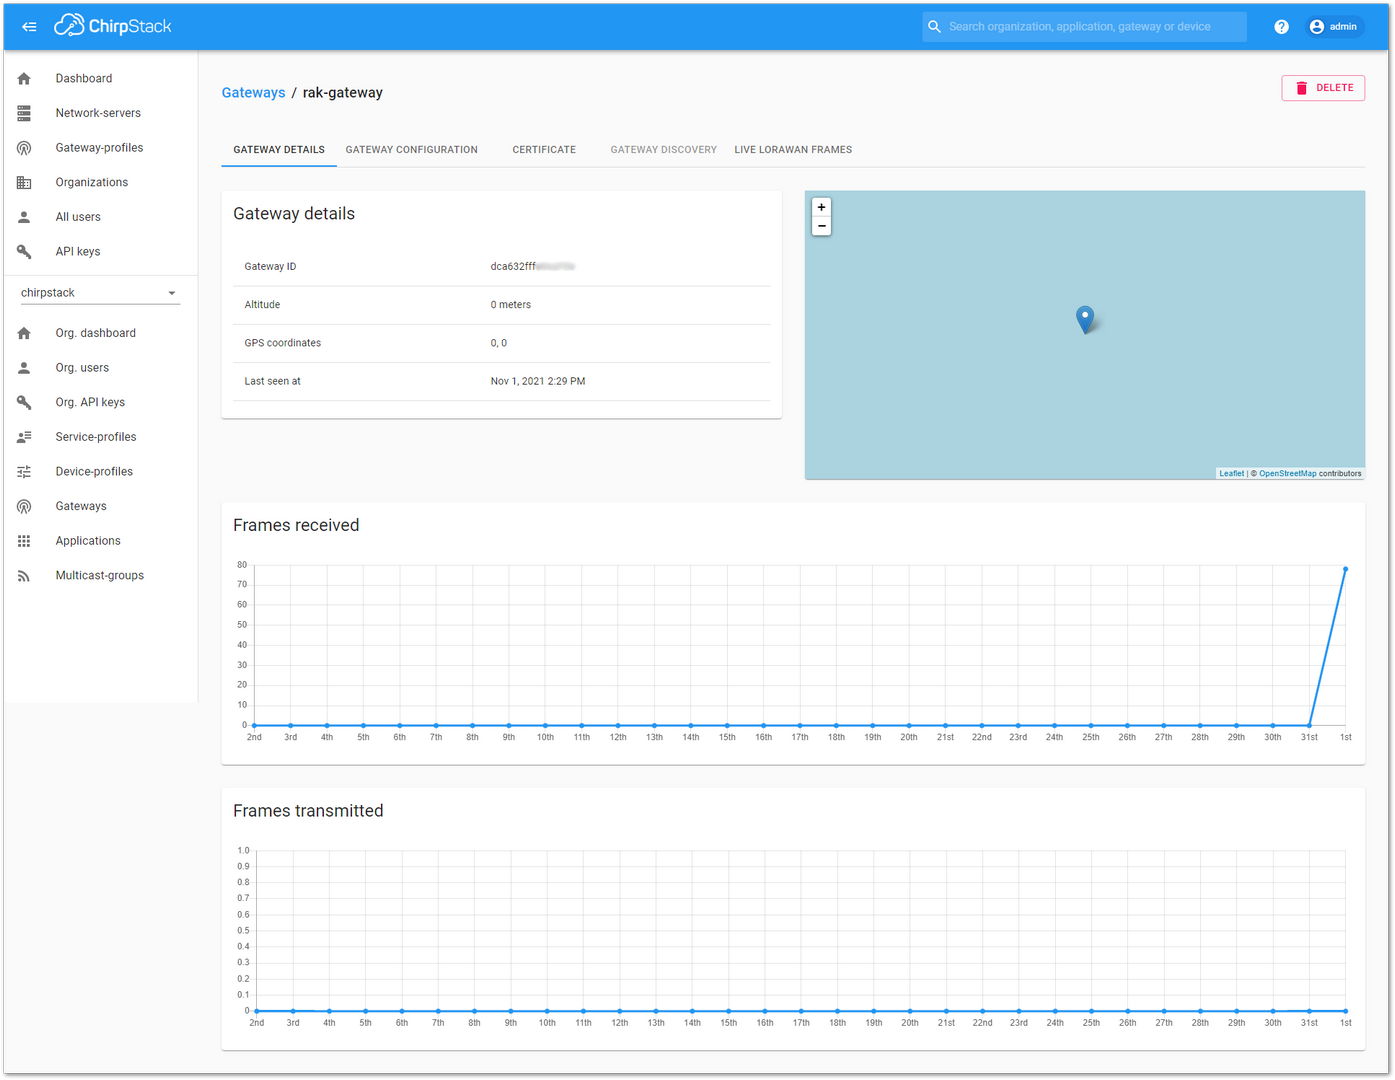 Figure 1: Available gateway in Chirpstack
- Navigate to the Gateways tab and check the Last seen status. It should show as a few seconds ago, indicating that the gateway is visible to the ChirpStack server.
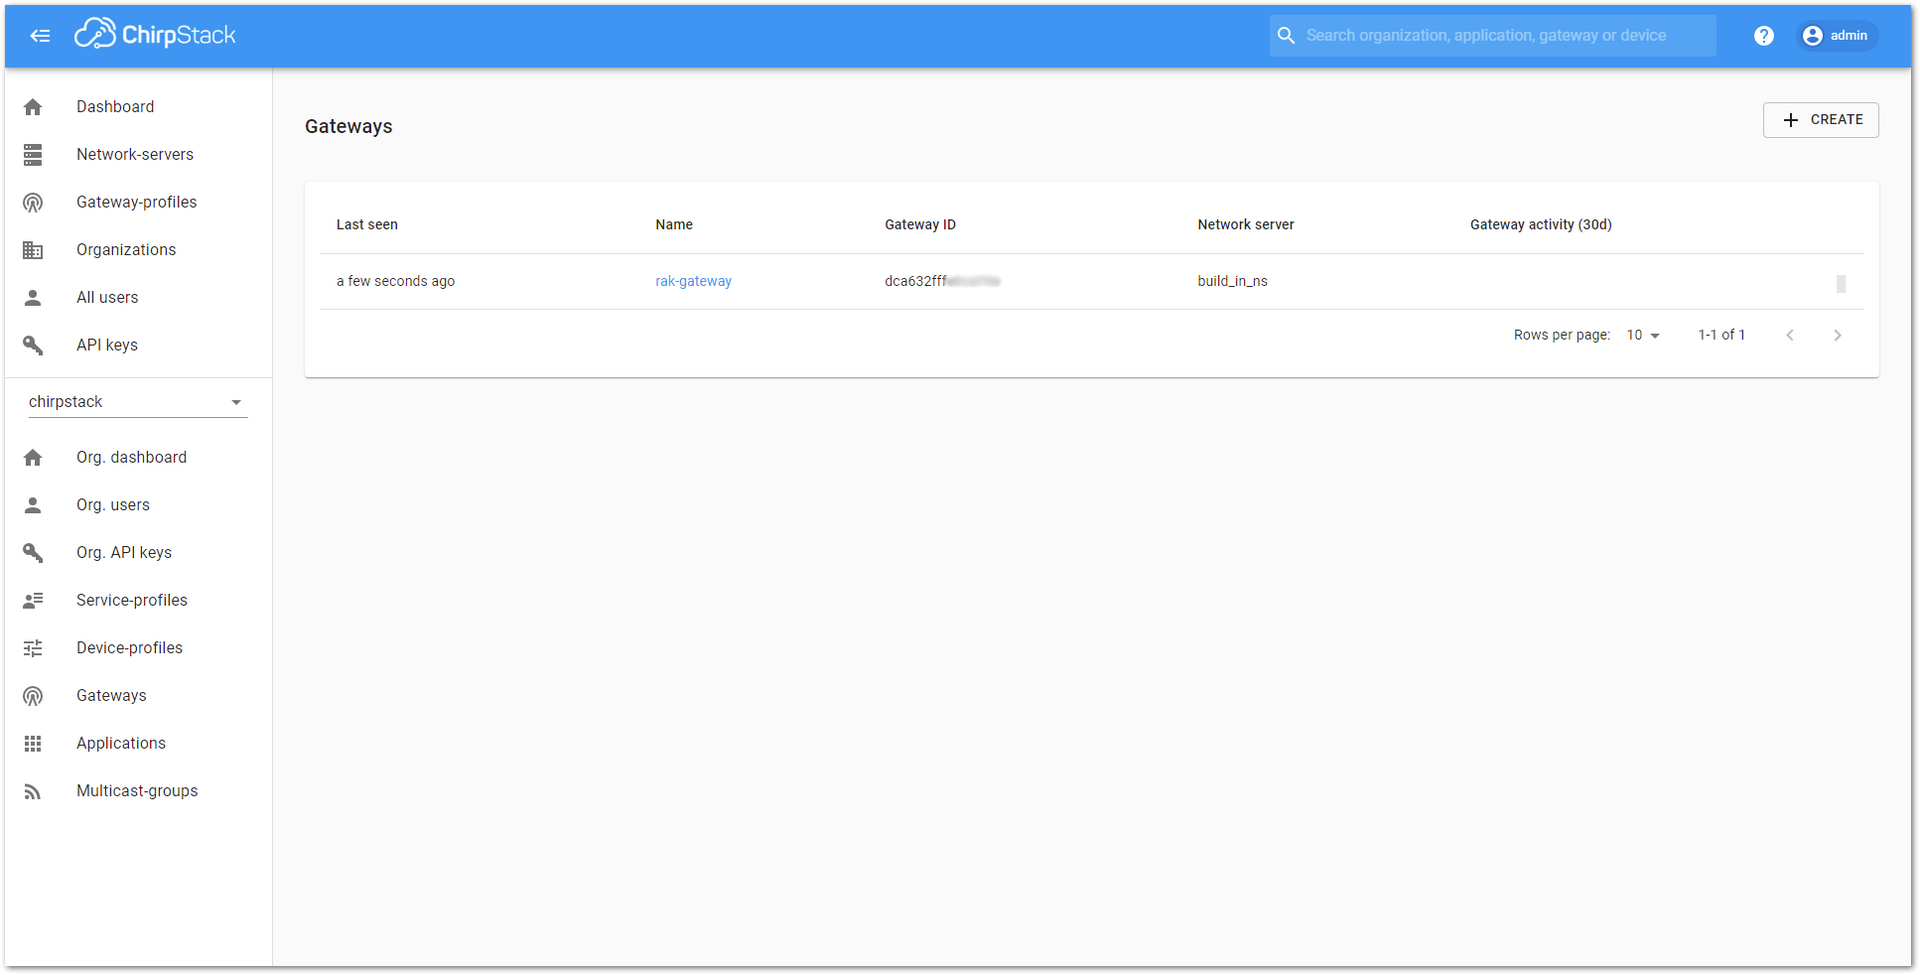 Figure 1: Last seen status
Using an Independent ChirpStack
You can set up an independent ChirpStack instance or deploy one on AWS. For instructions on using ChirpStack with AWS, refer to the AWS guide. If you prefer to run ChirpStack on a different host or cloud service, follow the Debian/Ubuntu guide on the ChirpStack site.
Run the sudo gateway-config command in the CLI and configure the gateway to point to the IP address of the machine where you installed ChirpStack. This can be done by selecting Setup RAK Gateway LoRa concentrator (item 2 in the menu).
- Assuming you have set it up correctly, log in to your ChirpStack to register your gateway.For the ChirpStack registration steps, refer to: How to Register a RAK Gateway in ChirpStack v3
AWS IoT Core for LoRaWAN
Execute the following steps to set up your AWS account and permissions.
Set Up Your AWS Account and Permissions
If you don't have an AWS account, refer to the instructions in the guide here. The relevant sections are Sign up for an AWS account and Create a user and grant permissions.
Overview
The high-level steps to get started with AWS IoT Core for LoRaWAN are as follows:
- Set up Roles and Policies in IAM
- Add a Gateway (see section Add the Gateway to AWS IoT)
- Add Device(s) (see section Add a LoRaWAN Device to AWS IoT)
- Verify device and service profiles
- Set up a Destination to which device traffic will be routed and processed by a rule.
These steps are outlined throughout this guide. For additional information, refer to the AWS LoRaWAN Developer Guide.
Add the Gateway to AWS IoT
Preparation
Refer to the online guide for steps required before onboarding your gateway. For more details, check the software section of the datasheet.
Frequency Band Selection and Role Setup
Refer to the online guide for information on selecting an appropriate frequency band.
The LoRa frequency bands supported by the RAK7394 include:
- RU864
- IN865
- EU868
- US915
- AU915
- KR920
- AS923
- CN470
You can choose the appropriate frequency band of your device from the options available on the RAK Store.
Add the LoRaWAN Gateway
To register the gateway with AWS IoT Core for LoRaWAN, follow the steps in the online guide under the Add a gateway using the console section.
Add a LoRaWAN Device to AWS IoT
Preparation
- Go to the datasheet to learn more about the RAK4631 WisBlock LPWAN Module.
- Follow the steps in the online guide under the Before onboarding your wireless device section, then proceed to the Add your wireless device to AWS IoT Core for LoRaWAN section.
Verify Profiles
AWS IoT Core for LoRaWAN supports device profiles and service profiles. Device profiles contain the communication and protocol parameter values the device needs to communicate with the network server. Service profiles describe the communication parameters the device needs to communicate with the application server.
Some pre-defined profiles are available for device and service profiles. Before proceeding, verify that these profile settings match the devices you will be setting up to work with AWS IoT Core for LoRaWAN. For more details, refer to the online guide under the Add profiles to AWS IoT Core for LoRaWAN section.
Proceed only if you have a device and service profile that meets your requirements.
Set Up a Destination for Device Traffic
Most LoRaWAN devices do not send data to AWS IoT Core for LoRaWAN in a format directly usable by AWS services. Therefore, the data must first be routed to a Destination. A Destination represents an AWS IoT rule that processes the device's data for AWS services. This rule includes an SQL statement to select the device's data and topic rule actions to forward the SQL query results to the intended AWS services.
For more information, refer to the online guide under sections Add a destination using the console and Create an IAM role for your destinations. Also, refer to Create rules to process LoRaWAN device messages section in the online guide.
Set Up the Gateway
For additional software references, check the following link:
Configure the Gateway Device
- To connect to AWS IoT Core for LoRaWAN, you need to download and compile Basics Station.
Assuming you have successfully accessed the gateway via SSH, it is recommended to update and upgrade the system. This will ensure all packages are up-to-date. Use the following commands:
sudo apt update
sudo apt upgrade -y
- To register the gateway in AWS IoT Core for LoRaWAN, you need the device’s EUI. To locate the gateway’s EUI, use the following command to open the graphical user interface (GUI). The EUI will be displayed at the top of the GUI:
sudo gateway-config
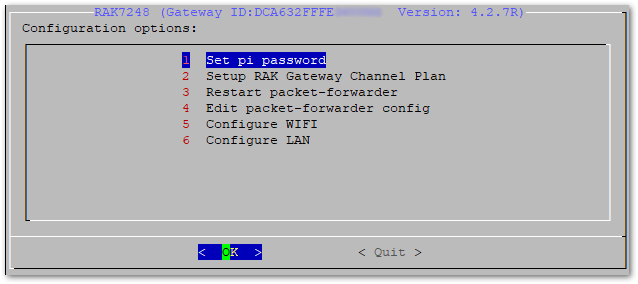 Figure 1: RAK7248 Configuration Options
You can also run the following command:
pi@rak-gateway:~ $ sudo gateway-version
Raspberry Pi 4 Model B Rev 1.1, OS "10 (buster)", 5.4.79-v7l+.
RAKwireless gateway RAK7248 no LTE version 4.2.7R install from firmware
Gateway ID: DCA632FFFE366417
- To configure Basics Station, clone the repository and navigate to the downloaded folder using the following commands:
git clone https://github.com/lorabasics/basicstation.git
cd basicstation
Run the following commands in the Basics Station directory.
- Install all the dependencies by running the following command:
make platform=corecell variant=std
- Replace the file
loragw_stts751.c.
sudo cp -f /opt/ttn-gateway/sx1302_hal/libloragw/src/loragw_stts751.c deps/lgw1302/platform-corecell/libloragw/src/loragw_stts751.c
- To build Basics Station, navigate to the directory, clean the build environment, and then run
maketo install all dependencies. Use the following commands:
make clean
make platform=corecell variant=std
- After completing the installation, you need to configure the Basics Station protocol. Navigate to the folder containing the examples provided by Semtech, and then enter the corecell folder (specific to SX1302 builds):
cd examples/corecell
- To successfully start the concentrator, edit the reset_gw.sh script and change the reset pin to 17.
#!/bin/sh

# This script is intended to be used on the SX1302 CoreCell platform, it performs the following actions:
#        - export/unexport GPI023 and GPI018 used to reset the SX1302 chip and to enable the LDOs
#
# Usage examples:
#       ./reset_lgw.sh stop
#       ./reset_lgw.sh start
#
# GPIO mapping has to be adopted with HW
#

SX1302_RESET_PIN=17
SX1302_POWER_EN_PIN=18

WAIT_GPIO() {
    sleep 0.1
}
- To organize the configuration files for Basics Station to connect to AWS IoT Core for LoRaWAN, create a new folder:
mkdir lns-aws
- Copy
station.confinto this folder.
cp lns-ttn/station.conf lns-aws/
- Add the certificates that you downloaded earlier to lns-aws. (Refer to Add the LoRaWAN Gateway.)
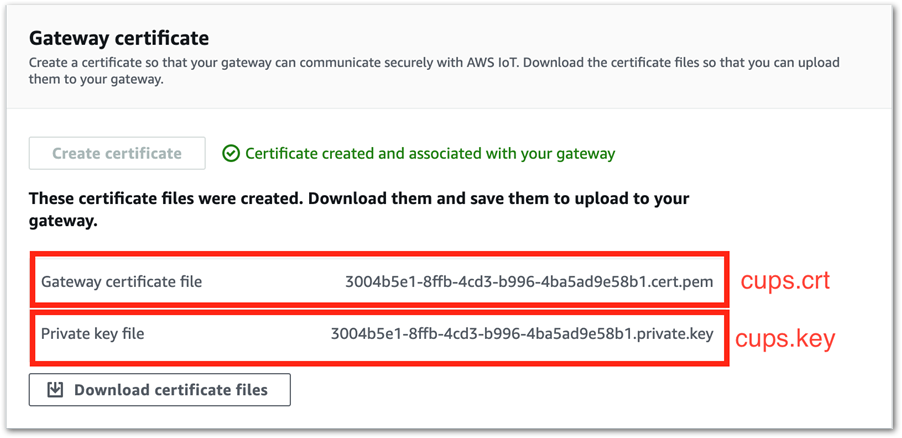 Figure 1: Gateway Certificate
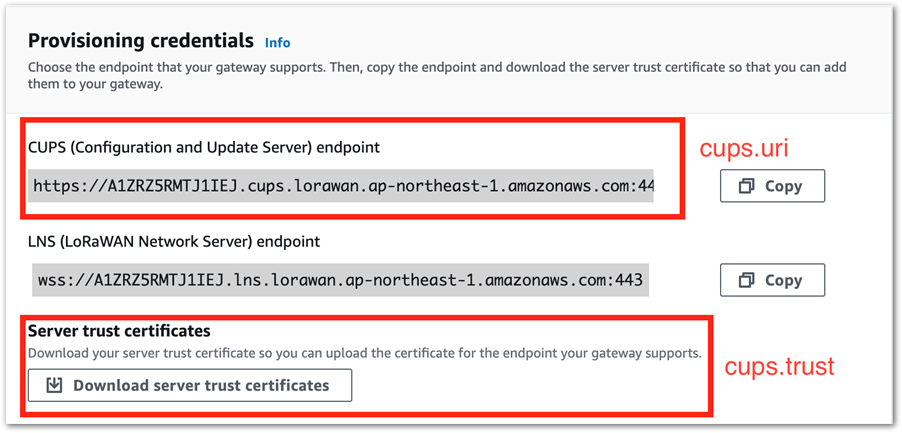 Figure 1: Enter the credentials
- All the configurations for the Basics Stations are ready. You should now have the files as follows:
pi@rak-gateway:~/basicstation/examples/corecell/lns-aws $ ls -al
total 28
drwxr-xr-x 2 pi pi 4096 Oct 28 17:57 .
drwxr-xr-x 4 pi pi 4096 Oct 28 17:44 ..
-rw-r--r-- 1 pi pi 1225 Oct 28 17:57 cups.crt
-rw-r--r-- 1 pi pi 1680 Oct 28 17:57 cups.key
-rw-r--r-- 1 pi pi 1607 Oct 28 17:57 cups.trust
-rw-r--r-- 1 pi pi   69 Oct 28 17:57 cups.uri
-rw-r--r-- 1 pi pi 2460 Oct 28 17:46 station.conf
- Before you start using the Basics Station, disable the packet forwarder.
Use the command
sudo systemctl edit ttn-gateway.serviceto edit the service of the packet forwarder, and add the following codes to the file.
To re-activate the packet forwarder, edit the service file and set the value of Restart to always.
[Unit]
Description=The Things Network Gateway

[Service]
WorkingDirectory=/opt/ttn-gateway/packet_forwarder/lora_pkt_fwd/
ExecStart=/opt/ttn-gateway/packet_forwarder/lora_pkt_fwd/start.sh
SyslogIdentifier=ttn-gateway
Restart=no
RestartSec=5

[Install]
WantedBy=multi-user.target
- To apply the changes made to the unit, execute the following command:
sudo systemctl daemon-reload
- Restart the ttn-gateway service to load the new service configuration. The unit file must be restated if you modify the running unit file.
sudo systemctl restart ttn-gateway.service
- Find the ttn-gateway process PID and
killthis process:
pi@rak-gateway:~/basicstation/example/corecell/lns-aws $ ps aux | grep ttn-gateway
pi      28165   0.2     0.1     7680        2780    pts/0   S+  18:20   0:00 /bin/bash/opt/ttn-gateway/packet_forwarder/lora_pkt_fwd/start.sh
pi      28236   0.0     0.0     7348         488    pts/1   S+  18:20   0:00 grep --color=auto ttn-gateway
pi@rak-gateway:~/basicstation/example/corecell/lns-aws $ sudo kill 28165
- Now, you can start Basics Station. Exit the configuration folder and start Basics Station.
cd ..
./start-station.sh –l lns-aws/
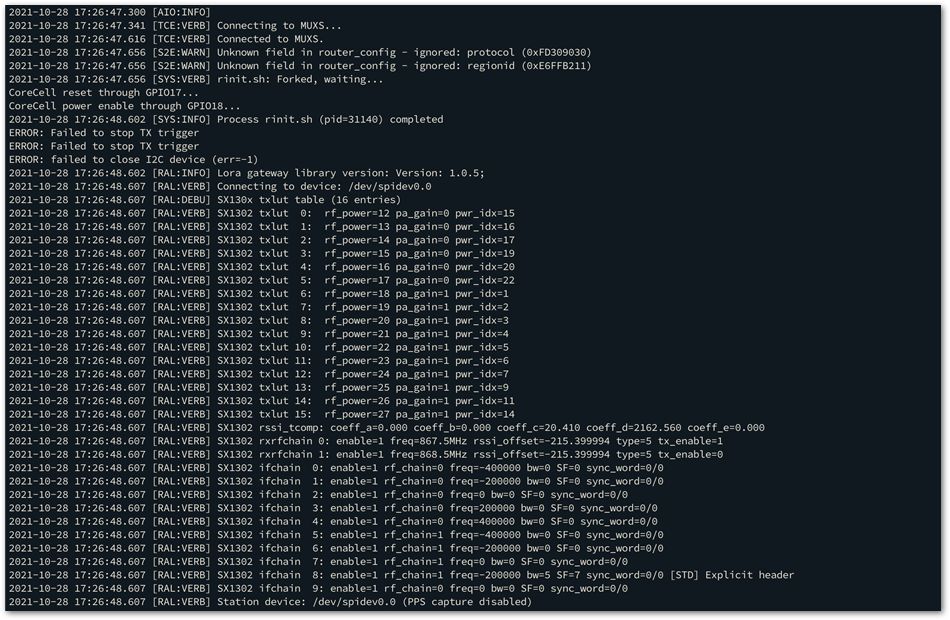 Figure 1: Configure the Basics Station
If everything is configured properly, your gateway should be online in the AWS IoT Core for LoRaWAN console:
 Figure 1: Connected Status in the LoRaWAN Console
Add End-Devices
Refer to RAK4631 Quick Start Guide to enable communication with the gateway.
Connect the Device and Verify the Connection Status
Follow the instructions in the online guide to connect your device to AWS IoT Core for LoRaWAN. To verify the connection status, refer to the instructions in the Check device connection status using the console section. You can also check View format of uplink messages sent from LoRaWAN devices.
For instructions on processing uplink data, creating rules, sending downlinks, and integrating other AWS services, refer to the AWS IoT Core for LoRaWAN Application guide.


