I²C Connection on RAK13002
This is just an example and illustration on how to use the RAK13002 for external I²C sensors, modules, or devices. You can use any I²C device as long as it operates at 3.3 V.
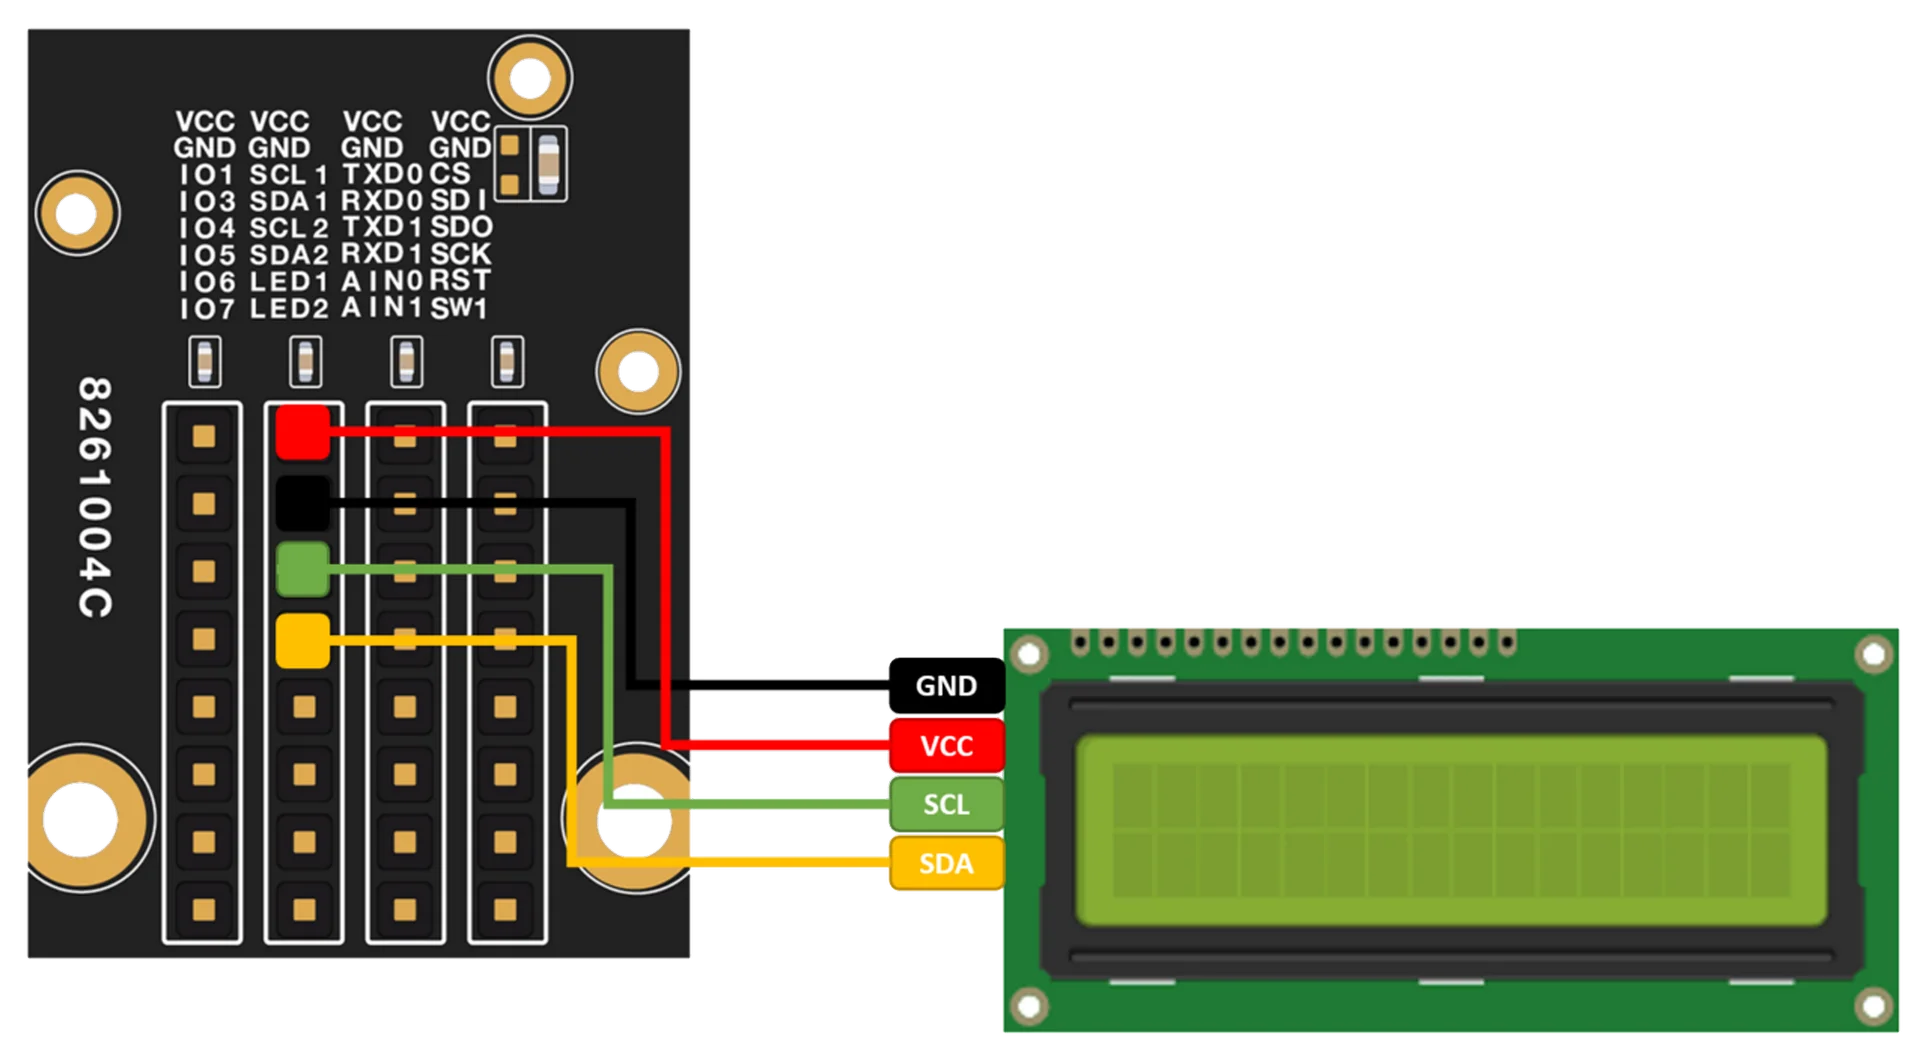 Figure 1: Connecting the RAK13002 to the I²C backpack of a 16x2 LCD
- You need to select first the WisBlock Core you have.
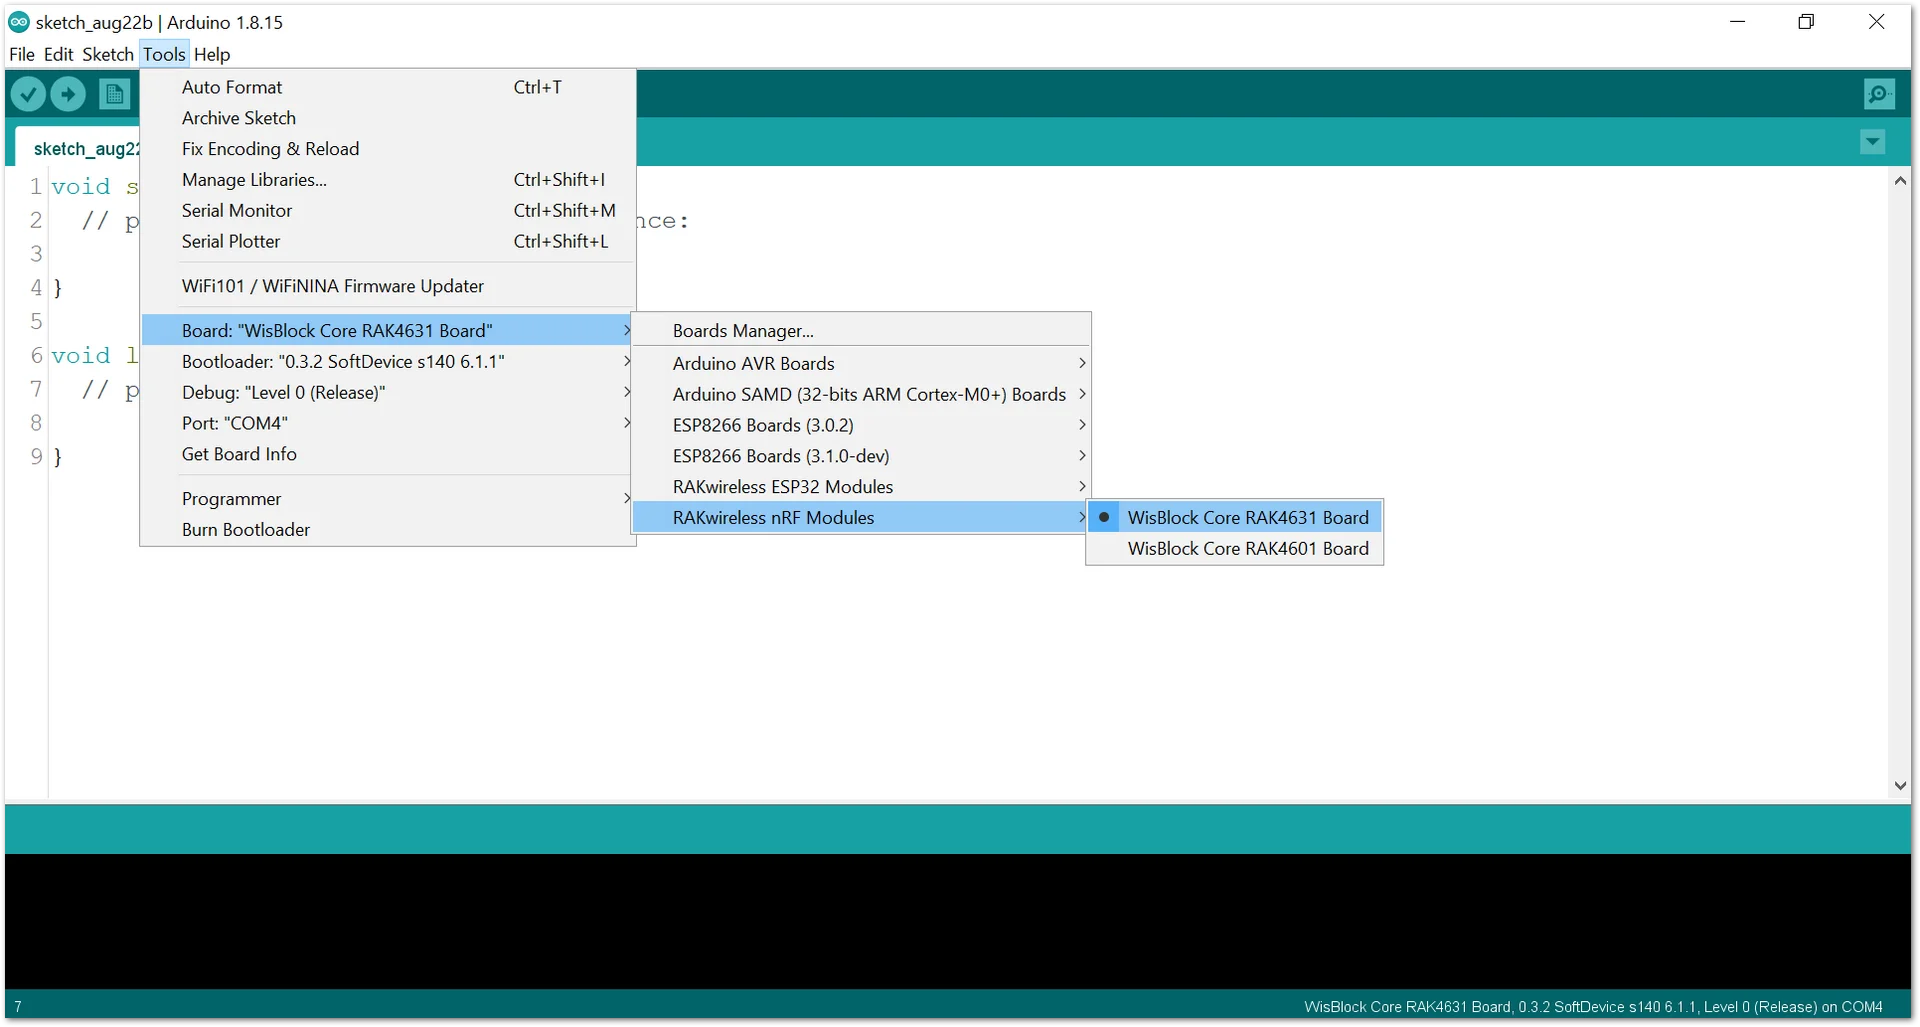 Figure 1: Selecting RAK4631 as WisBlock Core
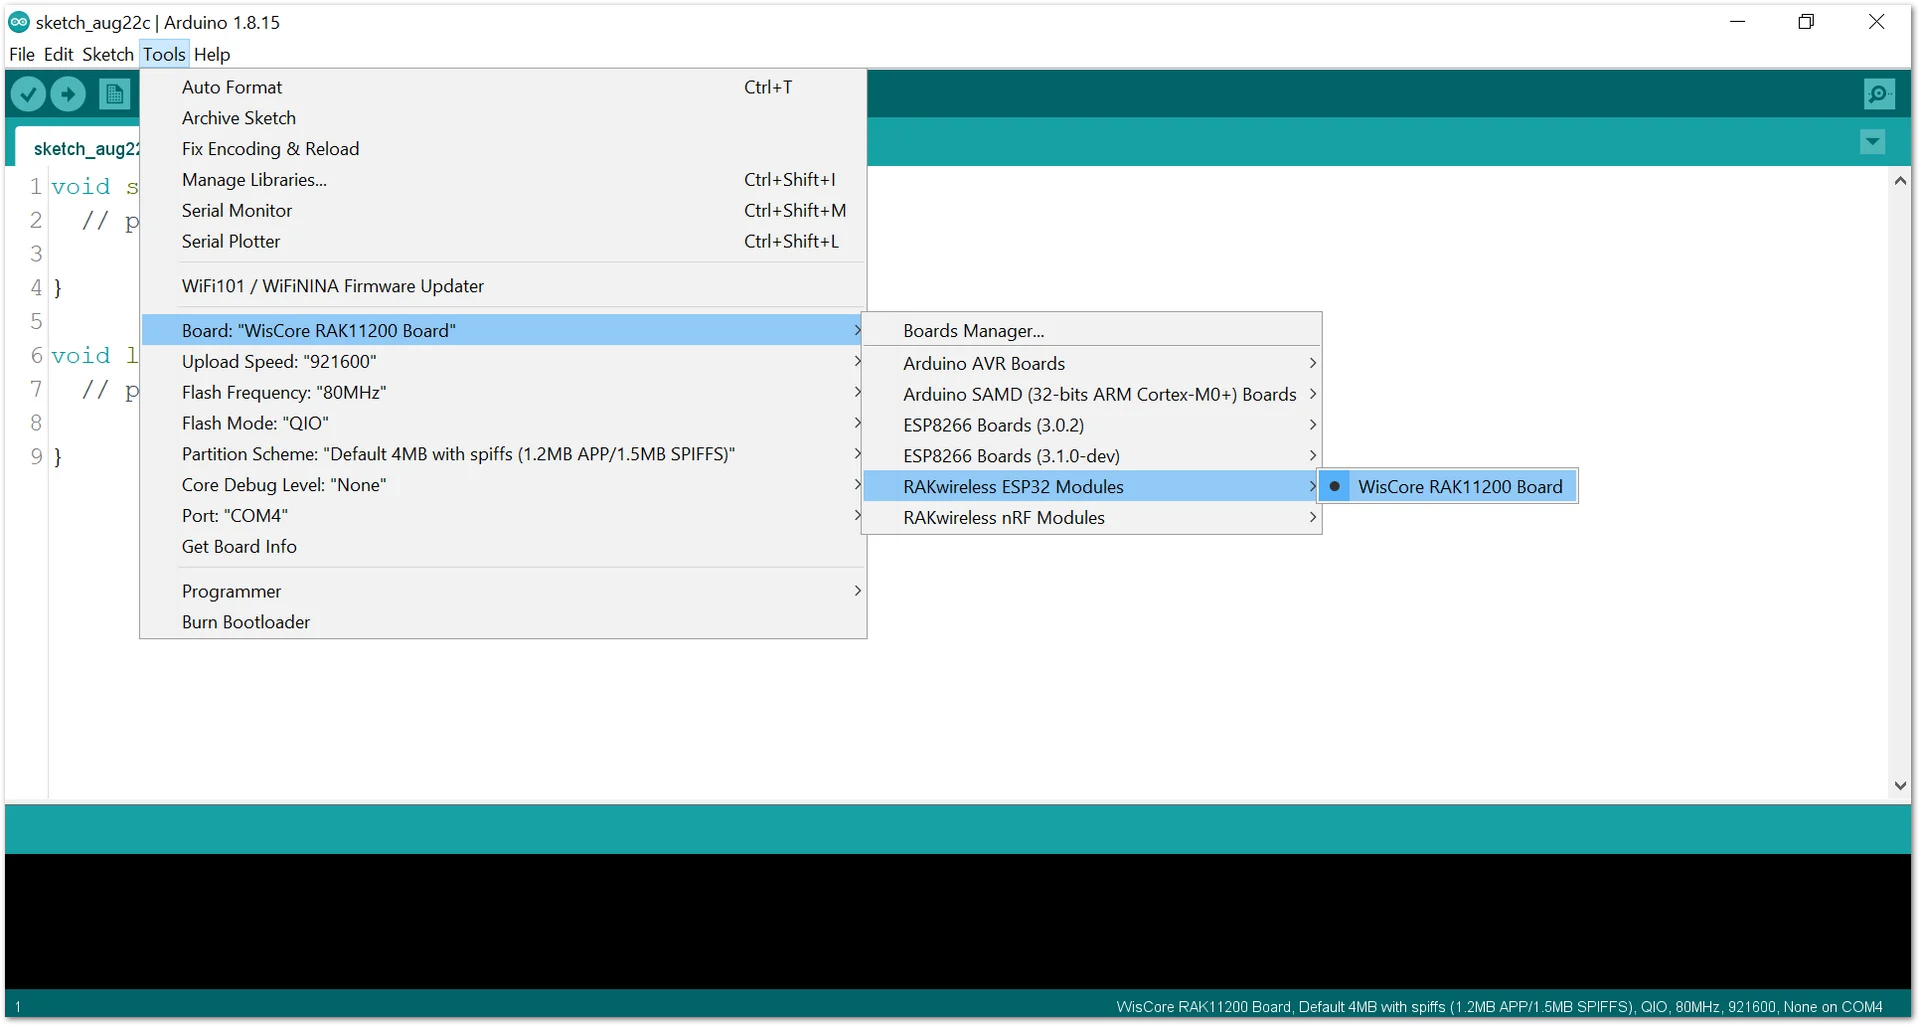 Figure 1: Selecting RAK11200 as WisBlock Core
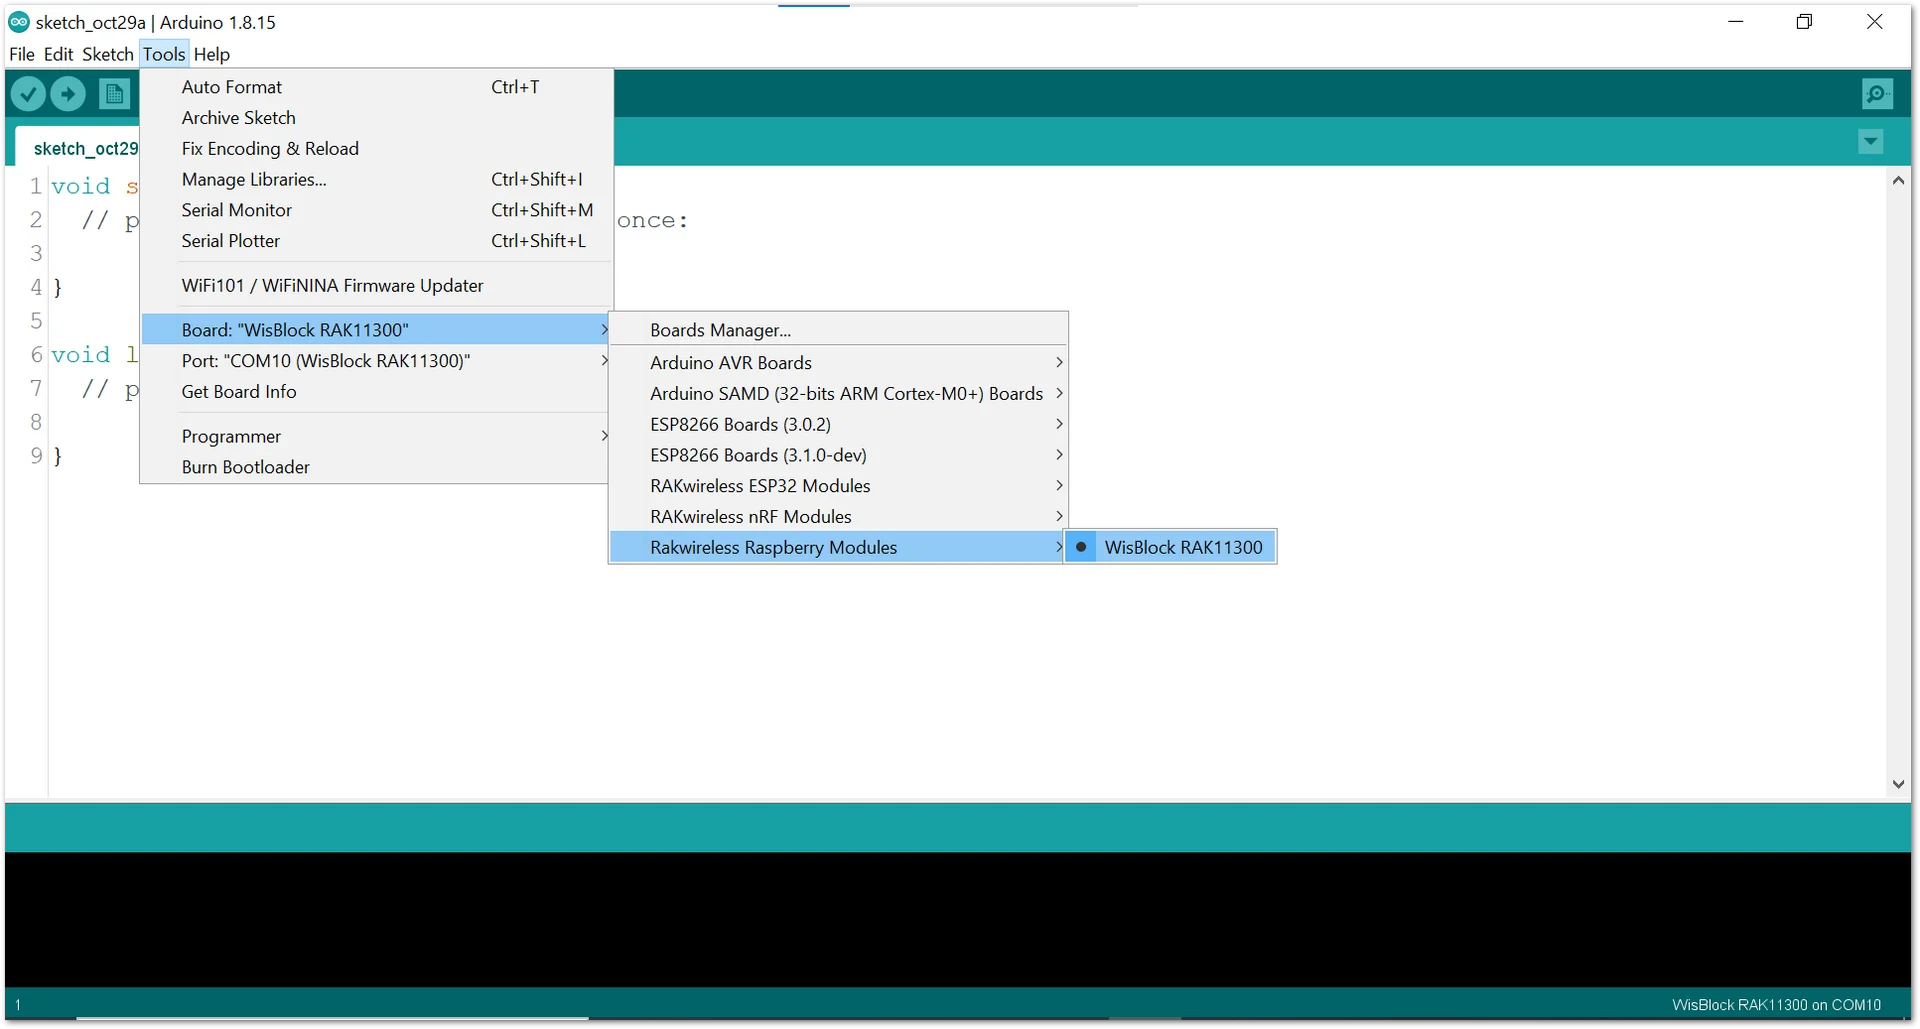 Figure 1: Selecting RAK11300 as WisBlock Core
- On the Arduino IDE, go to Sketch > Include Library > Manage Libraries. The Library Manager should open, then install the LiquidCrystal I²C library.
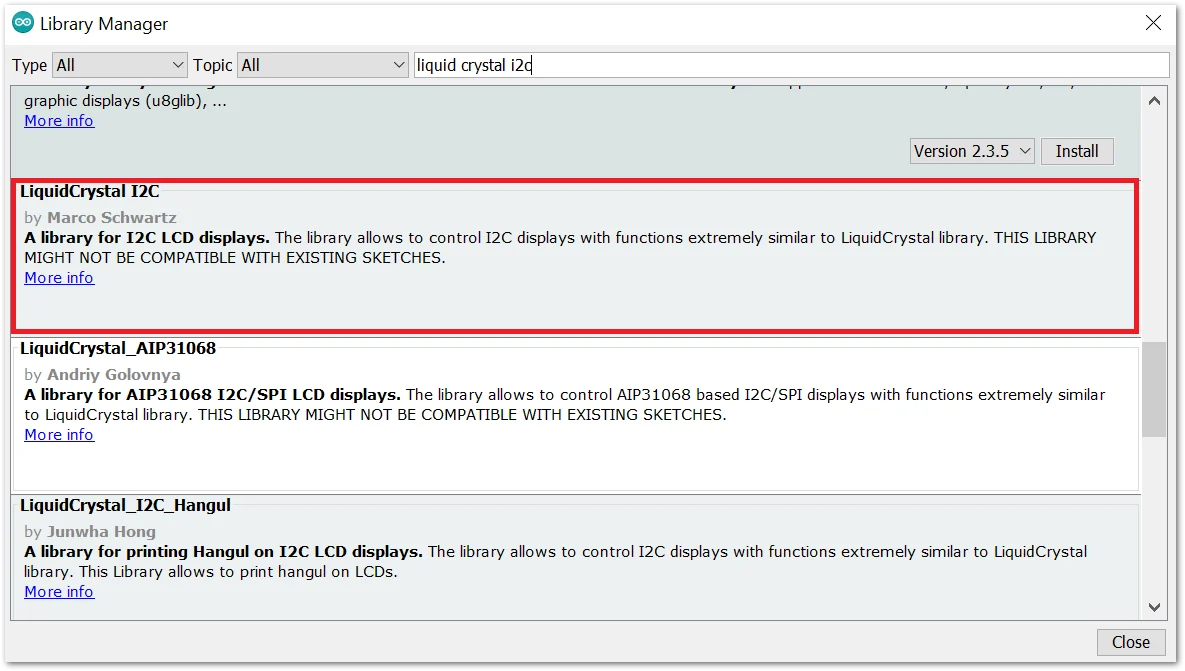 Figure 1: Installing the LiquidCrystal I²C library
- After successful installation of the library, you can now copy the following sample code into your Arduino IDE:
Click to view the code
#include LiquidCrystal_I2C.h

#include Wire.h

//initialize the liquid crystal library
//the first parameter is the I²C address
//the second parameter is how many rows are on your screen
//the third parameter is how many columns are on your screen
LiquidCrystal_I2C lcd(0x27, 16, 2);

void setup() {
  lcd.init();   //initialize lcd screen
  lcd.backlight(); // turn on the backlight
}
void loop() {

  start_display(); // star
  delay(1000); //wait for a second
  lcd.clear(); // clear the LCD content
  delay(1000); //wait for a second

}

void start_display(){

  lcd.setCursor(0,0); // tell the screen to write on the top row
  lcd.print("RAK13002");  // tell the screen to write “RAK13002” on the top row
  lcd.setCursor(0,1); // tell the screen to write on the bottom row
  lcd.print("EXAMPLE");  // tell the screen to write “EXAMPLE” on the bottom row

}
- Then select the right Serial Port and upload the code.
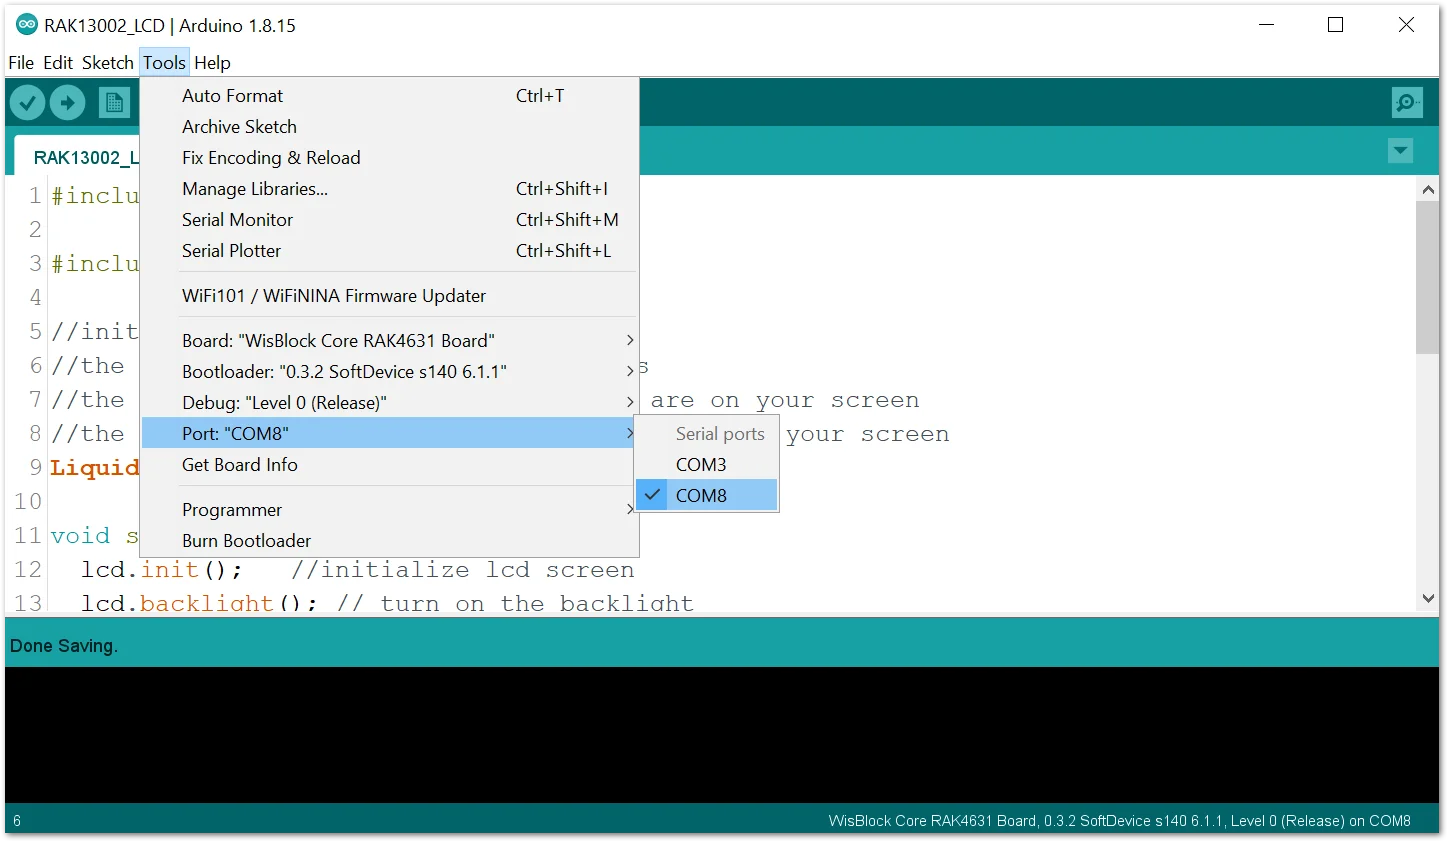 Figure 1: Selecting the correct Serial Port
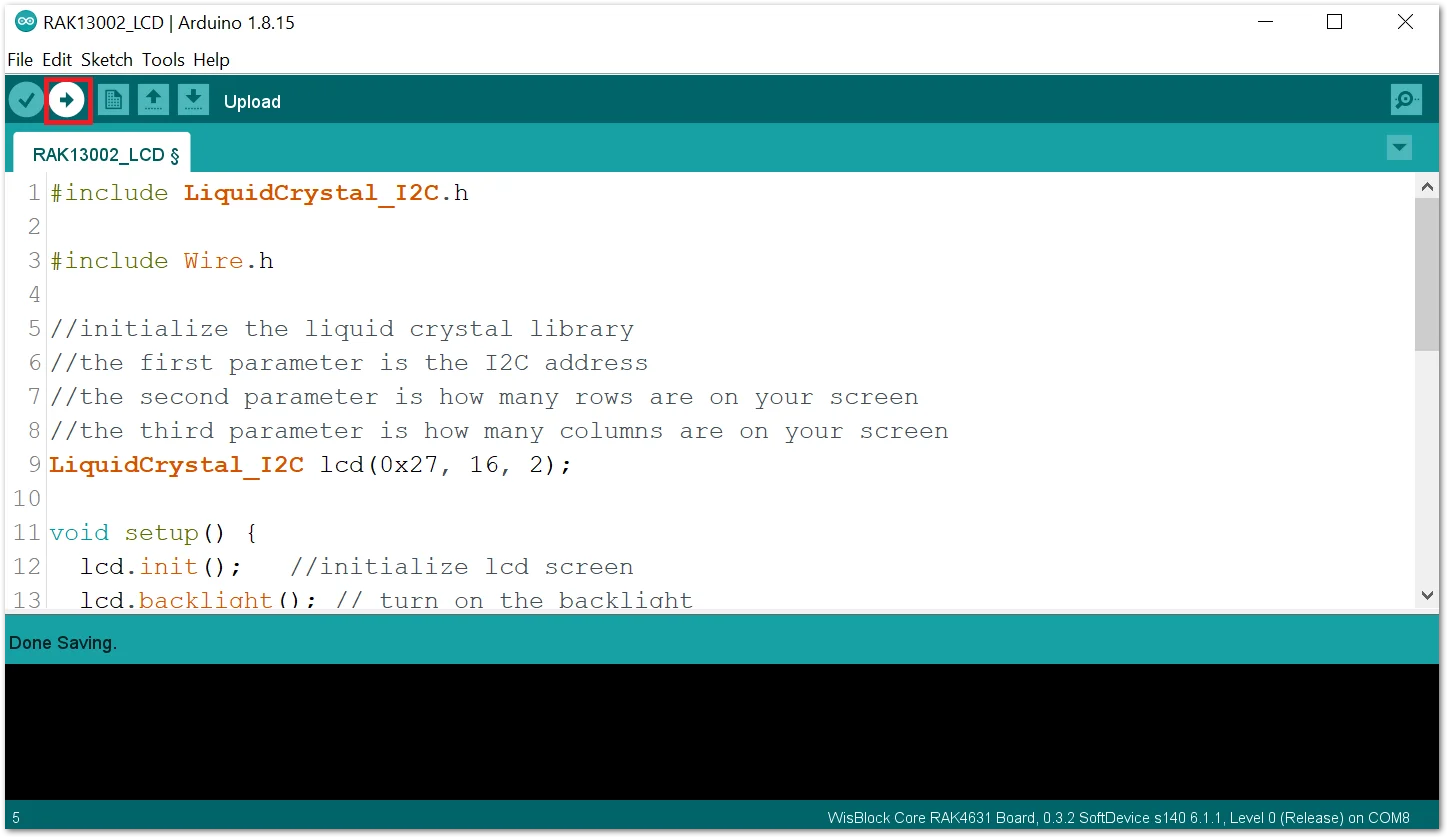 Figure 1: Uploading the sample code
- When you successfully uploaded the sample code, you will now be able to see the "RAK13002 EXAMPLE" in your LCD screen, which means that the module is properly communicating with the WisBlock core using the I²C protocol.
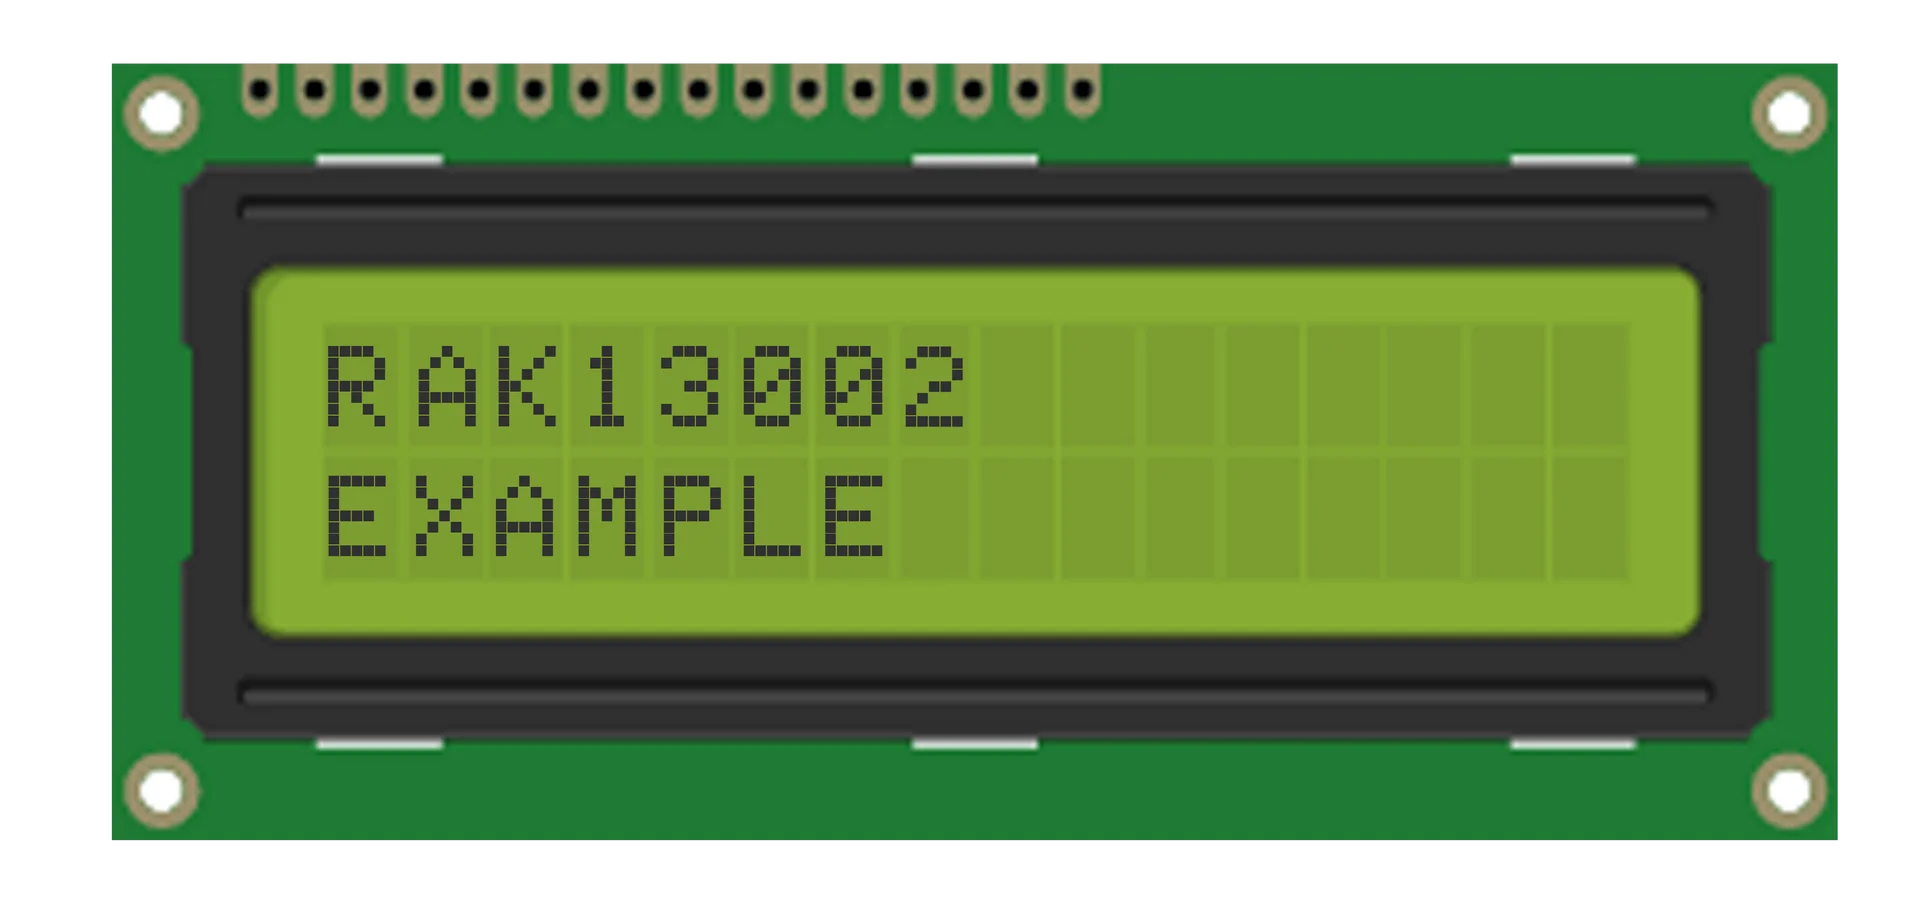 Figure 1: RAK13002 EXAMPLE displayed on 16x2 LCD
- If you are not seeing the same output, check the device's I²C address by using this code:
Click to view the code
/*
 * Scan the I²C Address of your LCD using
 * this example code. Make sure your SDA and SCL
 * line is connected properly.
 *
 * Follow the connection of LCD with I²C Backpack to RAK13002.
 */
#include <Wire.h> //include Wire.h library

void setup()
{
  Wire.begin(); // Wire communication begin
  Serial.begin(9600); // The baudrate of Serial monitor is set in 9600
  while (!Serial); // Waiting for Serial Monitor
  Serial.println("\nI2C Scanner");
}

void loop()
{
  byte error, address; //variable for error and I²C address
  int nDevices;

  Serial.println("Scanning...");

  nDevices = 0;
  for (address = 1; address < 127; address++ )
  {
    // The i2c_scanner uses the return value of
    // the Wire.endTransmission to see if
    // a device did acknowledge to the address.
    Wire.beginTransmission(address);
    error = Wire.endTransmission();

    if (error == 0)
    {
      Serial.print("I2C device found at address 0x");
      if (address < 16)
        Serial.print("0");
      Serial.print(address, HEX);
      Serial.println("  !");
      nDevices++;
    }
    else if (error == 4)
    {
      Serial.print("Unknown error at address 0x");
      if (address < 16)
        Serial.print("0");
      Serial.println(address, HEX);
    }
  }
  if (nDevices == 0)
    Serial.println("No I²C devices found\n");
  else
    Serial.println("done\n");

  delay(5000); // wait 5 seconds for the next I²C scan
}
- Your device's I²C address should be displayed on the Serial Monitor.
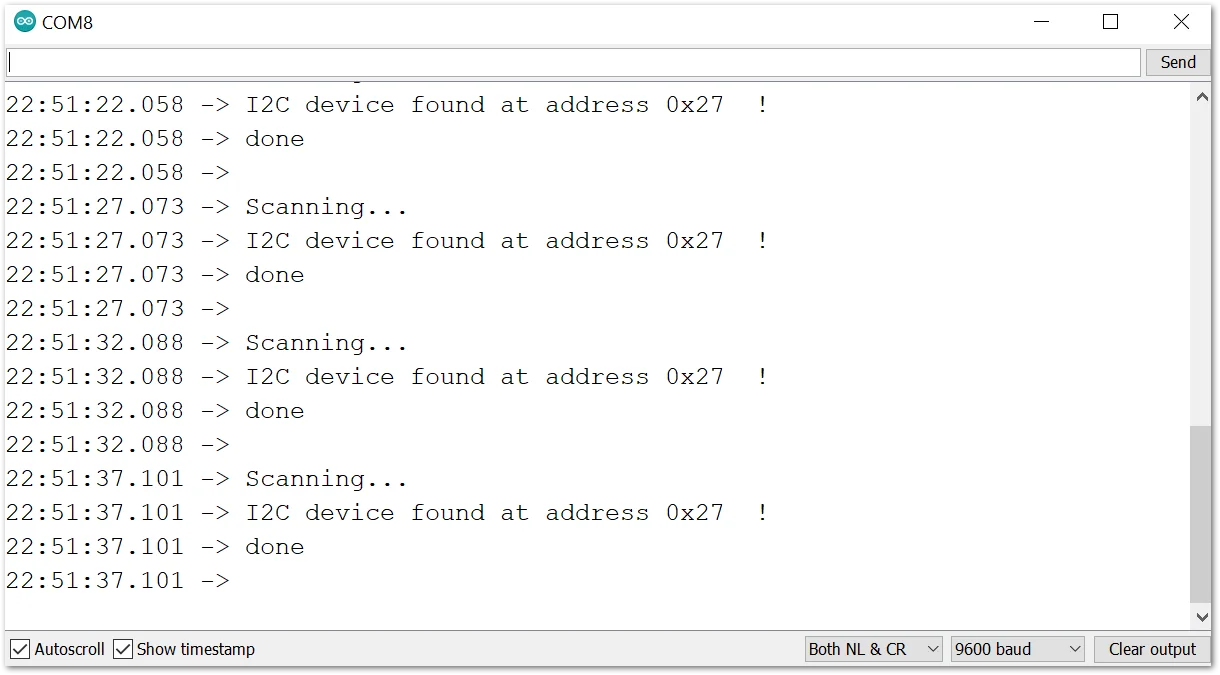 Figure 1: I2C address of your device


