RAK13800 WisBlock Ethernet Module Quick Start Guide
Prerequisite
Product Inclusions
Before going through each and every step on using the RAK13800 WisBlock module, make sure to prepare the necessary items listed below:
Hardware
- RAK13800 WisBlock Ethernet Module
- RAK19018 WisBlock POE Module (optional)
- Your choice of WisBlock Base
- Your choice of WisBlock Core
- USB Cable
- Li-Ion/LiPo battery (optional)
- Solar charger (optional)
Software
Arduino
Based on the choice of the WisBlock Core, select a Development Environment:
Programming via Arduino IDE- RAKwireless BSP support for Arduino
In Arduino IDE, once you installed the BSP, the examples for WisBlock Core will be automatically included on the list of examples.
Product Configuration
Hardware Setup
The RAK13800 WisBlock Ethernet Module must be mounted on the IO slot of the WisBlock Base board, as shown in the highlighted red area.
To use RAK13800 in your project, you need to connect a Wisblock Core, as shown in the highlighted green area.
RAK13800 can be POE enabled by mounting its daughter power board WisBlock RAK19018 POE Module.
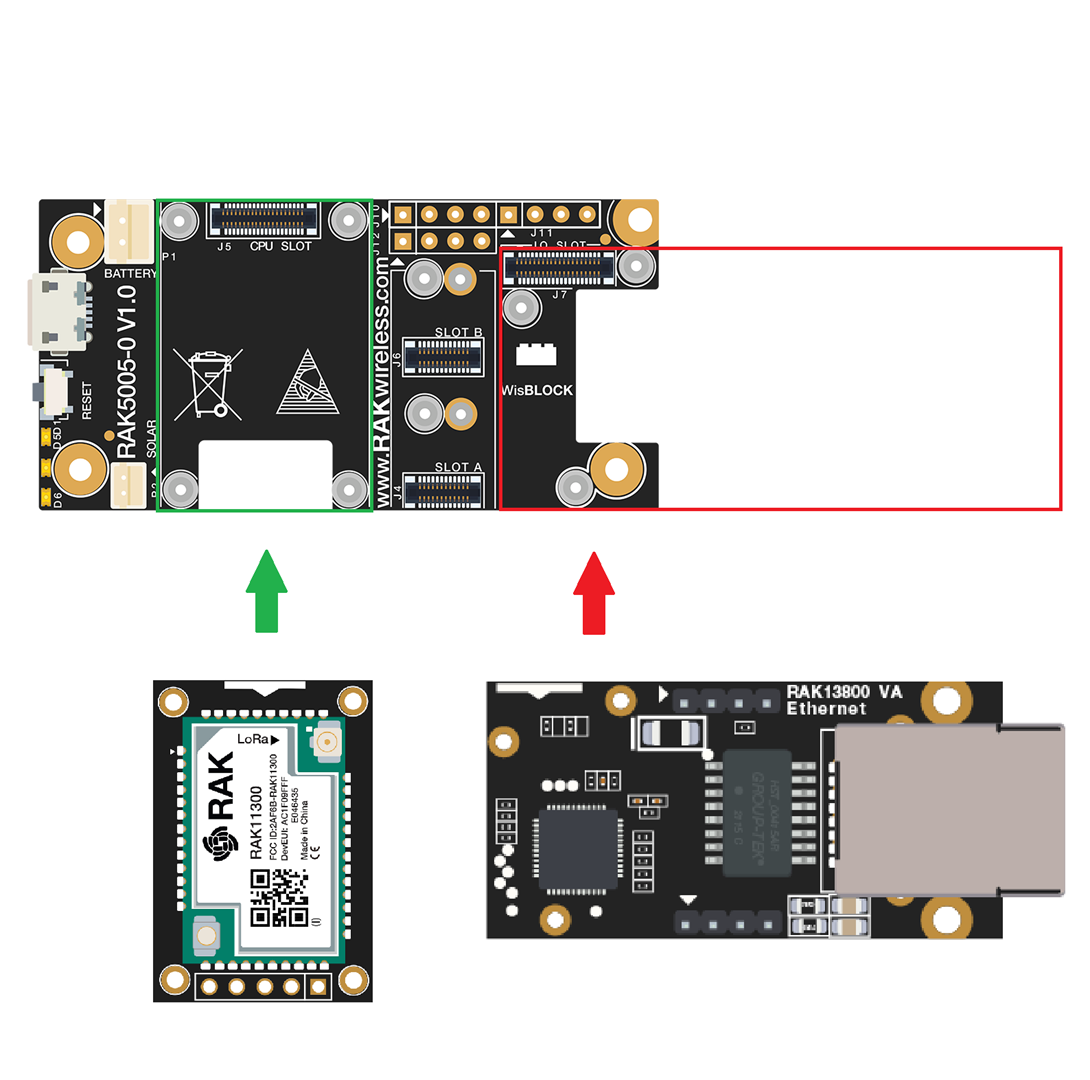 Figure 1: RAK13800 Connection to WisBlock Base Board
For more information about RAK13800, refer to the Datasheet.
Assembling and Disassembling of WisBlock Modules
Assembling Procedure
Always secure the connection of the WisBlock module by using compatible screws.
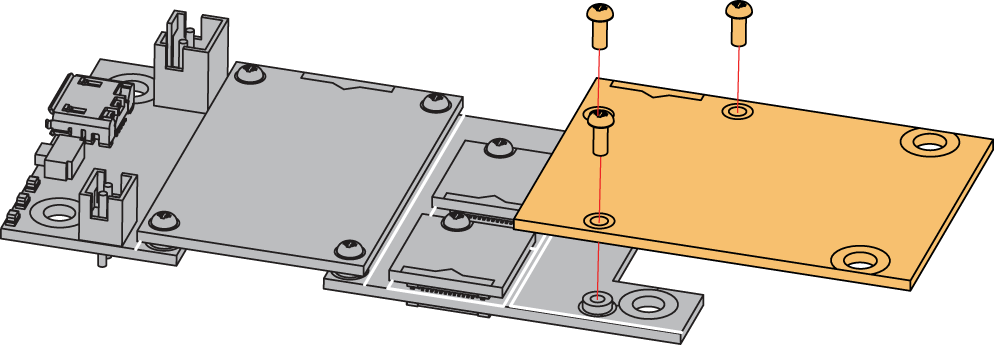 Figure 1: RAK13800 mounting connection to WisBlock Base module
Disassembling Procedure
The procedure in disassembling any type of WisBlock module is the same.
- First, remove the screws.
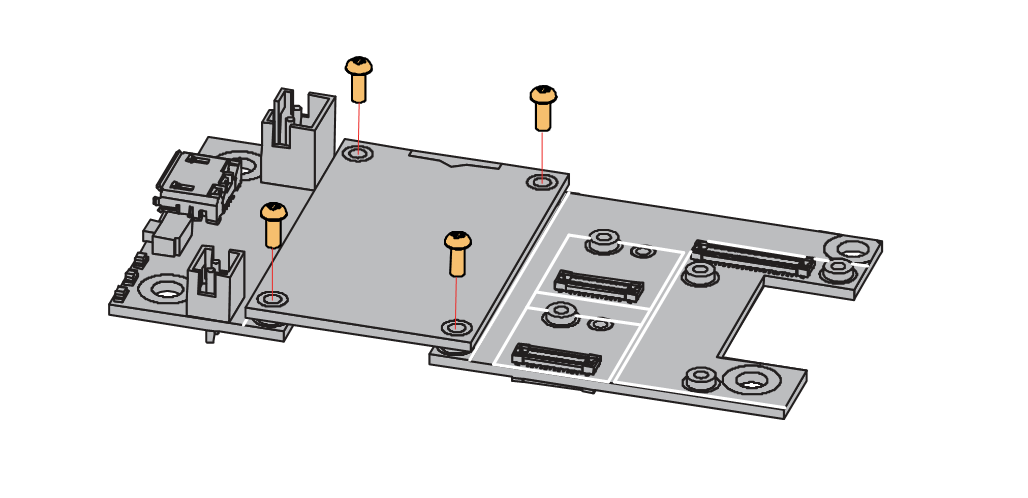 Figure 1: Removing screws from the WisBlock module
- Once the screws are removed, check the silkscreen of the module to find the correct location where force can be applied.
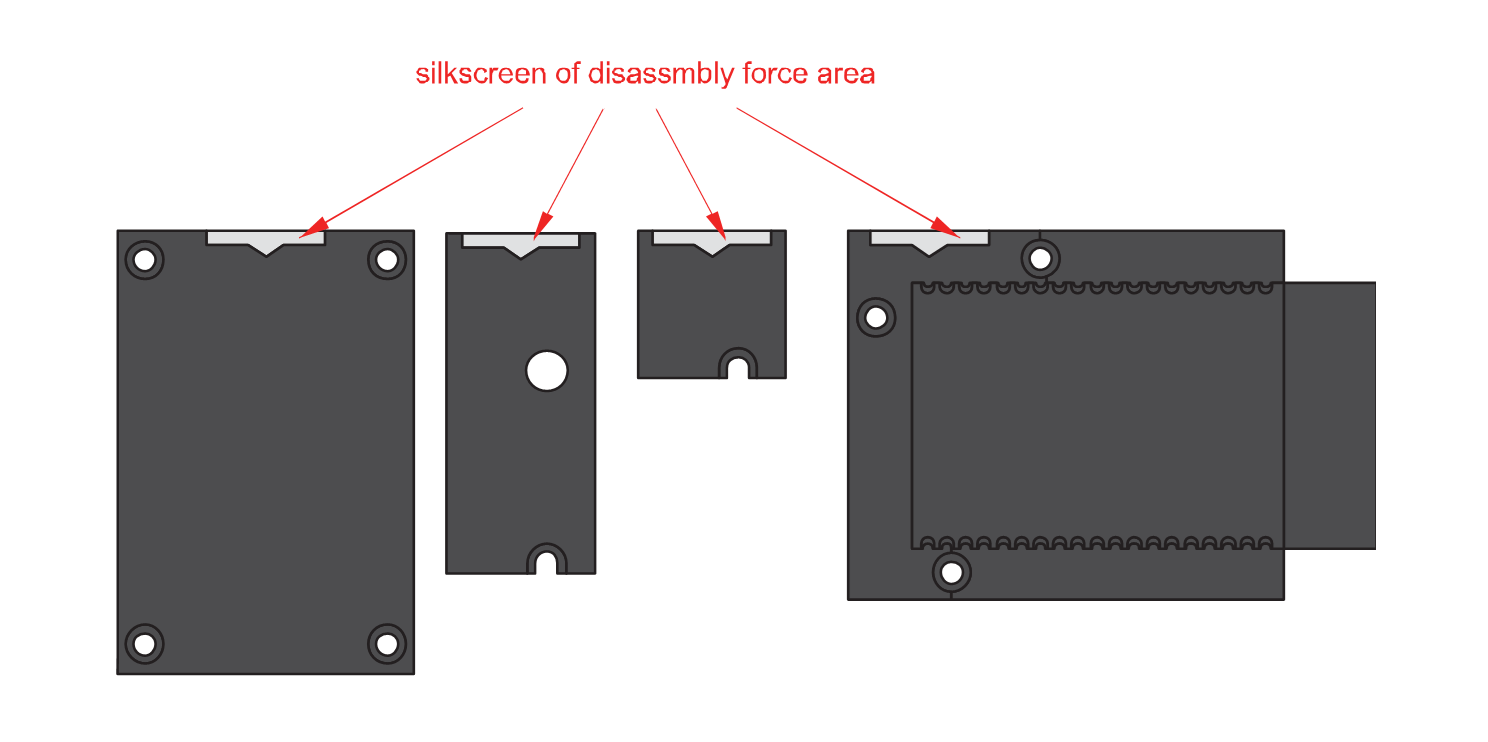 Figure 1: Detaching silkscreen on the WisBlock module
- Apply force to the module at the position of the connector, as shown in Figure 5, to detach the module from the baseboard.
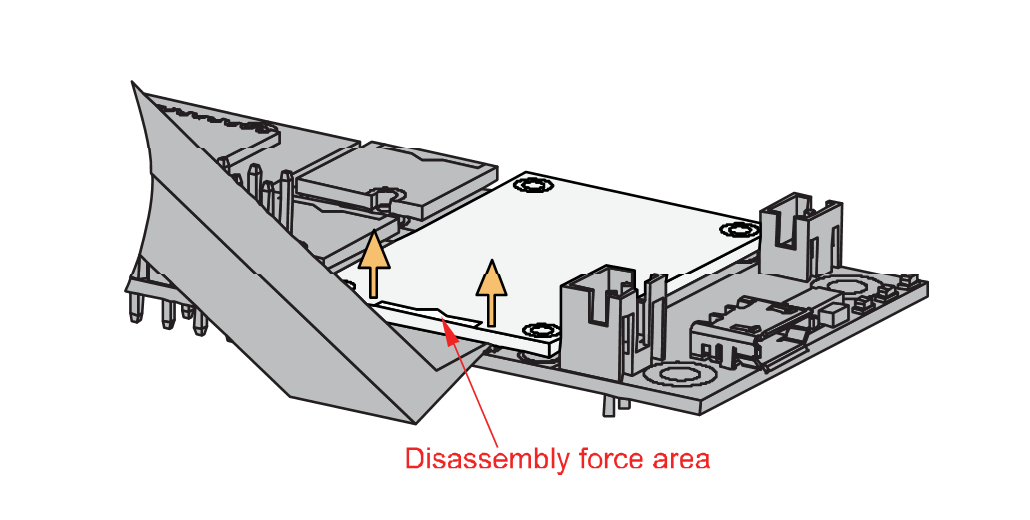 Figure 1: Applying even forces on the proper location of a WisBlock module
If you will connect other modules to the remaining WisBlock Base slots, check on the WisBlock Pin Mapper tool for possible conflicts.
Software Configuration and Example
In the following example, you will be using the RAK13800 HTTP Client example. This example sends an HTTP request to google.com and prints the output on the console.
RAK13800 WisBlock Core Guide
Arduino Setup
- Launch Arduino IDE and select your favorite WisBlock Core on Arduino Boards Manager:
- For RAK4631:
Tools->Boards Manager->RAKwireless nRF modules->WisBlock RAK4631 - For RAK11200:
Tools->Boards Manager->RAKwireless ESP32 modules->WisCore RAK11200 Board - For RAK11300:
Tools->Boards Manager->Rakwireless Raspberry Pi modules->WisBlock RAK11300
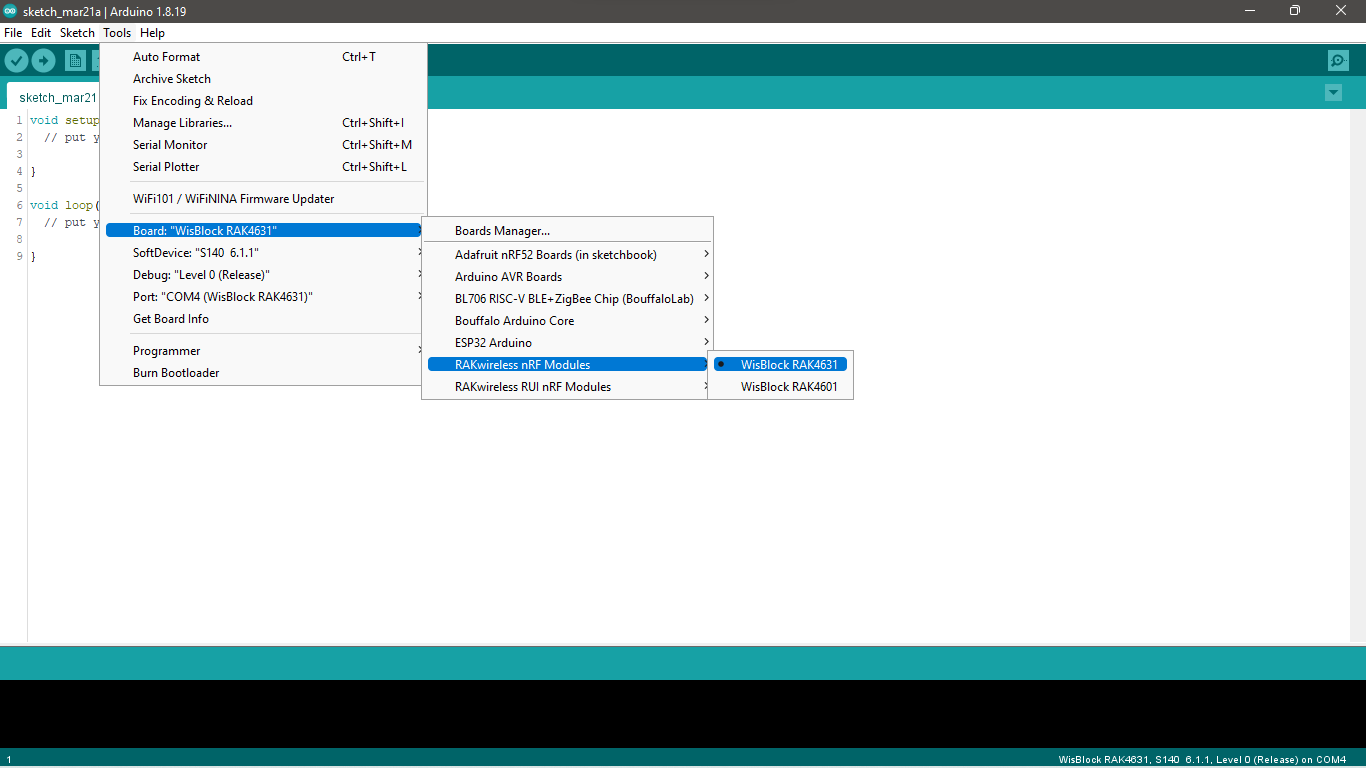 Figure 1: Selecting WisBlock RAK4631 as WisBlock Core
- Next, copy the following sample code into your Arduino IDE. The sample code will work on all WisBlock Core:
/**
   @file RAK13800_Ethernet_HTTP_Client_W5100S.ino
   @author rakwireless.com
   @brief  This example connects to a website (http://www.google.com).
   @version 0.1
   @date 2021-11-02
   @copyright Copyright (c) 2021
**/

#include <SPI.h>
#include <RAK13800_W5100S.h> // Click to install library: http://librarymanager/All#RAK13800_W5100S

#define SERVER_PORT   80    //  Define the server port.

// If you don't want to use DNS (and reduce your sketch size)
// Use the numeric IP instead of the name for the server.
//IPAddress server(74,125,232,128);  // Numeric IP for Google (no DNS)
char server[] = "www.google.com";    // Name address for Google (using DNS)

IPAddress ip(192, 168, 0, 177); // Set the static IP address to use if the DHCP fails to assign

IPAddress myDns(192, 168, 0, 1);

EthernetClient client;

byte mac[] = {0xDE, 0xAD, 0xBE, 0xEF, 0xFE, 0xED }; // Set the MAC address, do not repeat in a network.
unsigned long beginMicros, endMicros;
unsigned long byteCount = 0;
bool printWebData = true;  // Set to false for better speed measurement

void setup()
{
  pinMode(WB_IO2, OUTPUT);
  digitalWrite(WB_IO2, HIGH); // Enable power supply.

  pinMode(WB_IO3, OUTPUT);
  digitalWrite(WB_IO3, LOW);  // Reset Time.
  delay(100);
  digitalWrite(WB_IO3, HIGH);  // Reset Time.

  time_t timeout = millis();
  // Initialize Serial for debug output.
  Serial.begin(115200);
  while (!Serial)
  {
    if ((millis() - timeout) < 5000)
    {
      delay(100);
    }
    else
    {
      break;
    }
  }
  Serial.println("RAK13800 Ethernet HTTP Client example.");

  Ethernet.init( SS );
  Serial.println("Initialize Ethernet with DHCP:");
  if (Ethernet.begin(mac) == 0) // Start the Ethernet connection.
  {
    Serial.println("Failed to configure Ethernet using DHCP");
    if (Ethernet.hardwareStatus() == EthernetNoHardware)  // Check for Ethernet hardware present.
    {
      Serial.println("Ethernet shield was not found.  Sorry, can't run without hardware. :(");
      while (true)
      {
        delay(1); // Do nothing, just love you.
      }
    }
    while (Ethernet.linkStatus() == LinkOFF)
    {
      Serial.println("Ethernet cable is not connected.");
      delay(500);
    }

    Ethernet.begin(mac, ip, myDns); // Try to configure using IP address instead of DHCP.
  }
  else
  {
    Serial.print("DHCP assigned IP ");
    Serial.println(Ethernet.localIP());
  }

  delay(1000);   // Give the Ethernet shield a second to initialize.
  Serial.print("connecting to ");
  Serial.print(server);
  Serial.println("...");

  if (client.connect(server, SERVER_PORT)) // If you get a connection, report back via serial.
  {
    Serial.print("connected to ");
    Serial.println(client.remoteIP());
    // Make a HTTP request.
    client.println("GET /search?q=arduino HTTP/1.1");
    client.println("Host: www.google.com");
    client.println("Connection: close");
    client.println();
  }
  else
  {
    Serial.println("connection failed");  // If you didn't get a connection to the server.
  }
  beginMicros = micros();
}

void loop()
{
  int len = client.available(); //  If there are incoming bytes available from the server, read them and print them.
  if (len > 0)
  {
    byte buffer[80];
    if (len > 80)
  {
      len = 80;
  }
    client.read(buffer, len);
    if (printWebData)
    {
      Serial.write(buffer, len); // Show in the serial monitor (slows some boards)
    }
    byteCount = byteCount + len;
  }

  if (!client.connected()) // If the server's disconnected, stop the client.
  {
    endMicros = micros();
    Serial.println();
    Serial.println("disconnecting.");
    client.stop();
    Serial.print("Received ");
    Serial.print(byteCount);
    Serial.print(" bytes in ");
    float seconds = (float)(endMicros - beginMicros) / 1000000.0;
    Serial.print(seconds, 4);
    float rate = (float)byteCount / seconds / 1000.0;
    Serial.print(", rate = ");
    Serial.print(rate);
    Serial.print(" kbytes/second");
    Serial.println();

    while (true)
    {
      delay(1); // Do nothing forevermore.
    }
  }
}
- If you experience any error in compiling the example sketch, check the updated code for the RAK11200 WisBlock Core Module that can be found on the RAK13800 WisBlock Example Code Repository.
- Don't repeat the same MAC address on network :
byte mac[] = {0xDE, 0xAD, 0xBE, 0xEF, 0xFE, 0xED };. - Don't forget to connect the ethernet cable on J4.
- Install the required library using Arduino Library Manager, as shown in Figure 7. On Arduino, select
Sketch->Include Library->Manage Libraries....
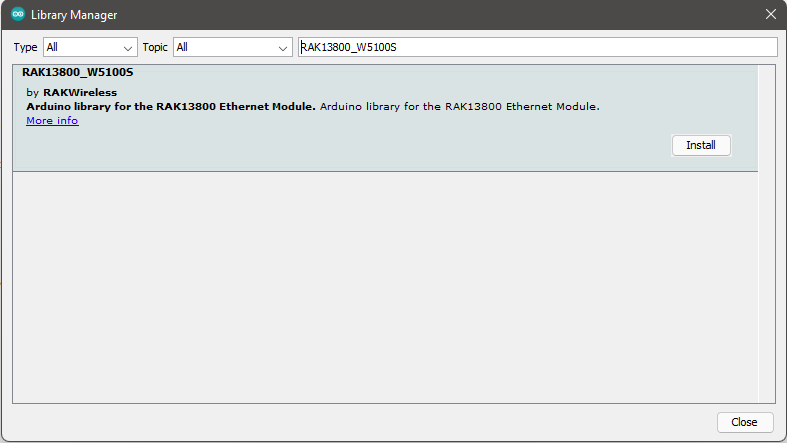 Figure 1: Installing the RAK13800 Library using Arduino library manager
Make sure you have installed the latest version of the RAKWireless library for the RAK13800 Ethernet Module.
- After a successful installation of the library, you can now select the right serial port and upload the code, as shown in Figure 8 and Figure 9.
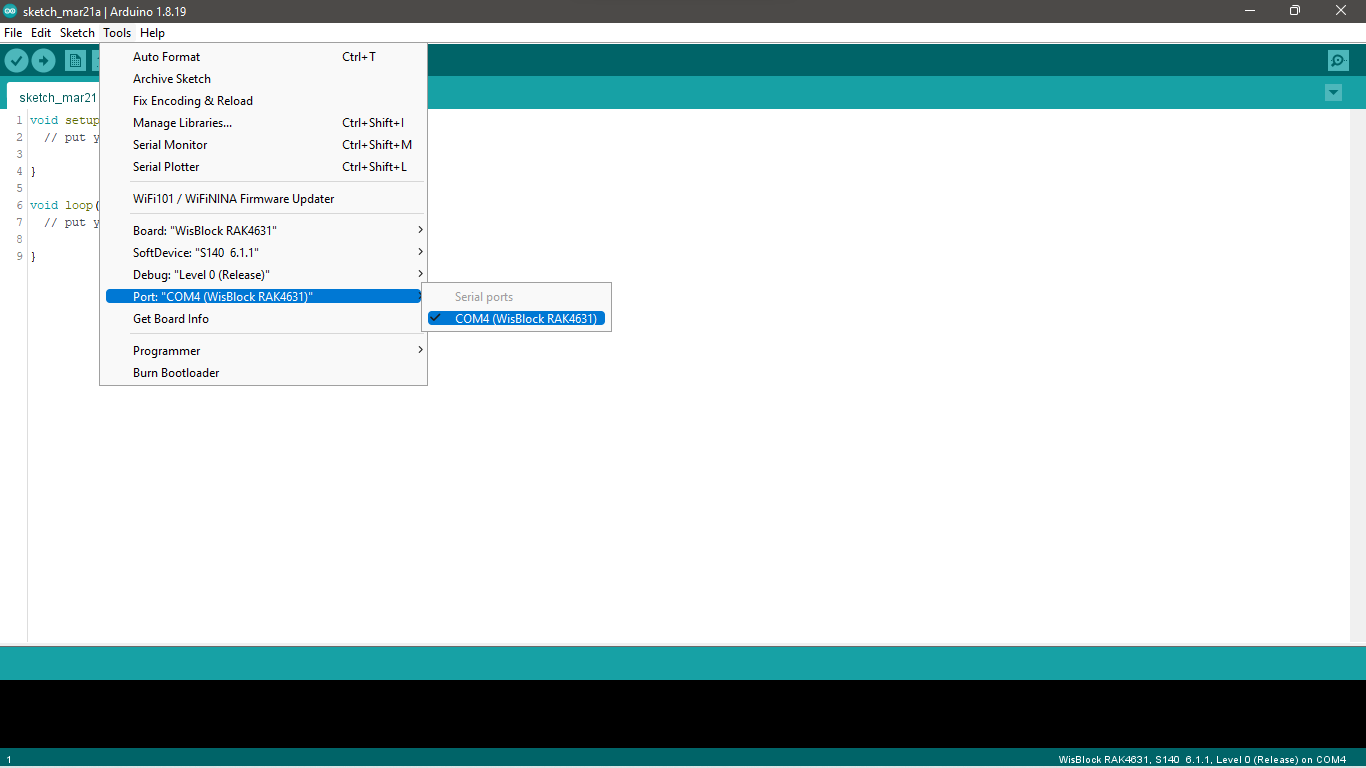 Figure 1: Selecting the correct serial port
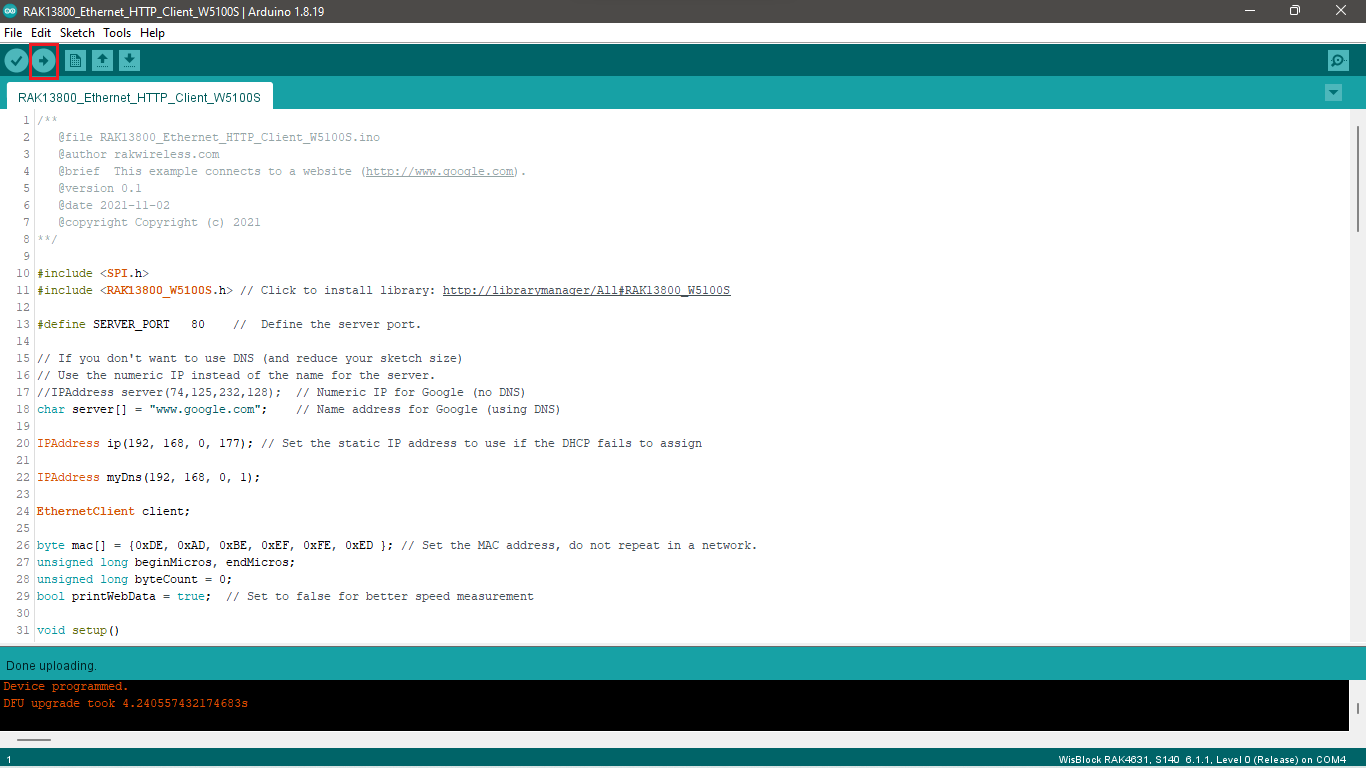 Figure 1: Uploading the RAK13800 Sketch
RAK11200 WisBlock WiFi module requires the BOOT0 pin to be configured properly before uploading. If not done properly, uploading the source code to RAK11200 will fail. Check the full details on the RAK11200 Quick Start Guide.
Before uploading your sketch on RAK11200, short circuit BOOT0 and GND pins and press the reset button.
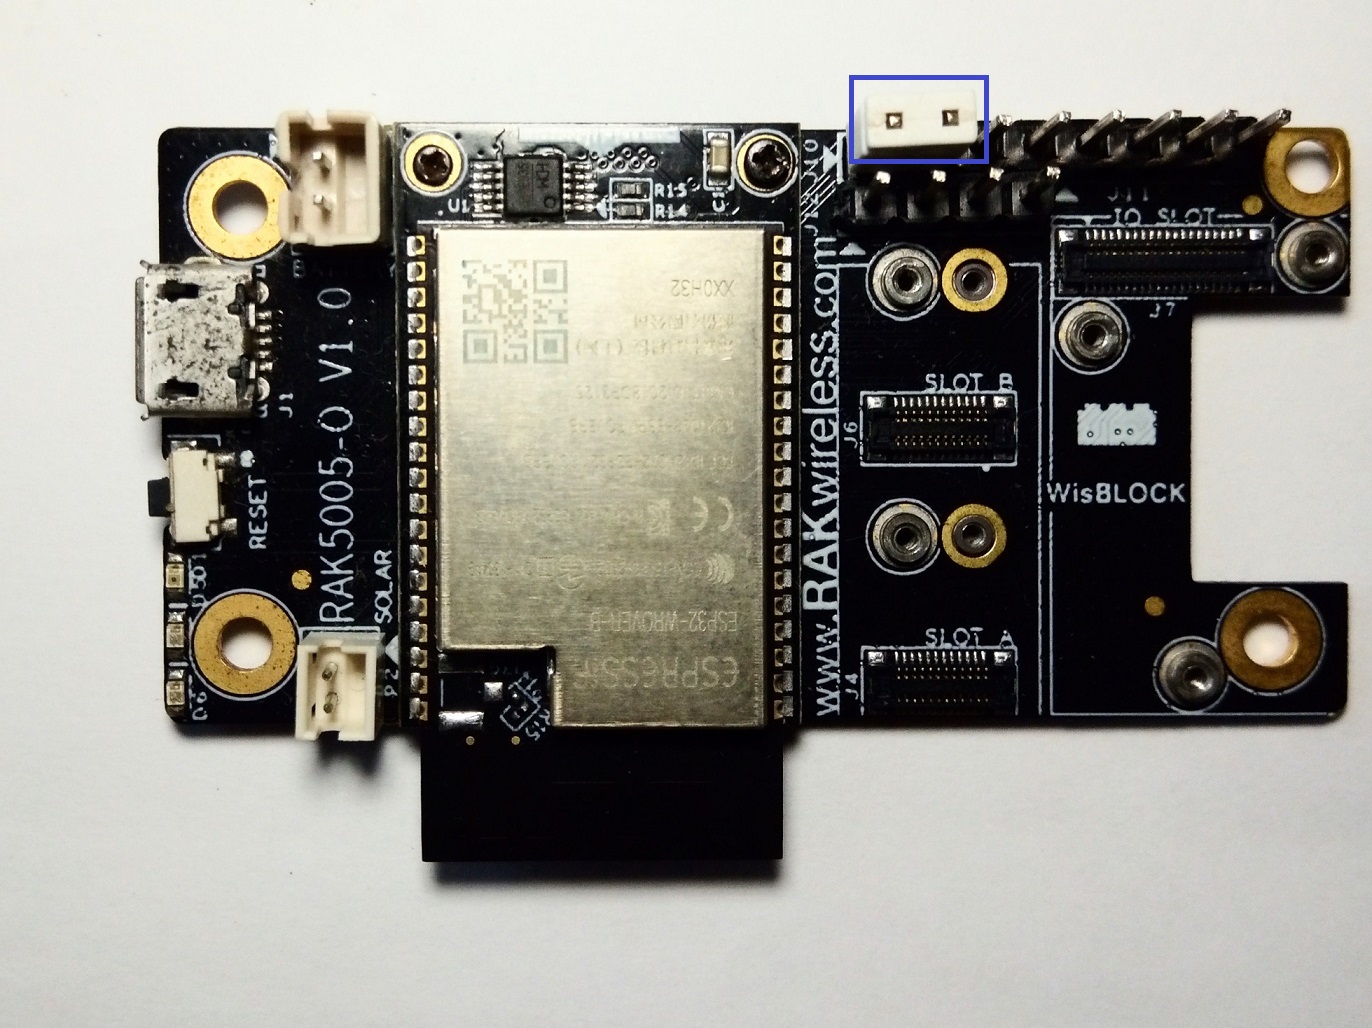 Figure 1: RAK11200 download mode
- When you have successfully uploaded the example sketch, check the Arduino console, as shown in Figure 11.
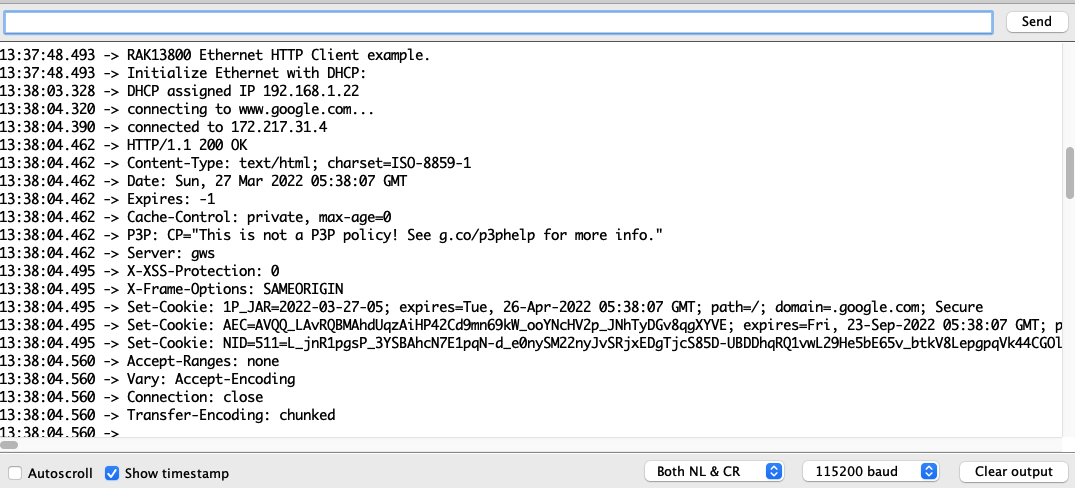 Figure 1: RAK13800 HTTP client console output log