RAK7437/RAK7437C Unboxing & Installation
This document provides clear instructions for installing and deploying the gateway.
Prerequisites
Package Inclusions
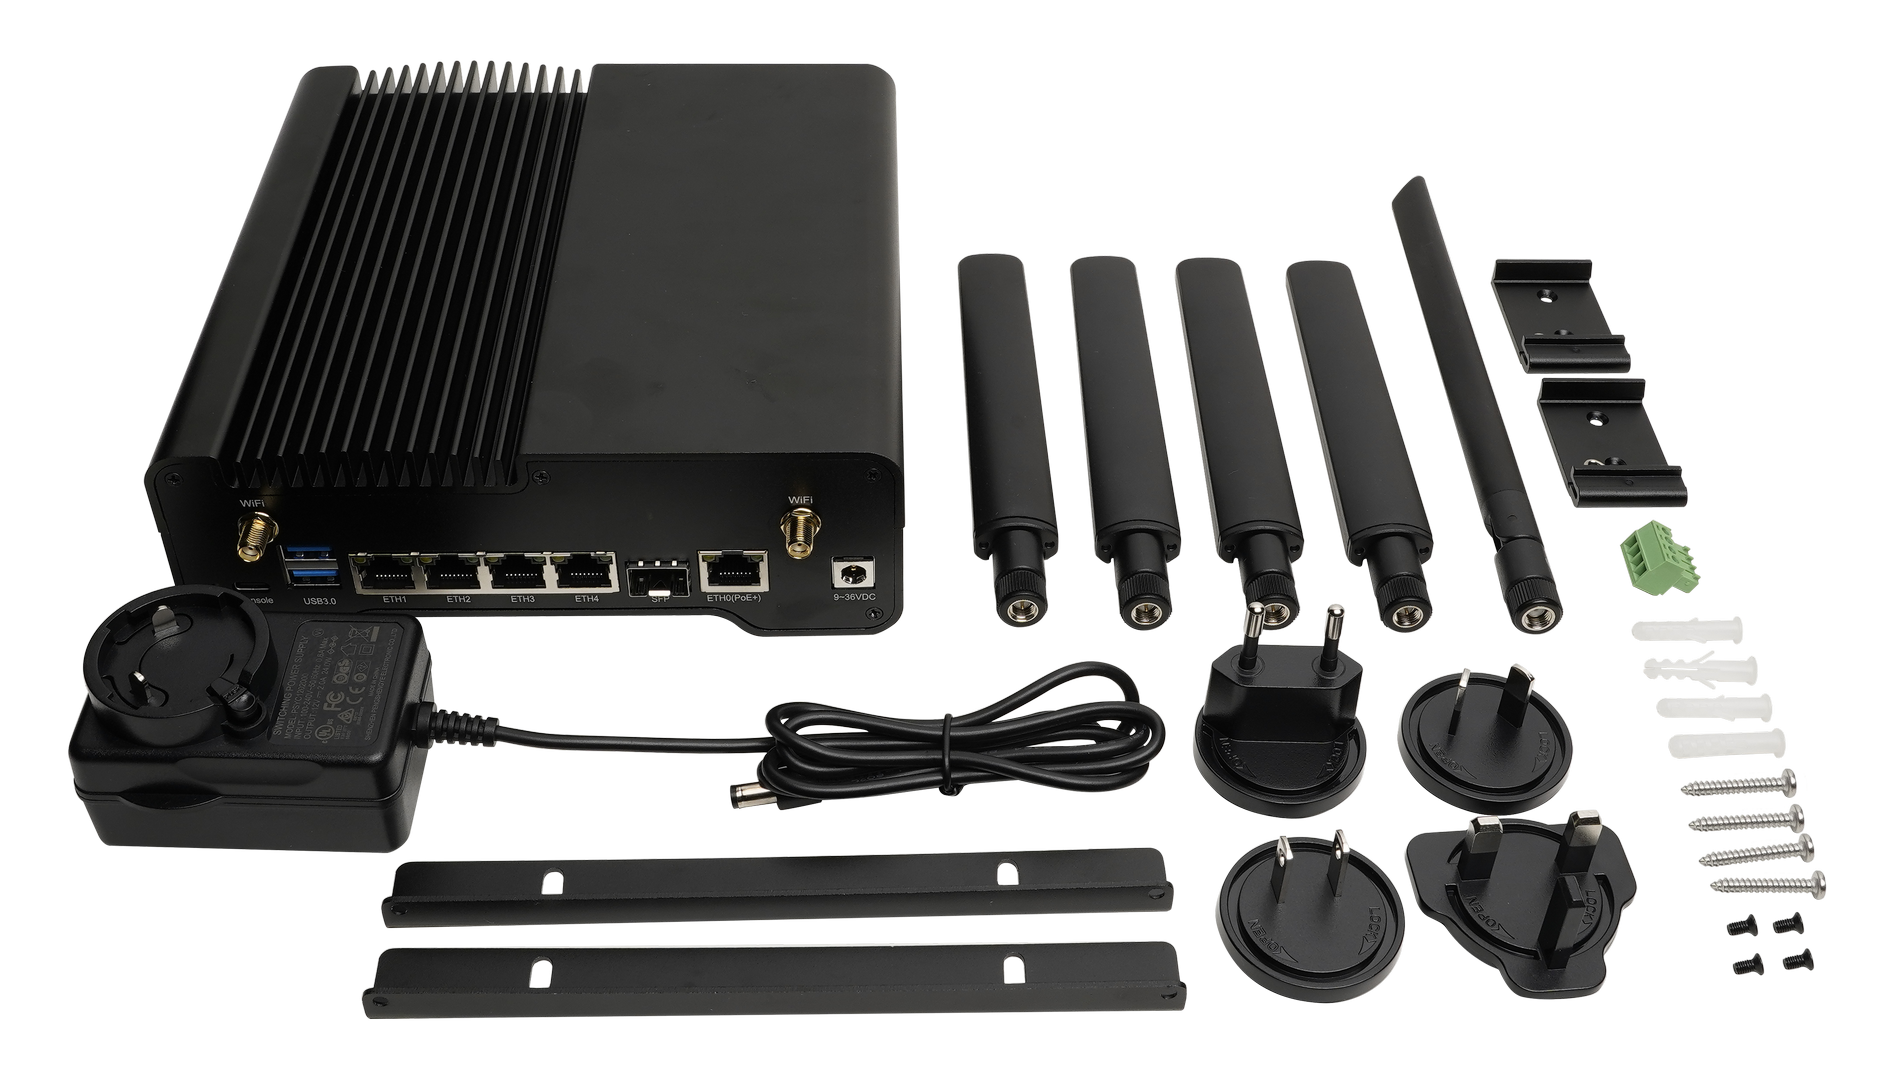 Figure 1: RAK7437 / RAK7437C package list
The image shows a list of all antennas and power accessories. The specific items included will vary based on the bundle you purchased.
Additional Hardware Required
- (Optional) Ethernet Cable (RJ-45 Port) – Required for network setup
- (Optional) Fiber Optic Cable (for SFP connection) – Ensure you have the appropriate LC-LC fiber optic cable for the fiber backhaul setup. The required type may vary depending on the SFP module you choose.
- A Windows/MacOS/Linux Computer – For configuration via Web UI
- NanoSIM Card (for LTE version) – Size: 12 mm x 9 mm x 0.67 mm
Installation
Insert SIM Card (For RAK7437C)
The SIM card slot in the cellular versions is not hot-swappable. Make sure to turn off the gateway before inserting or ejecting the SIM card.
- Insert the SIM card into the SIM card slot, following the placement method indicated on the interface.
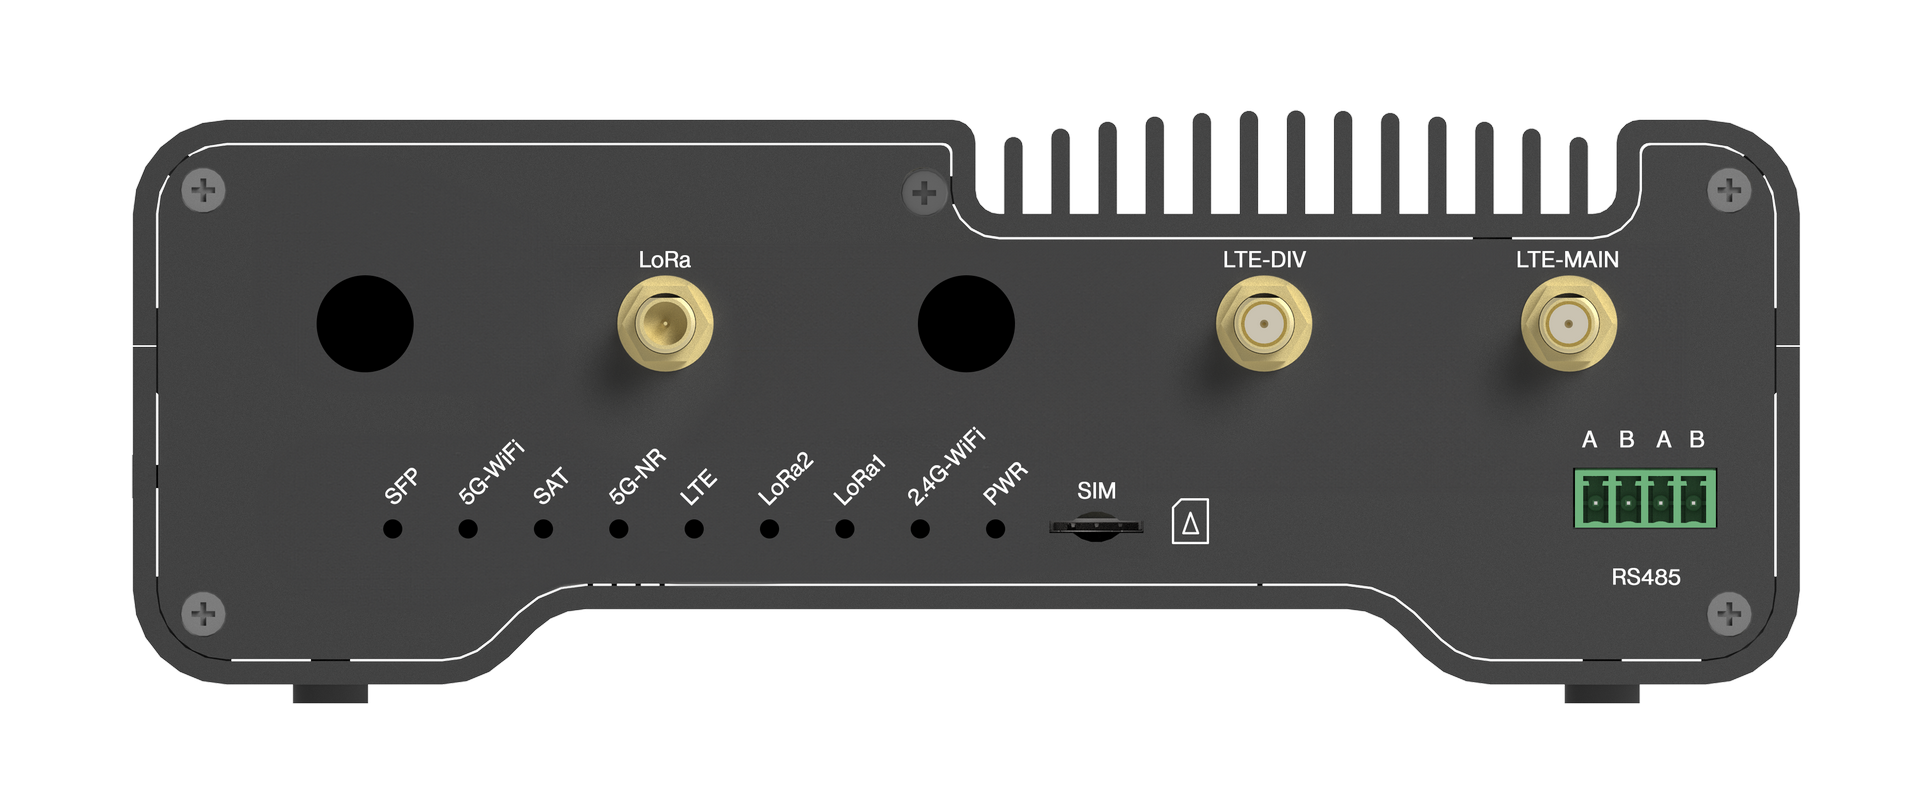 Figure 1: Inserting SIM card
Mount the Gateway
The gateway supports three installation methods: desktop placement, wall mounting, and DIN rail mounting. Choose the method that best fits your environment, and follow the steps outlined below for each option.
Desktop Installation
-
Attach the four feet to the grooves on the back of the device.
-
Position the device on a flat surface, such as a desk.
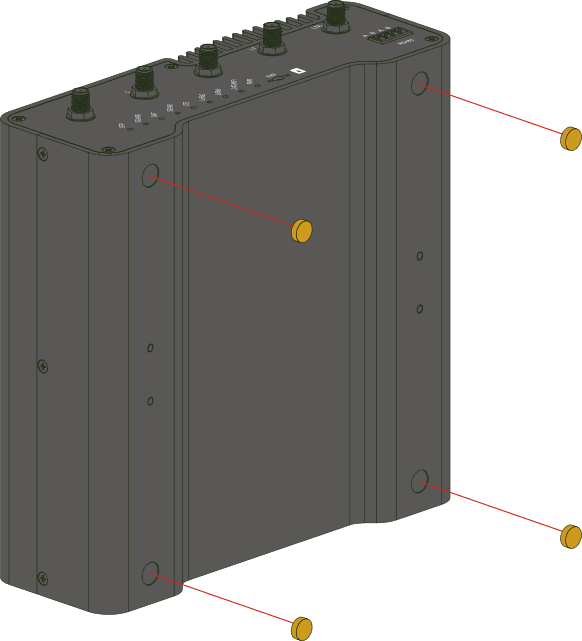 Figure 1: Mounting the feet to the enclosure for desktop placement
Wall Mounting
- Unscrew the four screws on the device, then use them to attach the mounting brackets.
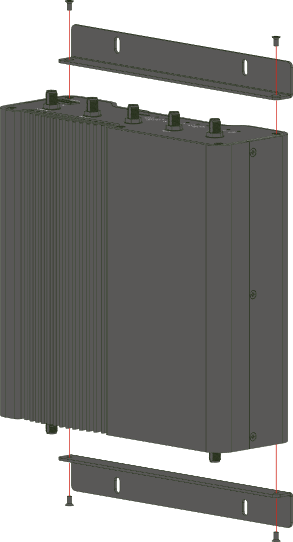 Figure 1: Assembling mounting angles
- Use a 5-millimeter drill bit to create four holes in the wall, then insert the screw anchors into those holes.
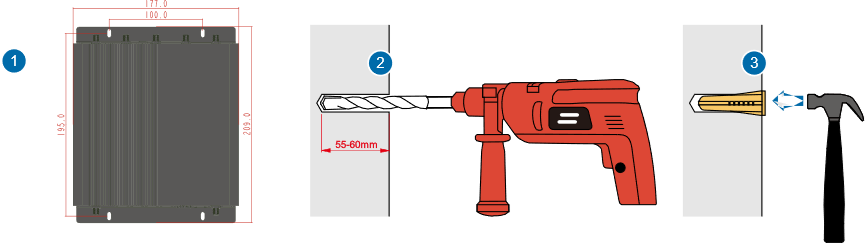 Figure 1: Drilling holes in the wall
- Secure the device to the wall with four tapping screws.
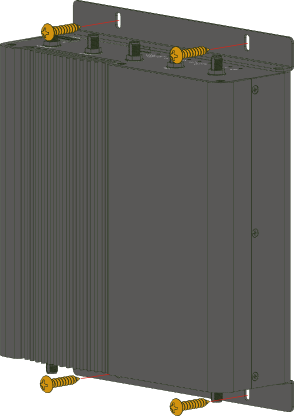 Figure 1: Fixed gateway
Din rail mounting
- Attach the DIN rail mounting clips to the device with four M3*6 countersunk screws.
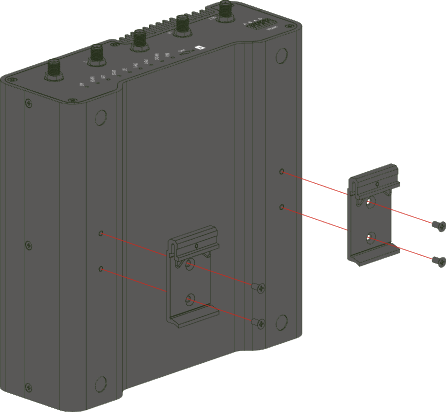 Figure 1: Installing Din rail mounting clips
- Attach the device to the DIN rail.
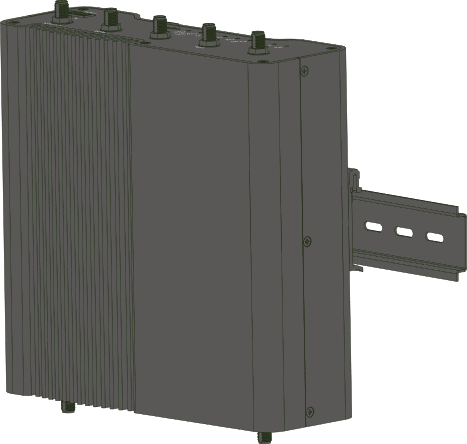 Figure 1: Fixed gateway
Install Antennas
LoRa Antenna
Based on the LoRa label on the enclosure, attach the LoRa antenna to the LoRa connector.
Wi-Fi Antenna:
According to the Wi-Fi labels on the enclosure, connect the two Wi-Fi antennas (marked with a blue sticker) to the Wi-Fi connectors.
LTE Antenna (for the RAK7437C model only):
Refer to the LTE-MAIN and LTE-DIV labels on the enclosure, and attach the LTE antennas (marked with a gray sticker) to the LTE connectors.
Power On the Gateway
Do not power on the device if any antenna ports are left open.
- Connect the power adapter to the 9-36 VDC power input on the gateway.
- Plug the adapter into an electrical outlet.
Alternatively, the gateway also supports PoE (Power over Ethernet). You can connect an Ethernet cable to the ETH0 (PoE+) port to supply power.