RAKR314 CM4 Base Board Flashing the OS
The RAKR314 is designed to utilize a Raspberry Pi Compute Module 4 (CM4). Since CM4 modules are available with or without built-in eMMC, there are two usage options:
- For models without eMMC storage (CM4 Lite versions), a Micro SD card can be used in the same way it is utilized with a Raspberry Pi 4 (RPi 4).
- For models with eMMC storage, the OS image must be flashed directly to the onboard storage. Using the SD card is not an option in this case.
Preparing the Software
RAK provides two options for the operating system: a pre-configured image, RAKPiOS, or access to the public repository.
You can use Windows, macOS, or Linux to flash the image. It is recommended to use balenaEtcher, a cross-platform tool compatible with all three operating systems.
Flashing a Micro SD Card
It is recommended to use a Micro SD card with a capacity of 8 GB or greater, along with a high-quality, high-speed card reader. Insert the card into the reader and ensure it is properly connected to the host device. Then, follow these steps:
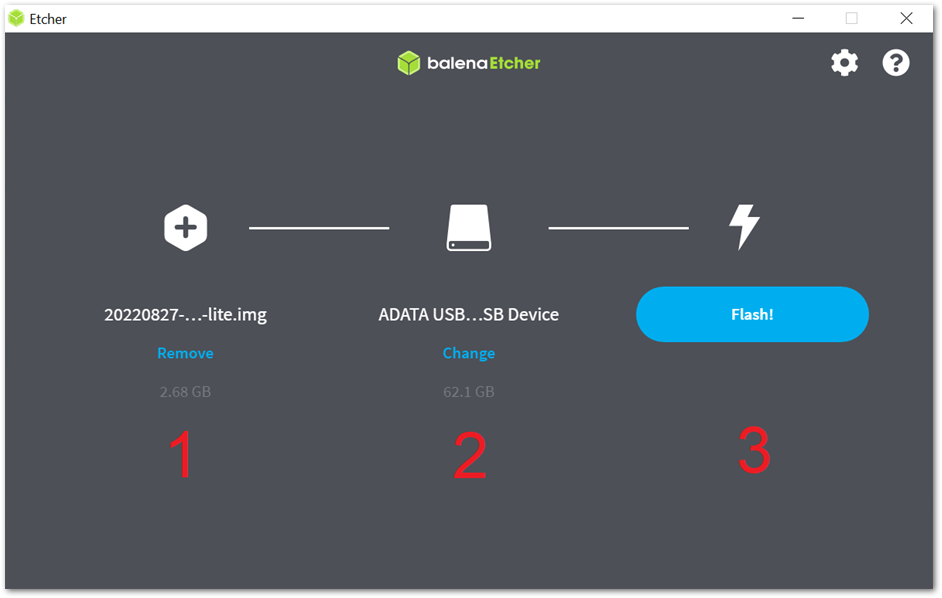
- Open balenaEtcher and select the OS image (no need to unzip the archive).
- Select the target (your Micro SD card).
- Press the Flash! button to start the process.
 Figure 1: balena Etcher
Wait for the flashing process and the subsequent verification phase to complete. Once finished, unplug the card from the reader and insert it into the RAKR314's Micro SD slot located on the bottom side of the board.
Flashing the eMMC
To access the eMMC storage on the CM4, ensure that the proper drivers and boot tools are installed. This setup will enable you to access the eMMC as a mass storage device, similar to an SD card. You can then flash the firmware file using the same method as in the previous step with balenaEtcher.
Instructions are provided for Windows, MacOS, and Linux.
Installing the Drivers and Mounting the Storage
Before installing the drivers, regardless of the operating system, ensure you perform the following procedure to put the module into flash mode, enabling it to appear as removable storage on the host OS.
- Connect the Type-C port via a suitable cable to a USB port on your computer. Do not power the board on yet.
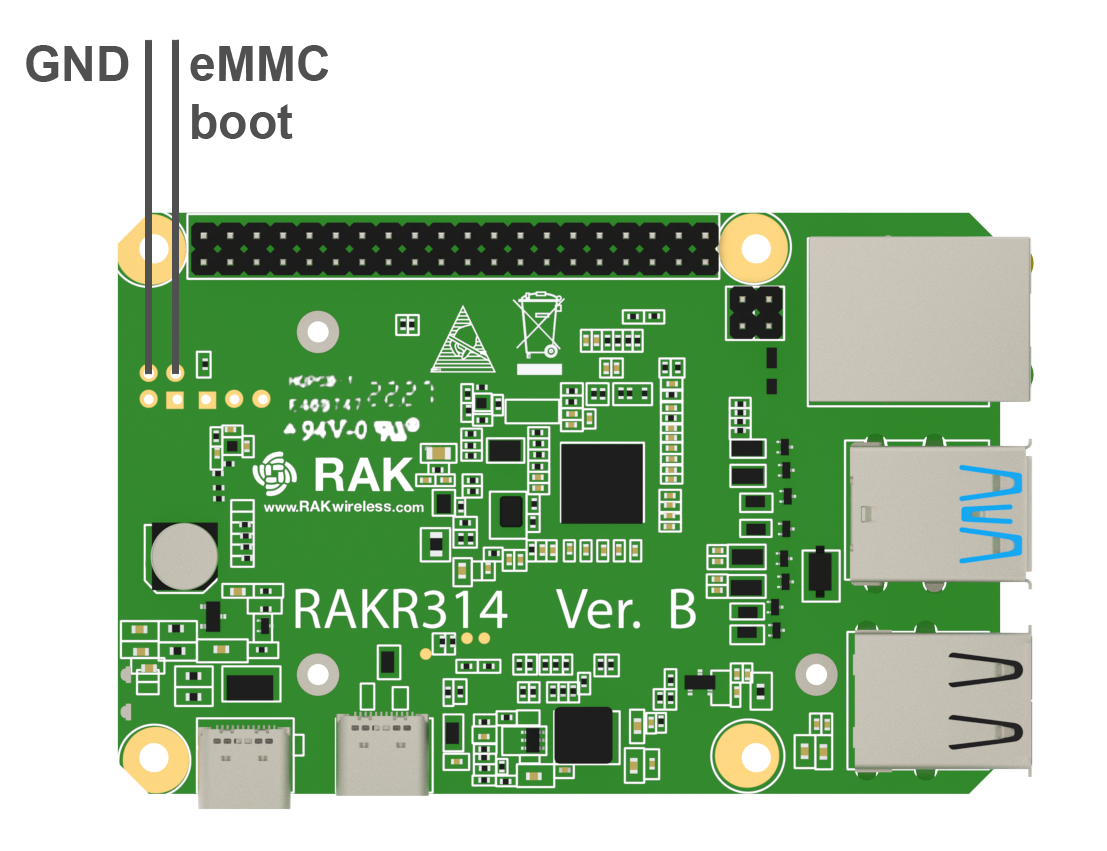
- Short the eMMC boot PIN and GND PIN.
 Figure 1: GND and eMMC boot pins
Once the appropriate utility is installed for your operating system, the eMMC storage will appear as mounted storage.
Windows
The official stand-alone installer is the recommended method. Refer to Raspberry Pi's official documentation for detailed information about the Windows installer and instructions for installing the necessary drivers and boot tools.
macOS
To mount the eMMC storage, install the required USB library on your Mac OS device and build the rpiboot executable. All operations can be done in the Terminal application.
- First, you need to install Homebrew by entering the following command in the terminal:
/bin/bash -c "$(curl -fsSL https://raw.githubusercontent.com/Homebrew/install/HEAD/install.sh)"
- Once Homebrew has been installed, you can install the
libusblibrary by the following command:
brew install pkgconfig libusb
- Clone the
usbbootrepository to your computer:
git clone --depth=1 https://github.com/raspberrypi/usbboot
- After that, navigate to the
usbbootdirectory using thecdcommand and buildrpiboot.
cd usbboot && make
- Now, there should be a
rpibootexecutable in the directory. To mount the eMMC storage, run:
sudo ./rpiboot
- A few seconds later, the boot volume should be mounted. The CLI output should look like this:
rak@RAKR314 usbboot % sudo ./rpiboot
Password:
RPIBOOT: build-date Sep 20 2022 version 20220815~145439 2472aaf9
Waiting for BCM2835/6/7/2711...
Loading embedded: bootcode4.bin
Sending bootcode.bin
Successful read 4 bytes
Waiting for BCM2835/6/7/2711...
Loading embedded: bootcode4.bin
Second stage boot server
Loading embedded: start4.elf
File read: start4.elf
Second stage boot server done
rak@RAKR314 usbboot %
Linux
Check Raspberry Pi's official documentation for instructions on how to install the tools required, build the usbboot tool, and run the tool.
Flashing the Image
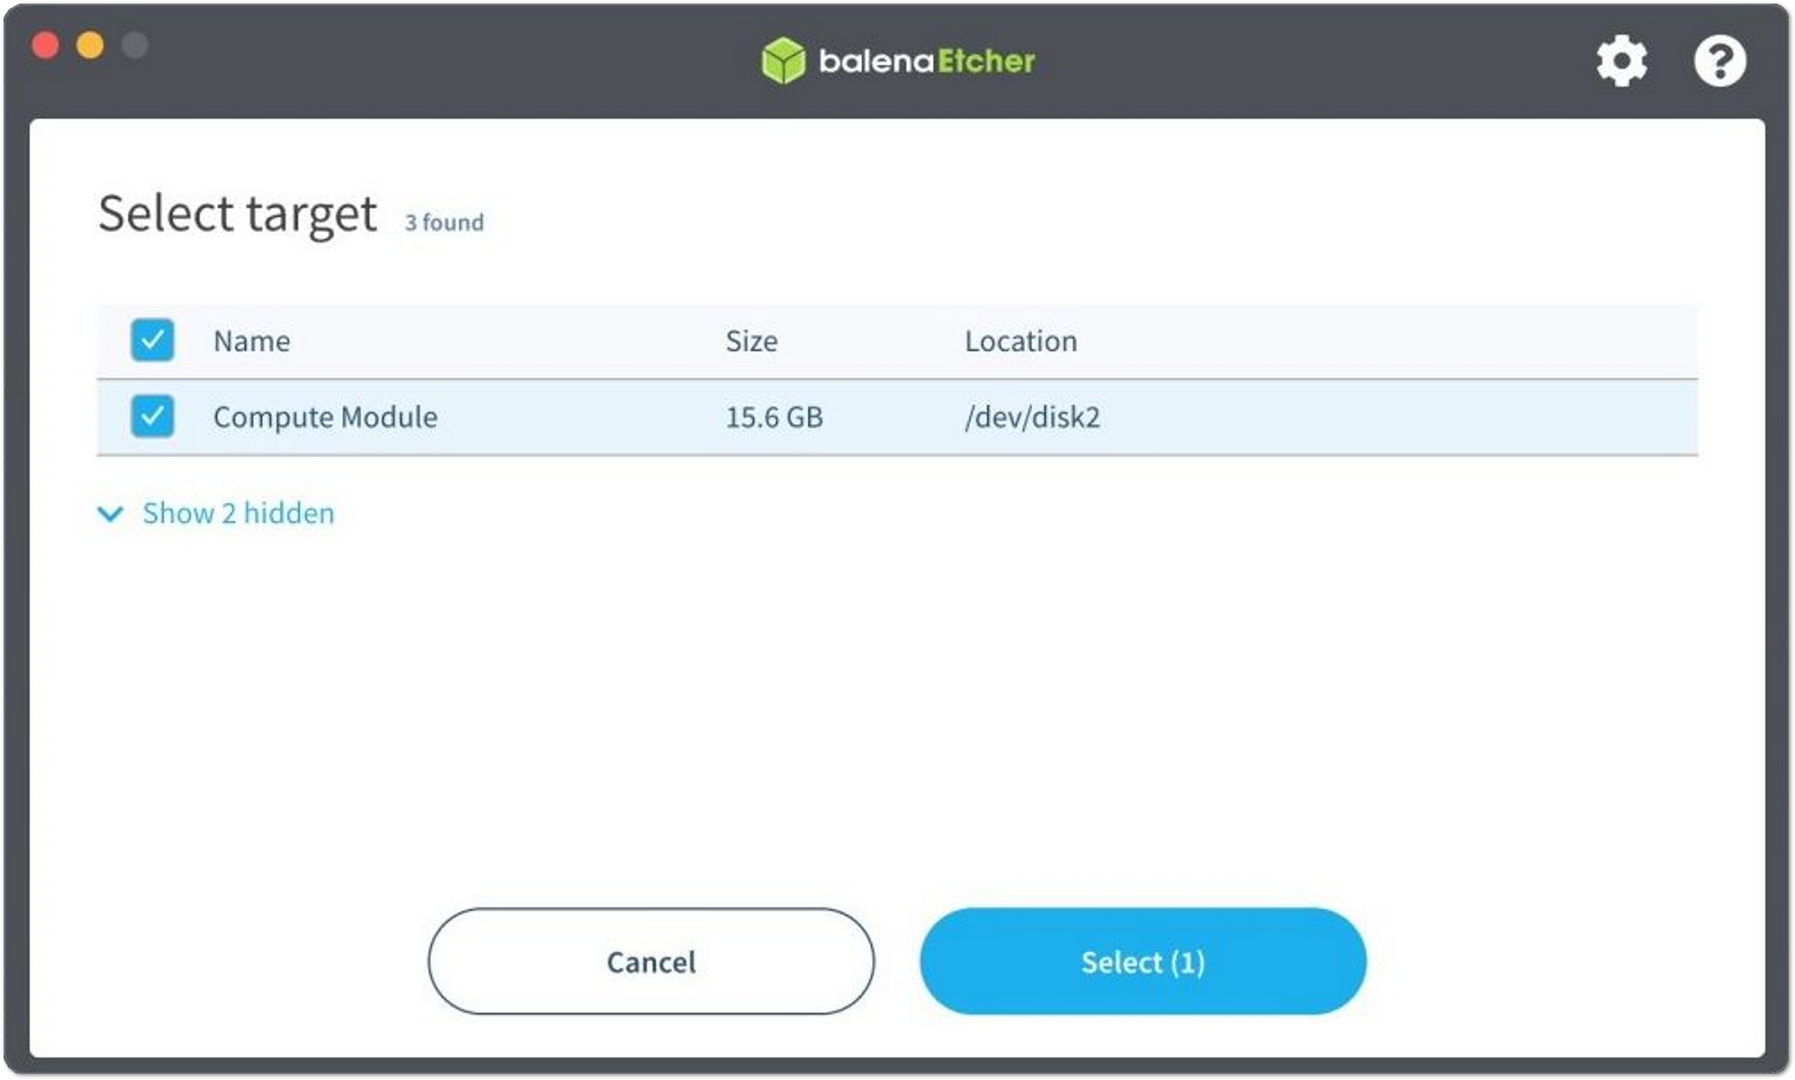
Now that the eMMC is properly mounted, the rest of the process is similar to flashing an SD card. Open balenaEtcher, select the firmware file, choose the drive labeled Compute Module, and click Flash.
 Figure 1: eMMC as seen in balenaEtcher
First Login
It is recommended to connect the RAKR314 via Ethernet for its first-time setup.
The OS operates in DHCP client mode by default, allowing you to connect the device to your router via one of the Ethernet ports. Check the IP address assigned by the router, which will be listed as rakpios. Use your preferred SSH tool to log in and start using the device.
The default RAKPiOS username is rak, and the password is changeme. During the first login, you will be required to change the default password. For instance, if you log in via SSH for the first time, you will need to enter the default password followed by a new one to complete the setup.
