RAK2287 Quick Start Guide
Prerequisites
What Do You Need?
The following two sections provide a list of the components and tools you need to get started with the development board. Some of those are included in the package, while others you need to provide yourself.
Hardware Tools
- RAK2287 WisLink LPWAN Concentrator
- Raspberry Pi 3/4 (RAK2287 bundle includes a Raspberry Pi 4)
- RAK2287 Pi HAT (RAK2287 bundle includes a RAK2287 Pi HAT)
- LoRa and GPS antennas
- A 16 GB SD card (included in the RAK2287 bundle only), a card reader, and a PC
Software Tools
- Balena Etcher: a tool for burning the firmware on the SD card
- PuTTY: a Windows tool for SSH, required to connect to the gateway
- Latest RAK2287 Firmware
Device Firmware Setup
For an easy and quick way of having a fully functional gateway, a Precompiled Firmware Image is provided. This section gives you step-by-step instructions on how to install the Image into your SD Card used for the gateway.
Burn the Latest Firmware
- Download the latest firmware of RAK2287, which is based on the Raspbian OS.
- Use an image writing tool to install the firmware on the SD Card. For this tutorial, you will be using Etcher, an open-source utility used for burning image files.
- Insert your SD Card into the SD Card reader and plug it into your computer.
- Open the Etcher Software, and select the downloaded image file through the ( Label - 1 ) button in Figure 1.
The SD card should be automatically detected by the Etcher software in Label - 2 of Figure 1. If not, secure a proper connection.
Click Flash and wait for a couple of minutes until it displays "Flash Complete."
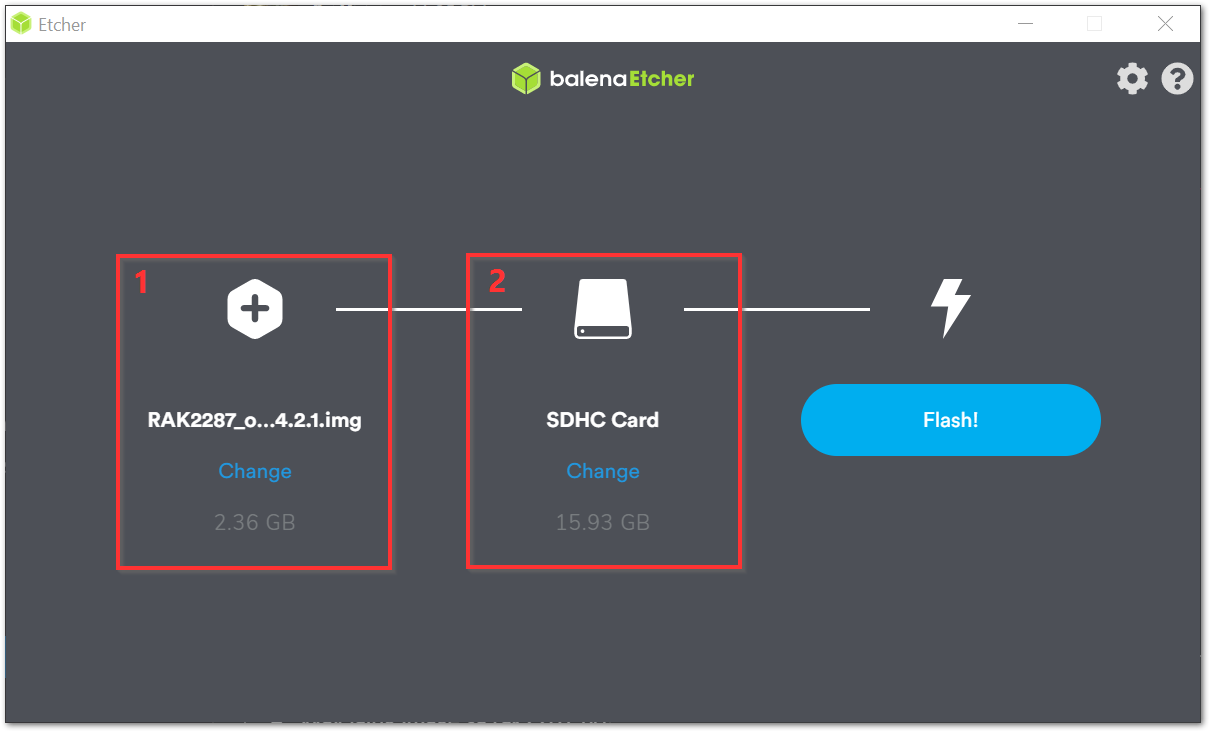 Figure 1: Balena Etcher Software
Assembly Guide
To create a functioning RAK2287 WisLink LPWAN Concentrator, you need to assemble several components together.
Mount the Concentrator
Insert your RAK2287 mPCIe card into the mPCIe slot on the RAK2003 Pi HAT. Ensure the card fits snugly into the connector, and it should end up sticking out at a 45-degree angle. Gently press it down and fasten it with 2 screws. If you have positioned the card correctly, the screw holes on the RAK2287 will match the ones on the RAK2003. Use Figure 2 as a reference.
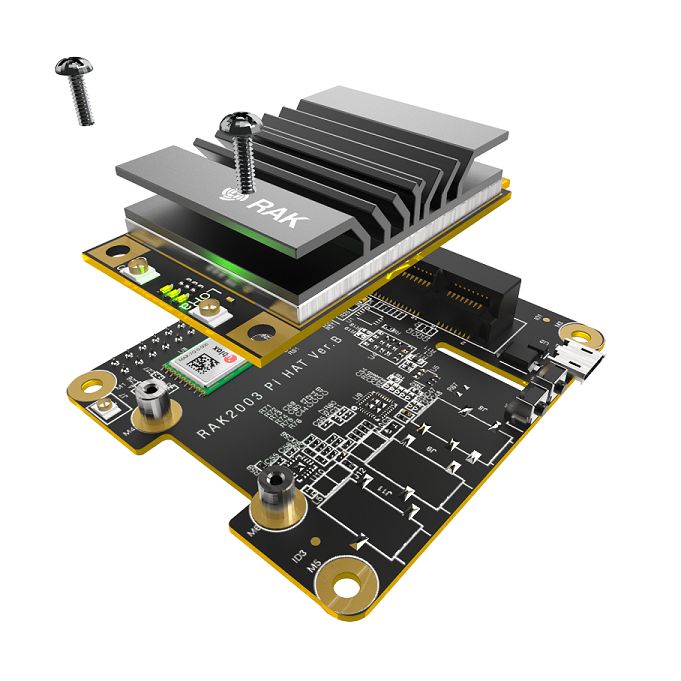 Figure 1: Assembly of the Concentrator and the HAT
Antennas
The module includes two antennas: GPS and LoRa. Both are equipped with pigtail cables that feature uFL connectors, which are compatible with the corresponding ports on the RAK2287. These ports are clearly labeled. Match each antenna to its appropriate port and gently press until the connectors securely fit together.
It is not recommended to power the device with the antennas detached, as this might damage the circuitry.
Mount the HAT
Take the RAK2003, which now has the RAK2287 securely mounted on top, and place it over the Raspberry Pi. Both the Pi and the HAT have a 40-pin connector that should align and fit together when pressed on top of each other.
SD Card
Insert the SD card with the Firmware you flashed in the previous step into the SD card slot on the bottom of the Raspberry Pi.
Boot
Power the Raspberry Pi using the Micro USB port (Pi3) or the USB Type-C port (Pi4). As this is the first time booting the OS, it may take a few minutes for everything to set up.
It is recommended to use at least a 2 A power supply.
Access the Gateway
There are two ways to connect to your RAK2287 WisLink LPWAN Concentrator setup.
Before powering the Raspberry Pi 3B+ or 4, ensure that the LoRa and GPS antennas are installed. Failing to do so may damage the boards.
1. Wi-Fi AP Mode
By default, the firmware is configured to operate the Raspberry Pi in Wi-Fi AP mode. This means you should be able to find an SSID named “Rakwireless_XXXX” on your Wi-Fi network list. For example:
 Figure 1: RAKWireless Access Point
Connect to this Wi-Fi SSID using "rakwireless" as the default password. The default IP address of the gateway's Wi-Fi is 192.168.230.1. Make note of this IP address, as it will be needed to connect via SSH.
There is no need to configure the IP address of your PC, as it will be automatically assigned by the DHCP server.
2. Via the Ethernet Port on the Raspberry Pi
You can also connect your PC to the gateway using an Ethernet cable. By default, the IP address of the gateway’s Ethernet interface is 192.168.10.10, so you need to set the IP address of your PC’s Ethernet to the same network segment, for example, 192.168.10.20.
- To do this, in Windows, go to Control Panel > Network and Internet > Network and Sharing Center and click Ethernet
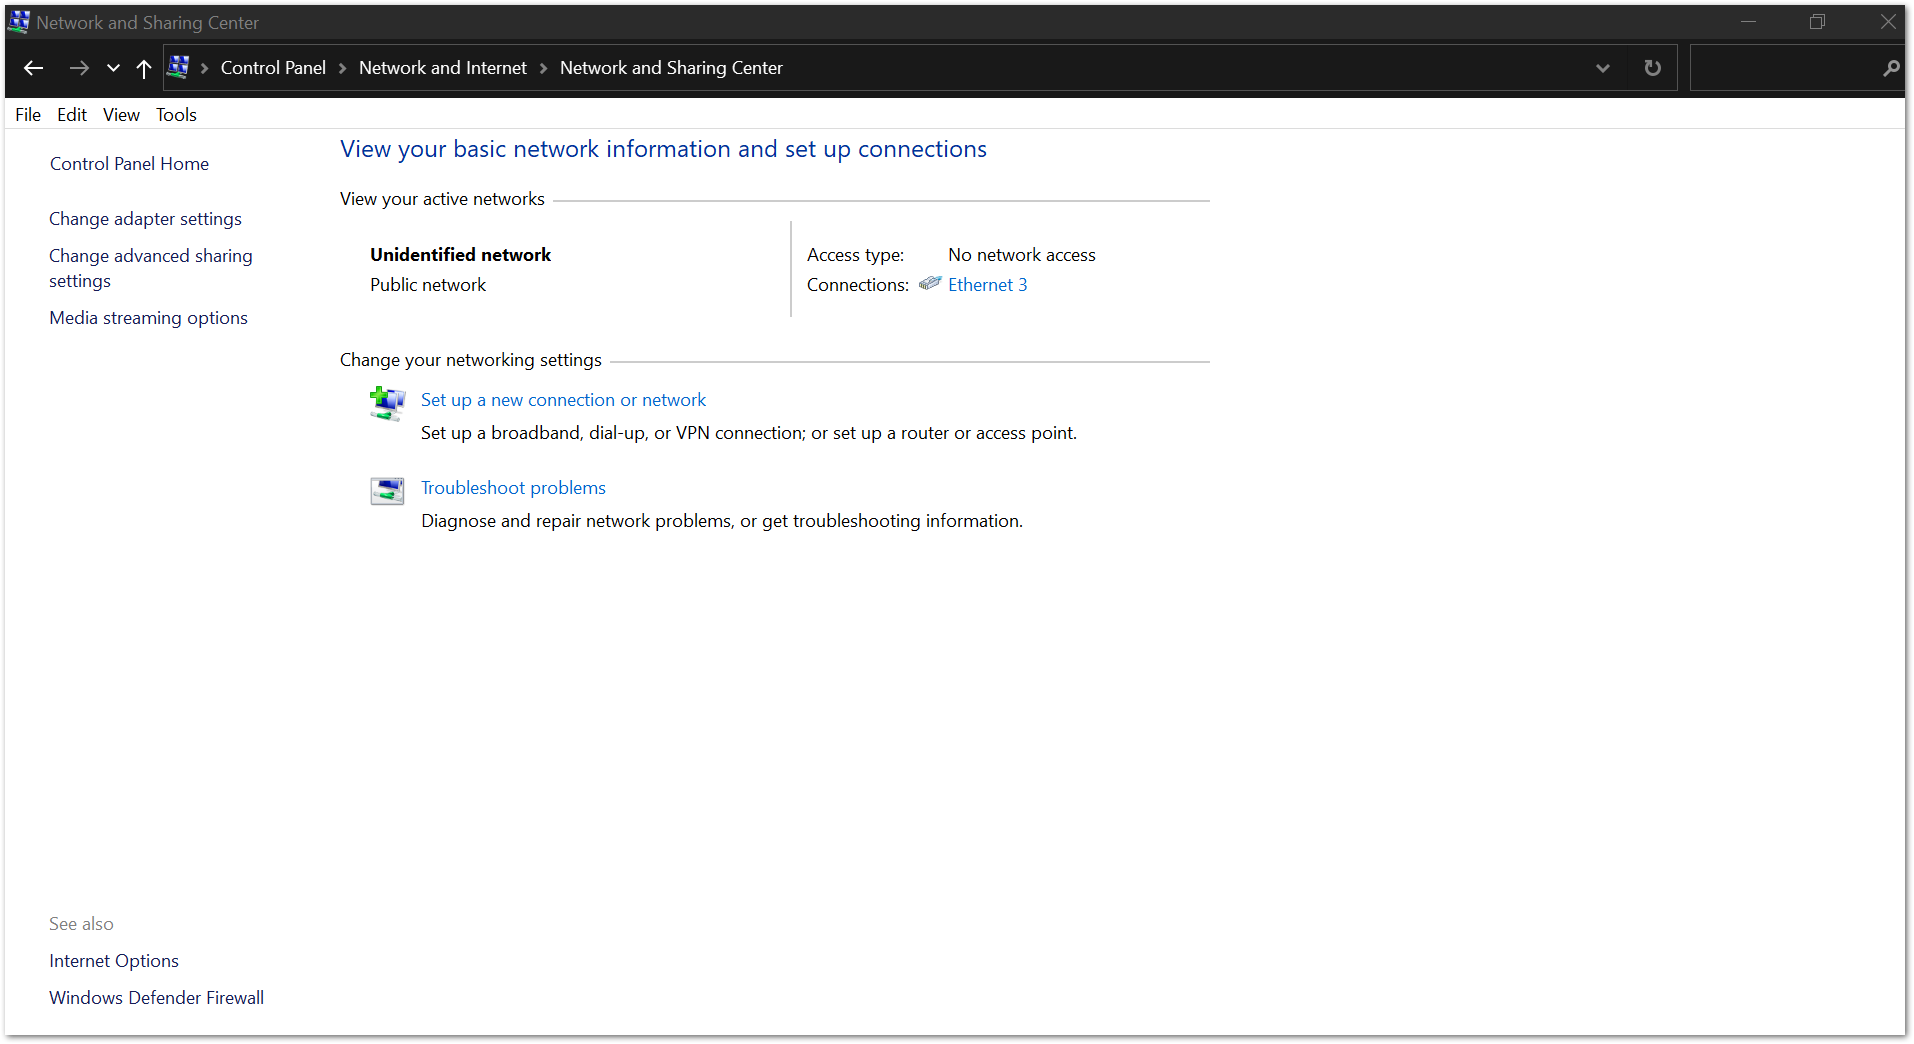 Figure 1: Network and Sharing Center
- Click Properties, then Choose Internet Protocol Version 4 (TCP/IPv4).
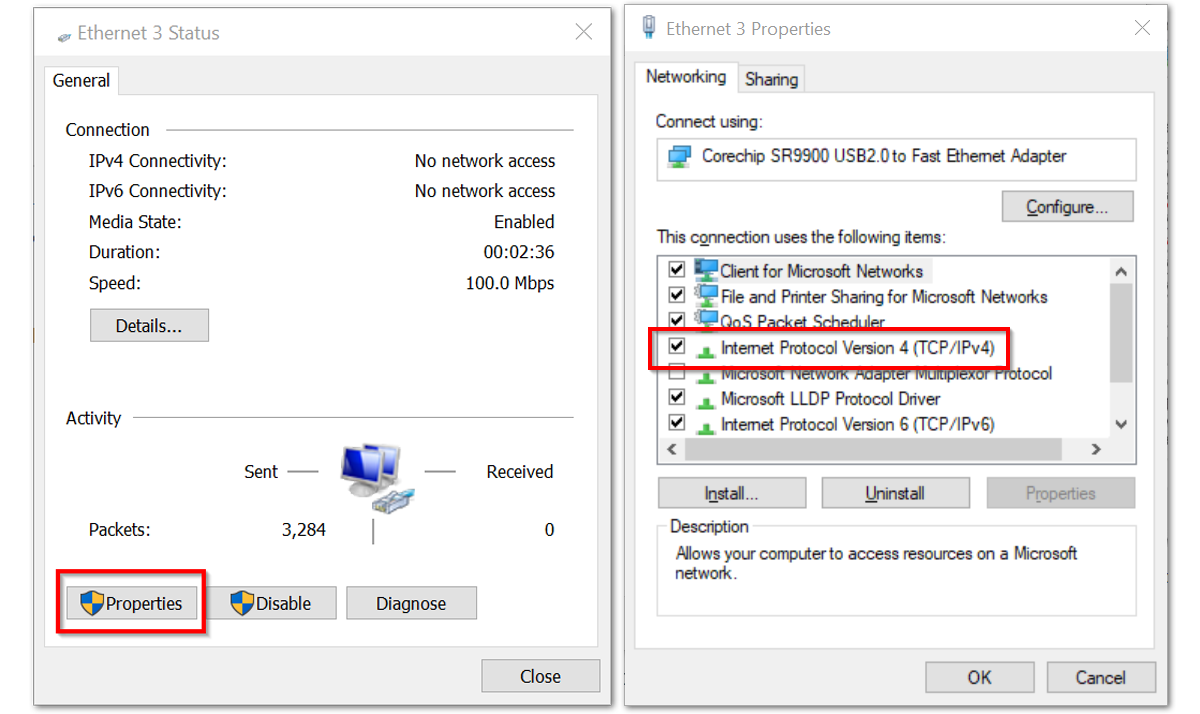 Figure 1: Ethernet Properties
- By default, it will obtain an IP address automatically. Click the Option Use the following IP Address and enter the IP address:
192.168.10.20and press OK.
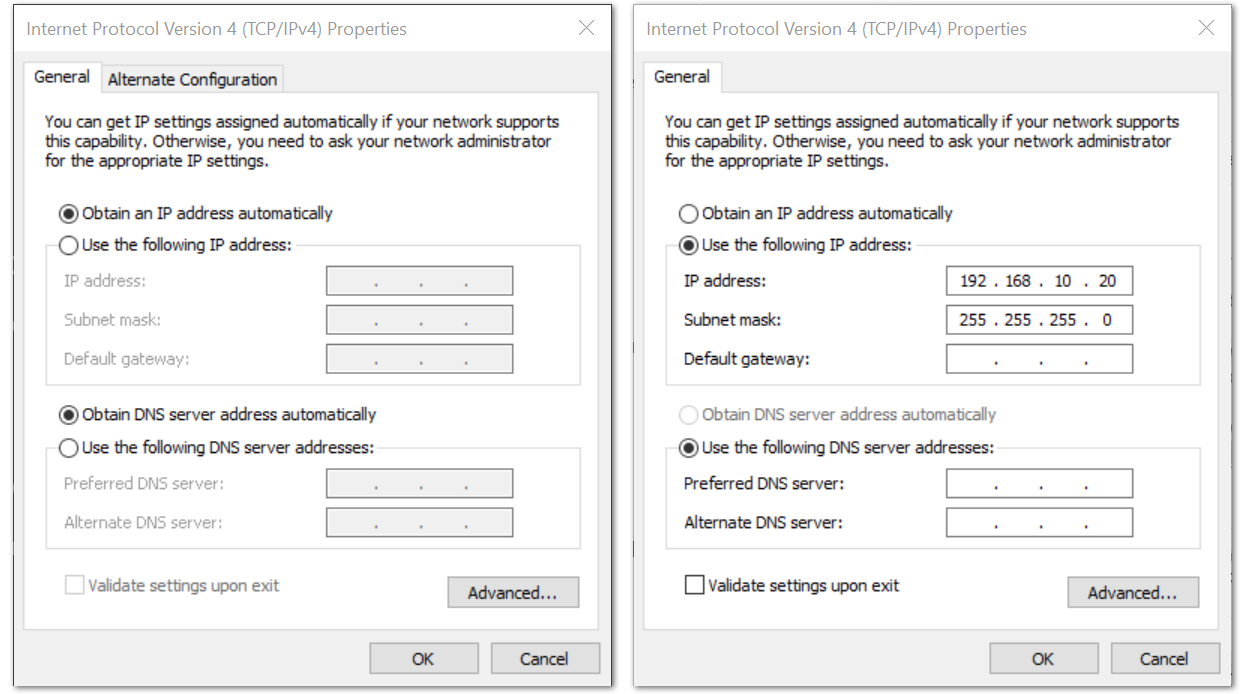 Figure 1: TCP/IPv4 Properties
Now, you should be able to access your gateway from your PC successfully using the IP address 192.168.10.10through SSH.
Log into the Gateway via SSH
1. Windows OS
Secure Shell (SSH) is typically used to log in to a remote machine and execute commands. There are a lot of free and good SSH Clients out there namely Putty, BitVise SSH Client, MobaXterm and many more. Feel free to choose one that fits your needs, but in this guide, you will be using Putty.
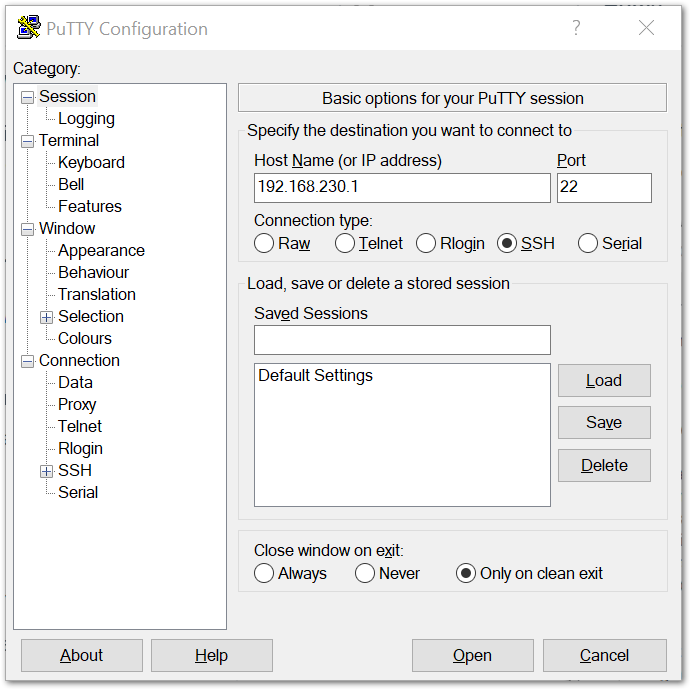 Figure 1: Putty Software for SSH in Windows
- If you have connected to the gateway through Wi-Fi AP Mode, the IP address is
192.168.230.1. - If you have connected to the gateway through Ethernet, the IP address is
192.168.10.10. - You will then be prompted to enter the username and password. The default username is "pi" and the default password is "raspberry".
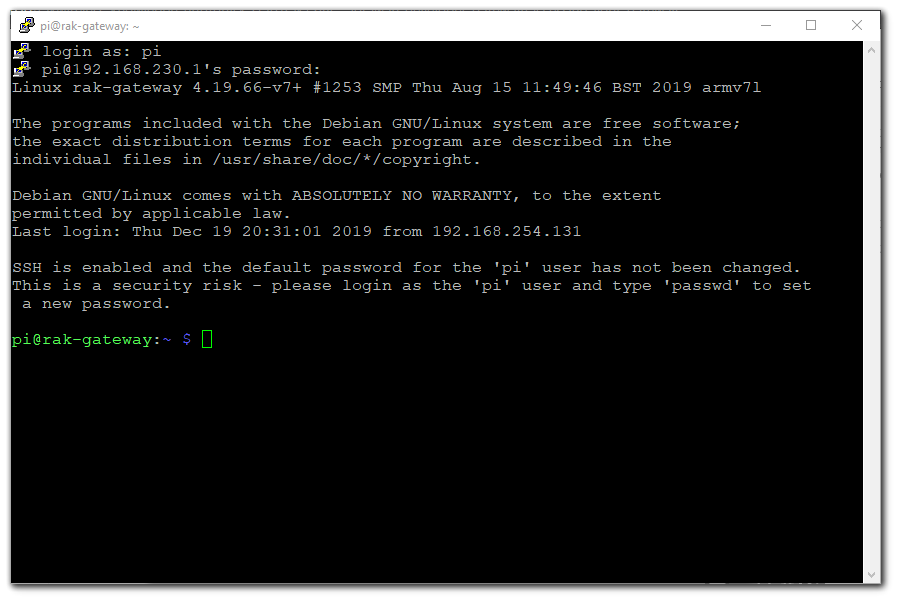 Figure 1: Command line after login
2. MacOS
Open the Mac OS terminal. Launch the Terminal application, which is found in the /Applications/Utilities/ directory. You can also launch it from Spotlight, press Command + Spacebar, type Terminal, and then return.
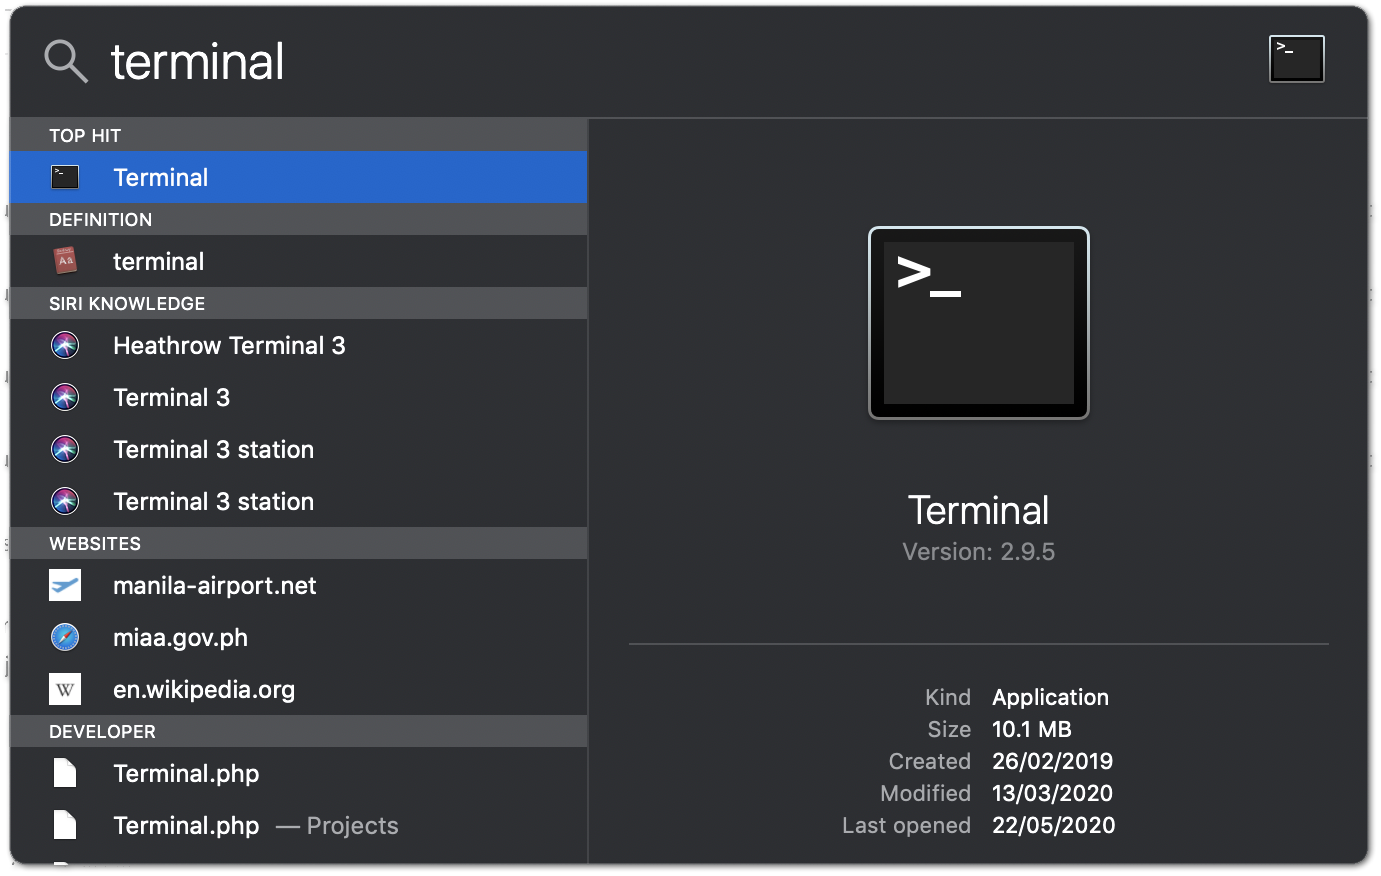 Figure 1: Opening Terminal in Mac OS
Open the terminal of Mac OS. Enter root mode by typing the following command: "sudo -i".
 Figure 1: SSH in Mac OS
- If you are not in root mode, enter "
ssh pi@192.168.230.1" in the terminal to log in to the gateway, the default password is "raspberry". - If you connect your PC with the gateway through Ethernet Cable, you should enter "
ssh pi@192.168.10.10", the default password is "raspberry".
Now, you have successfully logged into the gateway via SSH, as shown in Figure 11.
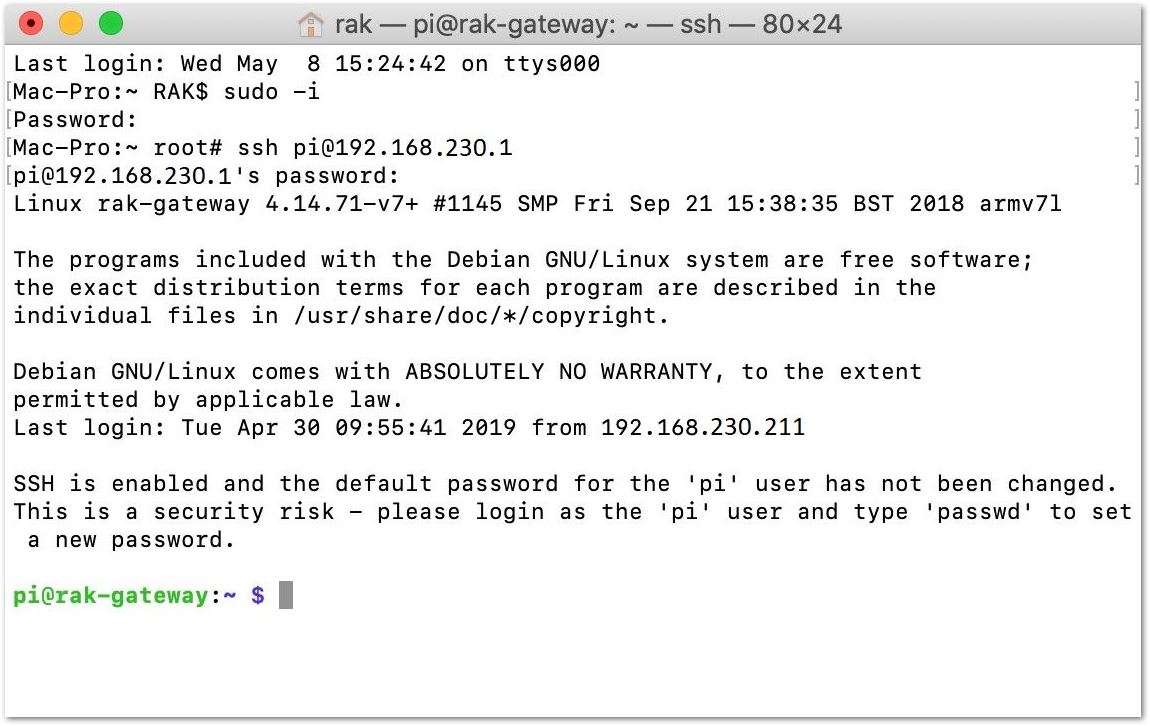 Figure 1: Log-in Successful Notification
3. Linux OS
If the OS of your PC is Linux, you should do the same as the Mac OS, except for the root mode.
Product Configuration
Configuring the Gateway
- Assuming you have successfully logged into your gateway using SSH. Enter the following command in the command line:
sudo gateway-config
- Then, you will see a page similar to the one shown in Figure 12.
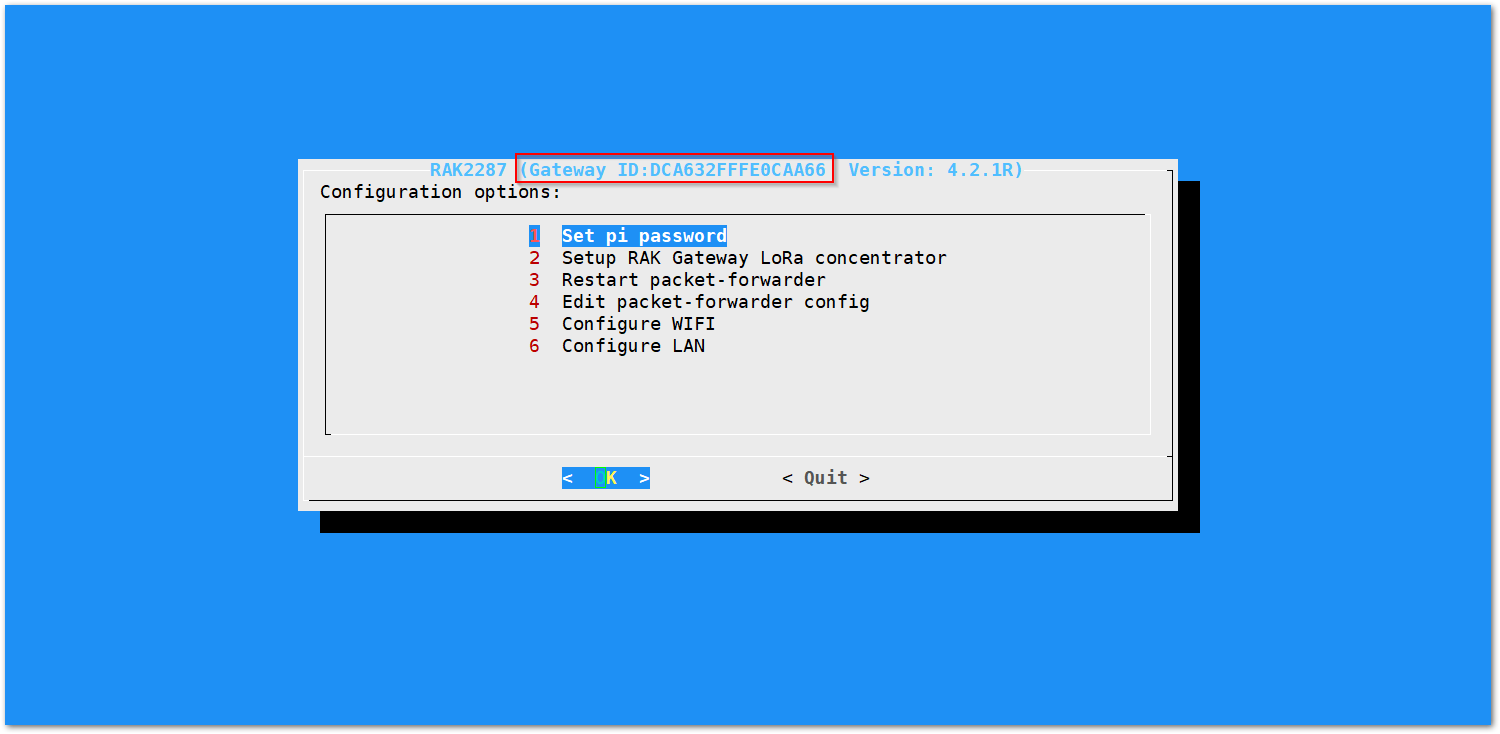 Figure 1: Configuration options for the gateway
- Set Pi Password: Used to set or change the password of the gateway.
- Set Up RAK Gateway LoRa Concentrator: Used to configure the operating frequency of the gateway and the LoRaWAN Server it will connect with.
- Restart Packet Forwarder: Used to restart the LoRa packet forwarding process.
- Edit Packet Forwarder Config: Used to open and manually edit LoRaWAN parameters in the
global_conf.jsonfile. - Configure WiFi: Used to configure the Wi-Fi settings for network connections.
- Configure LAN: Used to configure the Ethernet adapter settings.
A unique ID, also known as the Gateway EUI, will be generated for the gateway. This ID is highlighted in red in Figure 12 and is essential for registering the gateway with any LoRa Network Server (e.g., TTN, ChirpStack).
There is also another way to get your "Gateway ID", just enter the command below in the command line:
sudo gateway-version
 Figure 1: Gateway ID using the command line
Setting a new password for the Gateway
It is a good security practice to change the default password "raspberry" which is the same on all Raspberry Pi devices.
- Choose the 1 Set pi password option referred on Figure 14.
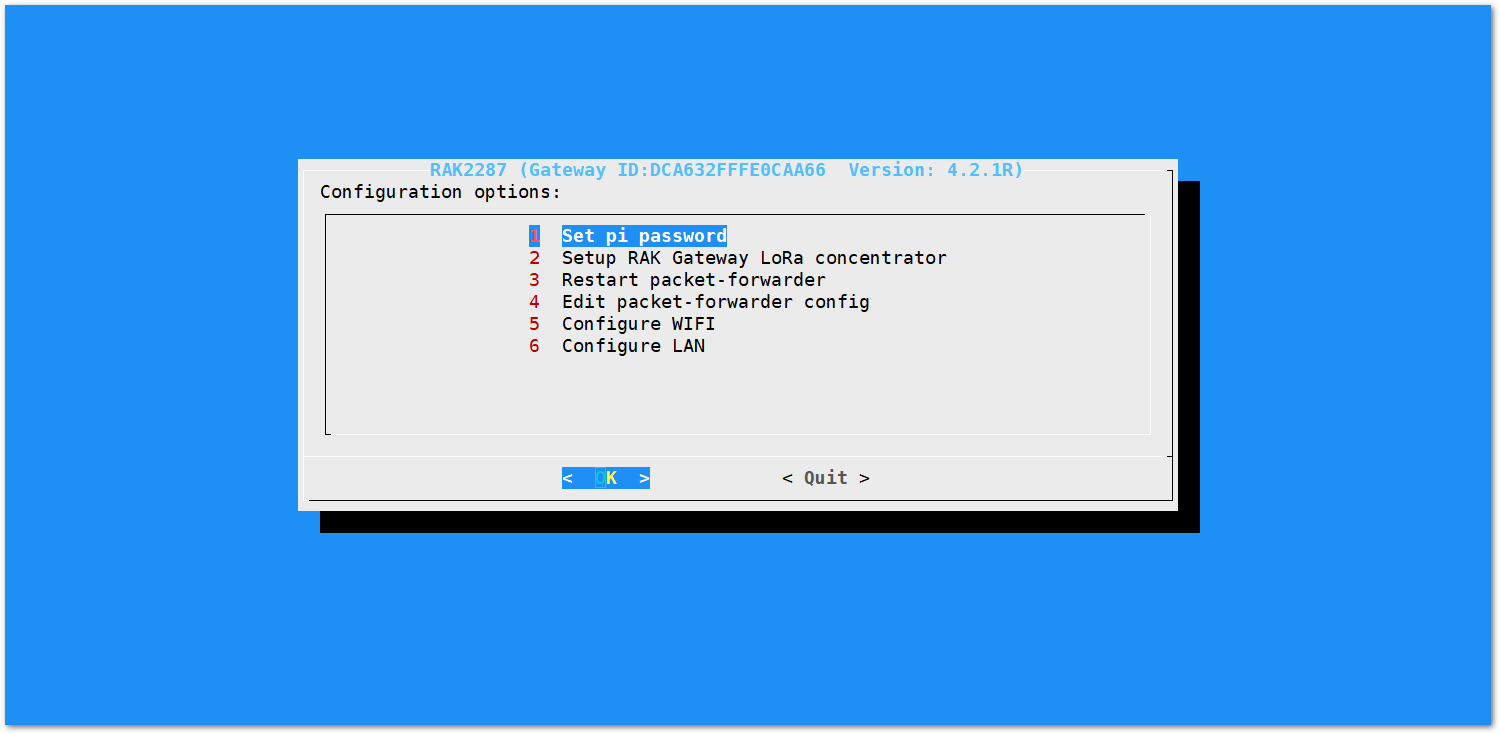 Figure 1: Set Pi Password
- Press Yes and you will be asked to enter your new password twice then press Enter.
 Figure 1: Confirm Password Change
- Once the password is successfully changed, a success message will appear.
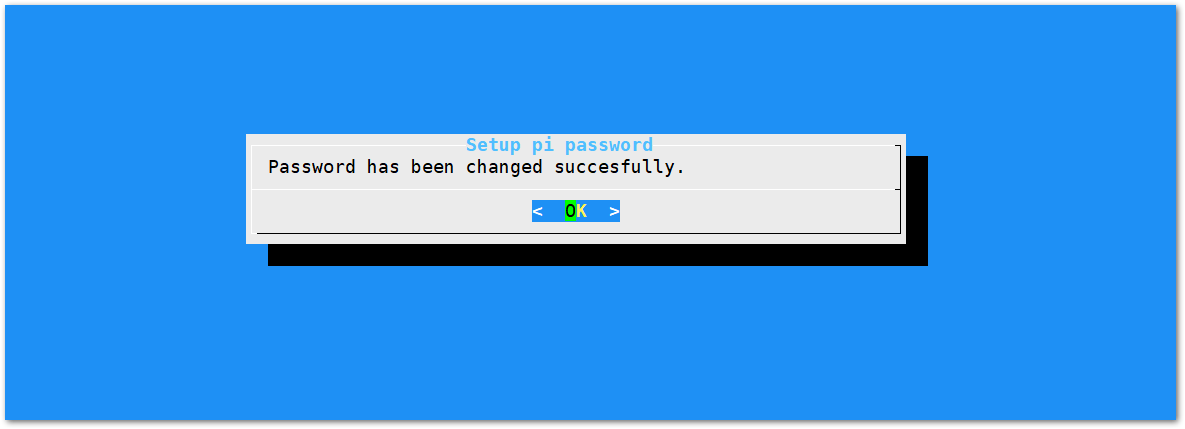 Figure 1: Successful Password Change
Set Up RAK Gateway LoRa Concentrator
This menu allows you to select your LoRa frequency band and one of the two available Networks Server options.
- Choosing option 2 Setup RAK Gateway LoRa concentrator.
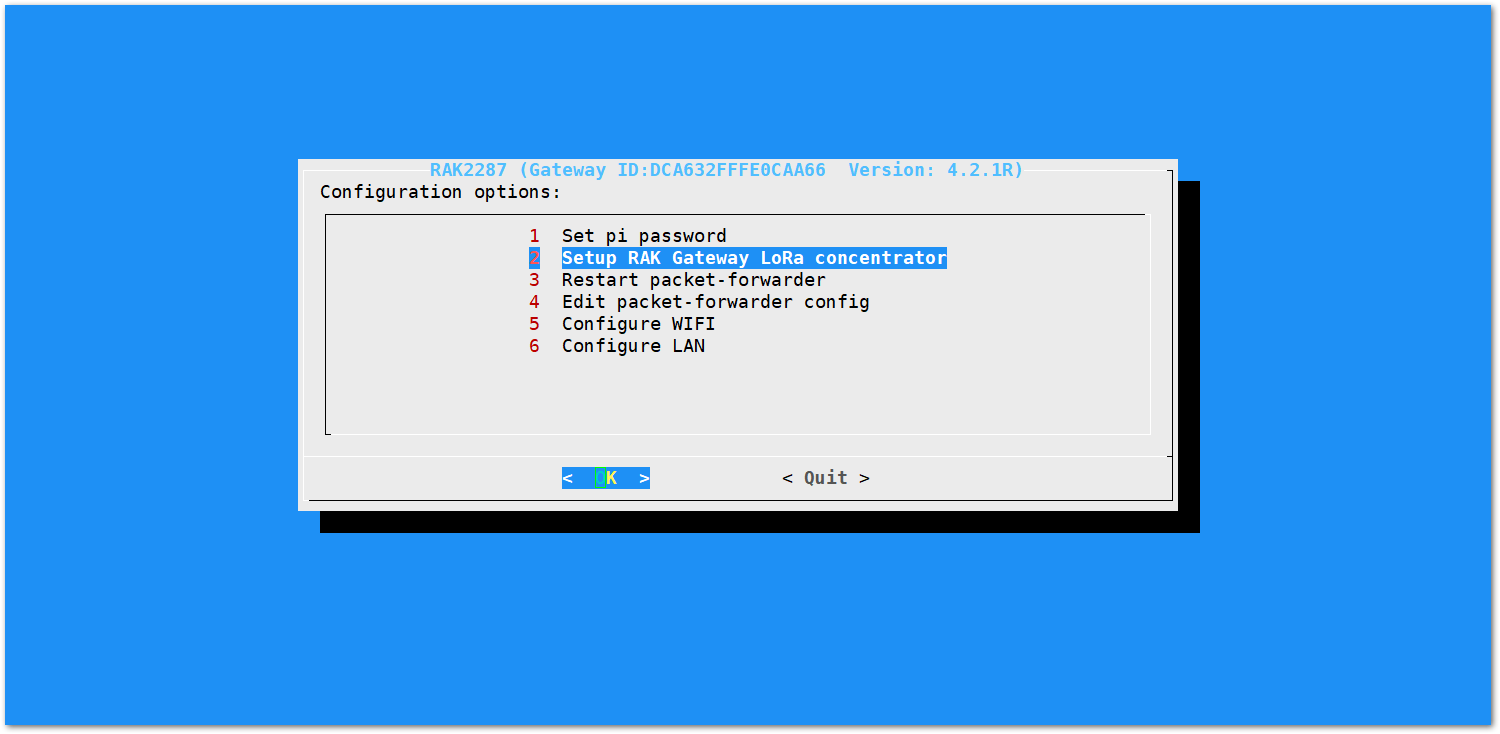 Figure 1: Choosing Setup RAK Gateway LoRa concentrator
- Select one of two supported LoRa servers: TTN or ChirpStack.
Server is TTN
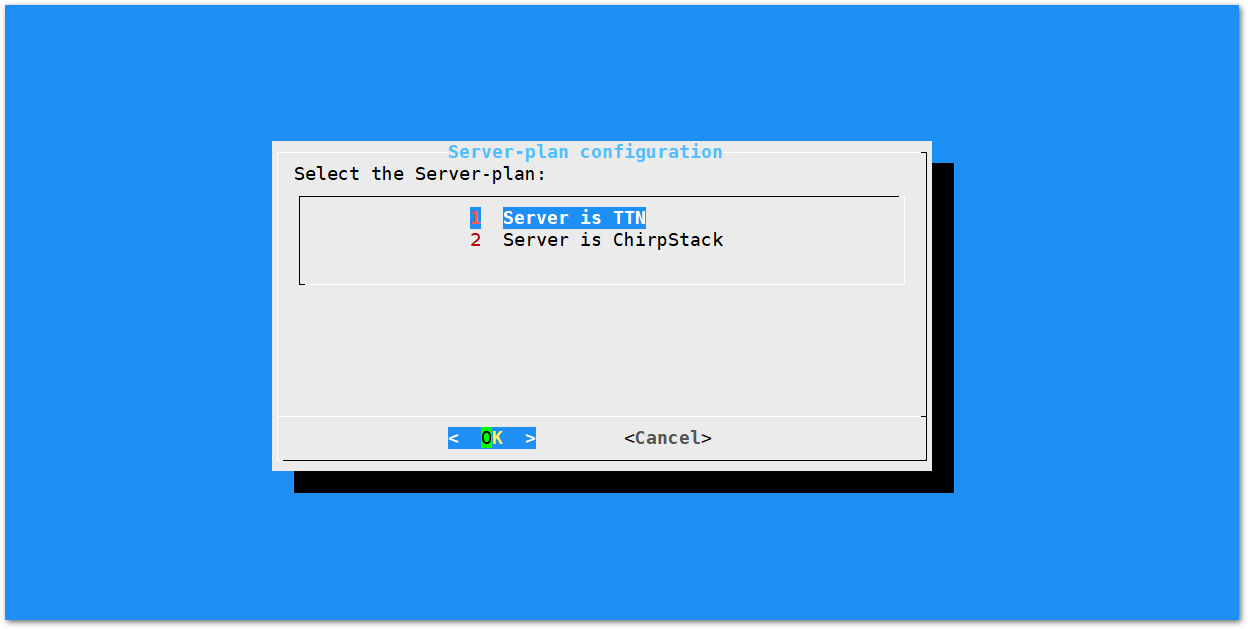 Figure 1: Server Is TTN
- The Things Network (TTN): If you choose TTN as the LoRa Server, you will see the following page. Visit this article for more information on your local TTN frequency plan. This will allow you to choose the correct plan.
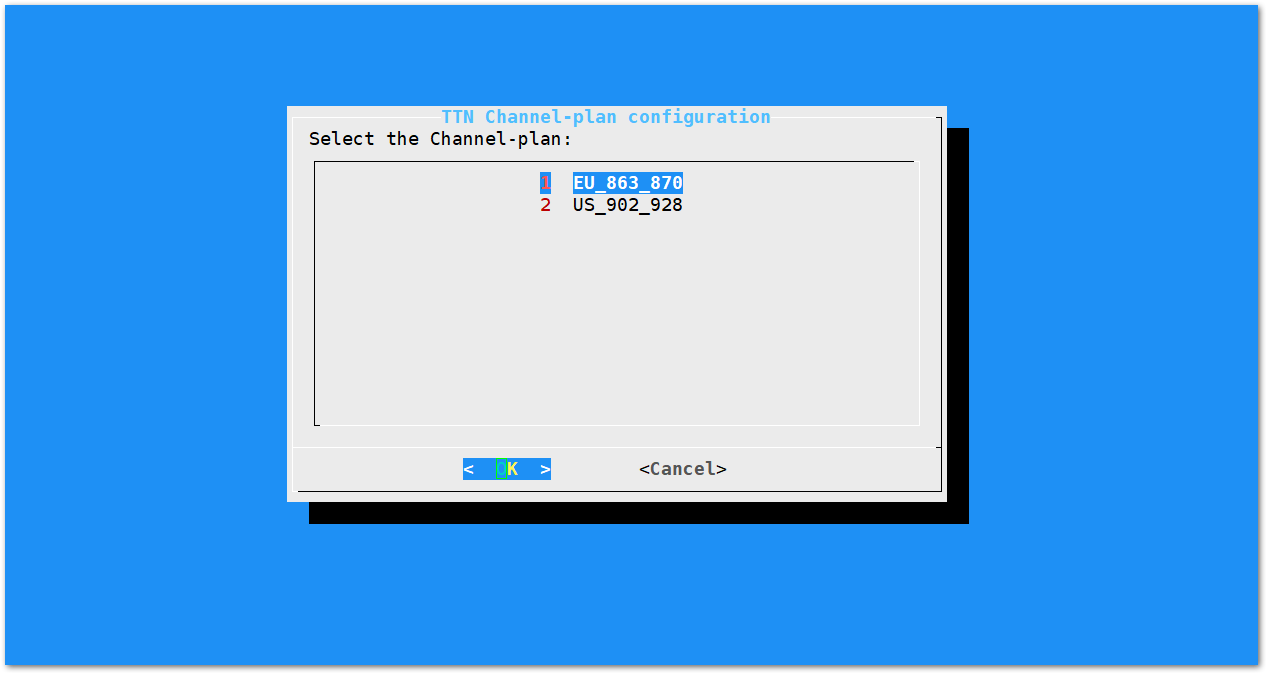 Figure 1: Selecting the TTN Channel Plan
After choosing the correct frequency, the success message will appear as shown in Figure 20.
 Figure 1: Successfully Changed the Frequency
Server is Chirpstack
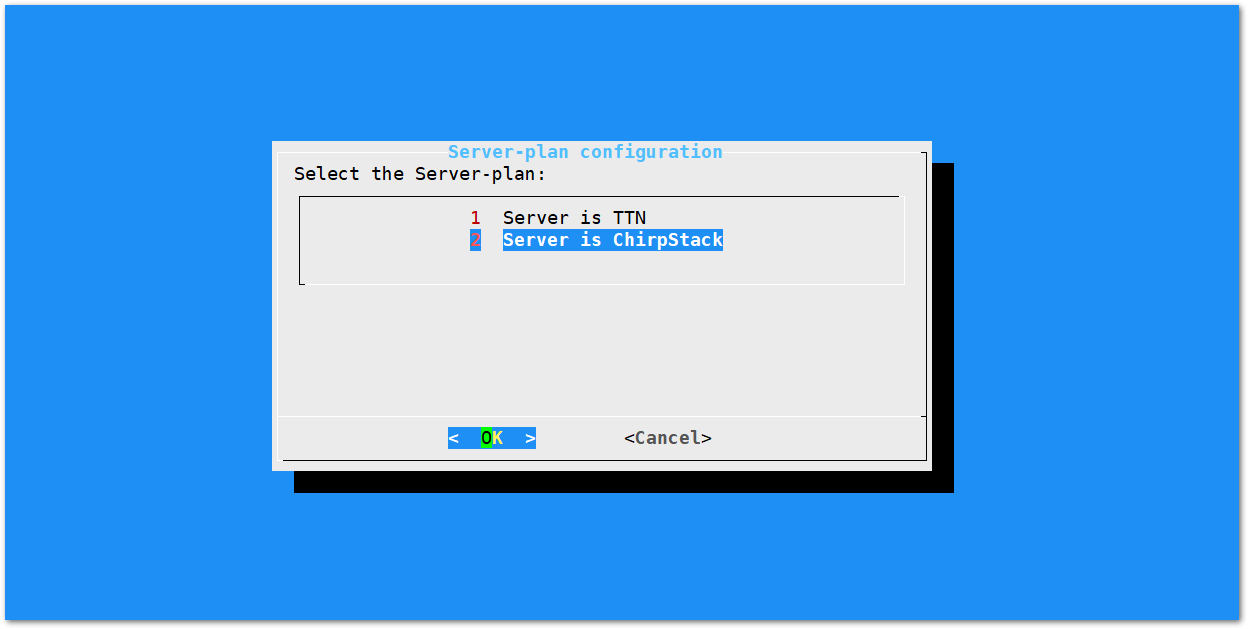 Figure 1: Server Is Chirpstack
If you choose Chirpstack as your LoRa Server, you will see the following page with two options available:
- ChirpStack Channel Plan Configuration: used to configure your Regional Frequency Band
- ChirpStack ADR Configure: used to enable/disable the Adaptive Data Rate (ADR) functionality.
- Select option 1 for configuring your Regional Frequency Band.
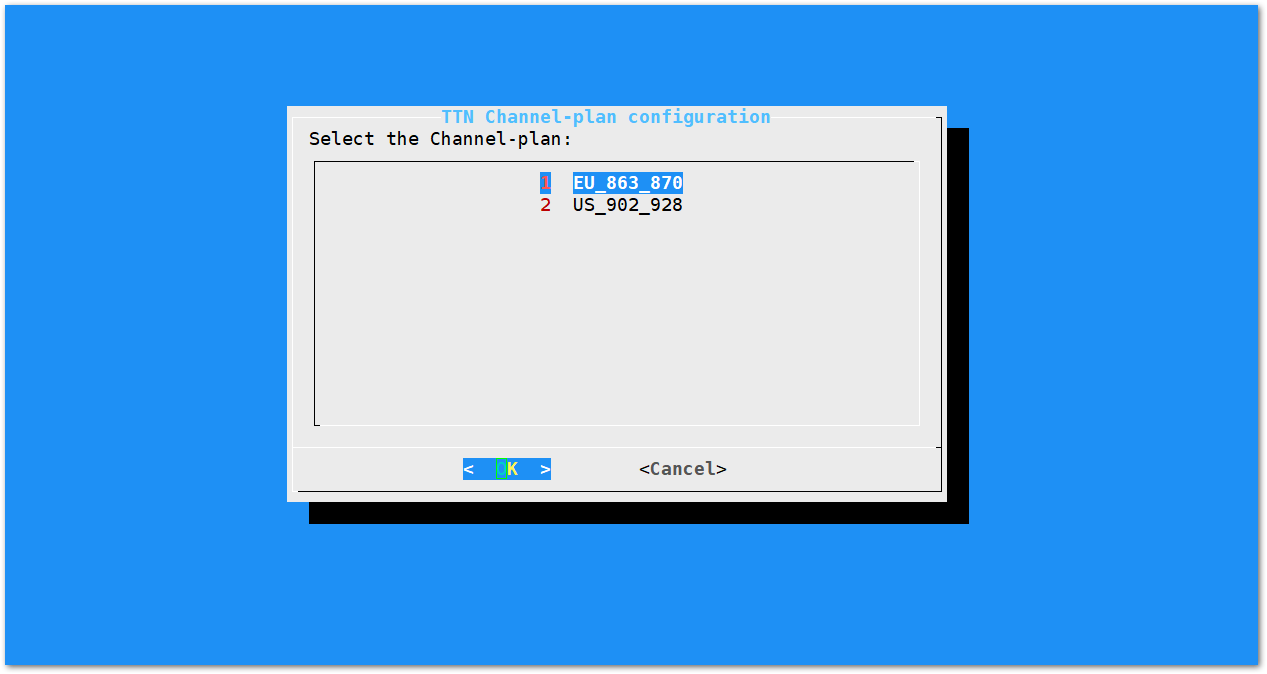 Figure 1: Regional Frequency Band Option
- Set the IP address of the ChirpStack that you want your gateway to connect with.
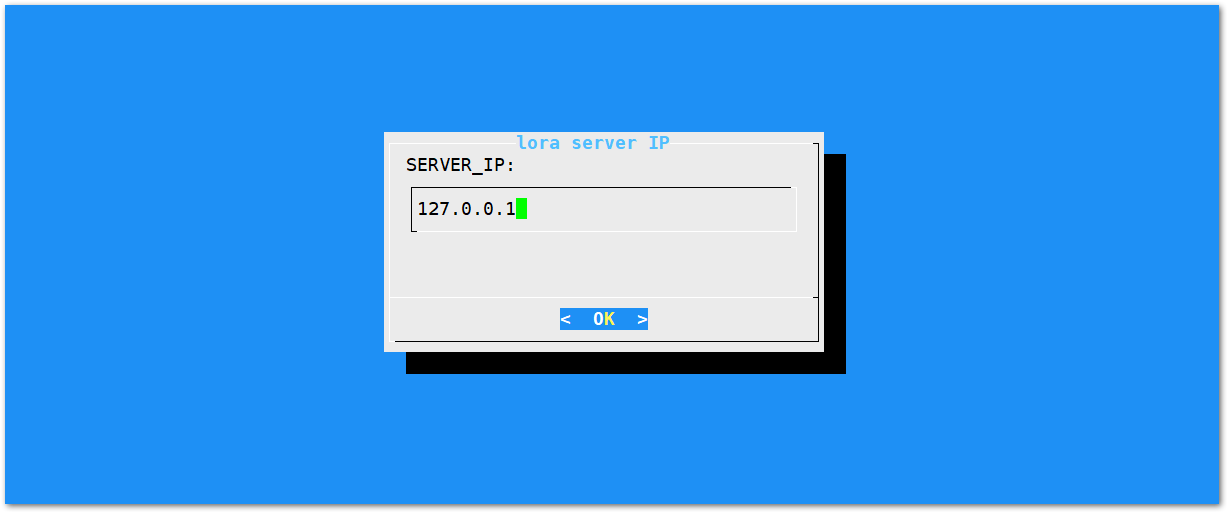 Figure 1: Default LoRaServer IP address
The default IP address is 127.0.0.1, which means you will be using the Built-in LoRa Server. If you want to use an independent LoRa Server running on another device or a cloud-based LoRa Server, you need to set it to the corresponding IP address.
- If you have instead selected Chirpstack ADR Configure, enable/disable the Adaptive Data Rate (ADR) functionality.
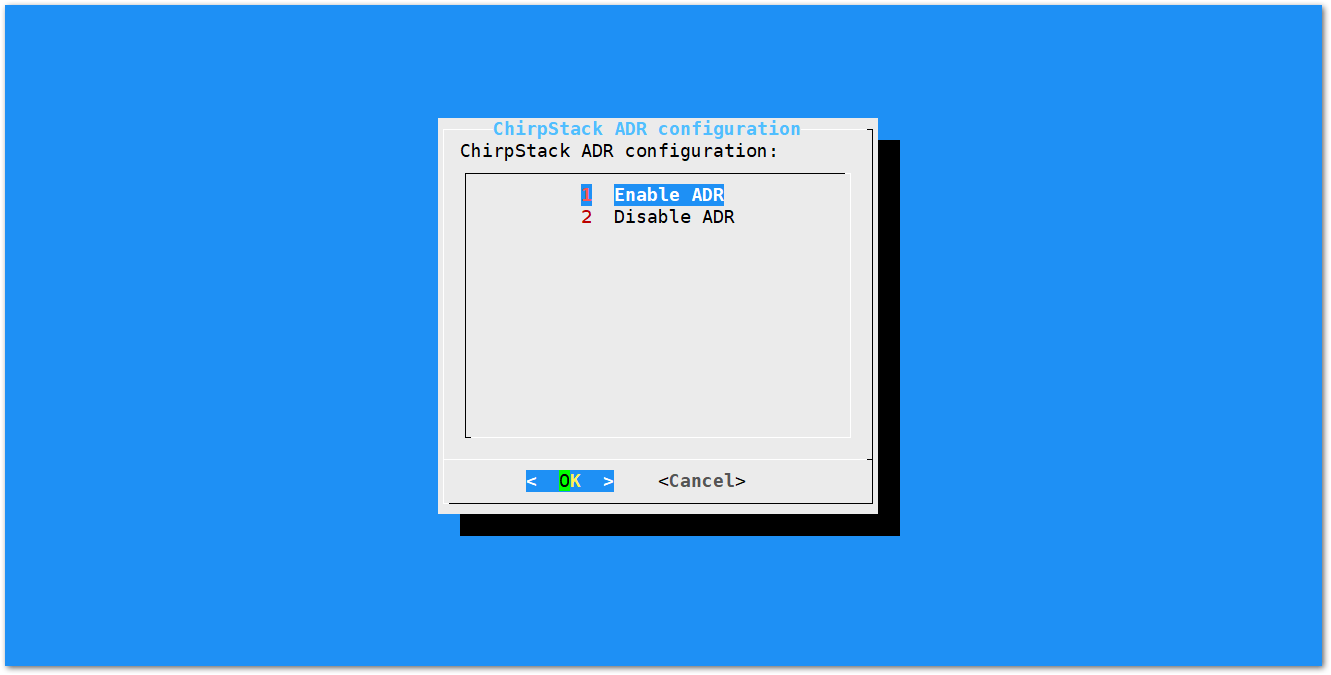 Figure 1: Chirpstack ADR Enable/Disable
Connecting to a Network
If you want to use TTN or an independent ChirpStack network server, which may be deployed in a local area network or remotely, connect your gateway to a networking device that provides internet connectivity, such as a router. There are two options available for this purpose.
Connect Through Wi-Fi
- If you want to connect through Wi-Fi, you can easily do so using the wireless capabilities of the Raspberry Pi 3B+ or Raspberry Pi 4 by selecting 5 Configure WIFI. By default, the RAK2287 WisLink LPWAN Concentrator operates in Wi-Fi AP Mode. To connect the gateway to a router, it must be set to Wi-Fi Client Mode.
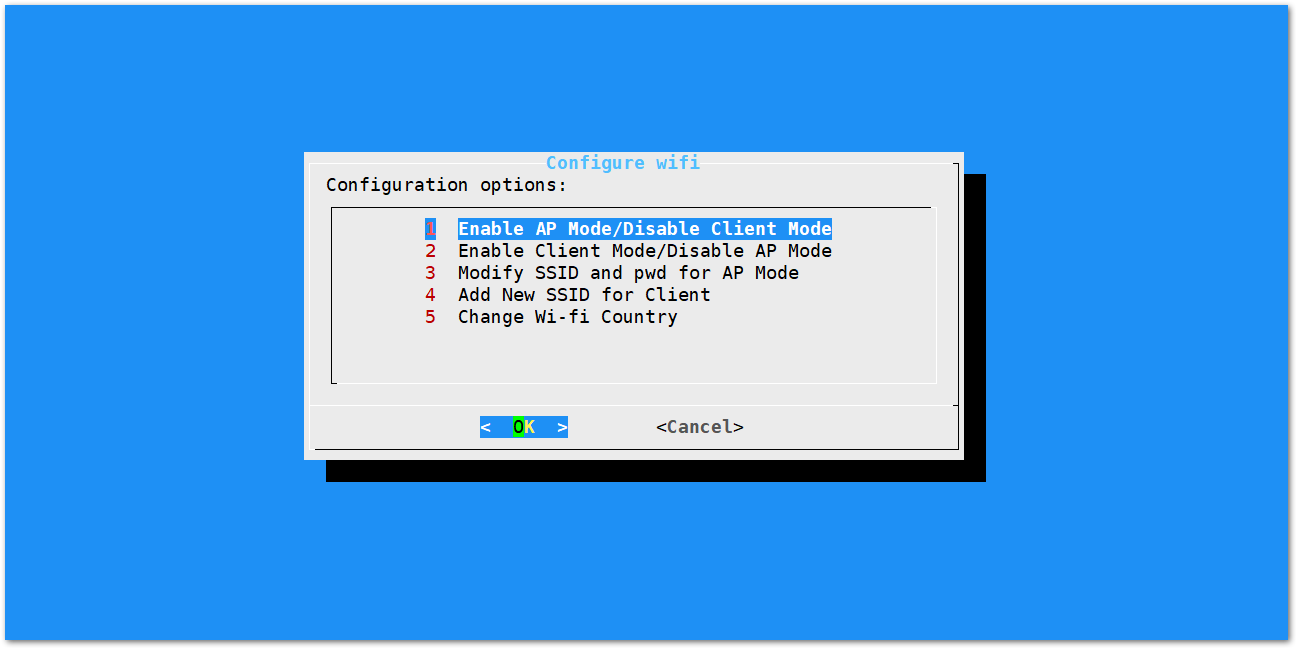 Figure 1: Configuration options for WIFI
There are 5 options to choose from in the Wi-Fi configuration menu:
- Enable AP Mode/Disable Client Mode: After rebooting, the gateway will operate in Wi-Fi Access Point Mode, and Wi-Fi Client Mode will be disabled (this is the default mode).
- Enable Client Mode/Disable AP Mode: After rebooting, the gateway will operate in Wi-Fi Client Mode, and Wi-Fi AP Mode will be disabled.
- Modify SSID and Password for AP Mode: This option is used to modify the SSID and password of the Wi-Fi AP. It only works if the Wi-Fi AP Mode is enabled.
- Add New SSID for Client Mode: This is used to connect to a new Wi-Fi network. It only works in Wi-Fi Client Mode.
- Change Wi-Fi Country: This is used to modify the resident country to match Wi-Fi standards.
To enable Wi-Fi Client Mode, you must first disable the AP Mode.
- Once Wi-Fi AP Mode has been disabled by choosing "2 Enable Client Mode/Disable AP Mode", connect to a new Wi-Fi Network by choosing "4 Add New SSID for Client".
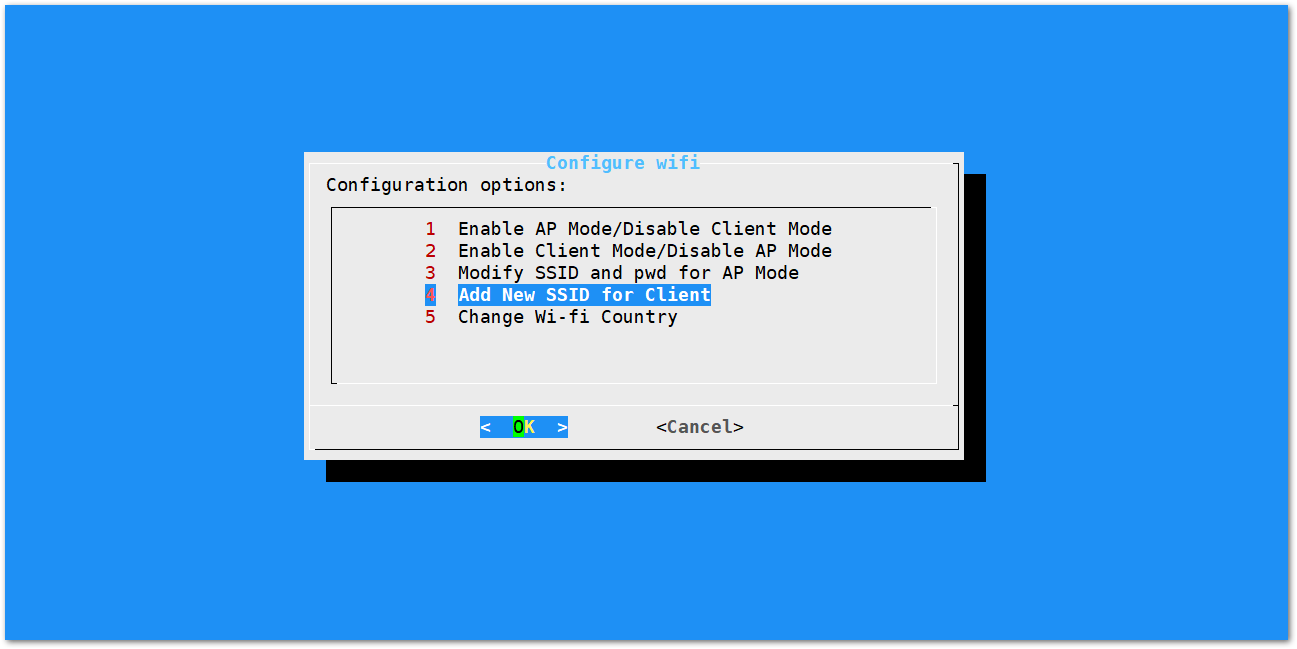 Figure 1: Add a new SSID
- Start by selecting your country of residence:
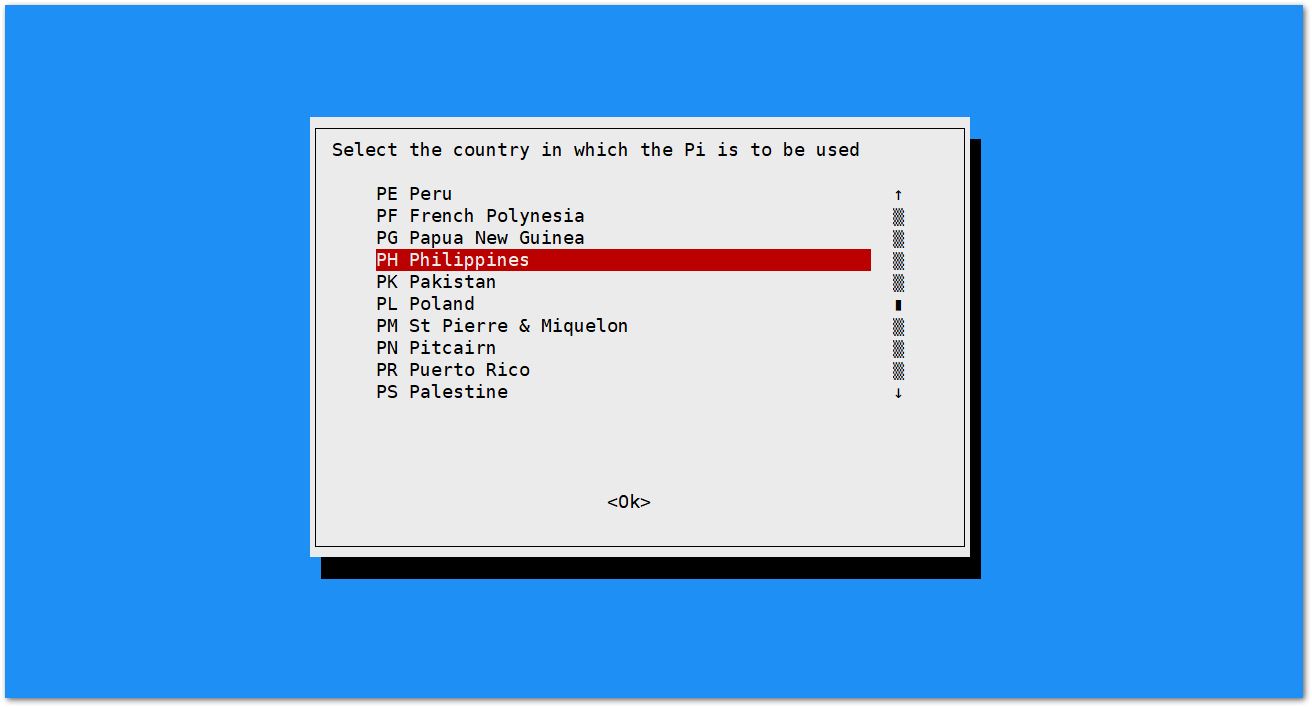 Figure 1: Selecting Country of Residence
- Enter the SSID of the network you want to connect to.
Make sure to input the correct Wi-Fi SSID and password; otherwise, you will not be able to connect to the RAK2287 WisLink LPWAN Concentrator again via SSH in Wi-Fi AP Mode. If you find yourself stuck in this situation, follow the procedure outlined in the Connecting to a Network document, which is applicable for all Raspberry Pi-based gateways to restore Wi-Fi AP mode functionality.
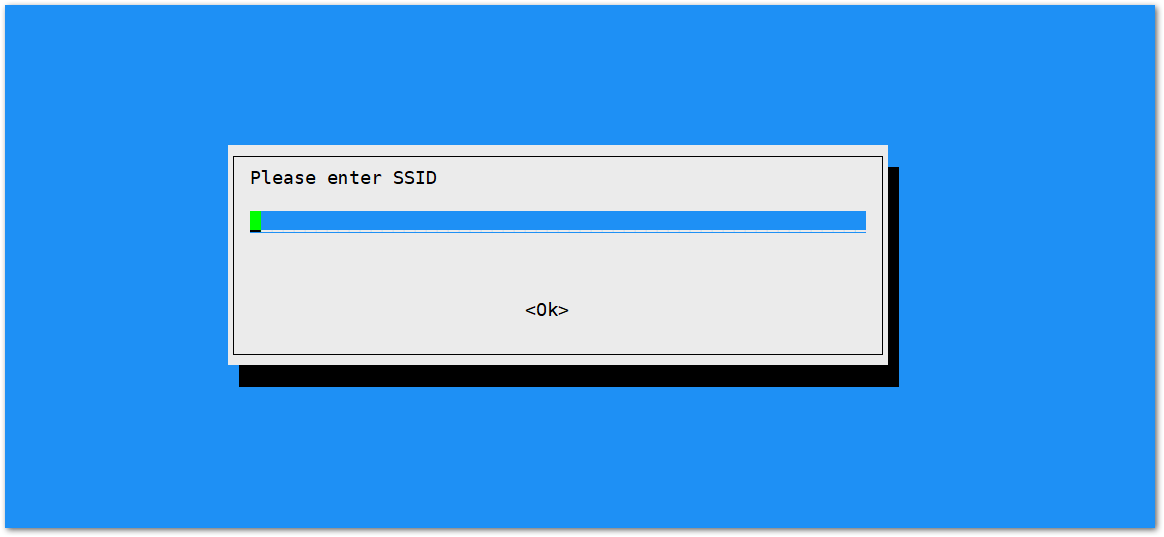 Figure 1: SSID of the Network you want to connect to.
- Enter the password as well. Leave it empty if there is none.
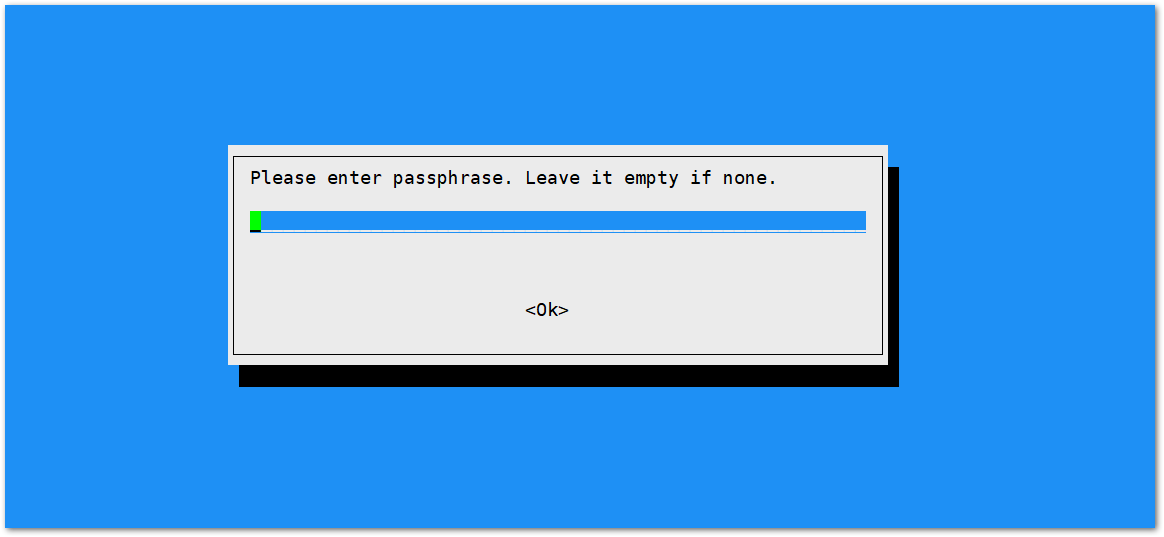 Figure 1: Password of the Wi-Fi
Connect Through Ethernet
To connect to the router using an Ethernet cable, follow these steps:
- In the main configuration menu, choose 6 Configure LAN. This allows you to set up a static IP address for the Gateway’s Ethernet adapter.
- Enter a static IP address that corresponds to your router's IP address range. Ensure that the LoRaWAN gateway and the router are in the same network segment; otherwise, the connection will fail.
- By default, the IP address of the gateway's Ethernet is
192.168.10.10.
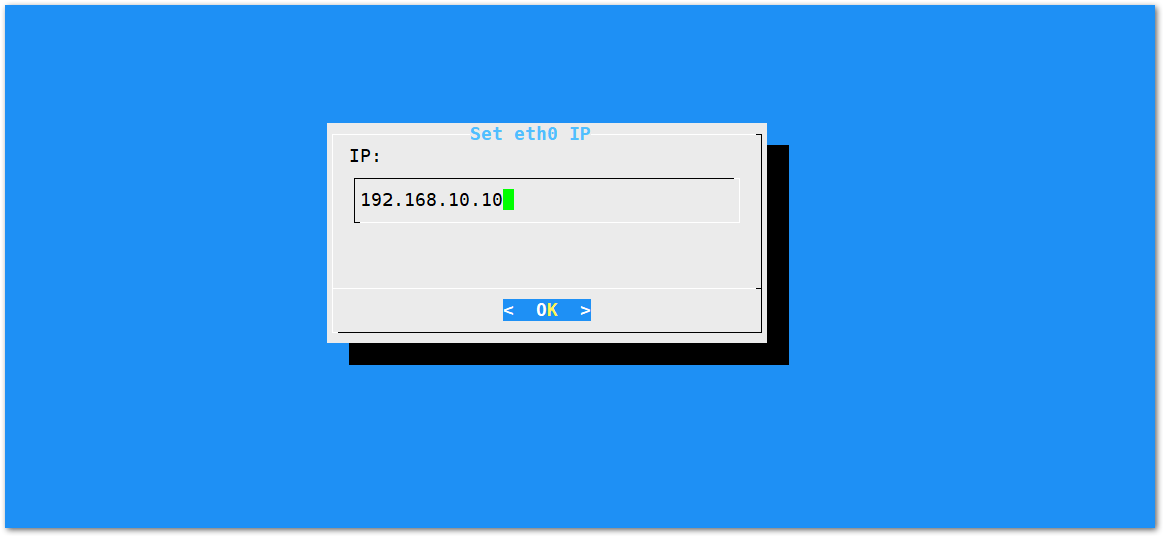 Figure 1: Default gateway Ethernet IP address
- Configure the IP address of the router. This will be the LAN interface IP address of the router.
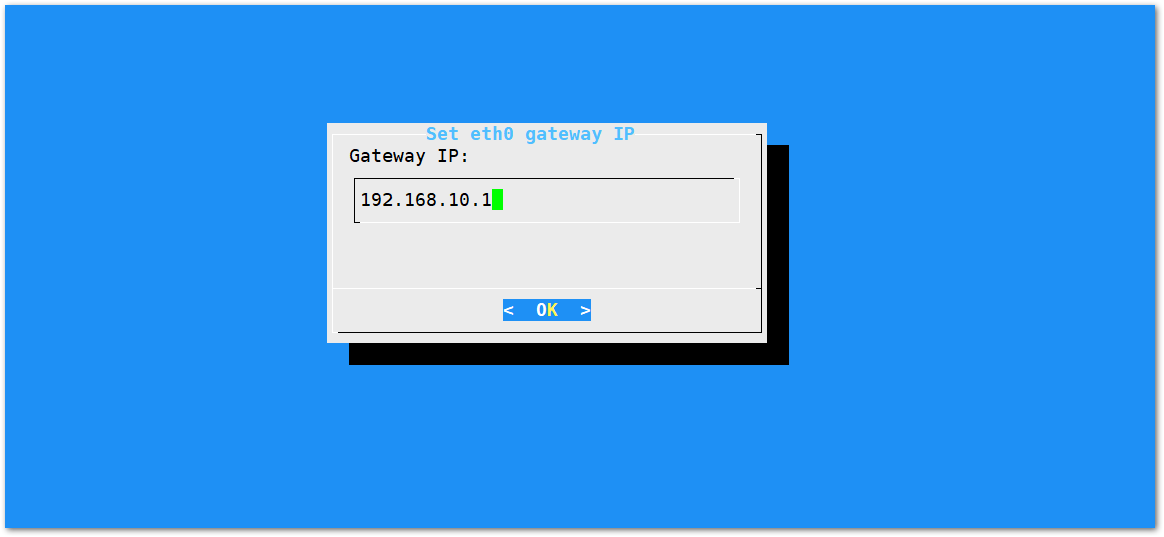 Figure 1: LAN Interface IP address of the Router
- Press OK and a success message will appear.
- Finally, reboot the gateway using the command
sudo rebootin the command line and it will connect to the router successfully through Ethernet.
Optional Configurations
The configurations in this section are optional and situational.
Reverting to Wi-Fi AP Mode
If you have entered incorrect Wi-Fi SSID and/or password during the Wi-Fi Client Mode setup for the RAK2287 WisLink LPWAN Concentrator, follow these steps to revert to Wi-Fi AP Mode and redo the setup:
- Remove the SD Card from your RAK2287 WisLink LPWAN Concentrator and insert it into your PC. Your PC should be able to detect as shown in Figure 32.
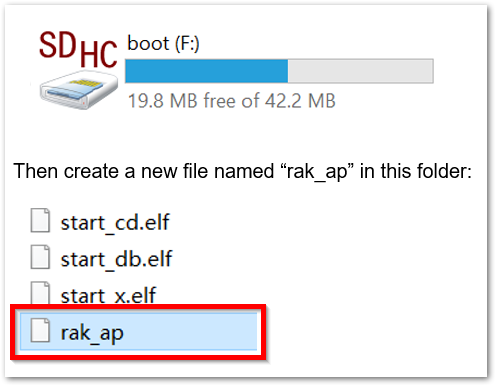 Figure 1: Creating rak_ap file to your SD Card
- Using your Command Prompt or Terminal, navigate to your SD Card and type the command
rak_apto generate a file.
cd > rak_ap
- Check if the
rak_apfile is created successfully. If so, re-insert the SD Card into your RAK2287 WisLink LPWAN Concentrator and it should work again in Wi-Fi AP Mode.
Connecting to The Things Network (TTN)
The Things Network facilitates the connection of low-power devices to long-range gateways, enabling them to join an open-source, decentralized network for data exchange with applications. You can learn more about The Things Network.
- Connect the gateway to the router to access the internet according to the method which has been introduced in the Connecting to a Network section of this document.
- Configure your gateway and choose TTN as the LoRa Server and select the correct frequency according to the method which has been introduced in the Configure the Gateway section.
- Go to the TTN website and log in.
 Figure 1: The Things Network Home Page
- Enter the TTN Console and click on Gateways.
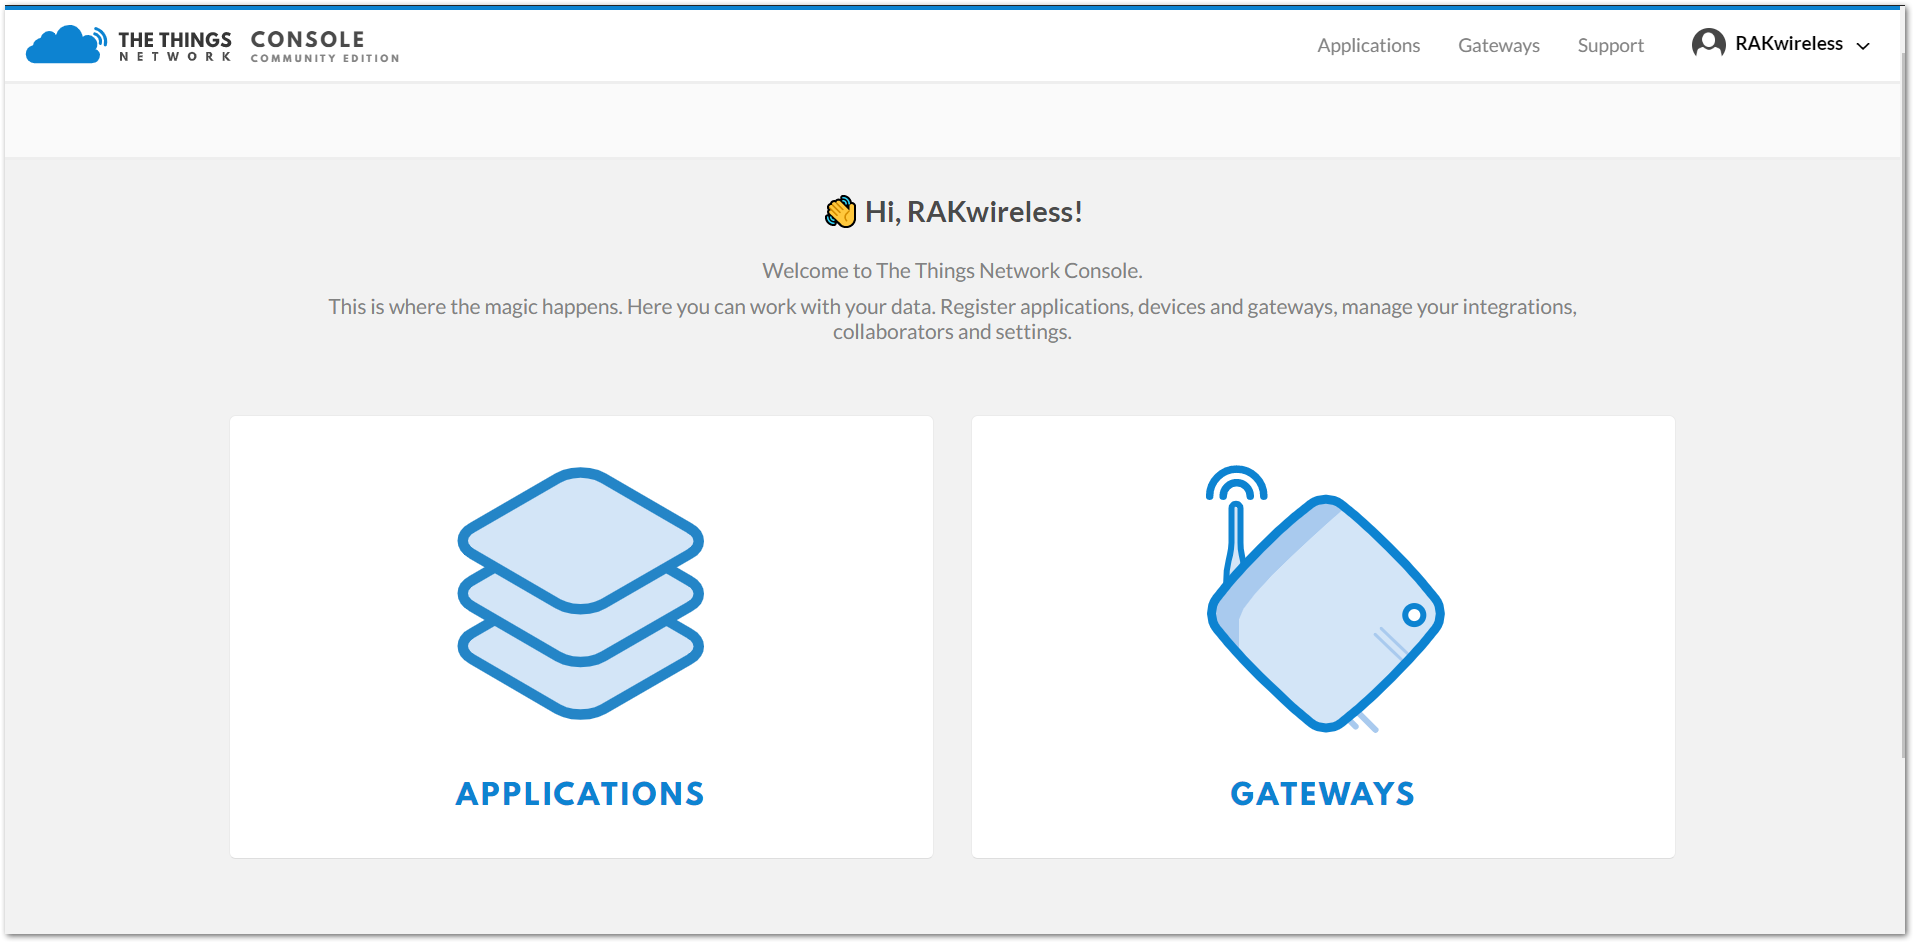 Figure 1: The Things Network Console Page
- All of your Registered Gateways will be displayed on this page. Click "register gateway"
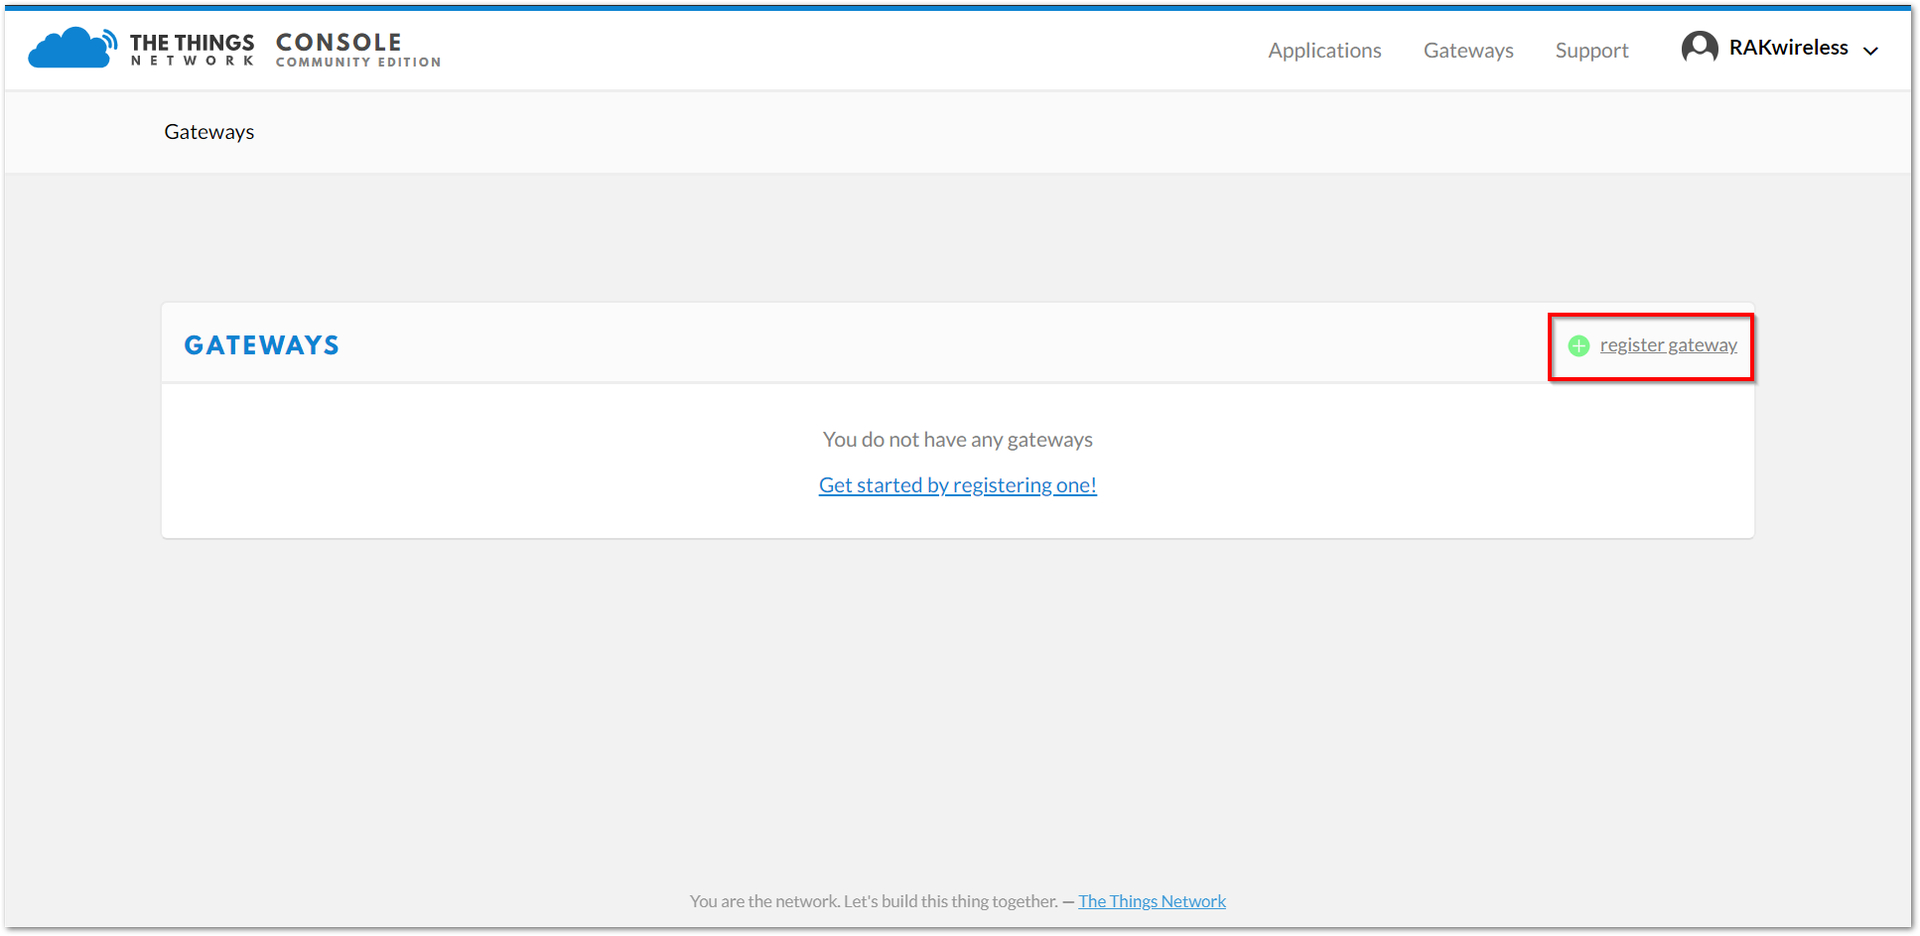 Figure 1: Adding a gateway to TTN
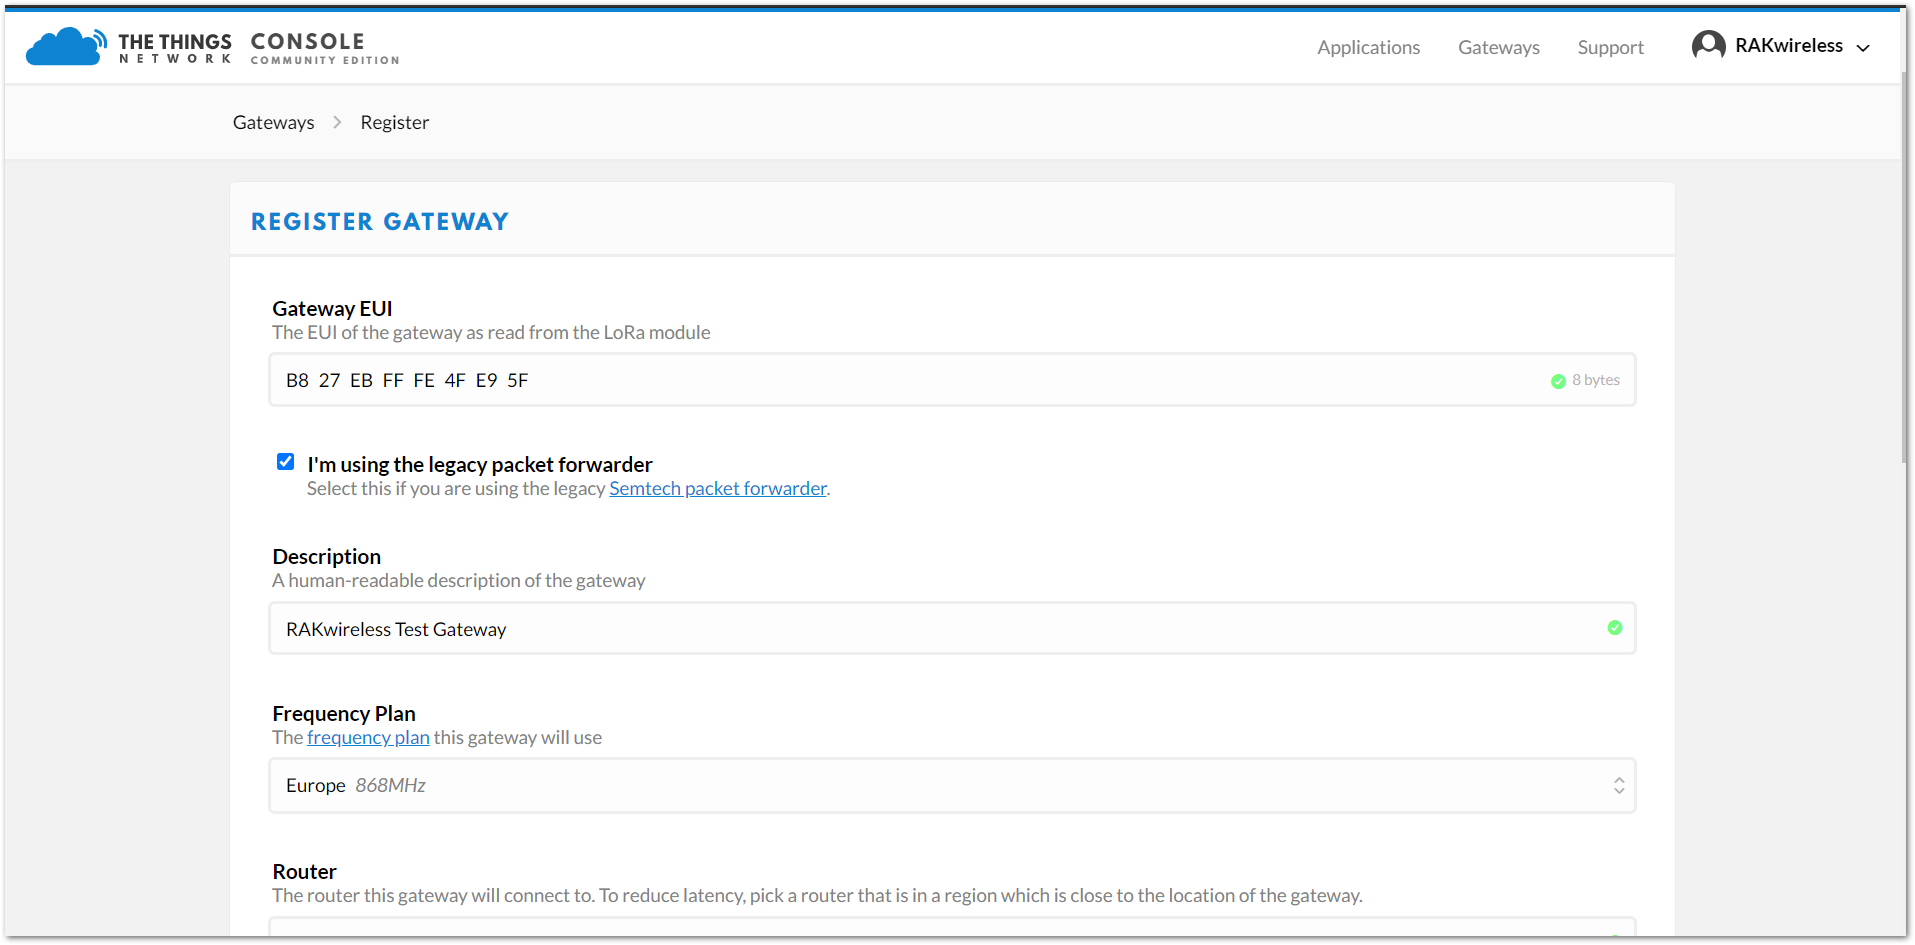 Figure 1: Registering your gateway
- Gateway EUI: Refers to the Gateway ID you obtained in the previous step. If you forgot it, simply type
gateway-versionin the command line. This ID must match the gateway's true Gateway ID; otherwise, you will not be able to register your gateway on TTN.
Make sure to select the I'm using the legacy packet forwarder check box.
- Description: Provide a human-readable description of your gateway.
- Frequency Plan: Select the frequency plan that you want to use, ensuring it matches the frequency of both the gateway and the node.
- Router: Choose the router your gateway will connect to. To minimize latency, select a router located near the gateway.
- Location: Enter the coordinates of the gateway's location. This information will be displayed on the Gateway World Map.
- Antenna Placement: Specify the placement of your antenna, whether it is indoors or outdoors.
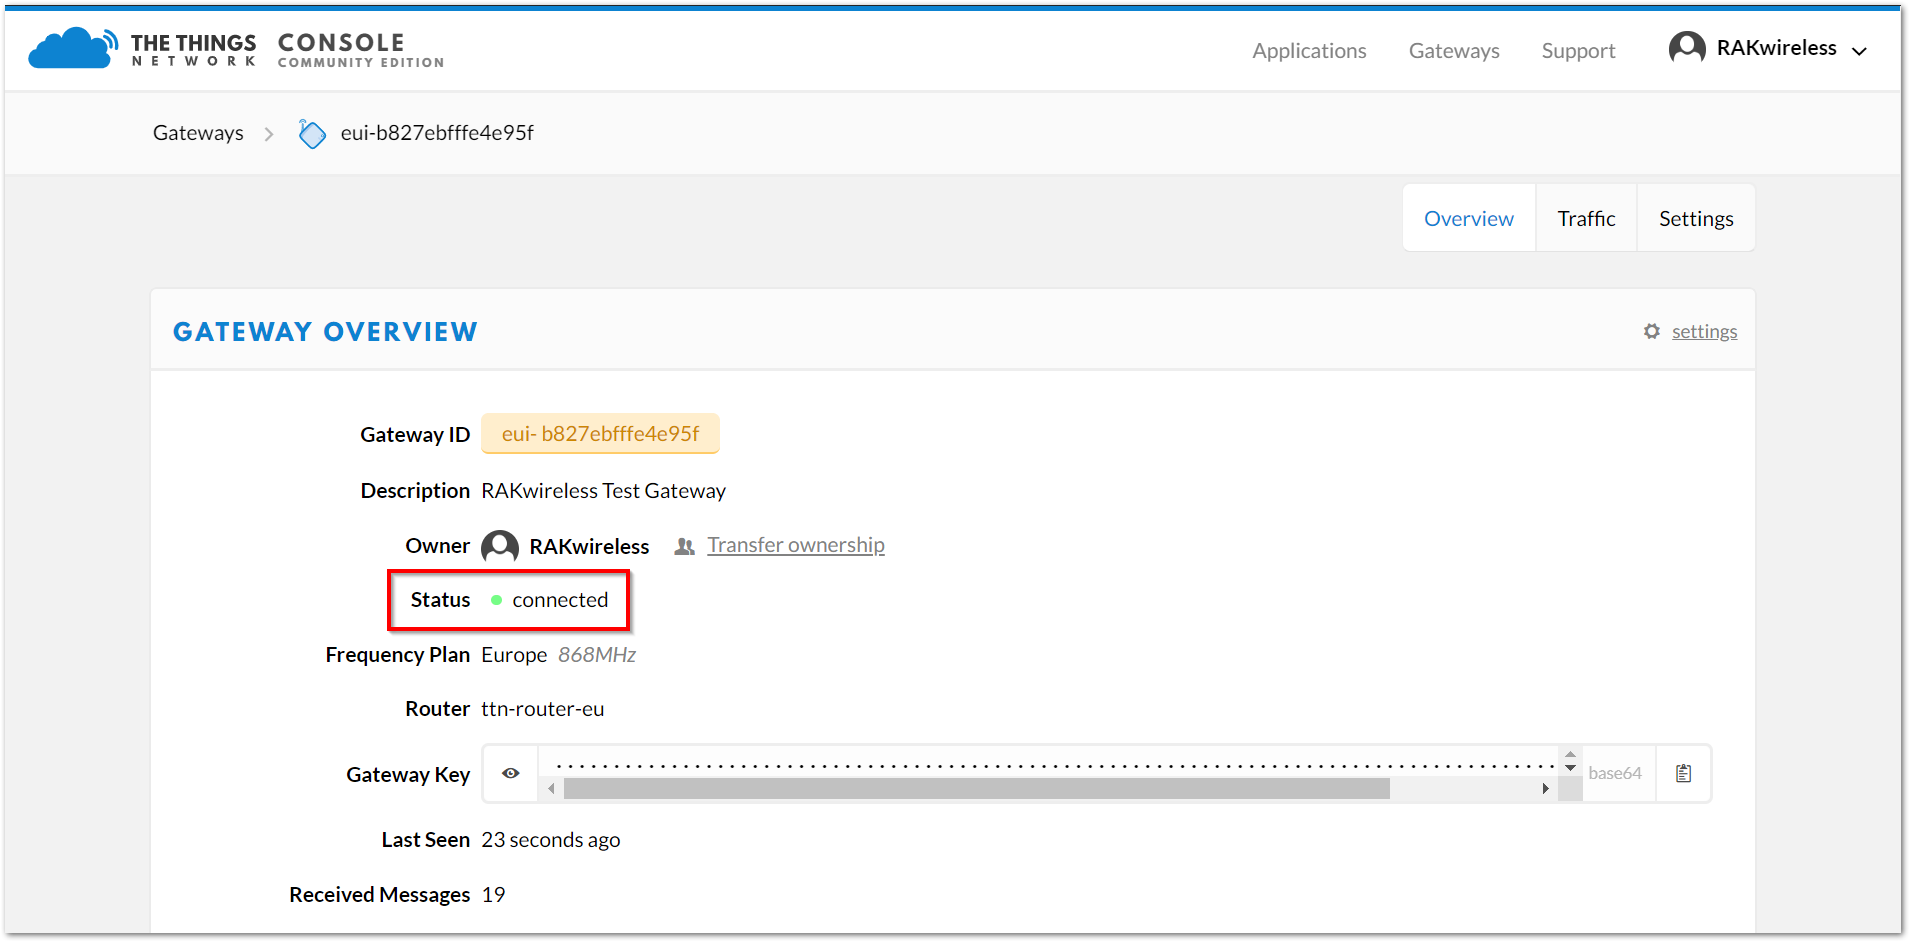 Figure 1: Gateway overview
- Click Register Gateway and wait for a few minutes. If the status of your gateway shows as Connected, as illustrated in Figure 37 for reference, then your setup is successful.
Connect the Gateway with Chirpstack
The ChirpStack or previously known as the LoRaServer project provides open-source components for building LoRaWAN networks. Learn more about ChirpStack on the website.
For the RAKwireless Developer Gateways, there are 2 ways to use the ChirpStack:
1. Using the Built-in ChirpStack
There is a built-in ChirpStack in every RAK Developer Gateway if you use the latest firmware.
- When you use it for the first time after burning the latest firmware, the gateway will work in the EU868 Band and use the built-in ChirpStack as its default LoRa server. If you don't want to change the frequency or LoRa server, you don't have to do anything as this will be configured automatically when the gateway boots.
- However, if it is not the first time and you want to use the built-in ChirpStack as the LoRa Server, follow the steps discussed in the Configuring the Gateway section.
- Optional: If ever you disabled the AP Mode and you have connected it to your own WiFi network (Client Mode). You can search for your gateway’s IP address via Advanced IP Scanner. Copy the IP address of your gateway, it should have the Manufacturer name of Raspberry Pi Foundation:
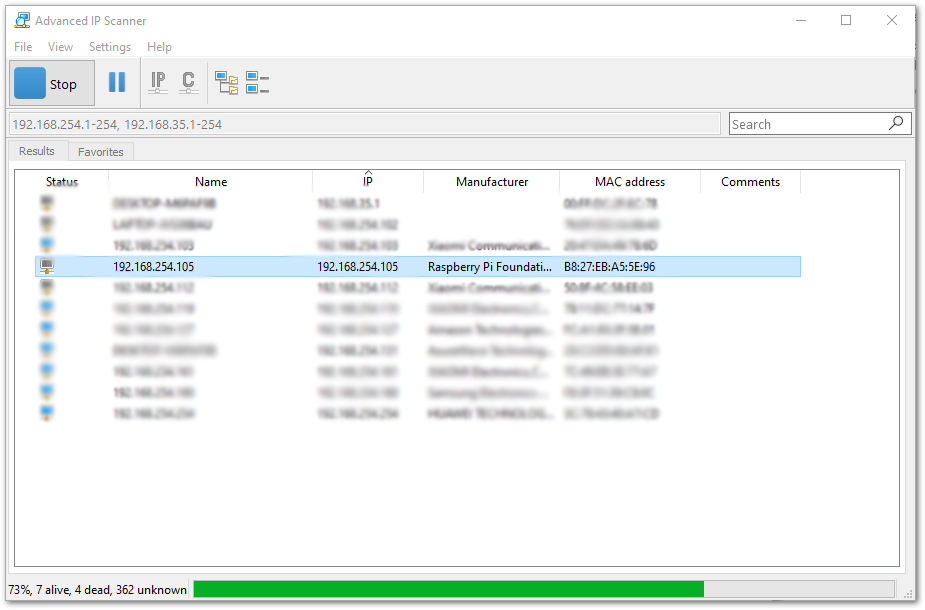 Figure 1: IP address of your LPWAN Gateway using IP Scanner
There is a web-based UI that comes with the ChirpStack instance. Simply open a browser and enter the following credentials:
- Browser Address: "Gateway IP address:8080" (Example:
http://192.168.254.176:8080) - Username: admin
- Password: admin
It is advisable to change your password to tighten the security of your account. You can change this by clicking the change password button at the user icon.
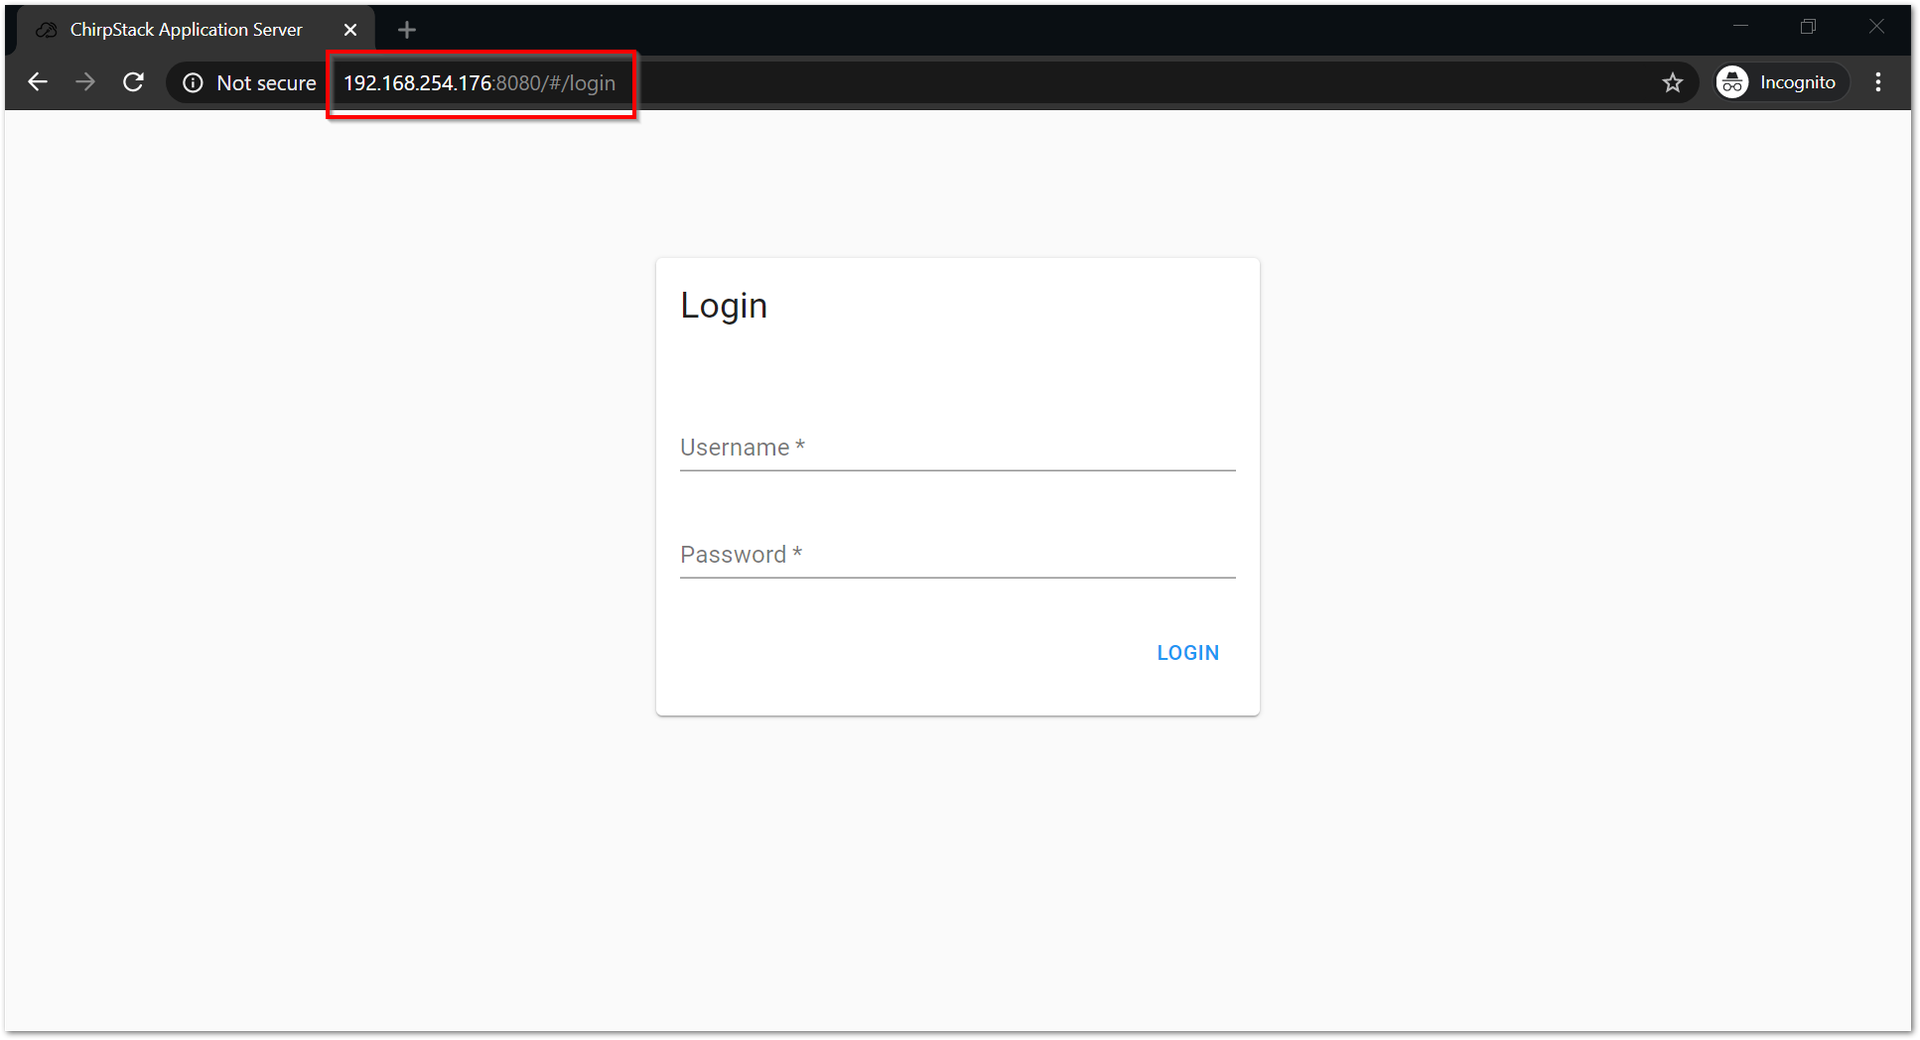 Figure 1: ChirpStack web-based UI
- If you navigate to the Gateways tab and click on rak_gateway, you should be able to view the gateway details page.
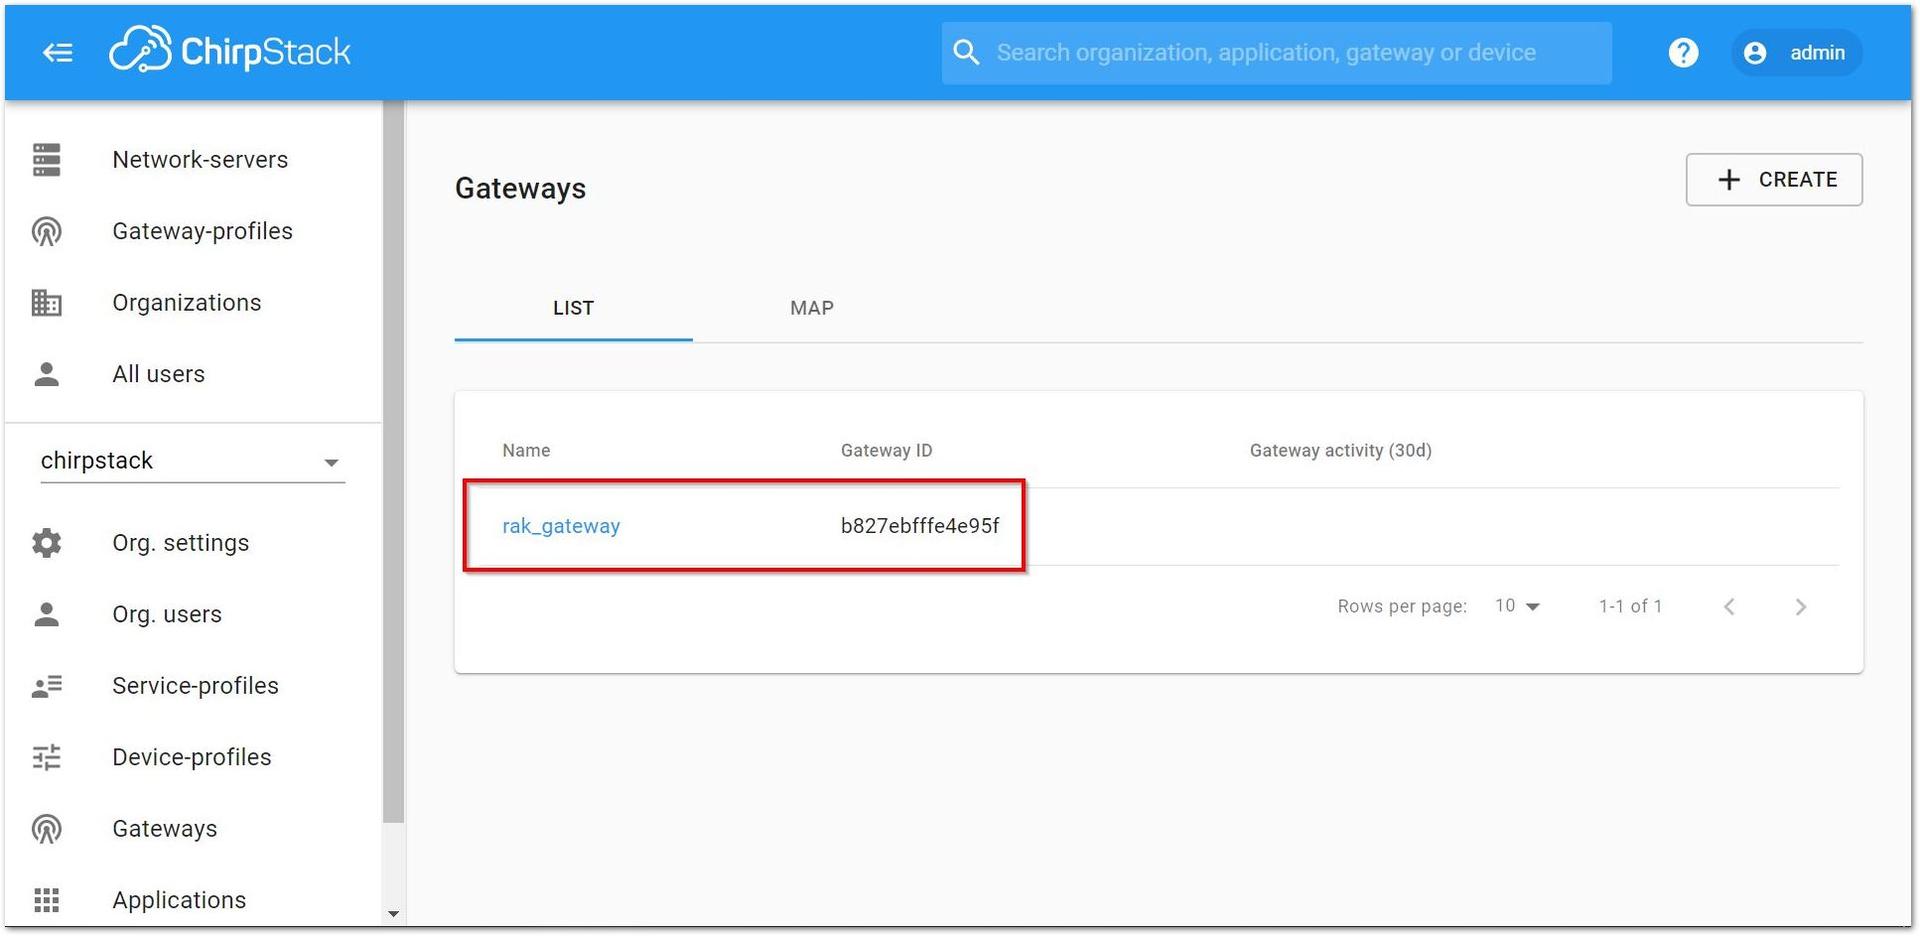 Figure 1: Available gateways in Chirpstack
- Go to the
rak_gatewayand see the Last seen status. It must be a few seconds ago which signifies that the gateway is visible in the ChirpStack server.
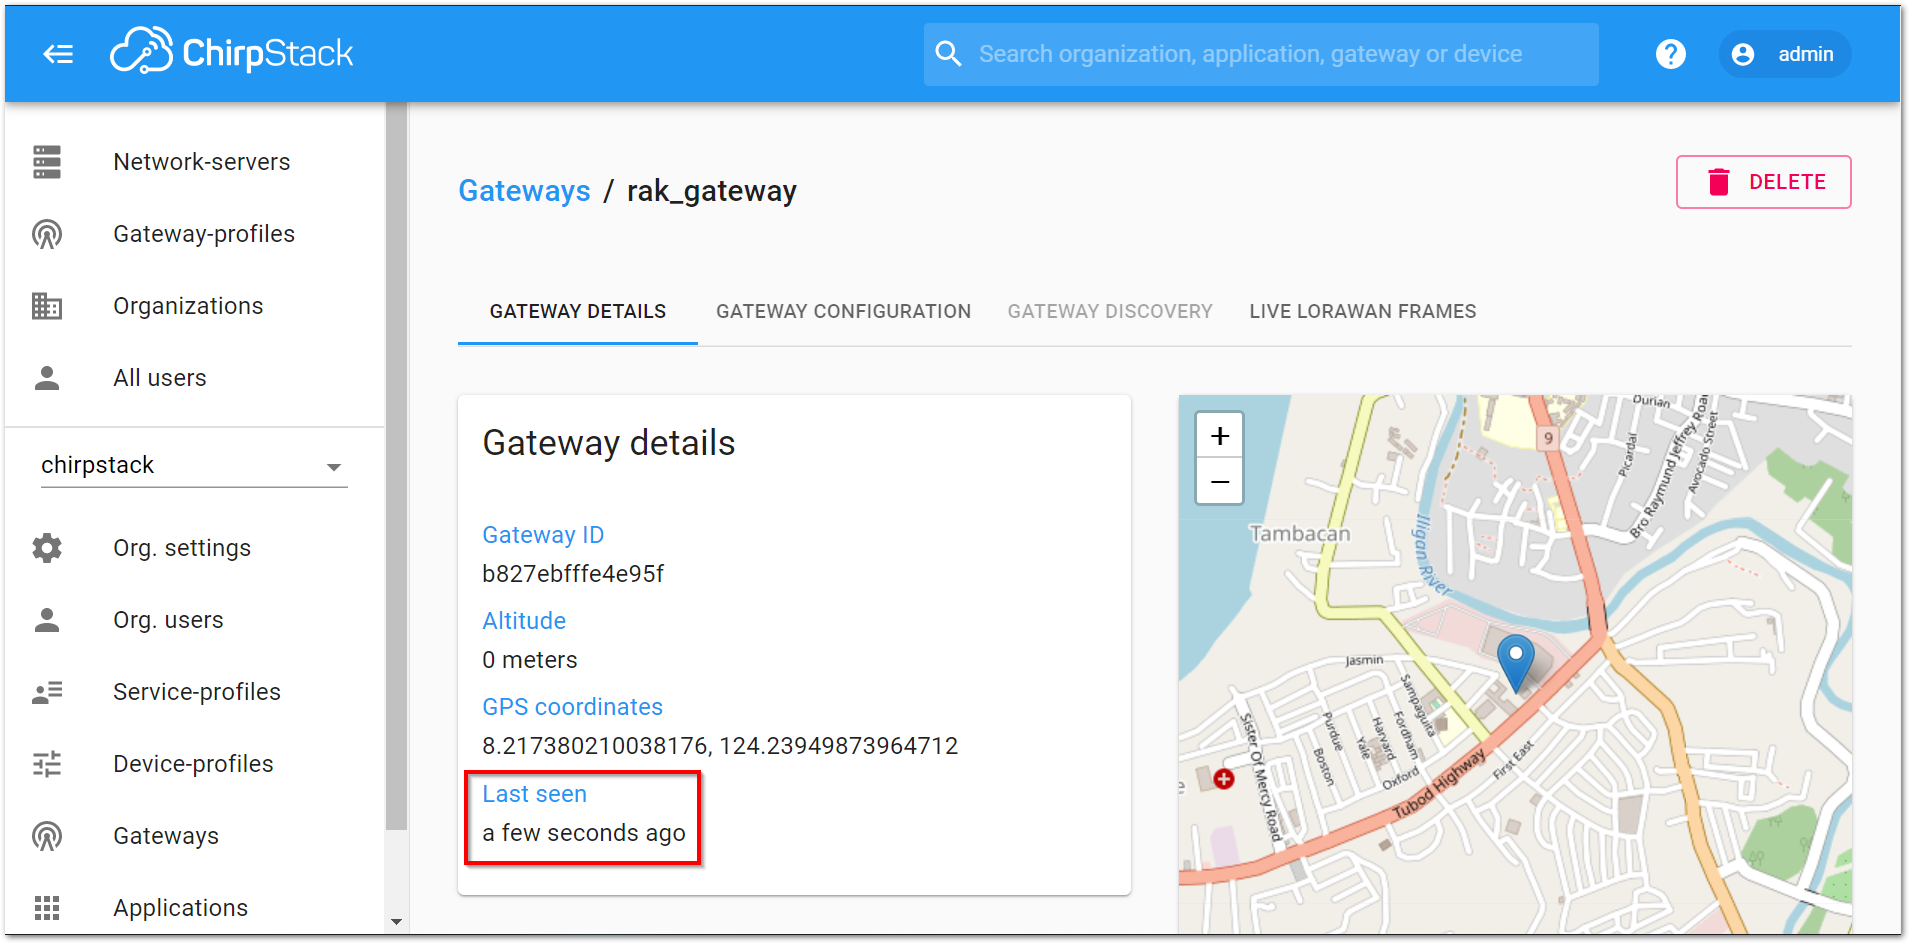 Figure 1: Last Seen Status
2. Using an Independent ChirpStack
You can set up an independent ChirpStack by yourself. Although this process is more complex than deploying a remote ChirpStack, ChirpStack provides a detailed guide on how to accomplish this. You can find the guide on their website.
