RAK612 WisNode Button Quick Start Guide
Prerequisites
- RAK612 WisNode Button
- Micro USB Cable
- Gateway in Range for Testing
- A Windows PC
This device released by RAKWireless is already pre-loaded with its latest firmware upon manufacture. If you want to have your device's firmware burned or upgraded, refer to the section below:
Product Configuration
Interfacing with RAK612 WisNode Button
In order for you to be able to interface with the RAK612 WisNode Button with your Windows Machine, you need to download the RAK Serial Port Tool.
- Using a standard Micro - USB Cable, connect your RAK612 WisNode Button to your computer.
If this is your first time to connect your RAK612 WisNode Button to your computer, it should automatically download the CH340 driver in order for them to communicate properly. Make sure to have an internet access if you want such automatic installation to be successful. If such process fails, re-plug your Micro - USB cord and proceed to the next step.
- Go to your Device Manager by pressing : Windows + R and type
devmgmt.mscor search in Start Menu or right click My Computer or "This PC" and click Manage. Look for Other Devices.
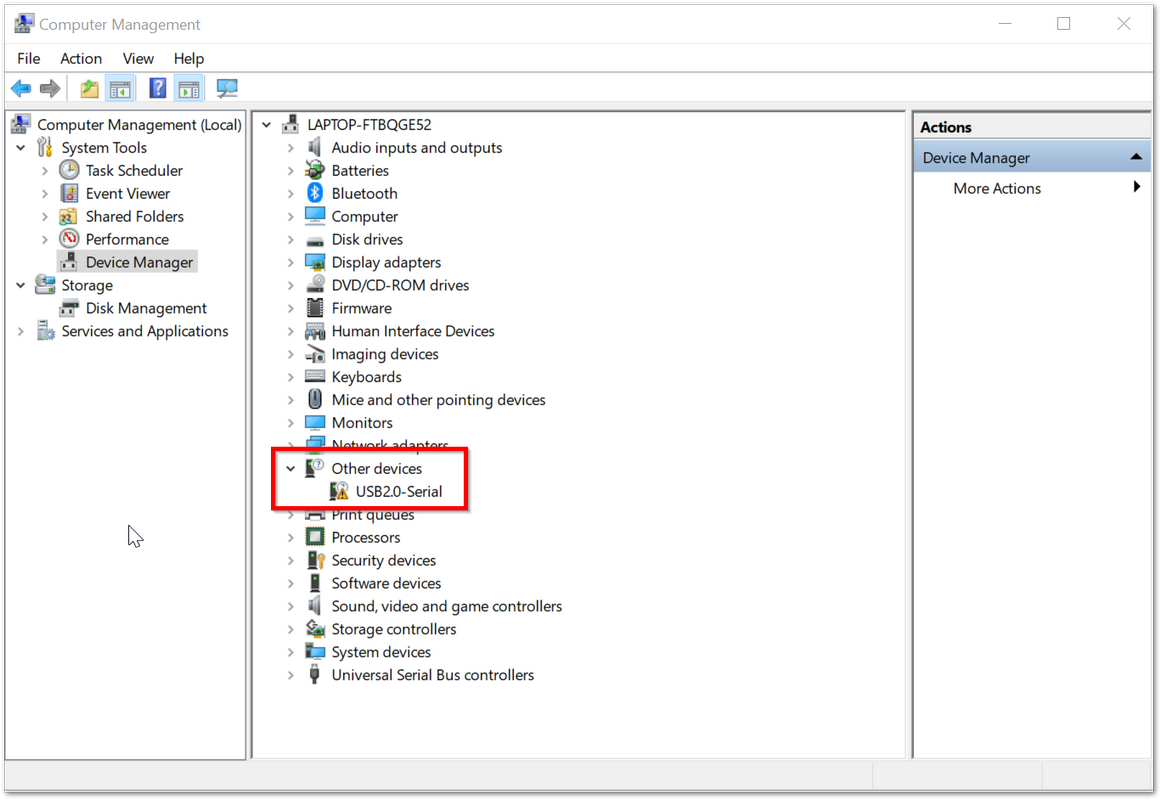 Figure 1: Missing Driver for the RAK612 WisNode Button
- Under Other devices drop down list, an unknown USB2.0-Serial driver must appear. Right click into it and choose Search automatically for updated driver software. Again, before doing so, make sure to have an internet access or it will fail.
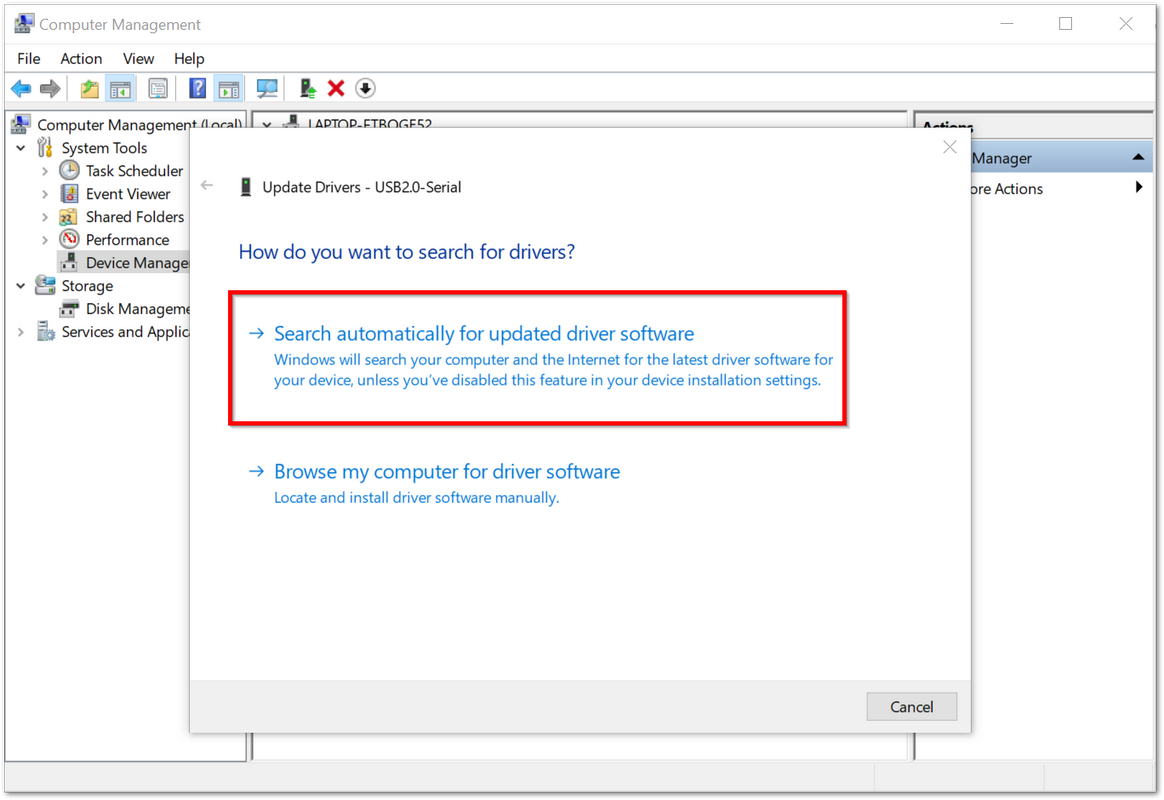 Figure 1: Automatic Driver Installation via Internet
- Wait for it to automatically download and install the missing driver. Once installation is done, USB-SERIAL CH340 must appear in the Ports (COM & LPT) drop down list. Take note of the COM Port associated with the driver as it will be used in the succeeding steps. For this sample process, the COM Port used by the USB-SERIAL CH340 driver is COM4.
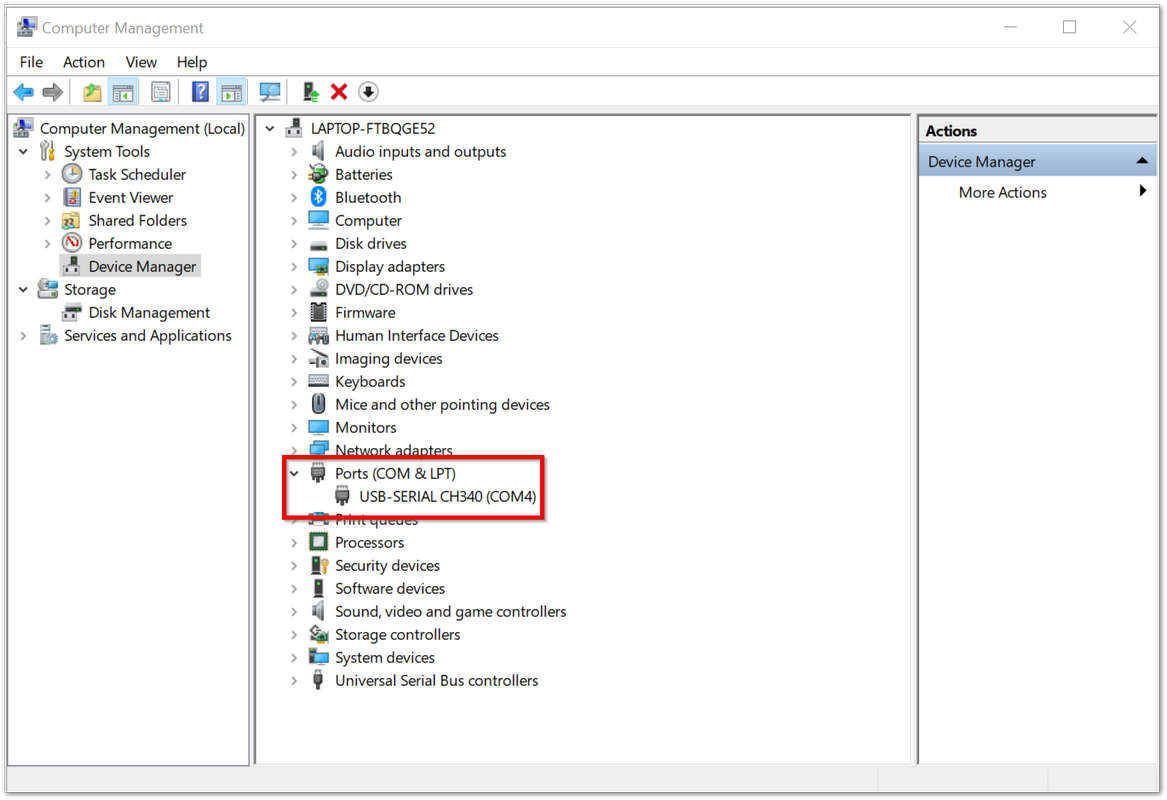 Figure 1: USB-SERIAL CH340 Driver Successfully Installed
In case the driver is still not installed upon doing the previous steps, kindly download the driver manually.
-
Test if your RAK612 WisNode Button can now communicate with the RAK Serial Port Tool. Connect with the RAK Serial Port Tool using the parameters listed below and click "Open".
- COM: Choose the COMPort associated with the USB-SERIAL CH340 from the previous step. For this tutorial, the COM Port is COM4.
- Baud Rate: 115200 bps
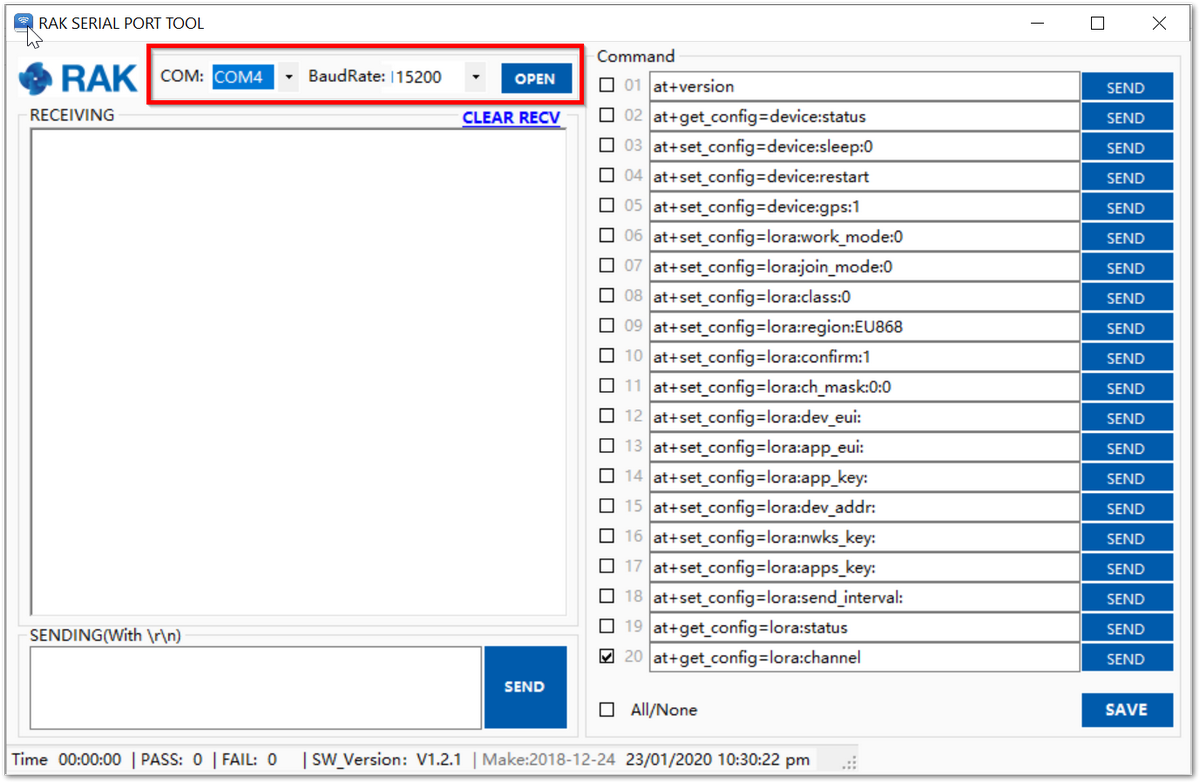 Figure 1: Connecting to the RAK Serial Port Tool
- To verify connectivity, try sending AT Commands. In the RAK Serial Port Tool, there are built-in AT Commands within it at the right side. Try sending the code below to check the firmware version of your RAK612 WisNode Button. If connection is successful, in the monitor panel at the left, the firmware version should appear same with the image shown below:
at+version
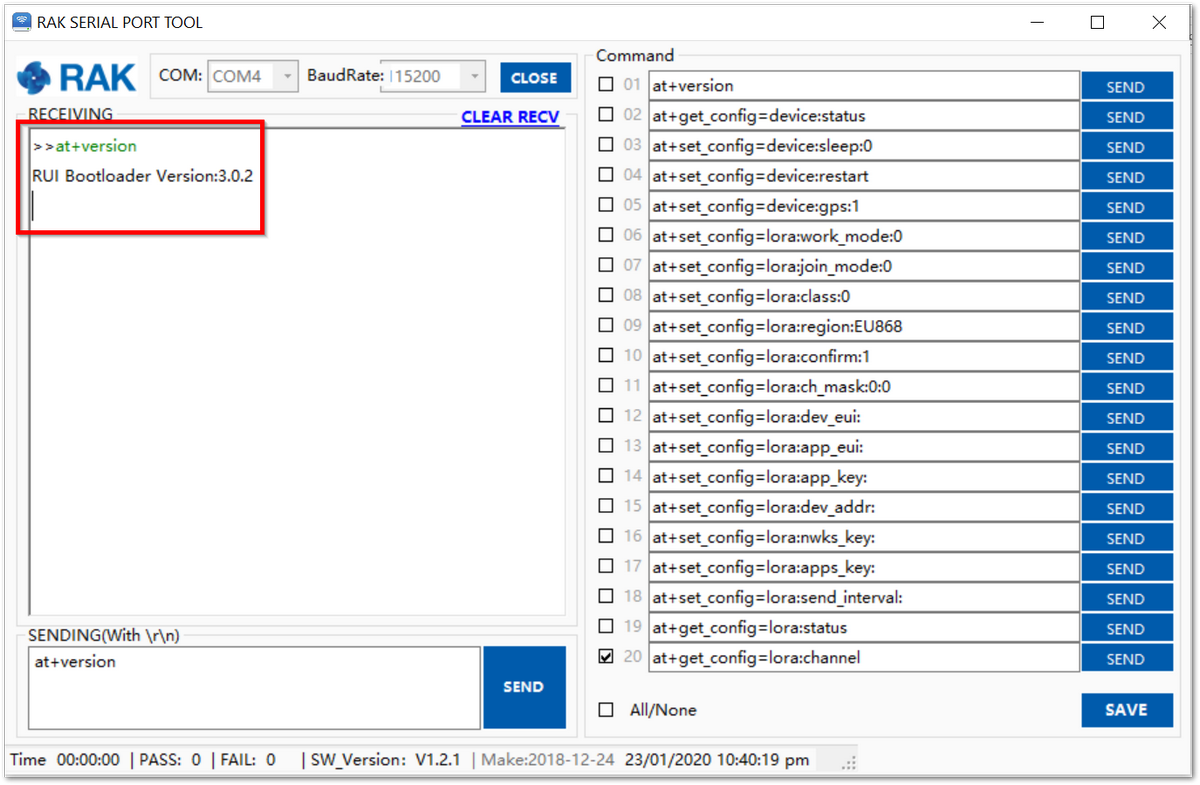 Figure 1: AT Command Sample Serial Communication Test
Connecting to The Things Network (TTN)
In this section, you will be connecting the RAK612 WisNode Button to The Things Network (TTN). If you don't have an account yet, head on to The Things Network and create one. Once done, Log in to your account and go to the console which can be found here:
 Figure 1: The Things Network Home Page
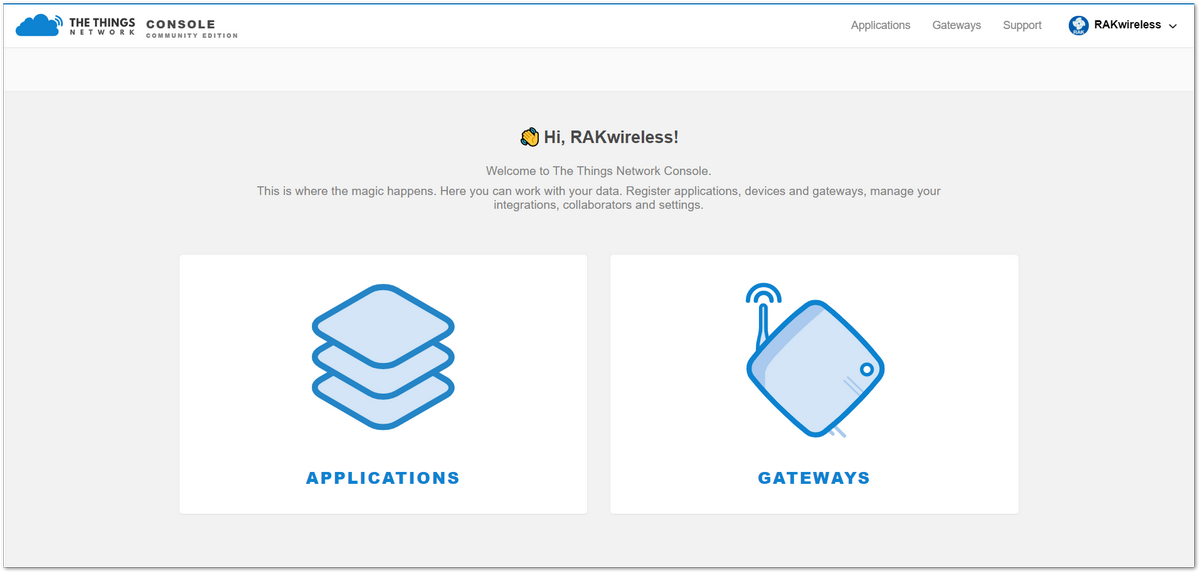 Figure 1: TTN Console Page
- Choose "APPLICATIONS"
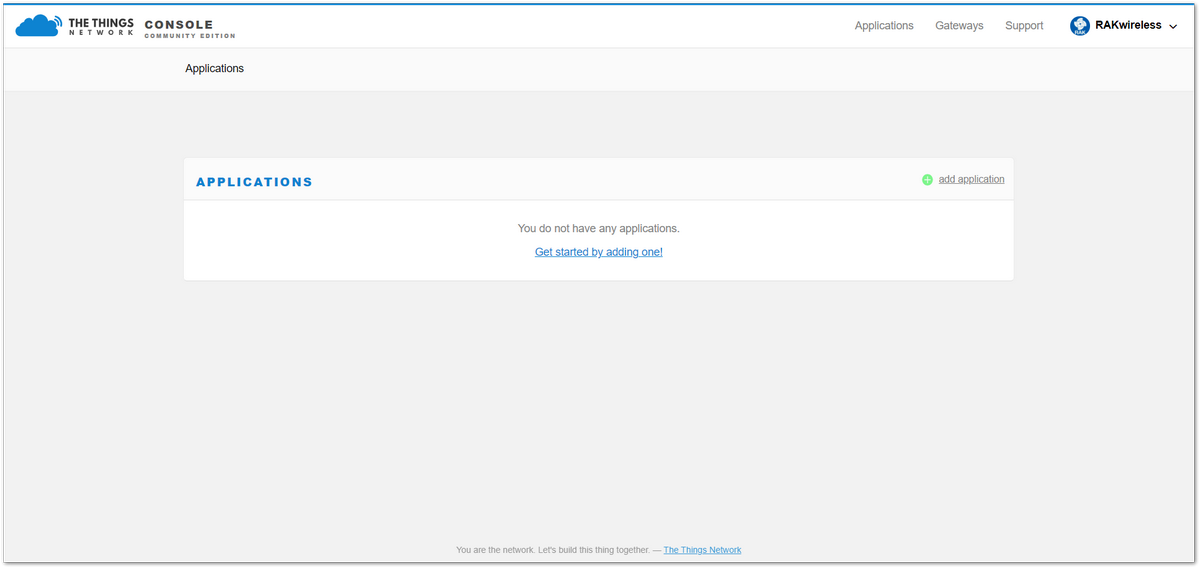 Figure 1: Application Page
Adding An Application
- Click the "add application" button
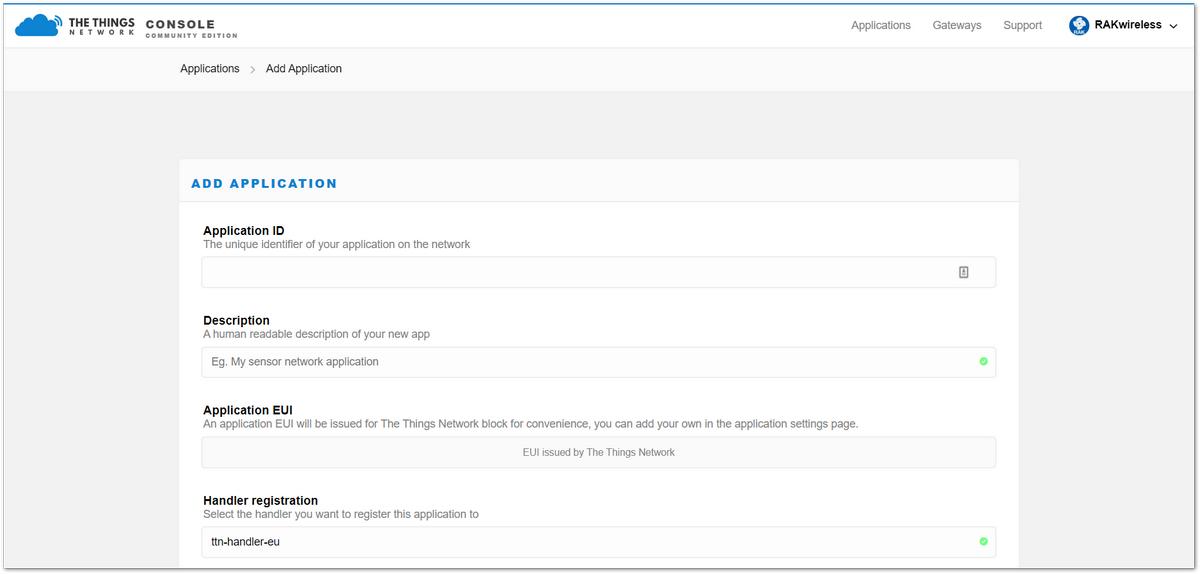 Figure 1: Adding an Application
Here are the things that you should take note in adding an application:
- Application ID - this will be the unique id of your application in the Network. Please note that characters should be in lower case, no spaces are allowed.
- Description - this is a short and concise human readable description of your application.
- Application EUI - this will be generated automatically by The Things Network for convenience.
- Handler Registration - handler you want to register this application to.
- After you fill in the necessary information, press the "Add application" button at the bottom of this page. If you see the following page, this means that you have successfully registered your application.
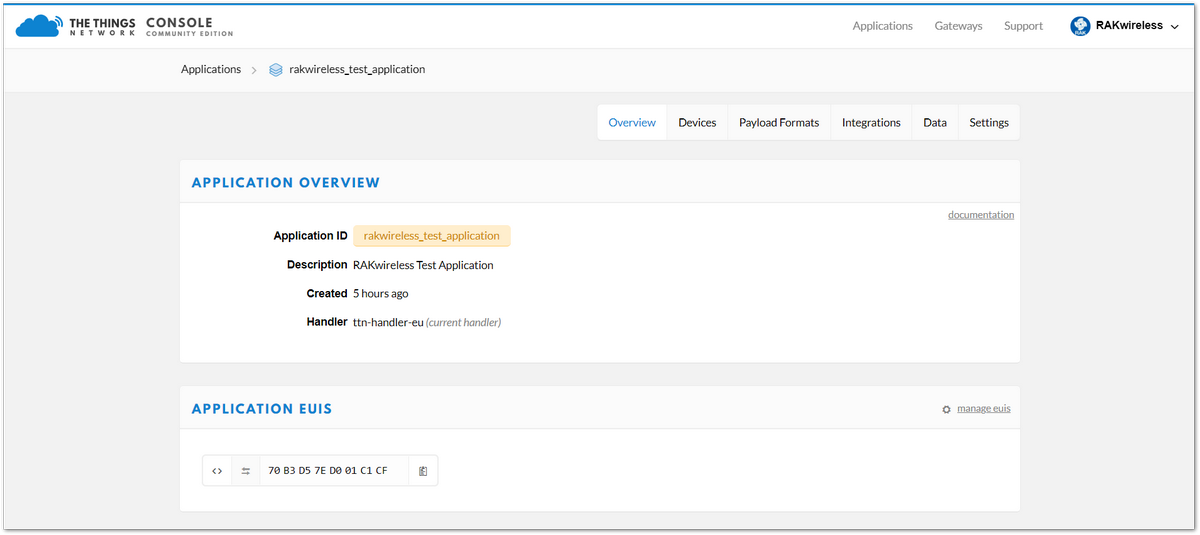 Figure 1: Adding an Application
Register Device
- Scroll down until you see the Devices section, or you can also click the "Devices" button at the top:
 Figure 1: Device Section
- Click "Register device"
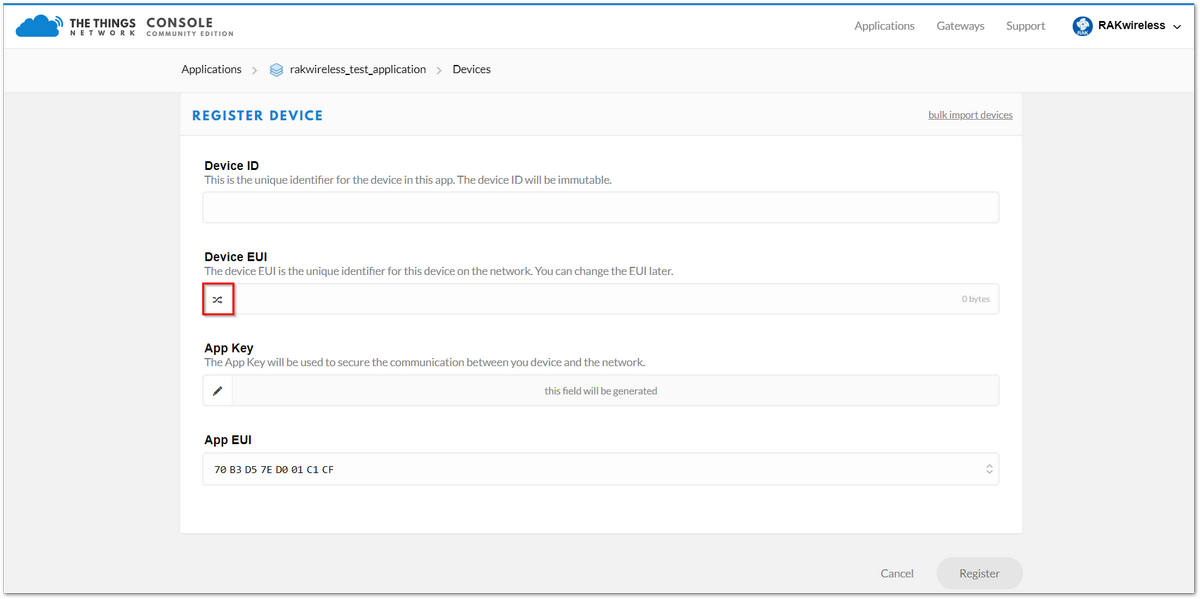 Figure 1: Add your Device
Here are the things that you should take note in registering your device:
- Device ID - this is the unique identifier for your RAK612 WisNode Button in your application. You need to enter this manually.
- Device EUI - this is the unique identifier for your device in the network. You can change it later, if you want.
Click the following icon and the Device EUI will be automatically generated. The App Key should be in auto generation mode by default.
- Lastly, click the Register button. Now, your device is registered under the corresponding application.
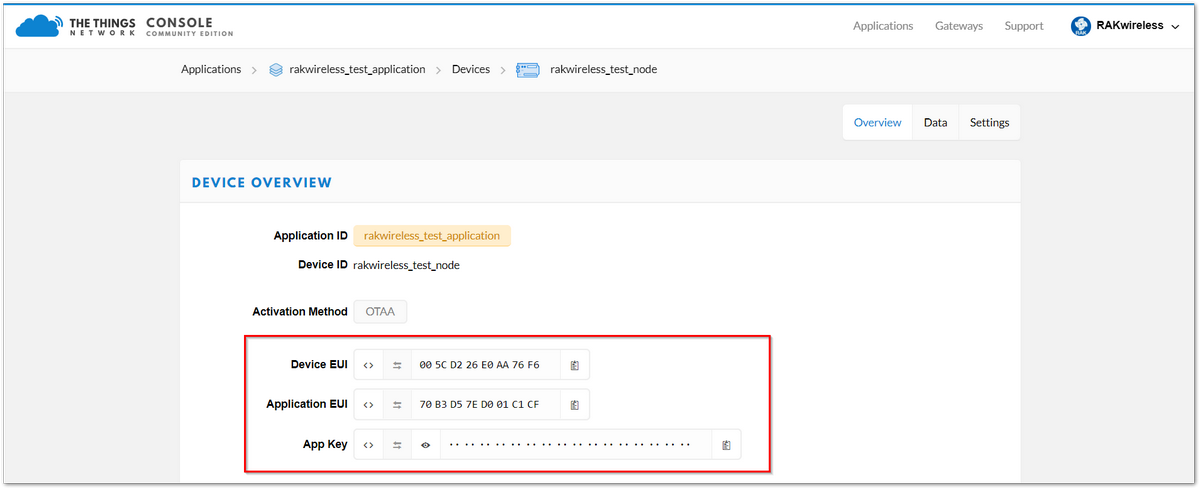 Figure 1: Device Overview
Depending on which authentication method you want to use ,proceed to either the OTAA mode or ABP mode section.
OTAA Mode
According to The Things Network, Over-the-Air Activation (OTAA) is the preferred and most secure way to connect with The Things Network. Thus, it is chosen as the default method when registering a device.
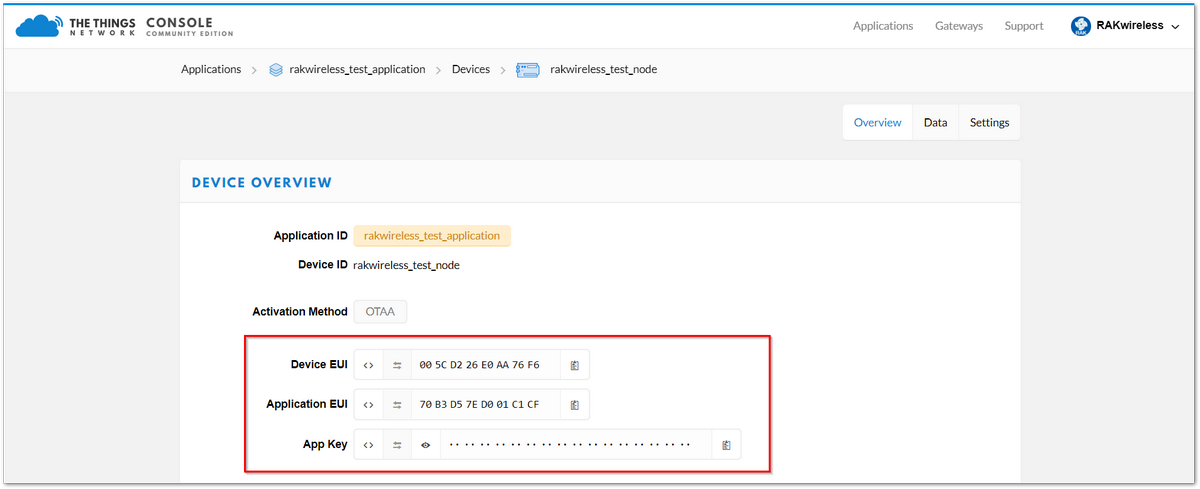 Figure 1: Activation Method - OTAA
As an example, let's join in OTAA mode and EU868 frequency.
- Set the LoRa join mode to OTAA as follows:
at+set_config=join_mode:1
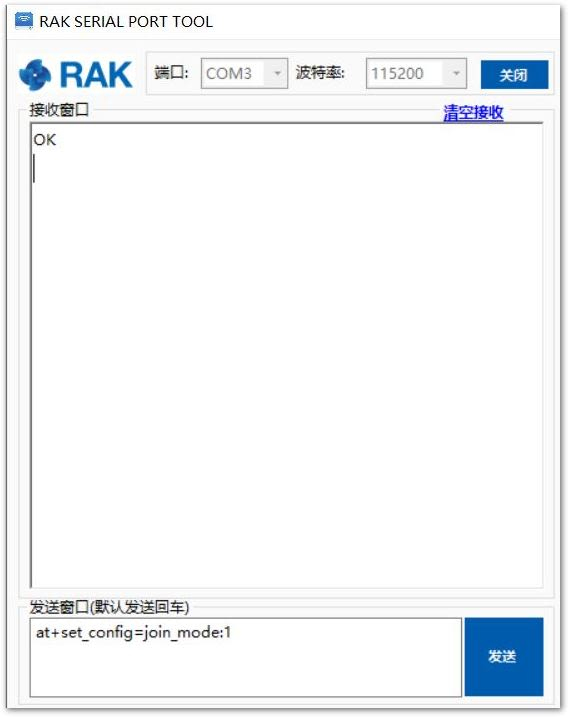 Figure 1: AT Command for OTAA LoRa Join Mode via RAK Serial Port Tool
- Set the frequency/region to EU868:
at+band=EU868
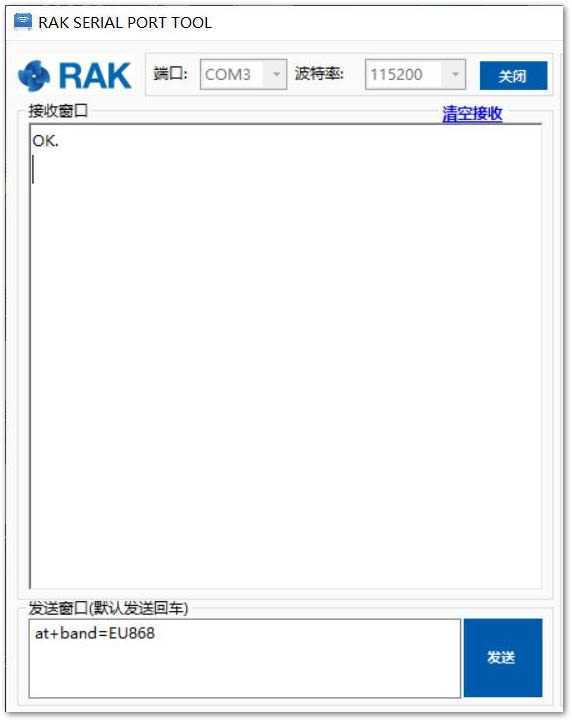 Figure 1: AT Command for OTAA LoRa Region/Frequency via RAK Serial Port Tool
- Set the Device EUI.
at+set_config=dev_eui:XXXX
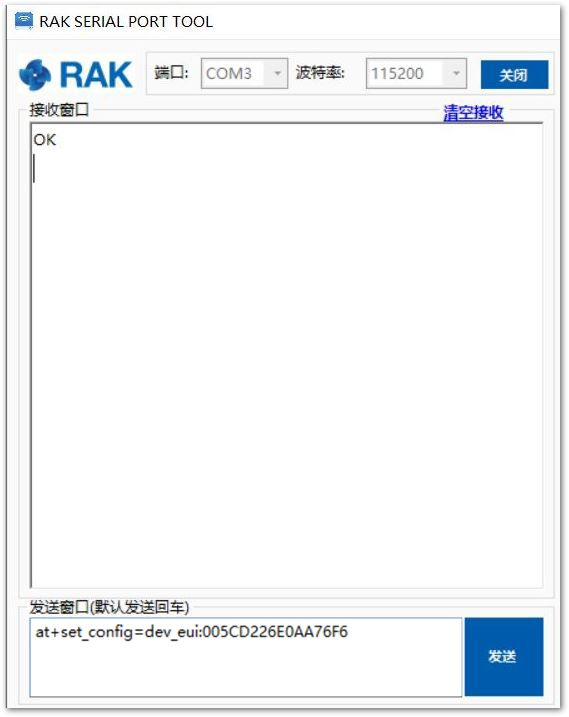 Figure 1: AT Command for OTAA LoRa Device EUI via RAK Serial Port Tool
- Set the Application EUI:
at+set_config=app_eui:XXXX
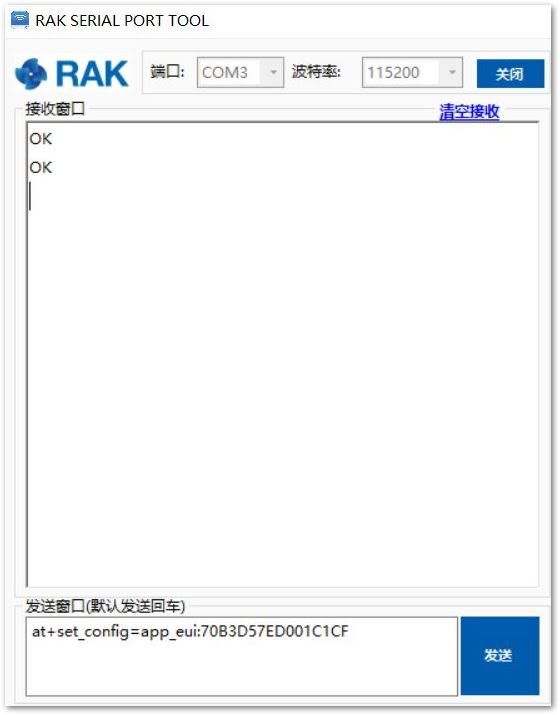 Figure 1: AT Command for OTAA LoRa Application EUI via RAK Serial Port Tool
- Set the Application Key:
at+set_config=app_key:XXXX
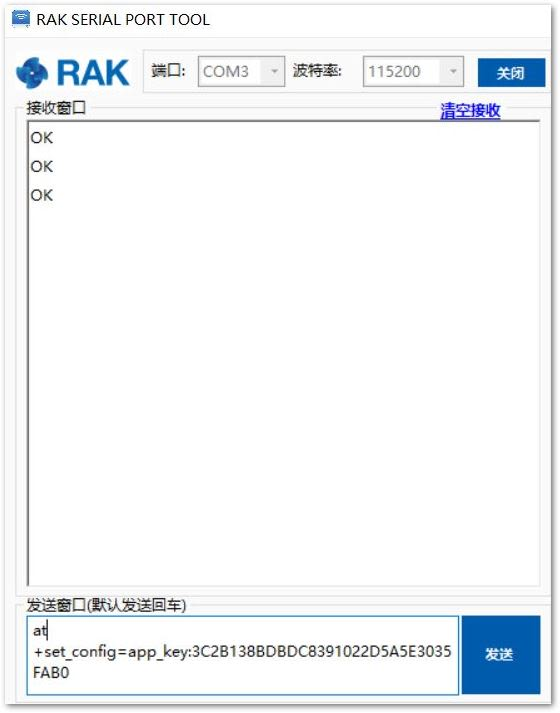 Figure 1: AT Command for OTAA LoRa Application Key via RAK Serial Port Tool
After configuring all the parameters, you need to reset your RAK612 WisNode Button for saving parameters.
- After resetting RAK612 WisNode Button, join in OTAA mode:
at+join=otaa
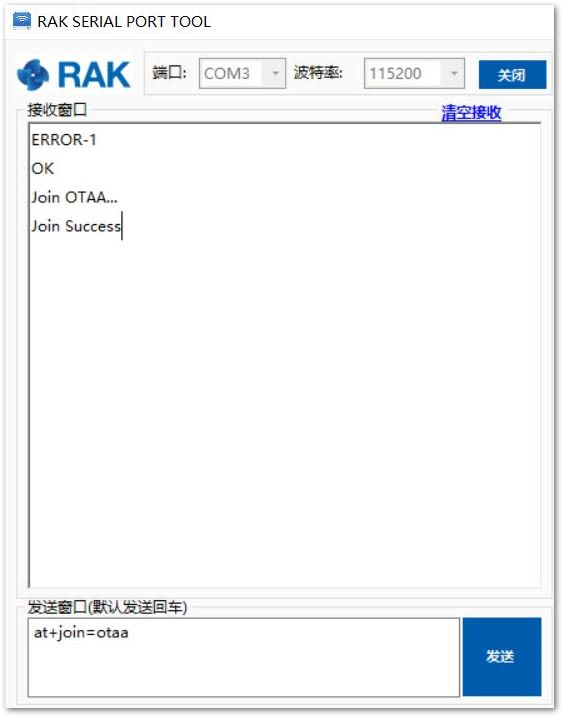 Figure 1: AT Command for OTAA LoRa Join via RAK Serial Port Tool
- Joined successfully! Now, let’s try to send a data to TTN. Try pressing any key on your RAK612 WisNode Button. You should see any data printed in the RAK Serial Port Tool whenever you press any key same as with the image below:
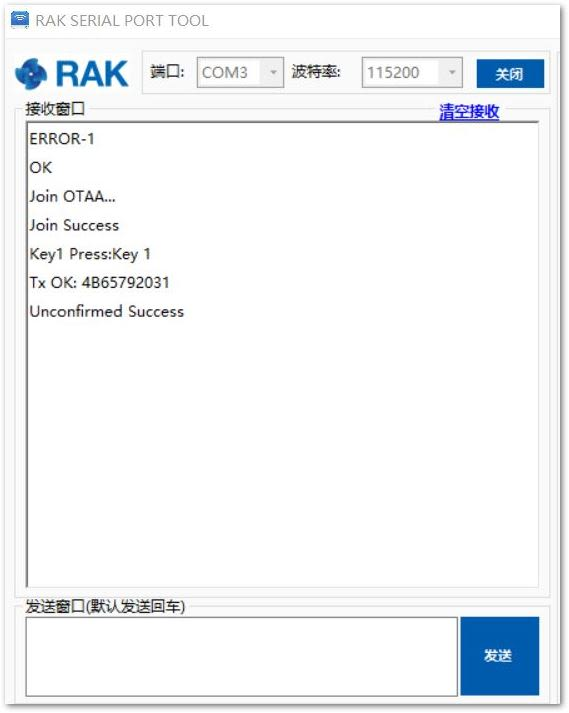 Figure 1: Testing the RAK612 WisNode Button in RAK Serial Port Tool
- You can then see the data sent from RAK612 WisNode Button in TTN website as follows:
 Figure 1: OTAA Test Sample Data Sent Viewed in The Things Network
ABP Mode
Follow these steps, if you want to join with The Things Network in Activation By Personalisation (ABP) Mode.
- First, switch the activation method to ABP as shown in Figure 23.
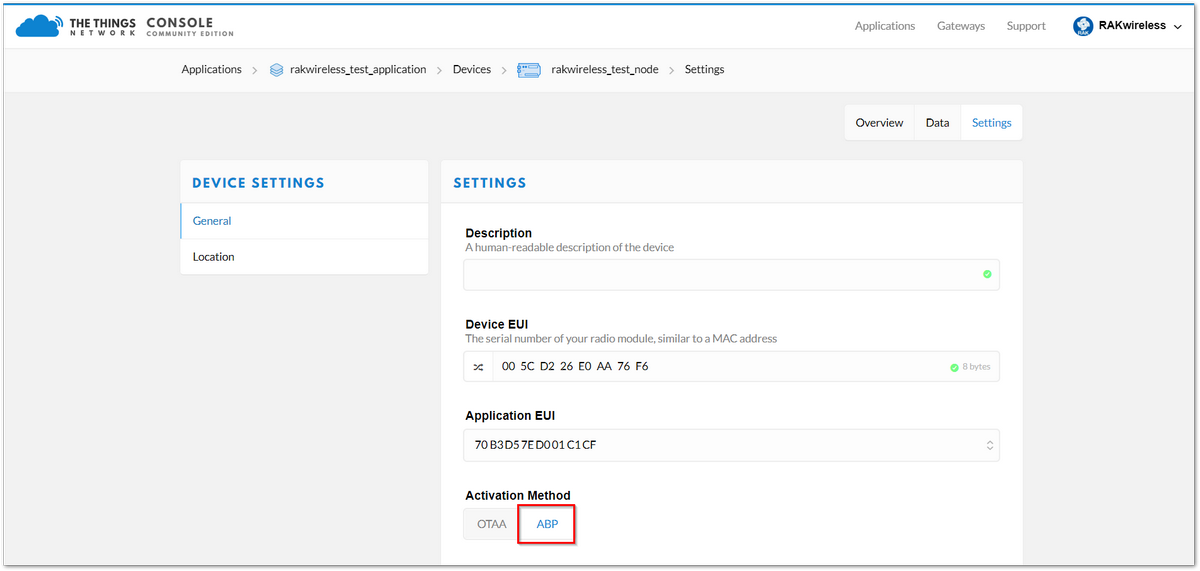 Figure 1: APB Activation in The Things Network
- These three parameters will be used on RAK612 WisNode Button: Device Address, Network Session Key and App Session Key.
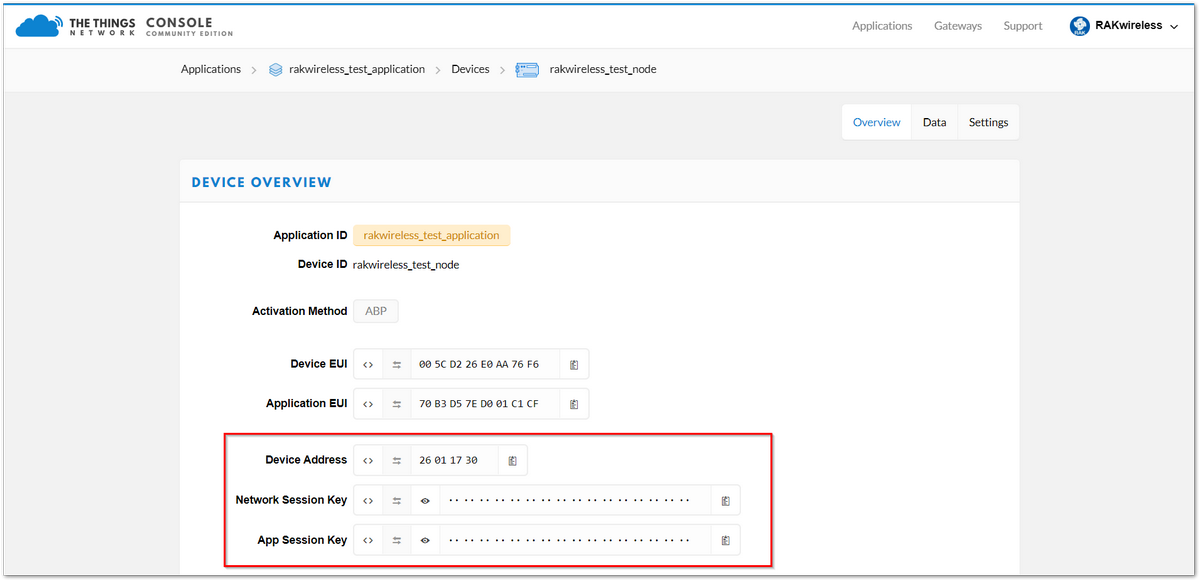 Figure 1: ABP Parameters in The Things Network
As an example, let's join in ABP mode and EU868 frequency.
- If the join mode is not in ABP Mode, just set the LoRa join mode to ABP as follows:
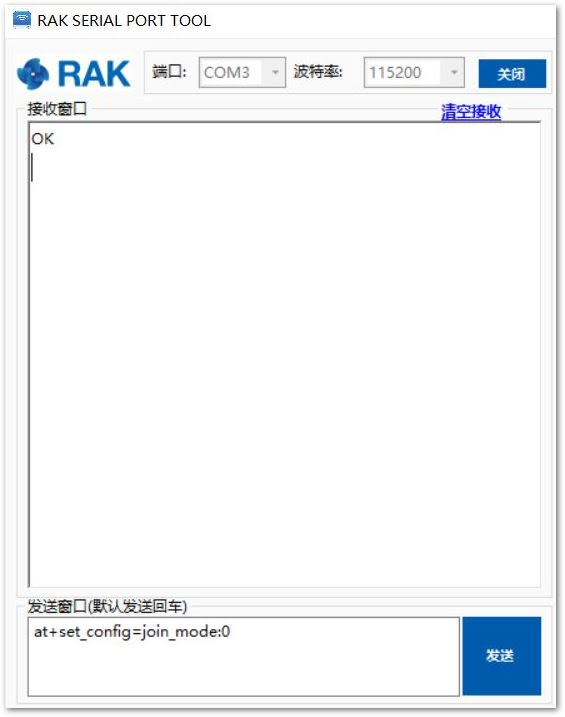 Figure 1: AT Command for ABP LoRa Join Mode via RAK Serial Port Tool
- Set the frequency/region to EU868:
at+band=EU868
 Figure 1: AT Command for ABP LoRa Region/Frequency via RAK Serial Port Tool
- Set the Device Address:
at+set_config=dev_addr:XXXX
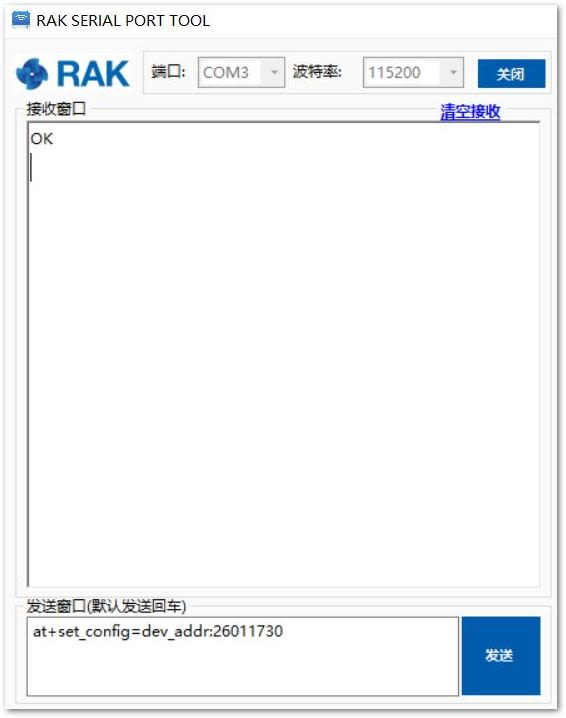 Figure 1: AT Command for ABP LoRa Device Address via RAK Serial Port Tool
- Set the Network Session Key:
at+set_config=nwks_key:XXXX
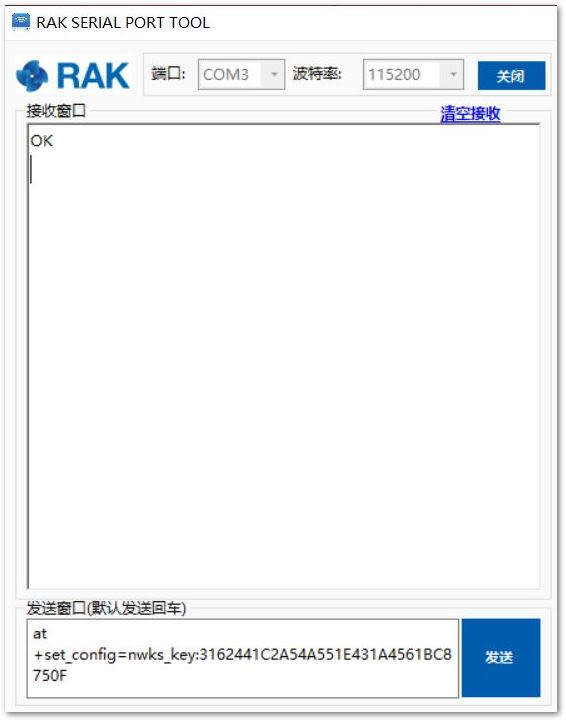 Figure 1: AT Command for ABP LoRa Network Session Key via RAK Serial Port Tool
- Set the Application Session Key:
at+set_config=apps_key:XXXX
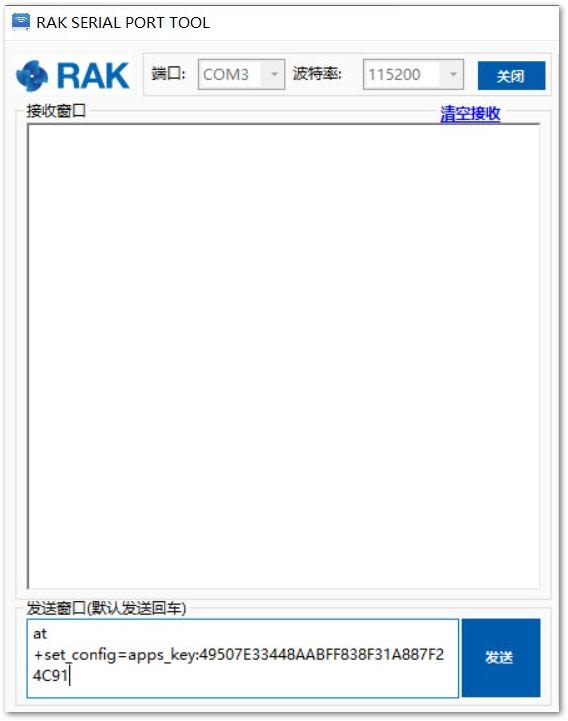 Figure 1: AT Command for ABP LoRa Application Session Key via RAK Serial Port Tool
After configuring all parameters, you need to reset the RAK612 WisNode Button for saving parameters.
- After resetting your RAK612 WisNode Button, join in ABP mode:
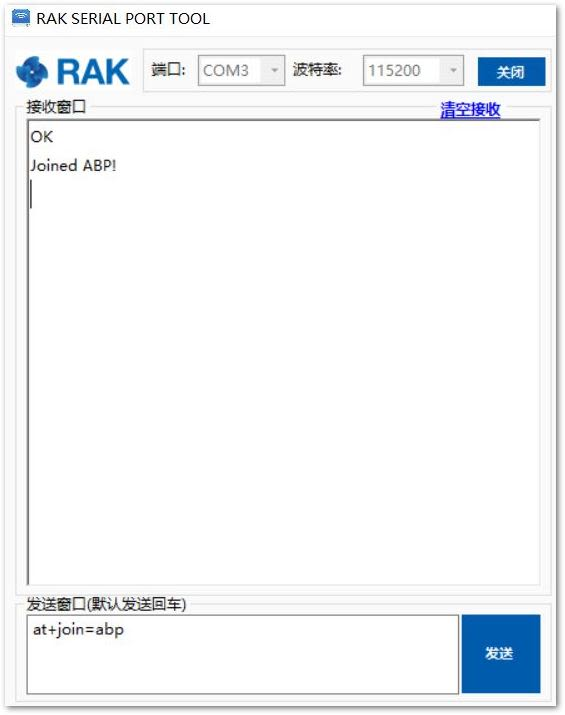 Figure 1: AT Command for ABP LoRa Join via RAK Serial Port Tool
- Joined successfully! Now, let’s try to send a data to TTN. Try pressing any key on your RAK612 WisNode Button. You should see any data printed in the RAK Serial Port Tool whenever you press any key same as with the image below:
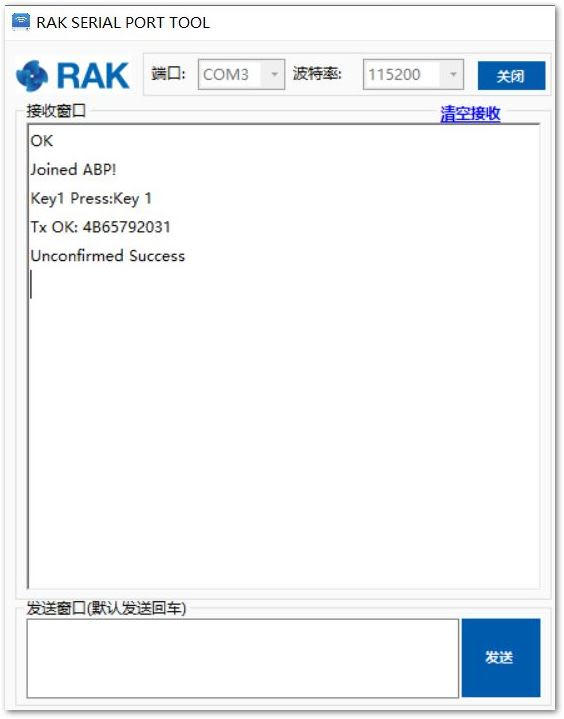 Figure 1: Testing the RAK612 WisNode Button in RAK Serial Port Tool
- You can then see the data sent from RAK612 WisNode Button in TTN website as follows:
 Figure 1: ABP Test Sample Data Sent Viewed in The Things Network
Key Functions Customizing
This section walks through the step-by-step discussion on how to customize each key functions of the RAK612 WisNode Button. For you to enable the message customization, you must at least have the 2.0.2.1.2 firmware version.
If your RAK612 WisNode Button's firmware version is lower than the least version set, please download the latest RAK612 WisNode Button Firmware and proceed to the Upgrading the Firmware section.
Defaults
Listed below are the default messages send by the RAK612 WisNode Button whenever each key is pressed:
| Key | Message |
|---|---|
| Key 1 | "Key 1" |
| Key 2 | "Key 2" |
| Key 3 | "Key 3" |
| Key 4 | "Key 4" |
Customizing
To fully customize the messages sent by the RAK612 WisNode Button in each key pressed, we must configure it using the RAK Serial Port Tool with the AT Command below:
at+key_config=<key>,<frame_port>,<message>
- key - The key you want to customize in your RAK612 WisNode Button
- frame_port - the port you want to send the customized message
- message - your customized message in replacement of your default message in every key pressed.
-
Connect your RAK612 WisNode Button to your Windows PC using a Micro USB cable. Follow the steps in the Interfacing with RAK612 WisNode Button section if this is the first time you are connecting the device into your WIndows PC.
-
Using the same RAK Serial Port Tool used in the previous step and the AT Command syntax, let us try configuring your RAK612 WisNode Button keys. As an example, try sending the AT Command same with the image shown below:
at+key_config=2,37,Hello Mark Angelo!
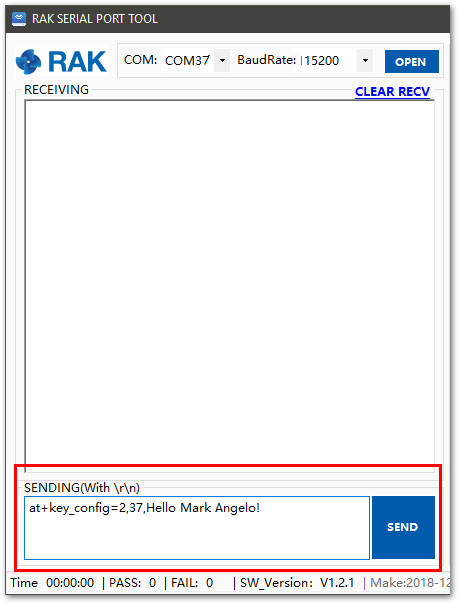 Figure 1: Configuring Each button
- You should be able to change the message to "Hello Mark Angelo!" whenever you press the key "Key 2". Congratulations, you have just customized your RAK612 WisNode Button keys. Go try the other keys with your desired message!
Miscellaneous
Upgrading the Firmware
Please use the the latest firmware for the RAK612 WisNode Button in order to avoid potential problems. Installing the firmware for is done as follows:
-
Download the RAK LoRaButton Upgrade tool and the latest firmware for the RAK612 WisNode Button.
-
Connect your RAK612 WisNode Button to your PC using the micro-USB cable.
-
Press and Hold Key 1 and Key 2 simultaneously for more than 5 seconds until you see all of the LEDs blink very fast. This will set the LPWAN Button in boot mode.
-
Open the RAK LPWAN Button Upgrade tool.
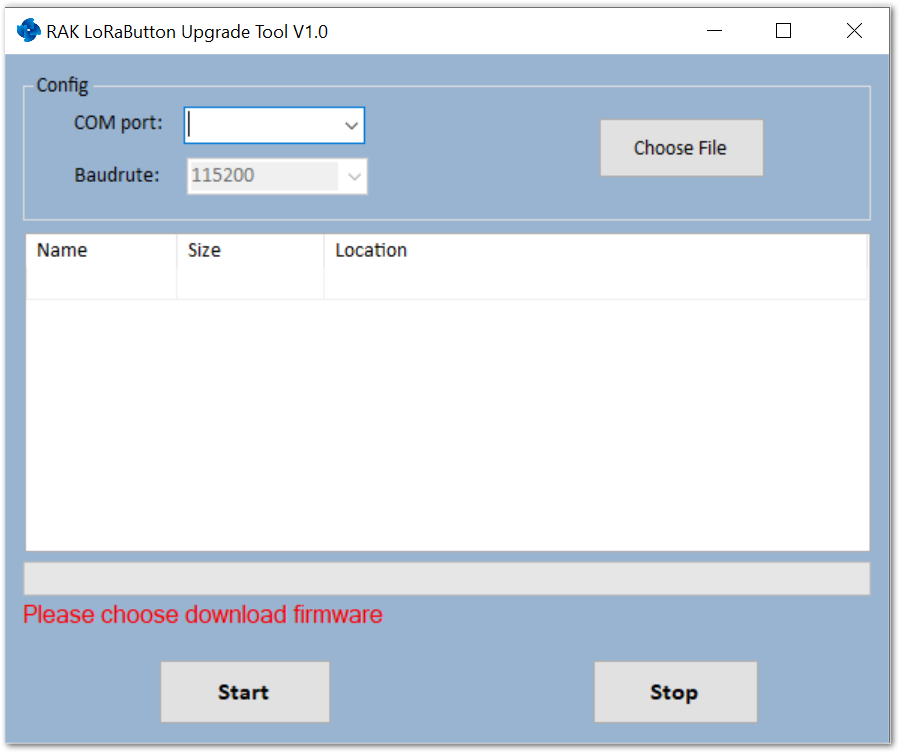 Figure 1: RAK LPWAN Button Upgrade Tool
- Choose the appropriate port number in the COM Port field. Open Interfacing with RAK612 WisNode Button section to learn on how to choose the appropriate COM Port used. For this demonstration, the COM Port is "COM3".
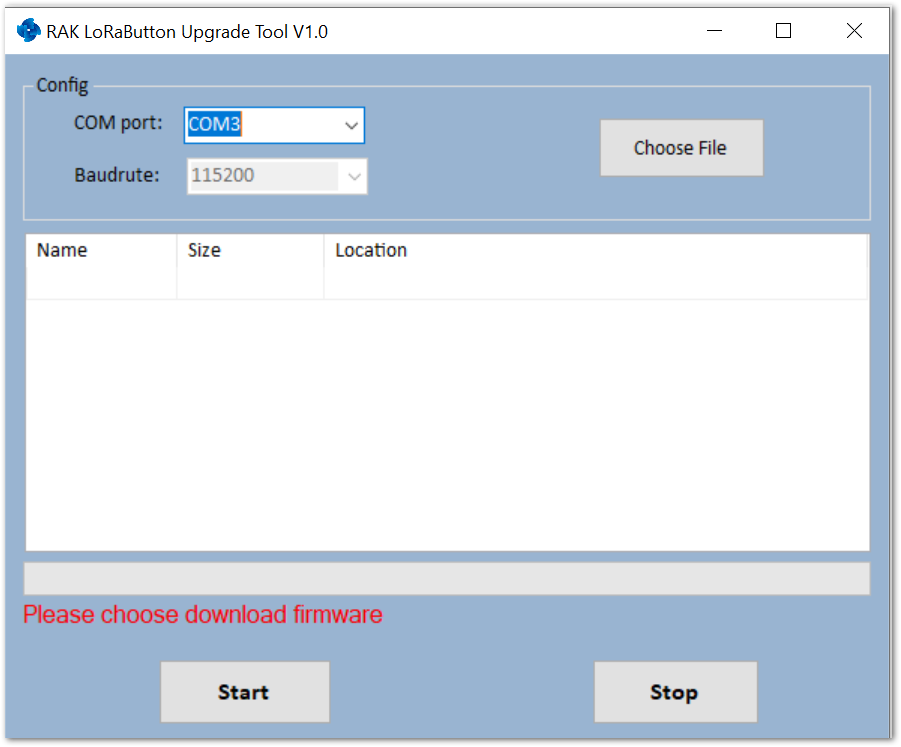 Figure 1: Select the Appropriate COM Port
- Click Choose File and navigate to the directory where you have saved the firmware, that you have just downloaded.
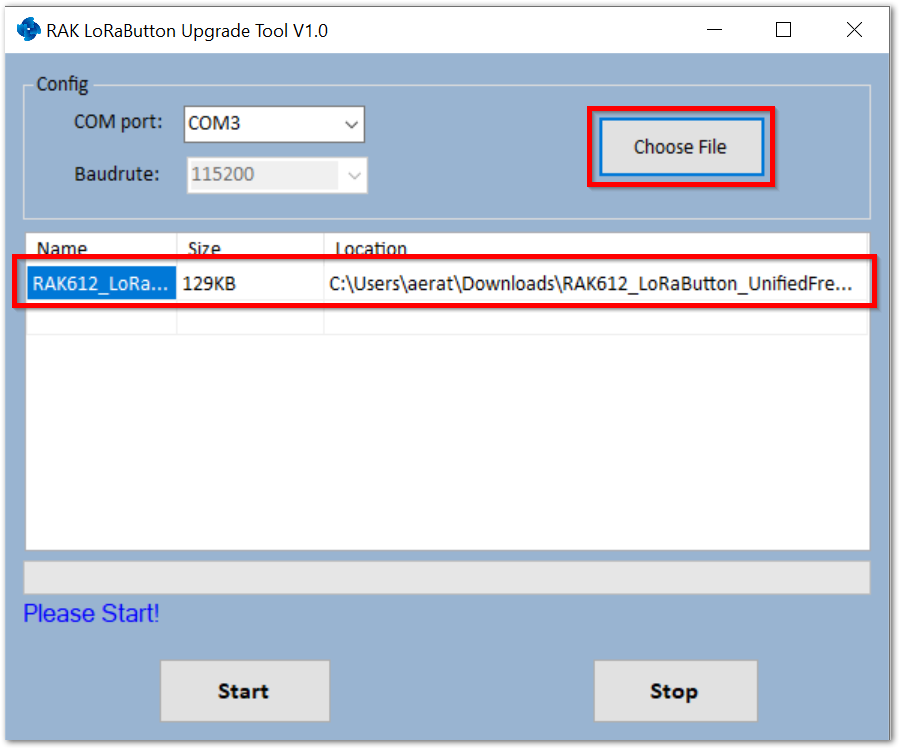 Figure 1: Choosing the Firmware
- Click the Start Button and wait for a couple of minutes.
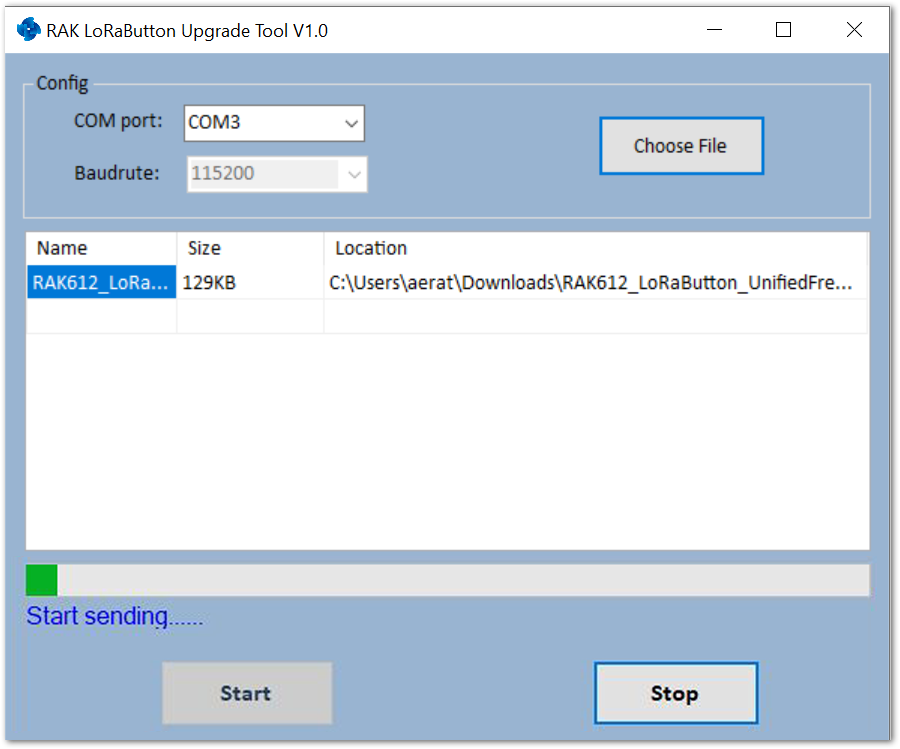 Figure 1: Start Flashing the Firmware
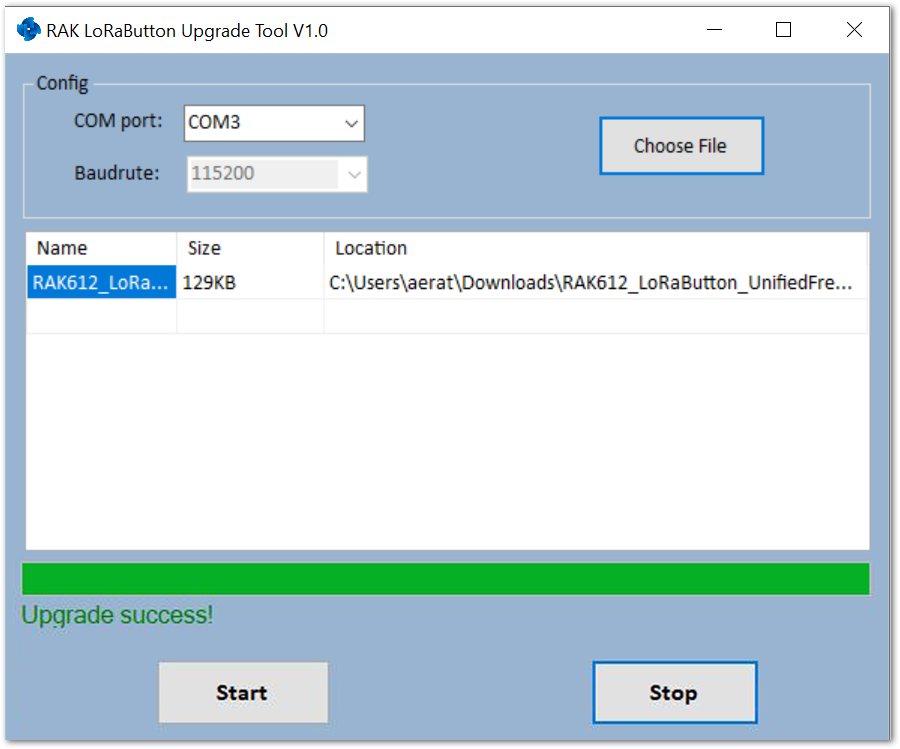 Figure 1: Upgrade Firmware Success
Testing the Installed Firmware
- In order for you to check if you have successfully installed the firmware on your RAK612 WisNode Button, open the RAK Serial Port tool on your PC.
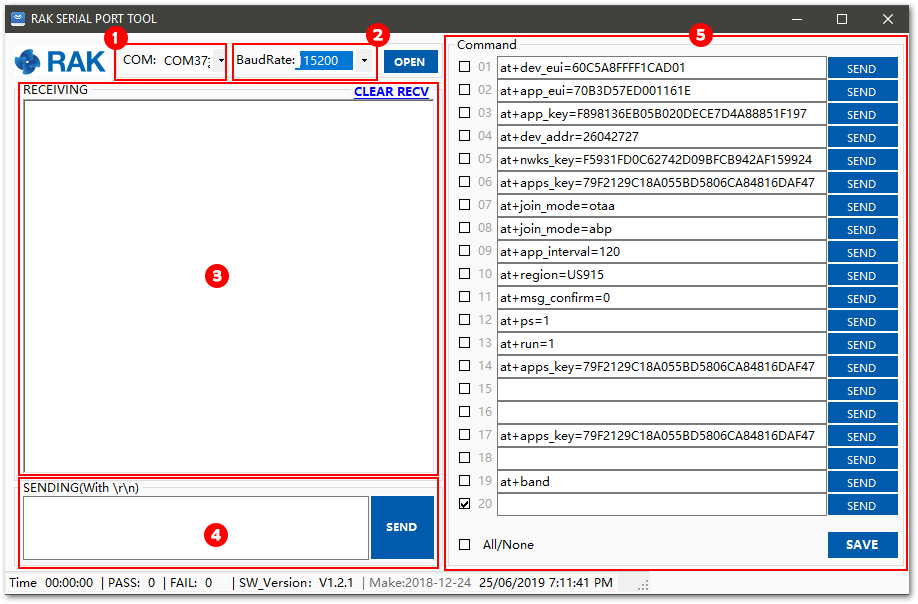 Figure 1: RAK Serial Port Tool
- COM Port - this is where you choose the COM Port of your RAK612 WisNode Button.
- Baudrate - the rate, at which information is transferred. (Use 115200 for RAK612 WisNode Button).
- Receiving - this is where all the responses of your AT Commands will be displayed.
- Sending - this is where you input your AT Command.
- Command - this is where you save all of your AT Commands for quick reuse. This is very useful in the AT Commands for RAK612 WisNode Button section.
- Choose the appropriate COM Port and Baud Rate for your RAK612 WisNode Button then click the Open button to open the serial port.
- Hold any key of the RAK612 WisNode Button for more than 5 seconds and then you will be able to see the following information:
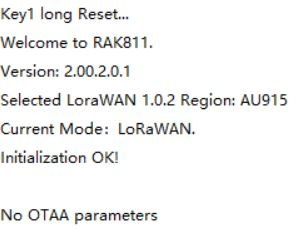 Figure 1: RAK612 WisNode Button Upgraded Firmware