BLE UART
Prerequisite
Before compiling the RUI3 BLE Examples, you must check the procedures described in the Prerequisite section of RAK4631-R QuickStart Guide. You will also need to install and configure the Arduino IDE, as described in the RAK4631-R Software section.
Loading the Example
The project is available on Arduino IDE RAK WisBlock RUI Examples.
- Launch Arduino IDE then go to: File -> Examples -> RAK WisBlock RUI examples -> Example -> BLE_Uart.
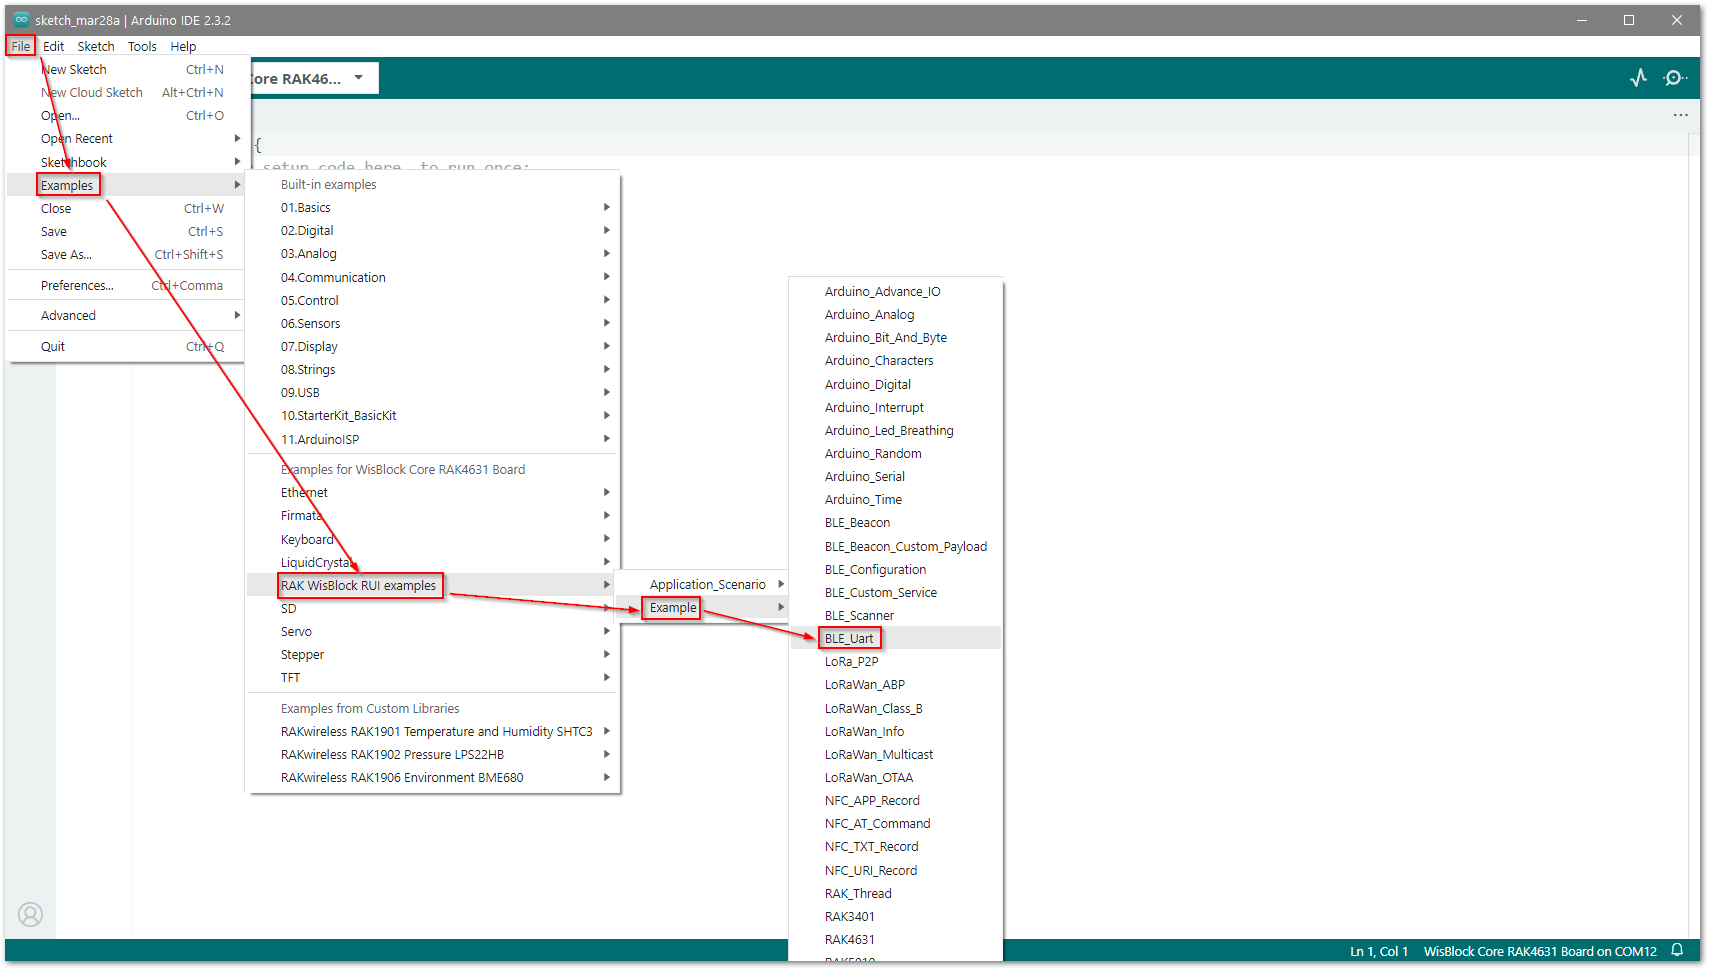 Figure 1: RAK WisBlock RUI BLE UART example
- Once the example code is open, you can now select the correct serial port, as shown in Figure 2.
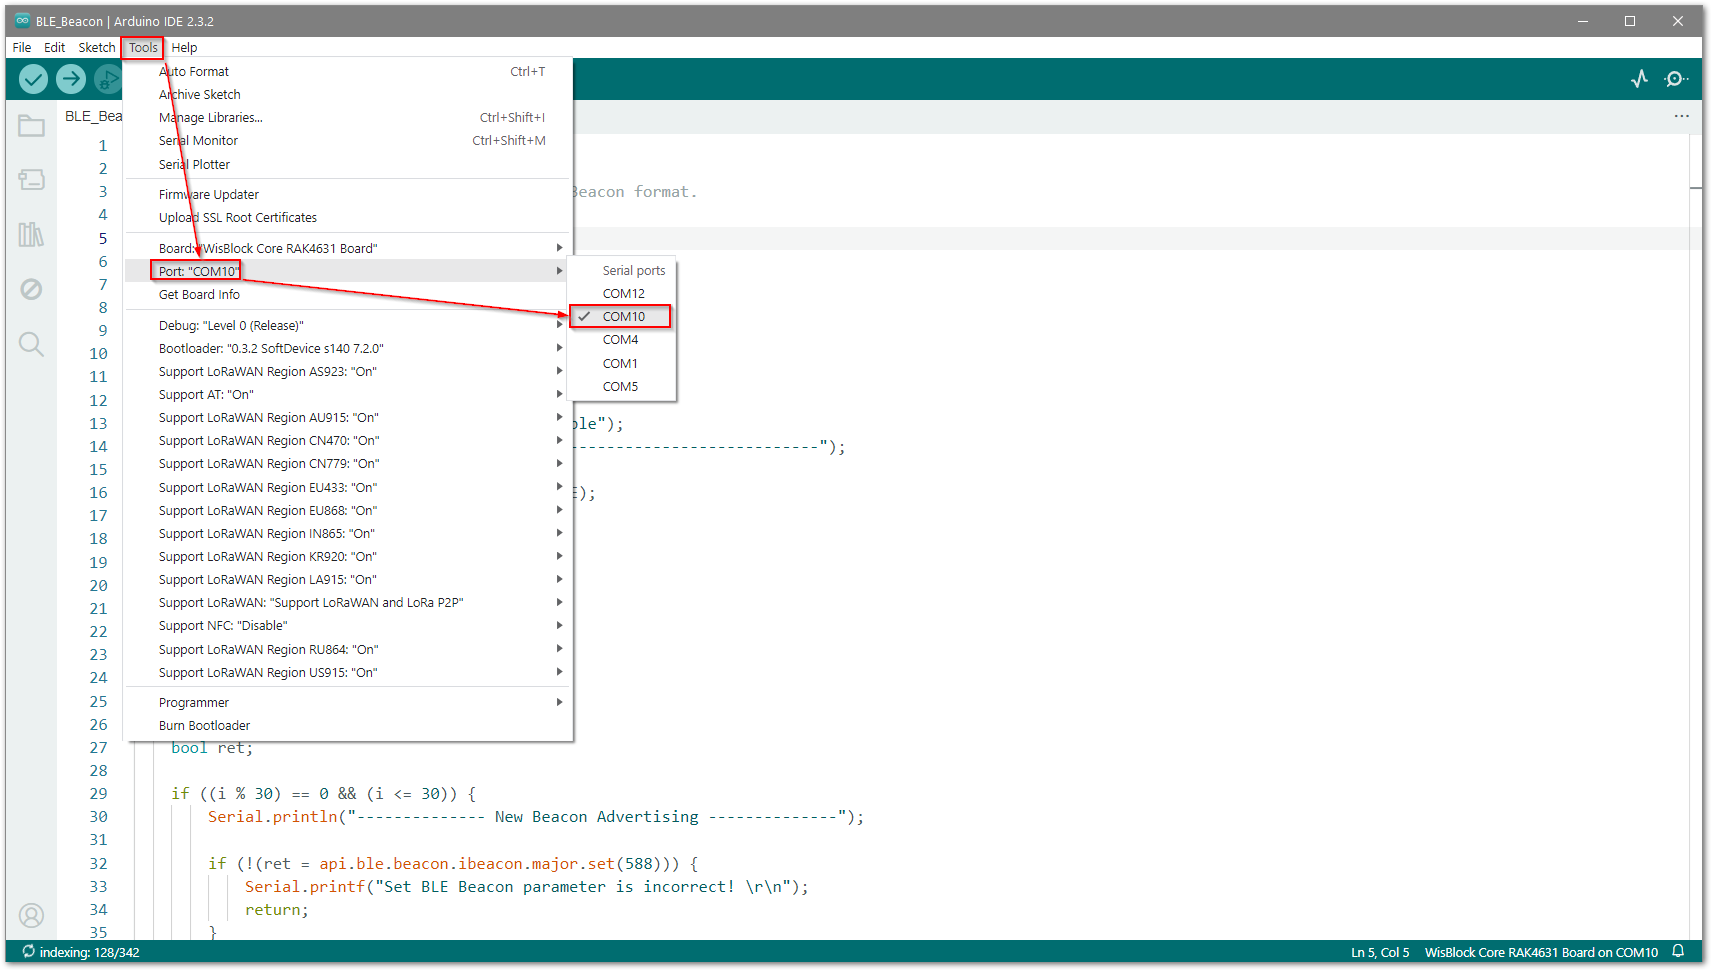 Figure 1: Selecting the correct serial port
- The last step is to upload the code by clicking the highlighted Upload icon.
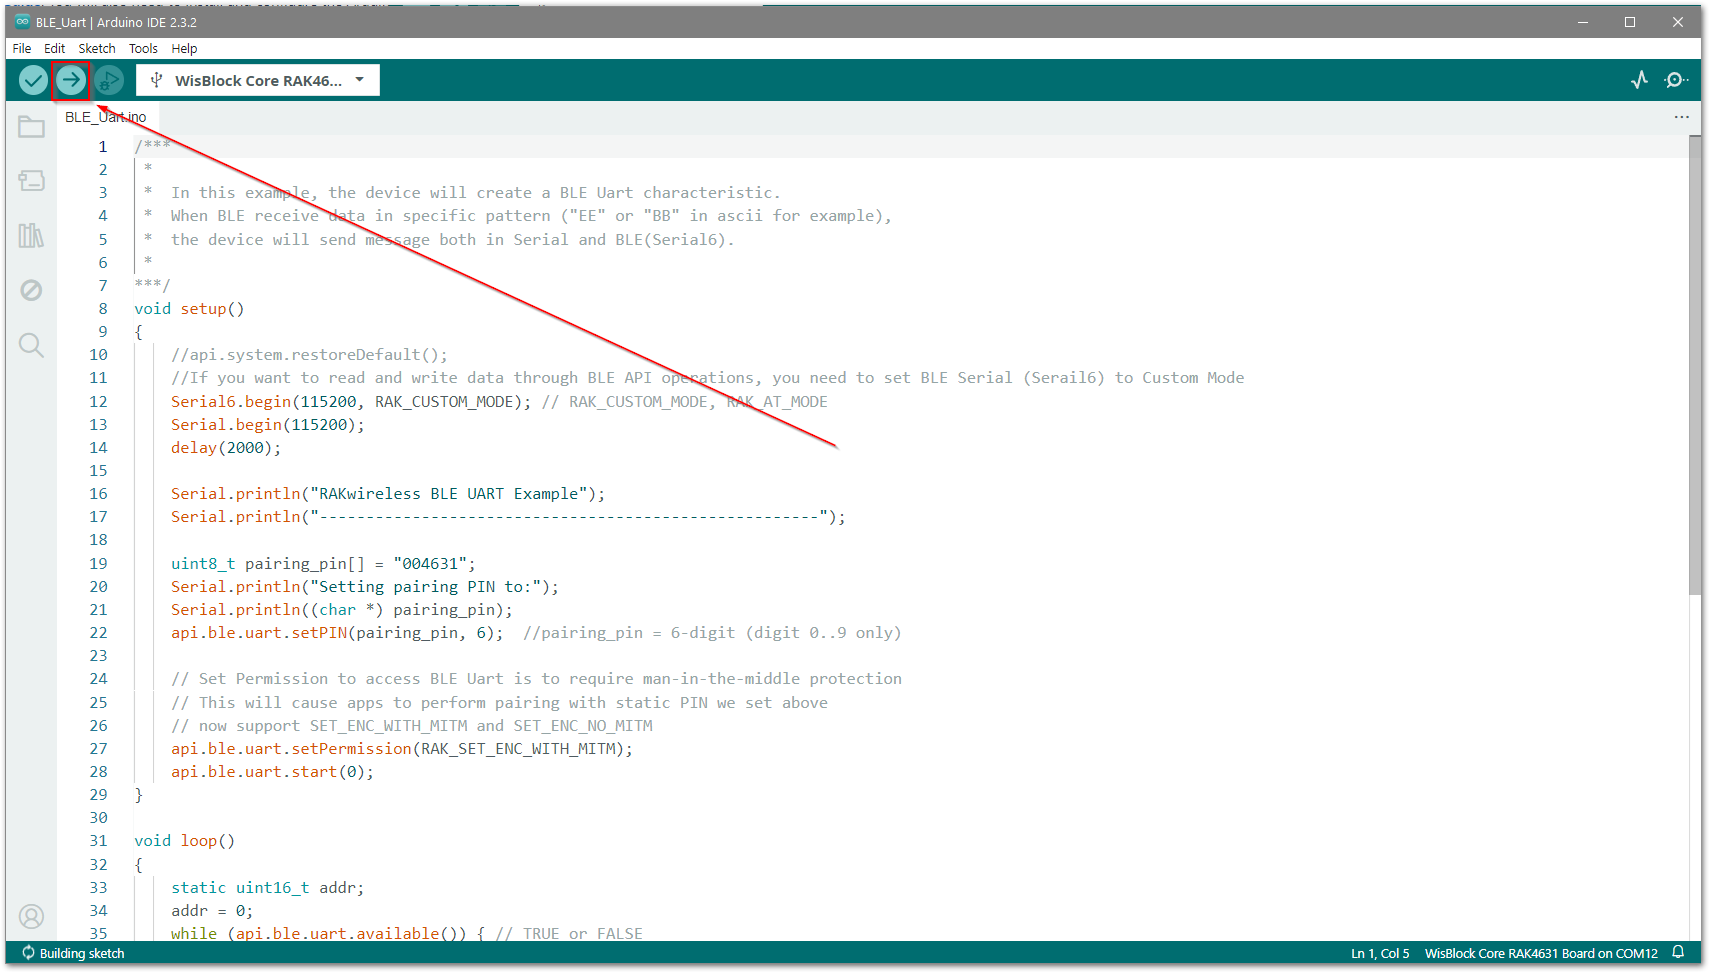 Figure 1: Uploading the BLE_Configuration example code
Example Details
The Bluetooth UART service allows another BLE device to exchange any data with the RAK4630-R, in small chunks. The Bluetooth UART service emulates the behavior of a physical UART.
BLE API Used in the Project
Set the Serial6 Custom Mode
If you want to read and write data through BLE API operations, you need to set the BLE Serial (Serial6) to RAK_CUSTOM_MODE.
Serial6.begin(115200, RAK_CUSTOM_MODE);
Set the Pairing PIN
This API is used to set the passkey for BLE pairing.
api.ble.uart.setPIN(pairing_pin, 6); //pairing_pin = 6-digit (digit 0..9 only)
Start BLE UART Service
This API is used to start the BLE UART Service.
api.ble.uart.start();
Set Permission
This API is used to require man-in-the-middle protection for UART service.
api.ble.uart.setPermission(RAK_SET_ENC_WITH_MITM);
Testing the BLE_UART Project
To test the BLE_UART project, download and install the nRF Toolbox for Bluetooth LE application.
- Open nRF Toolbox, scroll up and click the Utils services (UART) icon, as shown in Figure 4.
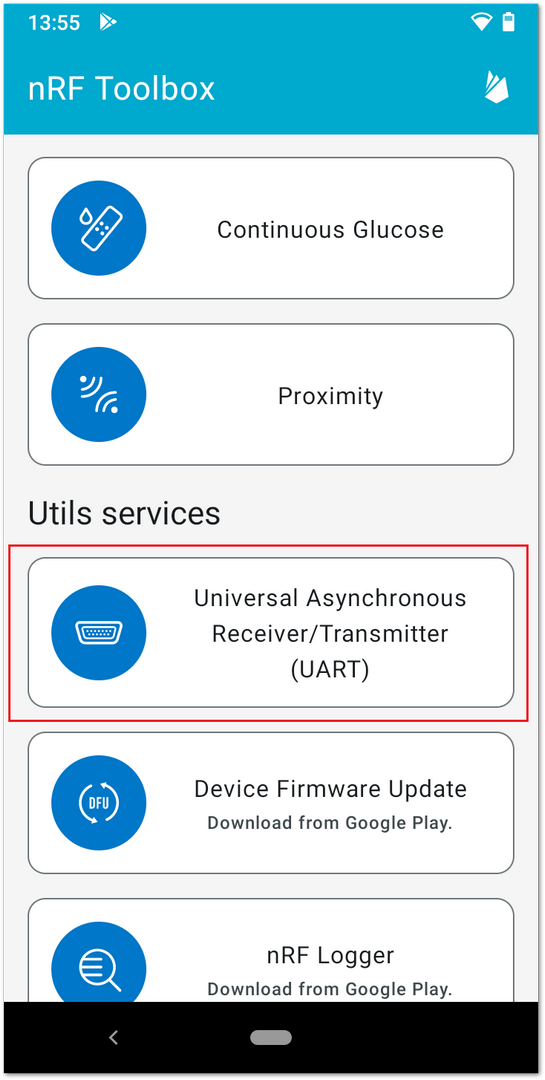 Figure 1: Toolbox UART service
- On the Scanner window, click on the
RAK.XXXXXXdevice icon.
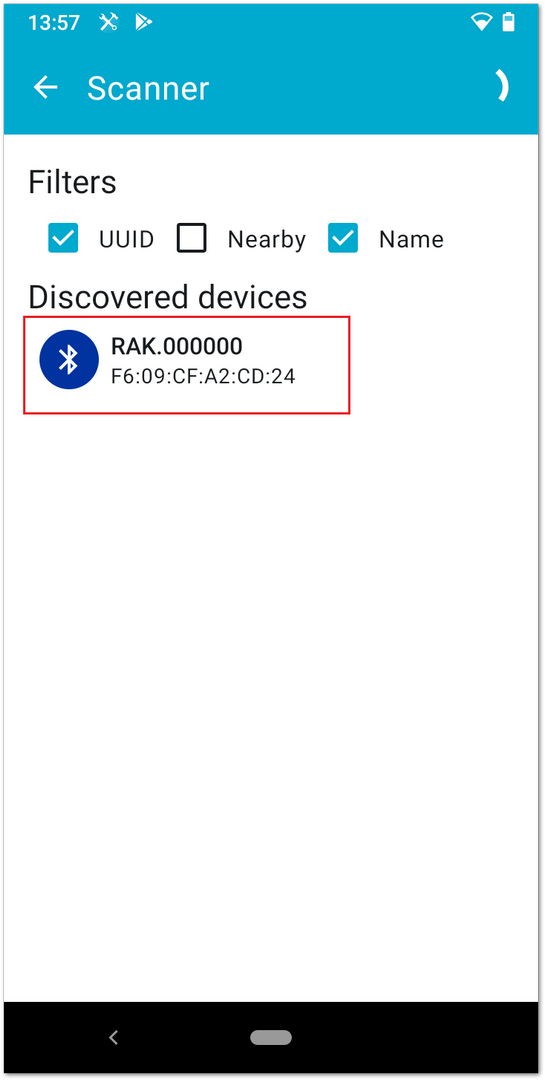 Figure 1: Scanning RAK device
Pairing is the process by which two BLE devices exchange device information so that a secure link can be established.
- Now pair with the RAK BLE device: Click the PAIR button then type the PIN password, as shown in Figure 6.
To finish the pairing, click the OK button. Pairing is the process by which two BLE devices exchange device information so that a secure link can be established.
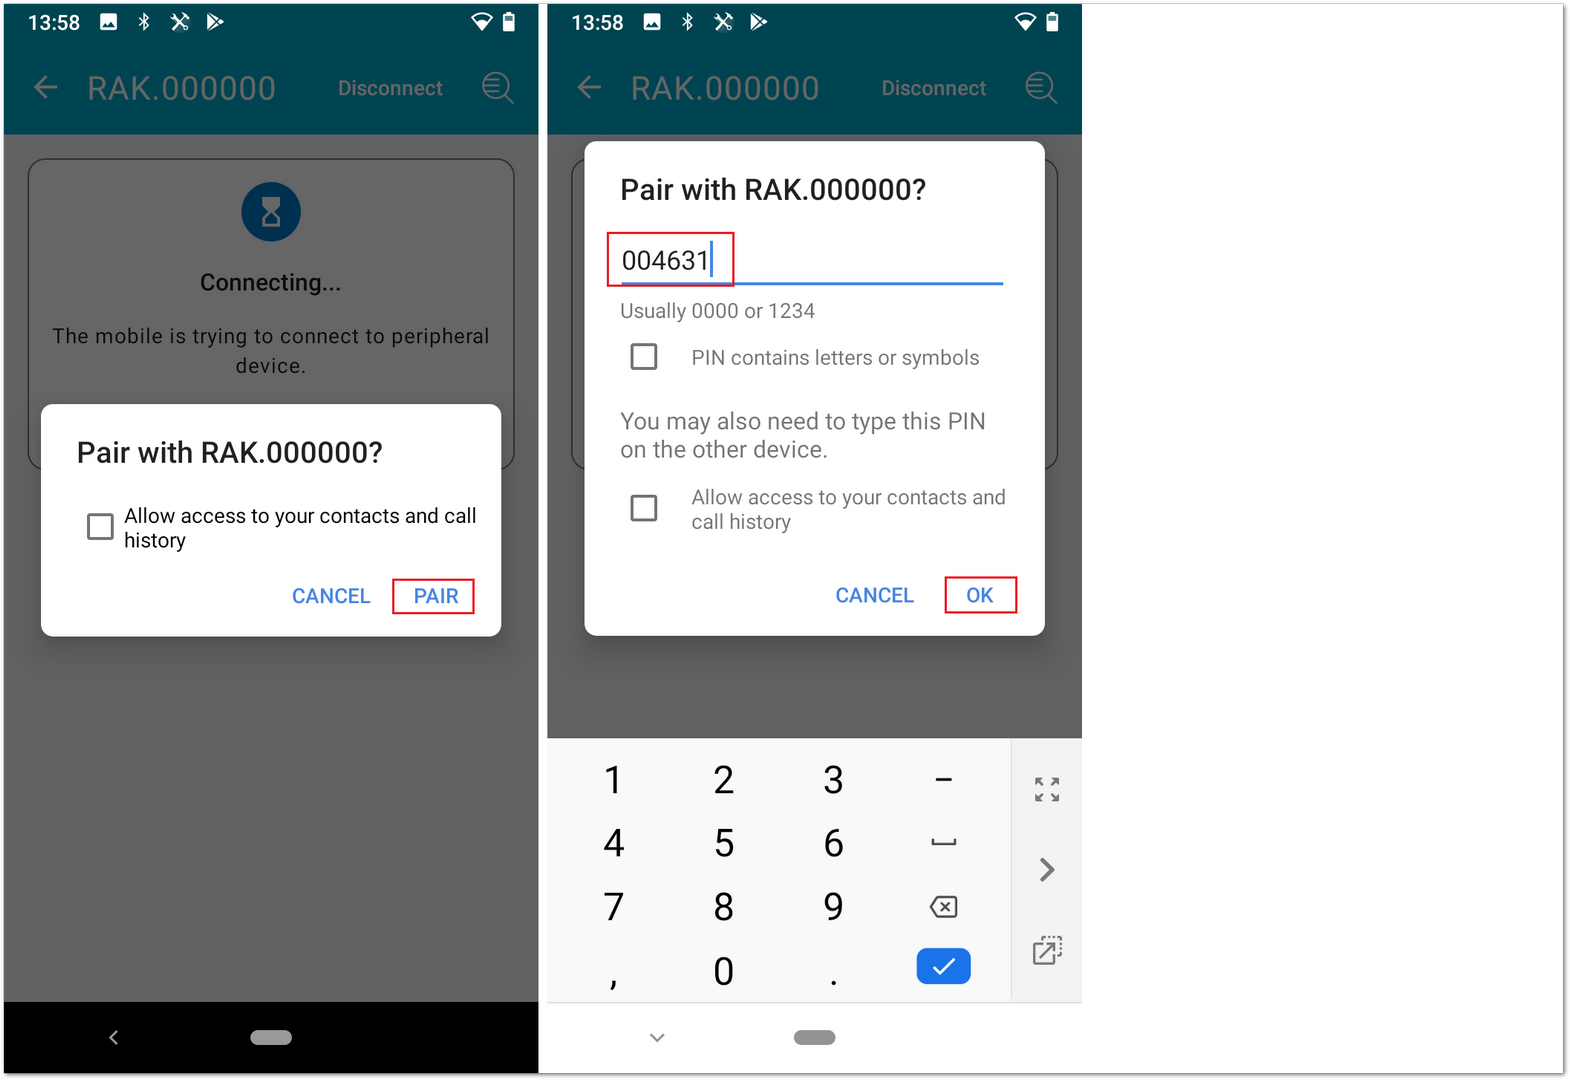 Figure 1: BLE UART pairing
- Once connected, enter a message in the Text to send text box, then click the Send button.
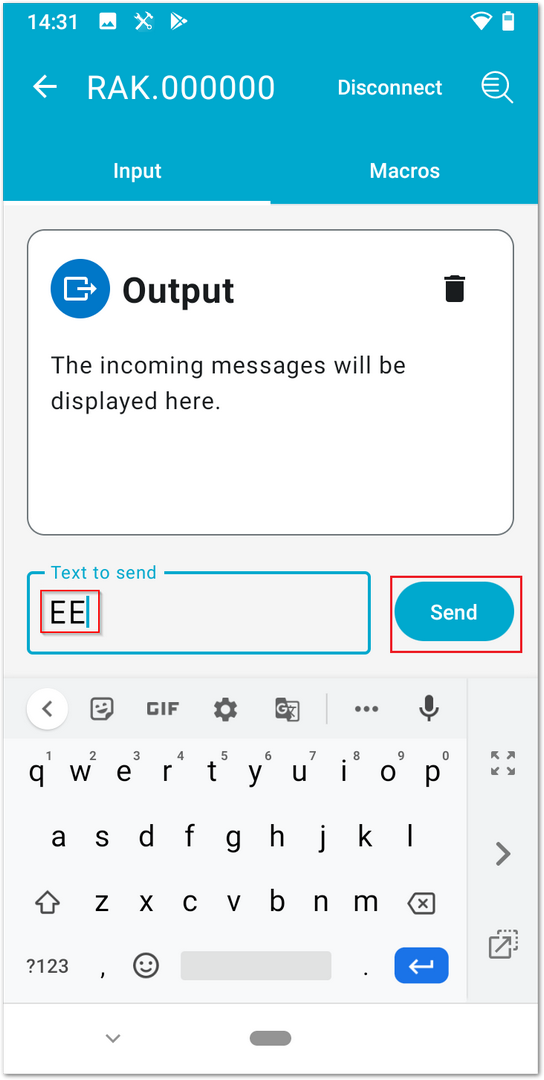 Figure 1: Send text message using UART Service
- Now check the Arduino Serial Monitor if you have received a message with content
RAK_BLE_UART!!!.
 Figure 1: Send a text message using UART service