RAK12005 WisBlock Rain Sensor Module Quick Start Guide
Prerequisite
What Do You Need?
Before going through each and every step on using the RAK12005 WisBlock module, make sure to prepare the necessary items listed below:
Hardware
- RAK12005 & RAK12030 WisBlock Rain Sensor Module
- Your choice of WisBlock Base with IO slot
- Your choice of WisBlock Core
- USB Cable
- RAK19008 WisBlock IO Extension Cable (optional)
- Li-Ion/LiPo battery (optional)
- Solar charger (optional)
Software
Arduino
- You need to download and install Arduino IDE.
- To add the RAKwireless Core boards on your Arduino Boards Manager, install the RAKwireless Arduino BSP.
Product Configuration
Hardware Setup
The RAK12005 is an electroconductive-liquid detect module used for detecting water and other electroconductive liquids. WisBlock can integrate this module, which makes it easy to build up a data acquisition system to help protect your assets from rain or fog damage.
For more information about RAK12005, refer to the Datasheet.
The RAK12005 module gives information about:
- Rain/Water Detect - measures resistance changes caused by water or condensed fog.
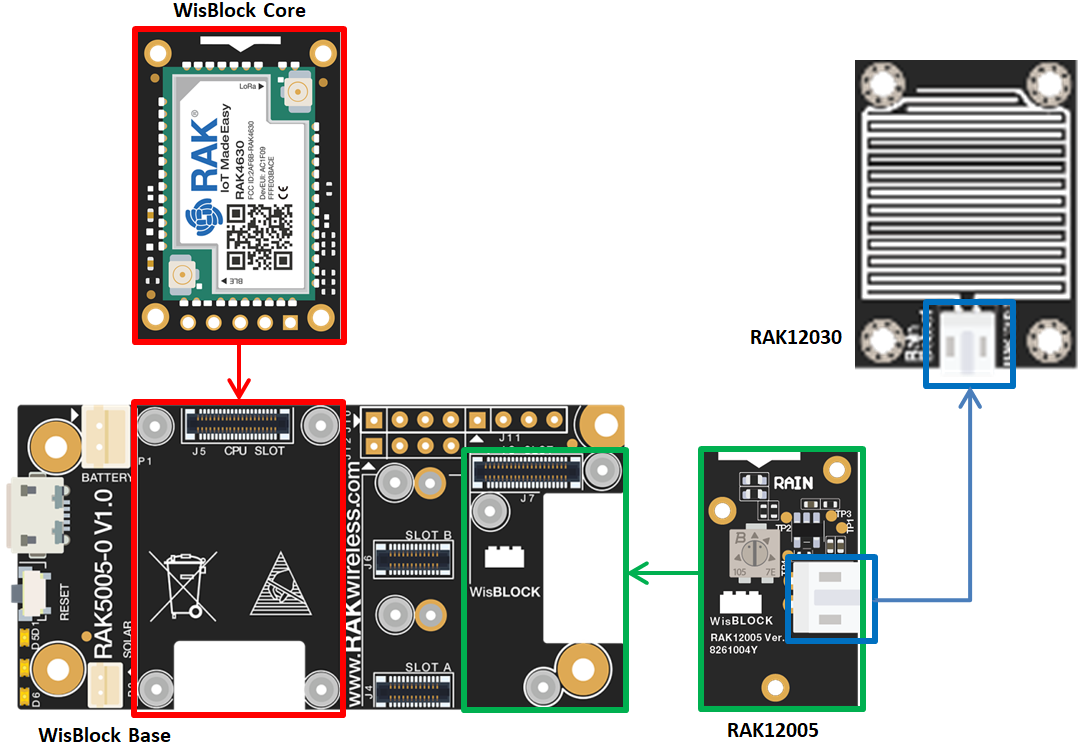 Figure 1: Rain Sensor mounting connection to WisBlock Base module
RAK12030 Sensing Pad
The sensor contains a sensing pad that you can place the sensor exposed under the open sky where it can be affected by rainfall and keep your WisBlock solution in a dry place or inside a waterproof enclosure.
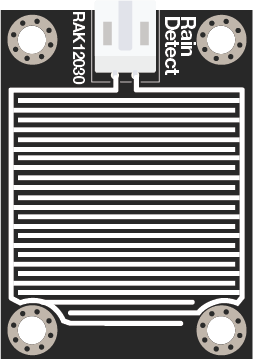 Figure 1: RAK12030 Module
RAK12005 Sensor Module
The RAK12005 module produces an output voltage depending on the resistance of the sensing pad. The signal from the sensing pad is fed to an MCP606 Comparator to digitize it then the comparator output is tied to the IO pin on the WisConnector. The module also has a built-in potentiometer for sensitivity adjustment of the digital output. Keep the RAK12005 in a dry place or inside a waterproof enclosure, just make sure not to wet this part of the module.
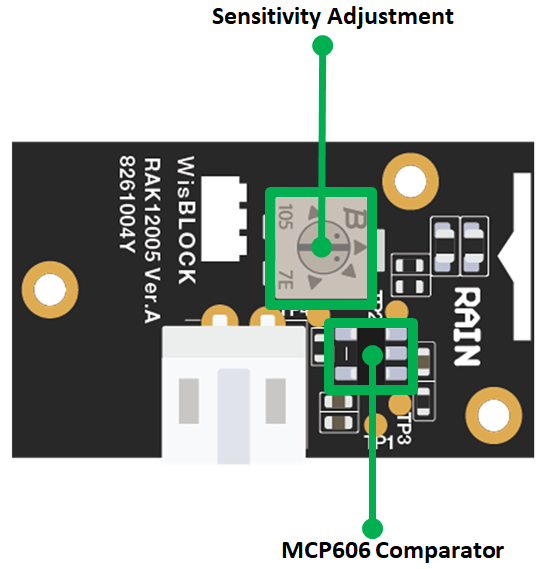 Figure 1: RAK12005 Module
Installation
Mounting Mechanism
The RAK12005 module can be mounted on the IO slot of the WisBlock Base board, as shown in Figure 4. Also, always secure the connection of the WisBlock module by using compatible screws.
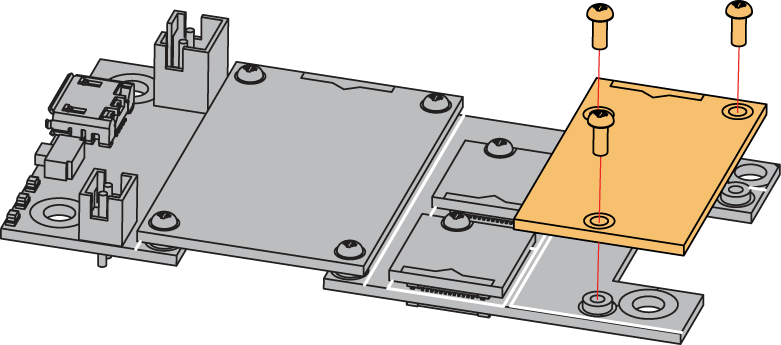 Figure 1: RAK12005 mounting connection to WisBlock Base module
Disassembling Procedure
The procedure in disassembling any type of WisBlock modules is the same.
- First, remove the screws.
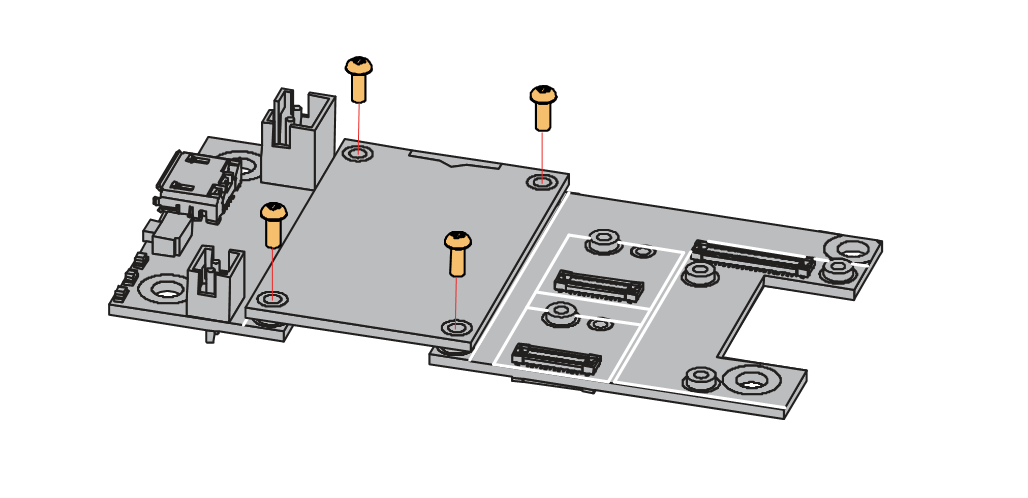 Figure 1: Removing screws from the WisBlock module
- Once the screws are removed, check the silkscreen of the module to find the correct location where force can be applied.
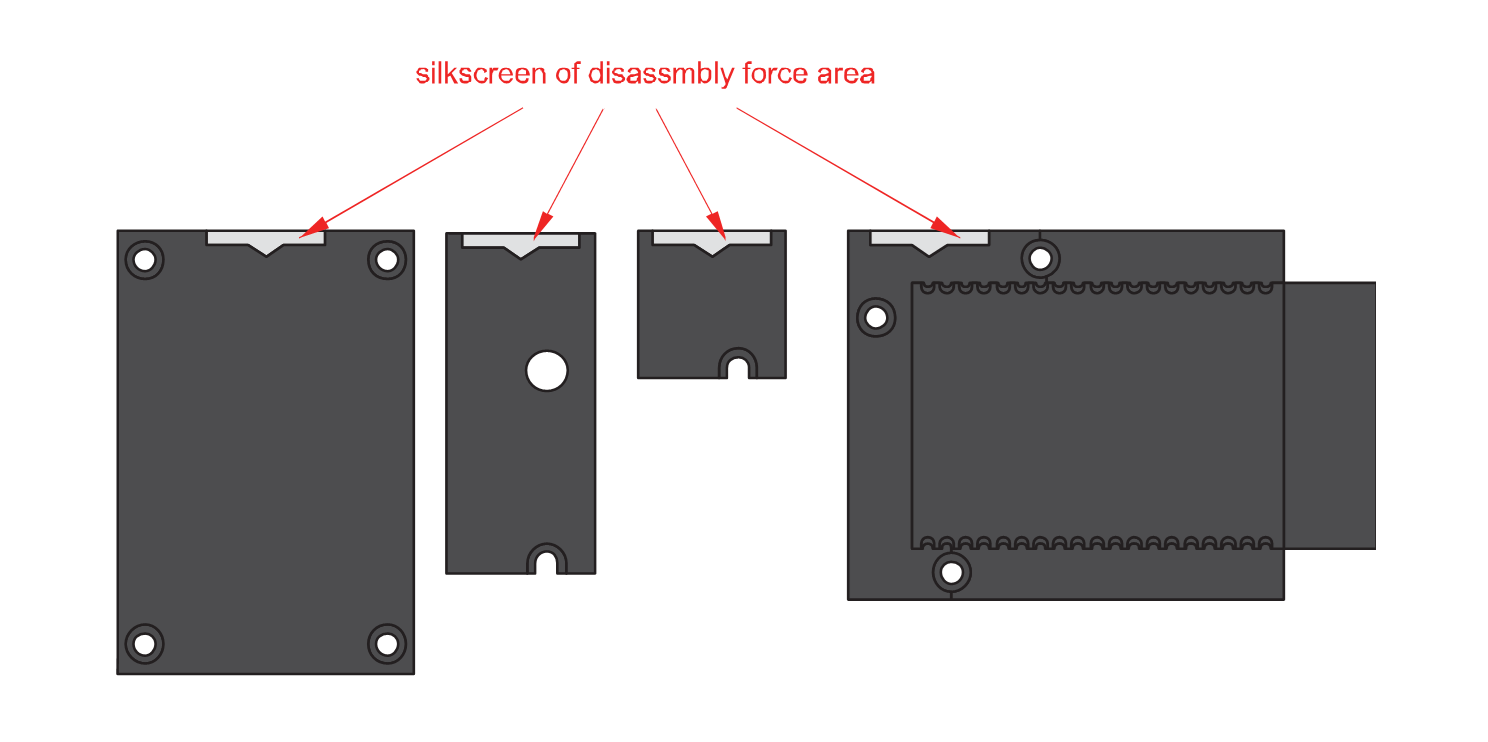 Figure 1: Detaching silkscreen on the WisBlock module
- Apply force to the module at the position of the connector, as shown in Figure 7, to detach the module from the baseboard.
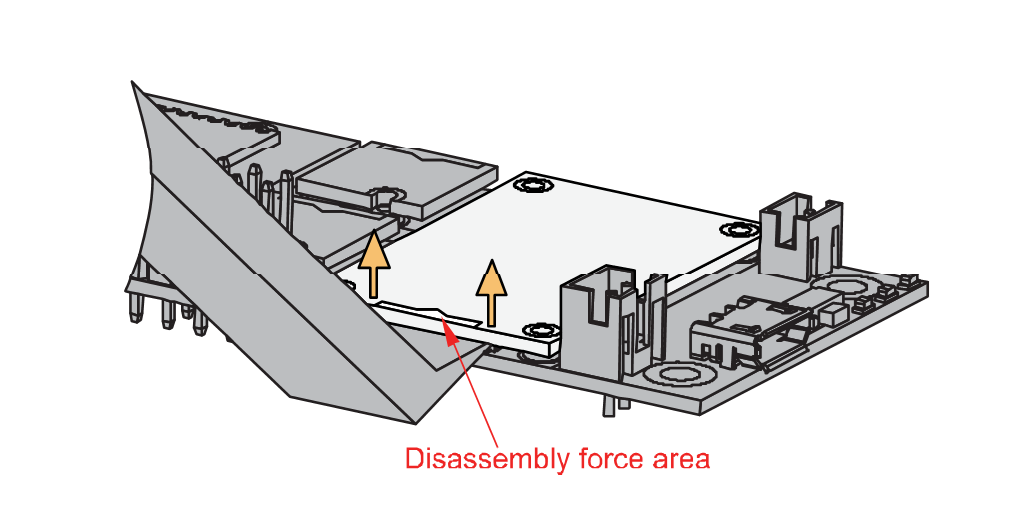 Figure 1: Applying even forces on the proper location of a WisBlock module
If you will connect other modules to the remaining WisBlock Base slots, check on the WisBlock Pin Mapper tool for possible conflicts.
Now, you can connect the battery (optional) and USB cable to start programming your WisBlock Core.
- Batteries can cause harm if not handled properly.
- Only 3.7-4.2 V Rechargeable LiPo batteries are supported. It is highly recommended not to use other types of batteries with the system unless you know what you are doing.
- If a non-rechargeable battery is used, it has to be unplugged first before connecting the USB cable to the USB port of the board to configure the device. Not doing so might damage the battery or cause a fire.
- Only 5 V solar panels are supported. Do not use 12 V solar panels. It will destroy the charging unit and eventually other electronic parts.
- Make sure the battery wires match the polarity on the WisBlock Base board. Not all batteries have the same wiring.
Software Configuration and Example
In our example, you will be using the RAK12005 and RAK12030 sensors for detecting water or rain.
For RAK12005, the accessible pin assignments are defined as follows in the Arduino IDE:
WB_IO6for Water Sensor Input pin
Initial Test of the RAK12005 WisBlock Module
-
Install the RAKwireless Arduino BSP for WisBlock by using the
package_rakwireless_index.jsonboard installation package. The WisBlock Core should now be available on the Arduino IDE. -
You need to select first the WisBlock Core you have.
RAK4631 Board
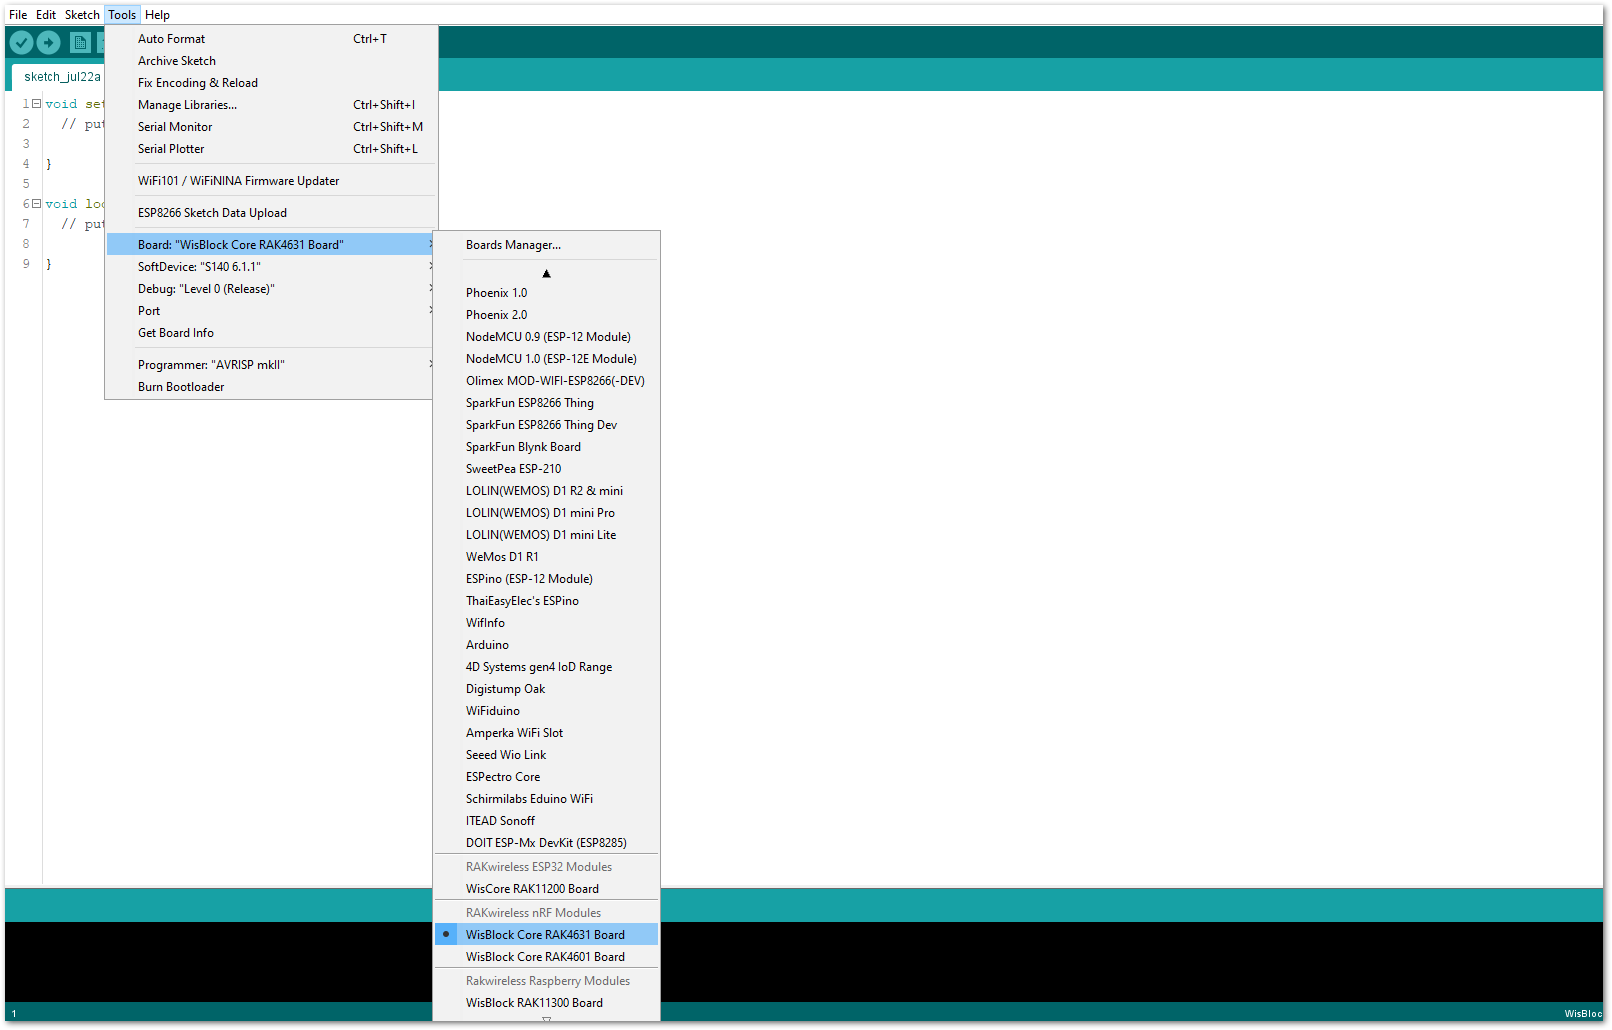 Figure 1: Selecting RAK4631 as WisBlock Core
RAK11200 Board
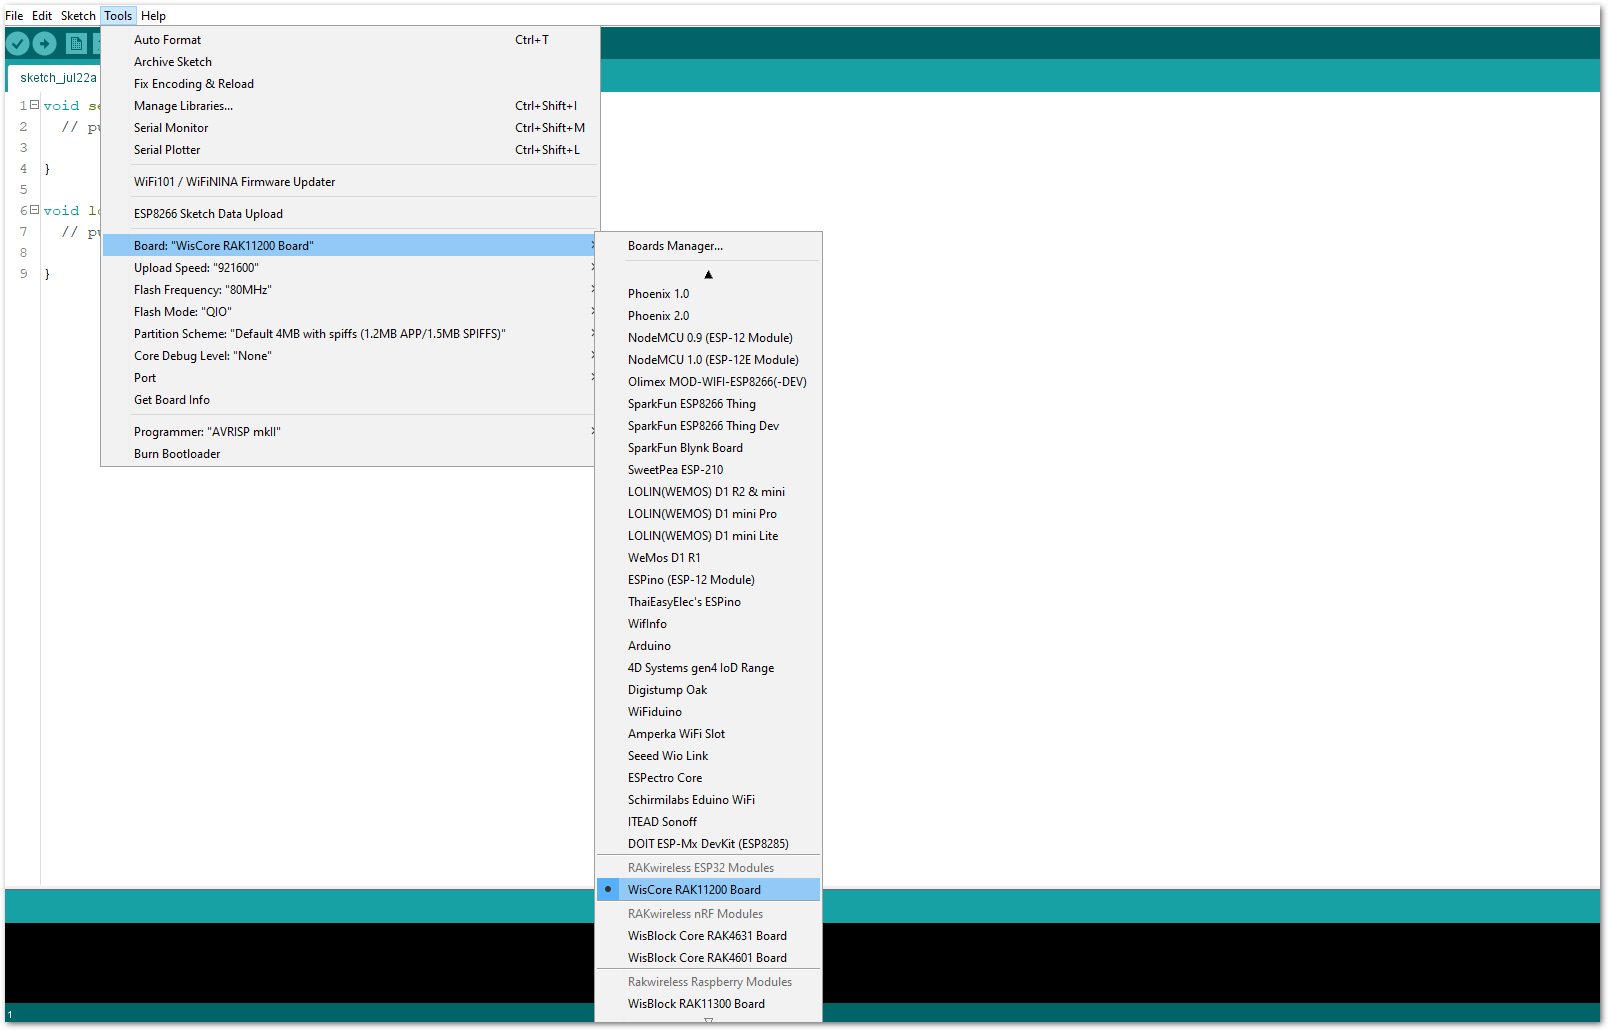 Figure 1: Selecting RAK11200 as WisBlock Core
RAK11310 Board
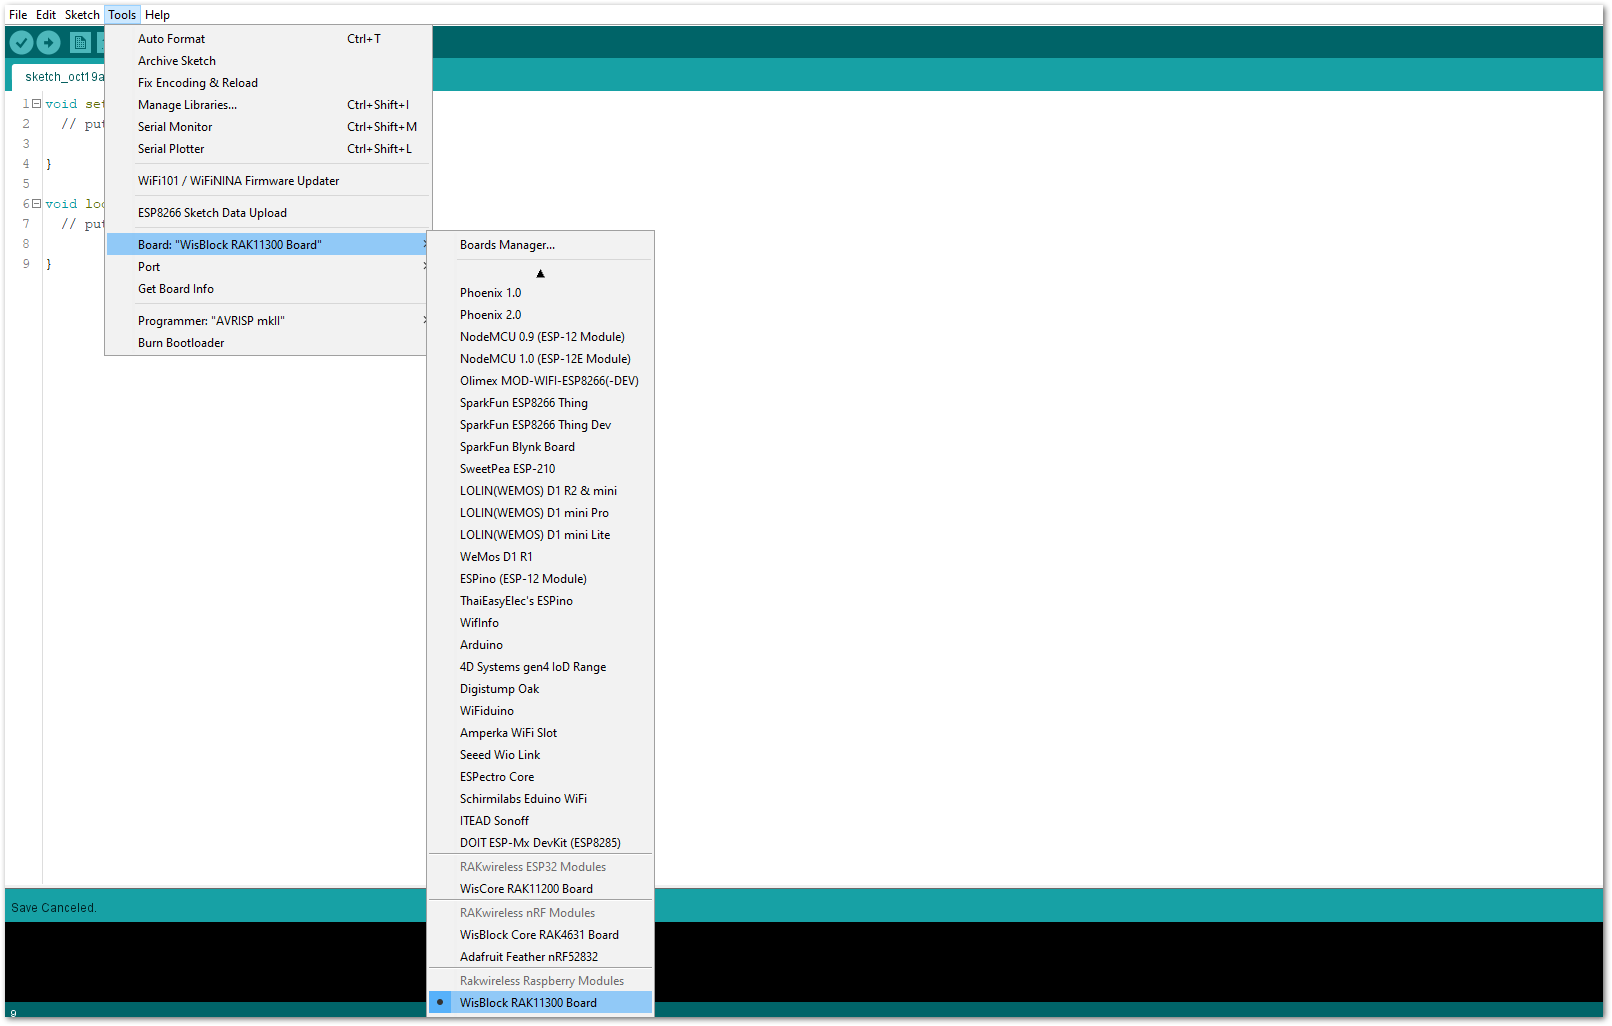 Figure 1: Selecting RAK11310 as WisBlock Core
- Next, copy the following sample code into your Arduino IDE.
Click to view the code
/**
 * @file RAK12005_WaterDetector.ino
 * @author rakwireless.com
 * @brief use RAK12005 water detector module to detect rain
 * @version 0.1
 * @date 2021-05-24
 * @copyright Copyright (c) 2021
 */
#define SENSOR_PIN  WB_IO6   // Attach Water sensor to Arduino Digital Pin WB_IO6

void setup()
{
   pinMode(SENSOR_PIN, INPUT);   // The Water Sensor is an Input
   pinMode(LED_GREEN, OUTPUT);  // The LED is an Output
   pinMode(LED_BLUE, OUTPUT);   // The LED is an Output
}
void loop()
{

   /* The water sensor will switch HIGH when water is detected.
    when water is detected turn LED on, and switch off when no water is present */
   if( digitalRead(SENSOR_PIN) == HIGH)
   {
      digitalWrite(LED_GREEN,HIGH);   //turn on
      digitalWrite(LED_BLUE,HIGH);
   }else
   {
      digitalWrite(LED_GREEN,LOW);
      digitalWrite(LED_BLUE,LOW);
   }
}
If you experience any error in compiling the example sketch, check the updated code for your WisBlock Core Module that can be found on the RAK12005 WisBlock Example Code Repository. This sample code in Github will work on all WisBlock Core.
- Then you can now select the right port and upload the code, as shown in Figure 11 and Figure 12.
If you are using the RAK11200 as your WisBlock Core, the RAK11200 requires the Boot0 pin to be configured properly first before uploading. If not done properly, uploading the source code to RAK11200 will fail. Check the full details on the RAK11200 Quick Start Guide.
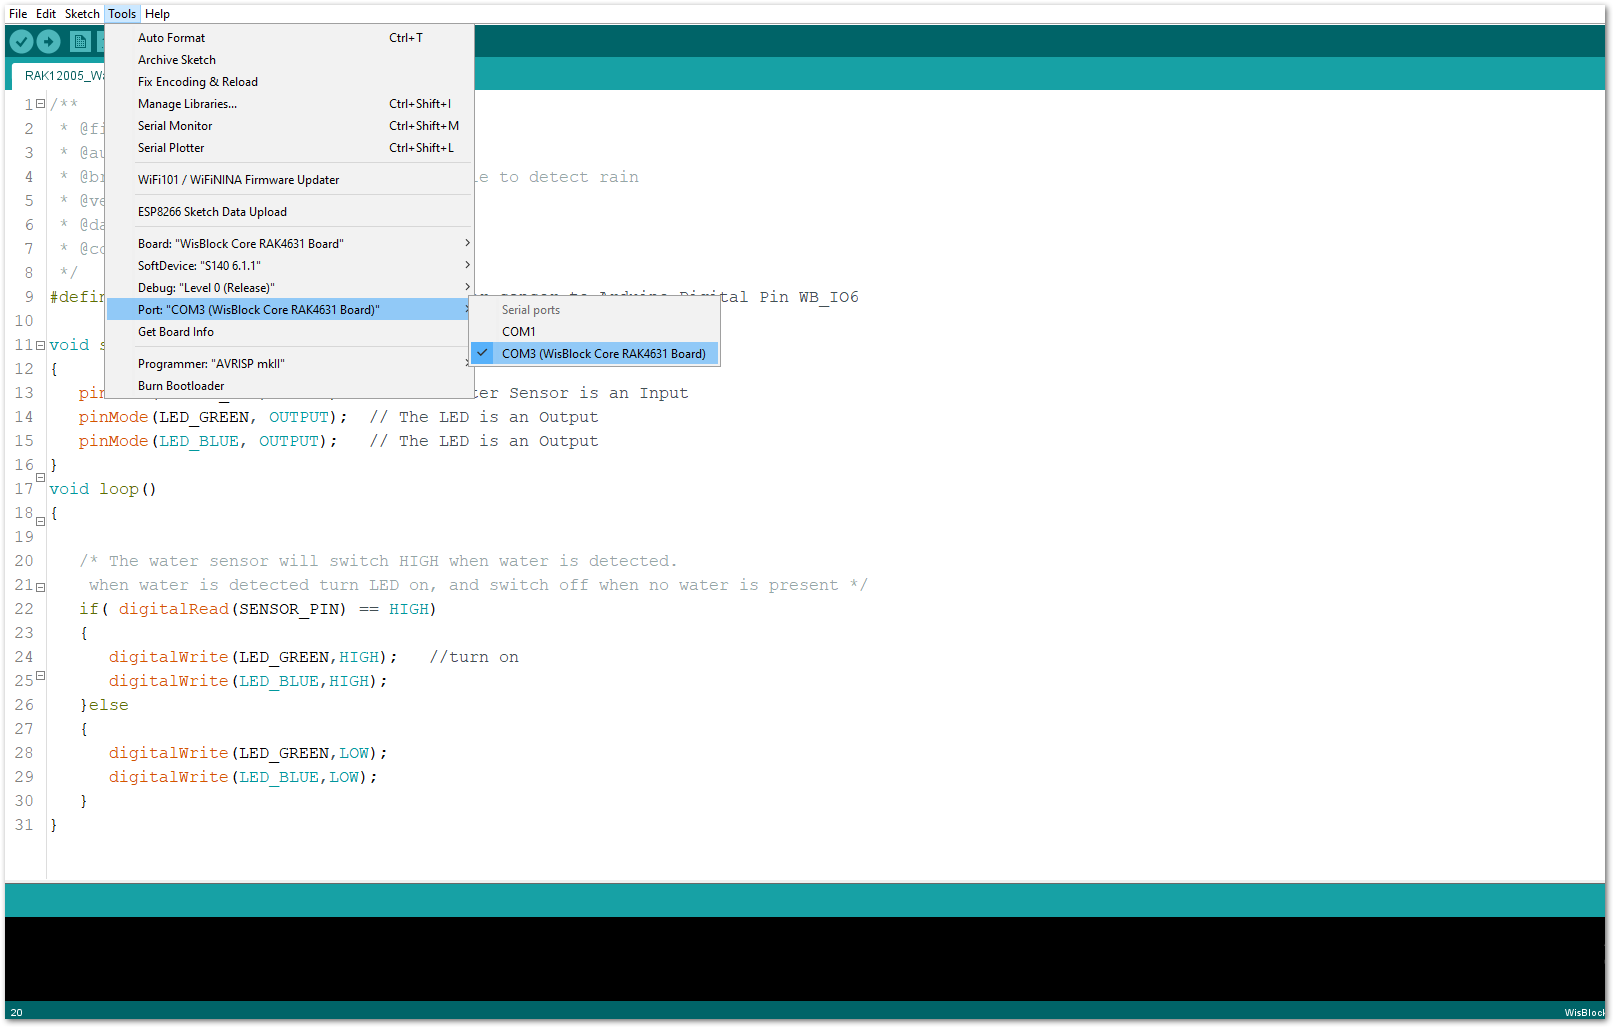 Figure 1: Selecting the correct Serial Port
 Figure 1: Uploading the RAK12005 Sample code
- When you successfully uploaded the example sketch, you'll now be able to test the RAK12005 Rain Sensor module. Try pouring water on the copper traces of the RAK12030 and you'll be able to see that the blue and green LED of the WisBlock solution lights up when there is a presence of water, and then switched off when there is no presence of water or dry.