RAK5860 WisBlock NB-IoT Interface Module Quick Start Guide
Prerequisite
What Do You Need?
Before going through each step of using the RAK5860 WisBlock NB-IoT Interface Module, make sure to prepare the necessary items listed below:
Hardware
- RAK5860
- Your choice of WisBlock Base
- Your choice of WisBlock Core
- USB Cable
- GNSS and GSM Antennas
- Li-Ion/LiPo battery
- Solar charger (optional)
Software
- Download and install the Arduino IDE.
- To add the RAKwireless Core boards on your Arduino board, install the RAKwireless Arduino BSP. Follow the steps in the GitHub repo.
Product Configuration
Hardware Setup
You can integrate the RAK5860 module on your WisBlock project to extend its functionality and have Cellular, LPWAN, LTE-M, and NB-IoT capability with GPS. This is ideal for IoT and tracking applications where there is a cellular LPWAN network in the area. For more information about RAK5860, refer to its Datasheet.
RAK5860 module can be mounted to the IO slot of the WisBlock Base and communicates with the WisBlock Core via UART. The module is activated via WB_IO1 pin of the WisBlock Core. Two antennas must also be connected to the module, one for the GNSS antenna port and one for the Cellular antenna port. An external battery (Li-Ion/LiPo 3.7-4.2 V) is also required to power up the module properly.
- Batteries can cause harm if not handled properly.
- Only 3.7-4.2 V rechargeable LiPo batteries are supported. It is highly recommended not to use other types of batteries with the system unless you know what you are doing.
- If a non-rechargeable battery is used, it has to be unplugged first before connecting the USB cable to the USB port of the board, to configure the device. Not doing so might damage the battery or cause a fire.
- Only 5 V solar panels are supported. Do not use 12 V solar panels. It will destroy the charging unit and eventually other electronic parts.
- Make sure the battery wires match the polarity on the WisBlock Base board. Not all batteries have the same wiring.
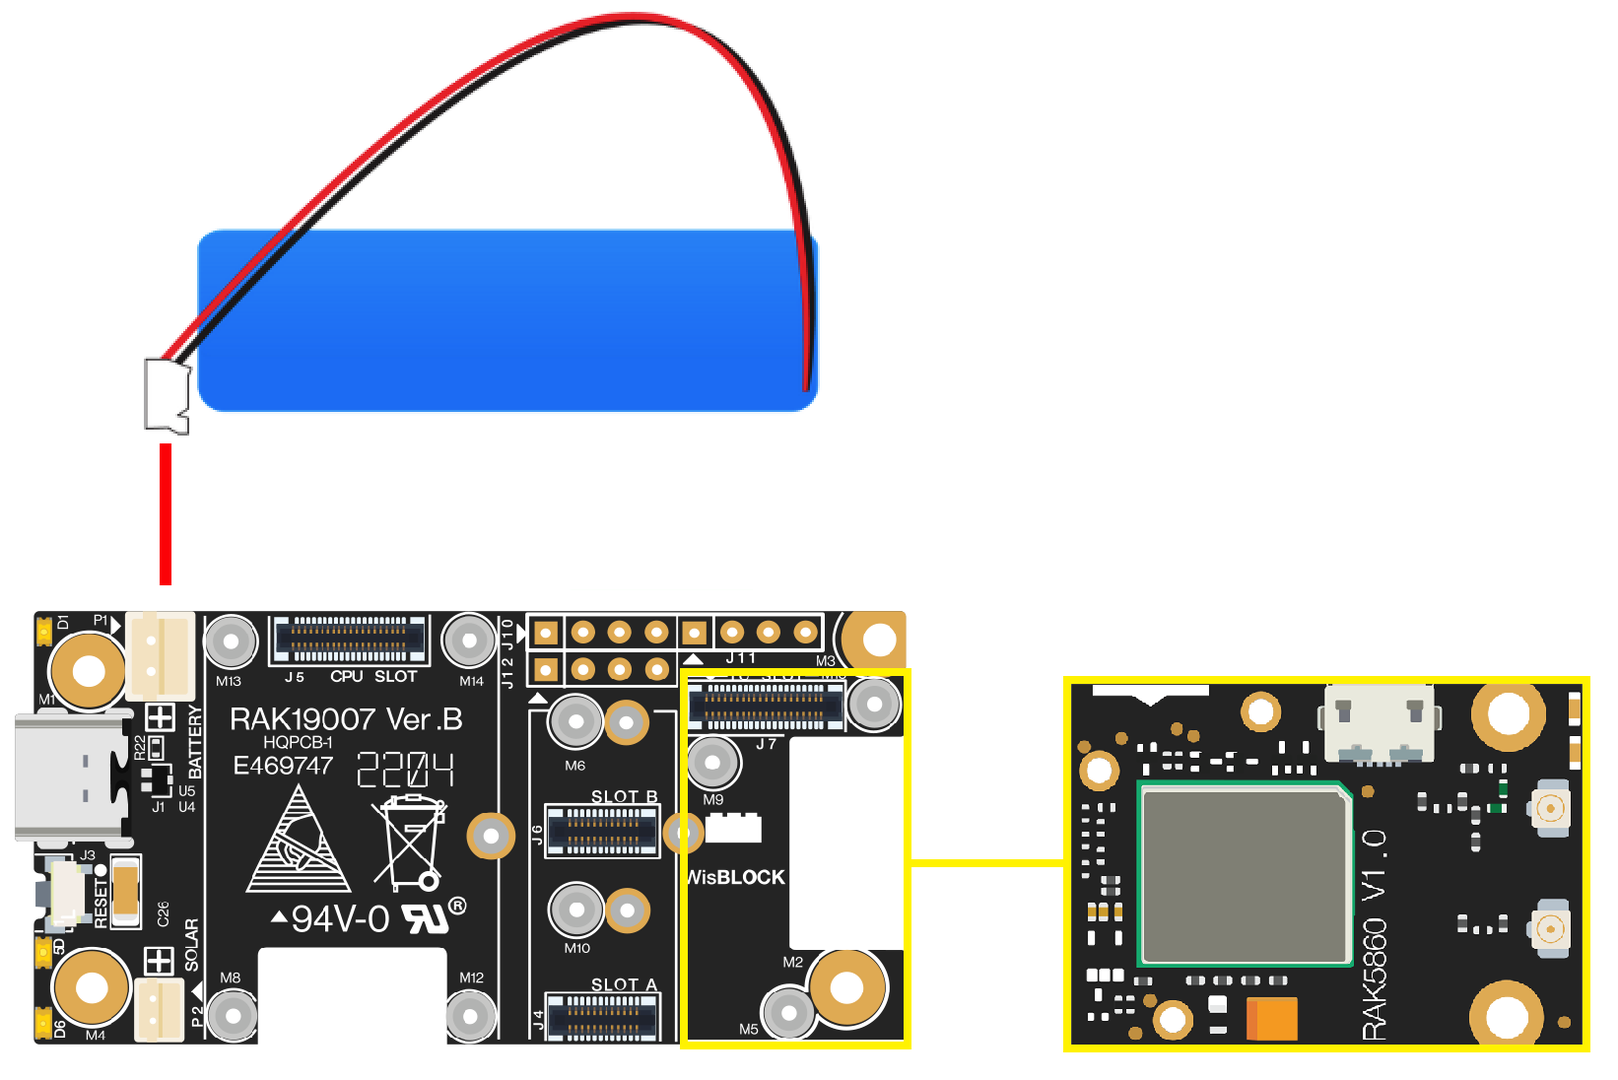 Figure 1: RAK5860 connection to WisBlock Base
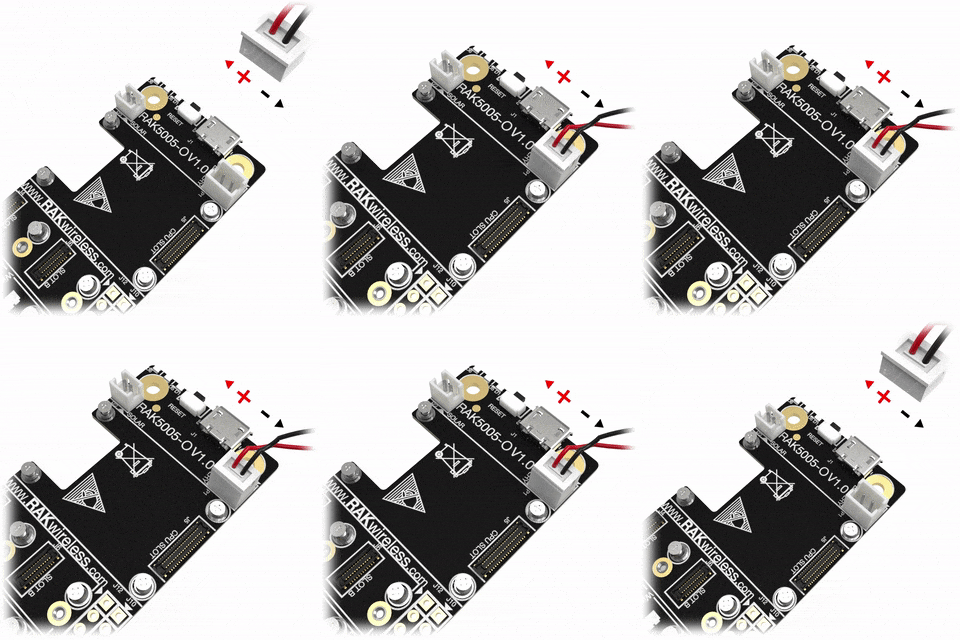 Figure 1: WisBlock Base battery polarity and connection
Assembling and Disassembling of WisBlock Modules
Assembling
As shown in Figure 3, the location for the module slots is properly marked by silkscreen. Follow the procedure defined in the WisBlock Base assembly/disassembly instructions to attach a WisBlock module. Once attached, carefully fix the module with one or more pieces of M1.2 x 3 mm screws, depending on the module.
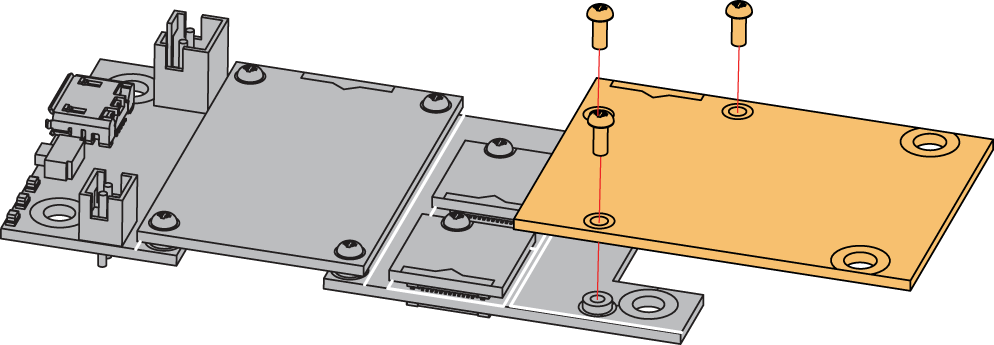 Figure 1: RAK5860 connection to WisBlock Base
Disassembling
The procedure for disassembling any type of WisBlock module is the same.
- First, remove the screws.
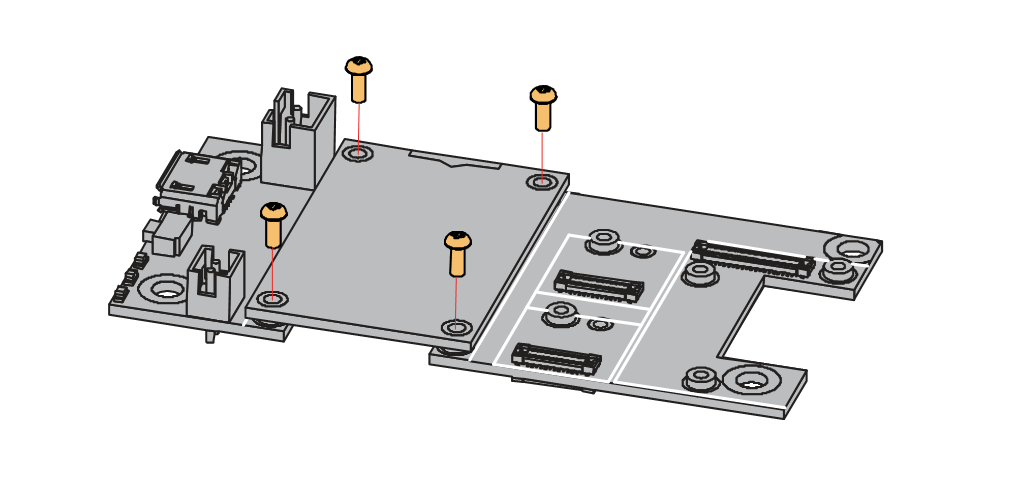 Figure 1: Removing screws from the WisBlock module
- Once the screws are removed, check the silkscreen of the module to find the correct location where force can be applied.
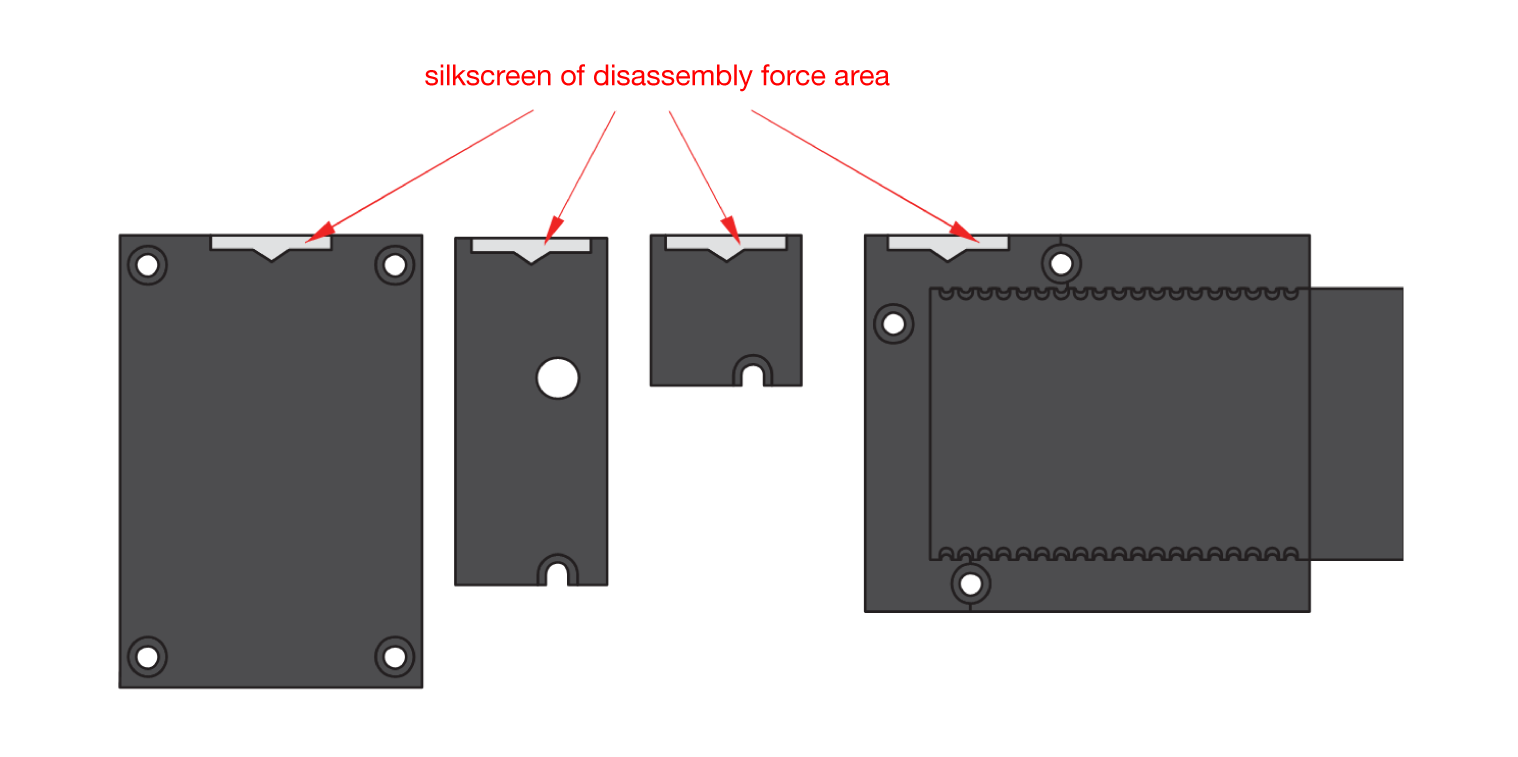 Figure 1: Detaching silkscreen on the WisBlock module
- Apply force to the module at the position of the connector, as shown in Figure 6, to detach the module from the baseboard.
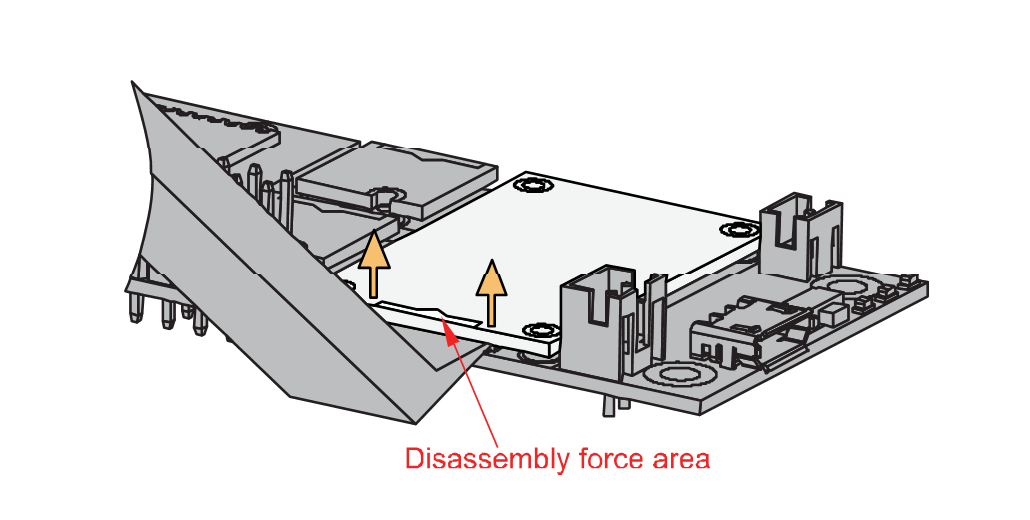 Figure 1: Applying even forces on the proper location of a WisBlock module
If you will connect other modules to the remaining WisBlock Base slots, check on the WisBlock IO Pin Mapping Tool for possible conflicts. RAK5860 uses UART communication lines, and it can cause possible conflict, especially on some modules that also use UART.
Software Configuration and Example
The RAK5860 WisBlock GSM/GPRS Module uses UART serial communication lines. In this example code, you will be able to send AT commands to the RAK5860 module. This will ensure that your RAK5860 is functional and ready for your IoT project.
Initial Test of the RAK5860 WisBlock Module
If you have already installed the RAKWireless Arduino BSP, the WisBlock Core and example code should be available in the Arduino IDE.
- First, you need to select the WisBlock Core you have, as shown in Figure 7 to Figure 9.
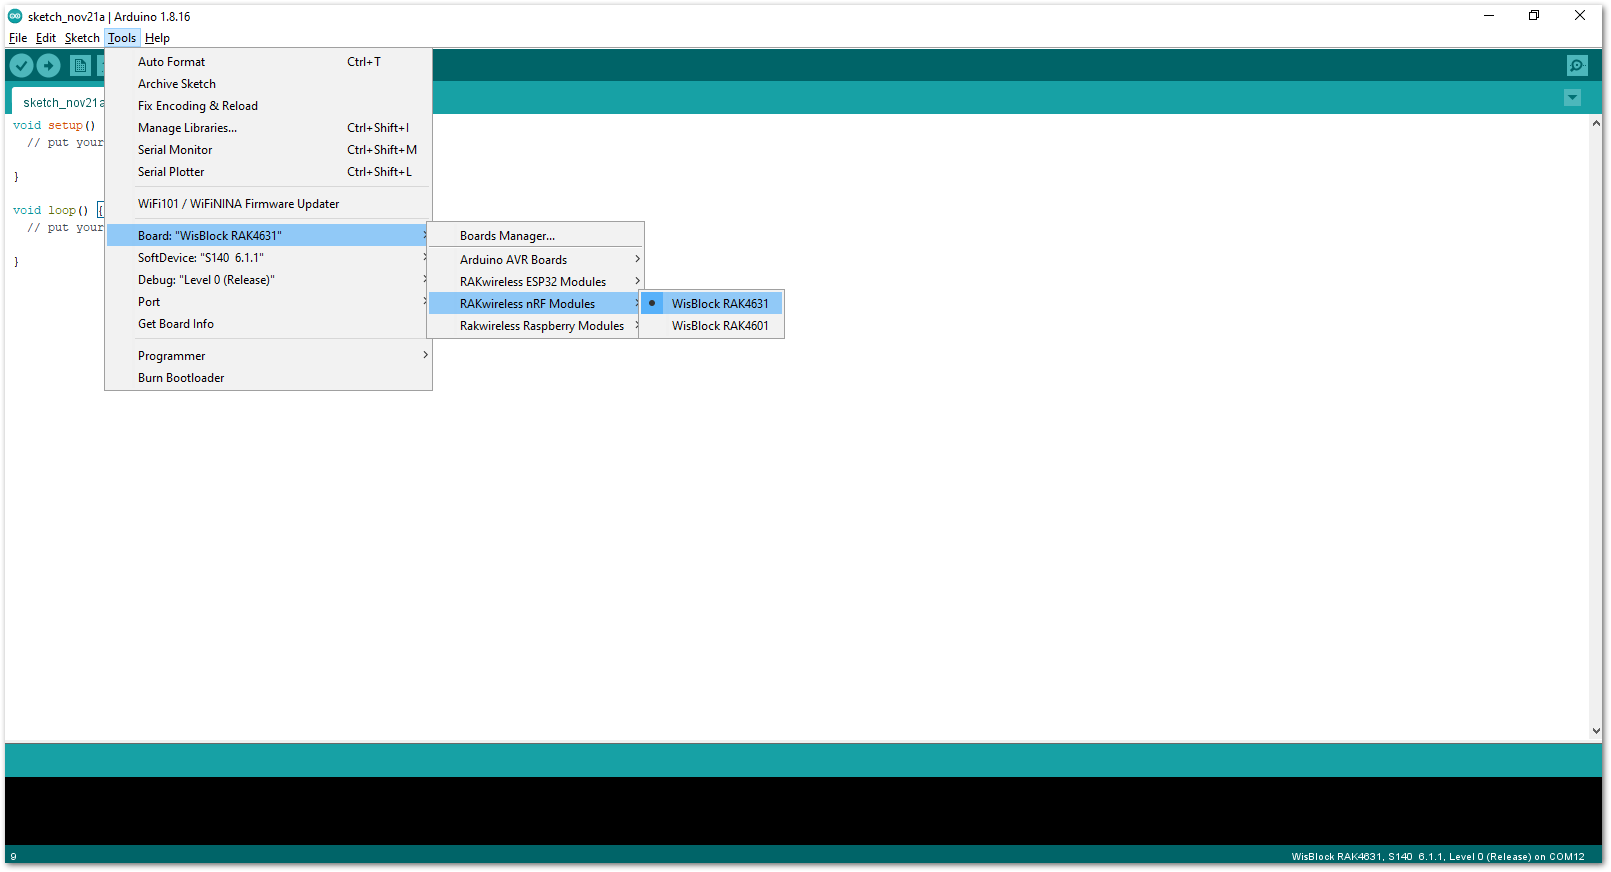 Figure 1: Selecting RAK4631 as WisBlock Core
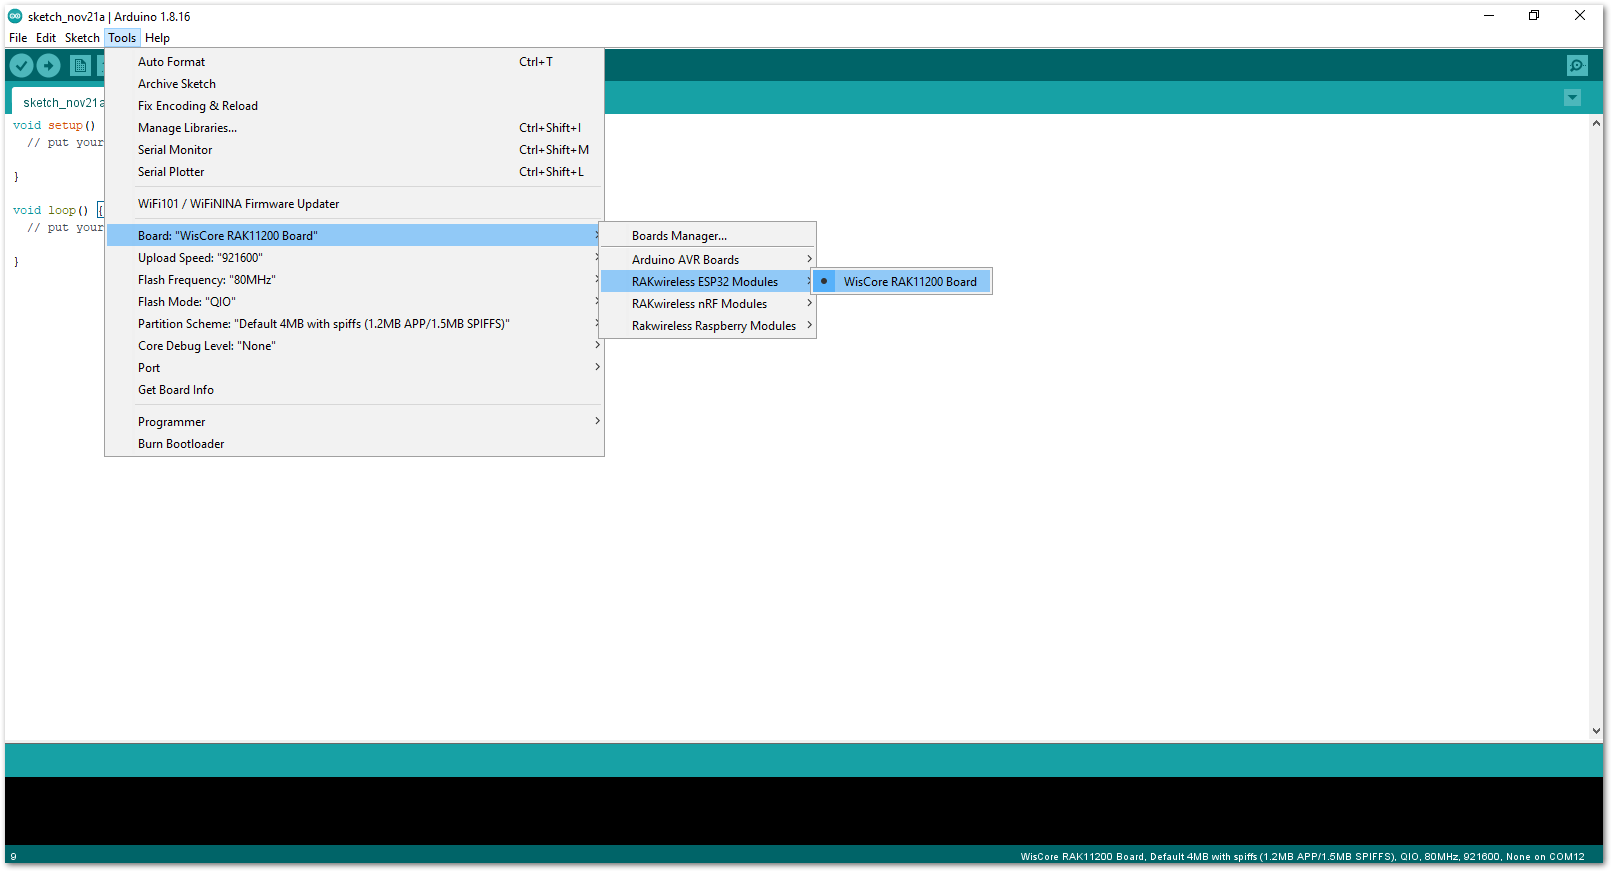 Figure 1: Selecting RAK11200 as WisBlock Core
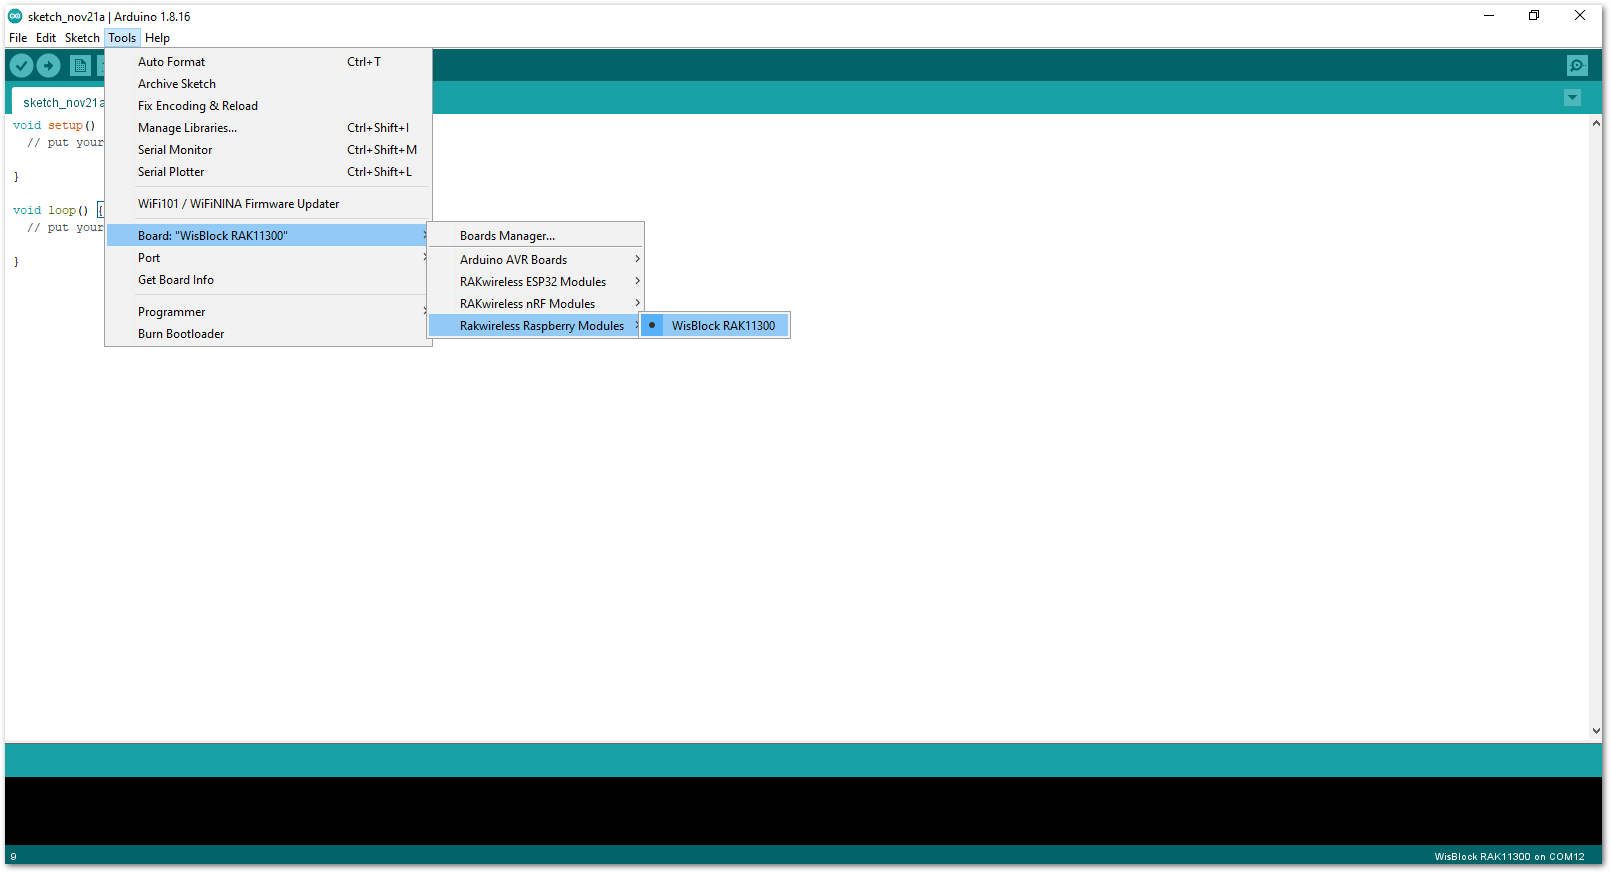 Figure 1: Selecting RAK11300 as WisBlock Core
- You also need to select the right serial port to upload the code, as shown in Figure 10.
If you are using RAK11200 as WisBlock Core, you need to configure the BOOT0 pin before uploading. You need to short it to the ground then press the reset button of the WisBlock Base before releasing the BOOT0 pin. If not done properly, uploading the source code to RAK11200 will fail. Check the full details on the RAK11200 Quick Start Guide.
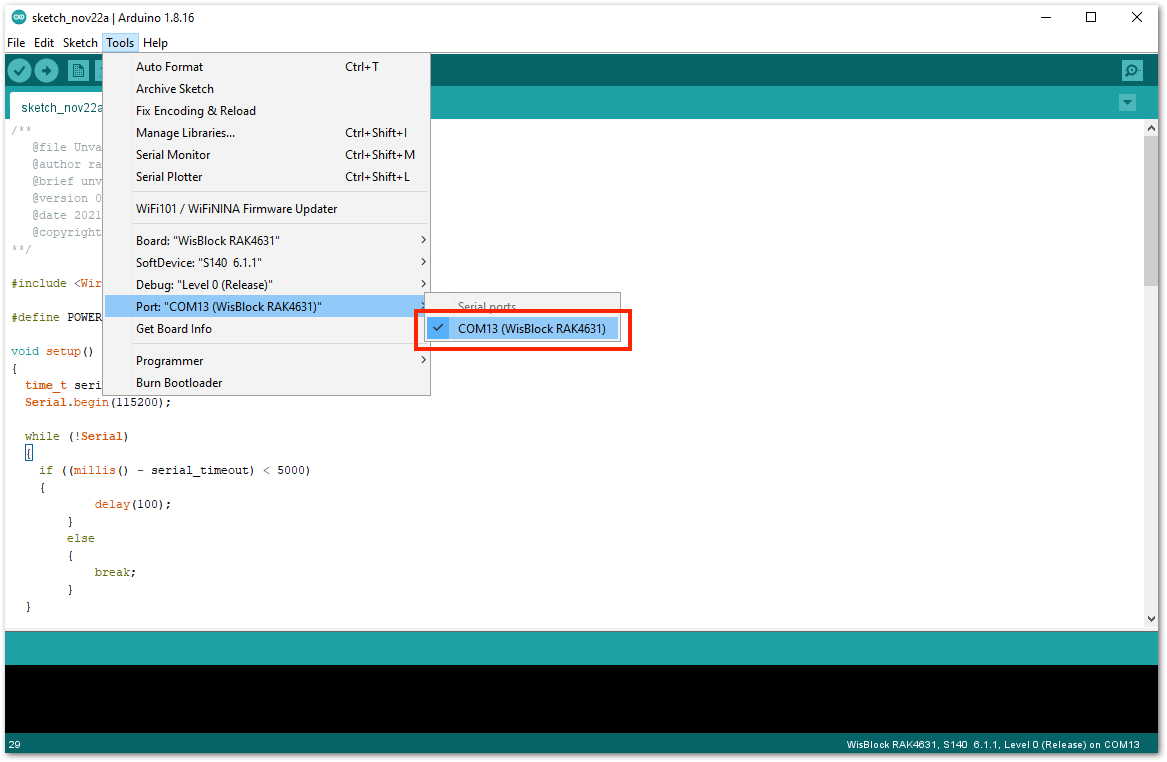 Figure 1: Selecting the correct Serial Port
- Once you are ready with the Arduino IDE software and the WisBlock Core modules are already added, you can now check the Cellular examples available for the RAK5860 Cellular Wireless module. You can look at examples for TCP, MQTT, HTTP, and GPS on the RAK5860 Examples Repository.
- The basic software example you can run is the BG77_Unvarnished_Transmission. This is a UART passthrough to the BG77 from RAK4631. This code will power up the module correctly and after initialization, AT commands is passed and received to the BG77 module. In the example below, the module responded to
ATandATIcommands.
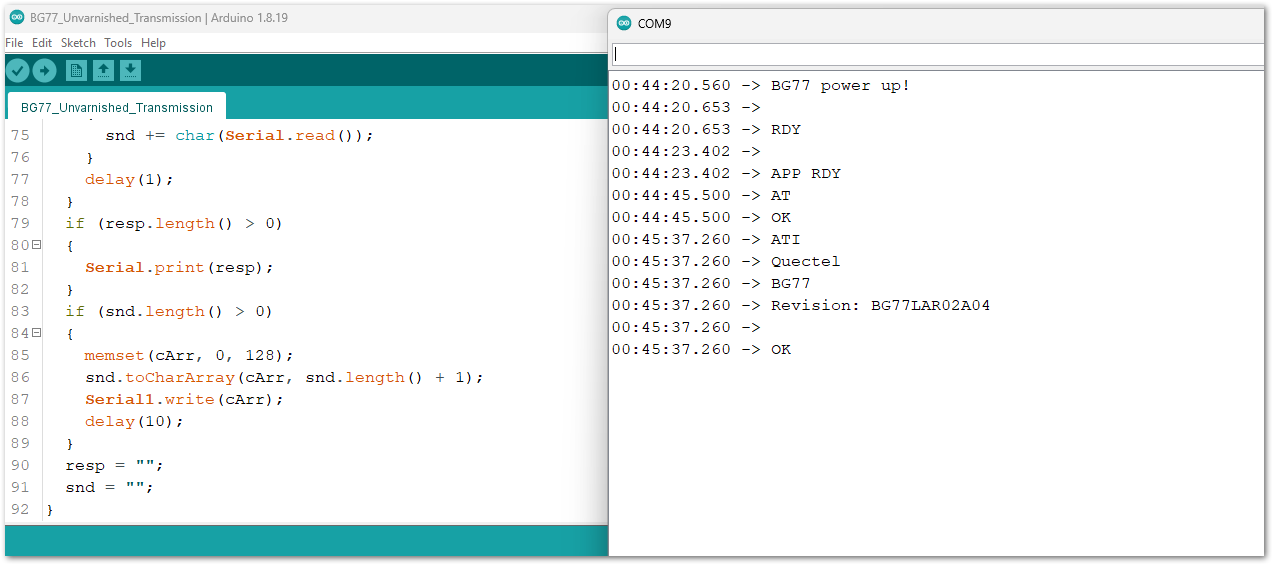 Figure 1: UART Passthrough to BG77 Module
Software Examples
The following examples will illustrate the different protocols where RAK5860 can be used to access and send data to cloud.
All the examples that use cellular connectivity should update the APN sections of the code. To illustrate, the code below configures the PDP context to 1 and APN to data.mono for Monogoto SIM.
You can purchase Monogoto SIM in the RAKwireless store.
  command = "AT+QICSGP=1,1,\"data.mono\",\"\",\"\",1";
  BG77_write(command.c_str());
  BG77_read(2000);
GNSS Satellite Example
- Go to the GNSS satellite example code from the RAK5860 repository.
- Copy and paste the code to Arduino IDE, and click upload.
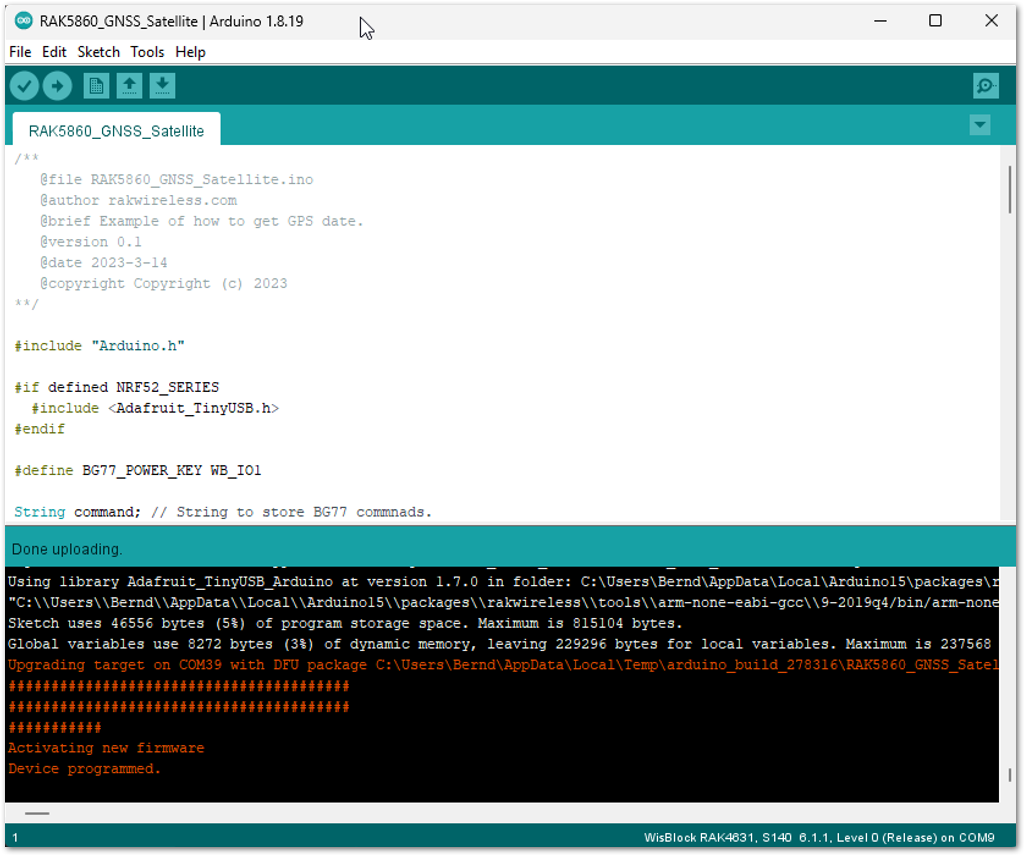 Figure 1: GNSS Example Code
BG77 is based on a cost-optimized architecture in which WWAN (LTE Cat-M1, LTE Cat-NB2, and GSM) and GNSS Rx chains share certain hardware blocks. As a result, the modules do not support the concurrent operation of WWAN and GNSS.
- The process will turn on the GNSS and Acquire Positioning Information and Query Satellite System as shown in the example. It should be able to obtain the latitude and longitude during the 30 s ~ 2 mins on power up. Open the
Serial Terminalof Arduino from the Tools tab to see the output data/coordinates.
If there are no coordinates data shown, make sure that you are exposed to a clear sky. You can also double-check that the antenna connector is properly attached to the module.
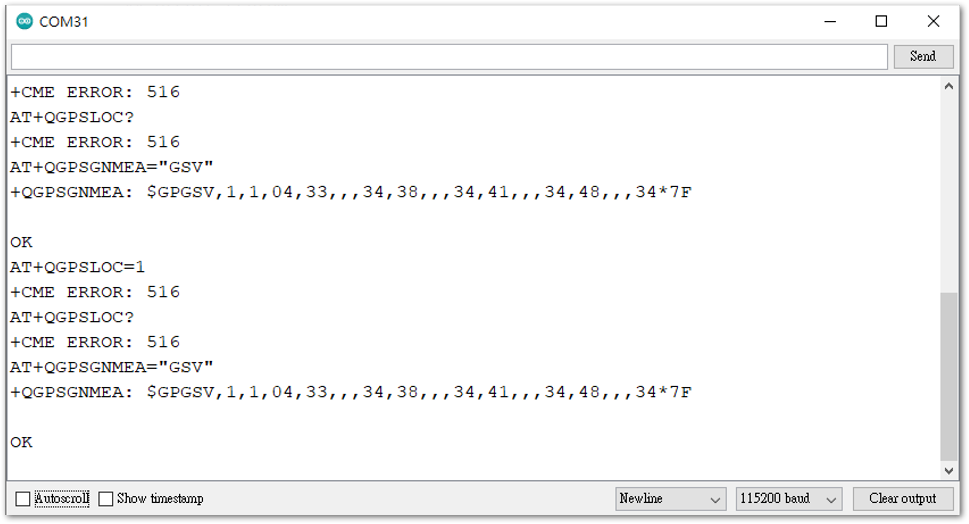 Figure 1: Serial Terminal output waiting for coordinates
HTTP Access Example
- Go to the HTTP Access example code from the RAK5860 repository.
- Copy and paste the code to Arduino IDE, and click upload.
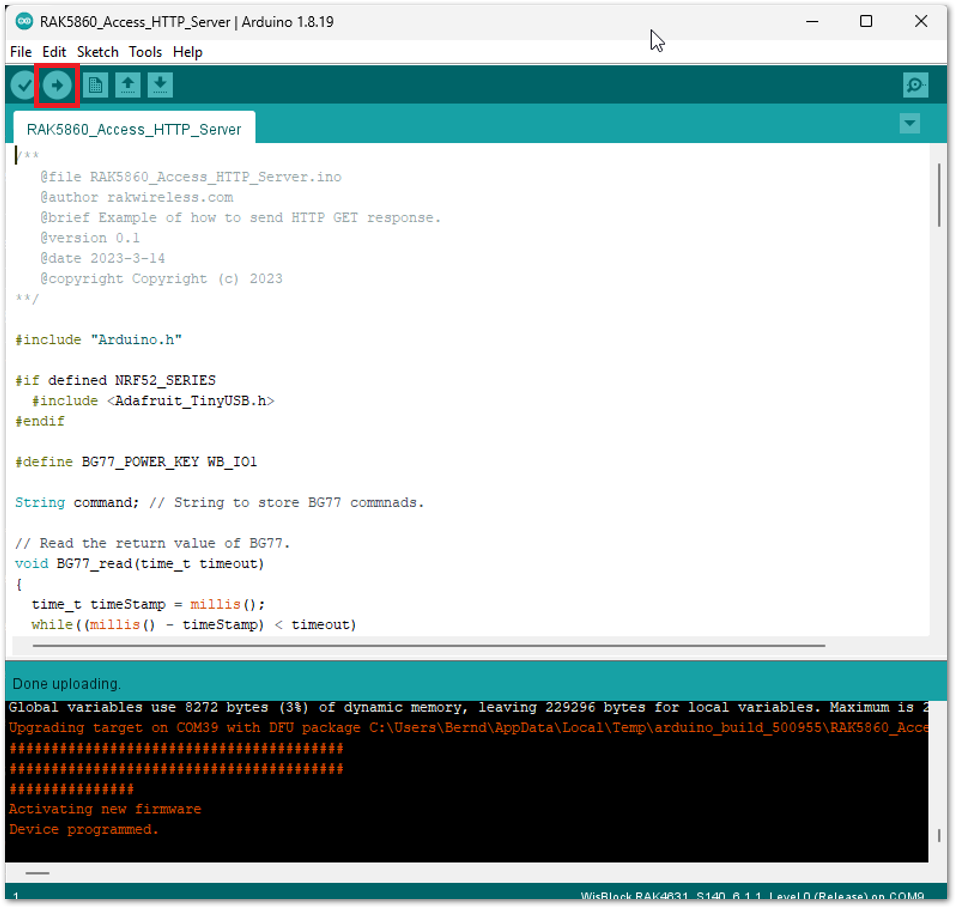 Figure 1: HTTP Example Code
- The process will first configure the APN of the cellular network, then set up the URL of the HTTP server to be accessed, send an HTTP GET/Read request, and enable the output of the HTTP response header to display on the Serial Terminal of the Arduino IDE.
The server to be accessed in the example is sina.com but this can be changed to a different website.
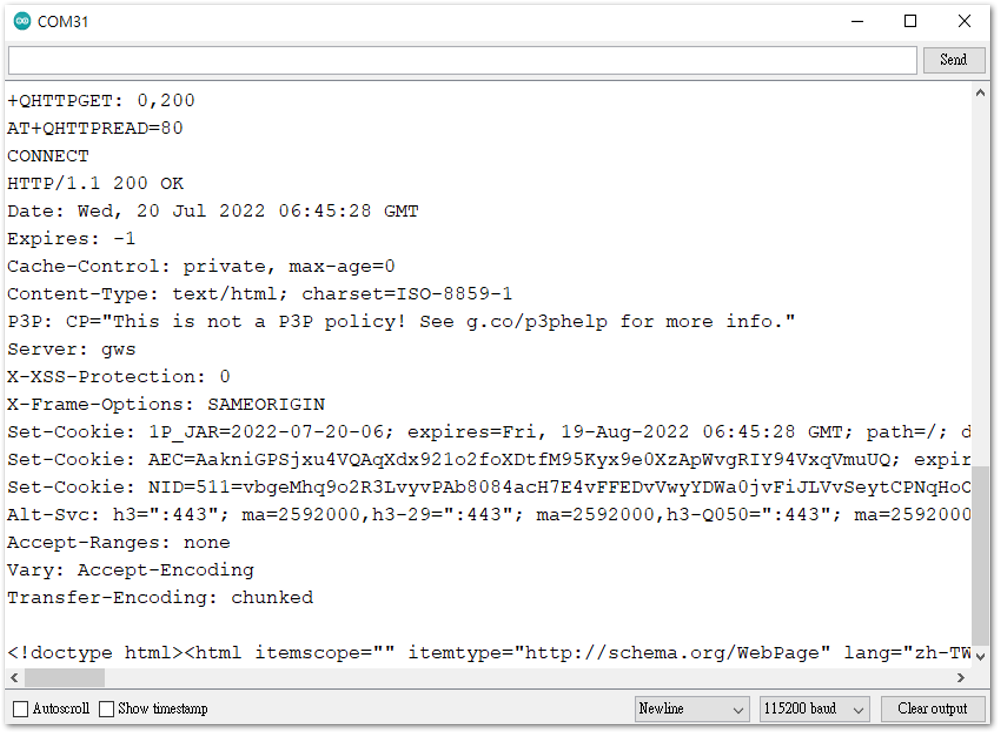 Figure 1: Successful HTTP Get with reply
TCP Client Example
- Go to the TCP Client example code from the RAK5860 repository.
- Copy and paste the code to Arduino IDE and click upload.
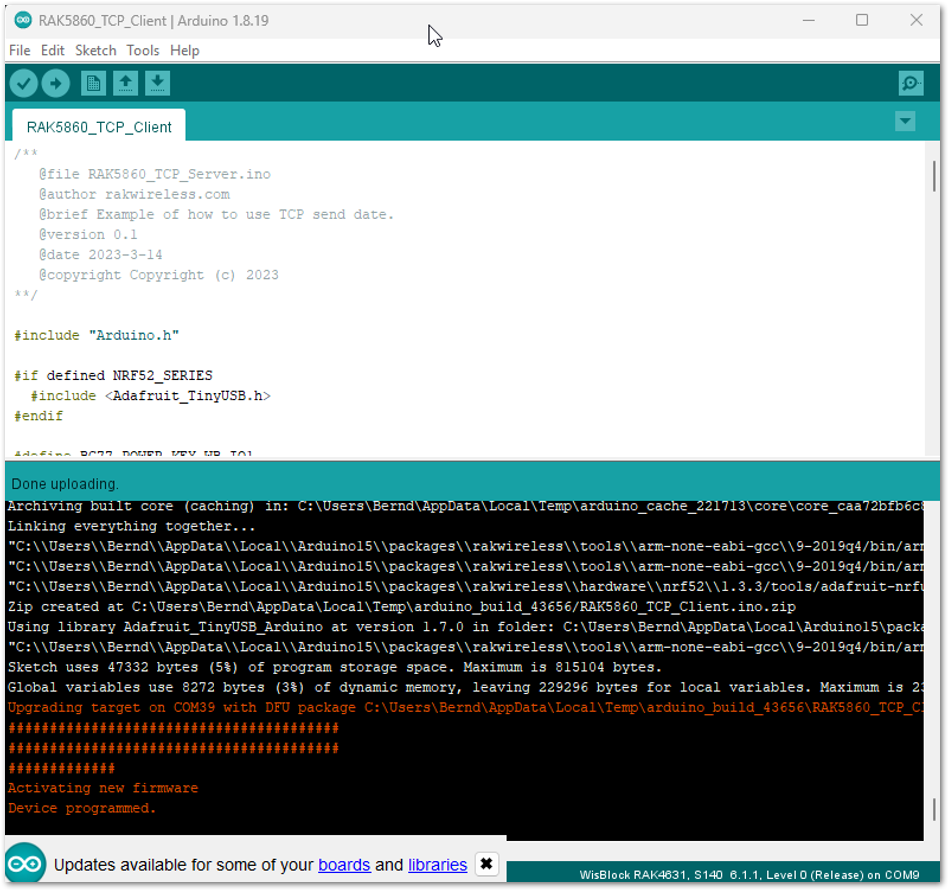 Figure 1: TCP Example Code
- The process will first configure the APN of the cellular network, then create a TCP socket connection and send data to the TCP server. You can see the status if the device has already sent the payload via the Serial Terminal of the Arduino IDE.
You need to configure your own TCP server that will receive the transferred data. You have to edit the AT+QIOPEN and put the address of your server.
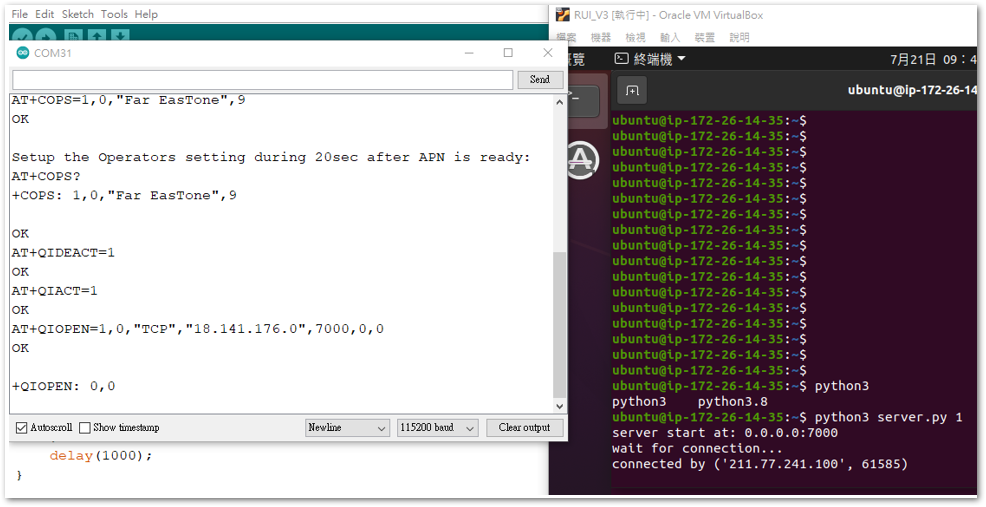 Figure 1: TCP Client connection
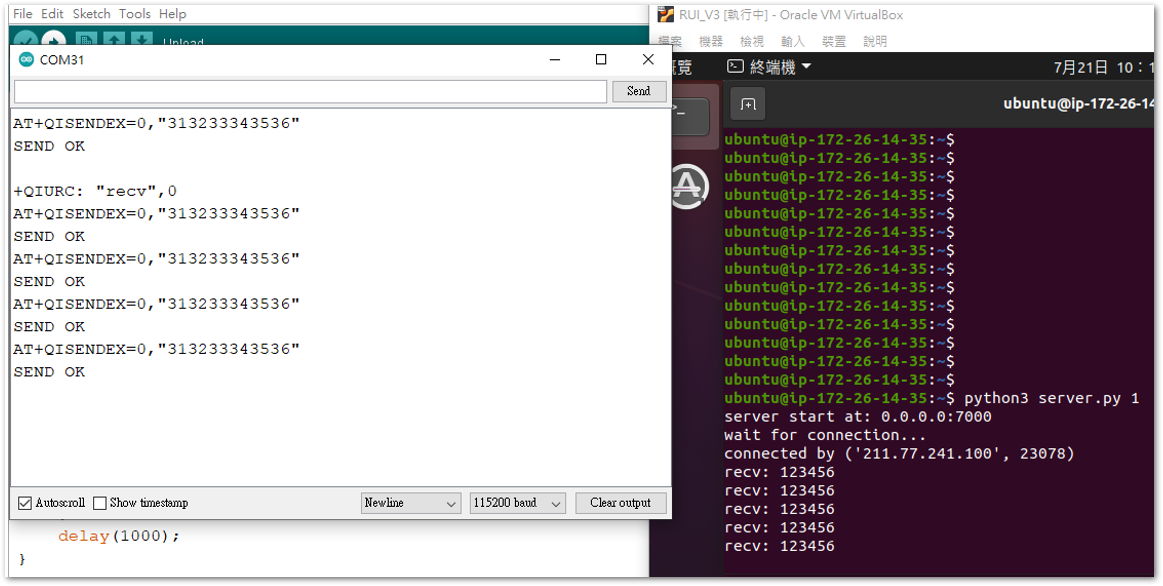 Figure 1: Data transmitted from TCP Client
MQTT Example
- Go to the MQTT Client example code from the RAK5860 repository.
- Copy and paste the code to Arduino IDE, and click upload.
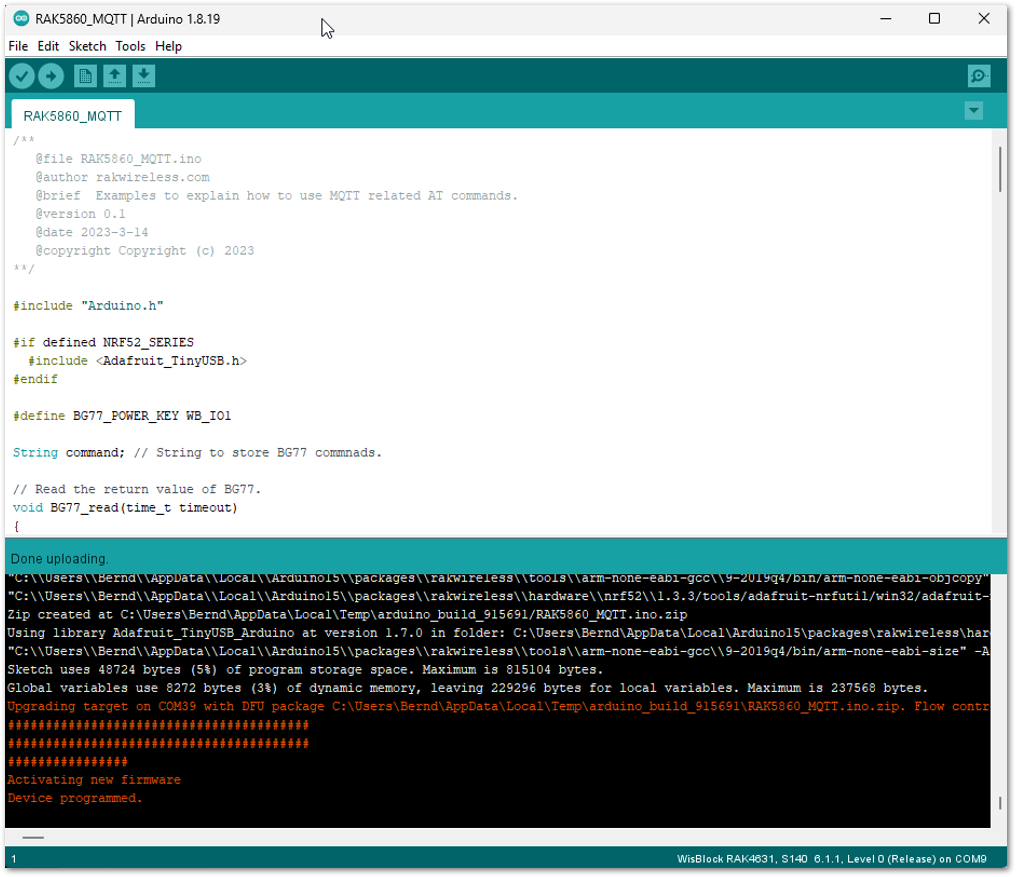 Figure 1: MQTT Example
- The process will first configure the APN of the cellular network, then configure the MQTT Broker (in this example, pointing to a specific address). It will then subscribe to an MQTT topic in the setup section and continuously publish Hello RAKwireless at fixed intervals. You can see the status if the device has already sent the payload via the Serial Terminal of the Arduino IDE.
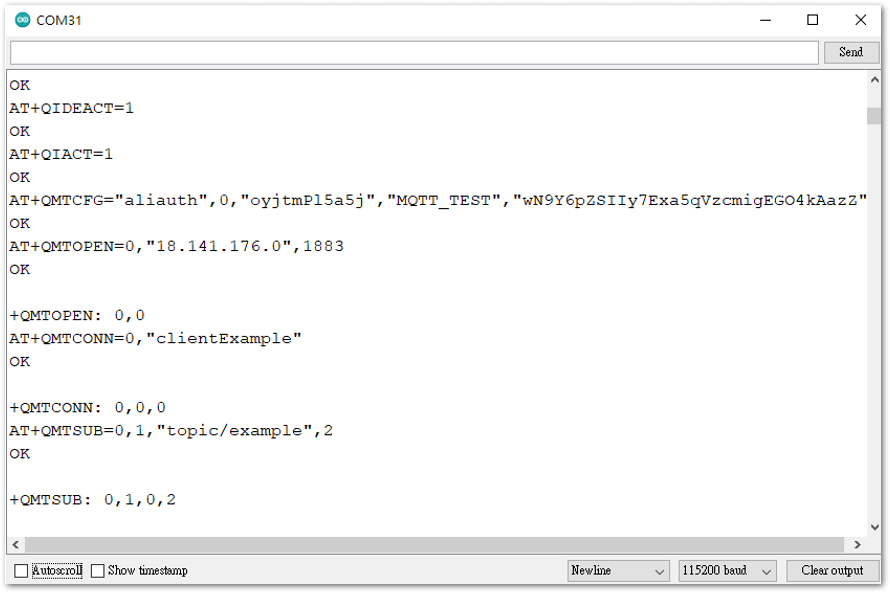 Figure 1: MQTT Subscription to Topic
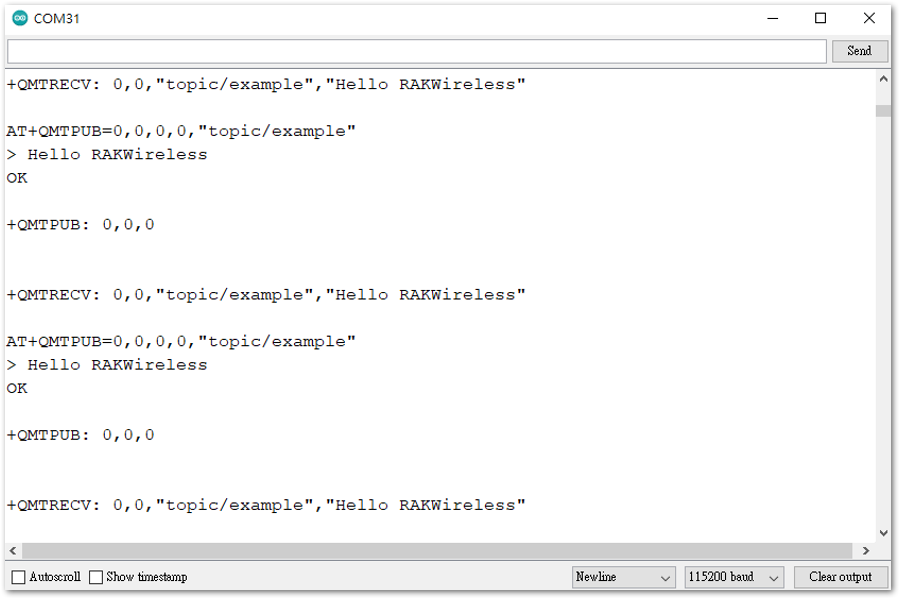 Figure 1: MQTT Publishing in fix intervals