RAK3244 BastWAN Breakout Board Quick Start Guide
Description
The RAK3244 BastWAN adapts the RAK4260 module into a Feather-compatible format, developed by ElectronicCats. At its core, the RAK4260 LPWAN Module is based on Microchip’s SAM R34 (R34J18B), a SiP device that integrates a 32-bit ARM Cortex-M0+ MCU with a LoRa transceiver. It provides full coding support through the Arduino™ IDE.
For more information about the board, check the ElectronicCats RAK3244 BastWAN repository.
Hardware Setup
The BastWAN is a Feather breakout board with everything you need to get started on your project.
Before powering the Feather Board, ensure that the included LoRa antenna is connected. Failure to do so may damage the board.
Software Setup
Burn the Bootloader
RAK3244 BastWAN board comes with a pre-flashed bootloader upon purchase. However, if it is necessary to replace the bootloader, you can burn the bootloader-bast-wan-v3.4.0.bin with Jlink as demonstrated below:
 Figure 1: Flash the bootloader
You can also flash the bootloader by using the RAKDAP1 Flash and Debug Tool. The guide on how to connect RAK3244 to RAKDAP1 can be found on SWD Programming Interface section of RAK3244 datasheet.
After ensuring the correct wiring connection, flash the bootloader using the pyocd command. If you do not have pyocd installed on your system, check the pyocd installation guide.
pyocd flash -t atsaml21j18a bootloader-bast-wan-v3.4.0.bin
Once the command is executed, the bootloader should be flashed successfully. You can now connect the RAK3244 BastWan to your PC.
Configure The Things Network (TTN)
This section covers The Things Network (TTN) and the procedure for setting up the platform to connect with the RAK3244 BastWAN.
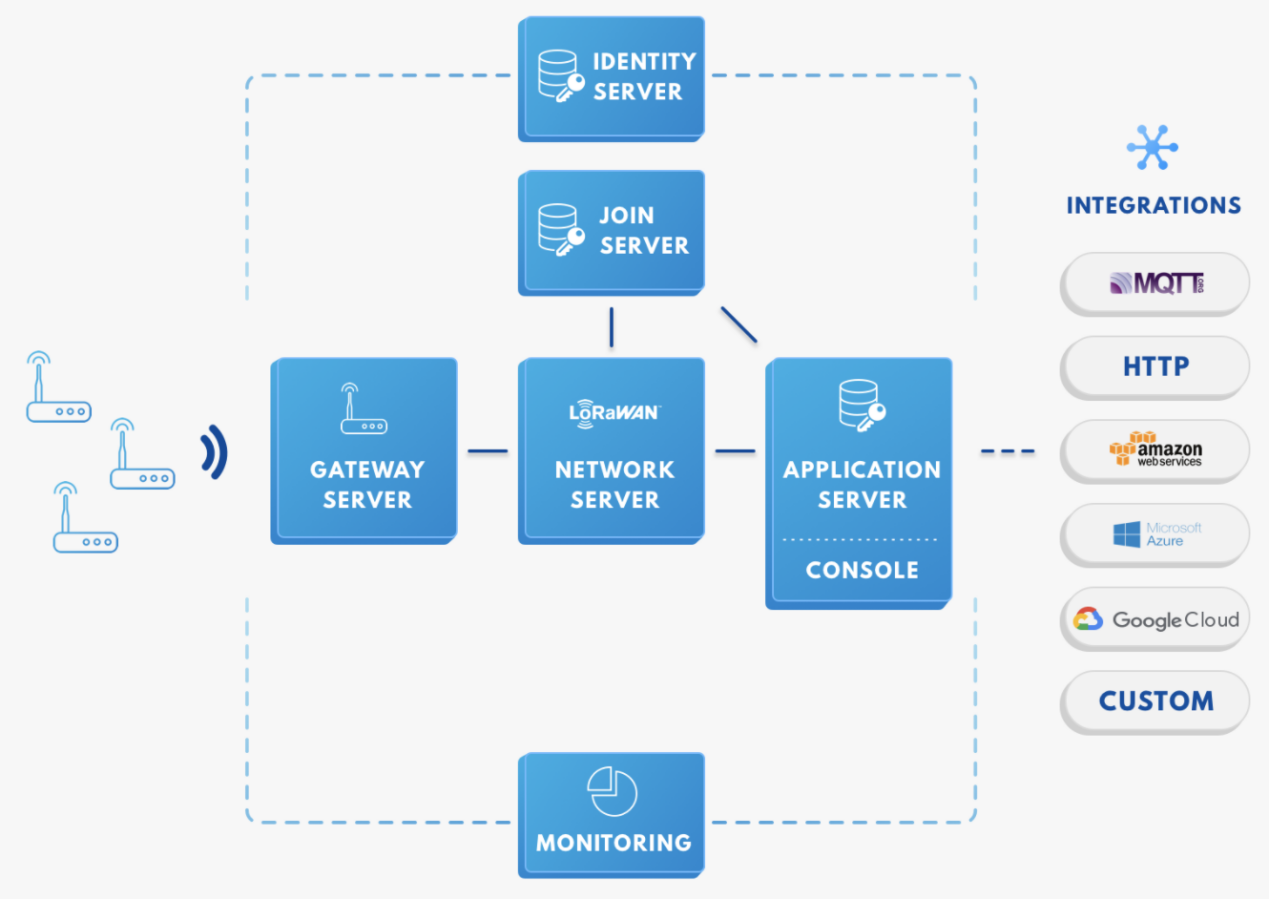 Figure 1: RAK3244 BastWAN in the context of the TTN
As depicted in Figure 2, the RAK3244 BastWAN is one of the devices positioned on the left side. In an IoT solution, its purpose is to sense relevant process variables and transmit the data to backend servers in the cloud. The processed data is then integrated into a larger solution to enable efficiency, traceability, predictability, and other capabilities.
The RAK3244 BastWAN can be part of this ecosystem, and this section aims to demonstrate how easy it is to send data to TTN using the LoRaWAN protocol. To accomplish this, the RAK3244 BastWAN must be within the coverage of a LoRaWAN gateway.
The device name used for this setup is "RAK4260", as it is the core of the RAK3244 BastWAN. However, you can assign any device name you prefer for your setup.
If you don’t have an account yet, visit the TTN website to create one. After completing the registration, log in to your account and navigate to the Console.
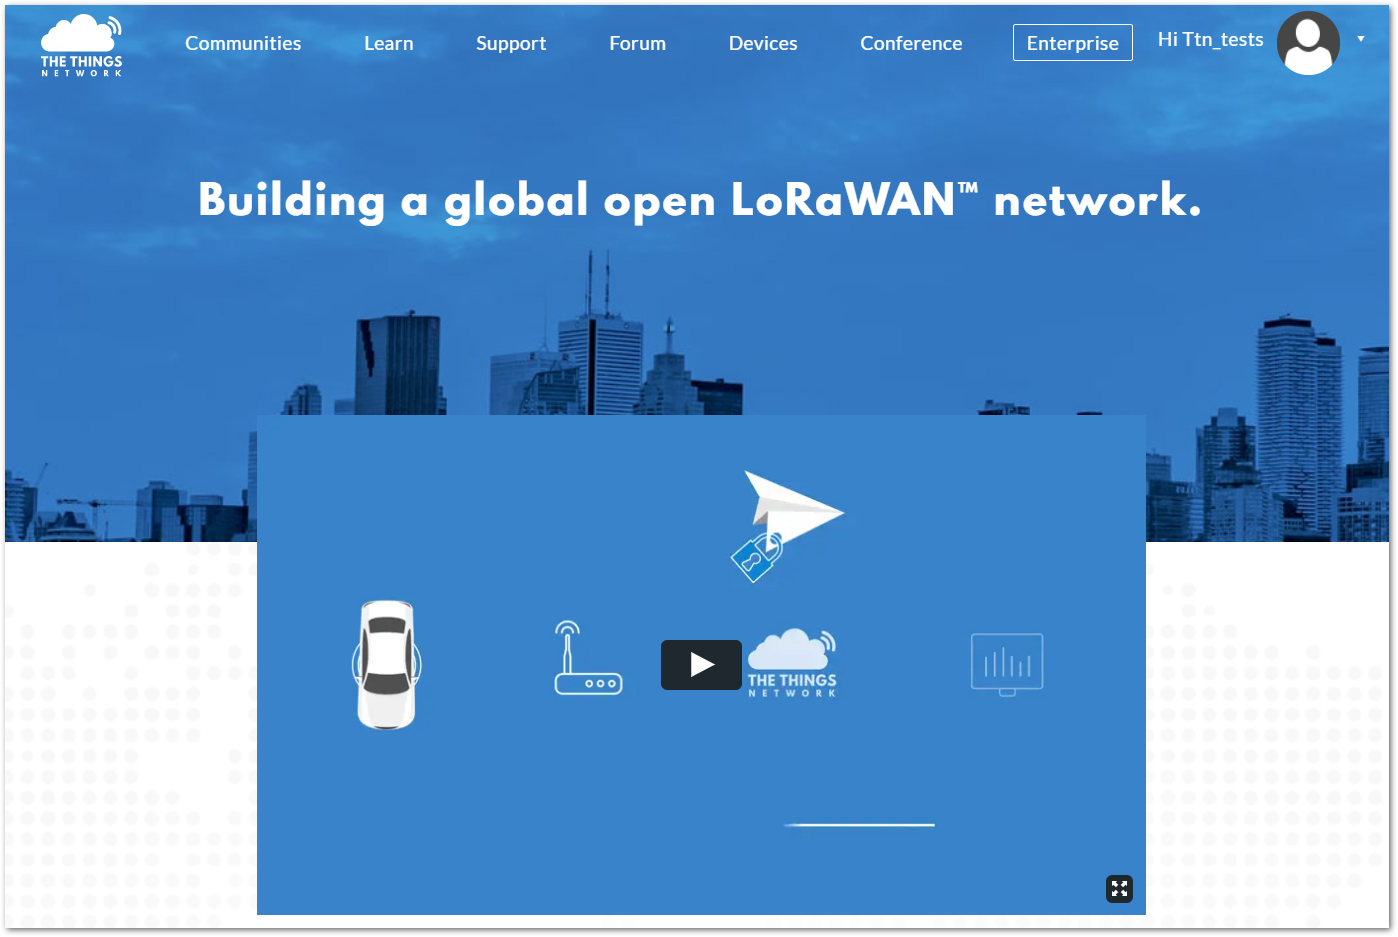 Figure 1: The Things Network Home Page
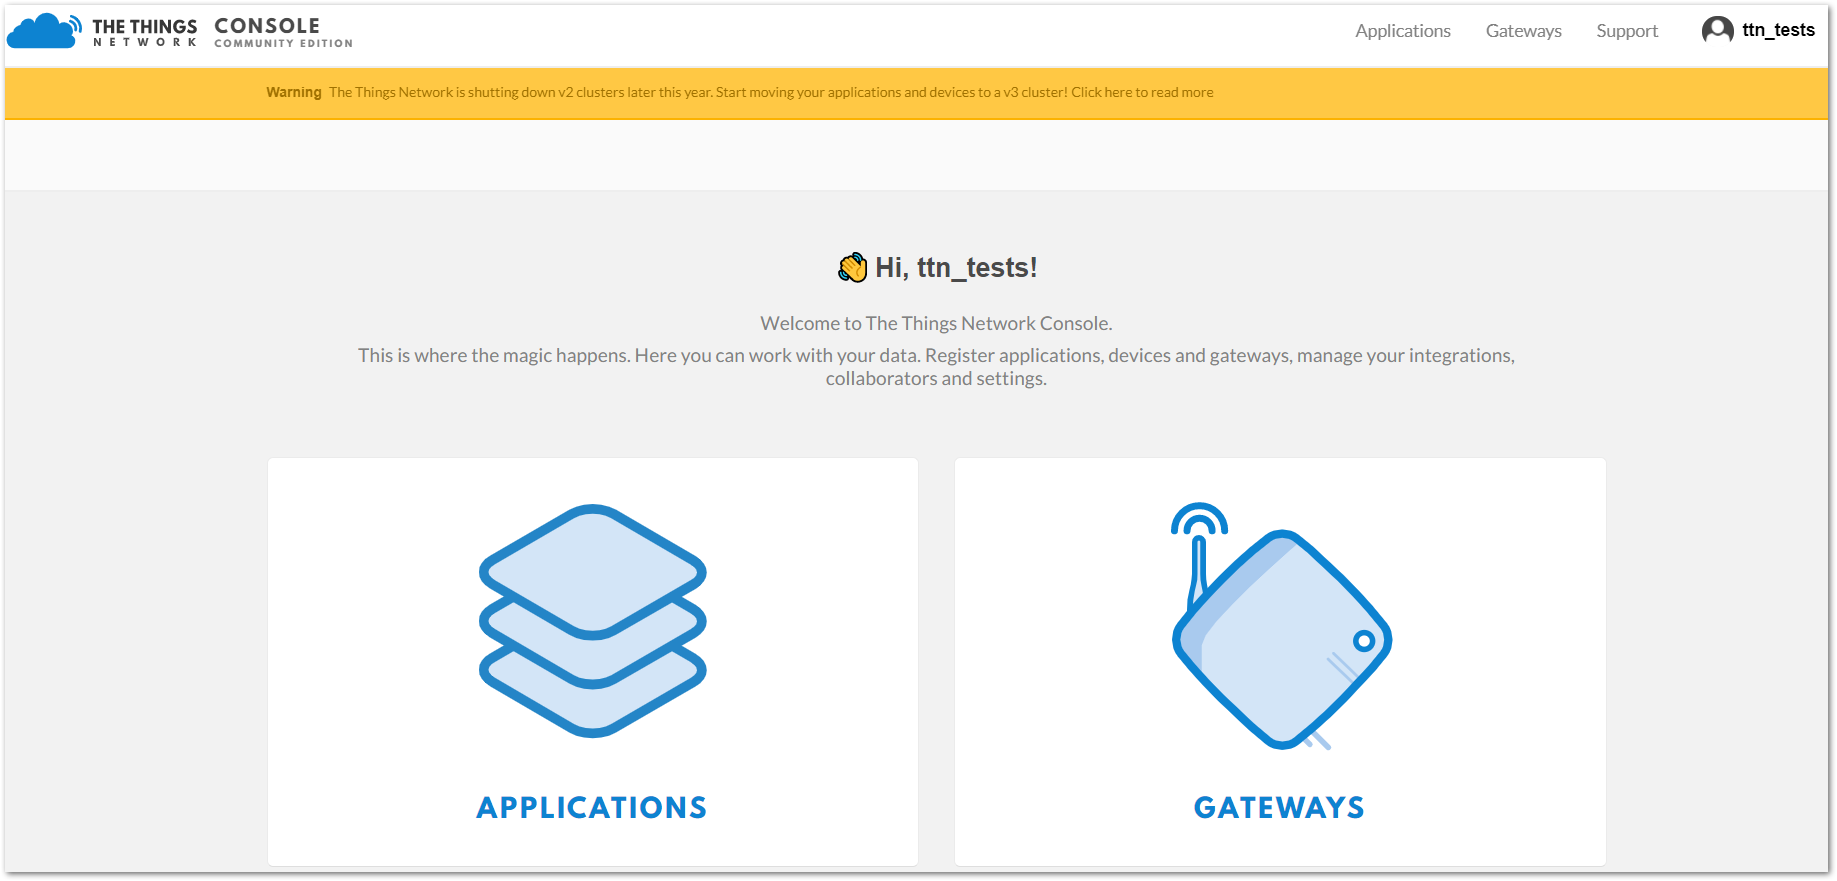 Figure 1: TTN Console Page
Create a New Application
- Choose APPLICATIONS.
 Figure 1: Application Section
- Click the add application button.
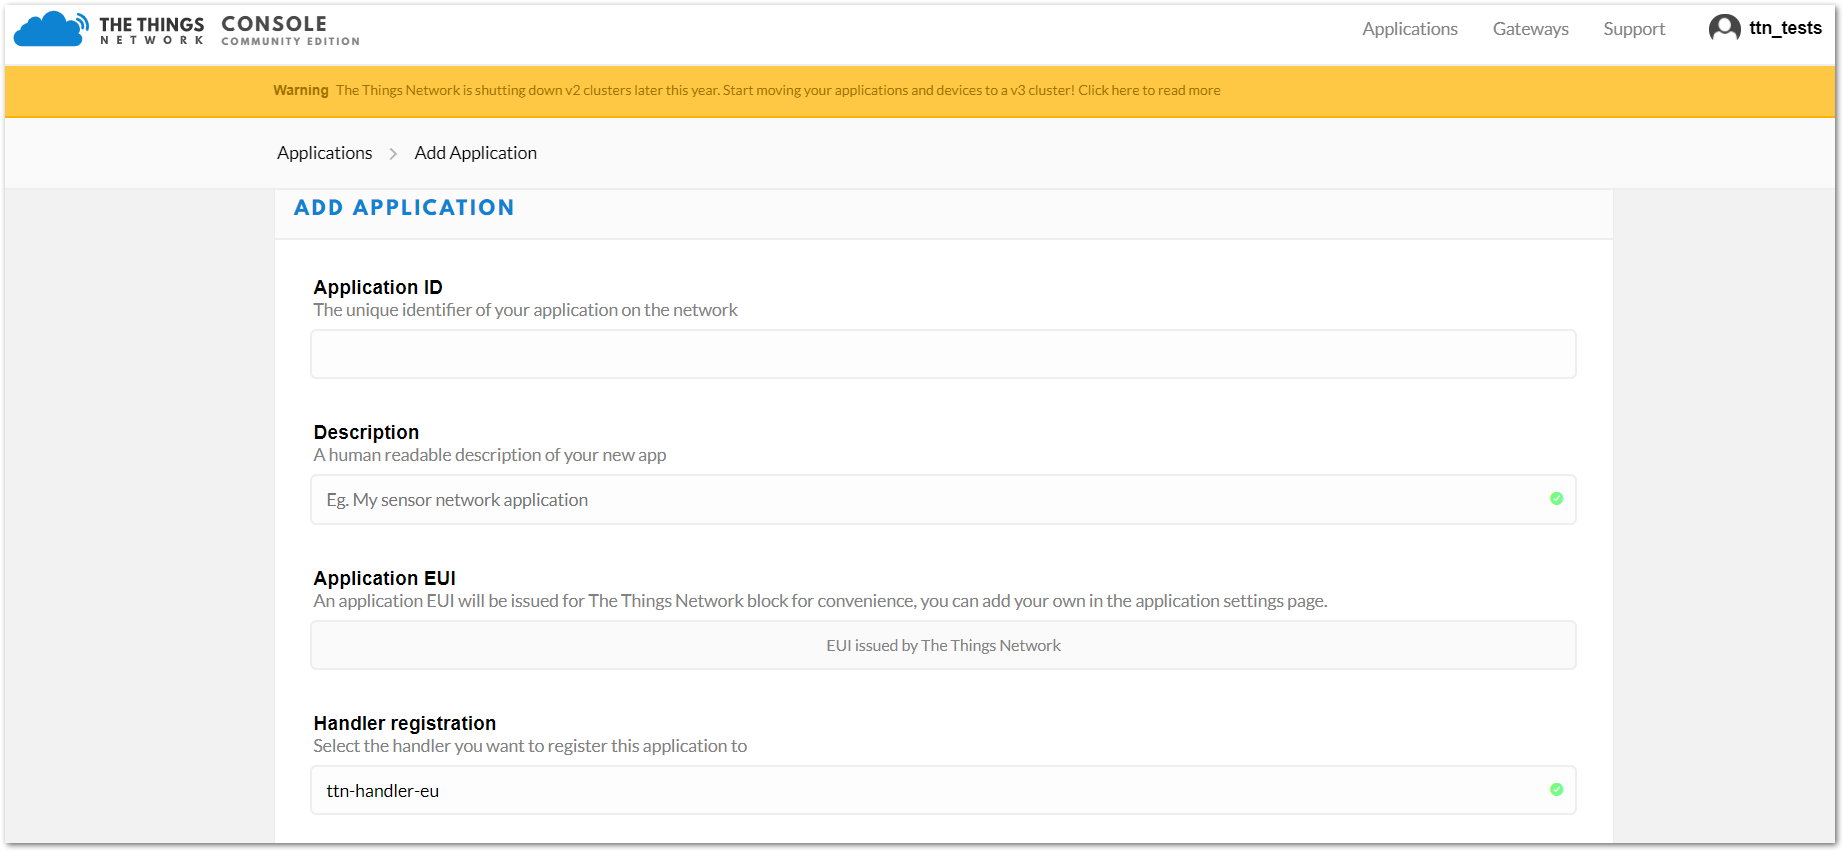 Figure 1: Add an Application
-
Here are the key points to remember when adding an application:
- Application ID: A unique identifier for your application in the network. It must be in lowercase with no spaces.
- Description: A brief, human-readable summary of your application.
- Application EUI: Automatically generated by The Things Network for your convenience.
- Handler Registration: The handler to which you want to register this application.
- After entering the required information, click the Add Application button. If a page similar to Figure 8 appears, your application has been successfully registered.
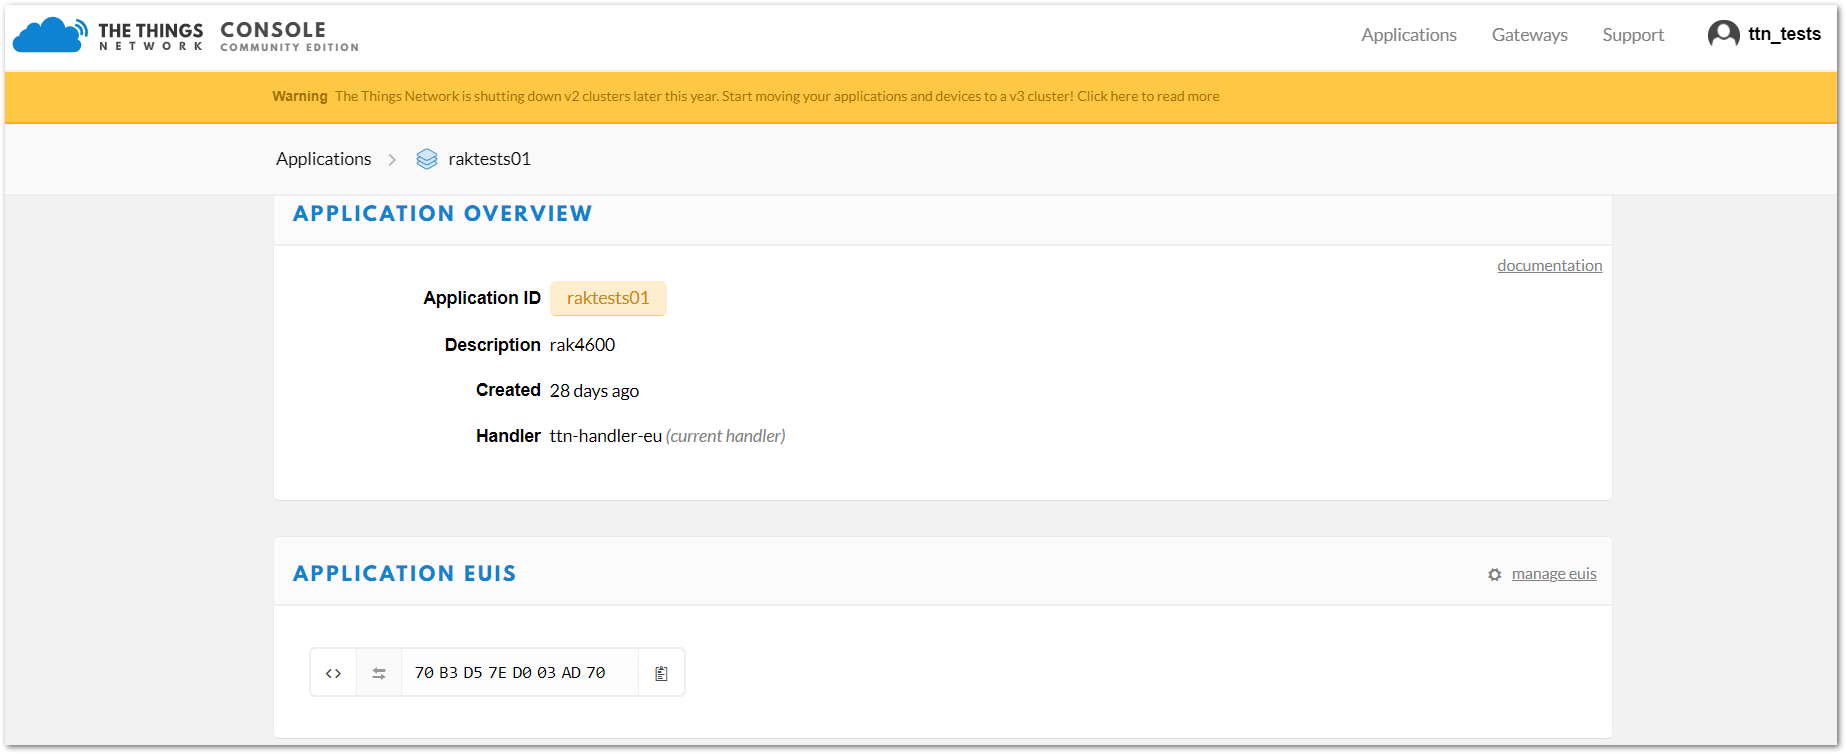 Figure 1: Application Overview
- Scroll down until you see the Devices section or click the Devices button at the top.
 Figure 1: Register a New Device
- Then, register a new device by clicking on register devices.
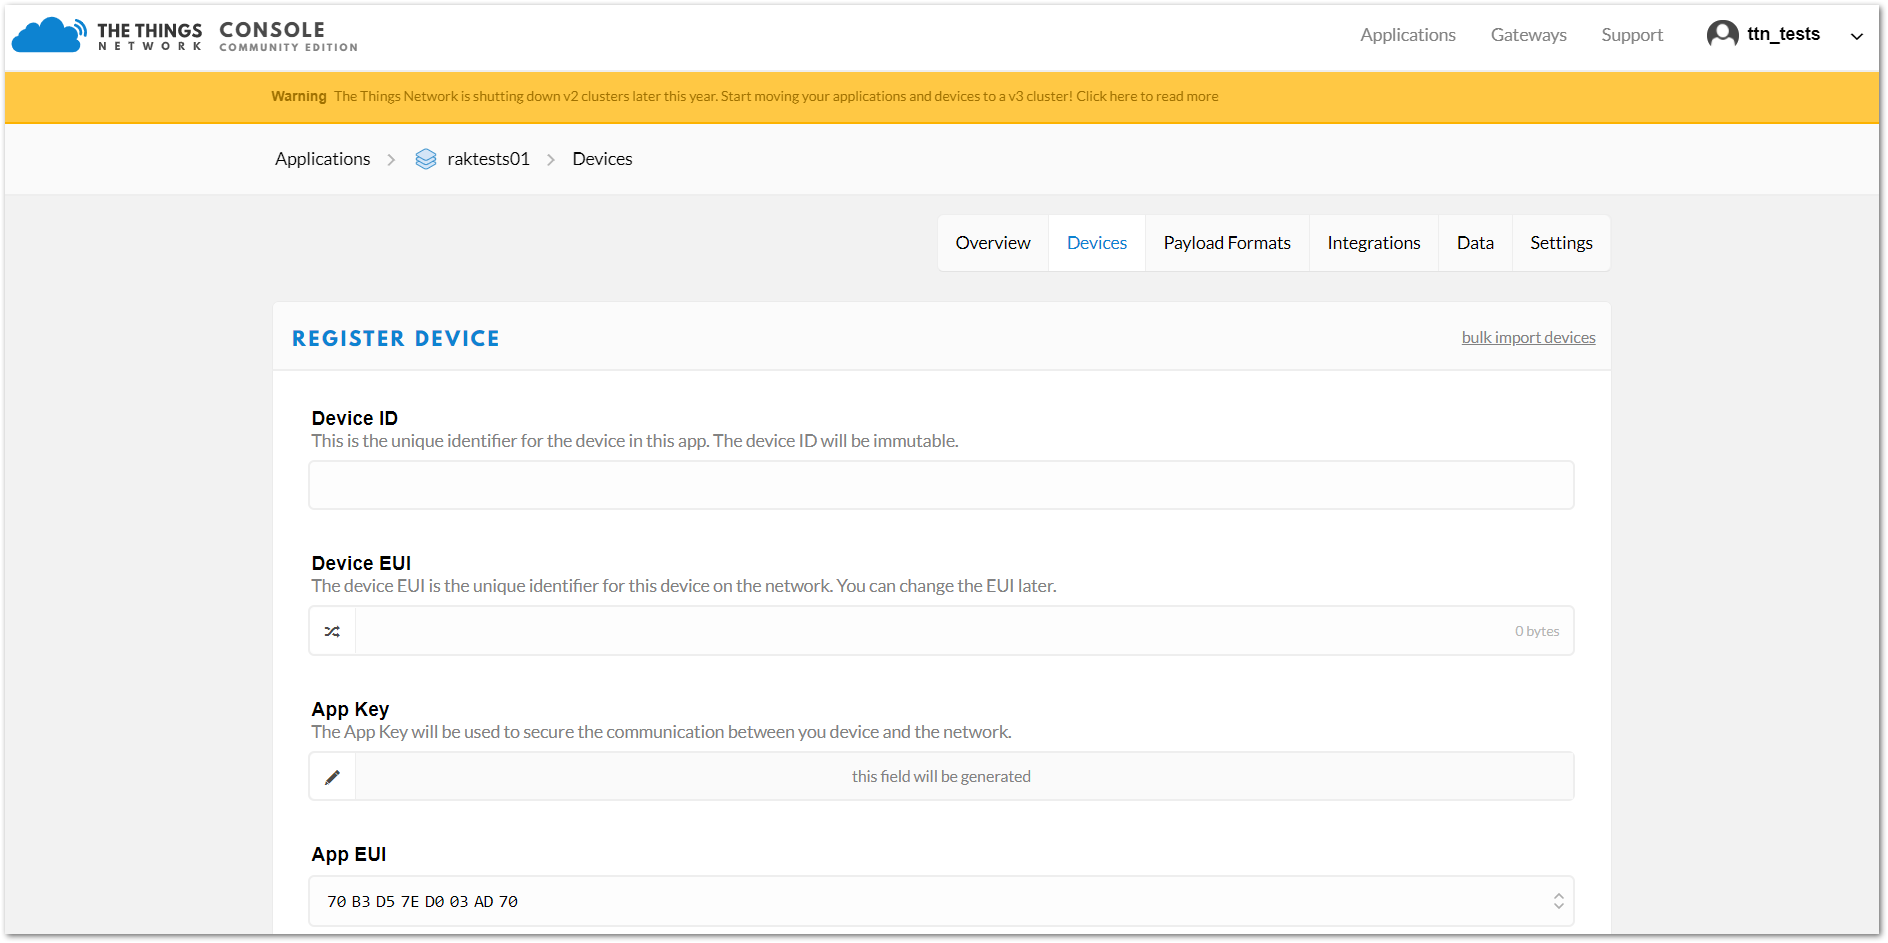 Figure 1: Add your Device
In this form, the Device ID must be unique within the application and consist of lowercase, alphanumeric characters. The other parameters in the form are crucial for the proper functioning of the LoRaWAN protocol:
- Device EUI
- Application Key
- Application EUI
The TTN platform can generate these parameters randomly by leaving those fields empty, or you can enter already existing values.
- Click the Register button at the bottom of this page to finish the process.
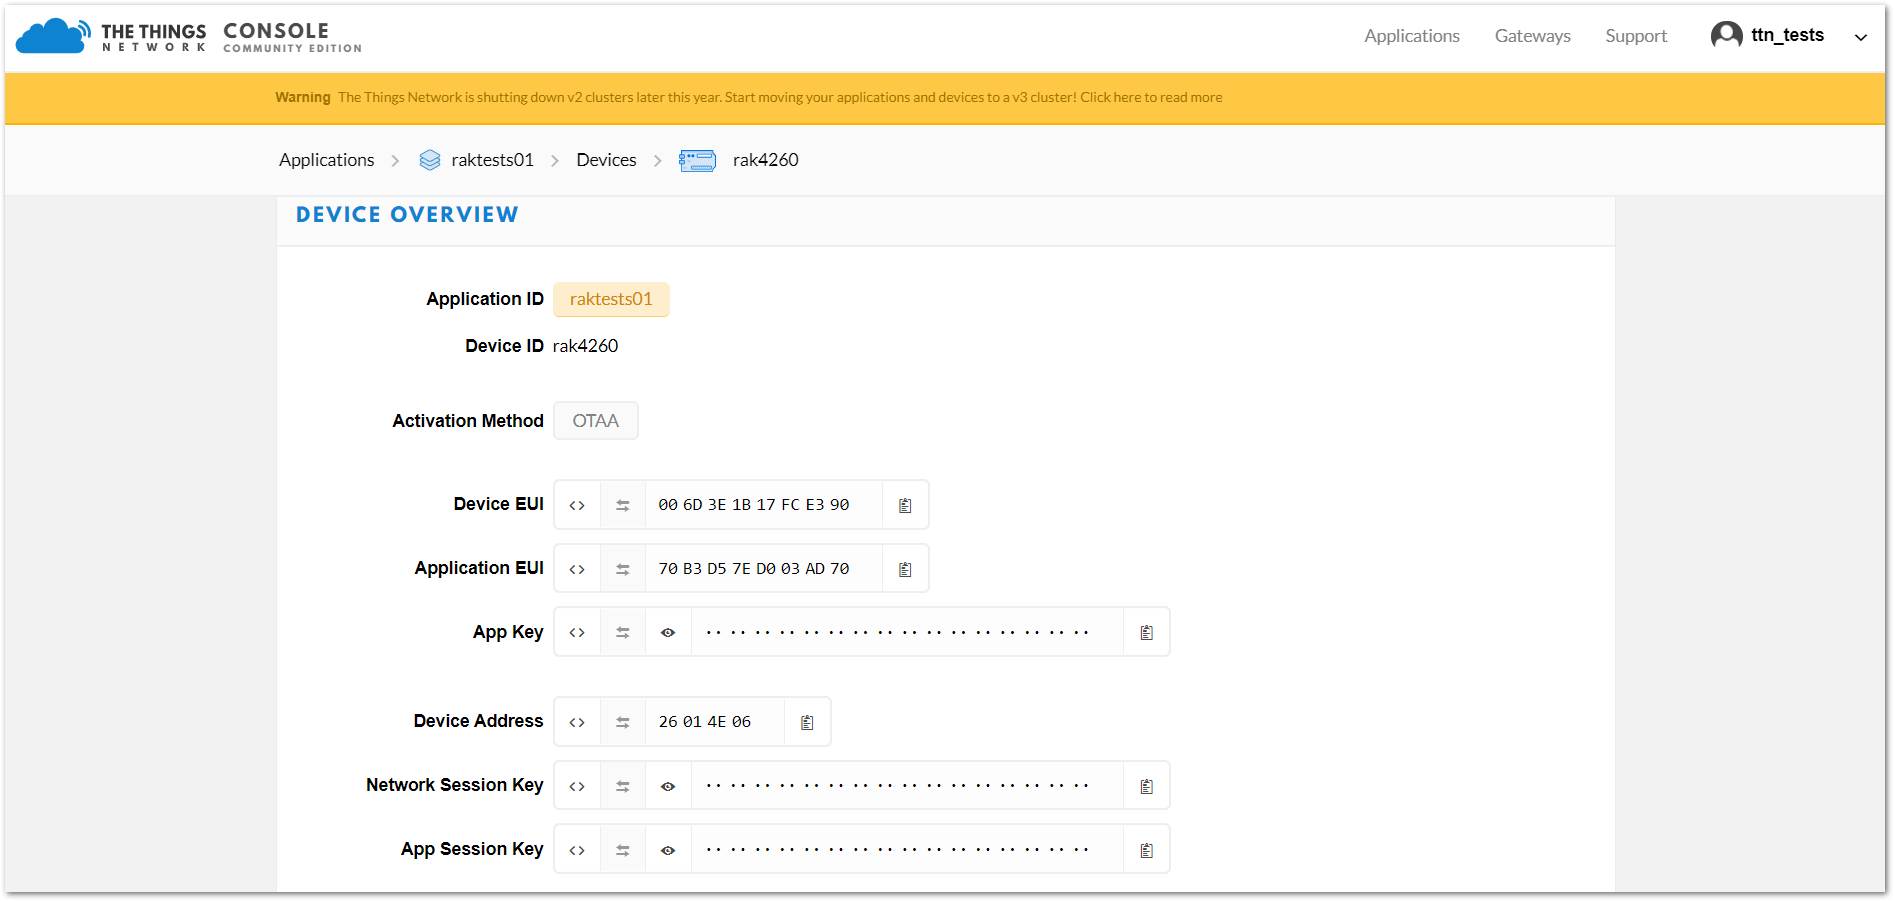 Figure 1: Device Overview
Now that the Device EUI, Application EUI, and Application Key are defined, proceed with the setup of RAK3244 BastWAN LoRa configurations.
Modify and Flash Firmware Using Arduino IDE
This section introduces how to use the RAK3244 BastWAN with the Arduino™ IDE.
BSP Installation
- After successfully flashing the bootloader, install the BSP library to add board support for the RAK3244 BastWAN. Open the Arduino IDE and navigate to File > Preferences. Copy and paste the following URL into the Additional Boards Manager URLs input field:
https://electroniccats.github.io/Arduino_Boards_Index/package_electroniccats_index.json
- Click OK.
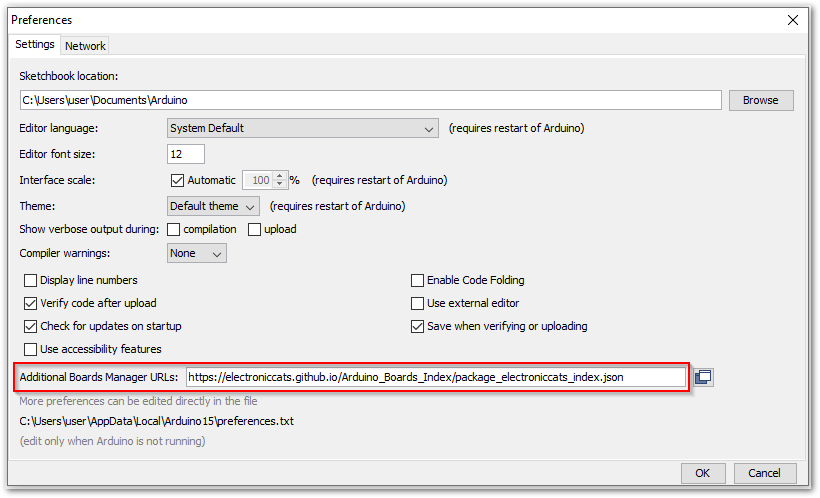 Figure 1: Arduino additional board support
If there is already an existing URL on the textbox, click the button at the right end of the field. This will open an editing window, allowing you to paste the above URL onto a new line as demonstrated in Figure 12.
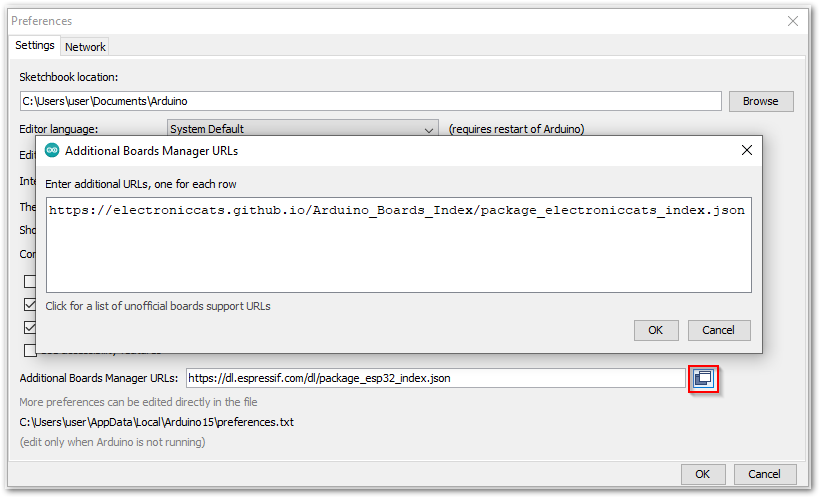 Figure 1: Alternative method for additional board support
- Open the Boards Manager by navigating through Tools > Board > Boards Manager.
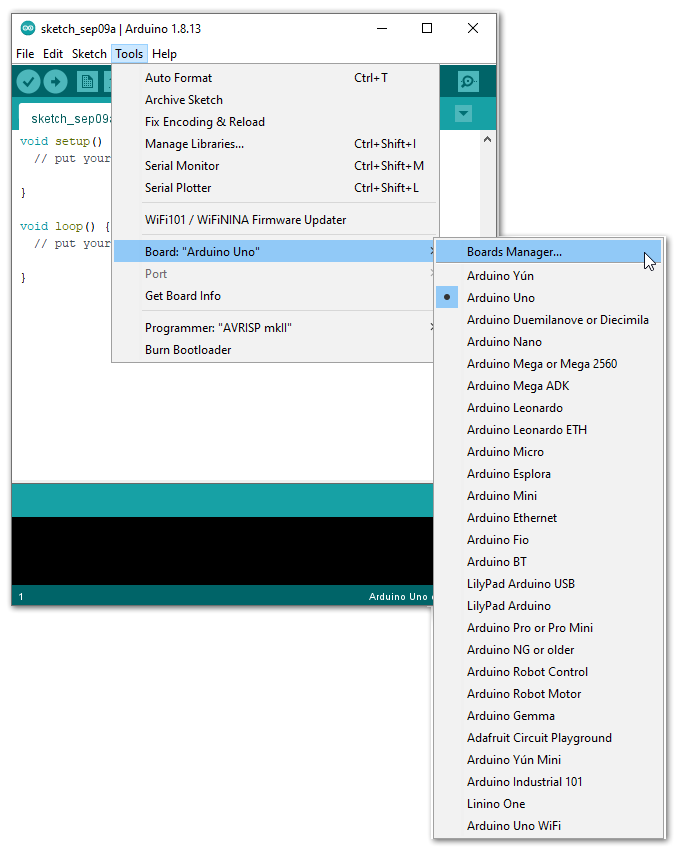 Figure 1: Arduino boards manager
- In the Boards Manager search bar, look for Electronic Cats SAMD Boards. Click Install next to Electronic Cats SAMD Boards, and wait for the installation to complete before closing the window.
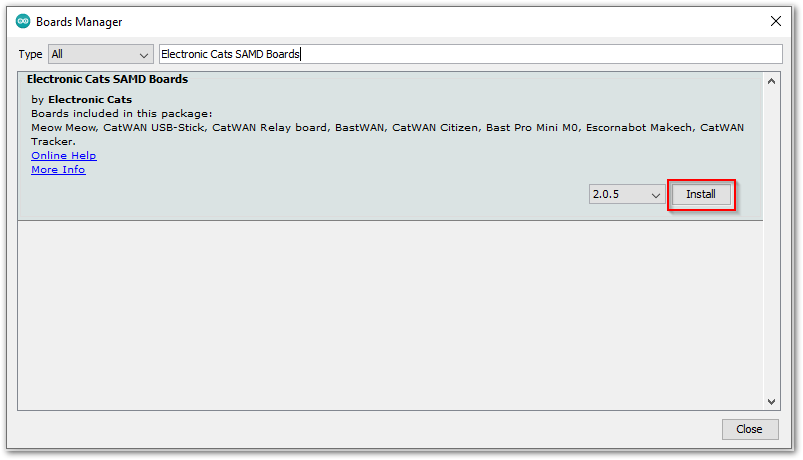 Figure 1: Install Electronic Cats SAMD Boards
- RAK3244 BastWAN should now be on the list of Boards by navigating through Tools > Board > Electronic Cats SAMD(L)(C) Core for Arduino.
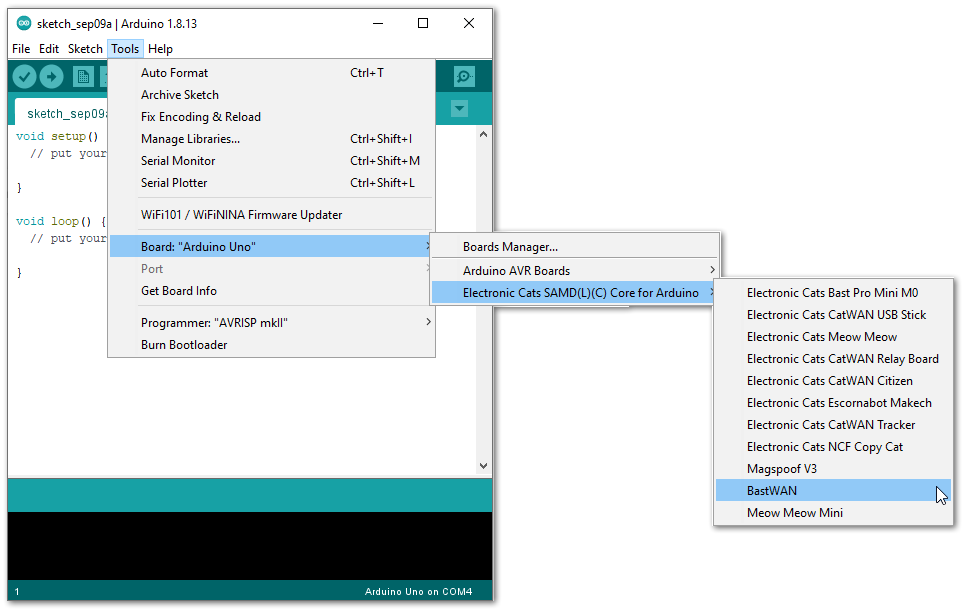 Figure 1: RAK3244 BastWAN available in Boards list
LoRaWAN Library Installation
RAK3244 BastWAN board uses the Beelan-LoRaWAN library, which supports LoRaWAN Class A and Class C implementations operating in EU-868, AS-923, US-915, and AU-915 bands. You can recognize this library as the <lorawan.h> on the sample code.
To ensure the sample code works, install the Beelan-LoRaWAN library. In the Arduino IDE, go to Tools > Manage Libraries. Search for Beelan LoRaWAN and install the latest version of the library. The window will indicate when the library is successfully installed, as shown in Figure 15.
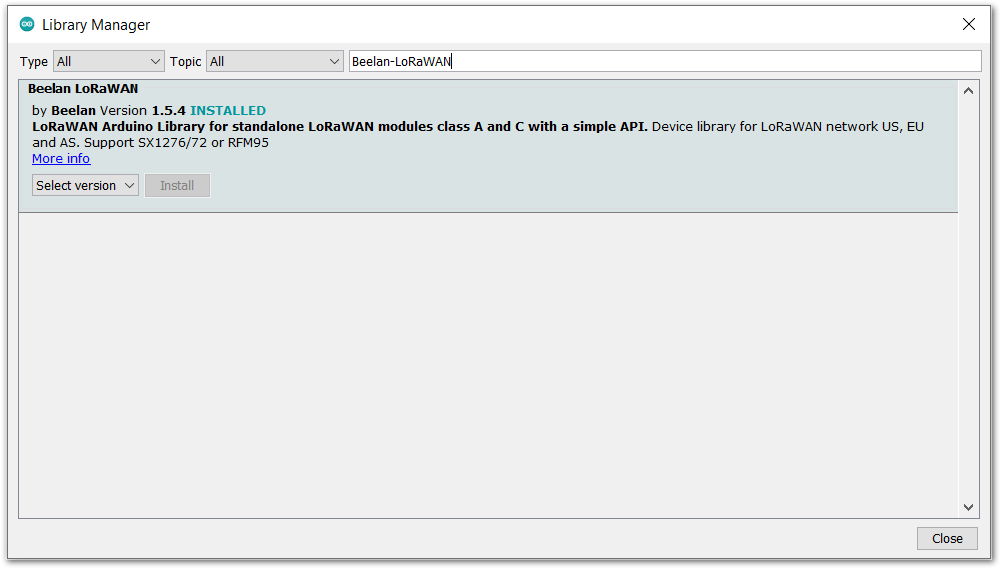 Figure 1: Beelan LoRaWAN library installed
Visit the Beelan-LoRaWAN official GitHub repository for more information.
First Test
For a quick test, a sample source code is provided for a LoRaWAN Class A node with OTAA support. Download the source code and open it with Arduino IDE.
The following sections will demonstrate how to modify LoRaWAN parameters to establish a connection with The Things Network (TTN).
Modify LoRaWAN Parameters
For the RAK3244 BastWAN to successfully connect to a LoRaWAN Platform, several parameters must be properly configured. Not doing so will result in connection failure.
The most volatile parameters on LoRaWAN configuration are the Device EUI, Application EUI, and Application Keys. These data must match with the ones on The Thing Network (TTN) platform. Copy the EUIs and Keys from the TTN platform and paste them on the sample source code. Figure 17 shows the lines of codes that should be modified:
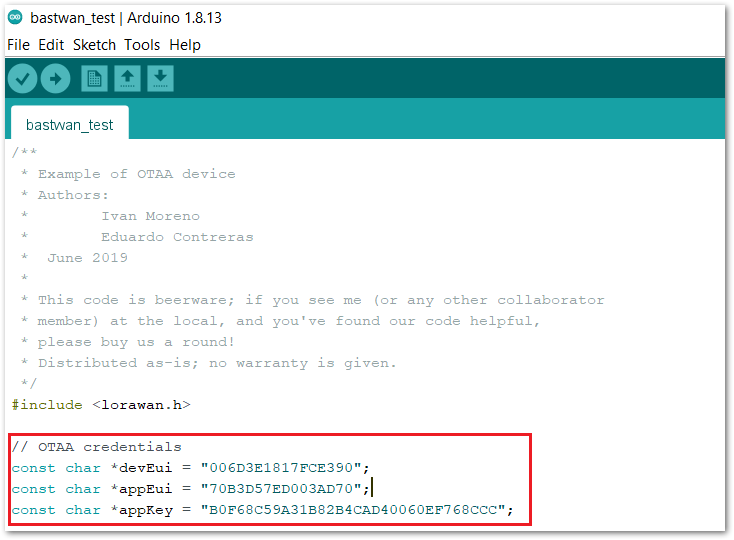 Figure 1: Device EUI, Application EUI, and Application Keys
Compile and Flash the Firmware
Now that the LoRaWAN parameters are set, run the sample program.
Click the Verify button on the upper left of Arduino IDE to compile the code. Before uploading the sample firmware, make sure that the RAK3244 BastWAN is connected and recognized by your PC. To verify this, there must be an assigned port on the Tools toolbar of Arduino IDE. It should not be grayed out.
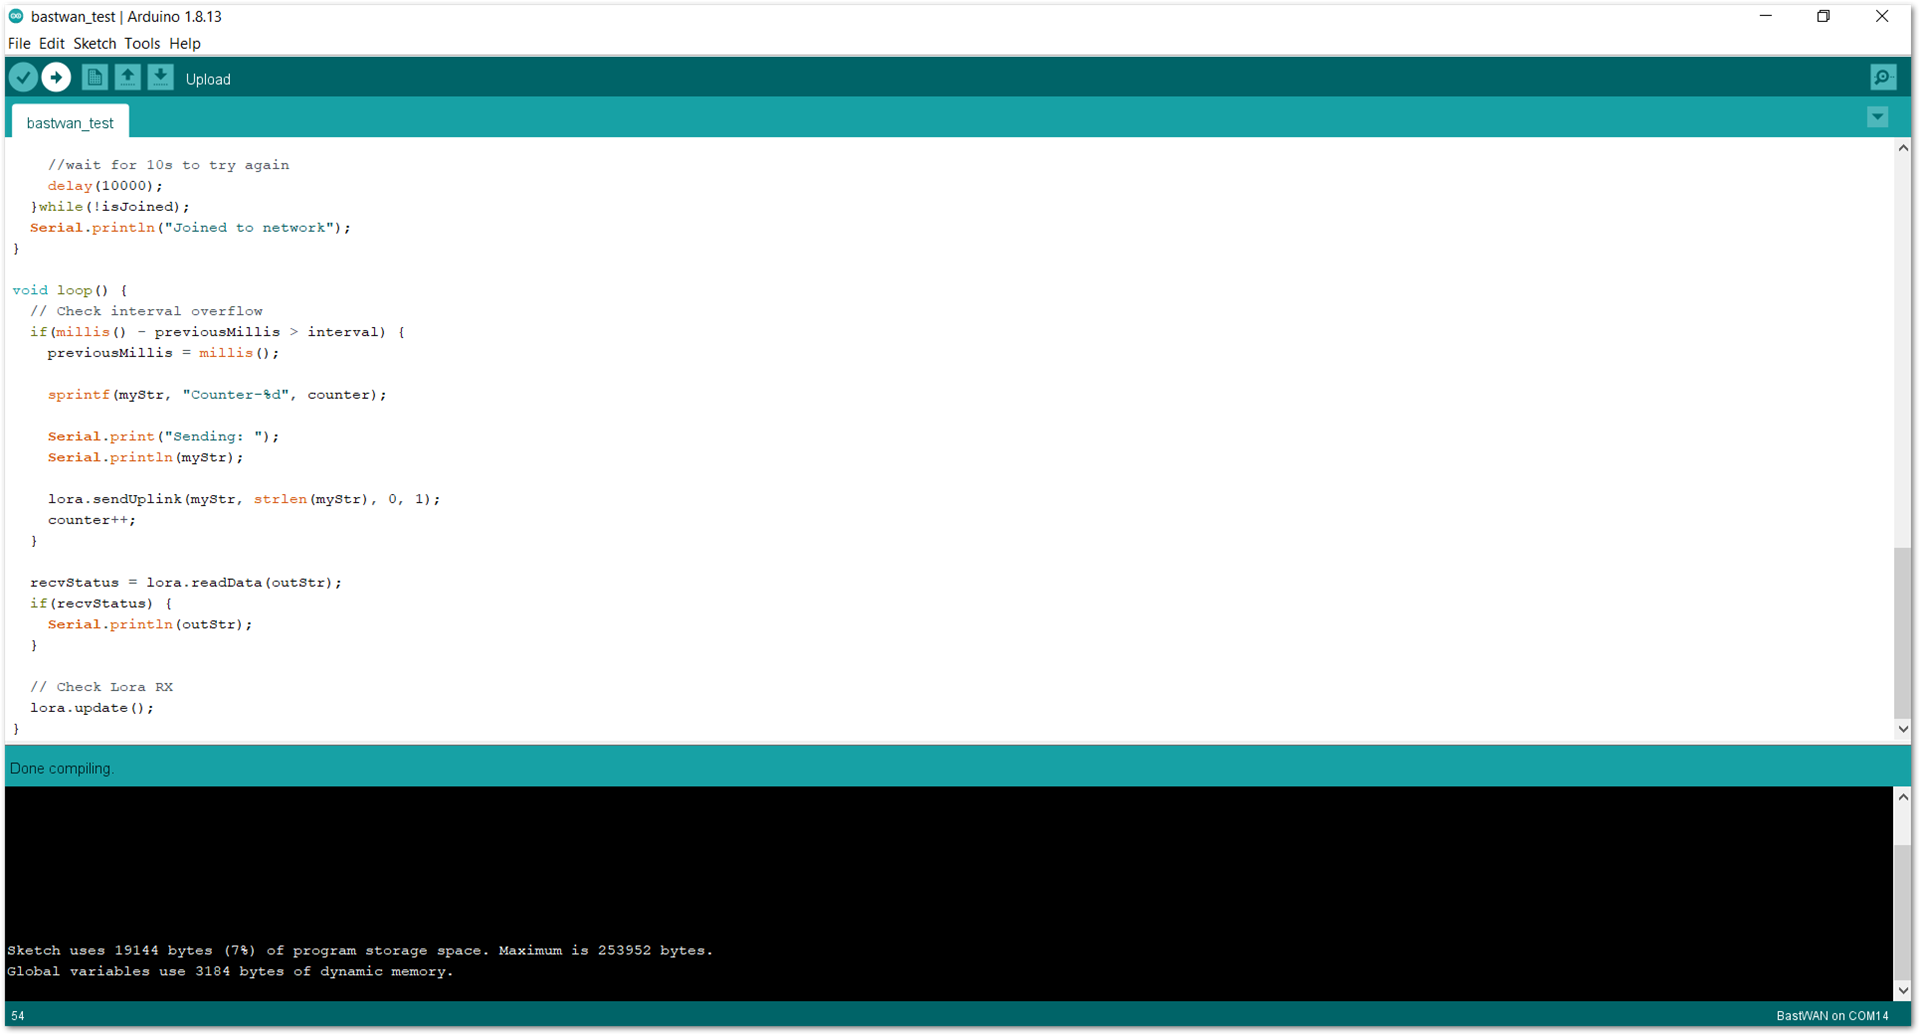 Figure 1: Compilation of sample source code
If everything is well, click the Upload button and the firmware should be flashed to your RAK3244 BastWAN.
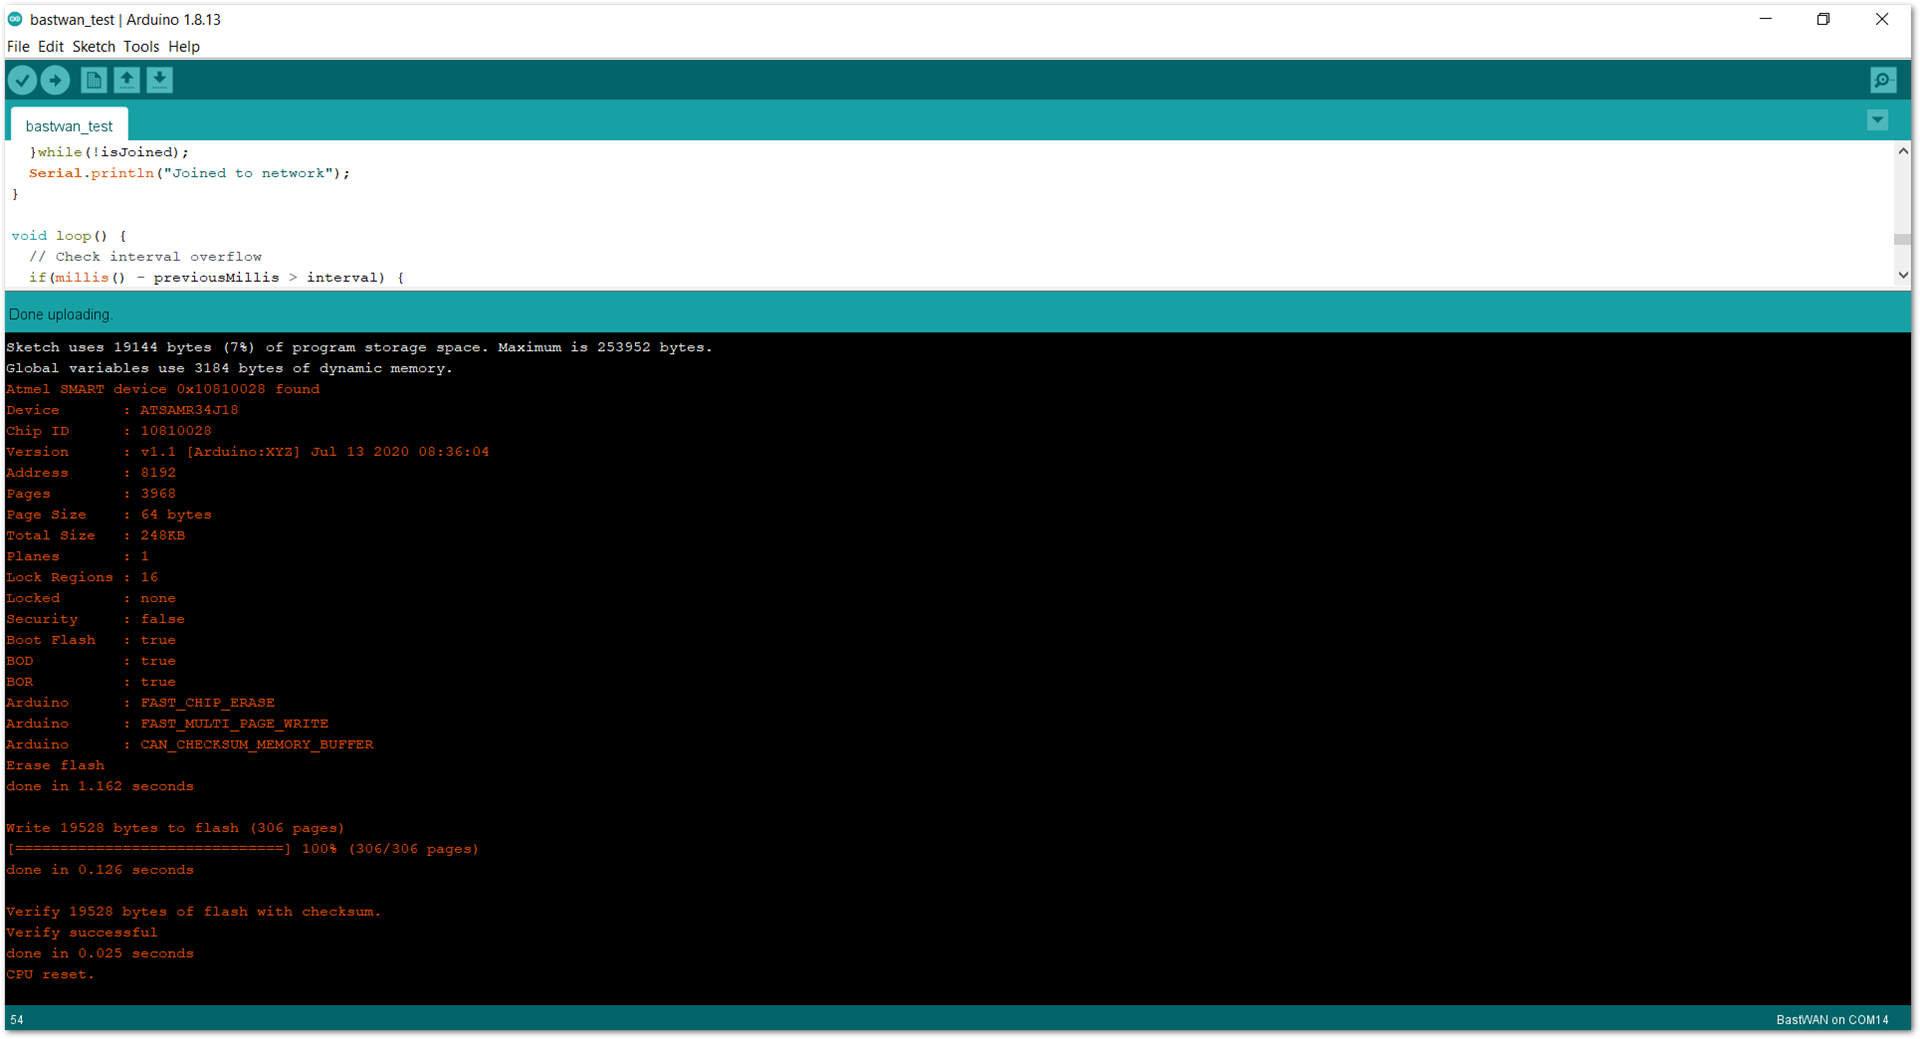 Figure 1: Upload the sample source code
The RAK3244 BastWAN will try to join the LoRaWAN network server, and if it is successful, it will send a string to verify its presence. You can find more details of the operation by examining the sample source code and opening the serial monitor.
Feel free to experiment with your own and explore the capabilities of RAK3244 BastWAN.
