RAK7248 Unboxing & Installation
This guide explains how to prepare the firmware, check the package contents, connect the required antennas, and complete the hardware installation of the RAK7248 WisGate Developer D4H Gateway.
Package Contents
The RAK7248 package includes the following components:
-
32 GB SD Card and Card Reader
-
Power supply
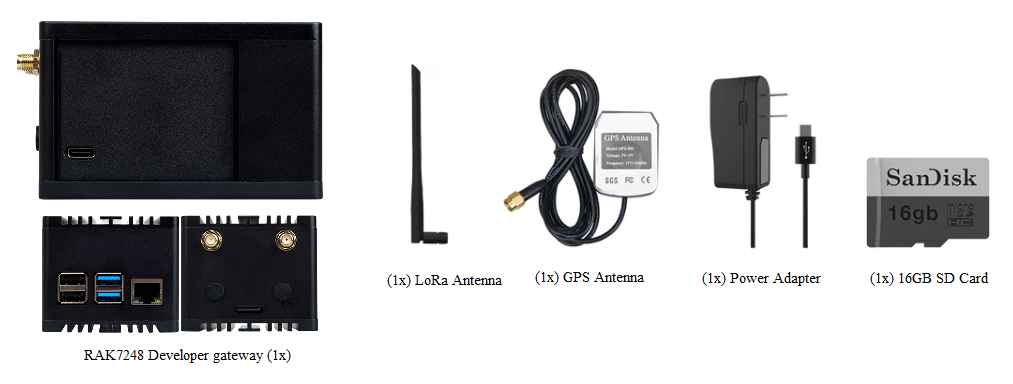 Figure 1: RAK7248/P WisGate Developer D4H Gateway package contents
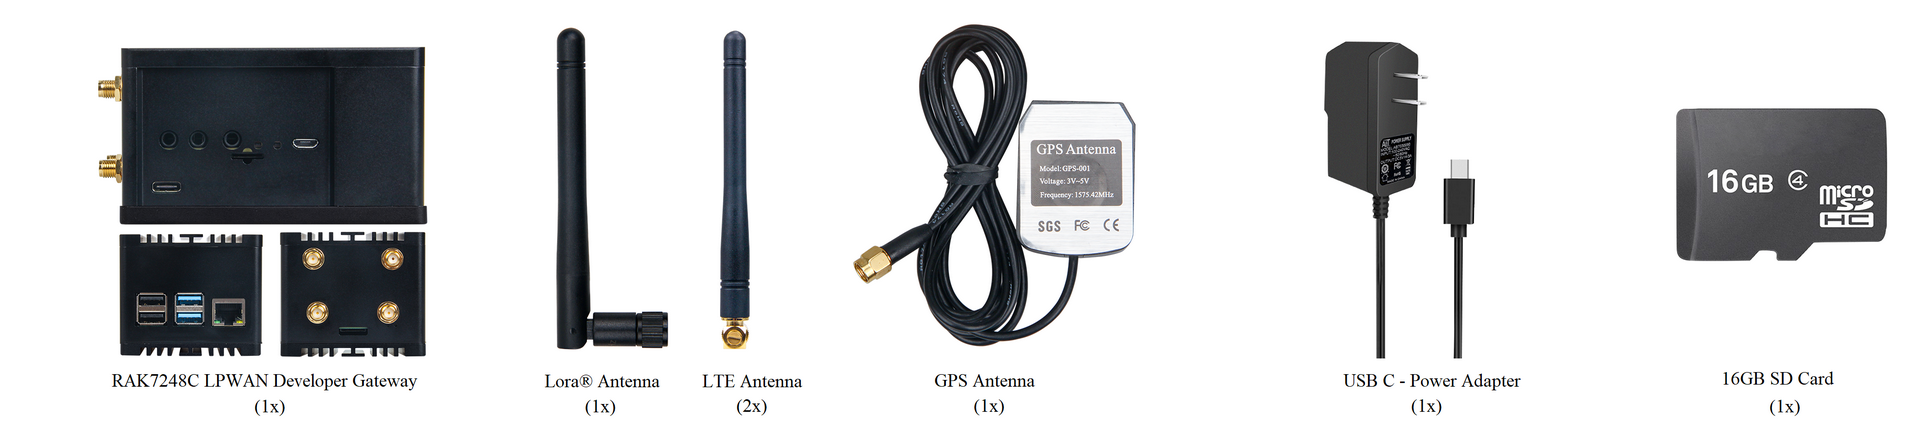 Figure 1: RAK7248C WisGate Developer D4H Gateway package contents
Prepare the Firmware
Before using the gateway, prepare the firmware image and install it on the SD card.
- Download the latest RAK7248 Firmware.
- Follow the WisGate Developer Gateway Firmware Setup to burn the firmware image onto the SD card.
- Insert the SD card into the gateway.
Connect the Antennas
Before powering on the Raspberry Pi 4, connect the required antennas.
Connect the LoRa, LTE (only for the Cellular variant), and GPS antennas before powering on the gateway. Not doing so might damage the boards.
The required antennas depend on the gateway variant:
- LoRa antenna
- GPS antenna
- LTE antenna (only for RAK7248C Cellular variant)
Connect the Power Supply
After the antennas are connected and the SD card is inserted, connect the power supply to start the gateway.
Make sure the antennas are connected before applying power to the gateway.
Complete the Installation
After completing the hardware preparation:
- The firmware image is installed on the SD card.
- The required antennas are connected.
- The gateway is powered on.
Continue with the Quick Start Guide to access the gateway and complete the initial configuration.


