ConnectOS Docker
ConnectOS ships with Docker and Docker Compose, so the gateway can run containerized applications alongside its radio workloads, a Node-RED flow, a time-series database, a dashboard, or your own application image. Everything is managed from Services → Docker, without needing a shell on the device.
The Docker pages are organized as stacks: each stack is a directory holding a docker-compose.yml and an optional .env file, managed as a unit.
This guide deploys Node-RED from the bundled templates.
Before You Start
- The gateway needs outbound internet access to pull images from Docker Hub.
- Check you have room on the filesystem. Container images are large, the Node-RED image alone is around 670 MB.
The Docker Pages
| Tab | Contents |
|---|---|
| Stacks | All Compose stacks, their status, and start/stop/restart controls |
| Containers | Every container on the device, running or not |
| Images | Images pulled to local storage |
| Volumes | Docker volumes, where container data persists |
| Networks | Docker networks |
| Settings | Docker daemon state and the Compose template library |
Check the Daemon
Open Services → Docker → Settings. The Docker daemon toggle must read Running; the state is preserved across reboots.
This page also manages the template library, a set of ready-made Compose files that ConnectOS can download from a ZIP archive. The stock library includes grafana, influxdb1, influxdb2, nodered and victoria-metrics. Update re-downloads the library from the configured URL and replaces what is installed.
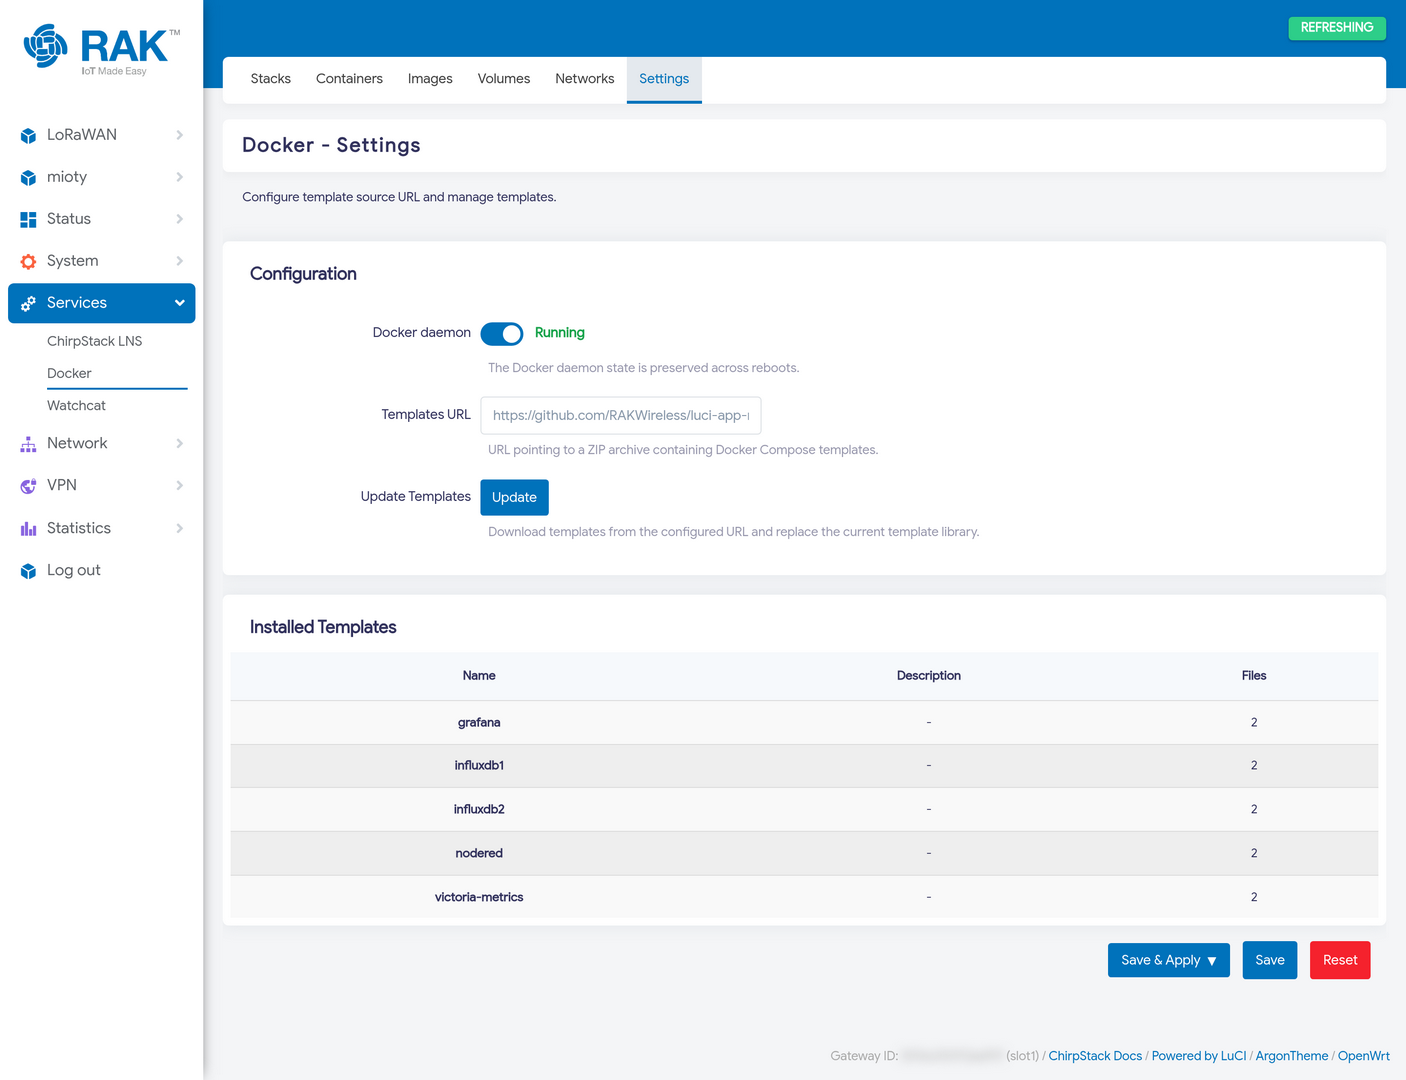 Figure 1: Docker Settings and Template Library
Create a Stack
Go to the Stacks tab and press New Stack.
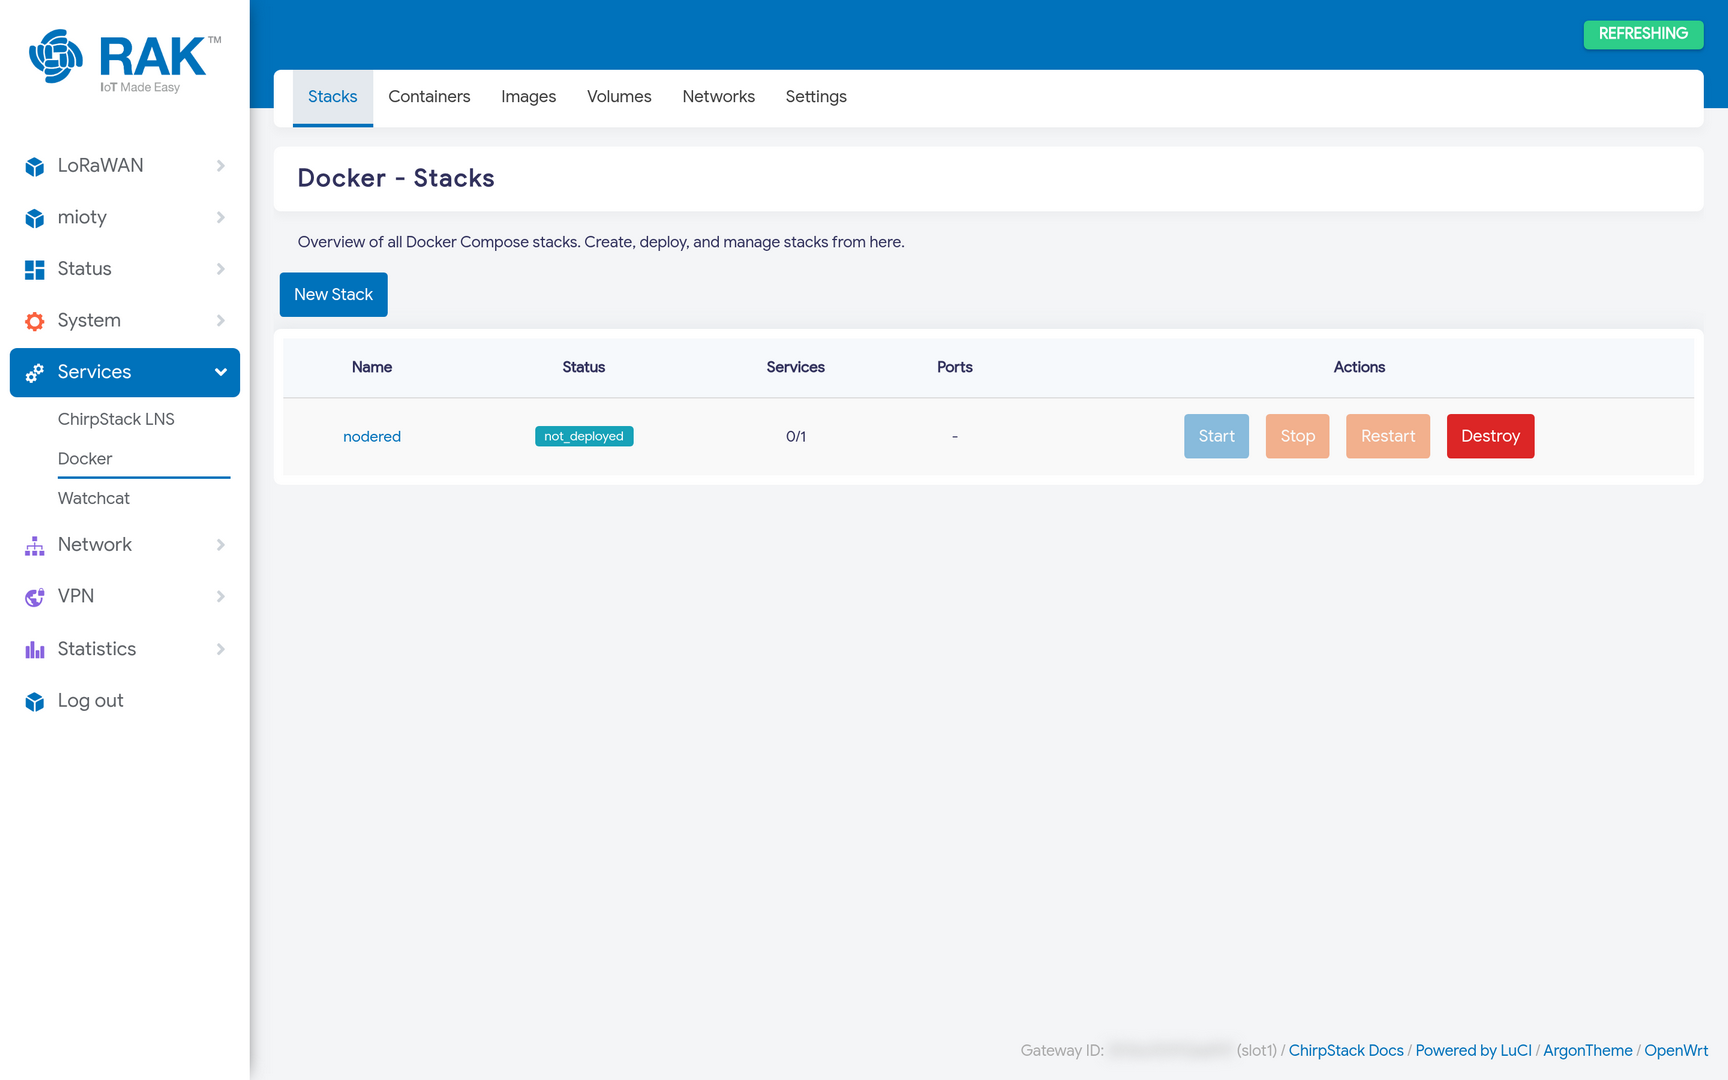 Figure 1: Docker Stacks
In the dialog, pick a Source, a template, in this case nodered, and give the stack a name. Names may use alphanumeric characters, hyphens and underscores, up to 64 characters. Press Create.
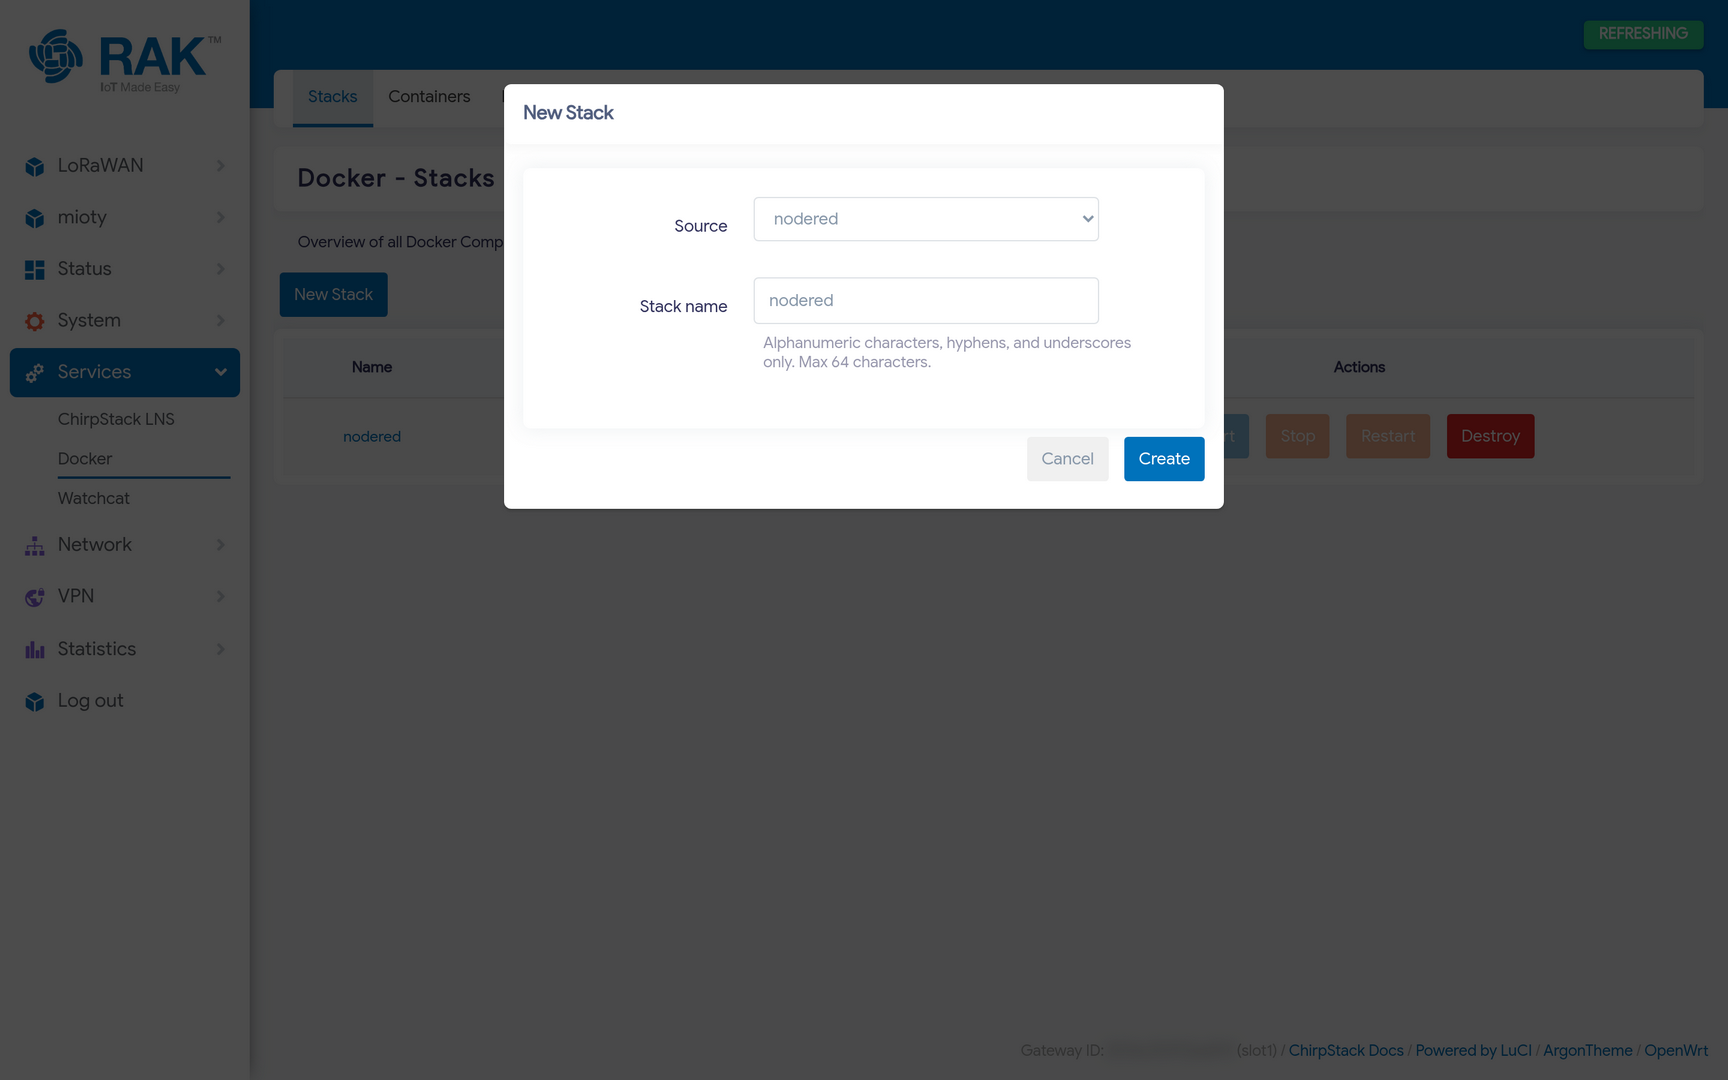 Figure 1: New Stack Dialog
The stack is created on disk but nothing is running yet: it is listed as not_deployed.
Review the Compose File
Click the stack name to open it. The Stack Files section is an editor over the stack's files, select docker-compose.yml or .env from the dropdown, edit, and press Save.
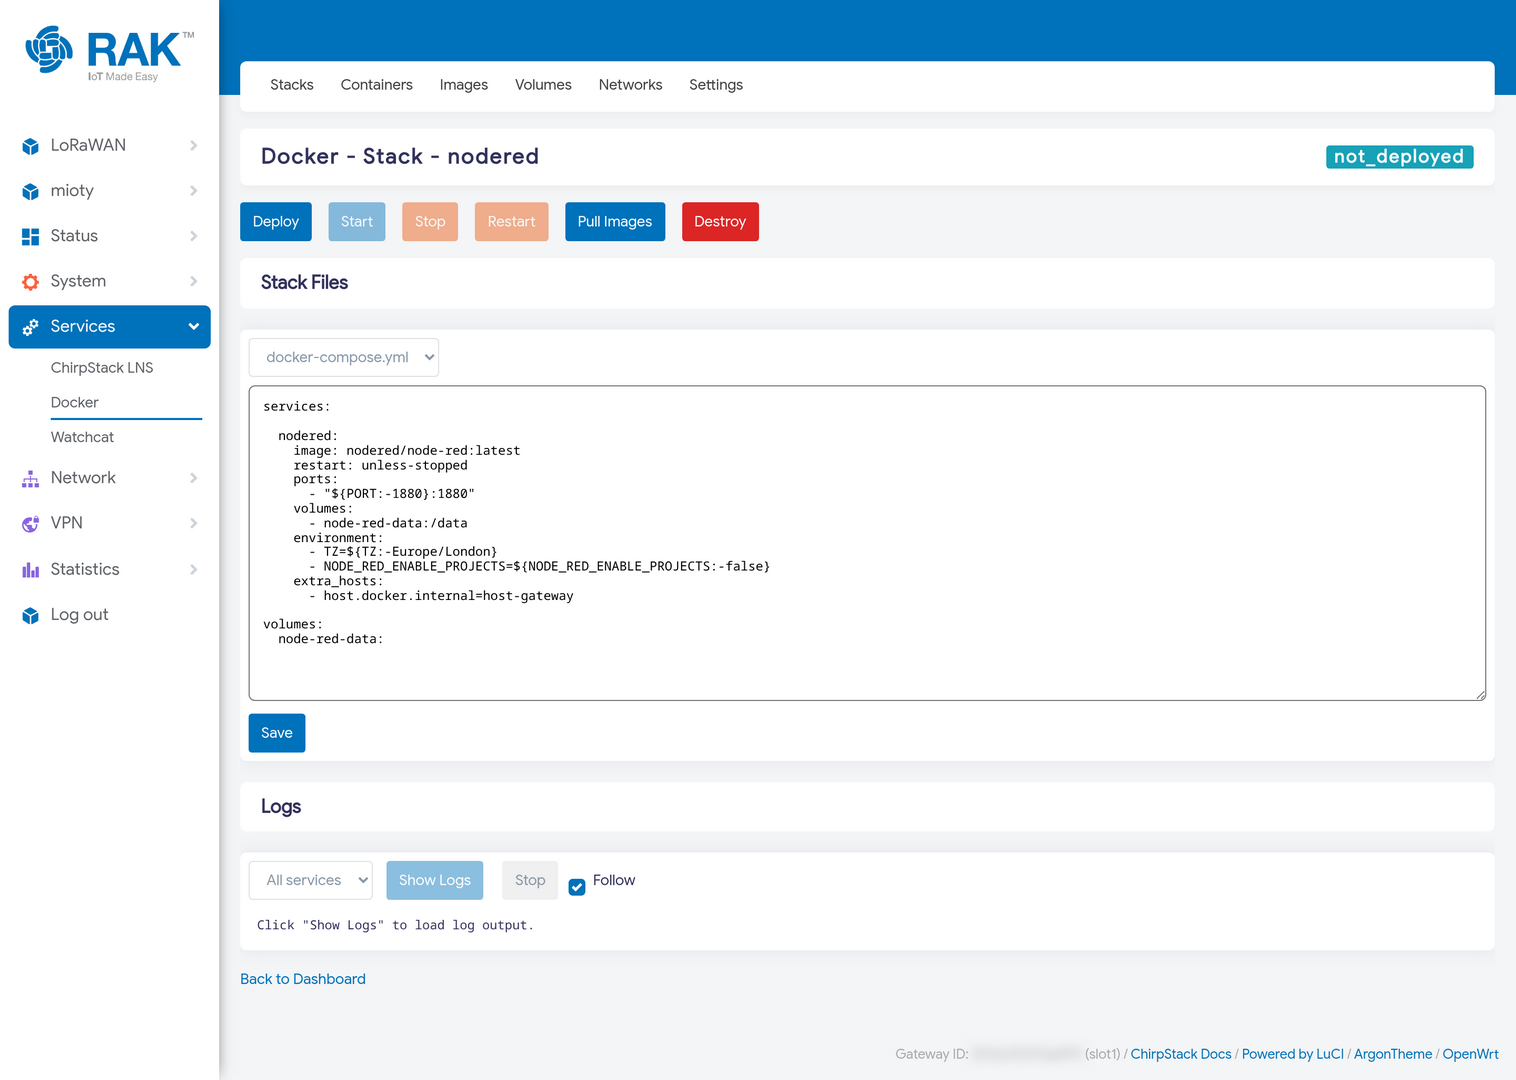 Figure 1: Docker Stack Details
The Node-RED template looks like this:
services:

  nodered:
    image: nodered/node-red:latest
    restart: unless-stopped
    ports:
      - "${PORT:-1880}:1880"
    volumes:
      - node-red-data:/data
    environment:
      - TZ=${TZ:-Europe/London}
      - NODE_RED_ENABLE_PROJECTS=${NODE_RED_ENABLE_PROJECTS:-false}
    extra_hosts:
      - host.docker.internal=host-gateway

volumes:
  node-red-data:
A few things worth noting, because they are conventions the bundled templates follow:
${PORT:-1880}The published port comes from a variable with a default. SetPORTin the.envfile to move the service to another port without touching the Compose file.node-red-data:/dataFlow data lives in a named volume, so it survives the container being recreated or the image being updated.host.docker.internalLets the container reach services running on the gateway itself, for example the built-in MQTT broker or ChirpStack LNS.
restart: unless-stopped makes the container come back automatically after a gateway reboot. Keep it for anything you want running permanently.
Deploy
Press Deploy. This pulls the images and starts the stack, which is the slow step, a first pull over a typical connection takes several minutes. When it finishes, the badge at the top right turns running and the Containers section lists the container with its published ports.
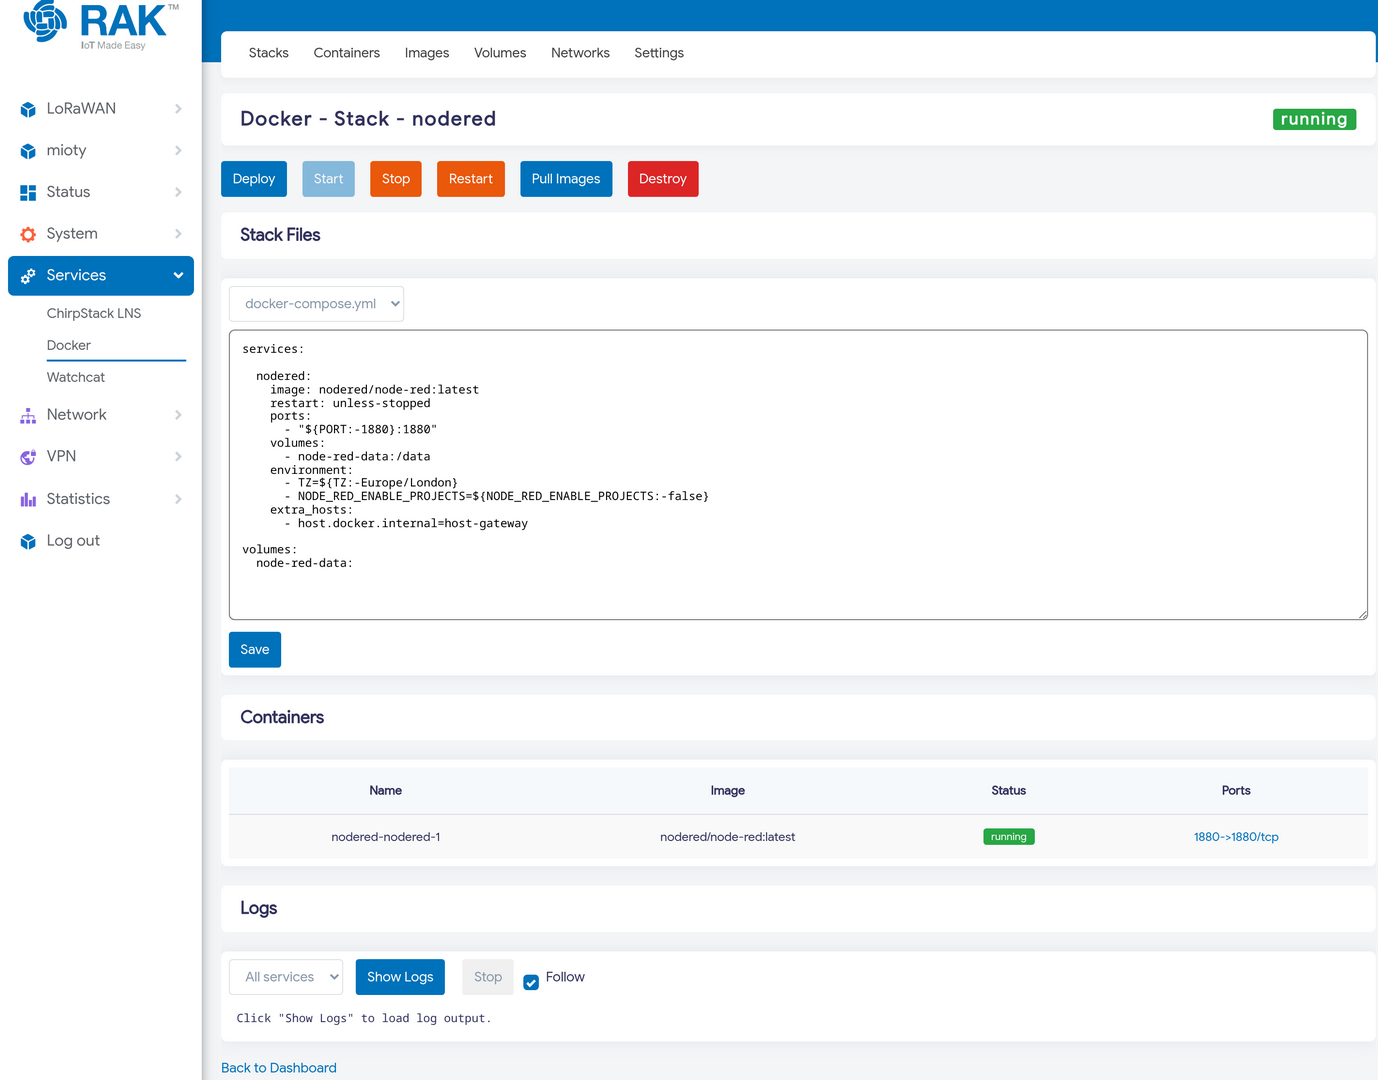 Figure 1: Deployed Docker Stack
Back on the Stacks tab, the stack now reports running with its service count and published ports.
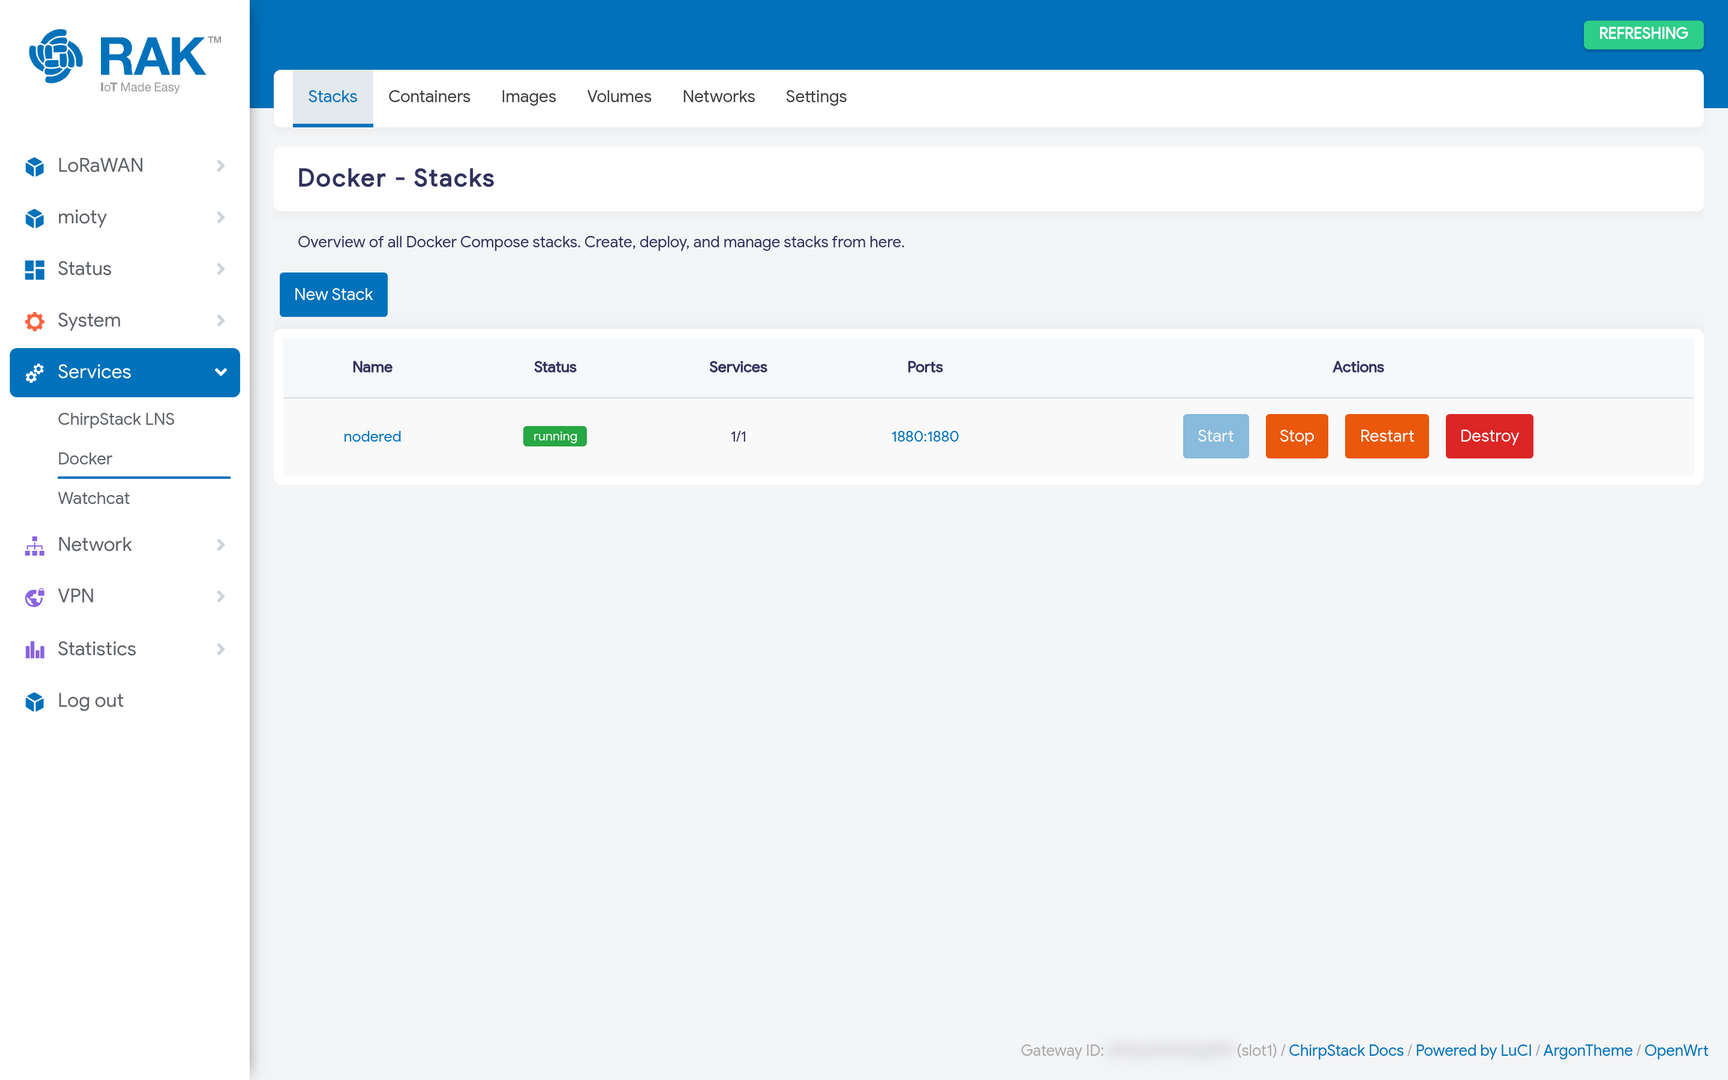 Figure 1: Running Docker Stacks
The action buttons above the editor are:
| Button | Effect |
|---|---|
| Deploy | Pull images if needed and bring the stack up |
| Start | Start a stack that was created or stopped |
| Stop | Stop the containers, keeping them and their volumes |
| Restart | Stop and start again |
| Pull Images | Fetch newer images without changing the running containers |
| Destroy | Remove the stack's containers |
To update a stack to a newer image: Pull Images, then Deploy to recreate the containers on the new image.
Read the Logs
The Logs section at the bottom of the stack page streams container output. Choose a service (or All services), press Show Logs, and leave Follow ticked to keep the output live. This is the first place to look when a container starts and immediately exits.
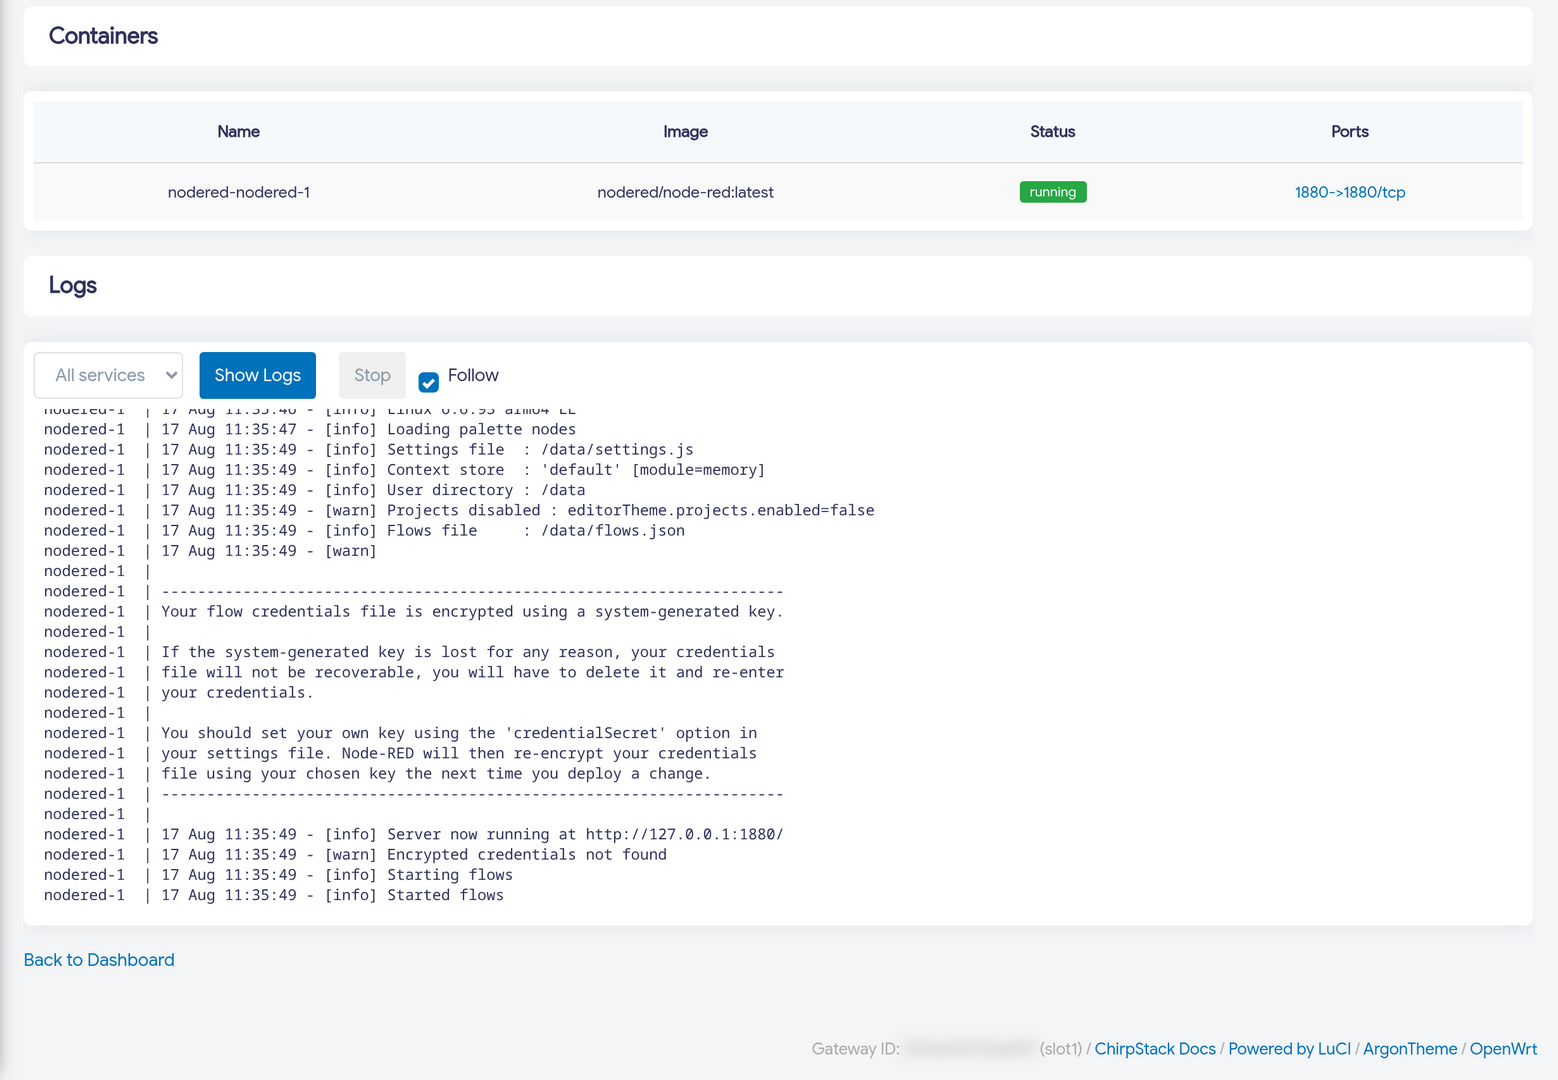 Figure 1: Docker Stack Logs
Use the Application
The Node-RED template publishes port 1880, so the editor is reachable at:
http://<gateway-ip>:1880
Published ports are reachable from whichever firewall zone allows them. If you cannot reach the service from your network, check Network → Firewall, a container publishing a port does not by itself open the gateway's firewall to the outside.
Containers, Images, Volumes and Networks
The remaining tabs show Docker's state across all stacks.
Containers lists everything on the device with its image, status and ports.
 Figure 1: Docker Containers
Images shows what has been pulled and how much space each image occupies, useful when reclaiming storage.
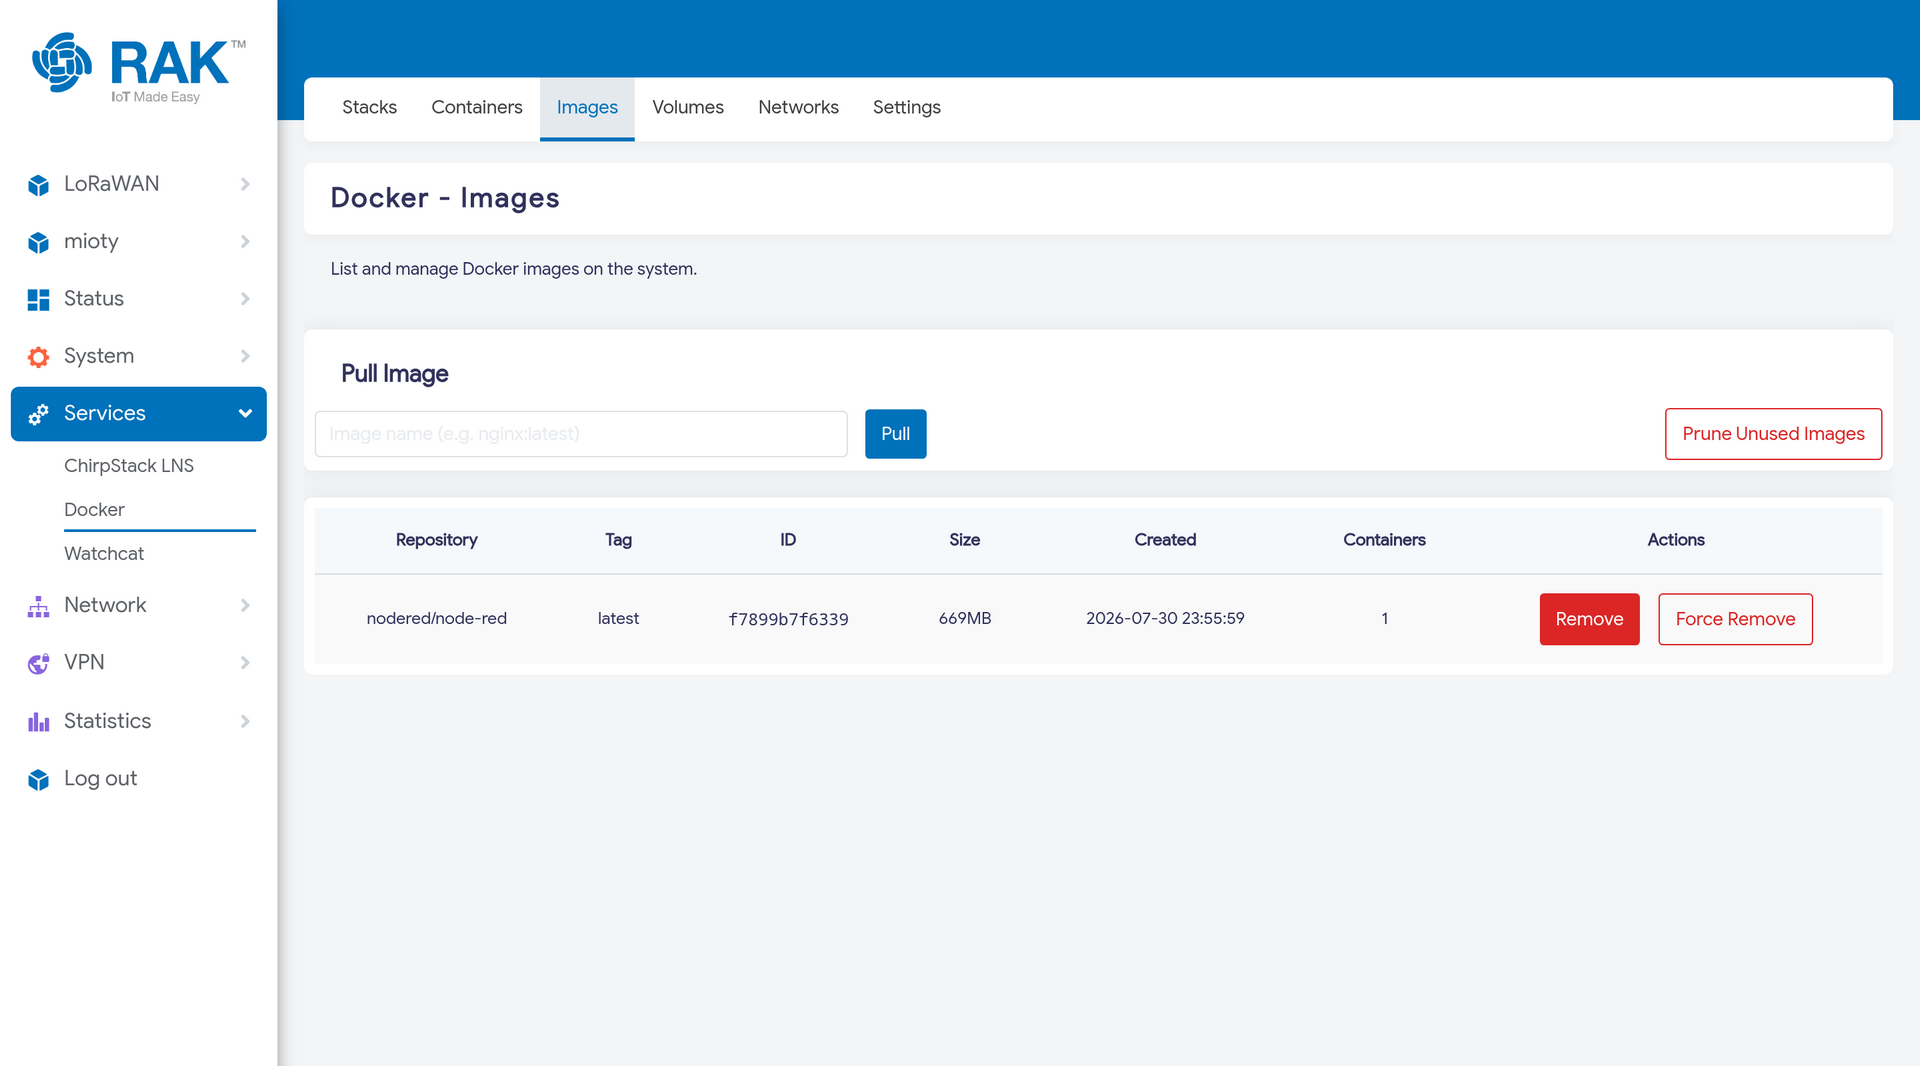 Figure 1: Docker Images
Volumes lists the named volumes holding persistent data. Destroying a stack does not delete its volumes, so data survives a redeploy, and equally, removing a volume here is irreversible.
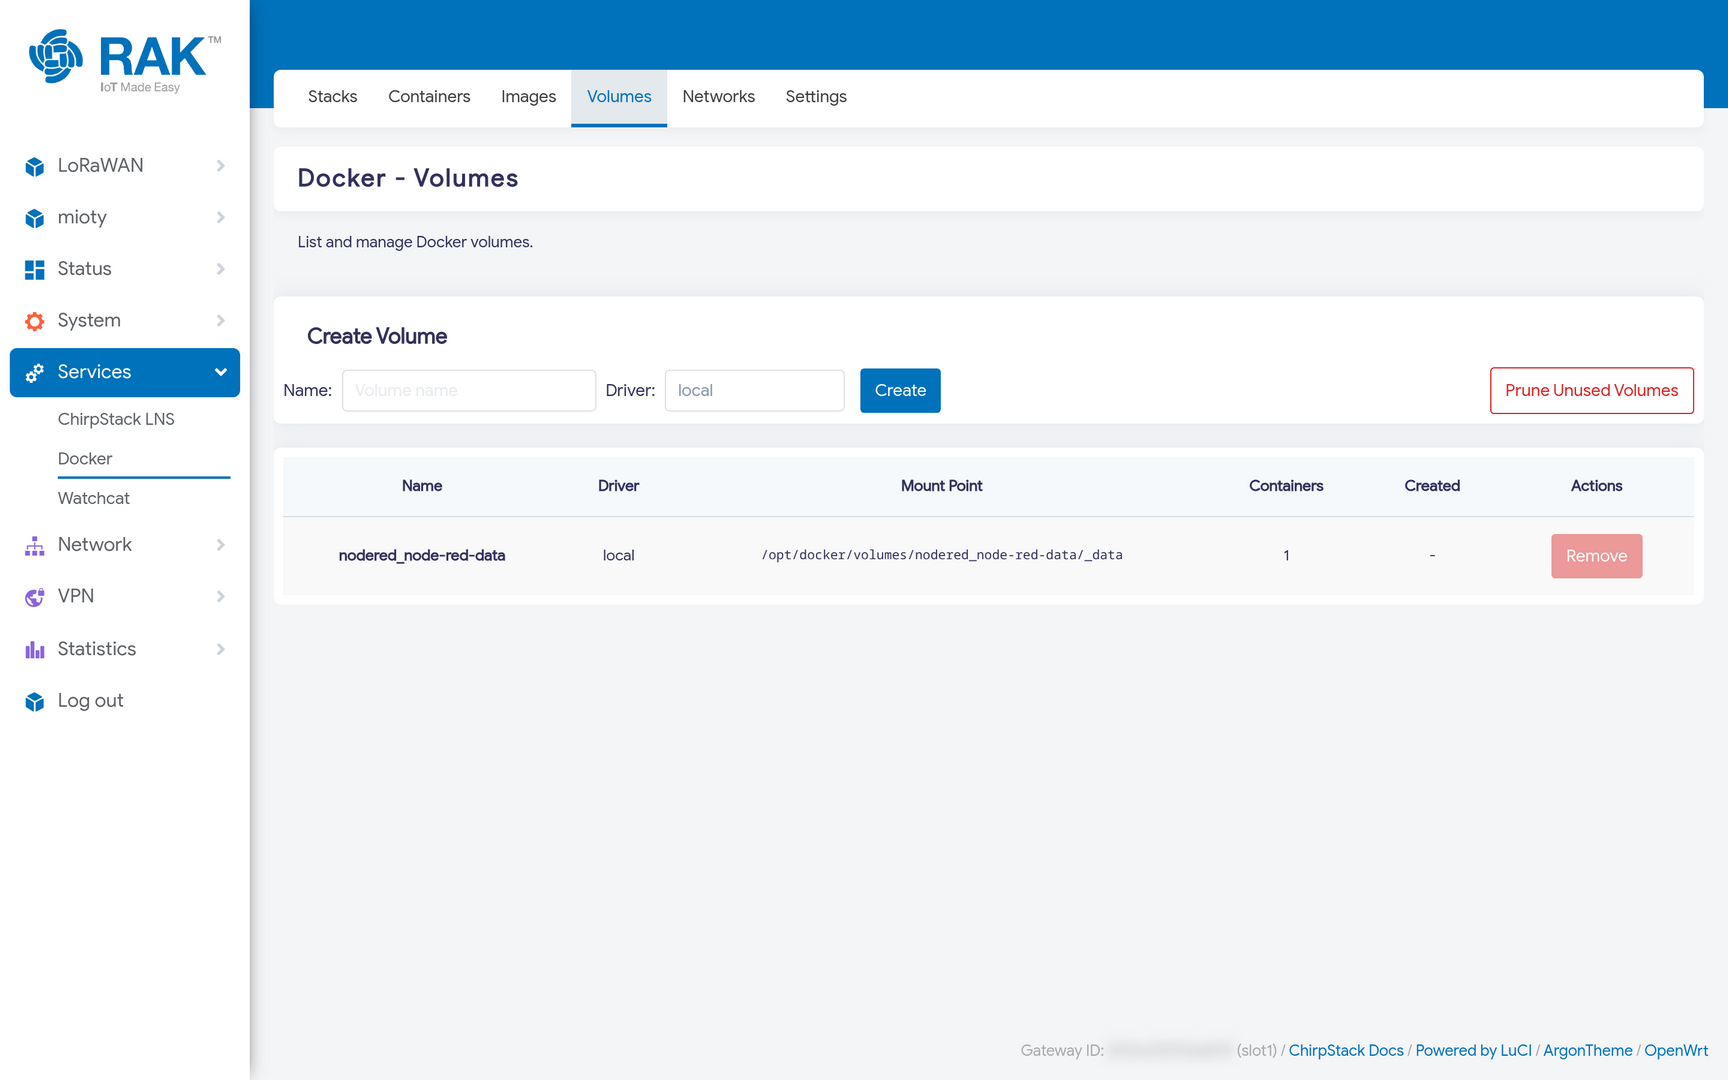 Figure 1: Docker Volumes
Networks lists the Docker networks, including the bridge network Compose creates per stack.
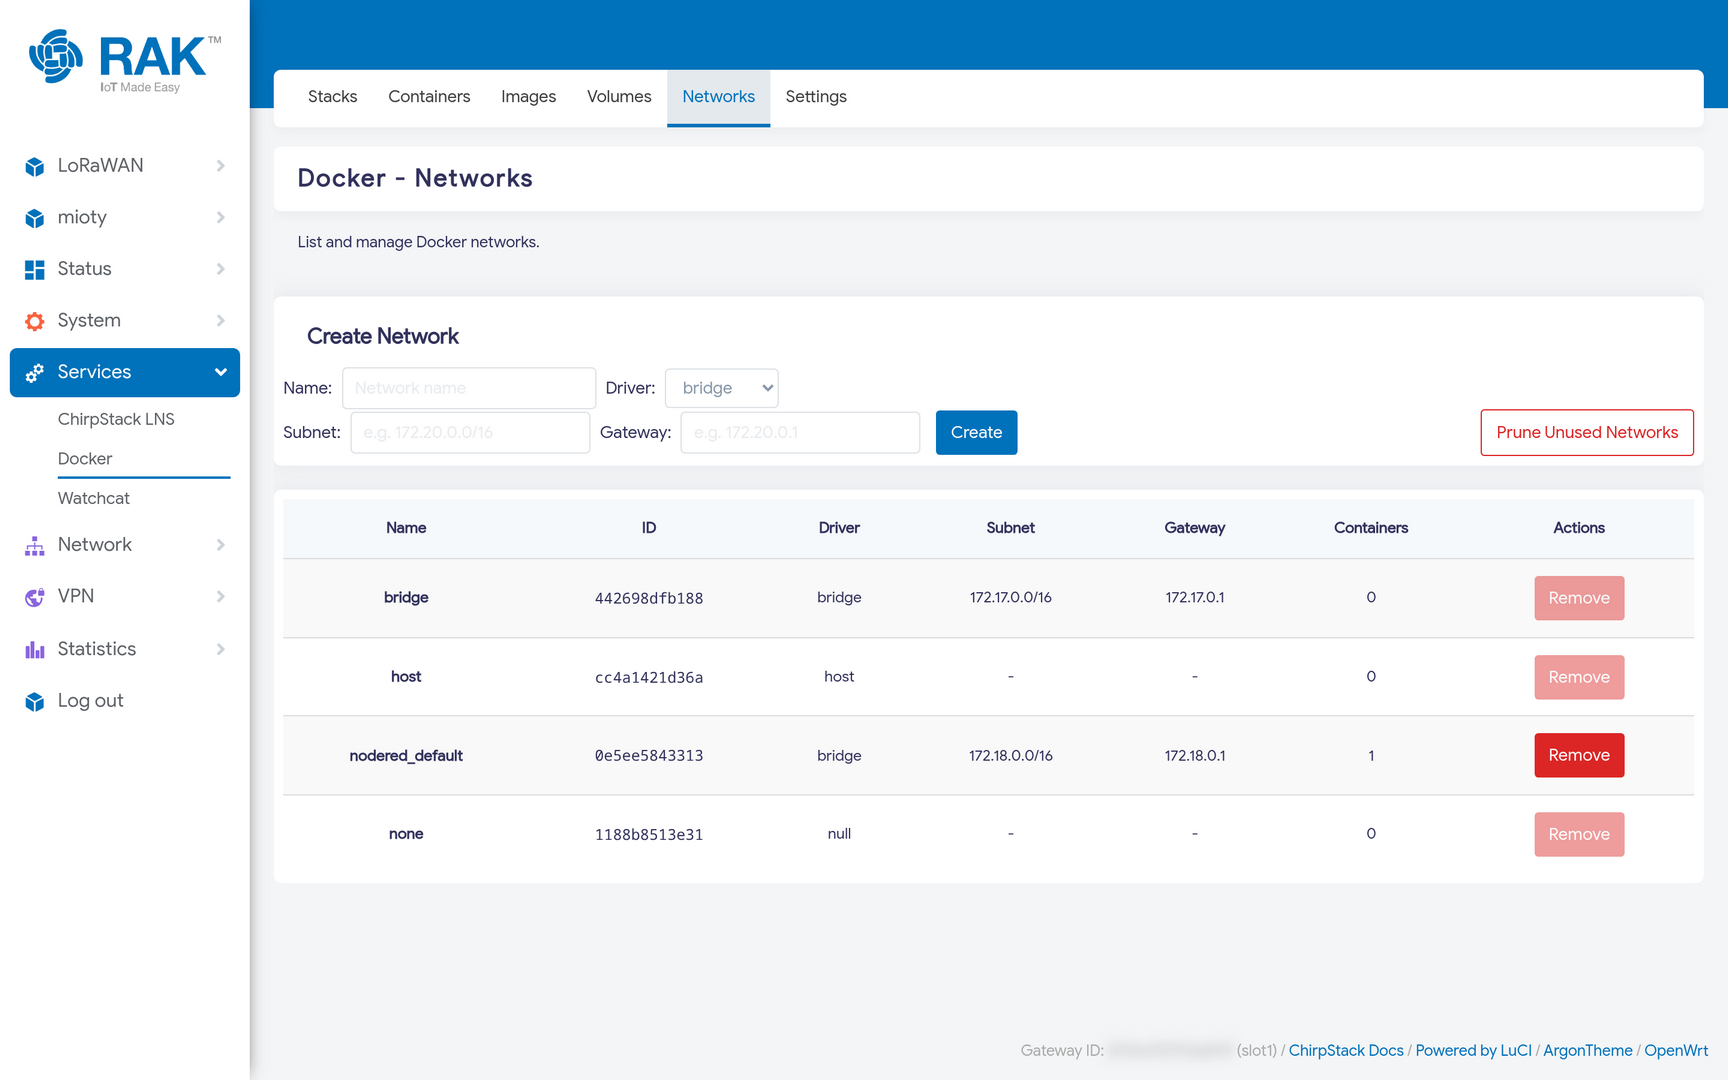 Figure 1: Docker Networks


