ConnectOS Installation Guide
Get the OS
The latest version of ConnectOS is available for download from the ConnectOS releases.
To flash the image, you can use either Windows, Mac OS, or Linux; however, it is recommended that you use balenaEtcher, a cross-platform tool that works with all three.
Depending on the device to which you want to flash the OS, you may have:
- For models without eMMC storage (CM4 Lite version) – utilize a Micro SD card the same way it is used for a Raspberry Pi 4 (RPi 4).
- For models with eMMC storage – the OS image must be flashed to the onboard storage; in this case, you cannot use an SD card.
For the initial installation of ConnectOS, use the factory image that matches your WisGate Connect gateway and Compute Module.
After ConnectOS is installed, subsequent upgrades can be performed from the ConnectOS web interface.
Flash to a Micro SD Card
It is recommended to use a Micro SD card of 8 GB or greater coupled with a good-quality and fast card reader. Insert the card into the card reader (make sure it is properly connected to the host device) and proceed as follows:
- Open balenaEtcher and select the OS image (no need to unzip the archive).
- Select the target (your Micro SD card).
- To begin the process, press the Flash! button.
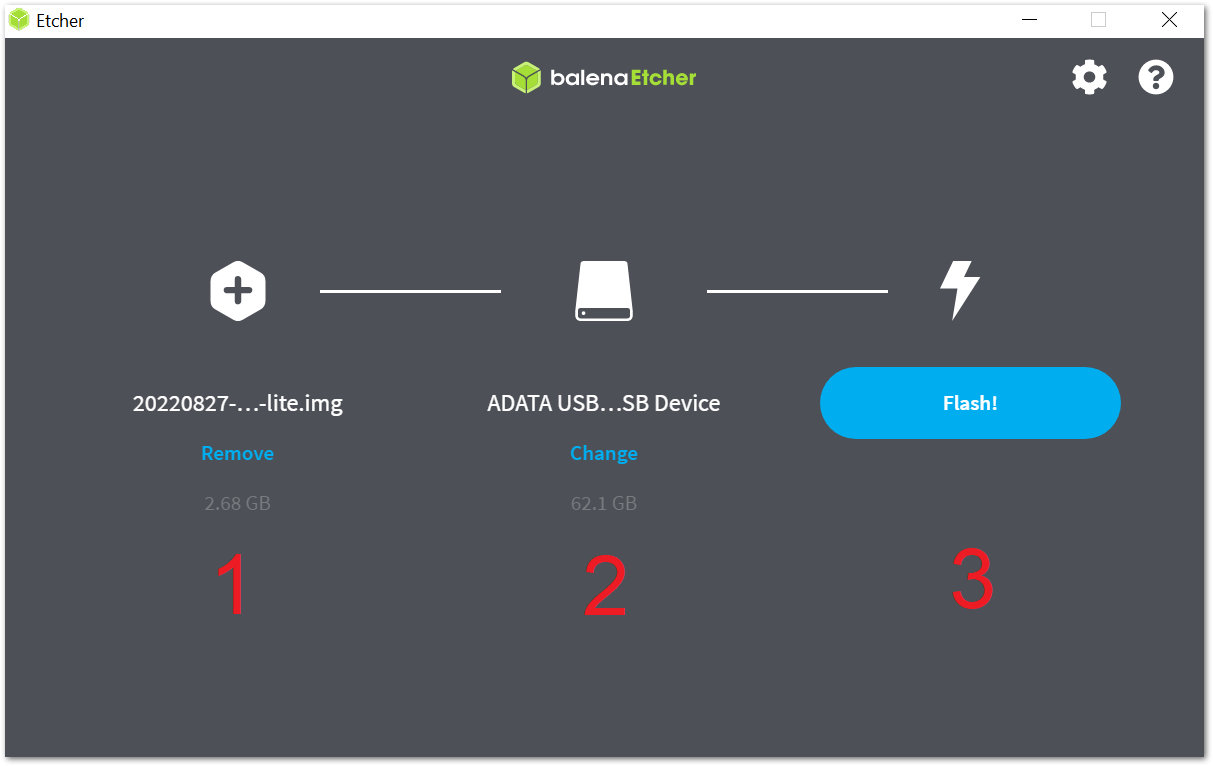 Figure 1: balenaEtcher flashing window
Wait for the flashing process to complete, followed by the verification phase. You can now remove the card from the reader and insert it into the device's Micro SD slot on the bottom side of the board (next to the three SIM slots).
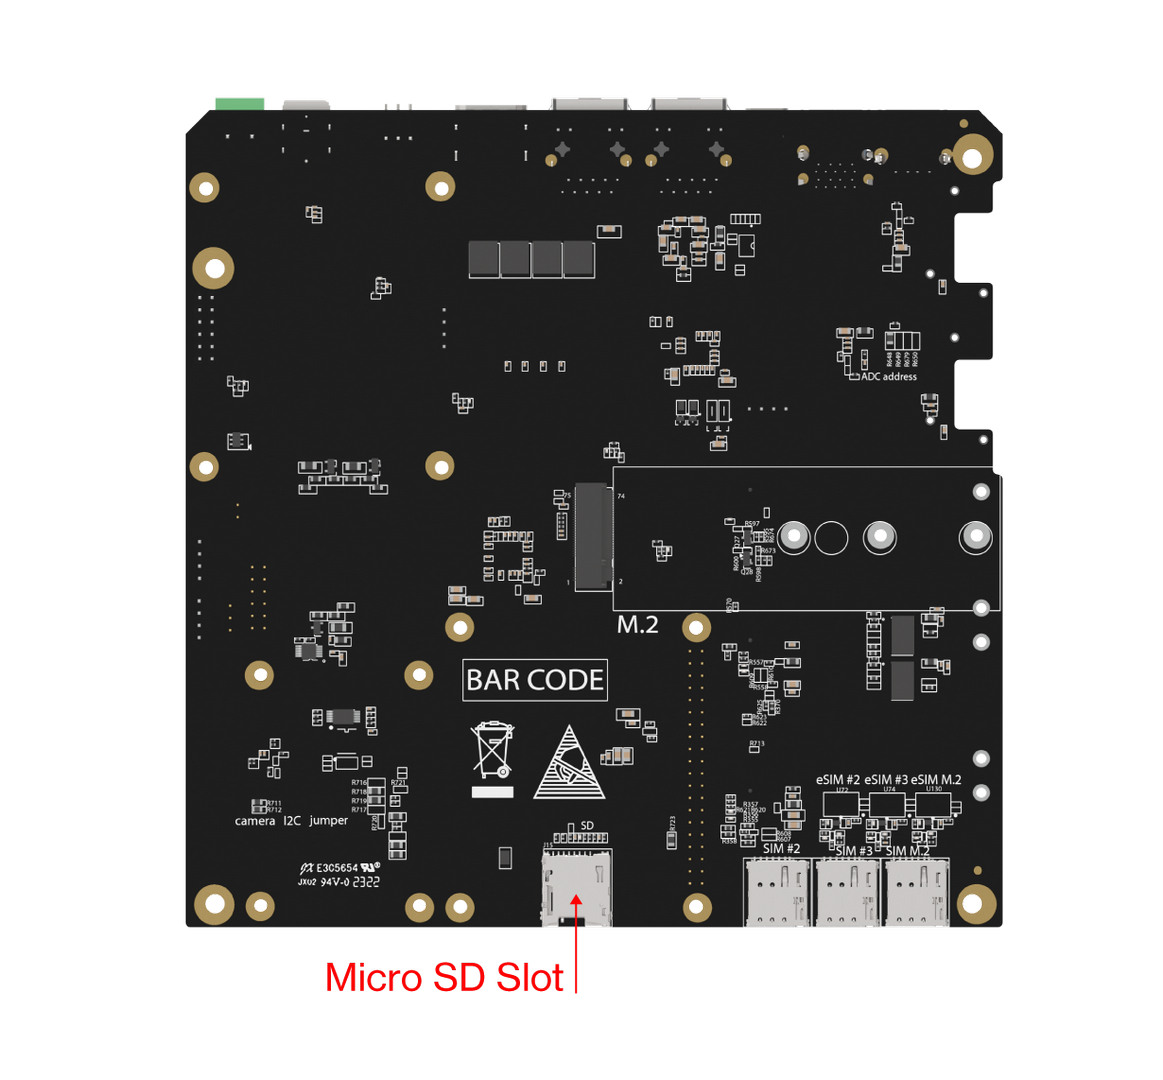 Figure 1: Micro SD slot
Flash to the eMMC
To access the CM4's eMMC storage, you must first install the necessary drivers and boot tool. This will allow you to access it as you would a mass storage device (SD card, for example) and flash the ConnectOS image file as you did in the previous step with balenaEtcher.
Instructions are provided for Windows, Mac OS, and Linux.
Installing the Drivers and Mounting the Storage
Before installing the drivers, regardless of the operating system, make sure to execute the following steps to put the gateway into flash mode, allowing it to be seen as removable storage by the host OS. The following procedure uses the RAK7391 as an example.
The procedure for entering flash mode differs slightly depending on the gateway model.
For the RAK7392 and RAK7393, connect the host computer to the USB Type-C port labeled Flash, move the Flash switch to the ON position, and then power on the gateway.
- Connect the Type-C port to a USB port on your computer using a suitable cable. Do not turn on the gateway yet.
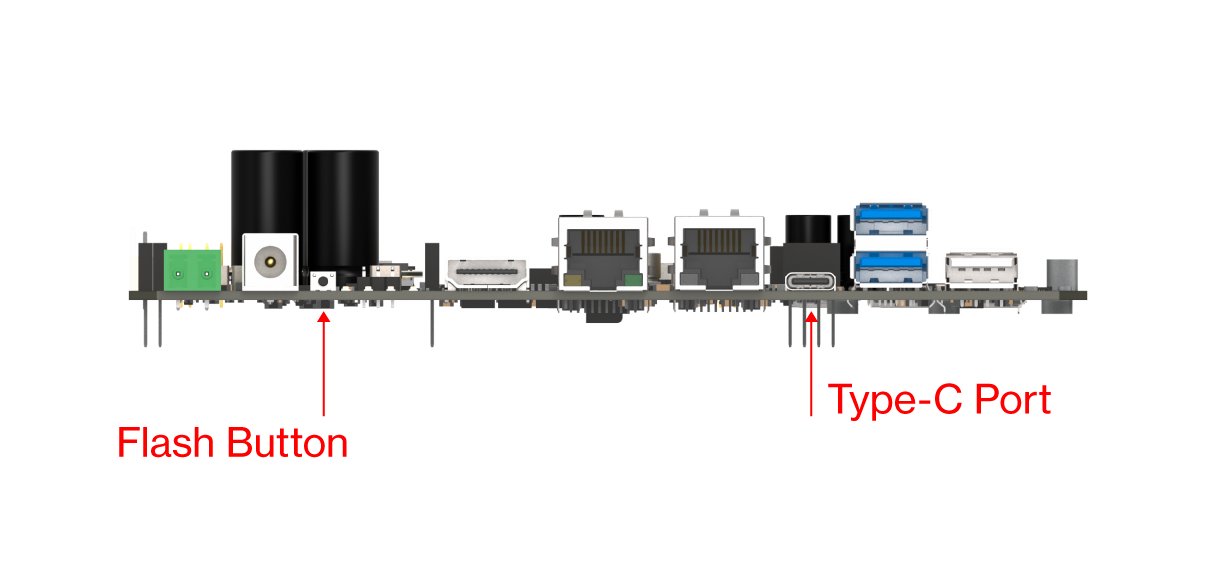 Figure 1: Type-C port and Flash button location
- Press and hold the Flash button, or bridge the eMMC Flash jumper and power the gateway.
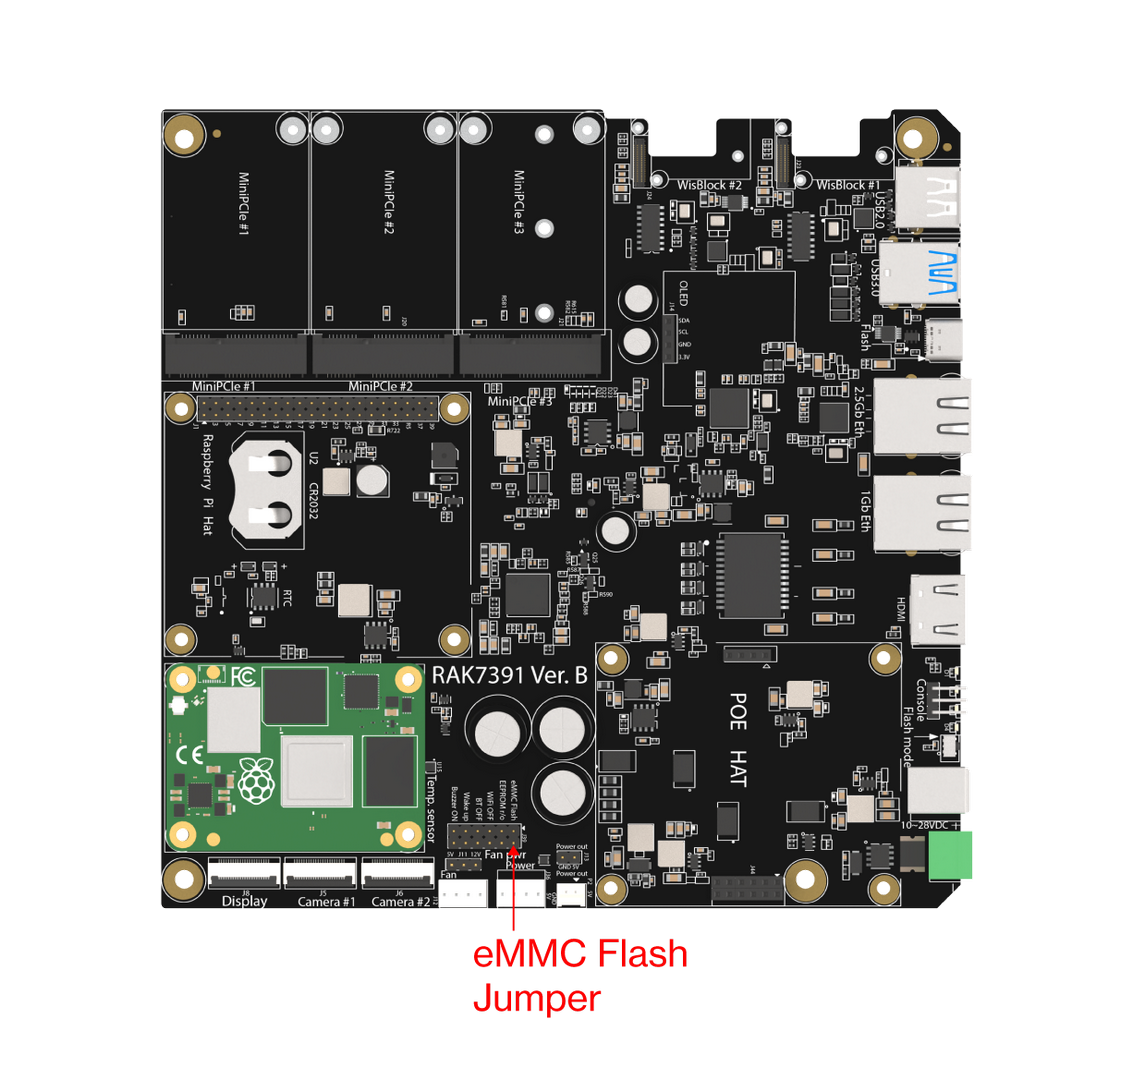 Figure 1: eMMC flash jumper location
- Once you have the respective utility installed depending on the OS, you will be able to see it as mounted storage.
Windows
The official stand-alone installer is the recommended method. Check out the Raspberry Pi official documentation for details on the Windows installer and how to install the drivers and boot tools.
Mac OS
To mount the eMMC storage, you need to install the required USB library on your Mac OS device and build the rpiboot executable. All operations can be done in the Terminal application.
- First, you need to install Homebrew by entering the following command in the terminal:
/bin/bash -c "$(curl -fsSL https://raw.githubusercontent.com/Homebrew/install/HEAD/install.sh)"
- Once Homebrew has been installed, you can install the
libusblibrary by the following command:
brew install pkgconfig libusb
- Clone the
usbbootrepository to your computer:
git clone --depth=1 https://github.com/raspberrypi/usbboot
- With the
cdcommand, go to theusbbootdirectory and buildrpiboot.
cd usbboot && make
- Now, there should be a
rpibootexecutable in the directory. To mount the eMMC storage, run the following command:
sudo ./rpiboot
- A few seconds later, you should see the boot volume mounted. The output of the CLI should be as follows:
Example output:
rak@RAK7391 usbboot % sudo ./rpiboot
Password:
RPIBOOT: build-date Sep 20 2022 version 20220815~145439 2472aaf9
Waiting for BCM2835/6/7/2711...
Loading embedded: bootcode4.bin
Sending bootcode.bin
Successful read 4 bytes
Waiting for BCM2835/6/7/2711...
Loading embedded: bootcode4.bin
Second stage boot server
Loading embedded: start4.elf
File read: start4.elf
Second stage boot server done
rak@RAK7391 usbboot %
Linux
Check out the Raspberry Pi official documentation for instructions on how to install the tools required, build the usbboot tool, and run the tool.
Flash the Image File
Now that you have the eMMC properly mounted, the rest of the procedure is very similar to what one has to do if flashing an SD card. Simply launch balenaEtcher, select the ConnectOS image file, choose the Compute Module drive, and flash.
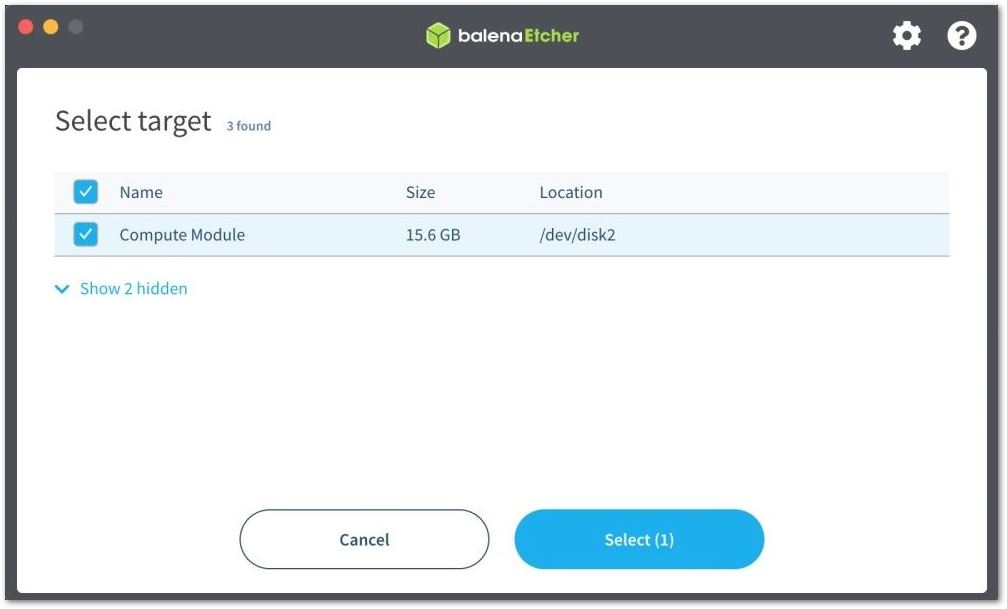 Figure 1: eMMC as seen in balenaEtcher
Accessing the Web Interface
The web interface is served over HTTPS. Point a browser at the gateway's IP address. plain HTTP requests are redirected to HTTPS automatically.
https://<gateway-ip>
ConnectOS ships with a self-signed certificate, so the browser will warn you the first time you connect. Accept the exception to continue.
Log in with the root account and the password configured for the device. If it's the first time logging in, the default password is empty ("").
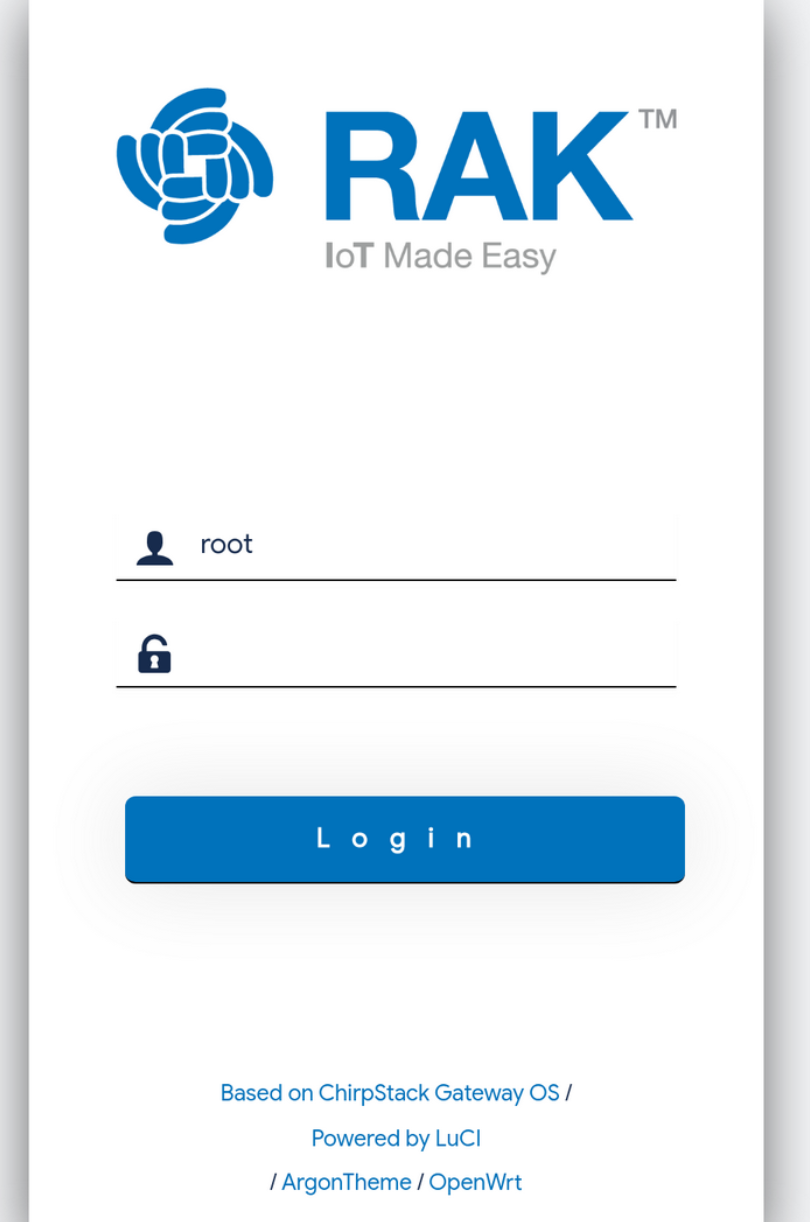 Figure 1: ConnectOS login page
Once logged in, the Status page summarizes the device: model, firmware version, uptime and resource usage
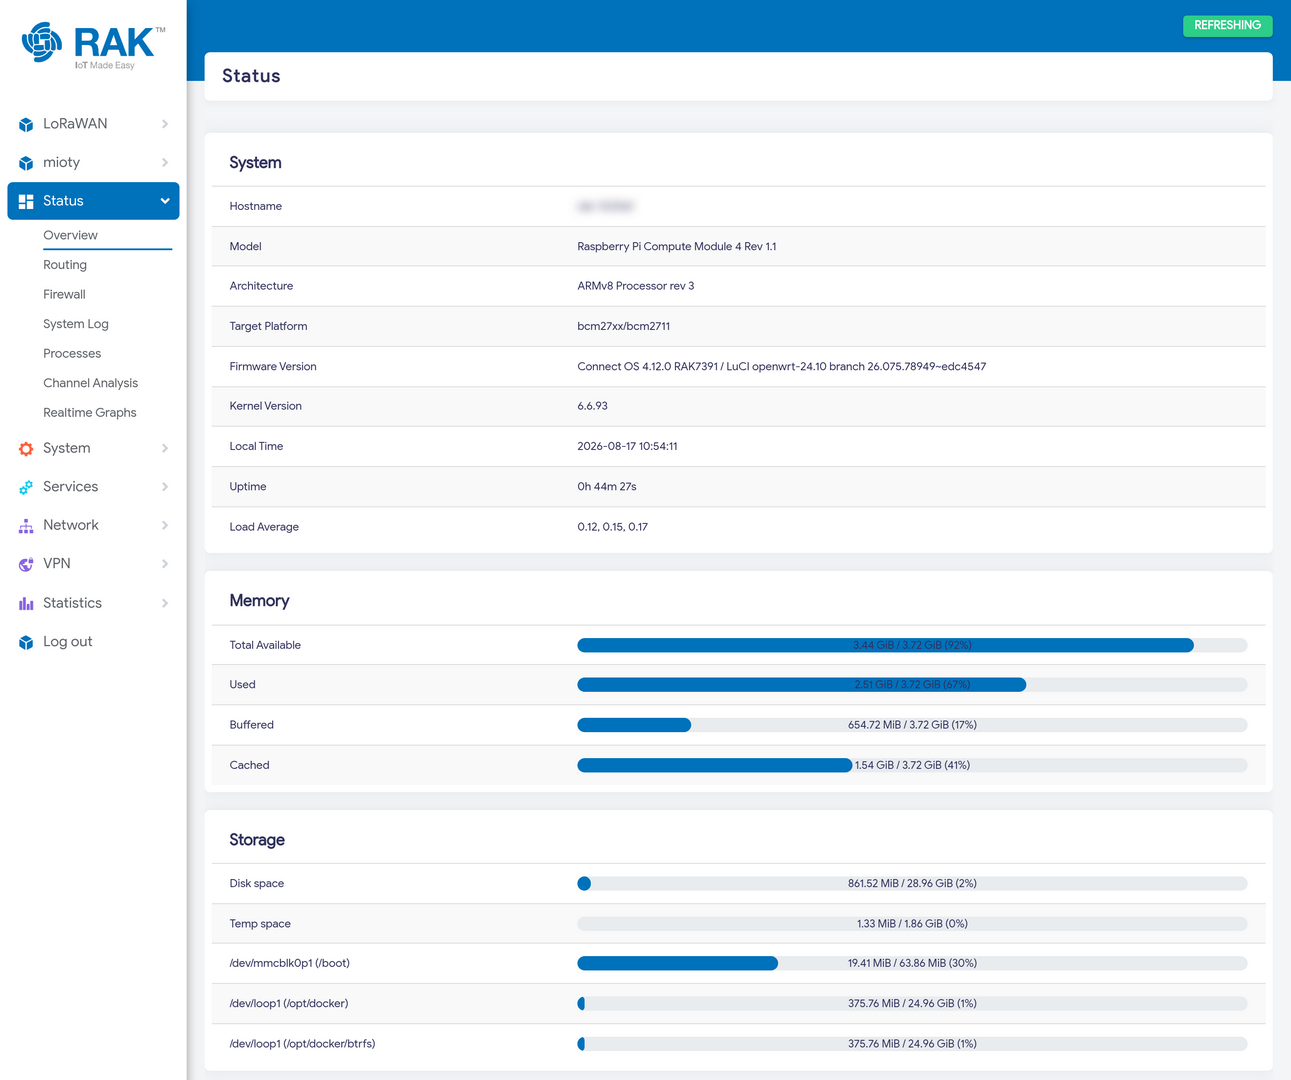 Figure 1: ConnectOS status overview


