RAK14002 With RAK11310 via Arduino Quick Start Guide
Prerequisite
- Assemble the RAK14002 with a WisBlock Base and WisBlock Core by following the RAK14002 Installation Guide.
- Download and install the Arduino IDE, then add the RAKwireless Core boards by installing the RAKwireless Arduino BSP.
- USB Cable
- Li-Ion/LiPo battery (optional)
- Solar charger (optional)
Software Configuration and Example
- Install the RAKwireless Arduino BSP.
- Launch Arduino IDE then select Tools-> Boards-> Boards Manager.
On Boards Manager text area, type RAK. The RAKwireless RP Boards will be shown in the window.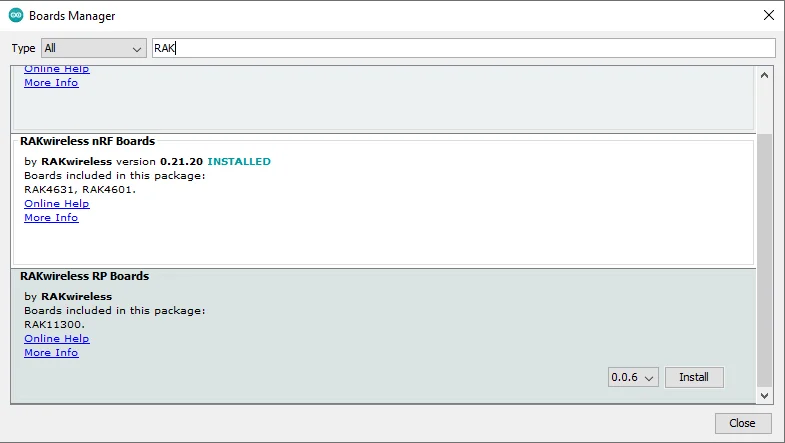 Figure 1: Boards Manager RAKwireless RP Boards
- Now select the RAKwireless RP Boards and then click on Install button.
Arduino programs are usually referred to as sketches. The sketches for this module will be available on the Arduino IDE after the Library install.
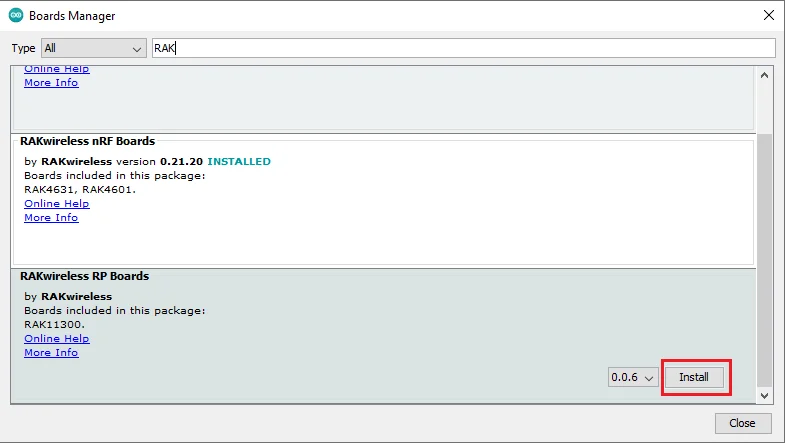 Figure 1: RAKwireless RP Boards install
- Install the RAKwireless CAP1293 Library using Arduino Library Manager.
- Launch Arduino IDE and select: Sketch-> Include Library -> Manage Libraries.
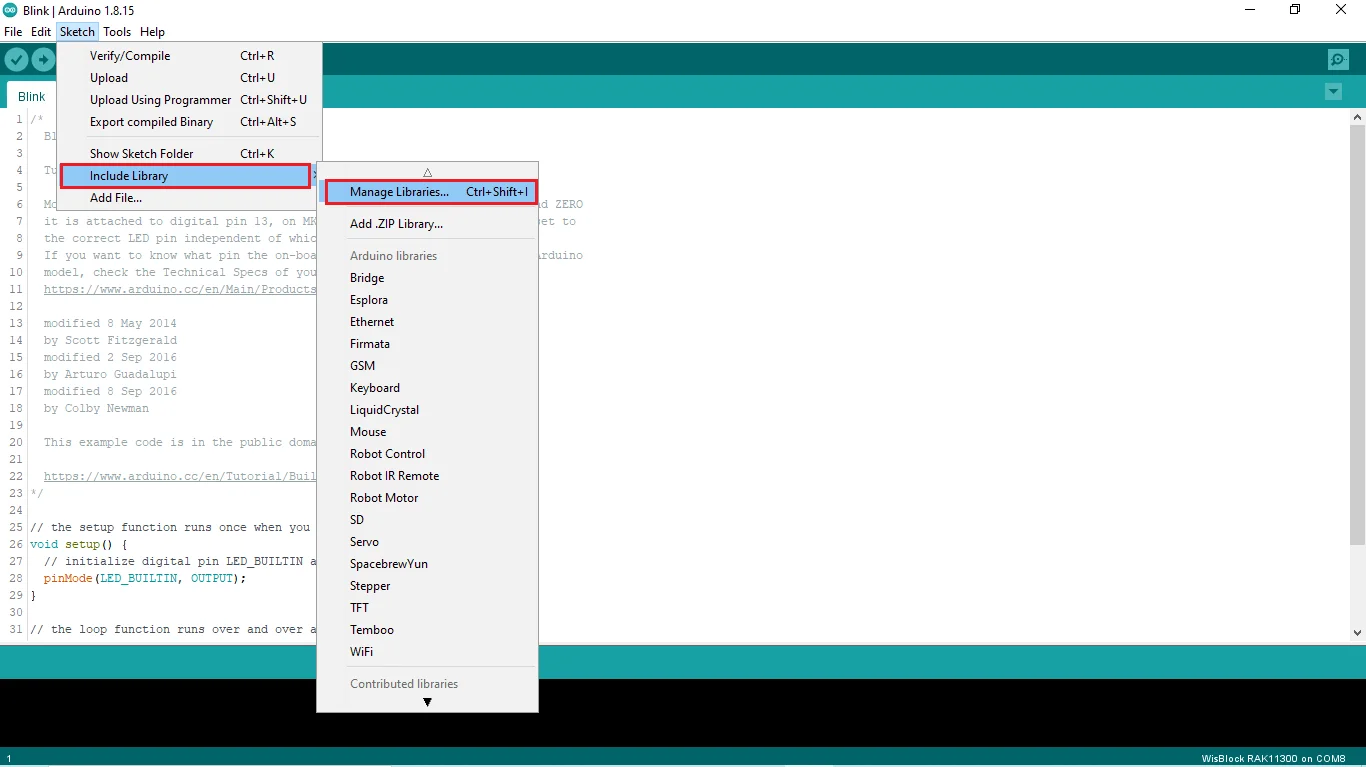 Figure 1: Select Arduino Library Manager
- On Library Manager text area, type RAKwireless CAP1293.
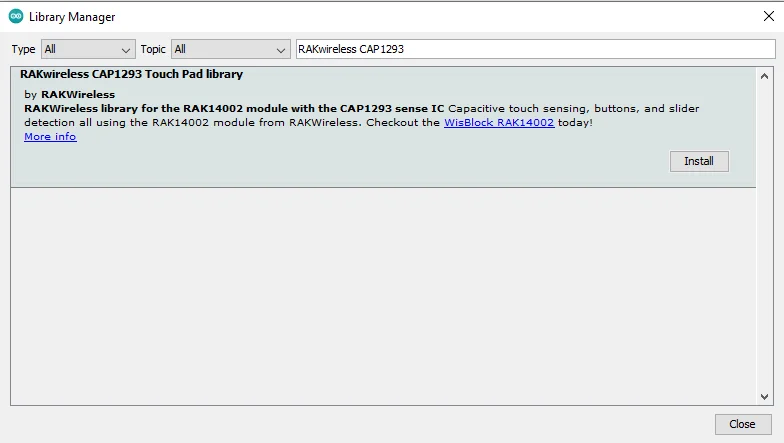 Figure 1: Arduino Library Manager RAKwireless CAP1293
- To finish the installation, click on the Install button.
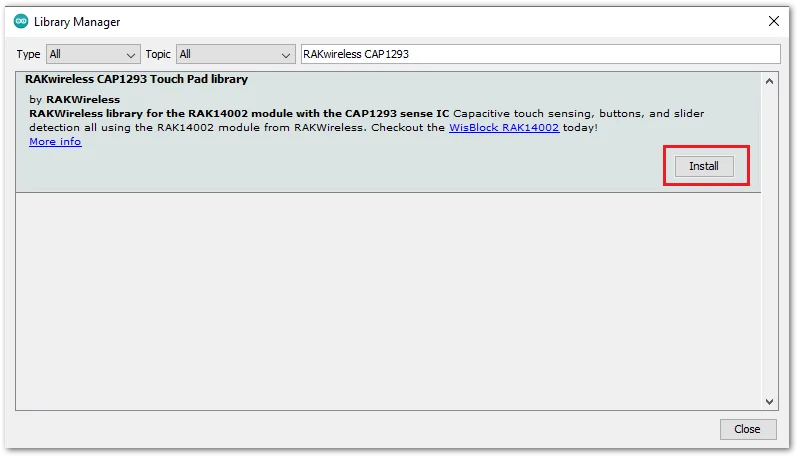 Figure 1: Finish RAKwireless CAP1293 Touch Pad Library Installation
- Once the library is installed, open the RAK14002 Example01_BasicReading example.
- Launch Arduino IDE and select: File -> Examples -> RAKwireless CAP1293 Touch Pad Library -> RAK14002 Example01_BasicReading.
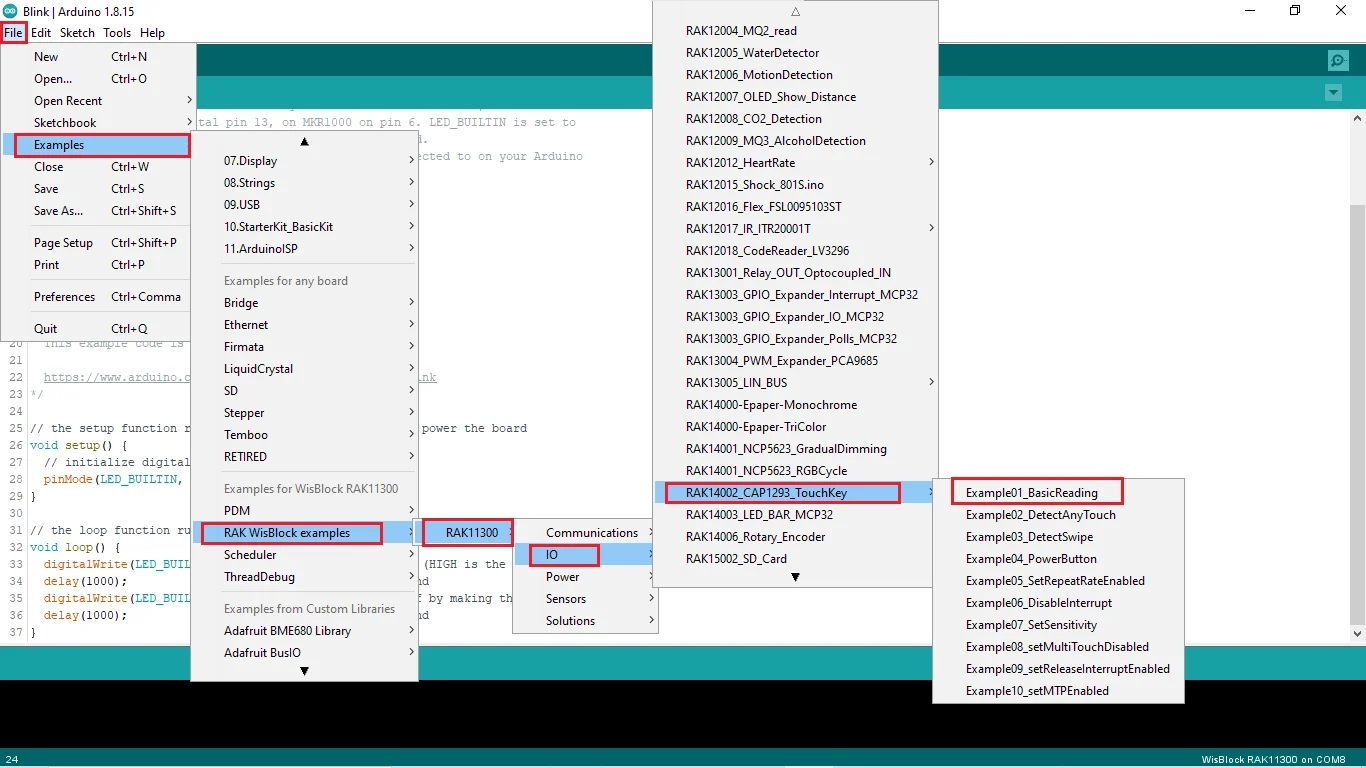 Figure 1: Open RAK14002 Example01_BasicReading
- You can now select the right serial port and upload the code.
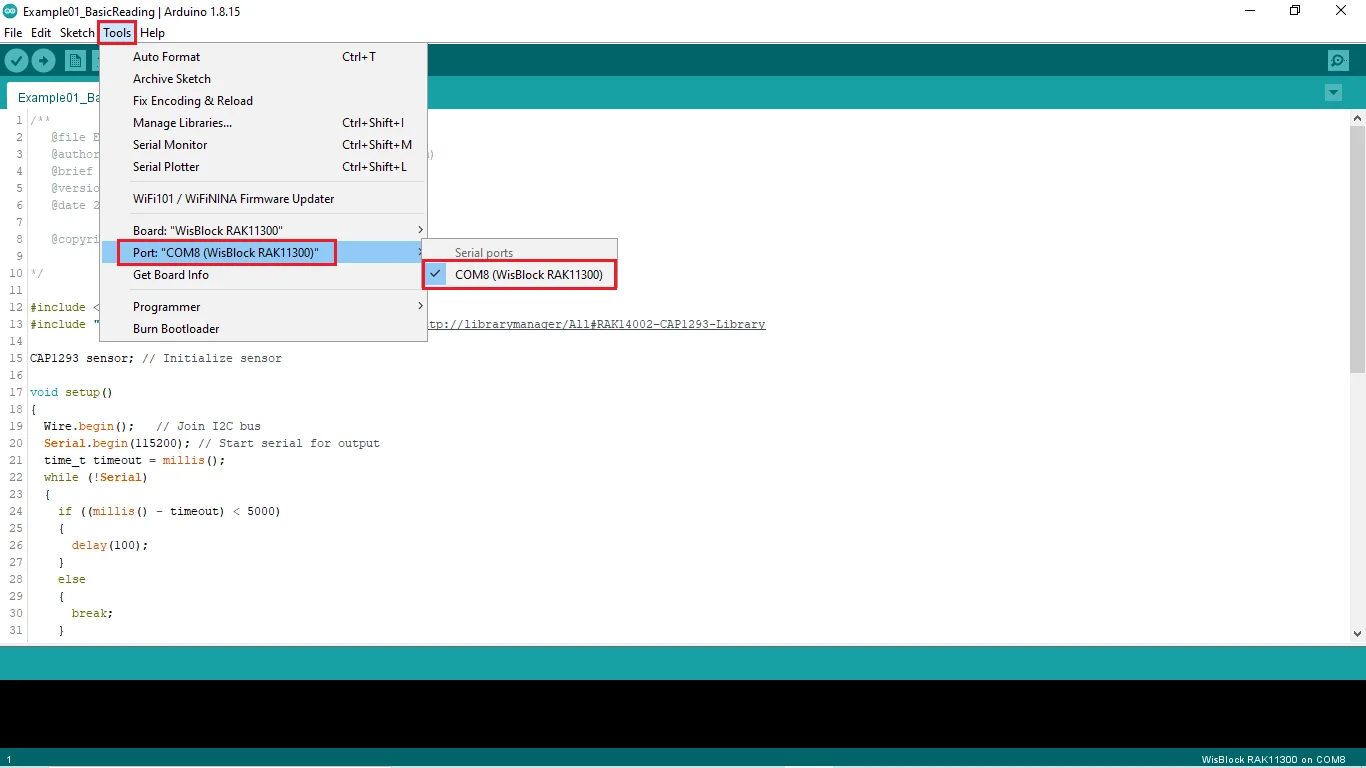 Figure 1: Selecting the RAK11310 Serial PortAfter successfully uploaded the Example01_BasicReading sketch, open the Serial Monitor of the Arduino IDE to check the sensor's reading logs.
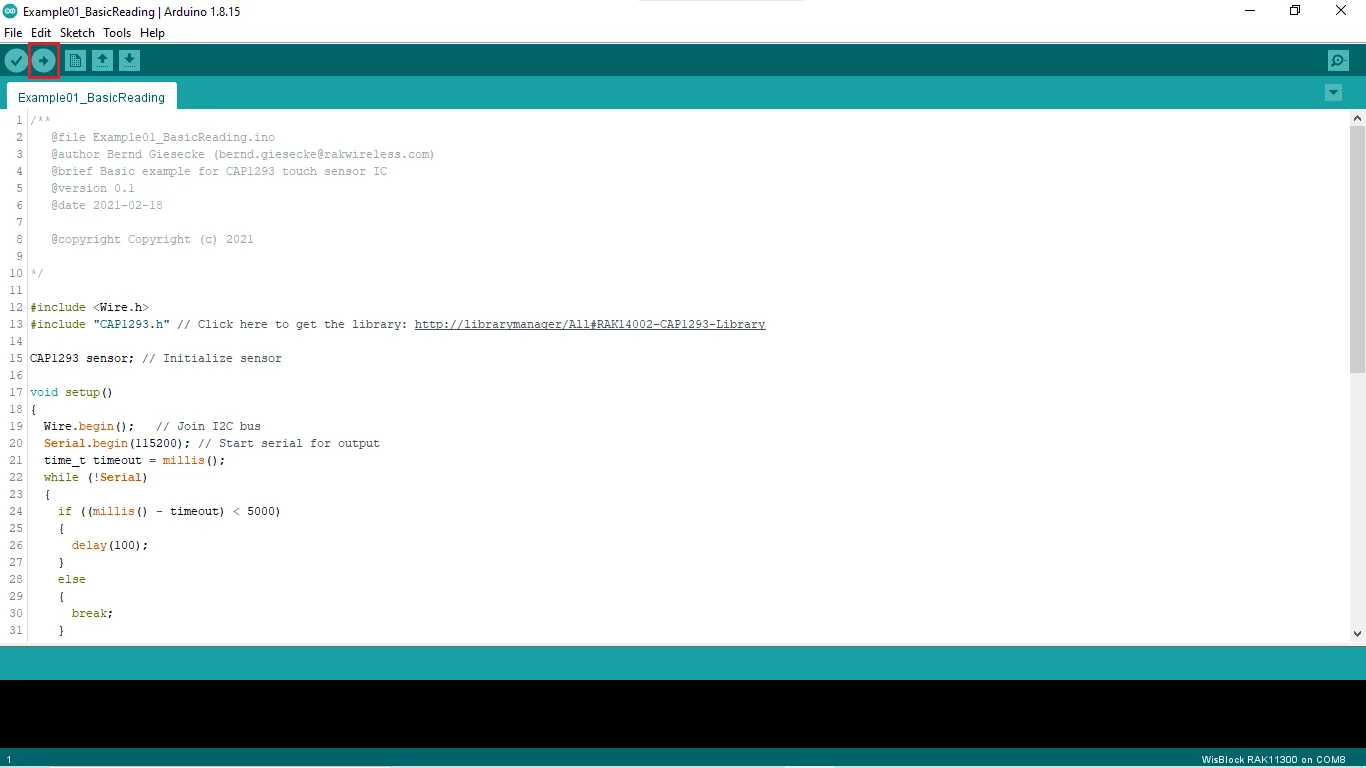 Figure 1: Uploading the RAK14002 example code on RAK11310


