RAK1921 WisBlock OLED Display Quick Start Guide
Prerequisite
What Do You Need?
Before going through each and every step on using the RAK1921 WisBlock module, make sure to prepare the necessary items listed below:
Hardware
- RAK1921 WisBlock OLED Display
- WisBlock Base
- Your choice of WisBlock Core
- USB Cable
- Li-Ion/LiPo battery (optional)
- Solar charger (optional)
Software
Arduino
- You need to download and install Arduino IDE.
- To add the RAKwireless Core boards on your Arduino Boards Manager, install the RAKwireless Arduino BSP.
PlatformIO
To use WisBlock Core modules with PlatformIO, you need to install a small script named RAK_PATCH. The script can be installed on WisBlock Core RAK4631, RAK11200, and RAK11310.
RAK_PATCH script was tested only on Windows 10 and Ubuntu.
Install RAK_PATCH on PlatformIO.
Product Configuration
Hardware Setup
The RAK1921 module is compatible with WisBlock Base Boards. The WisBlock Base Board has a dedicated I2C port with a 2.54 mm header (J12) and RAK1921 is assembled, as shown in Figure 1. Also, RAK1921 is not compatible with the WisDuo Evaluation Boards (different pinout on the same header J12).
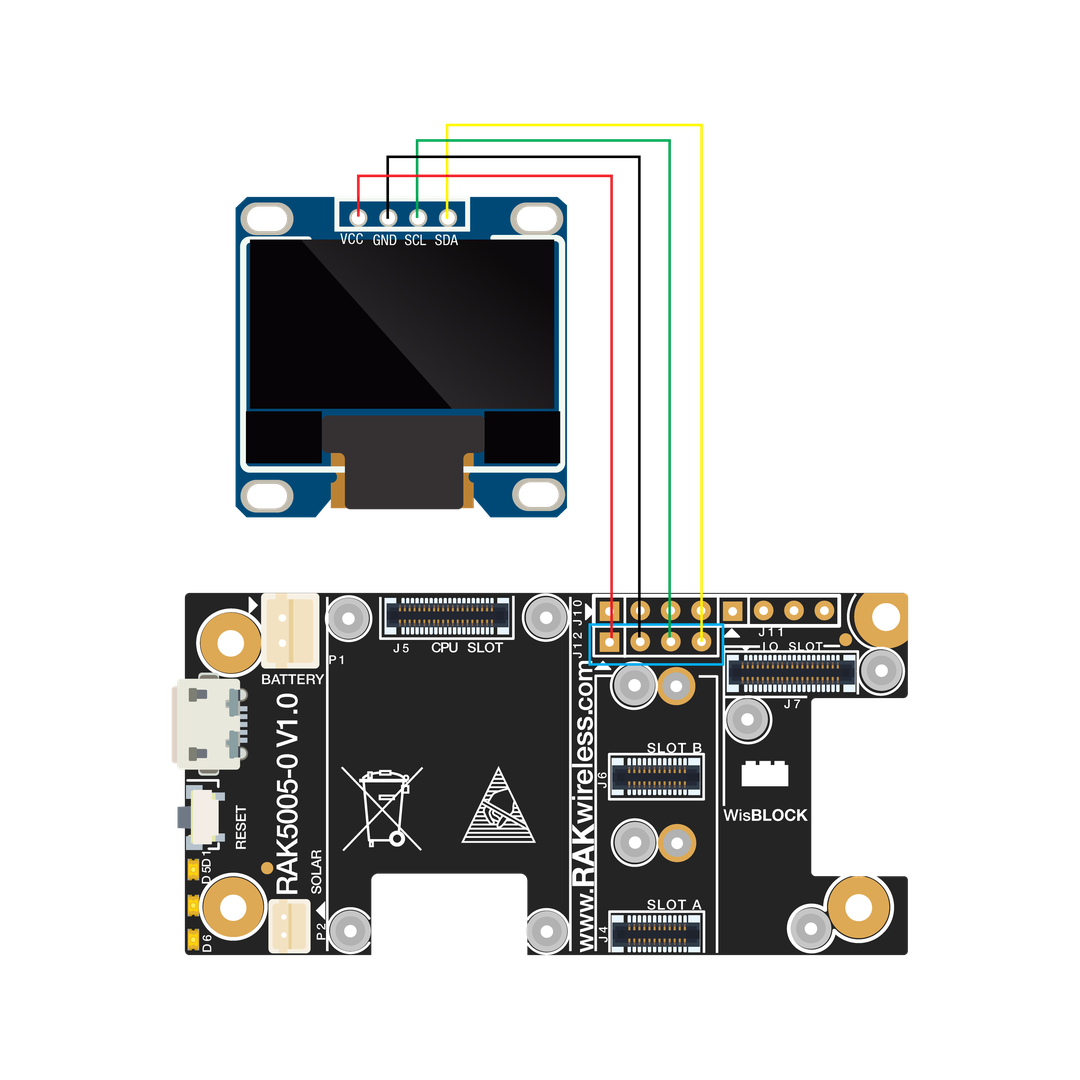 Figure 1: RAK5005-O and RAK1921
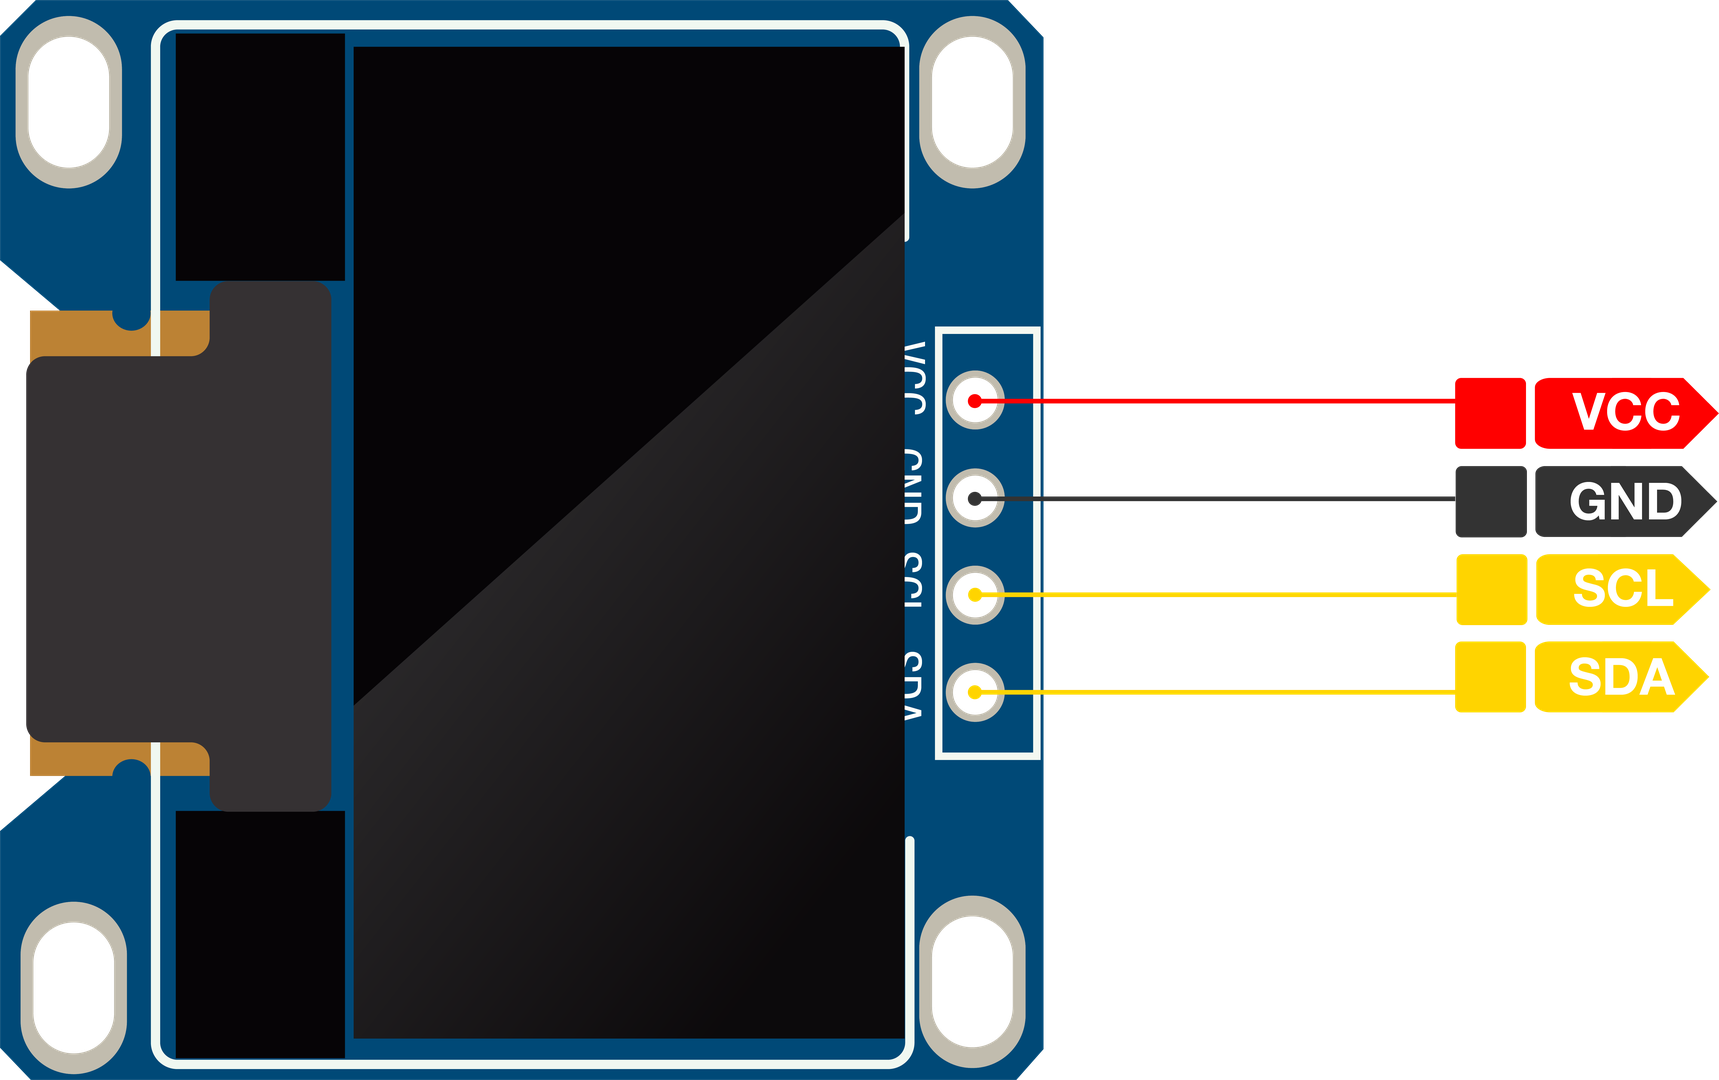 Figure 1: RAK1921 Pin Definition
If you will connect other modules to the remaining WisBlock Base slots, refer to the WisBlock Pin Mapper tool for possible conflicts.
Now, you can connect the battery (optional) and USB cable to start programming your WisBlock Core.
- Battery can cause harm if not handled properly.
- Only 3.7-4.2 V Rechargeable LiPo batteries are supported. It is highly recommended not to use other types of batteries with the system unless you know what you are doing.
- If a non-rechargeable battery is used, it has to be unplugged first before connecting the USB cable to the USB port of the board to configure the device. Not doing so might damage the battery or cause fire.
- Make sure the battery wires match the polarity on the RAK WisBlock Base Board. Not all batteries have the same wiring.
- Only 5 V solar panels are supported. Do not use 12 V solar panels. It will destroy the charging unit and eventually other electronic parts.
Initial Test of the RAK1921 WisBlock Module on Arduino
If you already installed the RAKwireless Arduino BSP, the WisBlock Core and example code should now be available on the Arduino IDE.
- First, you need to select the WisBlock Core you have.
Selecting RAK4631 as WisBlock Core.
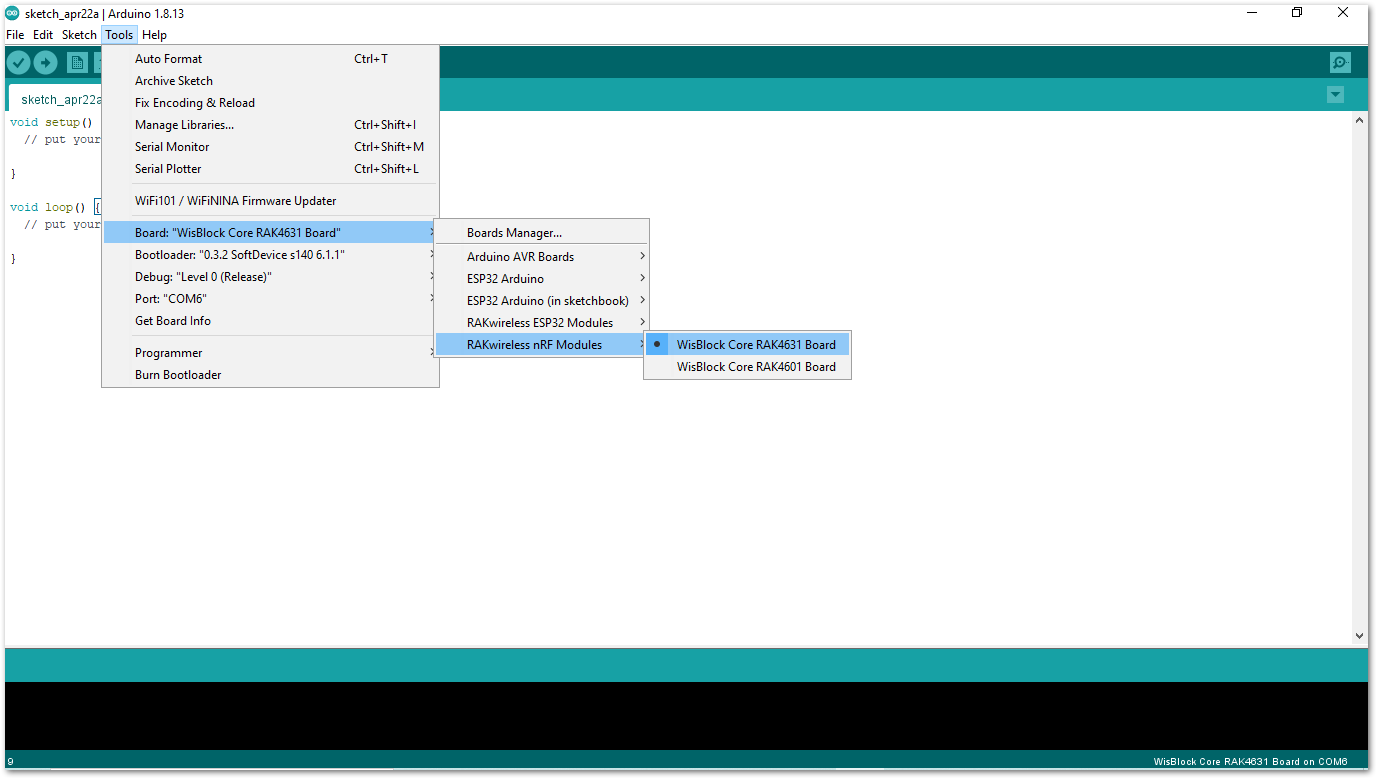 Figure 1: Selecting RAK4631 as WisBlock Core
Selecting RAK11200 as WisBlock Core.
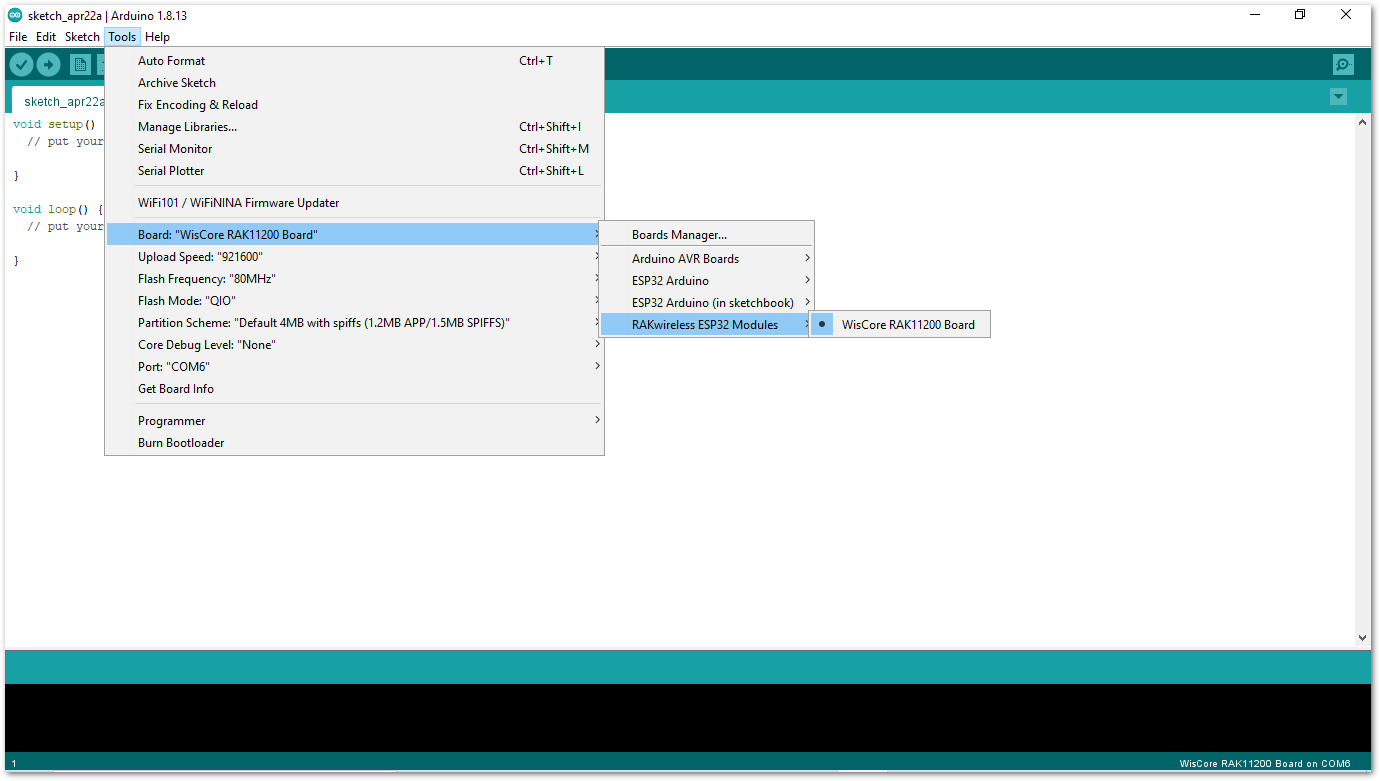 Figure 1: Selecting RAK11200 as WisBlock Core
Selecting RAK11310 as WisBlock Core.
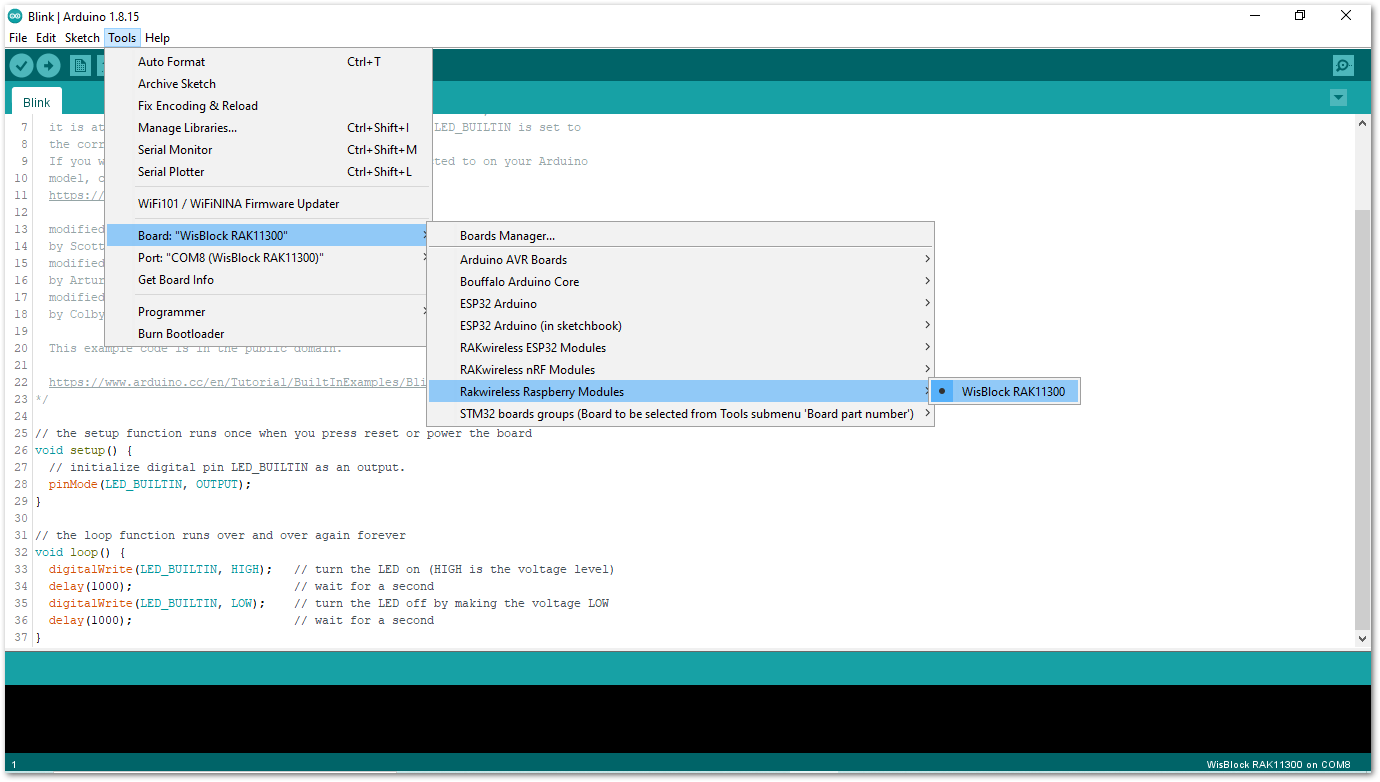 Figure 1: Selecting RAK11310 as WisBlock Core
- The Basic Sample Code for RAK1921 will work on all WisBlock Core. You can open the example codes depending on your WisBlock Core, as shown in Figure 6 to Figure 8.
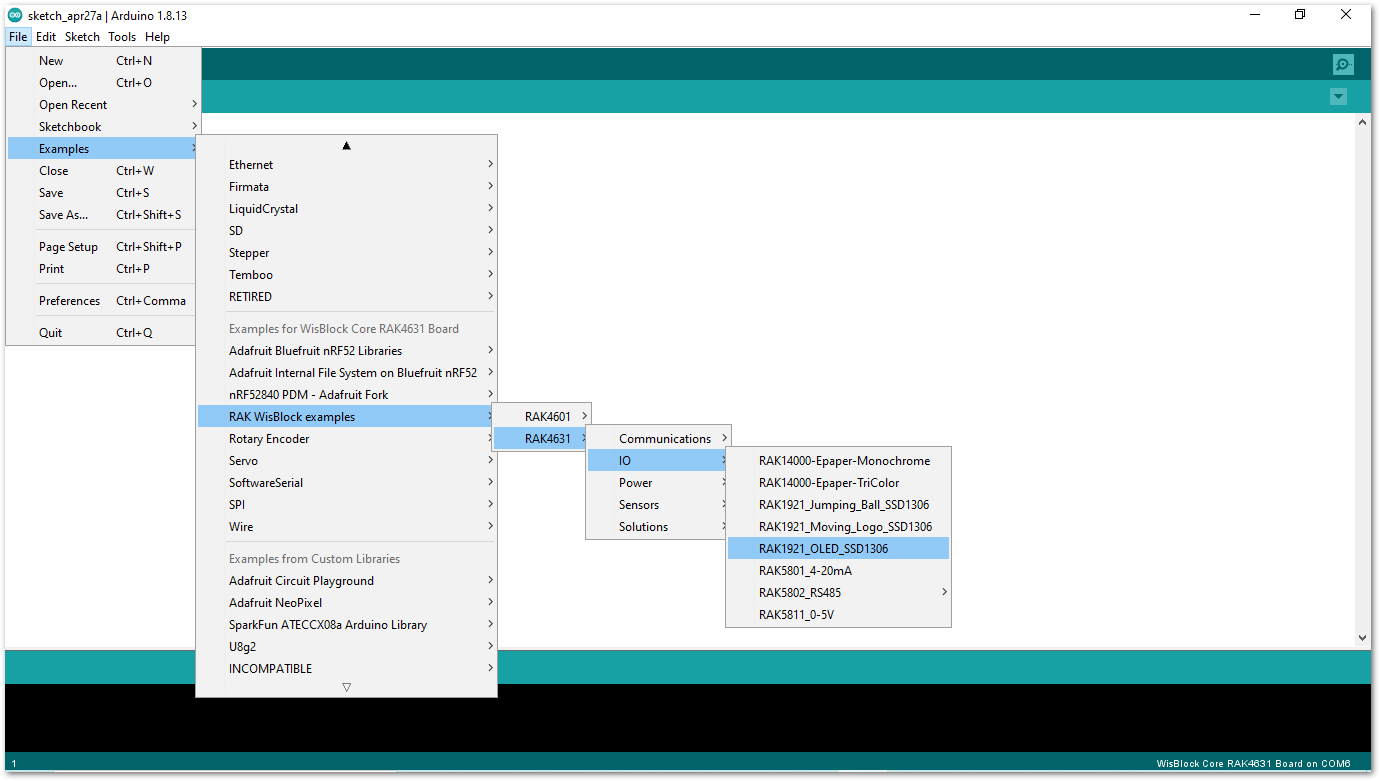 Figure 1: Opening RAK1921 example for RAK4631 WisBlock Core
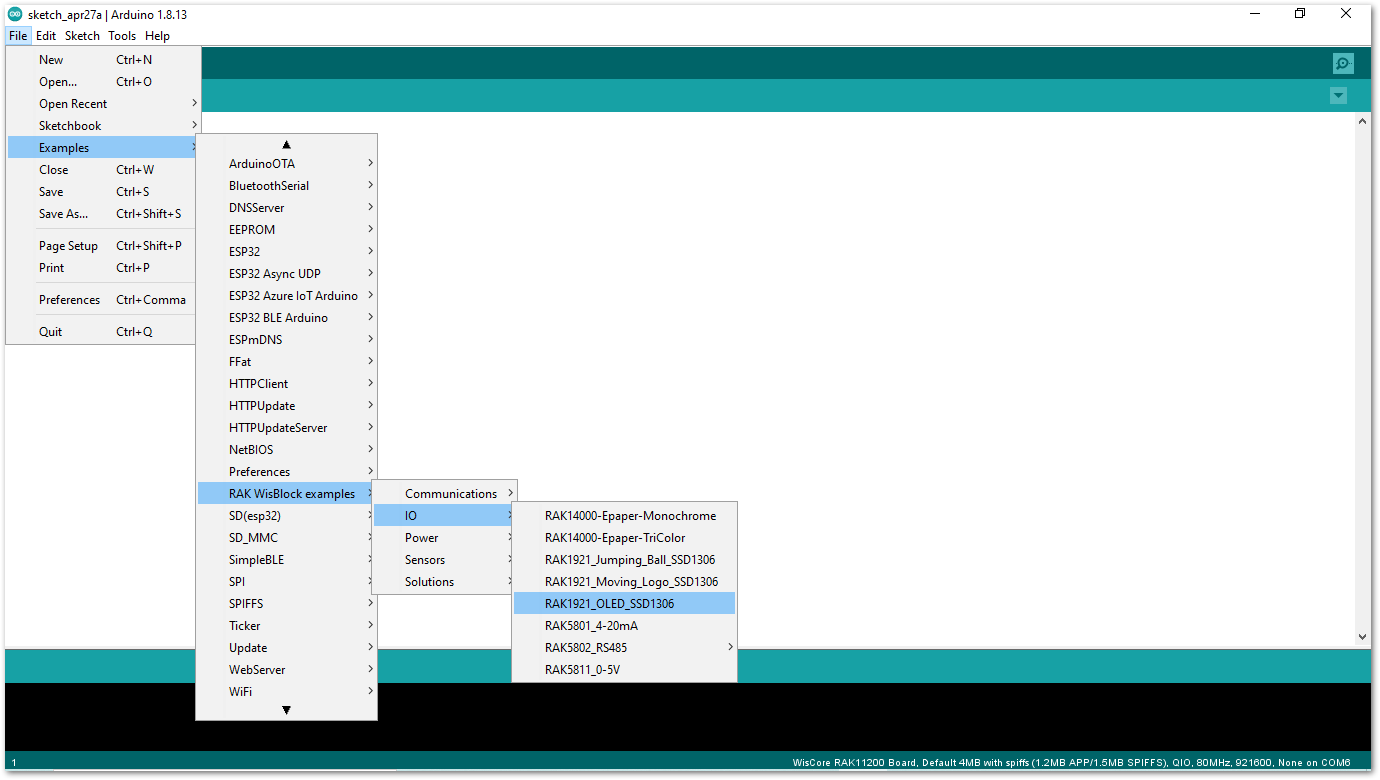 Figure 1: Opening RAK1921 example for RAK11200 WisBlock Core
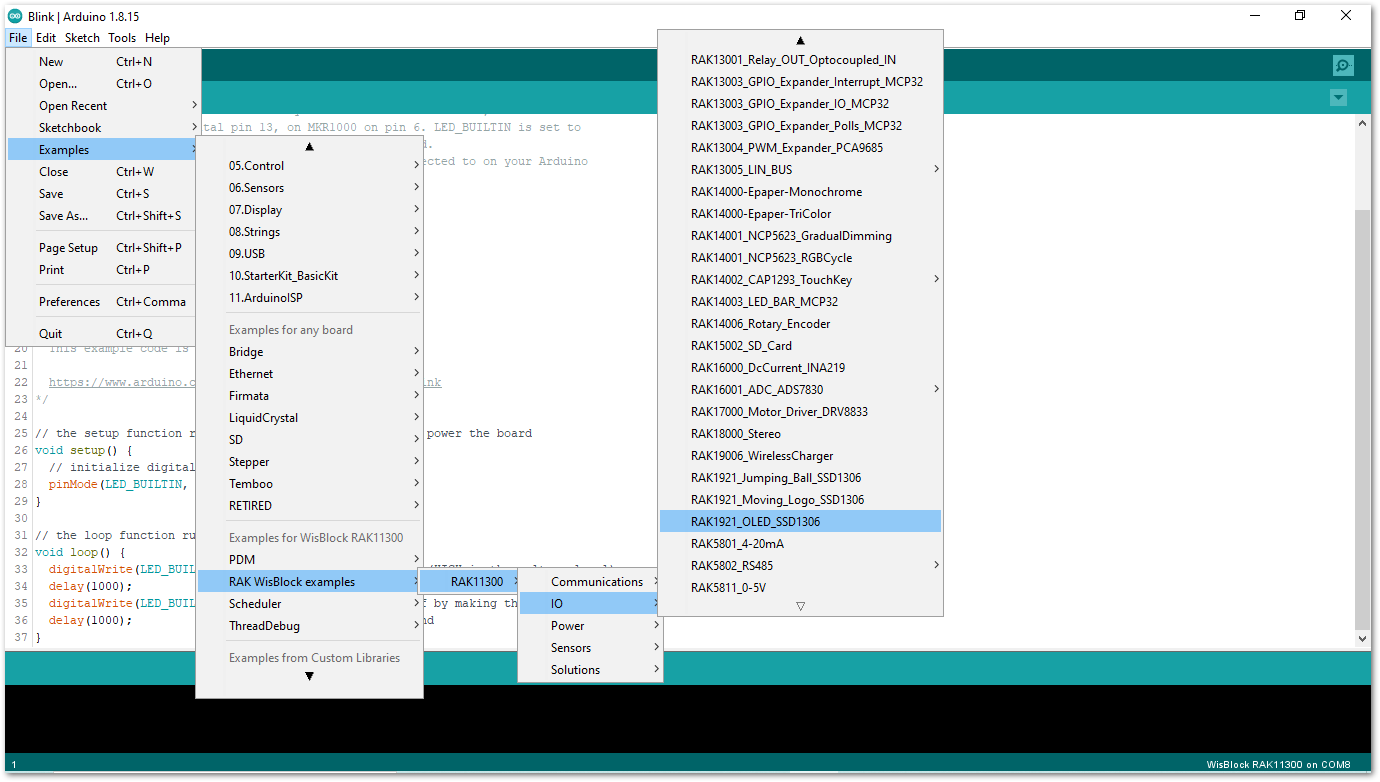 Figure 1: Opening RAK1921 example for RAK11310 WisBlock Core
- Before compiling the project, it is necessary to install the libraries. Just click on the links highlighted in red, as shown in Figure 9, to install each library.
 Figure 1: Install RAK1921 Example libraries
- Click on the Install button to install the U8g2 Library.
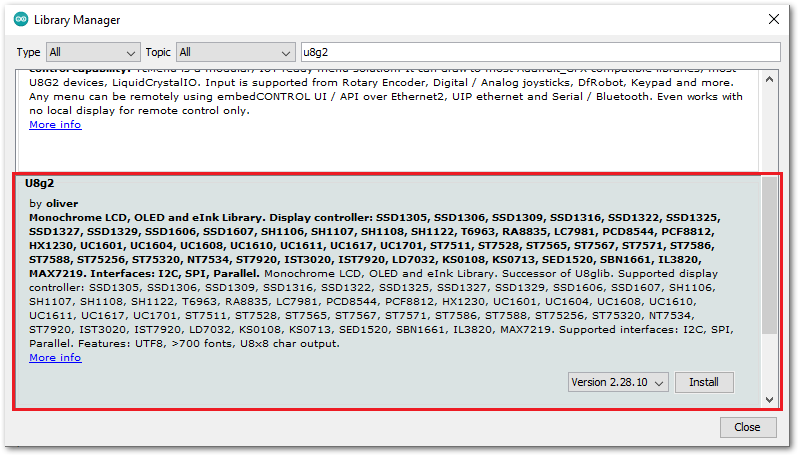 Figure 1: Install U8g2 Library
- Click on the Install button to install the Adafruit BME680 Library.
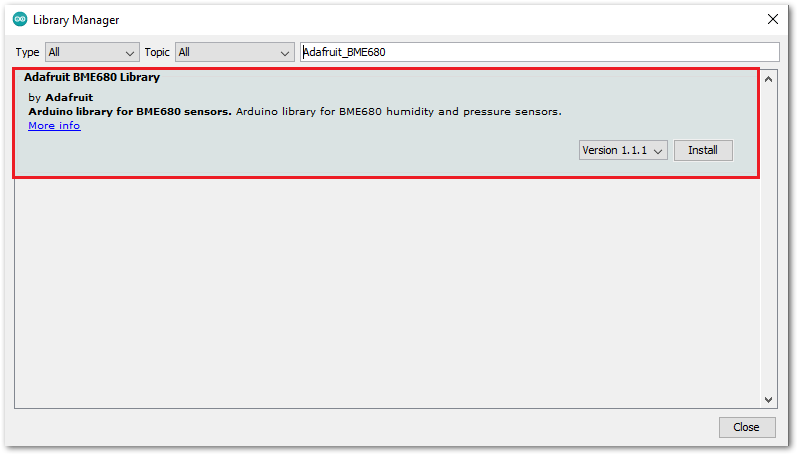 Figure 1: Install Adafruit BME680 Library
- After successful installation of the library, you can now select the right port and upload the code, as shown in Figure 12 to Figure 14.
Click on Tools -> Port then select the correct COM port.
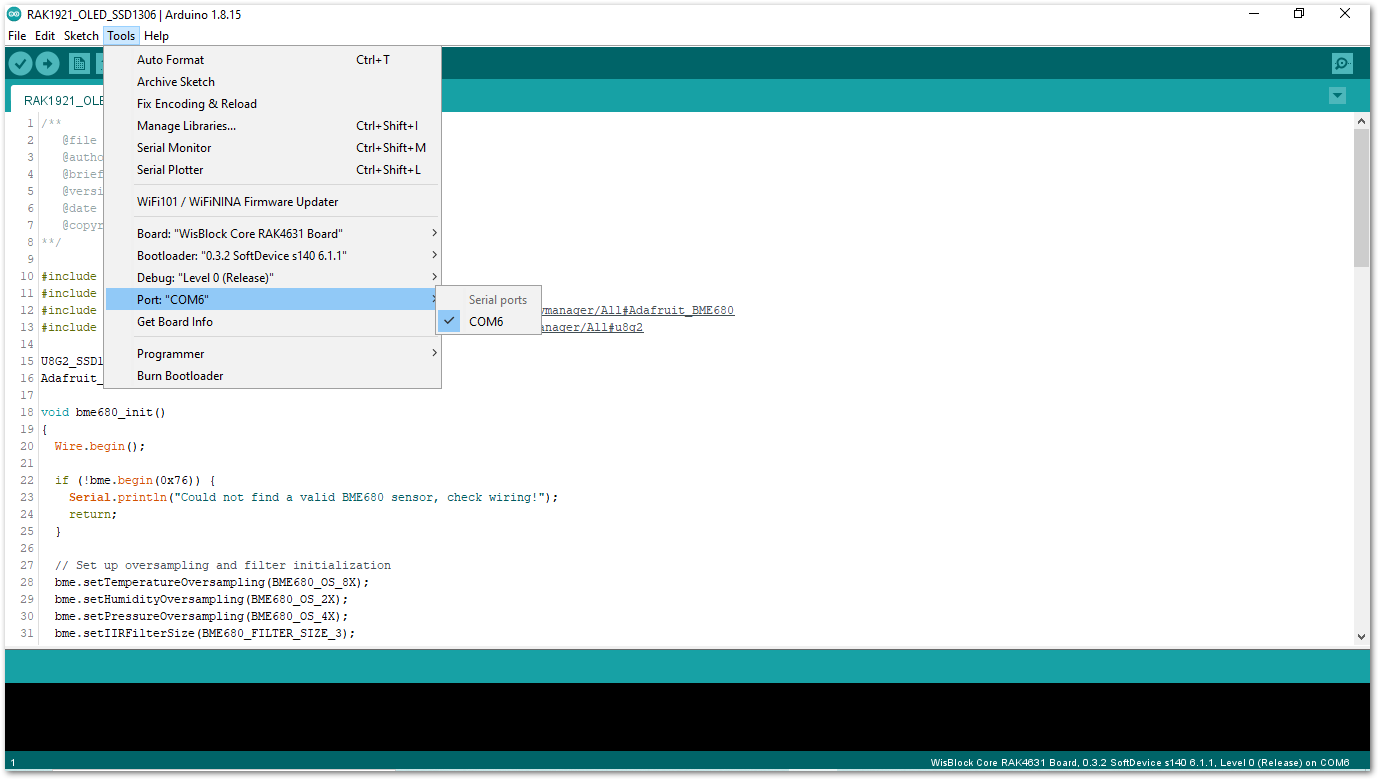 Figure 1: Configuring RAK1921 example for RAK4631 WisBlock Core
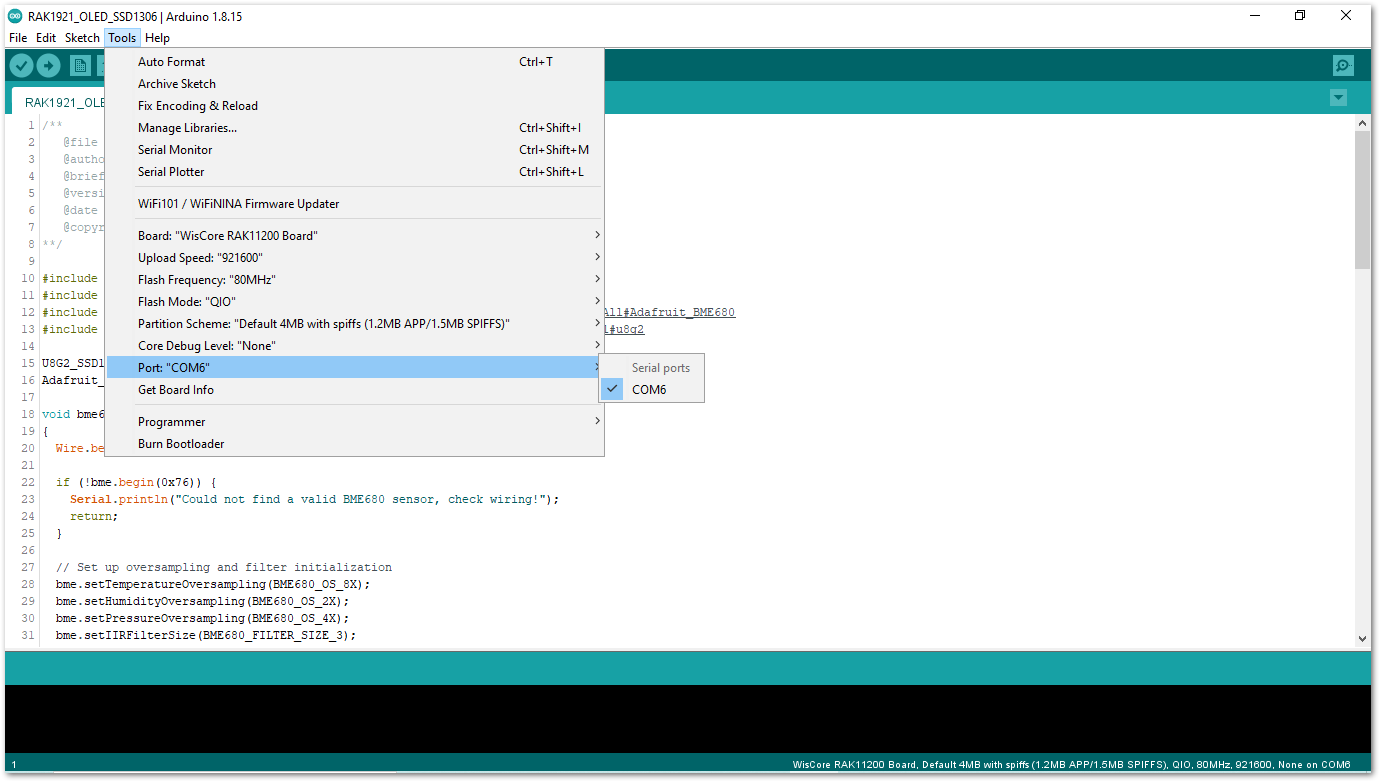 Figure 1: Configuring RAK1921 example for RAK11200 WisBlock Core
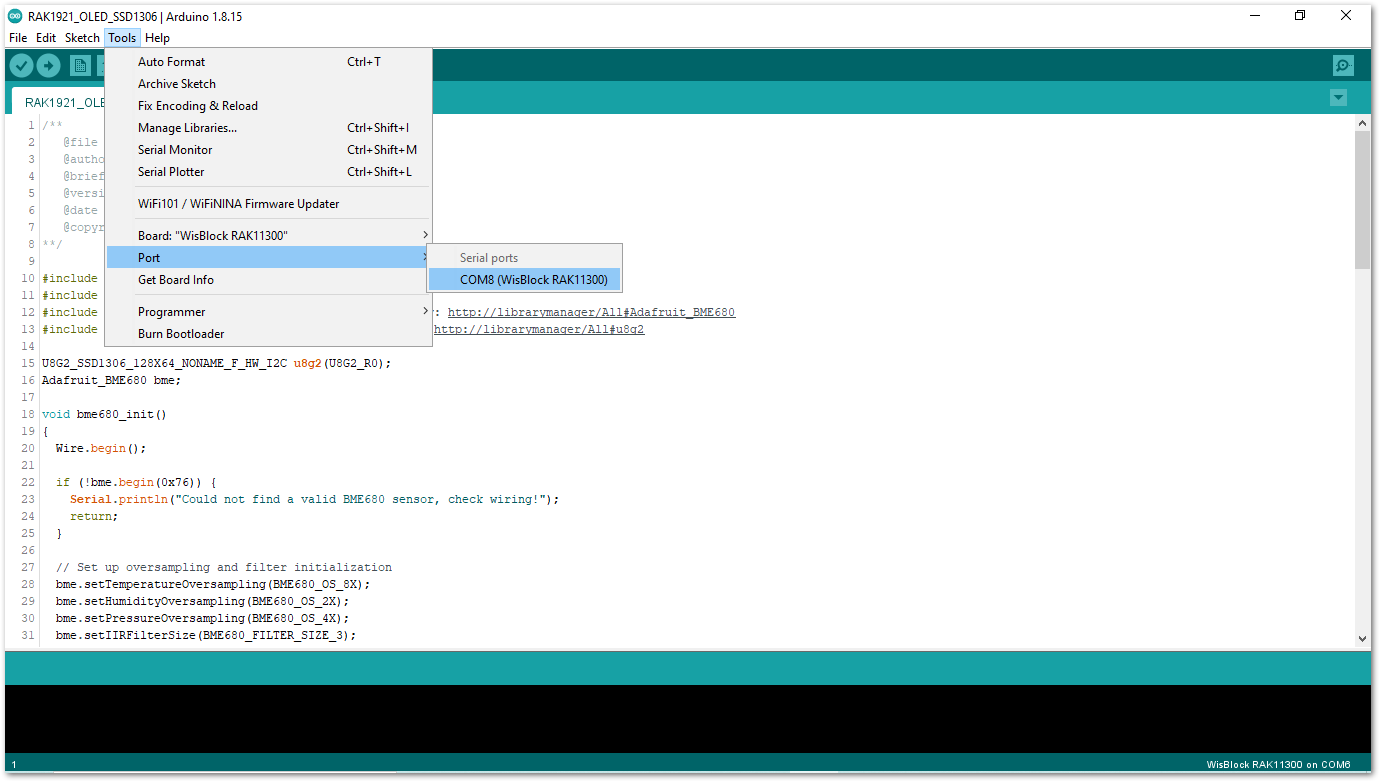 Figure 1: Configuring RAK1921 example for RAK11310 WisBlock Core
Testing an Alternative OLED Library for RAK11200
-
In Arduino IDE, select WisCore RAK11200 Board on Tools -> Boards Manager -> RAKwireless ESP32 modules.
-
Install ThingPulse library on RAK11200.
-
Open Arduino IDE then go to Sketch -> Include Library -> Manage Library.
-
In the Library Manager text area, search for esp32 oled, then click the Install button.
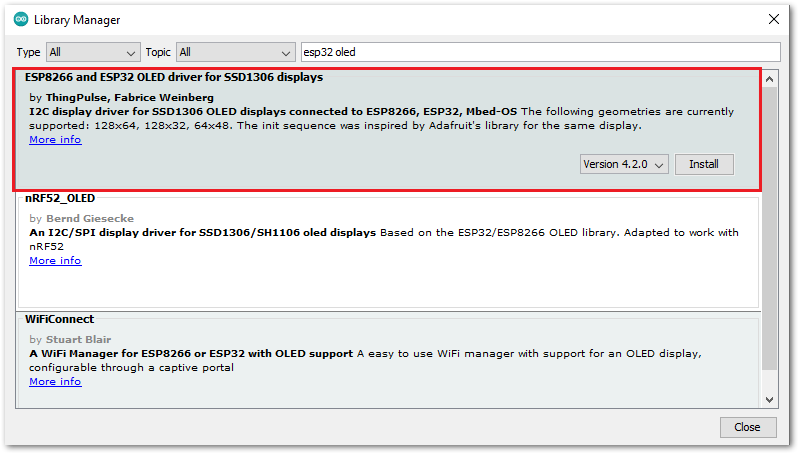 Figure 1: Install ThingPulse Library on Arduino
- After successful installation of the library, open the ThingPulse SimpleDemo example.
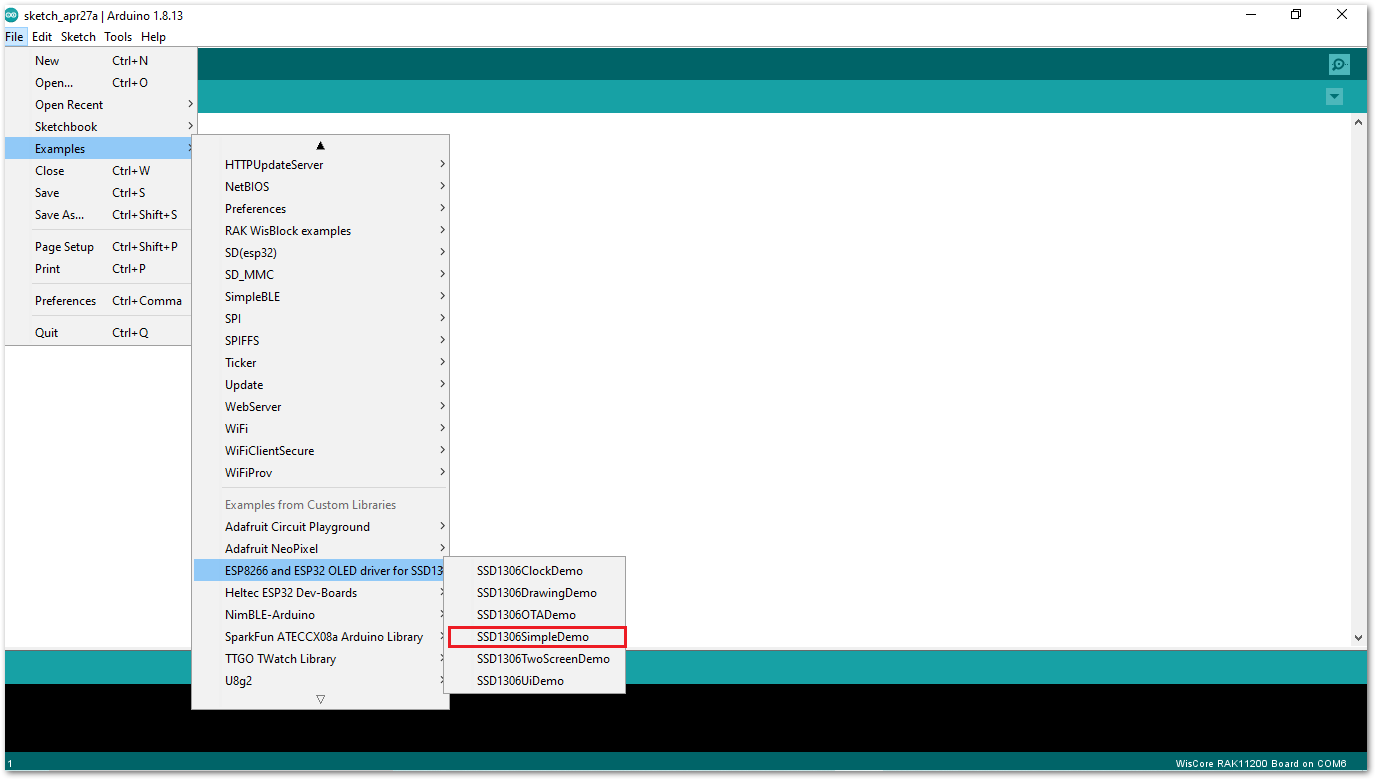 Figure 1: ThingPulse Example on Arduino
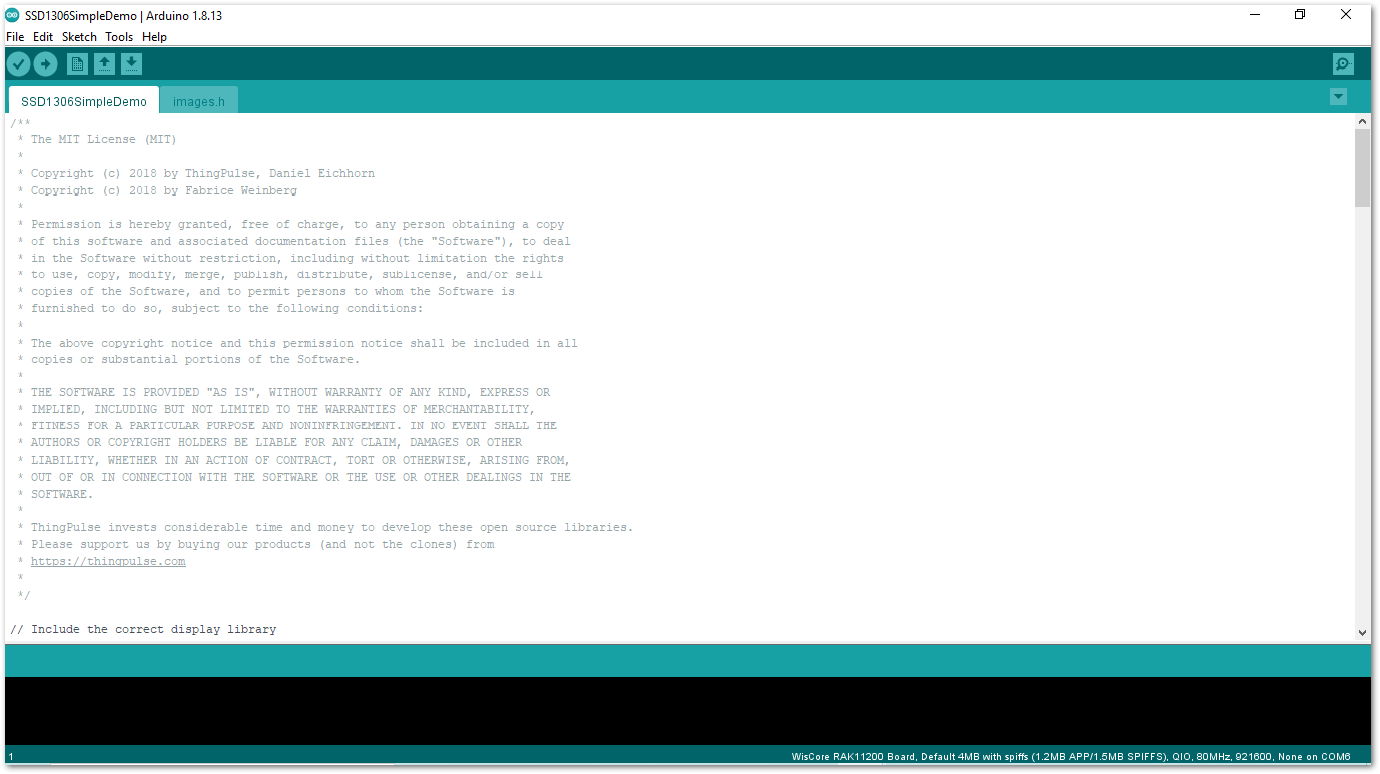 Figure 1: ThingPulse SimpleDemo on Arduino
You can check the other SSD1306 examples in the ThingPulse repository.
Initial Test of the RAK1921 WisBlock Module on PlatformIO
You can import your ThingPulse arduino project to PlatformIO. To perform this test, you need to install RAK_PATCH on PlatformIO.
- Open PlatformIO then PIO Home, and select Import Arduino Project, as shown in Figure 18.
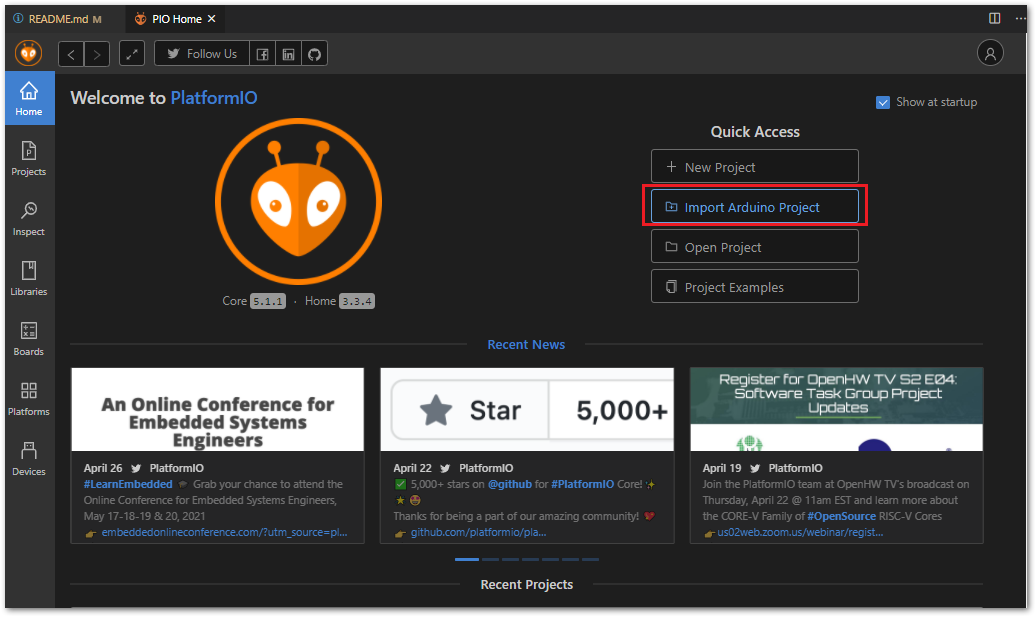 Figure 1: Import Arduino project
- Configure Import Arduino Project parameters:
- On boards list, select WisCore RAK11200 Board (RAKwireless) (Label 1).
- Check Use libraries installed by Arduino IDE (Label 2).
- Choose the directory of your ThingPulse Arduino project to be imported (Label 3).
- To finish import, click on Import button (Label 4).
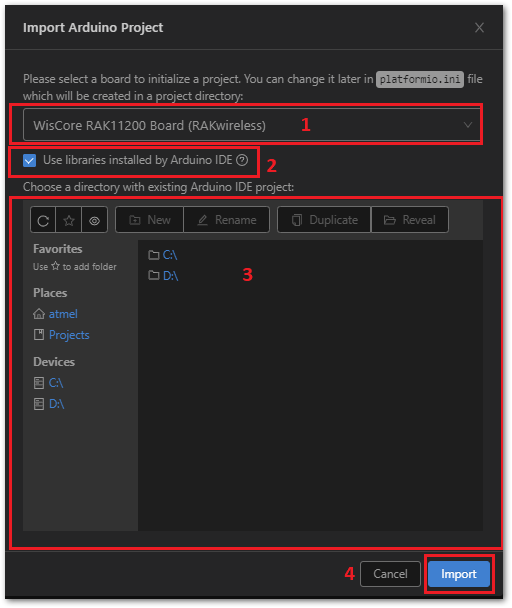 Figure 1: Configure Import parameters
- Open the imported project and check the platformio.ini file. The parameter libs_extra_dir is your Arduino library directory.
 Figure 1: Configuration file platformio.ini
- Build and flash your imported project. In case of upload error, check if your RAK11200 board is listed in PIO Home -> Devices.
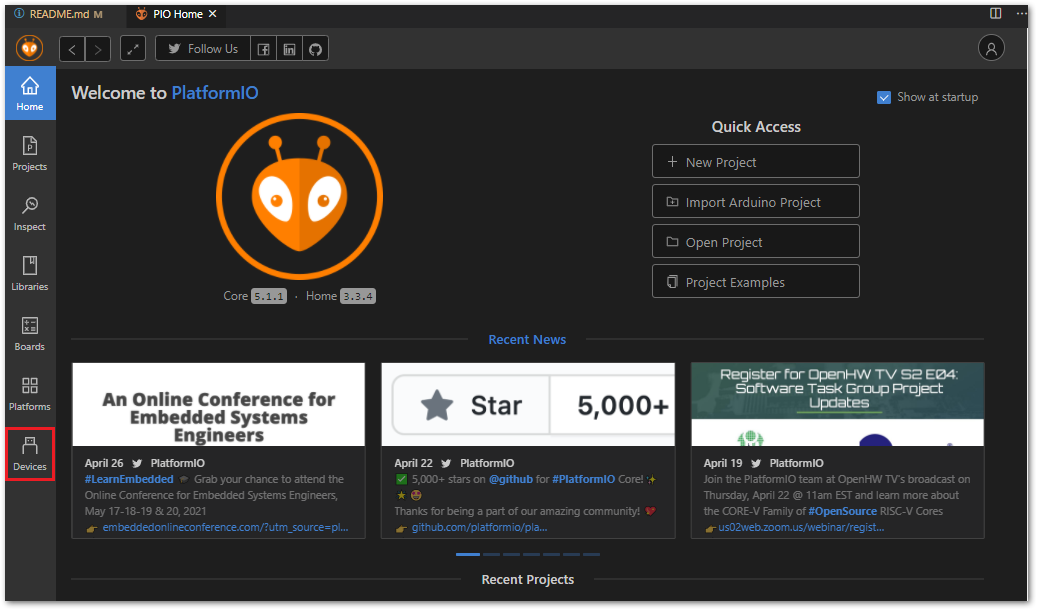 Figure 1: PIO Home Devices