WisDM Organization Settings
The Settings page centralizes organization profile details, subscription and billing information, temporary access configuration, and other organization-level settings.
Organization Information
The Settings > Overview section shows the basic profile information of the current Organization. Updating these details requires the Organization Admin role.
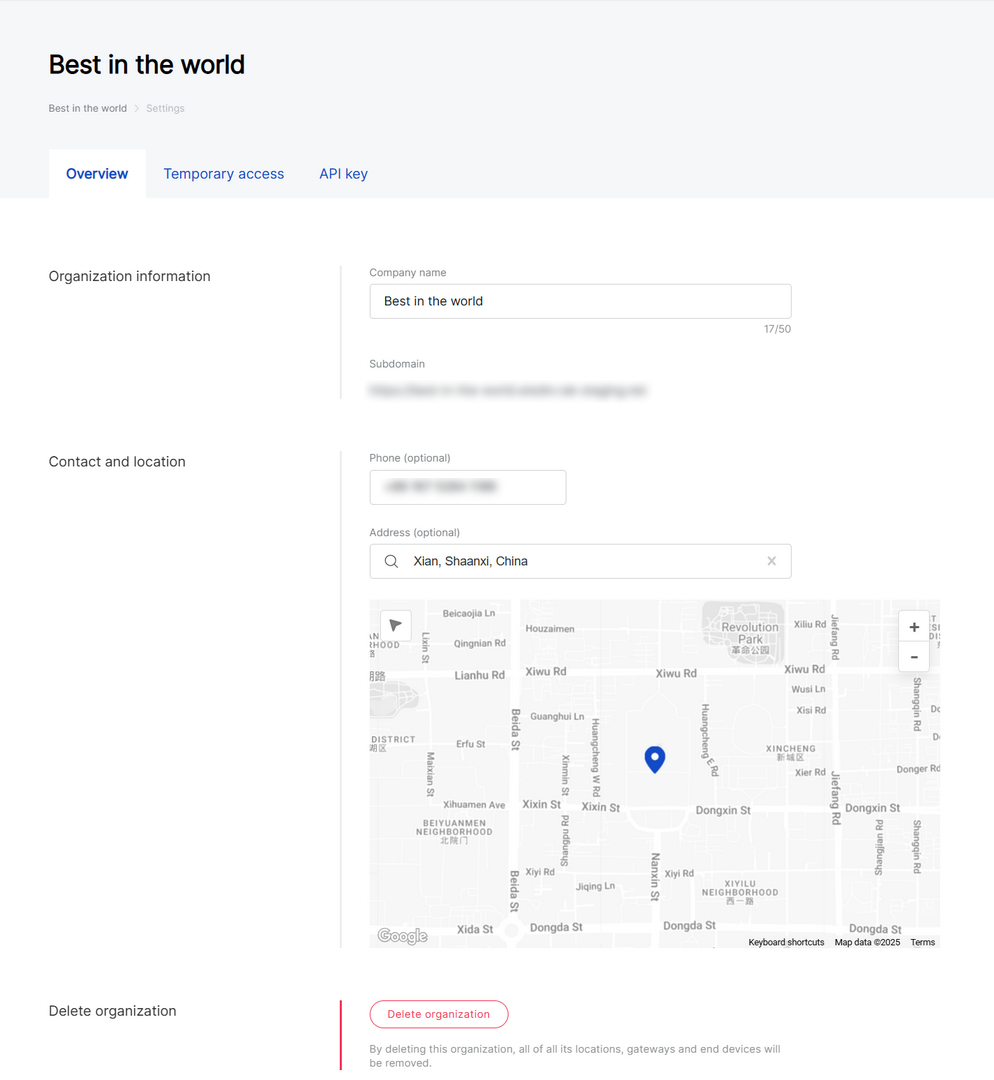 Figure 1: Organization basic information overview
In this section, you can view or update:
- Company Name: The display name of the Organization.
- Subdomain: The dedicated login URL for WisDM (e.g.,
your-org.wisdm.rakwireless.com). To change the subdomain, contact RAK Support. - Phone: Optional. The contact phone number of the Organization.
- Address: Optional. The Organization address or map location.
Delete an Organization
You can permanently delete an Organization when it is no longer needed. Only users with Organization Admin permissions can delete an Organization.
Deleting an Organization removes the Organization workspace and revokes access to its related WisDM assets, settings, members, and historical organization data. This action cannot be undone.
Before deleting an Organization, review the following carefully:
- You will immediately lose access to the Organization.
- All Locations, gateways, Applications, and end devices under this Organization will be deleted.
- WisDM support cannot restore a deleted Organization.
- If the Organization has an active paid subscription, the subscription will be cancelled immediately and no refund will be issued.
- Go to Settings > Overview.
- Scroll to the Delete organization section.
- Click Delete organization.
- Review the warning message in the confirmation dialog.
- Enter your RAK ID password.
- If two-factor authentication is enabled for your RAK ID, enter the verification code from your authenticator app.
- Click Delete to confirm the deletion.
After the Organization is deleted, your Organization role and permissions are revoked, and you are redirected to the Organizations list.
Subscription Management
The Subscription tab allows eligible administrators to view and manage the Organization subscription, gateway limit, billing status, payment method, invoices, and subscription-related actions.
Only an Organization Admin with billing permissions can manage subscription and billing-related settings.
View Current Subscription
The Subscription tab shows the current subscription status and related billing information.
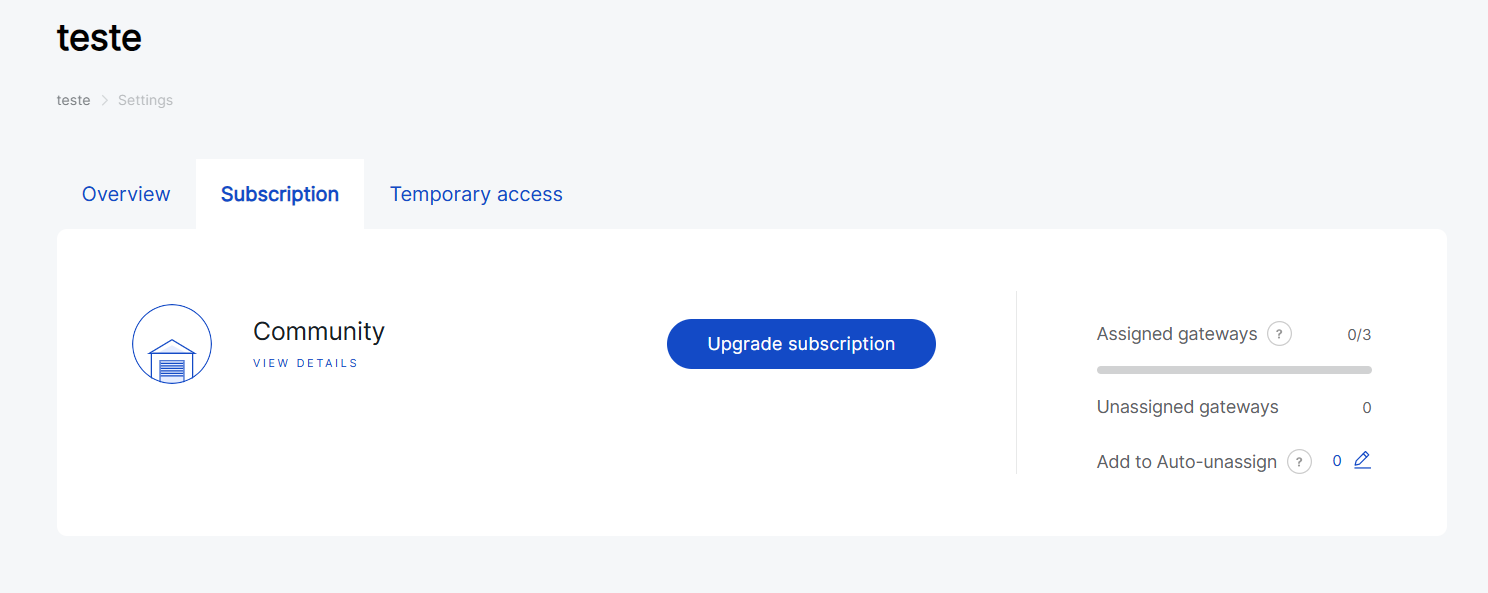 Figure 1: Organization subscription overview
Current Subscription Plan
The current subscription card shows the active subscription plan and key subscription details.
- Subscription plan: The current plan, such as Standard, Professional, Enterprise, or On Demand.
- Subscription fee: Shows the subscription fee and billing cycle when applicable.
- Renewal date: Shows the next renewal date for the current paid subscription.
- Gateways limit: Shows the maximum number of gateways allowed by the current subscription. This field is commonly used for On Demand subscriptions.
- End date: Shows the end date of the current subscription term when applicable. This field is commonly used for On Demand subscriptions.
- View details: Opens more information about the current subscription.
Gateway Usage
The gateway usage section shows how many gateways are currently assigned or unassigned in the Organization.
- Assigned gateways: Gateways currently assigned to Locations.
- Unassigned gateways: Gateways added to the Organization but not assigned to any Location.
- Gateway limit: The maximum number of gateways allowed by the current subscription.
- Auto-Unassign list: Gateways selected to be unassigned first if WisDM needs to reduce the number of assigned gateways during a subscription transition. For details, refer to Auto-Unassign Gateways.
The gateway limit defines the maximum number of gateways that can be managed within the Organization. If the Organization reaches the current subscription limit, additional gateways cannot be added until the subscription is upgraded or adjusted.
Billing Information
The Billing information section shows the billing and shipping details used for payment processing and invoice generation.
This section is mainly available for online paid subscriptions, such as Standard, Professional, and Enterprise.
It includes:
- Billing details: Cardholder or billing contact information.
- Shipping details: Registered business information used for invoices.
- Tax details: Business tax information, if applicable.
Click the edit icon to update billing information.
Billing information may be required when creating a paid subscription, upgrading from Community to a paid plan, updating subscription details, or completing payment during a retry period.
Payment Method
The Payment method section shows the saved payment method used for automatic renewal and other subscription payments.
This section is mainly available for online paid subscriptions, such as Standard, Professional, and Enterprise.
Click the edit icon to update the payment method.
A valid saved payment method is required for automatic renewal of paid subscriptions. If the saved payment method cannot be charged, the Organization may enter the retry period.
Download Invoices and Receipts
The Billing History section allows eligible users to download invoices and receipts for subscription-related transactions.
- Invoice: Provides billing details for the subscription transaction, including billing information, subscription plan, amount, tax details if applicable, and billing period.
- Receipt: Confirms that the payment was completed successfully.
Only users with billing permissions can view billing history and download invoices or receipts.
To download an invoice or receipt:
-
Go to Settings > Subscription.
-
Scroll to the Billing History section.
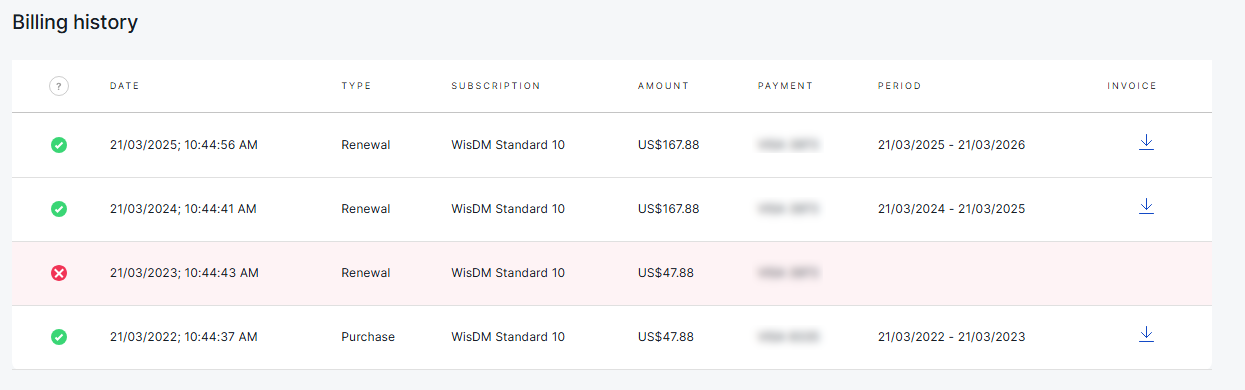 Figure 1: Billing History
-
Locate the target transaction record. You can check the transaction information, such as:
- Date
- Transaction type
- Subscription plan
- Amount
- Payment method
- Billing period
- Invoice
-
Click the download icon in the Invoice column.
-
In the pop-up window, select the file you want to download.
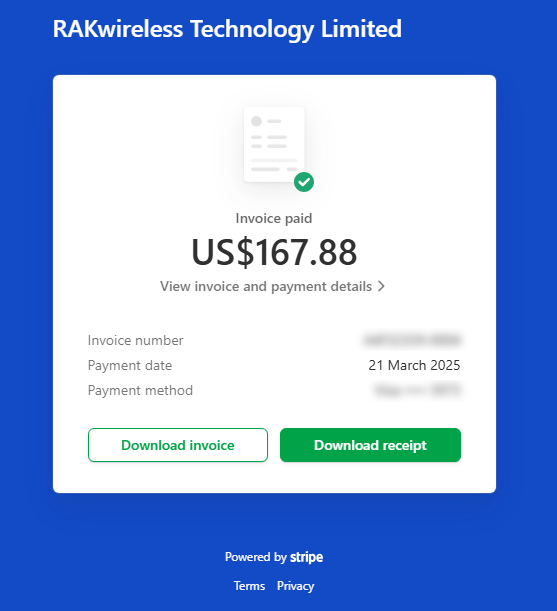 Figure 1: Download Invoice or Receipt
- Click Download invoice or Download receipt.
Upgrade Subscription
Use Upgrade subscription when the Organization needs a higher gateway limit or a higher subscription tier.
Upgrade from Community to a Paid Plan
Use this flow when the Organization is currently on the Community plan and needs to manage more than the Community gateway limit.
- Go to Settings > Subscription.
- Click Upgrade subscription.
- Select a paid plan, such as Standard, Professional, or Enterprise.
- Select the required gateway range if the plan provides multiple tiers.
- Complete the Billing Information form.
- Provide a valid business TAX ID if required.
- Complete the payment.
After the payment succeeds:
- The selected paid plan is activated.
- A new annual billing cycle starts from the successful payment date.
- The payment method is saved for future transactions.
- A transaction record is added to the billing history.
- A confirmation email is sent to Organization members with billing permissions.
Upgrade from a Paid Plan to a Higher Tier
Use this flow when the Organization already has a paid subscription and needs a higher gateway limit.
- Go to Settings > Subscription.
- Click See all plans or Upgrade subscription.
- Select a higher paid plan or higher gateway tier.
- Review the upgrade confirmation message.
- Confirm the action.
- Review or update the existing billing information.
- Complete the payment.
For paid-to-paid upgrades:
- WisDM reuses the existing billing information and payment method when available.
- You can update billing information or payment method during the upgrade.
- The upgrade is activated immediately after successful payment.
- The current billing cycle remains unchanged.
- You pay only the prorated price difference for the remaining time in the current billing cycle.
- A transaction record is added to the billing history.
If the subscription has a pending cancellation, a successful upgrade overrides the pending cancellation and activates the new subscription plan.
Downgrade Subscription
Use Downgrade subscription when the Organization wants to move from a higher paid plan to a lower paid plan.
Downgrading to Community is handled through Cancel subscription, not through the standard downgrade flow.
Request a Downgrade
- Go to Settings > Subscription.
- Click See all plans or Upgrade subscription.
- Select a lower paid plan or lower gateway tier.
- Review the downgrade confirmation message.
- Confirm the downgrade request.
After the request is confirmed:
- The current paid subscription remains active until the end of the current prepaid billing period.
- The downgrade is scheduled as a pending downgrade.
- WisDM displays the upcoming plan change in the subscription details.
- A notification email is sent to Organization members with billing permissions.
Before the Downgrade Takes Effect
Before the end of the current billing period, WisDM checks whether the number of assigned gateways fits the target plan limit.
- If the current gateway count fits the new plan limit, no gateway action is required.
- If the current gateway count exceeds the new plan limit, WisDM shows a reminder and may require gateway unassignment.
- Reminder emails may be sent before the downgrade takes effect.
If the Organization still exceeds the target plan gateway limit when the downgrade takes effect, WisDM may automatically unassign excess gateways according to the Auto-Unassign mechanism.
When the Downgrade Takes Effect
At the end of the current billing period:
- The new lower paid plan is activated.
- A new billing cycle starts.
- The saved payment method is charged for the new plan.
- Subscription details are updated.
- A transaction record is added to the billing history.
- A confirmation email is sent to Organization members with billing permissions.
While a pending downgrade is active, upgrading to a higher plan is not available unless the pending downgrade is rescinded.
Cancel Subscription
Use Cancel subscription when the Organization no longer wants to continue a paid subscription.
Only paid subscriptions can be canceled.
Cancel During an Active Paid Billing Period
When a paid subscription is canceled during the current prepaid billing period, the cancellation becomes a pending cancellation.
- Go to Settings > Subscription.
- Click See all plans or Upgrade subscription.
- Select the current paid plan.
- Click Cancel.
- Review the cancellation warning.
- Confirm the cancellation request.
After the request is confirmed:
- The current subscription remains active until the end of the current billing period.
- Future renewal is canceled.
- The subscription status changes to pending cancellation.
- A confirmation email is sent to Organization members with billing permissions.
At the end of the billing period:
- The paid subscription is canceled.
- The Organization is moved to the Community plan.
- Billing information and payment method are removed from the WisDM UI.
- Subscription details are updated.
- A confirmation email is sent to Organization members with billing permissions.
If the number of assigned gateways exceeds the Community plan limit when the cancellation takes effect, WisDM may automatically unassign excess gateways according to the Auto-Unassign mechanism.
Cancel During the Retry Period
During the retry period, subscription cancellation may take effect immediately.
- Go to Settings > Subscription.
- Click Pay now.
- Select the current paid plan.
- Click Cancel.
- WisDM checks the number of assigned gateways in the Organization.
- If the number of assigned gateways fits the Community plan limit, the cancellation can continue.
- If the number of assigned gateways exceeds the Community plan limit, the cancellation cannot continue. You must remove or unassign excess gateways before retrying the cancellation.
- Review the confirmation message and confirm the cancellation.
After immediate cancellation succeeds:
- The paid subscription is canceled.
- The Community plan is activated.
- Billing information and payment method are removed from the WisDM UI.
- Subscription details are updated.
- A confirmation email is sent to Organization members with billing permissions.
Rescind Pending Subscription Changes
Use Rescind when you want to cancel a pending subscription change before it takes effect.
Rescind a Pending Cancellation
If a paid subscription has a pending cancellation, an eligible Organization Admin with billing permissions can rescind the cancellation before the current billing period ends.
- Go to Settings > Subscription.
- Open the subscription change flow, such as See all plans or the available plan management entry.
- Select the current paid plan.
- Click Rescind cancelation.
- Review the confirmation message and confirm.
After rescinding the cancellation:
- The current subscription continues.
- Future renewal is restored.
- The pending cancellation status is removed.
- Subscription details are updated.
- A confirmation email is sent to Organization members with billing permissions.
Rescind a Pending Downgrade
If a paid subscription has a pending downgrade, an eligible Organization Admin with billing permissions can rescind the downgrade before the effective date.
- Go to Settings > Subscription.
- Open the subscription change flow, such as See all plans or the available plan management entry.
- Select the current paid plan.
- Click Rescind downgrade.
- Review the confirmation message and confirm.
After rescinding the downgrade:
- The current subscription continues.
- The pending downgrade status is removed.
- The current subscription renewal is restored.
- Subscription details are updated.
- A confirmation email is sent to Organization members with billing permissions.
Renew Subscription
Paid subscriptions are renewed automatically at the end of each billing period unless the subscription has been canceled.
Before renewal, WisDM sends renewal reminders to eligible Organization members so they can review the upcoming payment and make sure the billing contact is aware of the renewal.
Automatic Renewal
When the current billing period ends, WisDM automatically starts a new billing period and charges the saved payment method for the current subscription plan.
If the payment succeeds:
- The current subscription is renewed.
- Subscription status and details are updated.
- A transaction record is added to the billing history.
- A successful payment notification is sent to eligible Organization members.
Automatic renewal requires a valid saved payment method. If the saved payment method cannot be charged, the Organization enters the retry period.
Retry Period
The retry period starts when WisDM fails to charge the saved payment method for a paid subscription renewal or another scheduled subscription payment.
During the retry period, the Organization can continue using the current subscription for a limited time while WisDM retries the payment.
WisDM retries the payment on the following schedule:
- Day 4 of the retry period
- Day 7 of the retry period
- Day 14 of the retry period
If one of the retry attempts succeeds:
- The retry period ends.
- The current subscription is renewed or the scheduled subscription payment is completed.
- Subscription status and details are updated.
- A transaction record is added to the billing history.
- A successful payment notification is sent to eligible Organization members.
If all retry attempts fail:
- The paid subscription is canceled.
- The Organization is moved to the Community plan.
- Billing information and payment method are removed from the WisDM UI.
- Excess gateways may be automatically unassigned if the Organization exceeds the Community gateway limit.
During the retry period, subscription changes may be limited. Manual renewal of the current subscription is the primary available action.
Renew Manually During the Retry Period
If the Organization is in the retry period, an eligible Organization Admin with billing permissions can manually renew the subscription.
To renew manually:
- Go to Settings > Subscription.
- Click Pay now.
- Review or update the billing information.
- Confirm the payment method.
- Complete the payment.
If the payment succeeds:
- The retry period stops.
- The current subscription is renewed.
- Subscription status and details are updated.
- The payment method is saved for future transactions.
- A transaction record is added to the billing history.
- A successful payment notification is sent to eligible Organization members.
If the payment fails, you can update the payment method and try again during the retry period.
Manual renewal is available only during the retry period.
Auto-Unassign Gateways
Auto-Unassign helps WisDM move an Organization to a lower subscription limit when the number of assigned gateways exceeds the target plan limit.
This may happen when:
- A paid subscription is canceled and the Organization moves to Community.
- A paid subscription is downgraded to a plan with a lower gateway limit.
- A subscription payment fails and the retry period ends without successful payment.
- A pending subscription change takes effect and the Organization has more gateways than the new plan allows.
When Auto-Unassign is triggered, WisDM automatically unassigns excess gateways until the Organization fits the target subscription limit.
Auto-Unassign Rules
When WisDM needs to unassign excess gateways:
- Gateways in the Auto-Unassign list are processed first.
- If the Auto-Unassign list does not include enough gateways, WisDM unassigns additional gateways from the Organization.
- Gateways with the oldest update timestamp may be selected first.
- For Built-in Network Server Locations, if a Central Gateway is selected, related Extender Gateways are unassigned together with the Central Gateway.
Before downgrading or canceling a subscription, review the number of assigned gateways and update the Auto-Unassign list if needed. This helps reduce the risk of important gateways being unassigned automatically.
Add Gateways to Auto-Unassign
The Auto-Unassign list allows eligible administrators to specify which gateways should be unassigned first if Auto-Unassign is triggered.
Only assigned gateways can be added to the Auto-Unassign list. If a gateway is manually unassigned or deleted, it is removed from the Auto-Unassign list automatically.
- Go to Settings > Subscription.
- Click the pencil icon next to Add to Auto-Unassign.
- In the Auto-Unassign gateways window, select the gateways to include in the auto-unassign list.
- Click Add to Auto-Unassign and confirm your action.
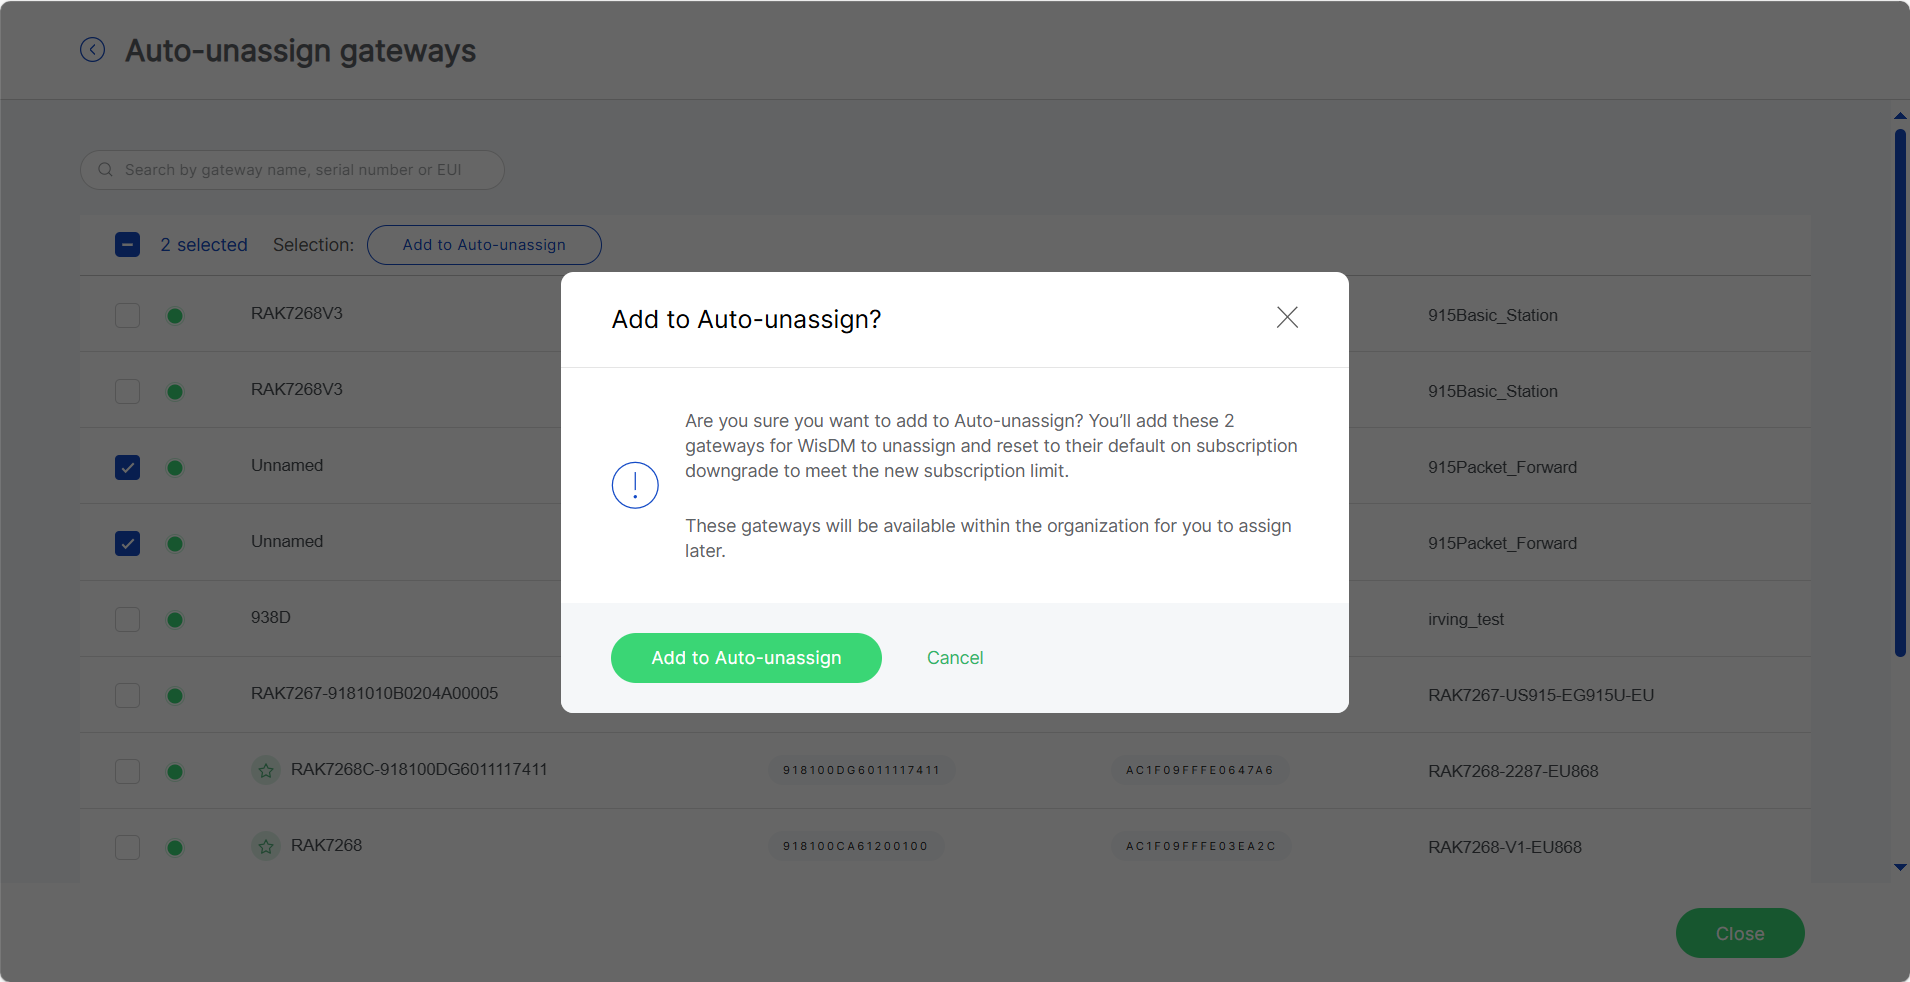 Figure 1: Confirm adding gateways to the Auto-Unassign list
The  icon next to a gateway indicates pending synchronization — the gateway has been selected for Auto-Unassign, but the update has not yet been applied.
Once completed, these gateways will appear under the Auto-Unassign list and will be prioritized for removal during a downgrade.
Remove Gateways from Auto-Unassign
- Go to Settings > Subscription.
- Click the pencil icon next to Add to Auto-Unassign.
- From the list, select the gateways currently marked for Auto-Unassign.
- Click Remove from Auto-Unassign and confirm the action.
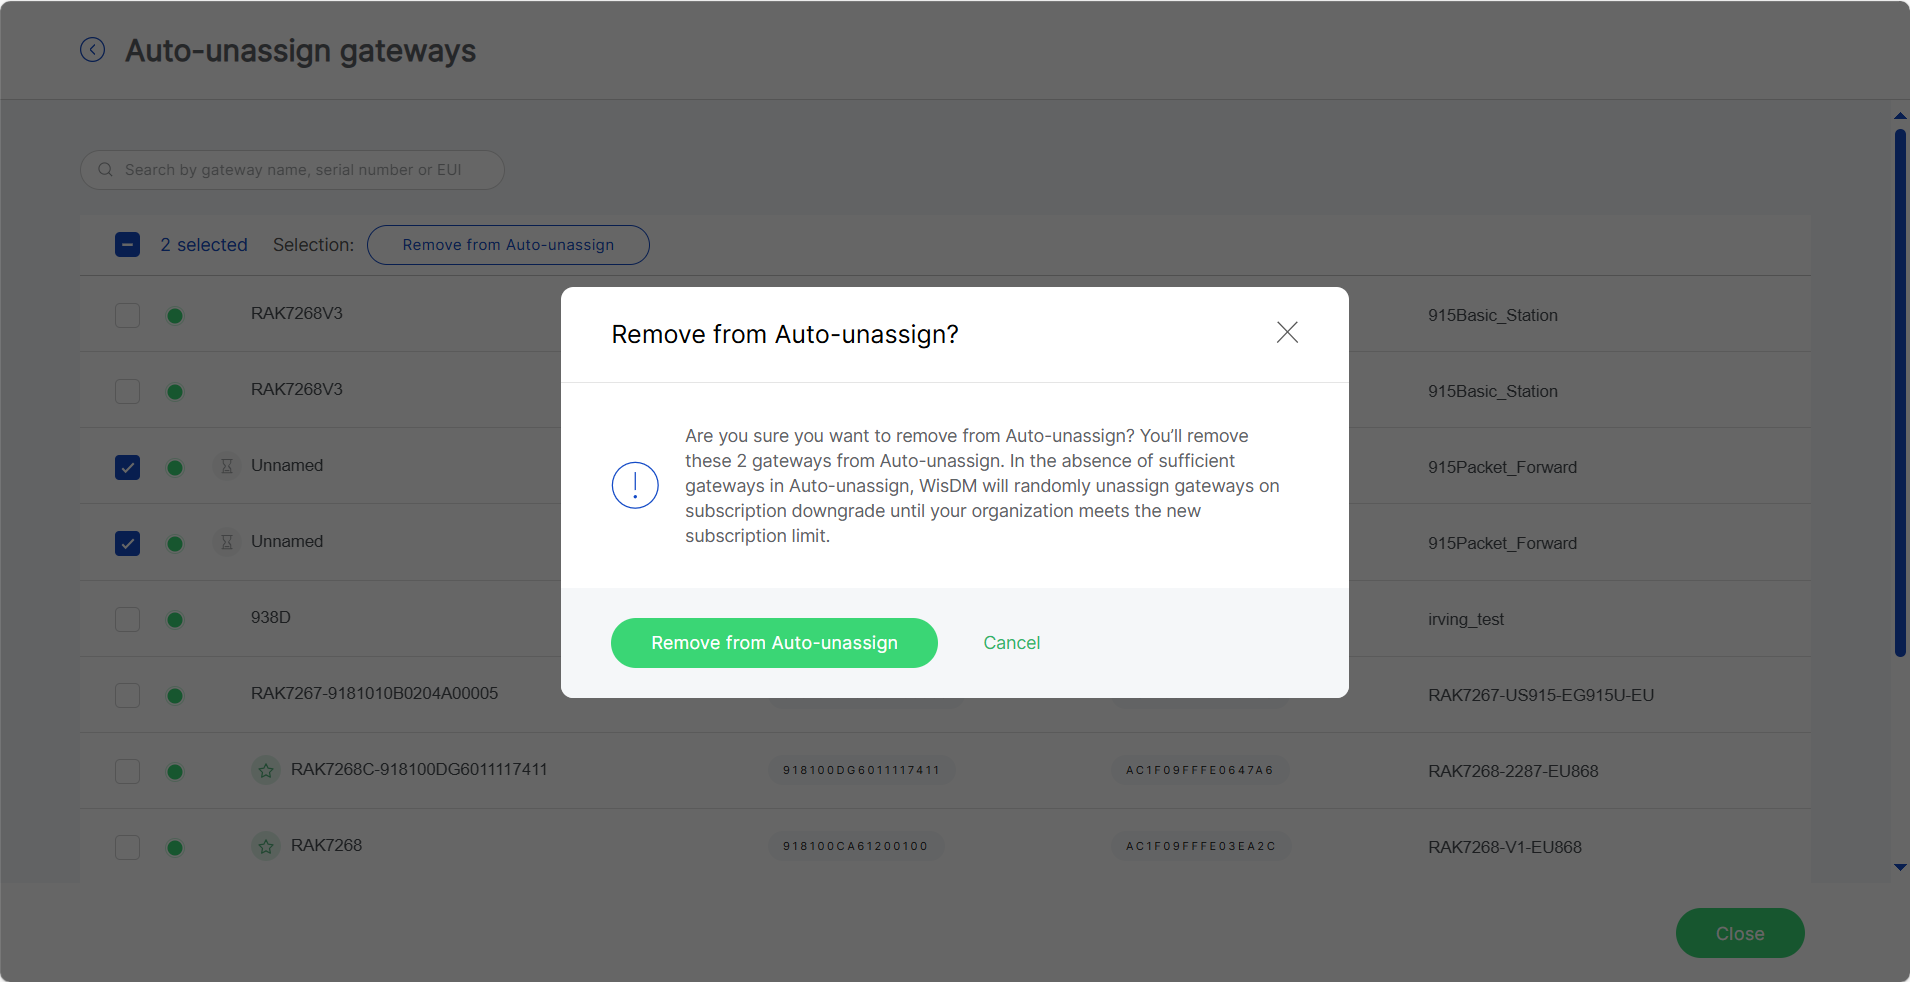 Figure 1: Remove gateways from Auto-Unassign list
On Demand Plan Adjustment
Use On Demand when the Organization requires a custom gateway quantity, special commercial terms, a very large deployment, or support outside the standard online checkout flow.
All On-Demand plan changes, renewals, or cancellations must be handled through RAK Sales or Support.
Request an On Demand Plan
-
Go to Settings > Subscription.
-
Click Request more gateways.
-
Provide the required gateway quantity and deployment information.
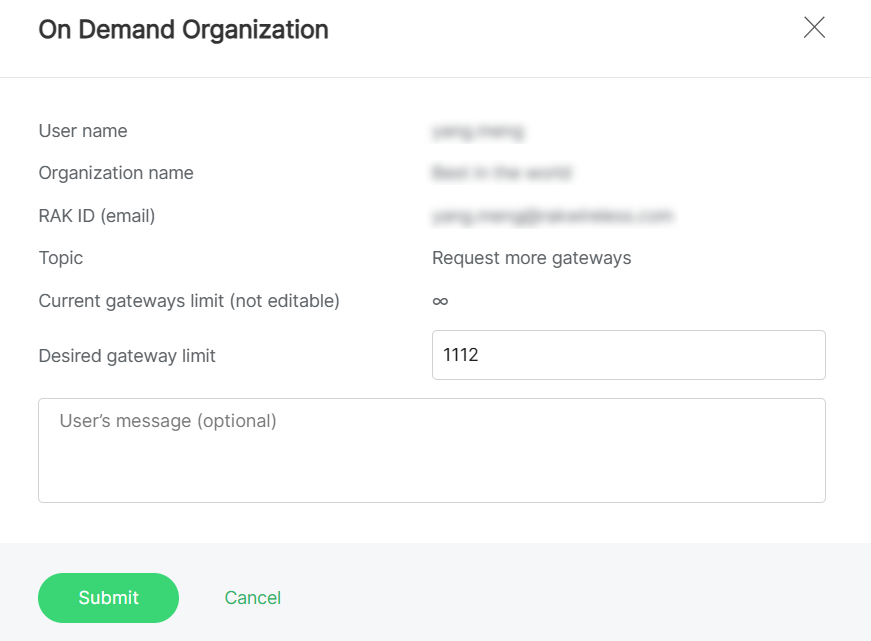 Figure 1: Gateway capacity requests
Switch from On Demand to an Online Plan
When an On Demand term is close to expiration, select an online plan if you want to continue using WisDM through a standard subscription.
- Go to Settings > Subscription.
- Click See all plans.
- Review the available online plans, such as Standard, Professional, or Enterprise.
- Select the plan that matches the required gateway quantity.
- Complete billing and payment if required.
Temporary Access
The Temporary Access feature allows Organization Administrators to grant RAK Support limited-time access to the Organization for troubleshooting or maintenance purposes.
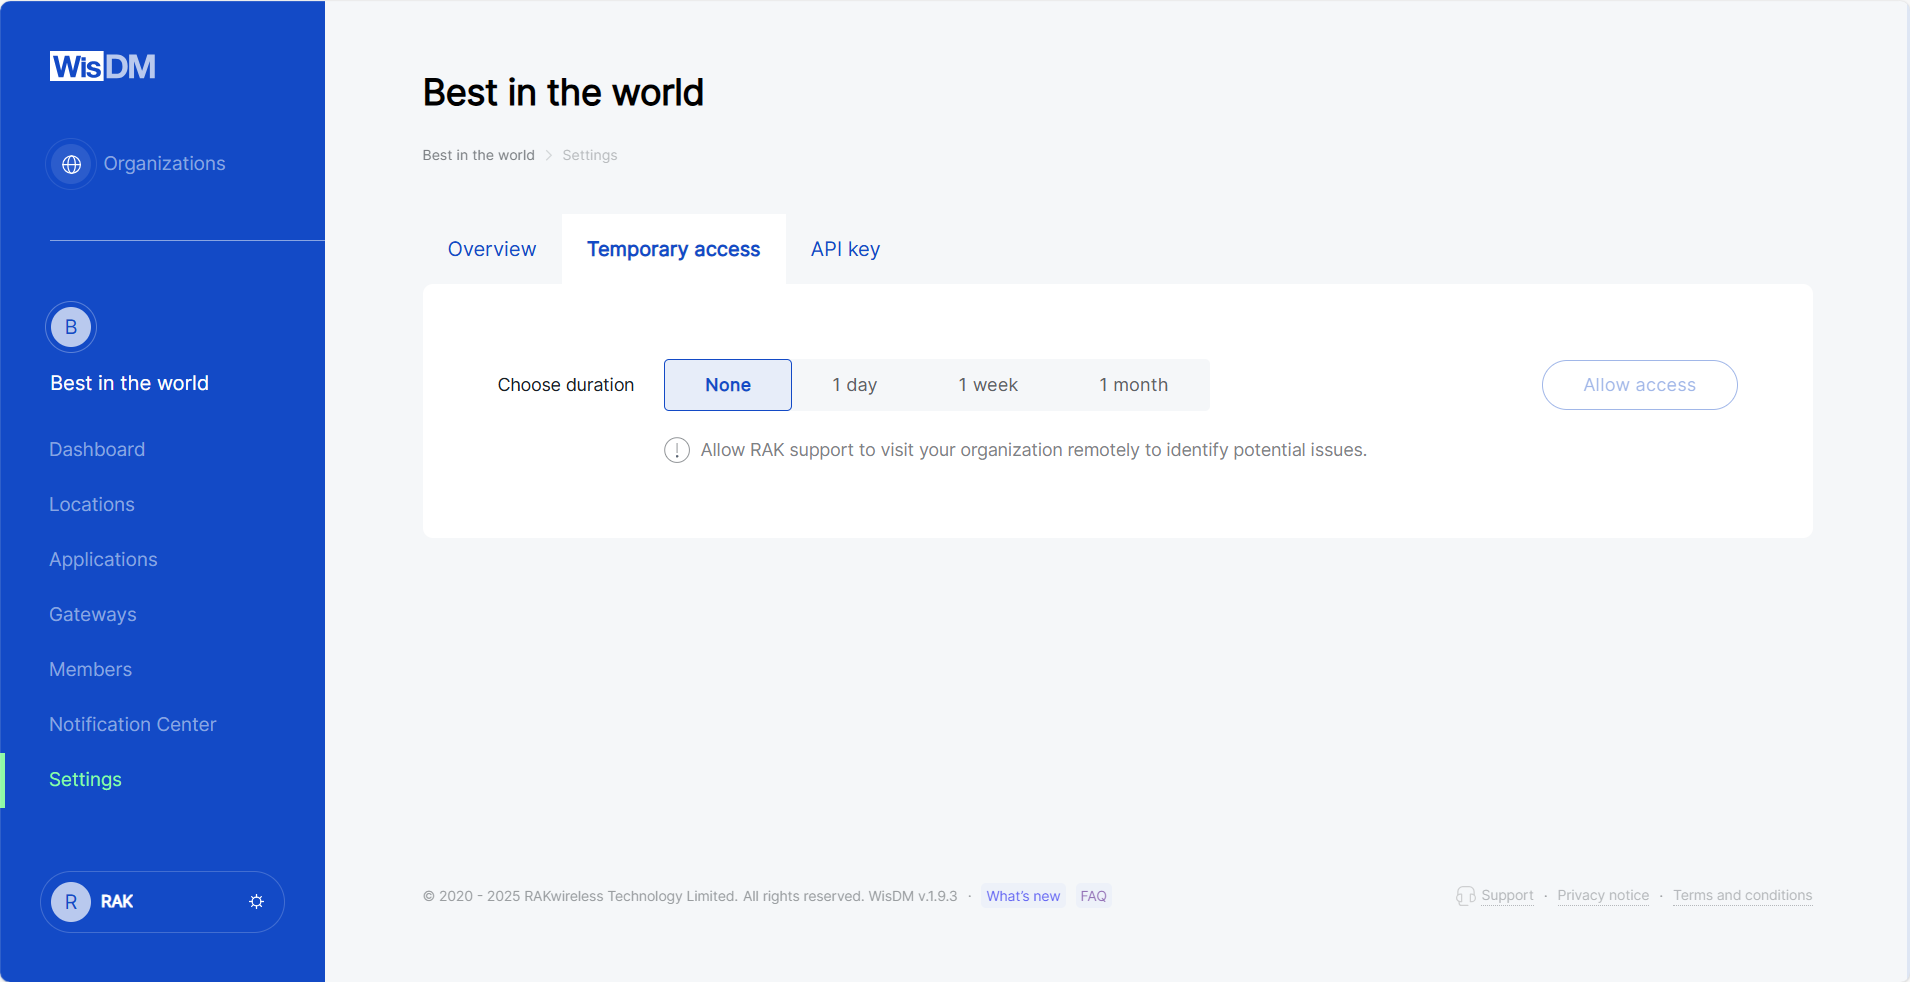 Figure 1: Temporary Access configuration interface
- Go to Settings > Temporary access.
- Select the access duration (
1 day,1 week, or1 month). - Click Allow access. The page will show the start and end time of the active access session.
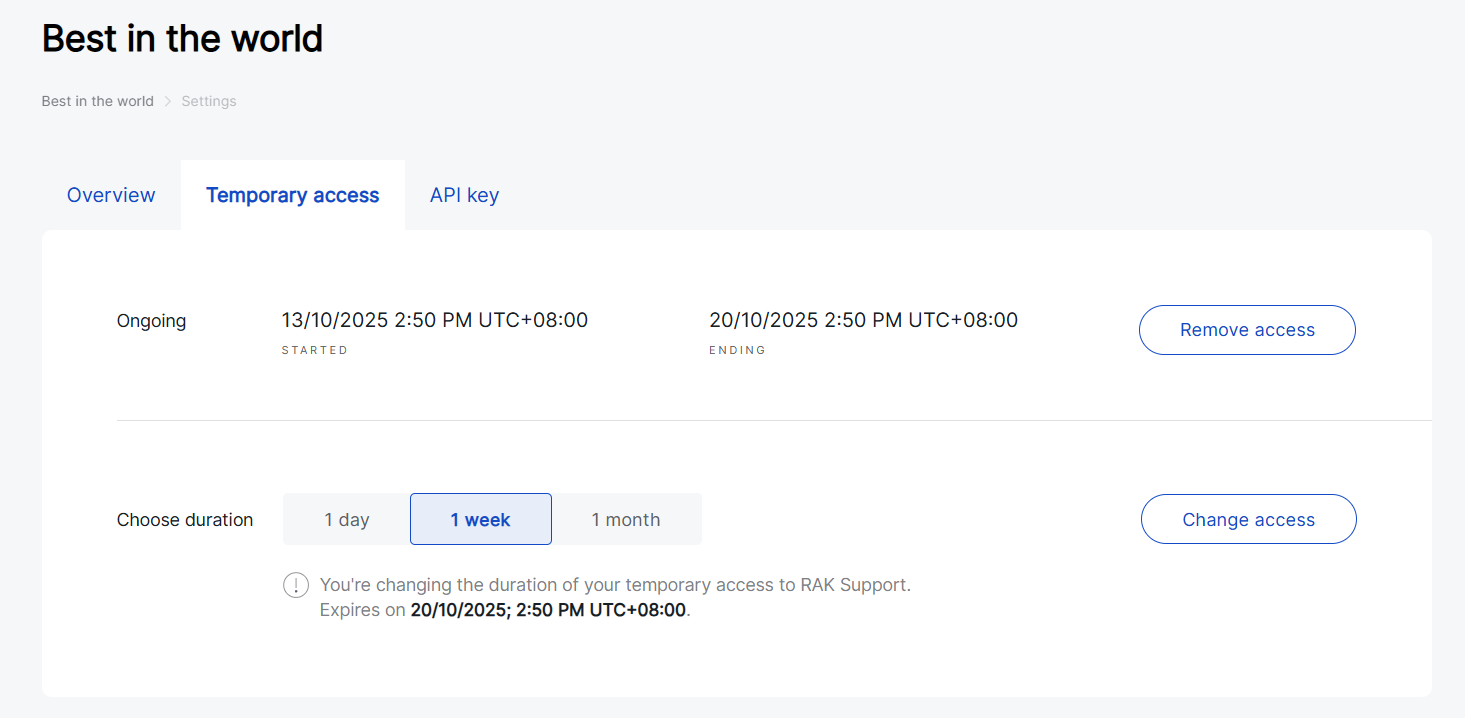 Figure 1: Granting temporary access to RAK Support
You can extend or shorten the duration by selecting a new period and clicking Change access, or Remove access at any time to terminate it immediately.