WisDM Applications (Built-in Network Server)
In WisDM, Applications and End Devices are key components of the Built-in Network Server architecture. Applications group devices and define how their data flows within the Built-in Network Server.
- End Devices – Physical devices (e.g., sensors) that send data packets via LoRaWAN®.
- Applications – Logical entities that define how device data is authenticated, parsed, and forwarded.
- WisDM does not provide LoRaWAN Network Server or Application Server functionality. It serves as a remote management platform for the Built-in Network Server running on the central gateway within a location.
- Applications are created at the Location level, not on individual gateways. You can create an Application even if no gateways are currently assigned, which is useful for preparing the network while gateways are still in transit.
- Adding an Application is a synchronous operation. If a Central Gateway is already assigned to the location, it must be online to successfully add the Application.
Access Applications
Applications can be accessed from two places in WisDM.
| Access Entry | Description |
|---|---|
| Location-level Applications | Go to Locations > Your Location > Applications to view and manage Applications under a specific Location. |
| Organization-level Applications list | Click Applications from the left navigation menu to view Applications across Locations in the current Organization. |
Both entries show the same Location-level Applications. The Organization-level Applications list is only a consolidated view that helps you quickly find and manage Applications from different Locations.
Create an Application
Create an Application when you want to register End Devices and define how their data is processed or forwarded.
- In Locations > Your location > Applications, click Add application.
 Figure 1: Application overview
- Configure the application details:
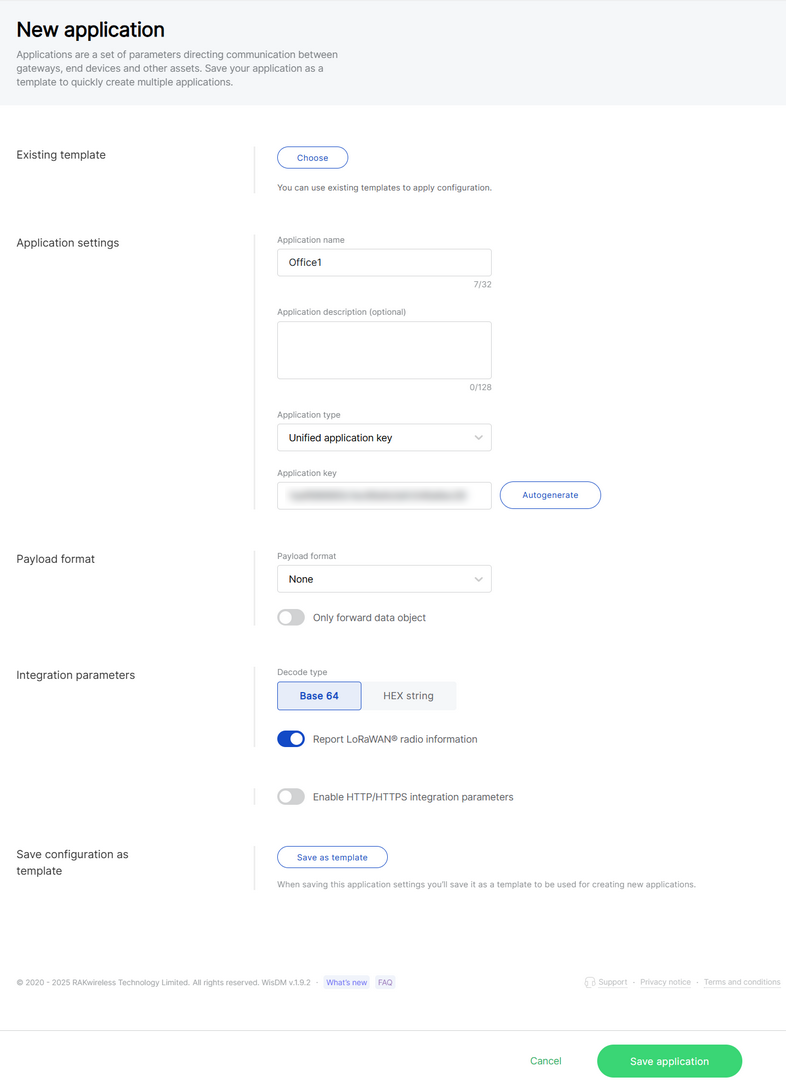 Figure 1: Configure application information
-
Application name: A unique name for the application.
-
Application description: (Optional) A description of the application.
-
Application type
- Unified application key: All devices will use the same application key.
- Separate application keys: Each device or group of devices has a unique key.
-
Application Key: Required for Unified Application Key setup.
-
Payload format
- None: No specific payload format.
- CayenneLPP: Payload format based on the Cayenne Low Power Payload (LPP) standard.
-
Only forward data object: If enabled, the gateway will only forward the raw data object to the server without processing or decoding it.
-
Decode type: Select the encoding of the uplink payload as forwarded to integrations. Ensure this matches what your cloud parser expects.
- Base 64
- HEX string
-
Report LoRa Radio Information: If enabled, the gateway will include LoRa signal data (RSSI, SNR, etc.) in the payload sent to the server. This may increase packet size.
-
Enable HTTP/HTTPS Integration Parameters: When enabled, uplink data and event messages can be forwarded to external HTTP/HTTPS endpoints, enabling seamless integration with third-party platforms or custom applications for data processing, storage, and visualization.
- Header name
- Header value
- Uplink data URL
- Join notification URL
- Ack notification URL
- Device-status notification URL
- Maximum number of concurrent connections
- Maximum length of queue
-
Save as template: Save this configuration as a reusable template.
- Click Save application.
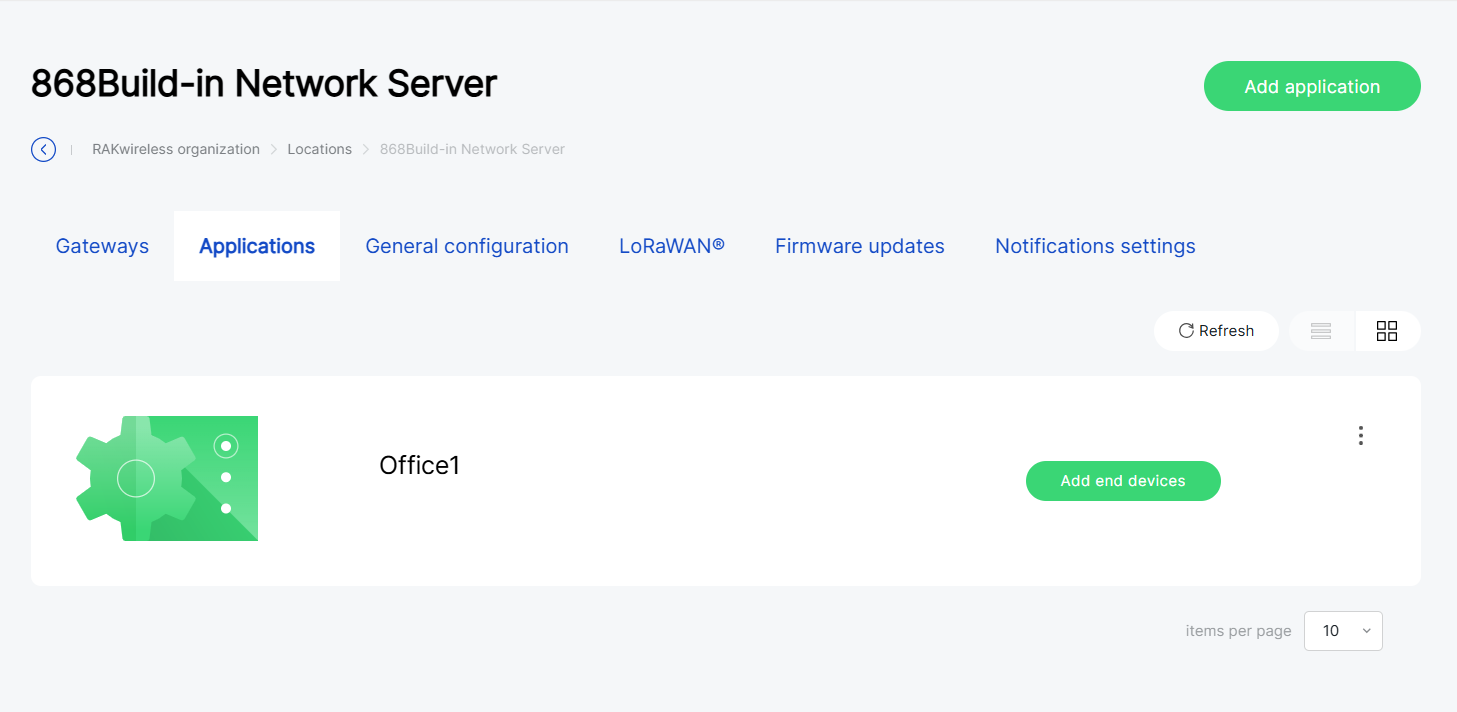 Figure 1: Application created
Register End Devices
After creating an Application, you can register End Devices to it. WisDM supports the following device registration methods:
| Method | Description |
|---|---|
| Import devices via CSV | Add many devices at once by uploading a CSV file. |
| Manually add devices | Add one or a small number of devices manually. |
| Add devices from saved list | Reuse a previously saved device list. |
Configure Device Parameters
-
In Locations > Your location > Applications, select the target application.
NOTEIf no devices are registered, you can also click Add end devices directly from the application list.
-
In the End devices page, click Add end devices.
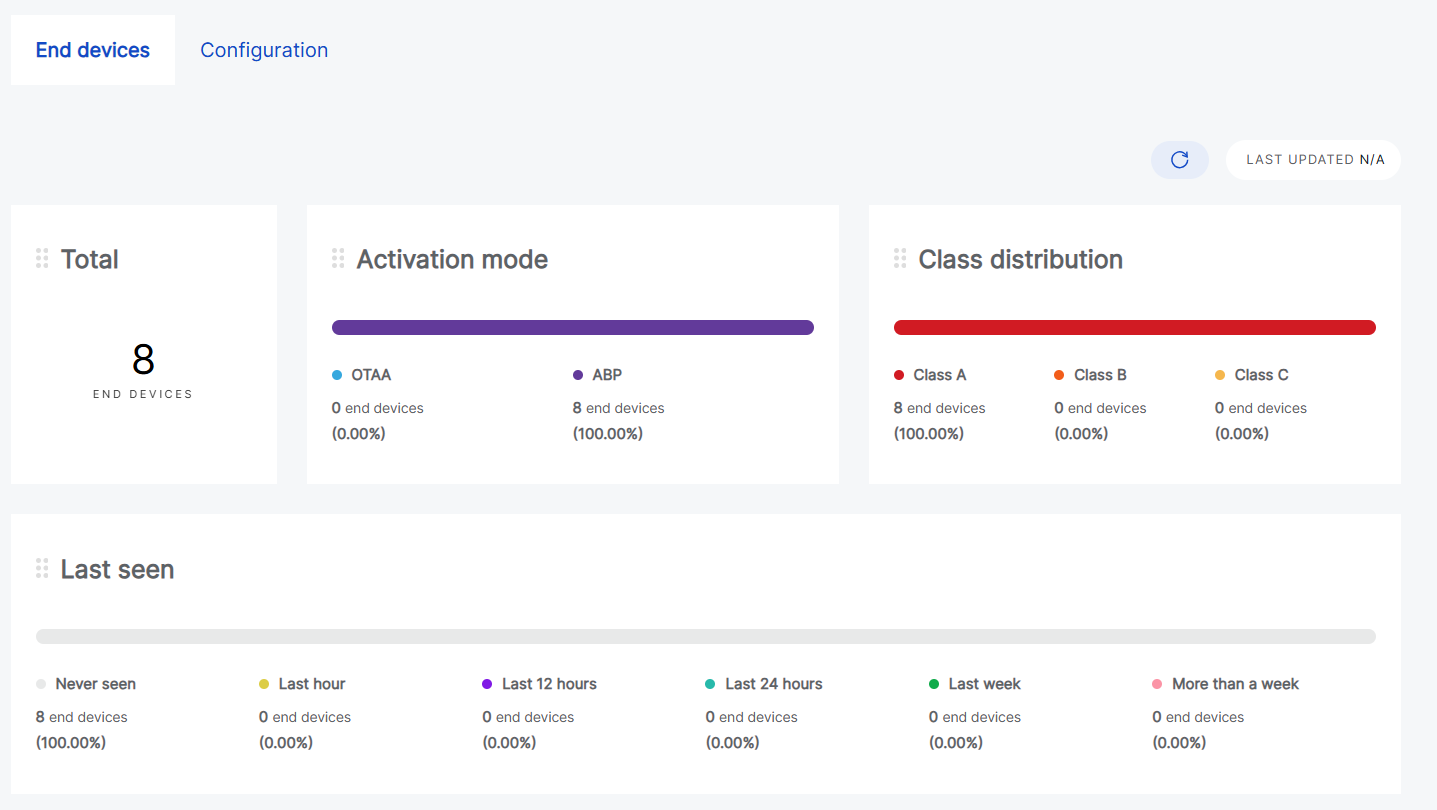 Figure 1: Add end device
- Fill in device details:
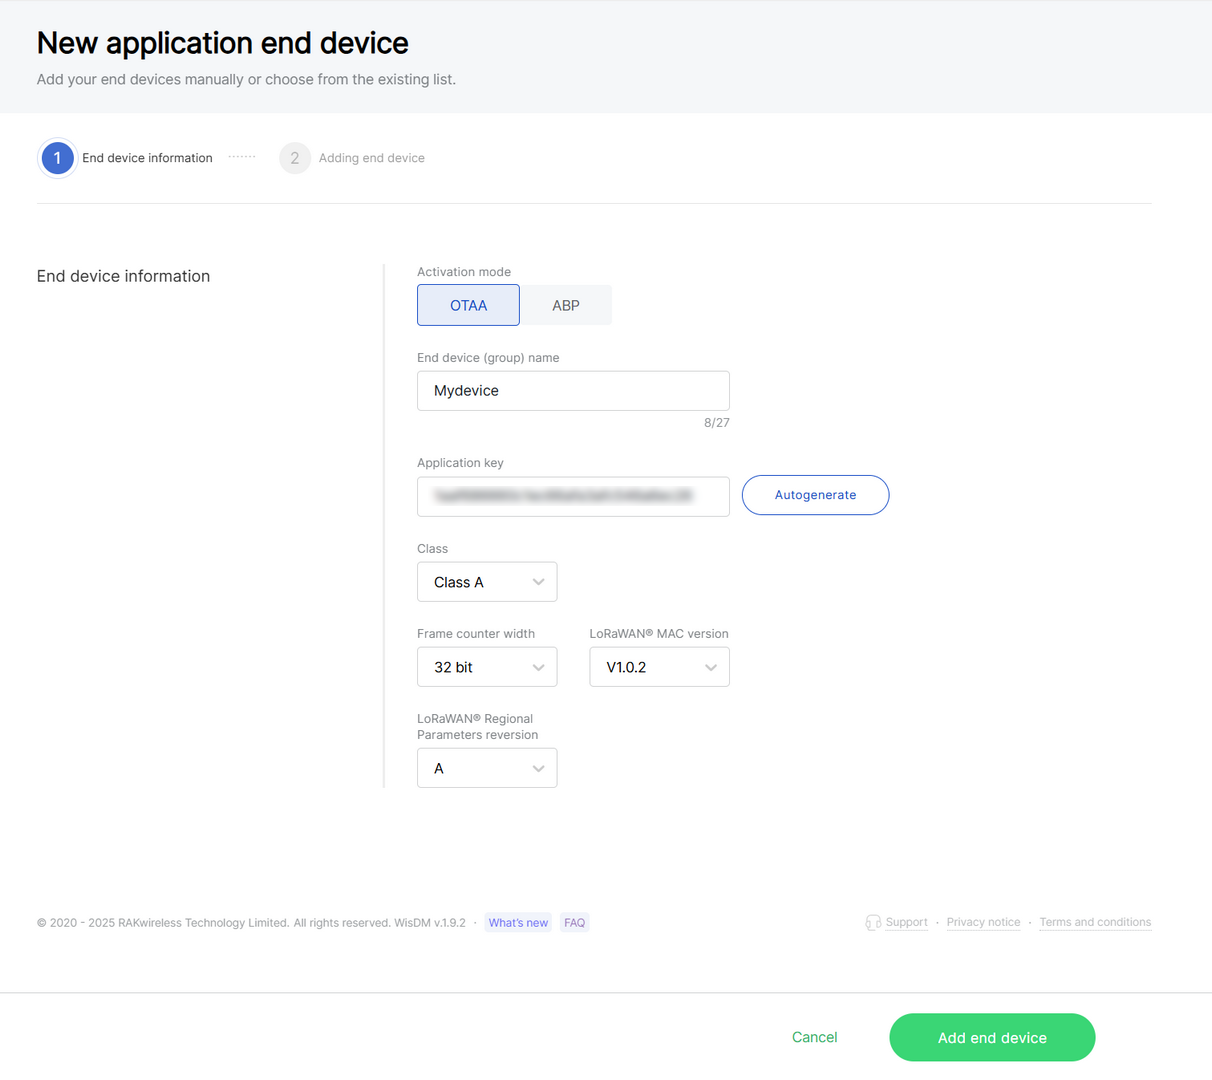 Figure 1: Configure device information
-
Activation mode
- OTAA: Over-The-Air-Activation (OTAA).
- ABP: Activation-By-Personalization (ABP).
-
End device (group) name: Enter a name for the device or group of devices.
-
Application key: Required for LoRaWAN OTAA devices. Enter the AppKey during registration when using Separate Application keys.
-
Application Session Key: Required for ABP devices.
-
Network Session Key: Required for ABP devices.
-
Class:
- Class A
- Class B
- Class C
-
Frame counter width: Defines the frame counter size for message tracking.
-
LoRaWAN MAC version: V1.0.2 / V1.0.3
-
LoRaWAN Regional Parameters revision: Defines the revision of the Regional Parameters specification (A or B). This setting is available only when the LoRaWAN MAC Version is 1.0.2.
- Click Add end device.
Import Devices via CSV
Use this method when adding a large number of devices at once.
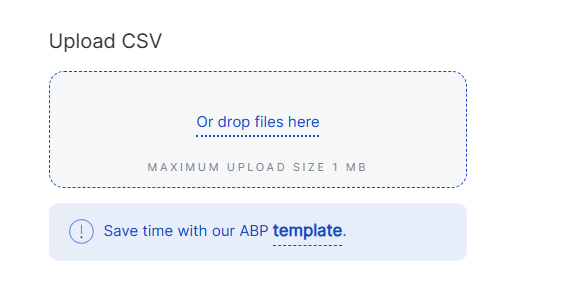 Figure 1: Download CSV template
-
You can create a CSV file in two ways:
- Download the template by clicking template.
- Alternatively, create your CSV file manually.
NOTE
- end device EUI : Enter the unique 64-bit EUI, displayed as a 16-character hexadecimal string.
- end device address: Enter the 32-bit device address, displayed as an 8-character hexadecimal string (required for ABP mode).
- Ensure the file size does not exceed 1 MB.
-
Click Or drop files here.
-
Once the CSV file is imported the system will automatically verify the device information.
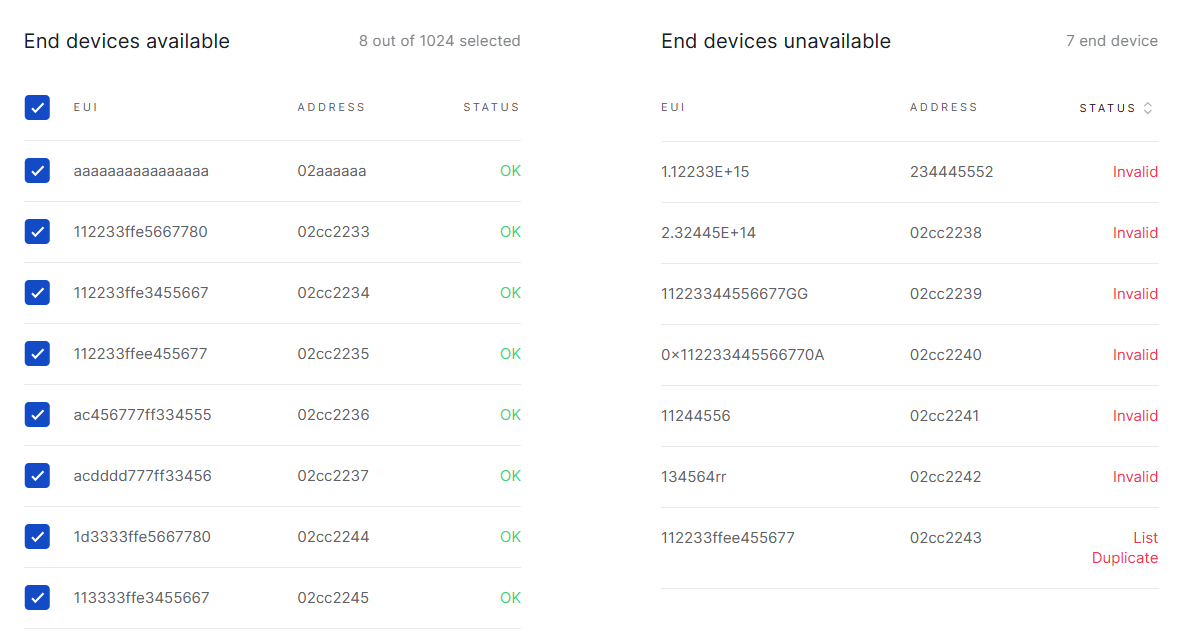 Figure 1: Verify device information
-
Valid devices will be listed under End devices available.
-
Duplicate or invalid entries will be listed under End devices unavailable.
NOTEYou can click Save as new list to reuse these entries later.
- Click Add to application.
Manually Add Devices
Use this method for quick testing or when adding only a few devices.
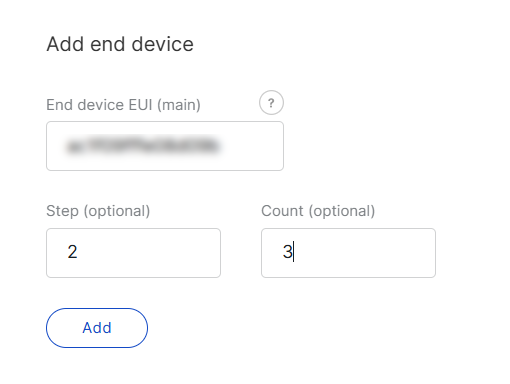 Figure 1: Manually add device
- Enter the following:
-
End device EUI (main): Enter the device's unique EUI (Required).
-
End device address (main): Enter the device's unique address (Required for ABP mode).
-
Step (optional): Use this field to auto-generate multiple devices in sequence.
-
Count (optional): Specify the number of devices to generate.
- Click Add and the system will automatically verify the device information.
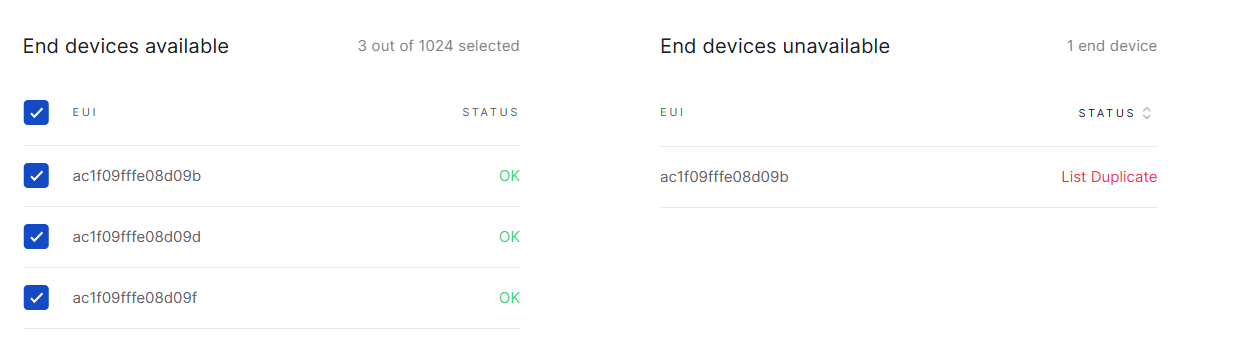 Figure 1: Verify device information
- Valid devices are listed under End devices available.
- Duplicates are found under End devices unavailable.
Click Save as new list to reuse these entries later.
- To add the devices, click Add to application.
Add Devices from Saved List
After validating device information (whether added via CSV or manually), the system allows you to save the verified devices in the End devices available list as a reusable device list. Later, you can quickly add devices by selecting from this saved list.
- On the Adding end device page, click Choose from list.
 Figure 1: Choose from saved device list
- Select the target list and click Add selected list.
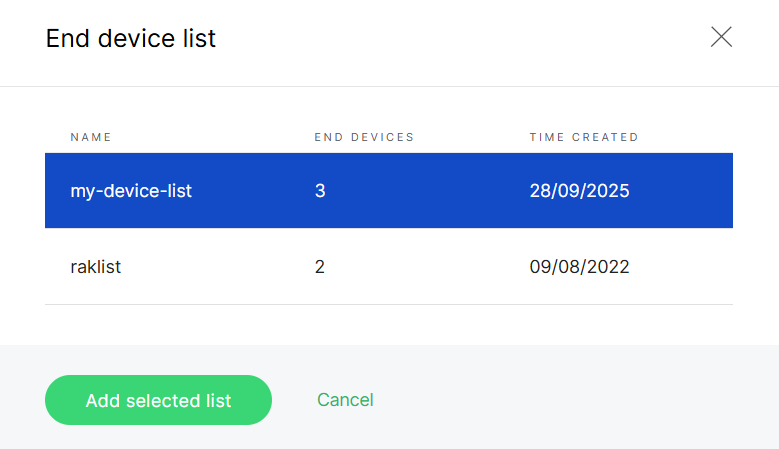 Figure 1: Select target device list
- Devices appear under End devices available.
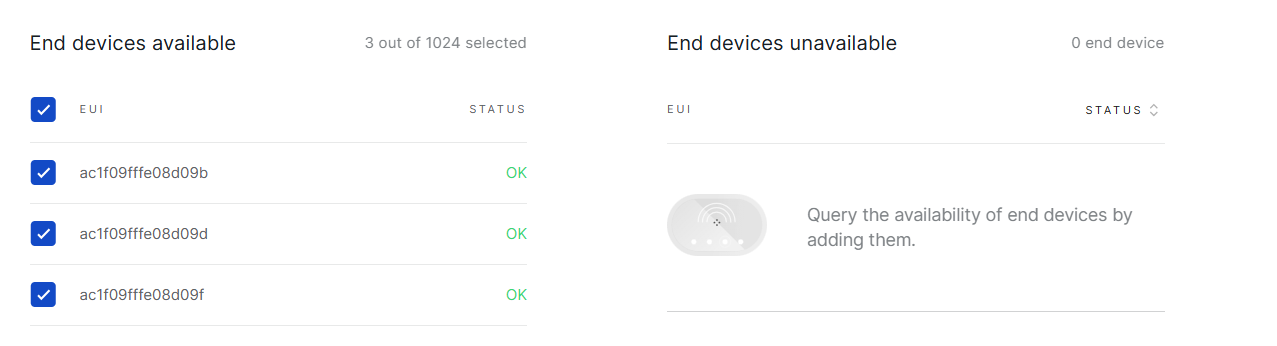 Figure 1: Device list
- Click Add to application.
Manage Application
You can manage Applications from either the Location-level Applications tab or the Organization-level Applications list.
View End Devices
From the Application list, open the actions menu and select View end devices.
This opens the End Devices page for the selected Application.
Figure 1: Device overview- Total: The total number of registered devices.
- Activation Mode: The distribution of devices using OTAA and ABP.
- Class Distribution: The distribution of devices across LoRaWAN® Classes A, B, and C.
- Last Seen: An overview of device activity indicating the recency of communication (e.g., Never, Last hour, Last 12 hours, Last week, etc.).
View and Edit Application Settings
To view or modify Application settings:
- Click the target application to navigate to its Configuration tab, or click (
 ) and choose Edit configuration.
 - In the Configuration tab, review or update the Application settings.
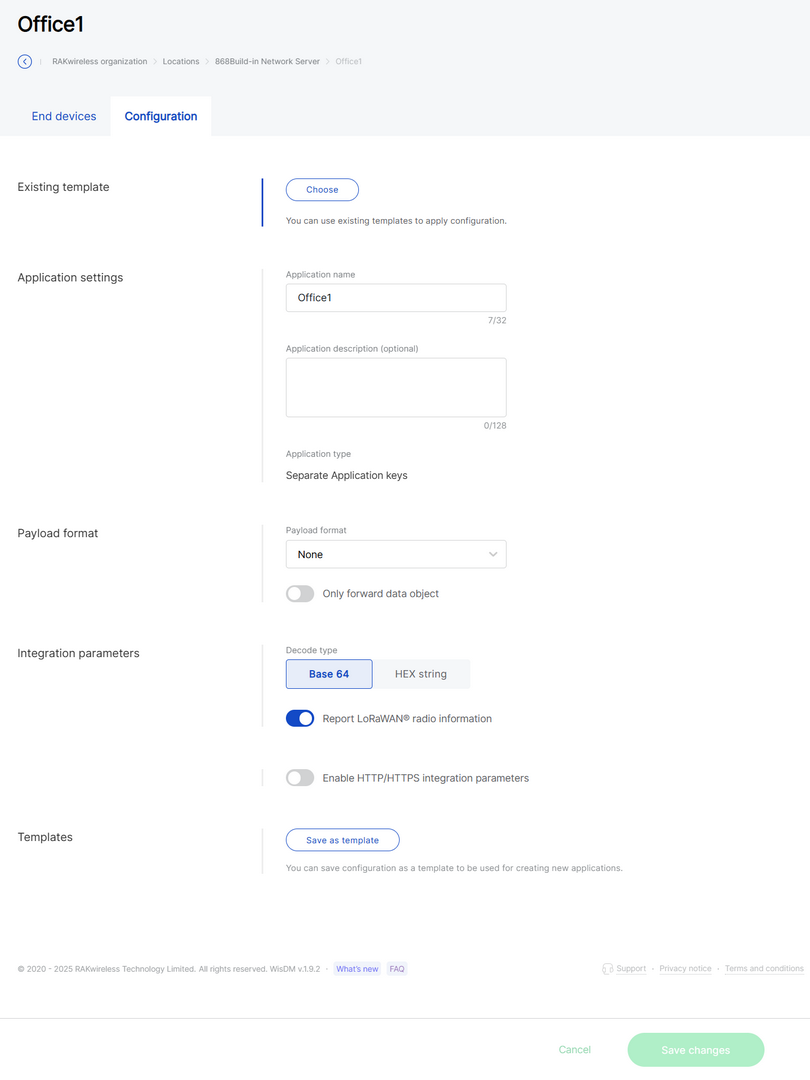 Figure 1: Application configuration
- Click Save changes.
Delete Application
Delete an Application when it is no longer needed.
Once deleted, the applications cannot be recovered. Proceed with caution.
- From the application list, click () and choose Delete application.
- Confirm your choice and click Delete application.
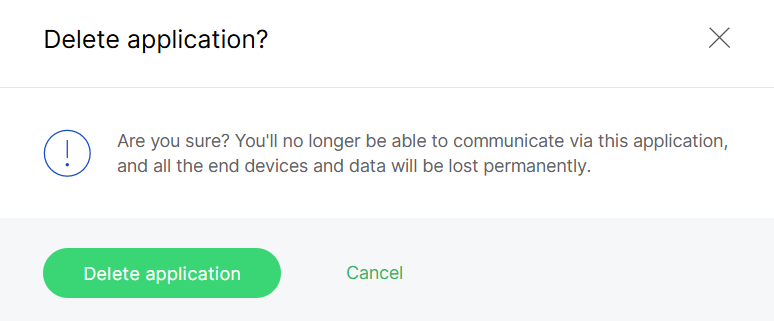 Figure 1: Confirm application deletion
Manage End Devices
The End devices page provides an overview of registered devices and device-level management operations.
To access the End Devices page, use one of the following methods:
- Open the target Application and go to the End devices tab.
- From the Application actions menu, select View end devices.
Overview of Registered Devices
Figure 1: Device overview- Total: The total number of registered devices.
- Activation Mode: The distribution of devices using OTAA and ABP.
- Class Distribution: The distribution of devices across LoRaWAN® Classes A, B, and C.
- Last Seen: An overview of device activity indicating the recency of communication (e.g., Never, Last hour, Last 12 hours, Last week, etc.).
Device Details
From the device list, click a device row, or View device details in the actions menu.
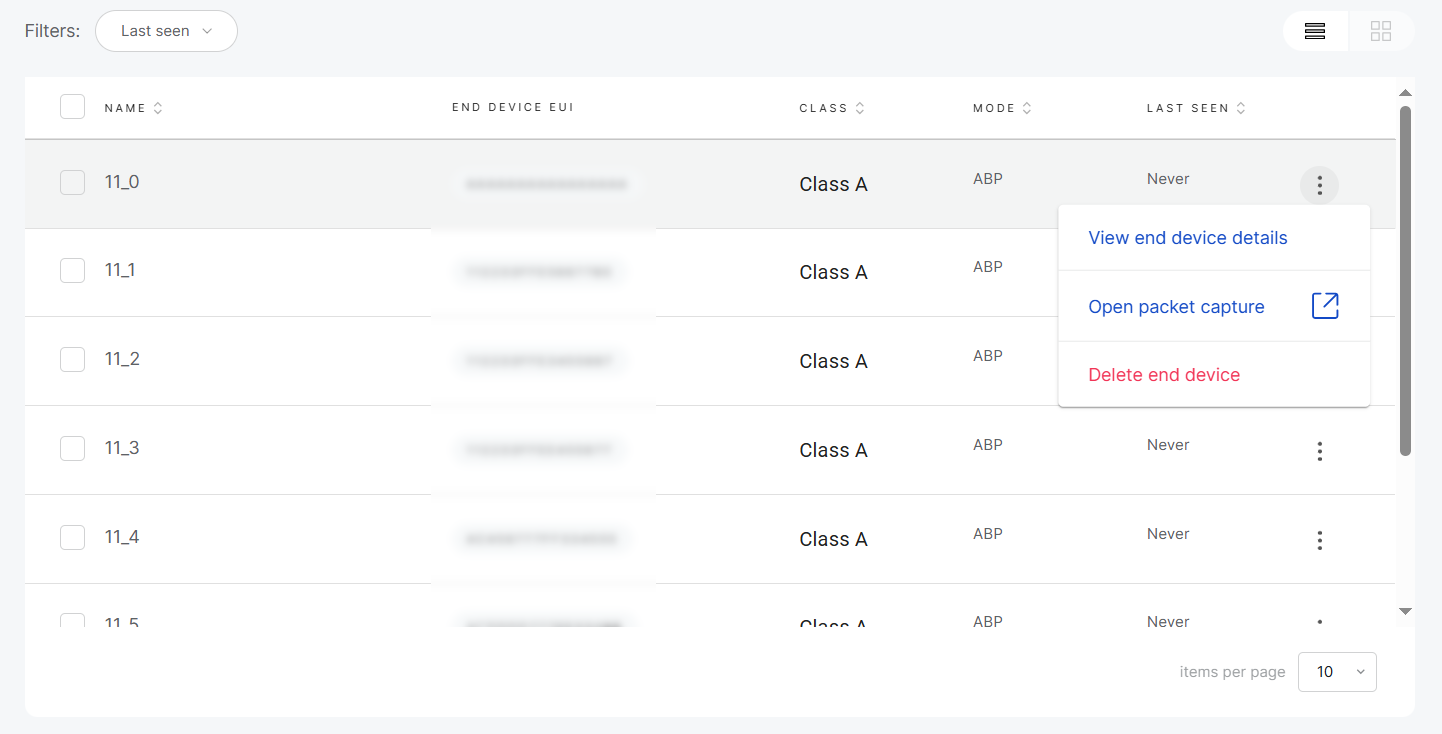 Figure 1: Single device management
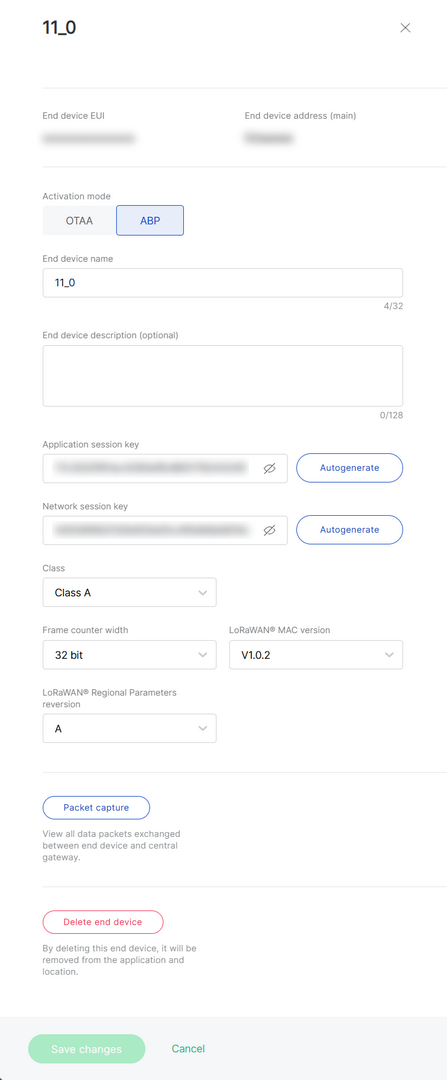 Figure 1: Device details
Device Packet Capture
Monitor real-time communication between the device and the Central Gateway.
-
From the actions menu, select Open packet capture, or navigate to the device details page and choose Packet capture.
-
Set the session duration and click Start new session.
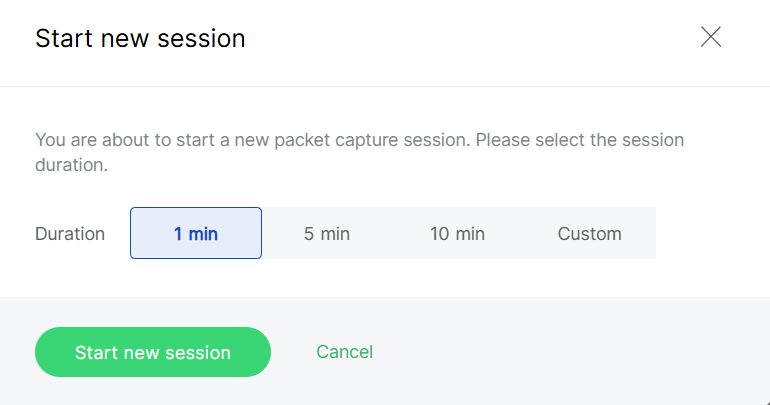 Figure 1: Configure capture session
- Packets are displayed in real time.
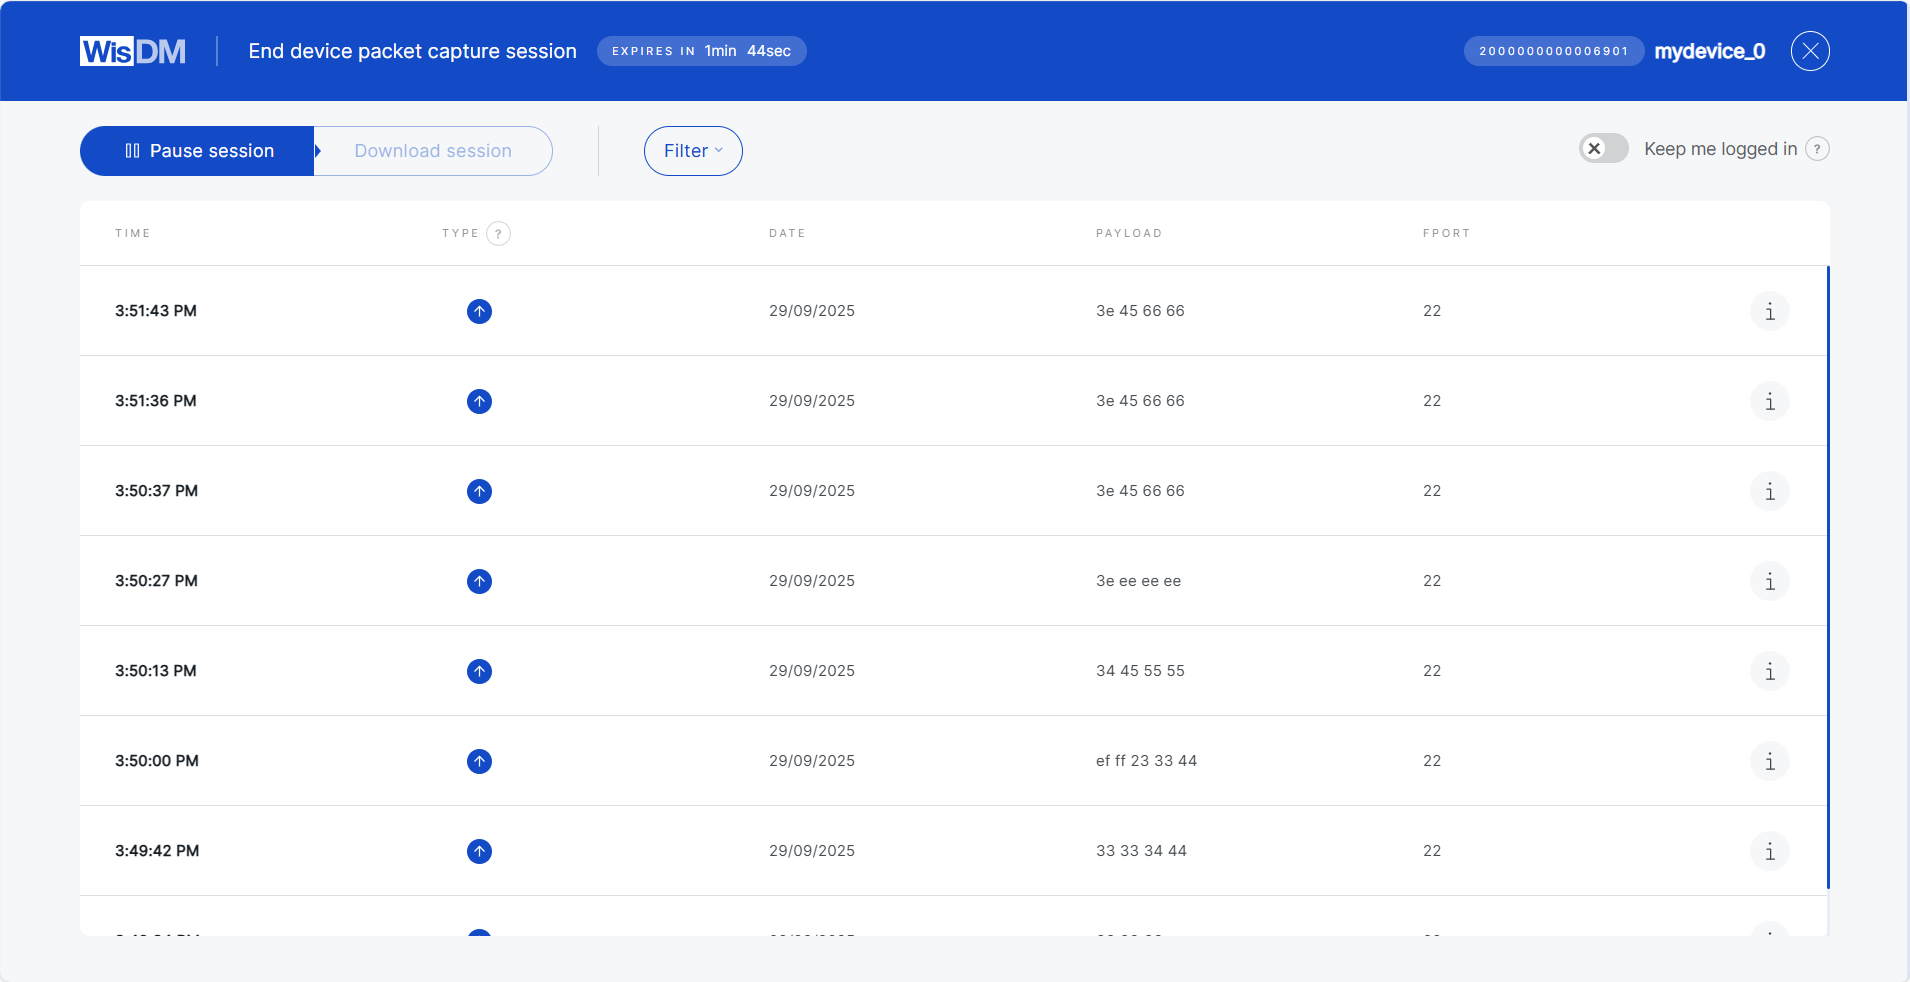 Figure 1: Packets Overview
- When the session ends, you can either start a new session with a different duration or download the captured data for further analysis.
Join Session
If the selected device already has an active session, you can join it for the duration you specify. While joining, you may also request to load all previously captured packets from the start of that session.
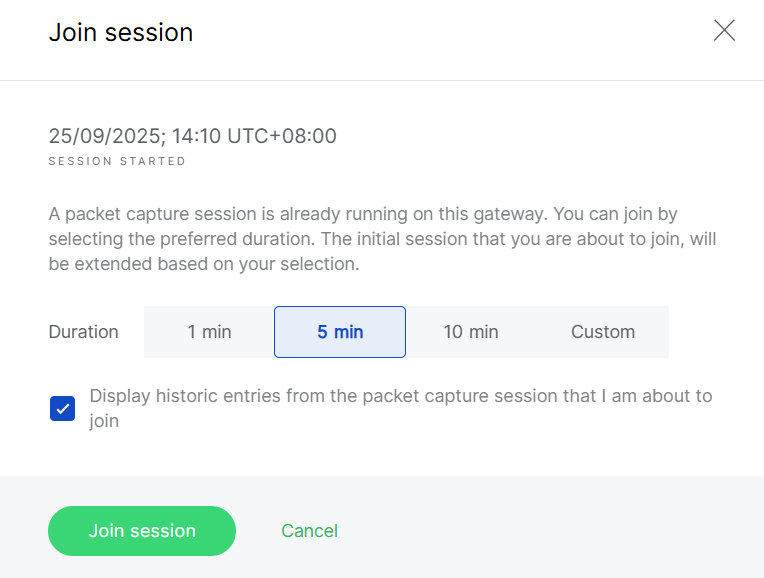 Figure 1: Join Existing Session
Pause and Resume
You can pause or resume updates at any time. While paused, you can review older packets or apply filters based on packet parameters.
Keep Me Logged In
For security reasons, WisDM automatically logs you out after 15 minutes of inactivity. If your packet capture session runs for longer than 15 minutes, ensure that you enable the Keep me logged in toggle during the session to prevent interruption.
Rename Devices
You can select multiple devices for bulk renaming. Apply a common name prefix, and WisDM will automatically append sequential numbers (e.g., MyDevice_1, MyDevice_2, etc).
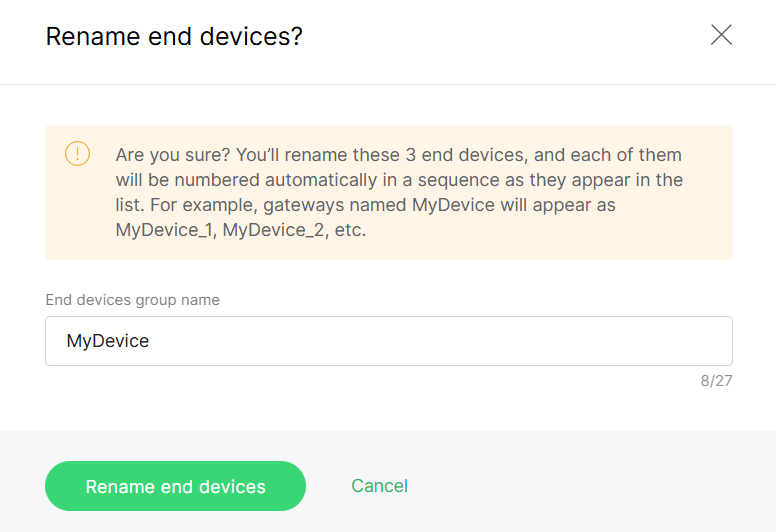 Figure 1: Bulk rename devices
Save as Device List
You can select multiple devices and save them as a device list for quick reuse when adding devices later.
Delete Devices
Devices can be removed individually or in bulk.
Deletion is permanent and cannot be undone.
-
To delete a single device, open the actions menu and select Delete end device.
-
To delete multiple devices, select the devices and click Delete.