WisDM Location Gateway Management
The Gateways tab under a Location is used to onboard and manage gateways that belong to that Location. From this page, you can add gateways, view assigned gateways, check gateway deployment on the map, and perform single-gateway or bulk gateway operations.
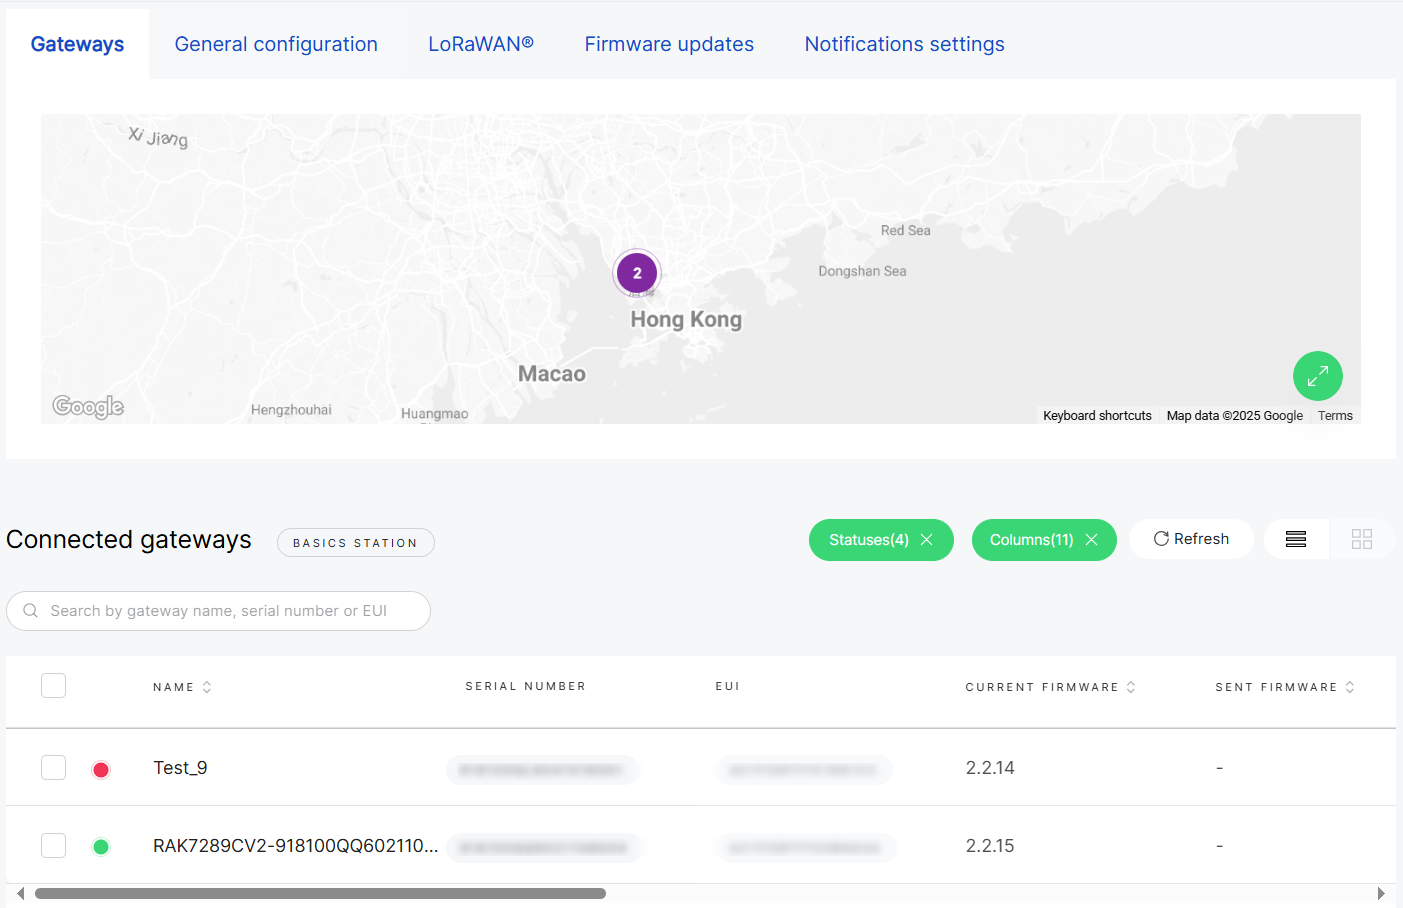 Figure 1: Manage gateways assigned to a specific Location
Gateway management in a Location includes:
- Add gateways: Add a new gateway manually, upload multiple gateways by CSV, or assign an existing unassigned gateway from the Organization.
- Single gateway operations: View gateway details, open packet capture, access SSH terminal, view logs, reboot, reassign, unassign, or delete a selected gateway.
- Bulk gateway operations: Select multiple gateways and perform supported actions, such as unassigning, reassigning, synchronizing settings, renaming, or exporting gateway information.
- Location-specific operations: Synchronize network interface settings or reassign gateways to another compatible Location.
Add a Gateway to the Location
After a Location is created and its LoRaWAN® work mode is configured, you can add gateways to the Location for onboarding and management.
To start adding gateways, go to Locations > Select a Location > Gateways, and click Add Gateway.
| Method | Description |
|---|---|
| Add a gateway manually | Add one new gateway by entering its Serial Number, Gateway EUI, and optional gateway name. This method is suitable for testing, first-time setup, or small deployments. |
| Upload gateways via CSV | Add multiple new gateways at once by uploading a CSV file. This method is suitable for batch onboarding. |
| Assign an existing unassigned gateway | Move a gateway that already exists in the Organization but is not assigned to any Location into the current Location. |
Prerequisites
Before adding a new gateway, make sure you have the following information and conditions ready:
- Serial Number and Gateway EUI (found on the device sticker or in the Web UI > Dashboard > Overview).
- WisDM integration is enabled on the gateway.
- Your RAK Gateway for LoRaWAN running WisGateOS version 1.2.2 or later (latest version recommended).
Upload Multiple Gateways via CSV
Serial Number and Gateway EUI, which can be found on the gateway label or in the gateway Web UI.
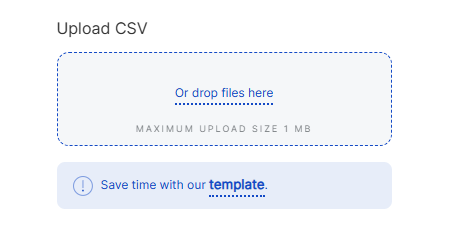 Figure 1: Upload Multiple Gateways via CSV
-
Go to Locations > Select a Location > Gateways.
-
Click Add Gateway.
-
In the Upload CSV section, click template to download the provided CSV template.
-
Fill in the required gateway details in the CSV file:
- Serial Number
- Gateway EUI
- Gateway Name
NOTE- Maximum upload size: 1 MB.
- If your Location operates in Basics™ Station mode and Use individual client keys is enabled, also need to provide the required per-gateway credentials based on the configured Authentication mode, such as a client certificate and client key, or a client token.
-
Drag and drop the file into the upload area, or click Or drop files here to upload.
-
After the file is uploaded, the system validates the gateway information to make sure the selected gateways are compatible with the target Location.
- Available – The gateway passed validation and can be added to the Location.
- Unavailable – The gateway failed one or more validation checks and cannot be added. Refer to the Status column for the specific reason. For detailed explanations, see Common Status/Errors.
NOTEYou can remove a gateway from the current verification list at any time by clicking the delete icon next to the gateway entry. This action is available in both the Available and Unavailable lists.
-
Select the gateways under Available list, then click Add gateways.
Add a Gateway Manually
Use this method when you want to onboard a single new gateway.
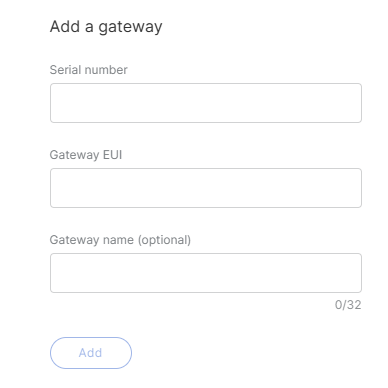 Figure 1: Add a Gateway Manually
-
Go to Locations > Select a Location > Gateways.
-
Click Add Gateway.
-
In the Add a gateway section, enter the gateway information.
- Serial Number: Enter the serial number printed on the gateway label or shown in the gateway Web UI.
- Gateway EUI: Enter the Gateway EUI printed on the gateway label or shown in the gateway Web UI.
- Gateway Name: Optional. Enter a name to identify the gateway in WisDM.
NOTEIf your Location operates in Basics™ Station mode and Use individual client keys is enabled, also need to provide the required per-gateway credentials based on the configured Authentication mode, such as a client certificate and client key, or a client token.
-
Click Add.
-
After the gateway is submitted, the system validates the gateway information to make sure it is compatible with the selected Location.
- Available – The gateway passed validation and can be added to the Location.
- Unavailable – The gateway failed one or more validation checks and cannot be added. Refer to the Status column for the specific reason. For detailed explanations, see Common Status/Errors.
NOTEYou can remove a gateway from the current verification list at any time by clicking the delete icon next to the gateway entry. This action is available in both the Available and Unavailable lists.
-
Select the gateway under Available list, then click Add gateways.
Assign an Existing Gateway from Unassigned Gateways
Use this method when the gateway is already added to the Organization but is not currently assigned to any Location.
 Figure 1: Assign an Existing Gateway from Unassigned Gateways
- Go to Locations > Select a Location > Gateways.
- Click Add Gateway.
- In the Unassigned gateways section, click Choose.
- From the Unassigned gateways list, select the gateway and click Apply selected.
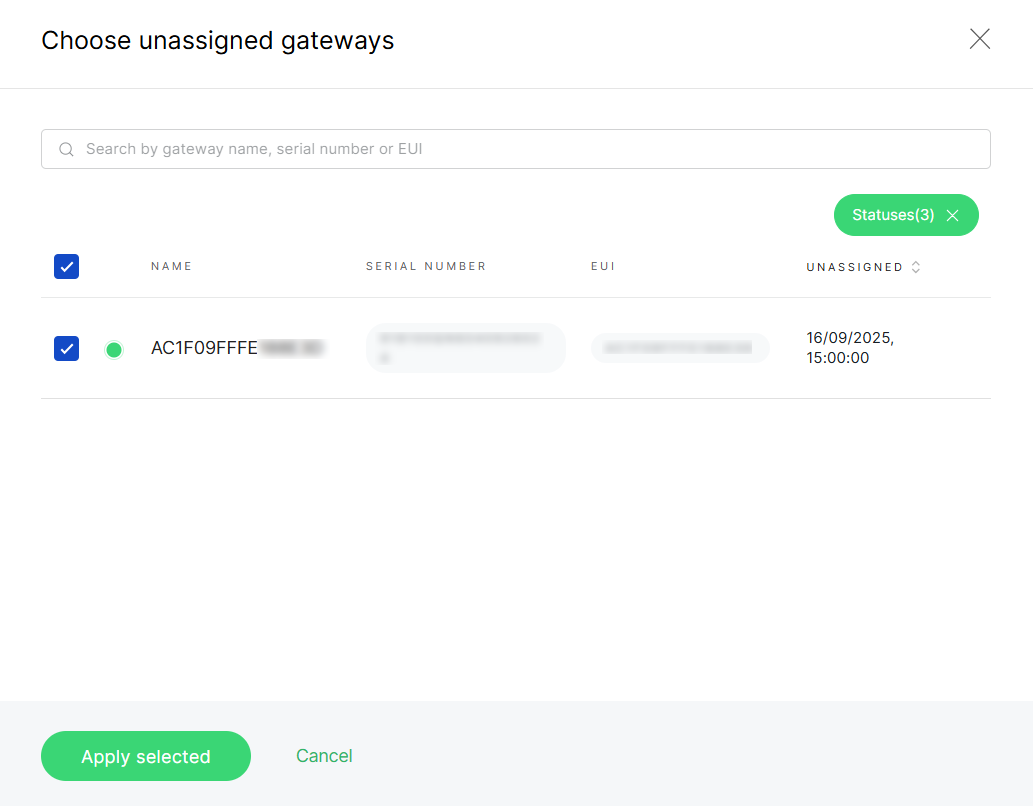 Figure 1: Select gateways
- Search bar: You can search unassigned gateways by entering their gateway name, serial number, or EUI in the search field. This helps quickly locate a specific gateway in large lists.
- Status filter: Click the Statuses button to filter gateways by their connection status:
- All – Displays all gateways.
- Online – Show only gateways that are currently connected.
- Offline – Display gateways that are disconnected.
- Pre-provisioning – Show gateways that are prepared for onboarding but not yet active.
- After the gateway is selected, the system validates the gateway information to make sure it is compatible with the selected Location.
- Available – The gateway passed validation and can be added to the Location.
- Unavailable – The gateway failed one or more validation checks and cannot be added. Refer to the Status column for the specific reason. For detailed explanations, see Common Status/Errors.
You can remove a gateway from the current verification list at any time by clicking the delete icon next to the gateway entry. This action is available in both the Available and Unavailable lists.
- Select the gateway under Available list, then click Add gateways.
Add Gateways by Location Work Mode
Gateway onboarding behavior depends on the Location work mode.
Packet Forwarder
In Packet Forwarder mode, gateways forward LoRaWAN packets to an external LoRaWAN Network Server.
Supported onboarding methods:
- Upload Multiple Gateways via CSV
- Add a Gateway Manually
- Assign an Existing Gateway from Unassigned Gateways
Basics™ Station
In Basics™ Station mode, gateways connect to an external LoRaWAN Network Server through the LoRa Basics™ Station protocol.
Supported onboarding methods:
- Upload Multiple Gateways via CSV
- Add a Gateway Manually
- Assign an Existing Gateway from Unassigned Gateways
Authentication and Credential Validation
In Basics™ Station mode, gateway credential requirements are determined by the Location LoRaWAN configuration.
If Use individual client keys is enabled for the Location, each gateway is validated for the required per-gateway credentials when it is added or assigned, regardless of the onboarding method used.
The required credential type depends on the selected Authentication mode:
| Authentication Mode | Required Gateway Credential |
|---|---|
| TLS server and client authentication | Client certificate and client key |
| TLS server authentication and client token authentication | Client token |
Manage Missing Credentials
After pre-validation, gateways are grouped under Available and Unavailable.
For gateways listed under Available, if credential-related checks require attention, the system displays the corresponding validation results in the Key State/Certificate State or Client token columns.
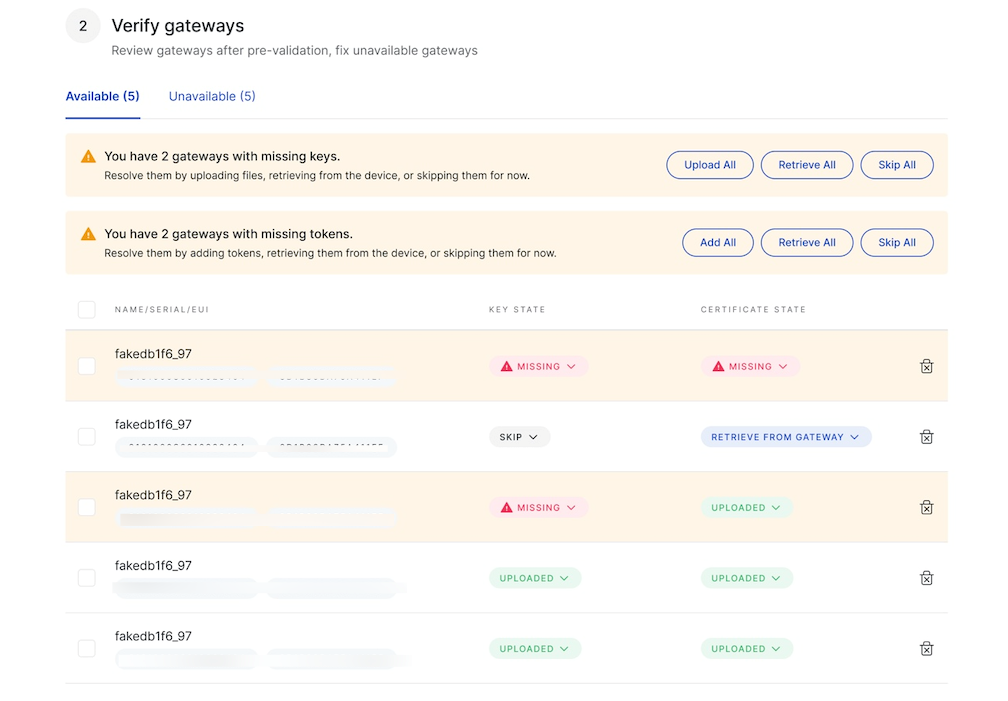 Figure 1: Gateway credential validation results
To resolve these items, you can use either of the following methods:
- Bulk actions: Use the action buttons in the warning banner, such as Upload All, Retrieve All, Skip All, or Add All, to apply the same handling method to all affected gateways in that category.
- Per-gateway actions: Use the dropdown in the Key State/Certificate State or Client token column to handle one gateway at a time. Available handling actions include:
- Upload file: Upload the required authentication file when the gateway is missing a client certificate or client key.
- Add token: Add the required client token when the gateway is using client token authentication and the token is missing.
- Retrieve from gateway: Retrieve credentials from the gateway after assignment.
- Skip for now: Temporarily skip credential configuration.
Built-in Network Server
In Built-in Network Server mode, one gateway acts as the Central Gateway and runs the built-in LoRaWAN Network Server. Other gateways can be added as Extender Gateways to extend coverage.
Central Gateway
The Central Gateway is the first gateway added to a Built-in Network Server Location. Each Built-in Network Server Location can have only one Central Gateway.
Supported onboarding methods:
The Central Gateway must be online before it can be added successfully.
Extender Gateways
After a Central Gateway has been added, newly added gateways are treated as Extender Gateways by default.
Supported onboarding methods:
- Upload Multiple Gateways via CSV
- Add a Gateway Manually
- Assign an Existing Gateway from Unassigned Gateways
The Central Gateway must remain online before Extender Gateways can be added.
Replace the Central Gateway
To replace the current Central Gateway, enable Add as central when adding a gateway.
The new Central Gateway must be online. After replacement, the existing Central Gateway becomes unassigned from the Location.
After Add as central is enabled, refer to Central Gateway for the supported onboarding methods.
Single Gateway Management
You can manage an individual gateway from the Gateways list in a Location. These operations apply only to the selected gateway.
View Gateway Details
Open the selected gateway details page to view gateway status, overview information, network interfaces, LoRaWAN network status, system settings, performance statistics, and extensions.
For detailed gateway settings and behavior, see Gateway Management.
Open Packet Capture
Open packet capture for the selected gateway to inspect LoRaWAN packet traffic and troubleshoot uplink, downlink, join, RSSI, SNR, and packet forwarding issues.
For detailed usage, see Diagnostic & Debug.
SSH Terminal
Open an SSH terminal session to access the gateway remotely for troubleshooting or advanced maintenance.
For detailed usage and permission requirements, see Diagnostic & Debug.
View Log
Open gateway logs to review system messages and troubleshoot gateway behavior.
For detailed usage, see Diagnostic & Debug.
Reboot Gateway
Restart the selected gateway remotely.
Only online gateways can be rebooted remotely.
Reassign Gateway
Move the selected gateway from the current Location to another compatible Location in the same Organization.
For details, see Reassign Gateways.
Unassign Gateway
Remove the selected gateway from the current Location. The gateway remains associated with the Organization and can be assigned to another Location later.
Unassign rules, gateway reset behavior, and confirmation requirements follow the same logic as organization-level gateway management. For details, see Gateway Management.
Delete Gateway
Delete the selected gateway according to the applicable gateway deletion rules.
Deleting a gateway is a sensitive operation. Review the confirmation message carefully before proceeding.
For detailed deletion rules and behavior, see Gateway Management.
Bulk Gateway Management
You can select multiple gateways in the Location gateway list and apply supported bulk actions.
Unassign Gateways
Unassign selected gateways from the current Location. The gateway remains associated with the Organization and can be assigned to another Location later.
Unassign rules, gateway reset behavior, and confirmation requirements follow the same logic as organization-level gateway management. For details, see Gateway Management.
Reassign Gateways
The Reassign Gateway feature allows you to move one or more gateways from their current Location to another existing Location within the same Organization.
This operation is supported only when the source and target Locations share the same work mode.
-
In the Gateways list of a location, select one or more gateways.
-
Click Reassign.
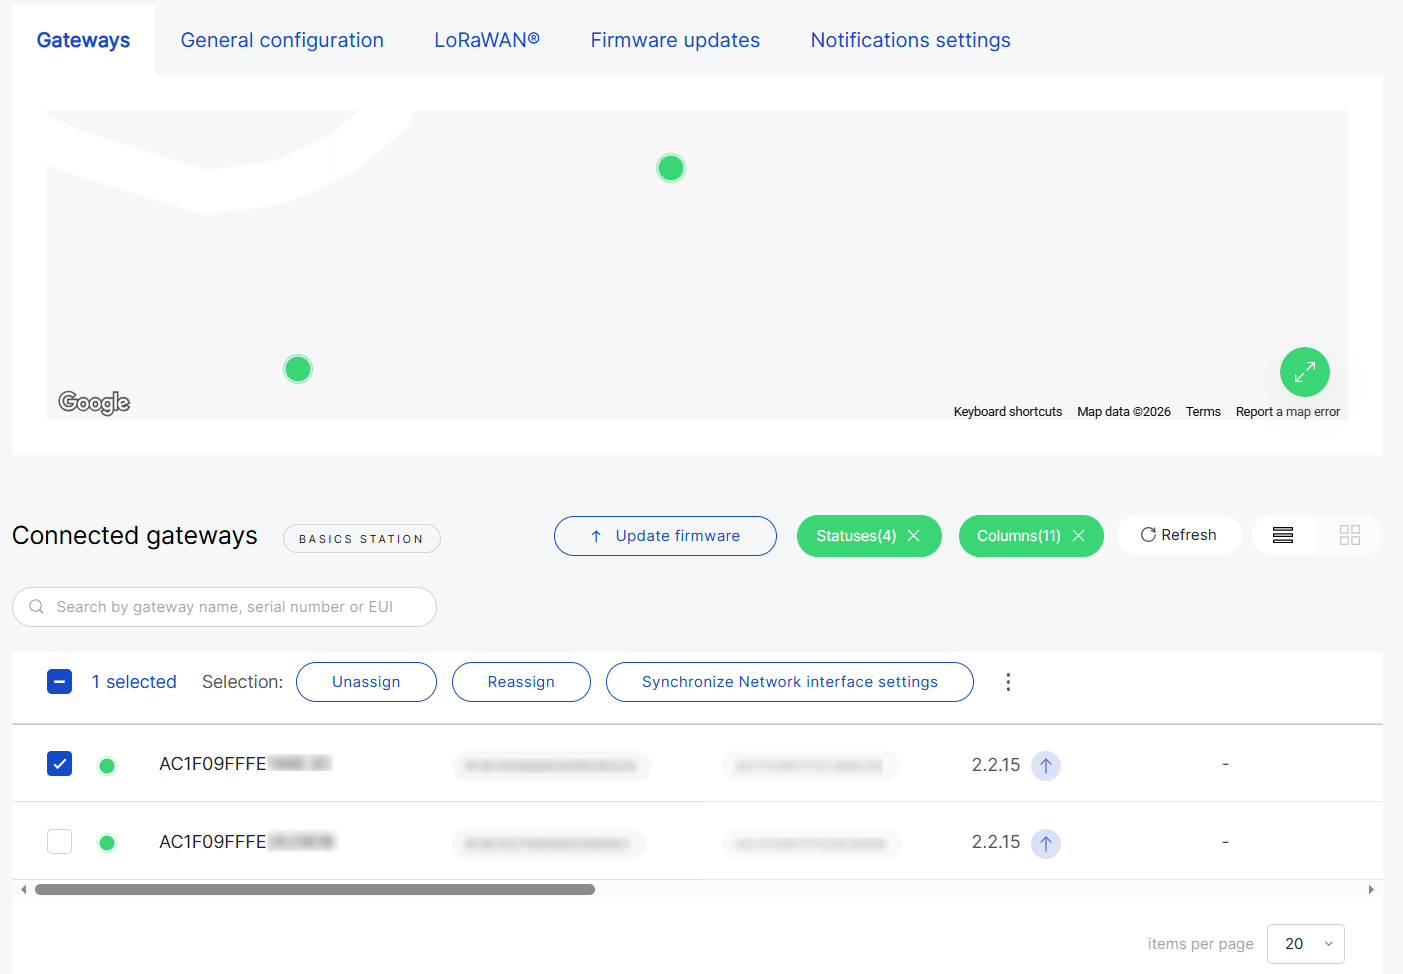 Figure 1: Select gateways and click Reassign
 -
Select a target Location. Only Locations with the same work mode are available for selection.
-
Click Reassign to proceed.
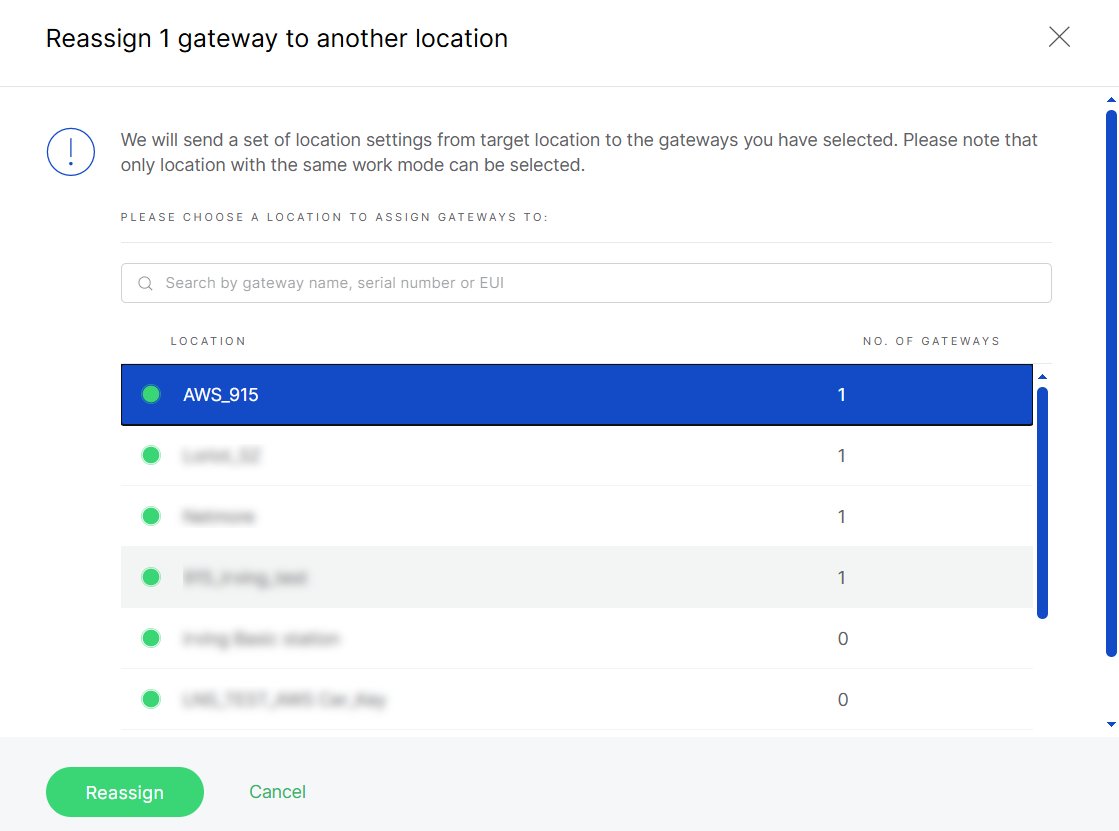 Figure 1: Select a compatible target location
 -
After that, the system validates the gateway information to make sure compatible with the target Location.
- Available – The gateway passed validation and can be reassigned to the target Location.
- Unavailable – The gateway failed one or more validation checks and cannot be added. Refer to the Status column for the specific reason. For detailed explanations, see Common Status/Errors.
NOTEYou can remove a gateway from the current verification list at any time by clicking the delete icon next to the gateway entry. This action is available in both the Available and Unavailable lists.
-
(Optional) If the target Location operates in Basics™ Station mode and Use individual client keys is enabled, the system also validates the required per-gateway credentials. If any credential-related checks require attention, the corresponding results are shown in the relevant validation columns, where you can resolve them individually or in bulk before assignment. For details, see Manage Missing Credentials.
-
If the gateway passes validation, or if any required credentials have been completed, click Add gateways. The gateway will then appear in the New Location’s Gateways list.
Synchronize Network Interface Settings
This feature enables you to copy the network interface configuration from one sample gateway and apply it to other selected gateways within the same location.
-
Synchronization overwrites the current network interface settings of the selected gateways.
-
Gateways in Provisioning state are automatically skipped.
-
If the sample gateway uses a static protocol, those settings will not be propagated.
-
In the Gateways list of a location, select one or more gateways.
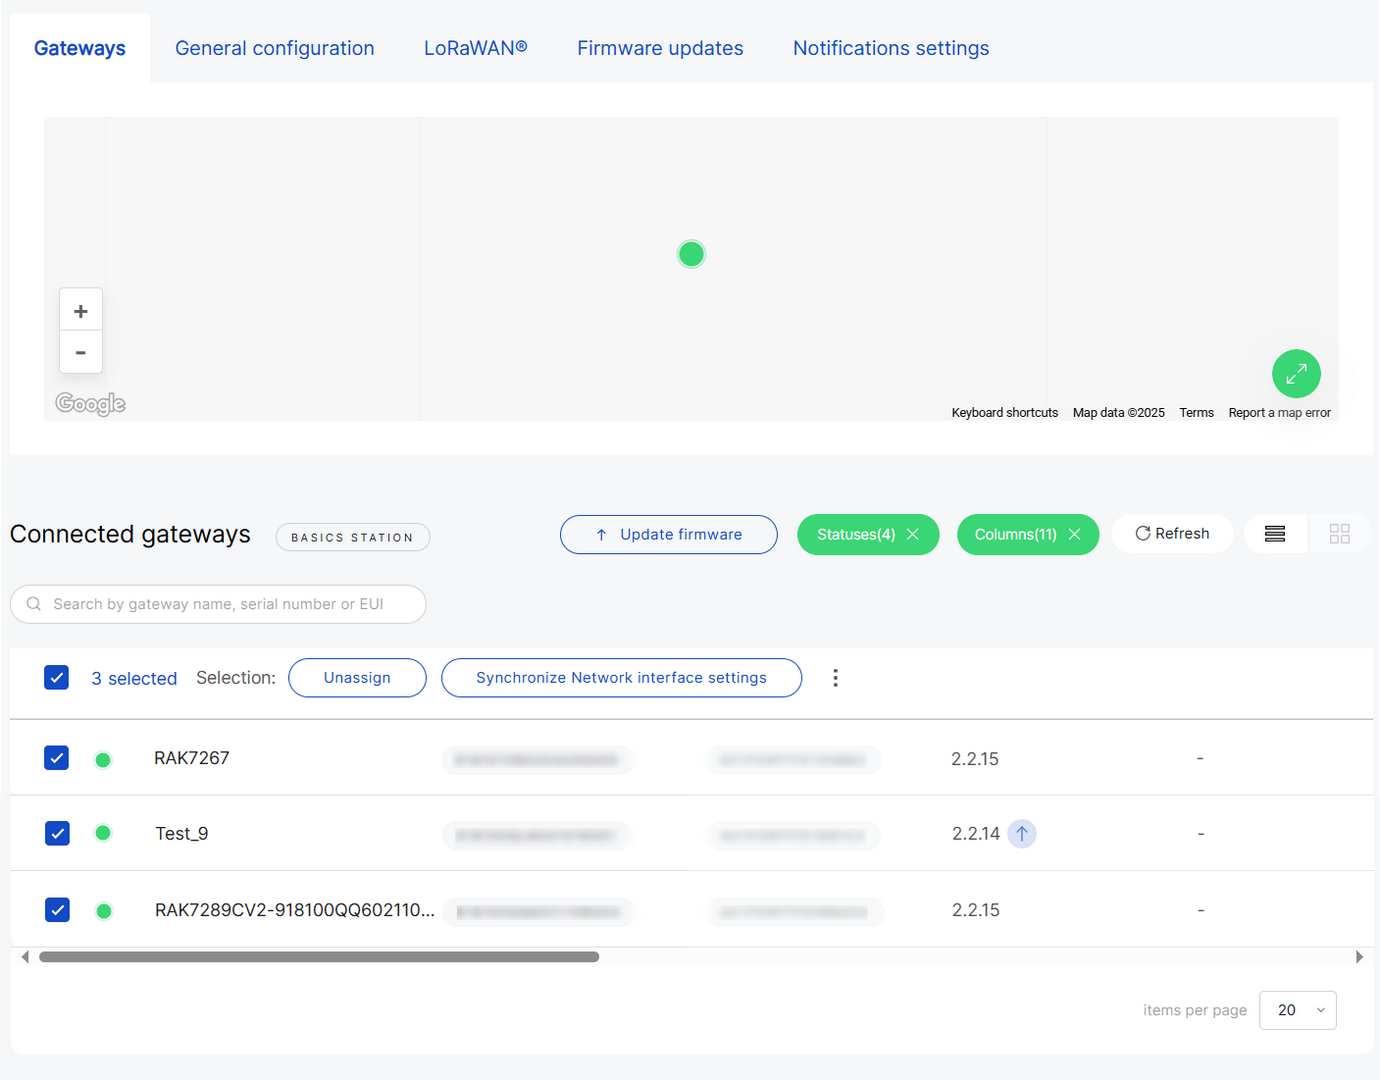 Figure 1: Select multiple gateways for synchronization
 -
Click Synchronize network interface settings and choose the sample gateway.
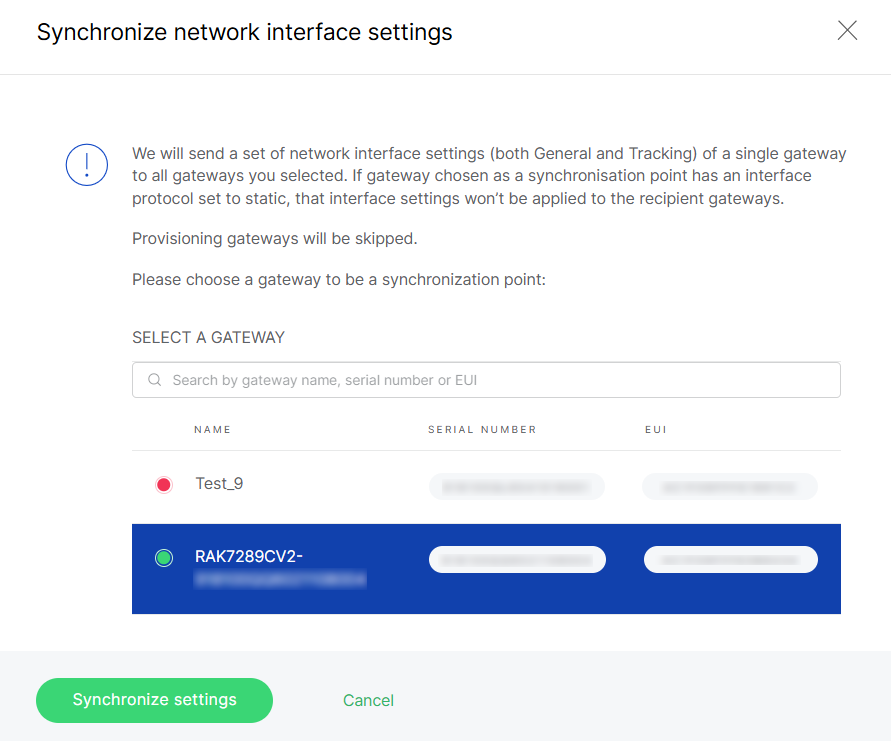 Figure 1: Choose a sample gateway for synchronization
- Click Synchronize settings to apply the configuration.
Synchronize System Settings
Synchronize system-level settings for selected gateways.
System setting synchronization follows the same rules as organization-level gateway bulk management. For detailed configuration rules and behavior, see Gateway Management.
Rename Gateways
Rename selected gateways in bulk.
Bulk rename rules follow the same naming and numbering logic as organization-level gateway management. For details, see Gateway Management.
Export CSV
Export selected gateway information to a CSV file.
Export fields, permission rules, and export behavior follow the same logic as organization-level gateway management. For details, see Gateway Management.